
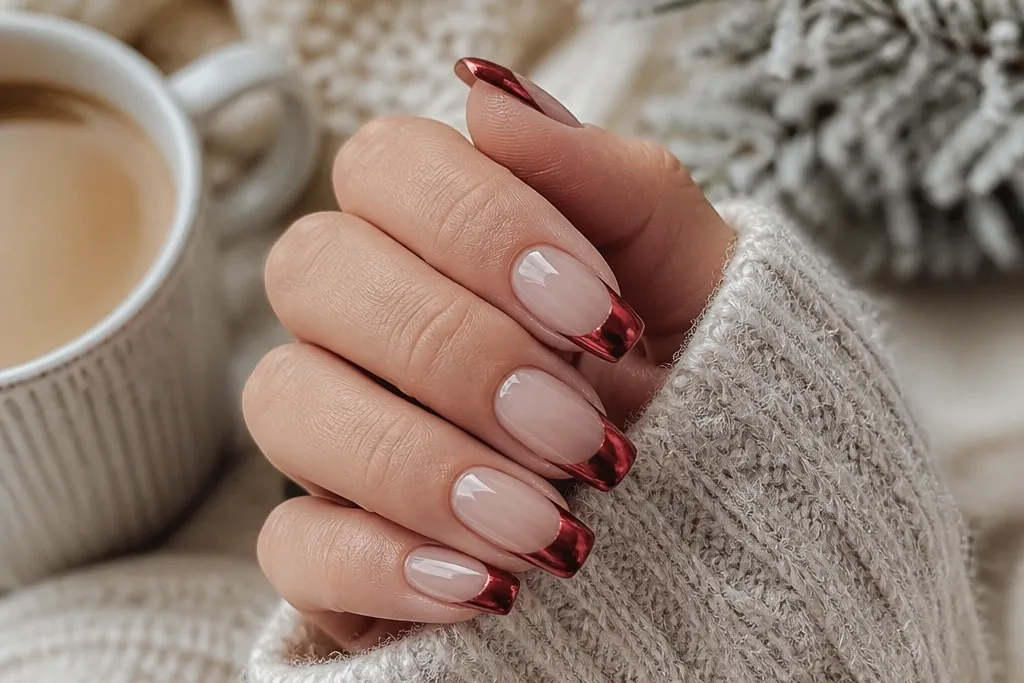

1. Cherry red base with 2 mm mirror French and micro-sparkle edge
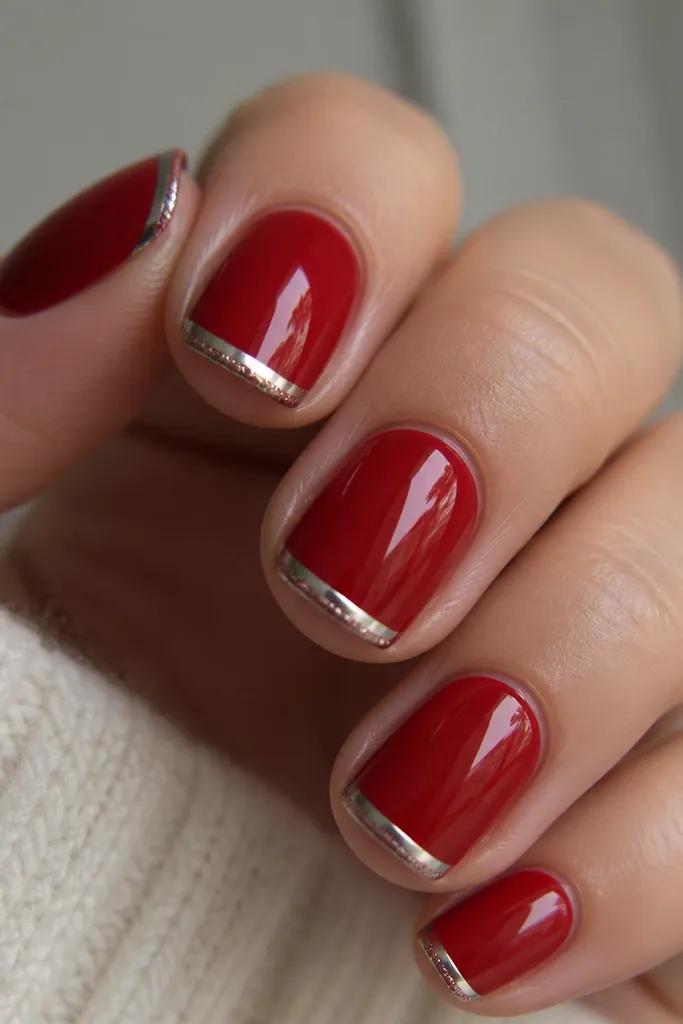
This design works because the cherry red stays flat and rich under the chrome, then the mirror French makes the tip look like it's lit from inside. I like it on warm-to-neutral skin tones because cherry reads clean and doesn't fight undertones. The micro-sparkle strip at the extreme edge gives winter texture without turning the whole nail into glitter overload. It's also forgiving if your smile line isn't perfectly symmetrical because the sparkle creates a visual border.
Start by applying your cherry red gel in two thin coats, curing fully between coats. Use French guide strips or a thin nail art brush to paint a 1.5 to 2 mm French arc, then cure. Buff the cured French area lightly, wipe with a lint-free wipe, and apply mirror chrome using the system's recommended tacky layer - press gently so the chrome grabs in one smooth pass. Seal with a thin top coat in two layers, cap the free edge on the second layer, then add the micro-sparkle along the outer edge after the first top coat layer has set.
Editor's noteIf your chrome looks patchy, press for 5-8 seconds and avoid rubbing - pressure transfers better than scrubbing.
Watch outDon't flood chrome onto the red base or it will look smoky instead of jewelry-sharp.
2. Brick red French with rose-tinged chrome for a softer winter glow
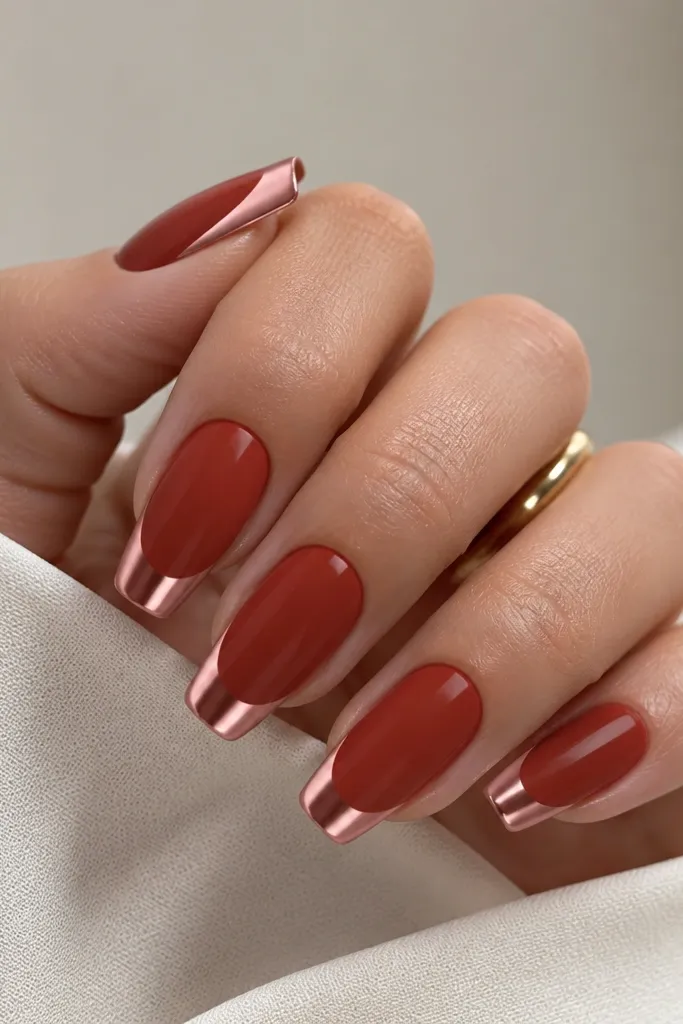
Rose-tinged chrome is my go-to when you want Chrome French Nails cozy winter but you don't want that harsh mirror look. Brick red has a warm undertone that flatters deeper skin tones and makes the rose chrome feel cohesive instead of contrasting too hard. The softer shine also photographs better in low winter lighting because it doesn't reflect harsh highlights. If you're prone to smudging, this finish hides micro imperfections more than mirror chrome.
Paint your nails in brick red gel, cure, then shape the French line with a guide strip set slightly higher than your natural curve. Keep the French width around 2 mm for medium coffin so it stays readable. Buff only the French zone lightly and wipe clean so the chrome adheres evenly. Apply rose-tinged chrome powder or foil onto the French area using the correct tack base, then press and wipe off excess. Finish with one glossy top coat layer, keeping it off the cuticle area.
Editor's noteWant it extra cozy? Pair the rose chrome with a matte top coat on the red base if your system allows - keep the tips glossy.
Watch outAvoid cool-toned reds with rose chrome; the combination can look muddy in winter light.
3. Red French with chrome ombré fade into the cuticle
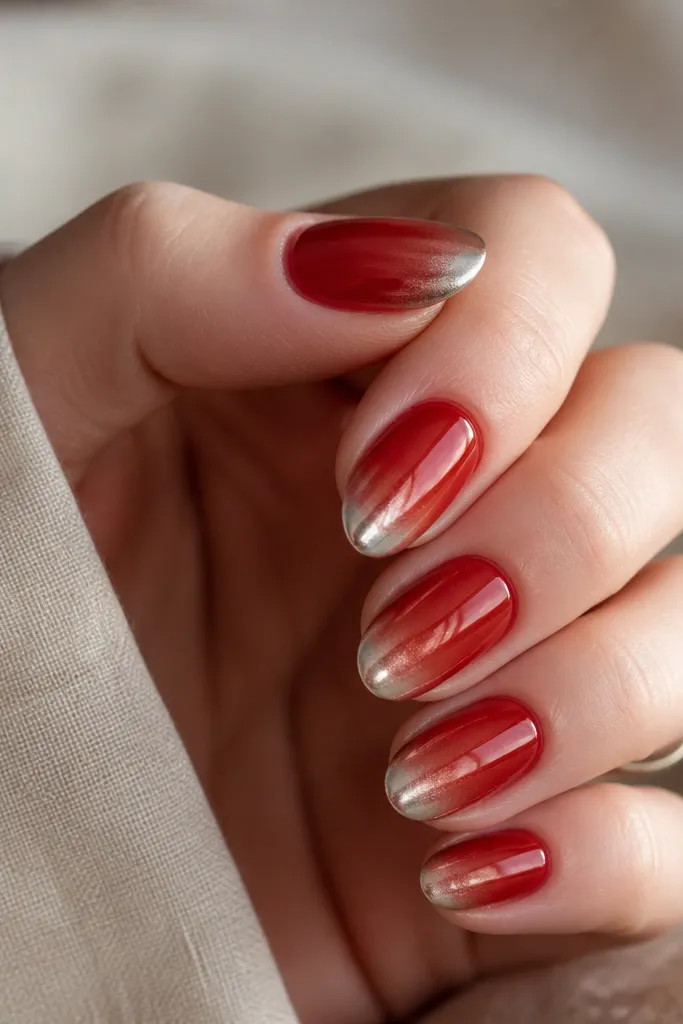
This one looks cozy because the chrome feels like winter light spilling over red, not like a hard sticker line. It works on short almond and squoval shapes because the fade gives the nail more visual length without needing long nails. I like it on lighter and medium skin tones since the gradient stays flattering and doesn't overpower your whole hand. The key is keeping the fade subtle - the red should still be the main color.
Apply a red gel base in two thin coats and cure. Create a French arc at the free edge and cure, then buff the French zone lightly. Apply mirror chrome only to the top half of the French area, then use a clean chrome sponge or applicator to lightly blend downward into the red - stop at about 2/3 of the nail length. Wipe off any loose chrome so the gradient stays soft. Seal with a glossy top coat, using a thin second coat to smooth the fade.
Editor's noteUse a makeup sponge to blend chrome - foam gives a softer ombré than a brush.
Watch outDon't take the chrome all the way to the cuticle; it will look messy and can make the red look dull.
4. Classic French arc with mirrored chrome outline and red fill
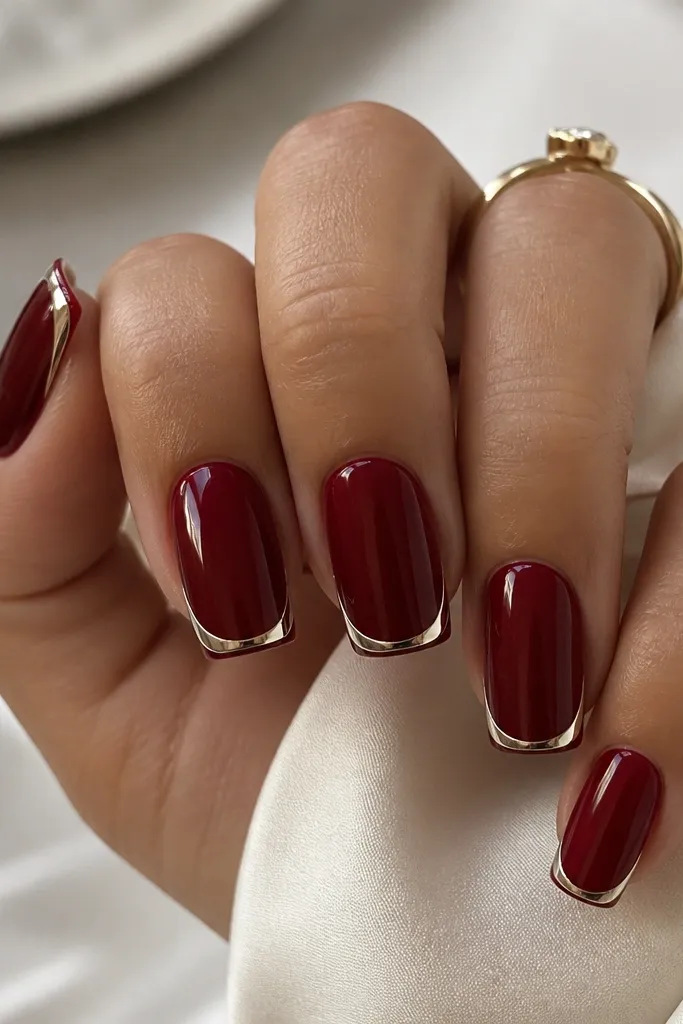
This is the "clean winter manicure" version of Chrome French Nails cozy winter. Instead of covering the tip entirely, you outline the arc with chrome, so the red stays rich and the shine reads like a thin bracelet. It flatters short nails because a thin chrome border makes the tip look longer without adding bulk. If you like a minimalist look but still want that mirror effect, this one nails it.
Start with deep red gel in two cures. Add a French arc guide using strips, leaving the tip center red. Paint a thin chrome-ready outline on the arc with your system's chrome base layer, cure, then buff lightly. Apply mirror chrome to just the outlined arc and wipe off excess. Seal with a glossy top coat, then run the brush along the tip edge to keep the outline crisp.
Editor's noteKeep the outline line under 1 mm - if it gets thicker, it turns into a full French and loses the elegant border look.
Watch outDon't skip edge sealing; outlined chrome lifts faster if the free edge isn't capped.
5. Tuxedo-style red French with chrome negative space window
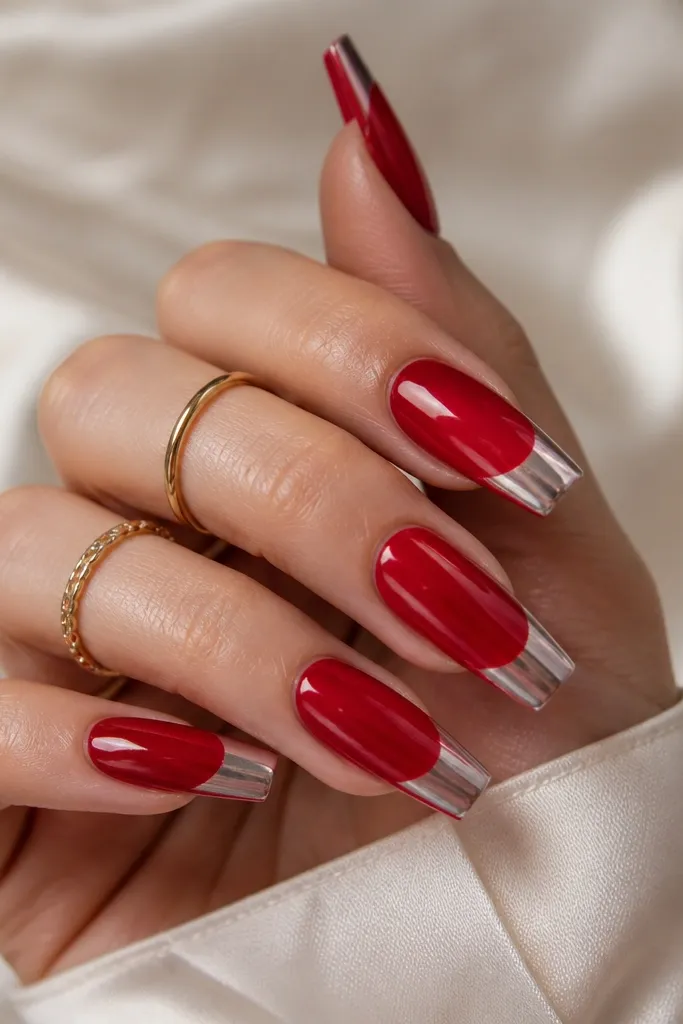
Negative space makes this feel modern and cozy at the same time. The chrome only on the sides gives a structured look, and the nude window keeps it from getting heavy in winter. This is great if you have shorter nails and want the manicure to look lighter on your hand. I've worn it with thick knit sleeves and it still looks crisp because the negative space keeps the eye moving.
Apply a nude or clear base layer (or your natural nail with a thin base gel) and cure. Paint deep red around the tip area, leaving a narrow window centered where the French arc would be. Cure, then use a fine brush to apply chrome base only on the two side sections of the arc. Buff those chrome zones lightly, apply mirror chrome, and wipe off excess. Seal with top coat and cap the free edge so the chrome side pieces stay smooth.
Editor's noteUse a nail art strip at the center to keep the negative window straight.
Watch outDon't make the window too wide; wide negative space can look unfinished on short nails.
6. Red French tip with holographic chrome sprinkle over the top line
If you want Chrome French Nails cozy winter but with a little personality, holographic flecks on top of mirror chrome look like icy light. The red base stays solid, while the holographic bits shift color under sunlight and indoor bulbs. This is flattering for everyone because it doesn't rely on skin tone - the sparkle does the work. It also makes your tips look more dimensional than regular chrome.
Paint nails red in two coats and cure. Create a French arc and cure, then buff the French zone. Apply mirror chrome to the French arc and wipe off excess while it's still tack-free. Then add holographic micro-sprinkles only along the top edge of the chrome band (press them lightly so they sit flat). Seal with a top coat in two thin layers; the second layer smooths down any raised flecks.
Editor's notePick holographic flecks labeled fine or micro - chunky glitter makes chrome look grainy.
Watch outDon't sprinkle all over the tip - concentrate it on the top edge so it reads as "ice," not "confetti."
7. Deep wine red base with mirror chrome French and tiny white snow dots
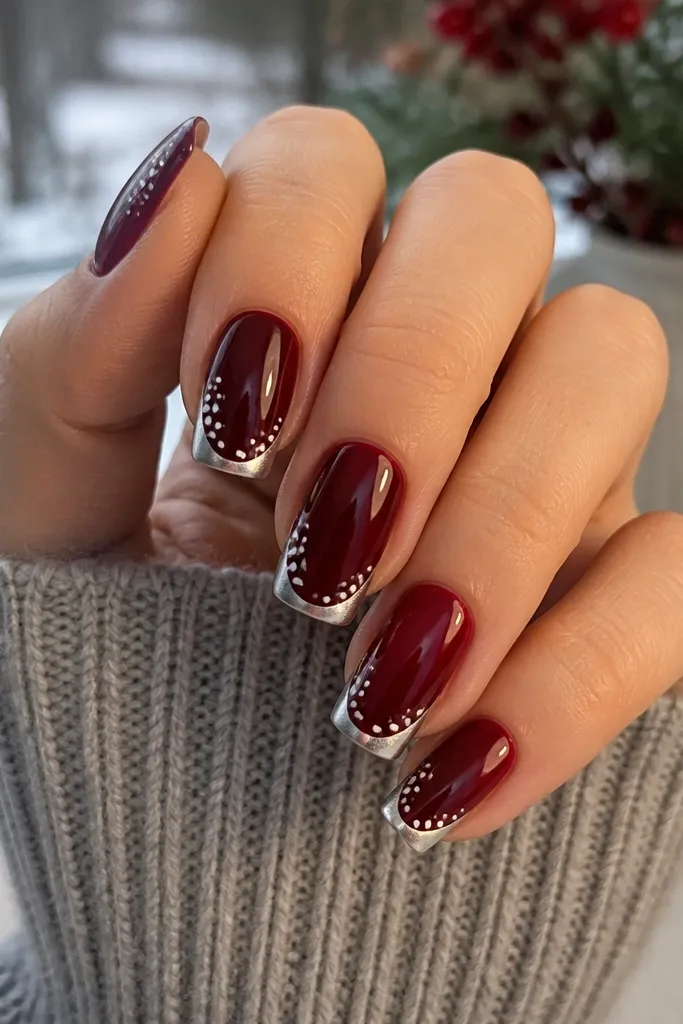
This one feels genuinely winter because the tiny white dots mimic snow without turning the manicure into full-on holiday nail art. Wine red is flattering on cool and neutral skin tones, and mirror chrome keeps the tips bright even if your hands get dry and ashy. The dots add a focal point at the corners, which makes the smile line look cleaner. It's also easy to wear because the design stays mostly red and chrome.
Apply wine red gel in two thin coats and cure. Use French strips to paint the chrome-ready French arc, cure, and buff the French section. Apply mirror chrome, press lightly, and wipe off excess. With a dotting tool, place 1-2 micro white dots at the outer corners of each chrome tip and connect them with a second tiny dot if you want a "snow cluster" look. Seal with a glossy top coat, cap the free edge, and keep the dot area fully covered.
Editor's noteUse a white gel liner or thick white polish for dots so they sit raised and don't disappear under chrome.
Watch outSkip big snowflake shapes - they make the chrome look cheap and cluttered.
8. Matte red base with glossy mirror chrome French (contrast winter look)
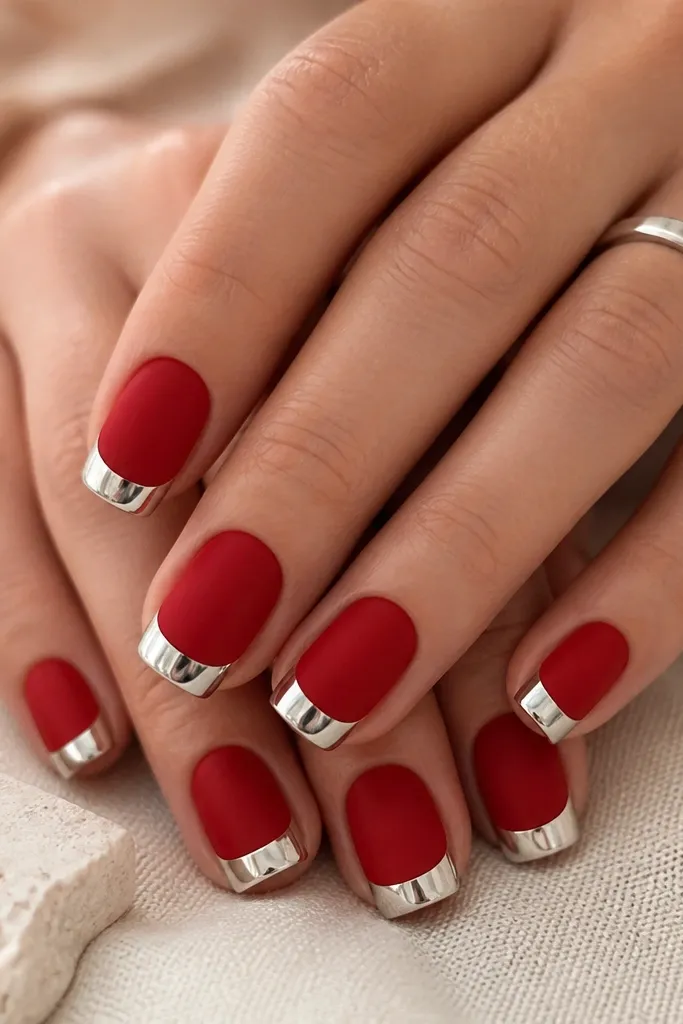
Matte red makes the chrome feel even shinier. This contrast is why it reads cozy in winter - matte looks like knit fabric, while the chrome looks like ice. I've worn this on hands with slightly dry cuticles, and the matte finish hides texture better than full gloss. It's flattering on all skin tones because the red is the star and the chrome adds dimension at the tips.
Paint nails with red gel in two coats and cure. Apply a matte top coat over the entire nail except the French zone you plan to chrome - or keep the French area glossy by not matting it. Create the French arc, cure, buff lightly, and apply mirror chrome only on the tips. Seal the chrome with glossy top coat so it doesn't haze, then leave the red matte. If you're using one top coat system, do two finishes: matte on the red, glossy only on the chrome tips.
Editor's noteClean the brush tip and cap the chrome edge - matte tops can smear if chrome gets wet during finishing.
Watch outDon't put matte top coat over the chrome - it turns mirror into dull metallic.
9. Red French with chrome micro-line over the smile (double-line effect)
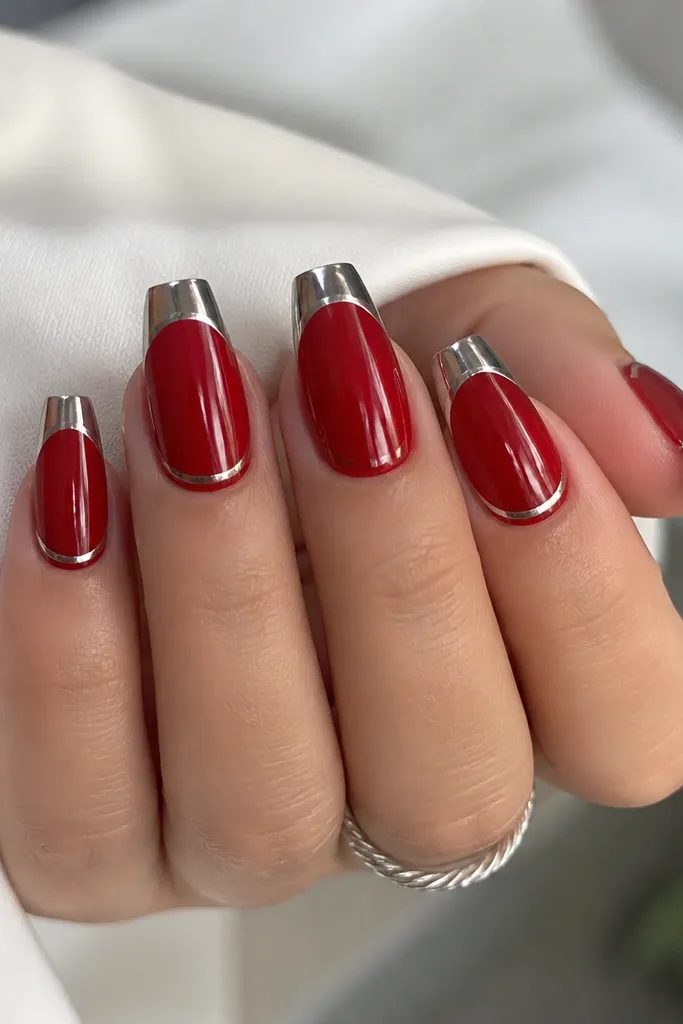
Double-line French is a small detail that makes your manicure look like you paid for nail art. The thicker chrome band gives the main shine, while the micro-line adds a "trim" effect at the top edge. This design looks great on medium coffin and almond because you have enough space to place both lines without them merging. It flatters hands that like a bit of structure, especially if your nails are slightly wider - the double border frames them.
Start with glossy red in two coats and cure. Paint a standard French arc about 2 mm wide, cure, and buff lightly. Apply mirror chrome to the French band and seal lightly. For the micro-line, use a thin chrome base layer or gel line and cure, then apply mirror chrome only along the top edge of the French arc. Seal again with a glossy top coat; keep the second coat thinner so the lines stay crisp.
Editor's noteUse a liner brush with a pointed tip and rest your hand on your table so the micro-line stays straight.
Watch outDon't make the micro-line too thick - it will overpower the French and look like a messy stripe.
10. Red French with chrome foil shards inside the tip
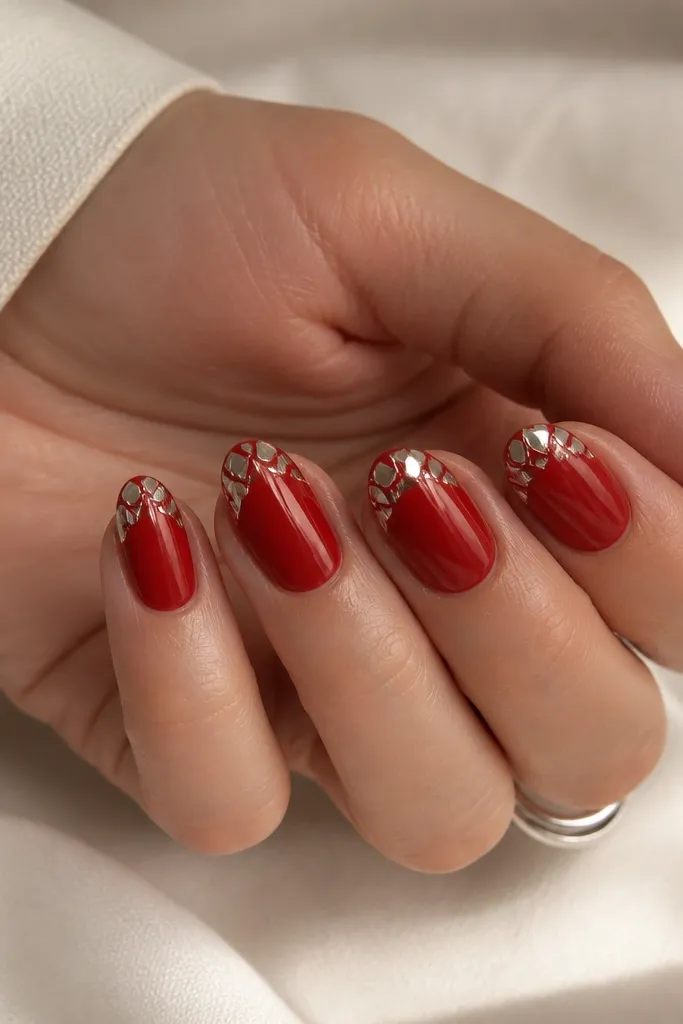
Foil shards look cozy because they mimic the way ice breaks into pieces. The red peeking through keeps it from looking like full chrome is too much for everyday wear. I like this on short almond and squoval because the shard pattern adds interest without needing extra length. It also hides minor application unevenness since the foil itself creates texture.
Apply red gel in two coats and cure. Create a French arc at the free edge and cure, leaving the tip area ready for foil. Buff lightly and wipe. Apply chrome adhesive or foil base to the French tip area, then tear small mirror chrome foil pieces and press them randomly within the French zone - focus toward the outer edge for dimension. Seal with a thick-viscosity top coat in two layers so the shards stay flat and smooth.
Editor's noteTear foil by hand instead of cutting - torn edges blend better into the gel.
Watch outAvoid one heavy top coat right away; it can push foil up and create bumps.
11. Red French with chrome glitter dust at the corners (frosted tips)
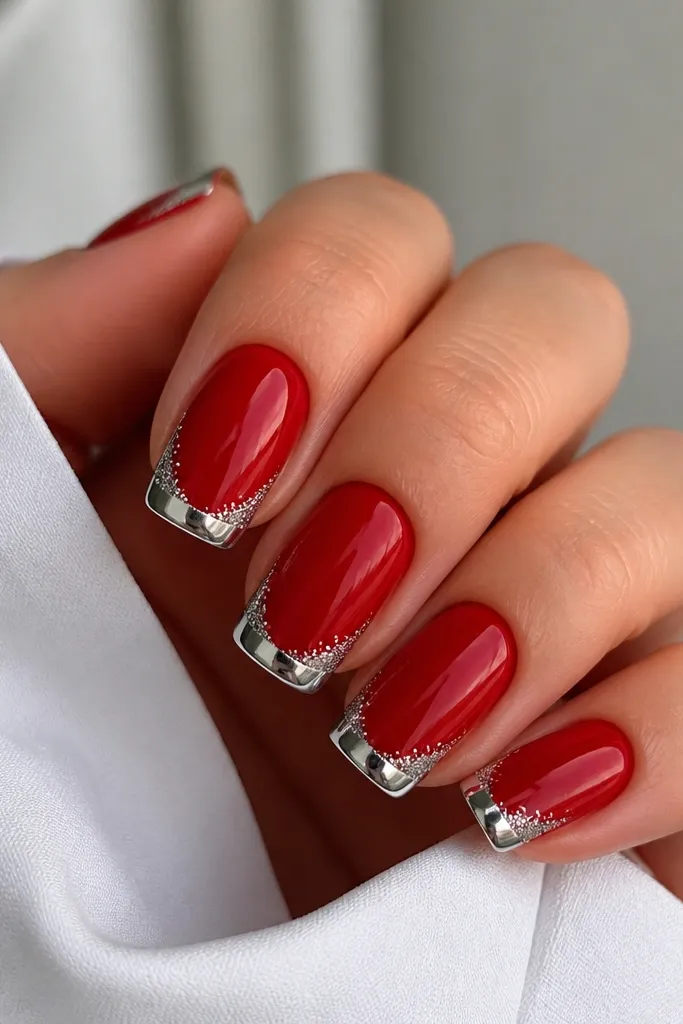
Corner dusting makes the tips look frosted without turning the whole French line into glitter. It's one of my favorite Chrome French Nails cozy winter combos because it reads "winter" even in plain outfits. This works beautifully on wide nail beds because the corner sparkle draws the eye inward and makes the nail look more balanced. The center stays crisp, so your smile line still looks neat.
Paint red in two thin coats and cure. Apply the French arc guide and paint the French area, cure, and buff. Apply mirror chrome to the full French tip, then wipe excess. Add chrome glitter dust only at the outer corners by tapping a small amount with a foam applicator - keep it off the center. Seal with a glossy top coat, then cap the free edge carefully to lock in the corner texture.
Editor's noteIf the dust looks too heavy, wipe lightly with a clean sponge - you want a soft buildup, not a mound.
Watch outDon't drag glitter dust across the entire tip; it kills the clean mirror effect.
12. Crimson red French with chrome "smile" line and negative cuticle border
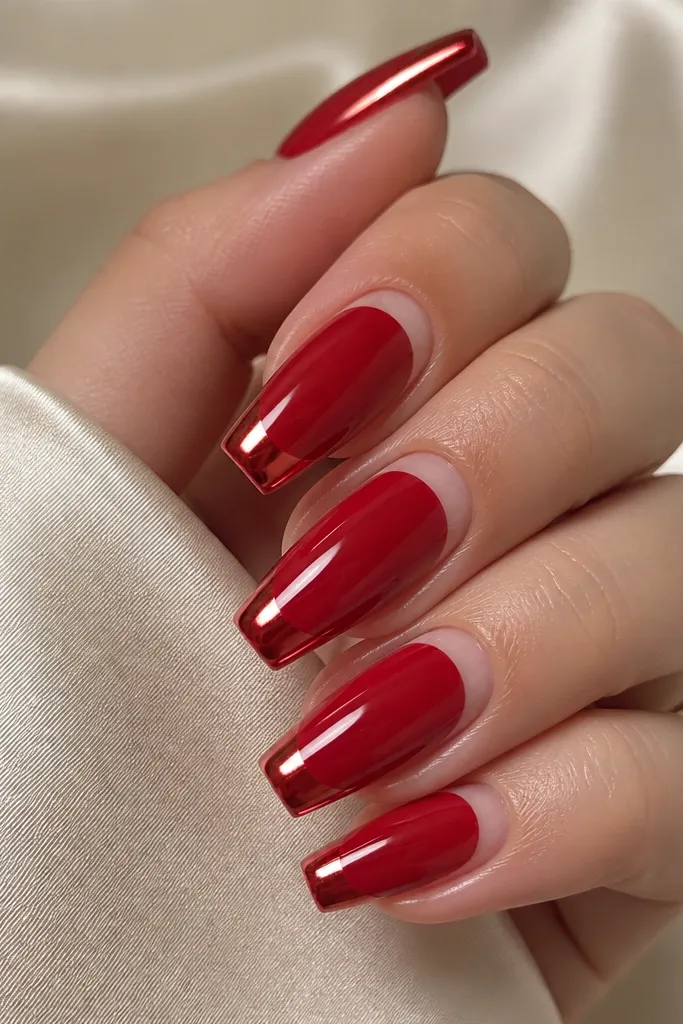
The chrome smile line is the star here, and the negative cuticle border makes it feel intentional instead of random. Crimson red looks bold and wintery, and the nude frame keeps it from feeling too heavy for hands with short nails. I've worn this when my cuticles looked dry - the negative border makes the manicure look cleaner because you're not trying to hide everything with thick color. It's a strong choice for date nights or holiday parties.
Start with a nude base layer and cure. Apply crimson red gel, leaving a thin negative border under the cuticle area - about 1 mm wide. Cure, then create the French arc at the tip and cure. Buff the French zone lightly, apply mirror chrome to the smile line only (keep it thin and centered), and wipe excess. Seal with glossy top coat, making sure the chrome line is fully covered but the negative cuticle border stays clean.
Editor's noteUse a small strip of French tape to protect the negative border while you chrome the tip.
Watch outAvoid letting red creep into the negative border - any spill makes the frame look sloppy.
13. Red ombré base with chrome French tip and clear jelly center
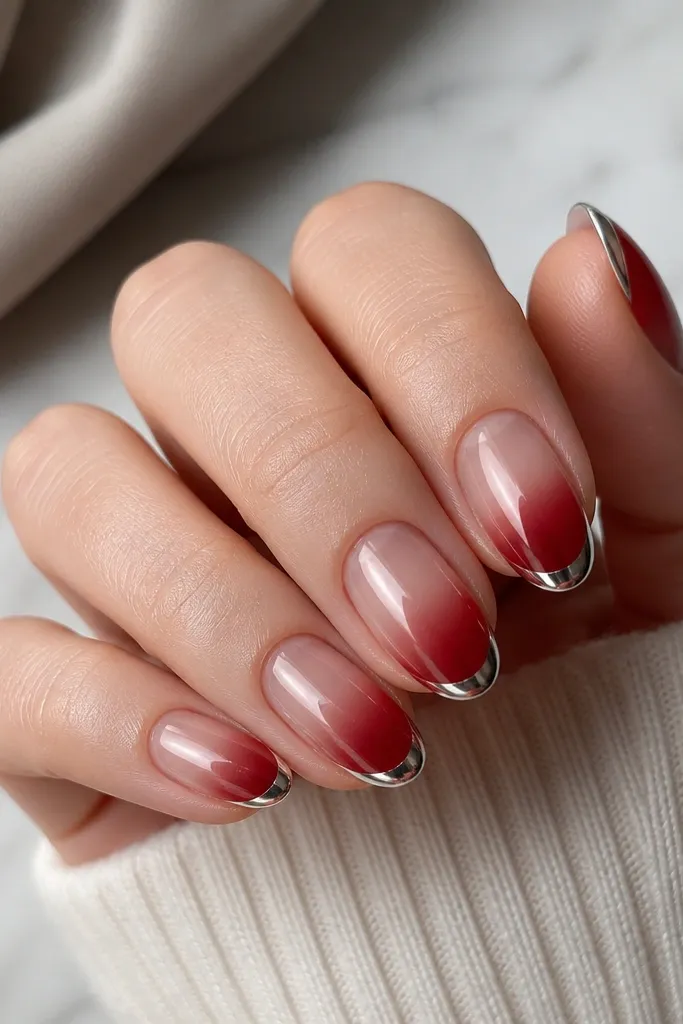
This one looks expensive because it's layered: red color, clear jelly, then chrome at the tip. The jelly center gives a "glazed" look, which is perfect for cozy winter outfits because it catches light like a warm drink in a glass. It flatters hands because the ombré creates a smooth lengthening effect, and the chrome at the tip keeps the French line the focal point. I've done this on both fair and deeper skin tones and it always looks clean.
Build a red ombré using a sponge from the tip down about halfway, then cure. Apply a clear jelly layer on the center area and cure again - keep it domed slightly if your system allows. Create and cure the French arc at the free edge on top of the red ombré layer. Buff only the French zone, apply mirror chrome to the tip, and wipe off excess. Seal with a glossy top coat, then gently cap the edge so the jelly center doesn't snag.
Editor's noteIf your jelly center looks cloudy, thin the layer and cure longer instead of adding more product.
Watch outDon't place chrome directly onto a thick jelly layer without curing and buffing - it can peel.
14. Warm brick red French with chrome micro-heart cutout sparkle
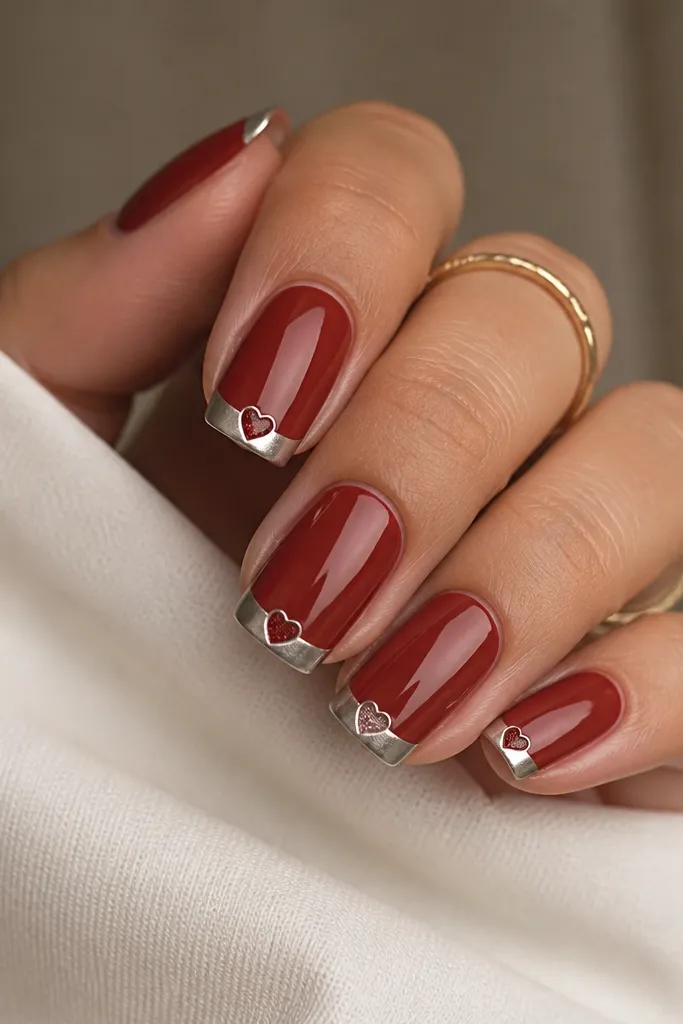
Micro-heart details make Chrome French Nails cozy winter feel playful without getting childish. Brick red keeps the hearts looking warm and winter-appropriate, and the chrome makes the tiny heart shape pop like a charm. This is flattering on hands with short to medium nails because the heart sits in the center and draws the eye to the shape of your French line. I like it for holiday weekends when you want something cute but still polished.
Paint warm brick red in two coats and cure. Create the French arc, cure, and buff the French zone lightly. Apply mirror chrome to the French tip and wipe excess. Use a small nail art stencil or freehand with a dotting tool to place micro-heart shapes at the center of each chrome tip - either leave them red by masking before chrome, or add a tiny gel heart filled with fine clear glitter after chrome. Seal carefully with a thin glossy top coat so the heart detail stays crisp.
Editor's noteUse a 1.5 mm dotting tool for the heart - it keeps the proportions winter-cute instead of oversized.
Watch outAvoid hearts bigger than 2 mm across; they start looking like stickers.
15. Red French with chrome halo ring at the tip edge
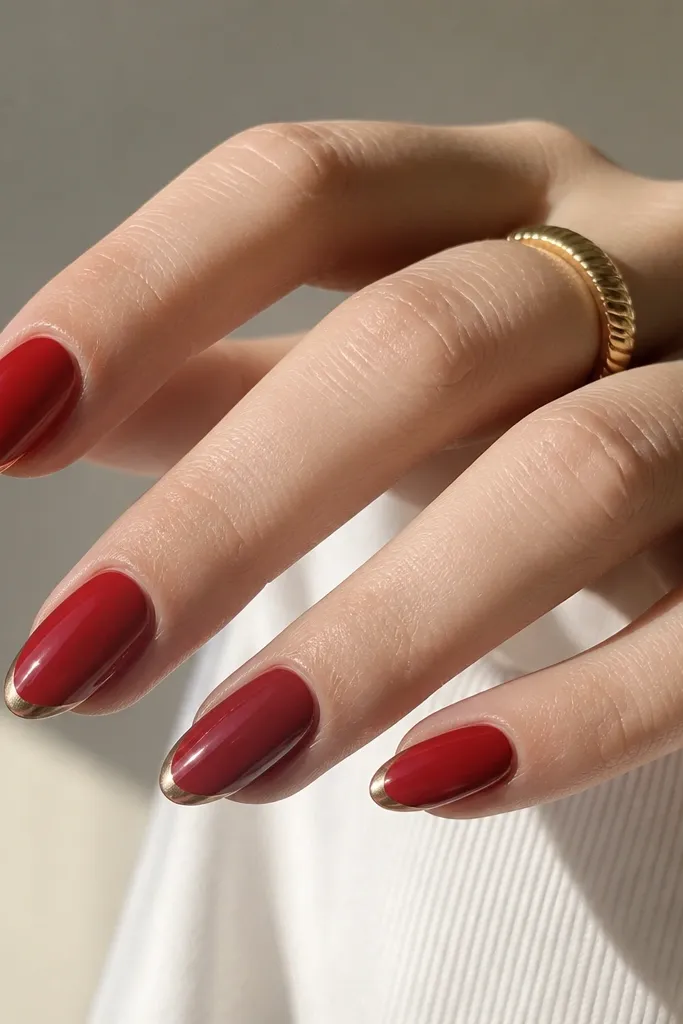
A halo ring is a subtle way to wear chrome when you want the shine but not full chrome coverage. The inside stays red, so the manicure keeps that cozy winter warmth, while the halo edge adds a clean metallic glow. It's flattering on medium almond because the curved ring emphasizes the shape. I've found it looks extra good when your hands have visible veins - the halo ring adds contrast without making the whole nail too busy.
Start with glossy red gel in two coats and cure. Paint a French arc but keep the center red - you're only going to chrome the outermost edge. Cure the French arc, then buff just the very edge area lightly so the chrome adheres. Apply a chrome-ready base along the outer edge of the French and cure. Apply mirror chrome along that edge line, wipe excess, then seal with a glossy top coat. Cap the free edge so the halo doesn't catch fabric.
Editor's noteHold the nail at a slight angle while applying chrome so the edge line stays even and doesn't flood inward.
Watch outDon't make the halo too thick; it should read like trim, not a full chrome layer.



