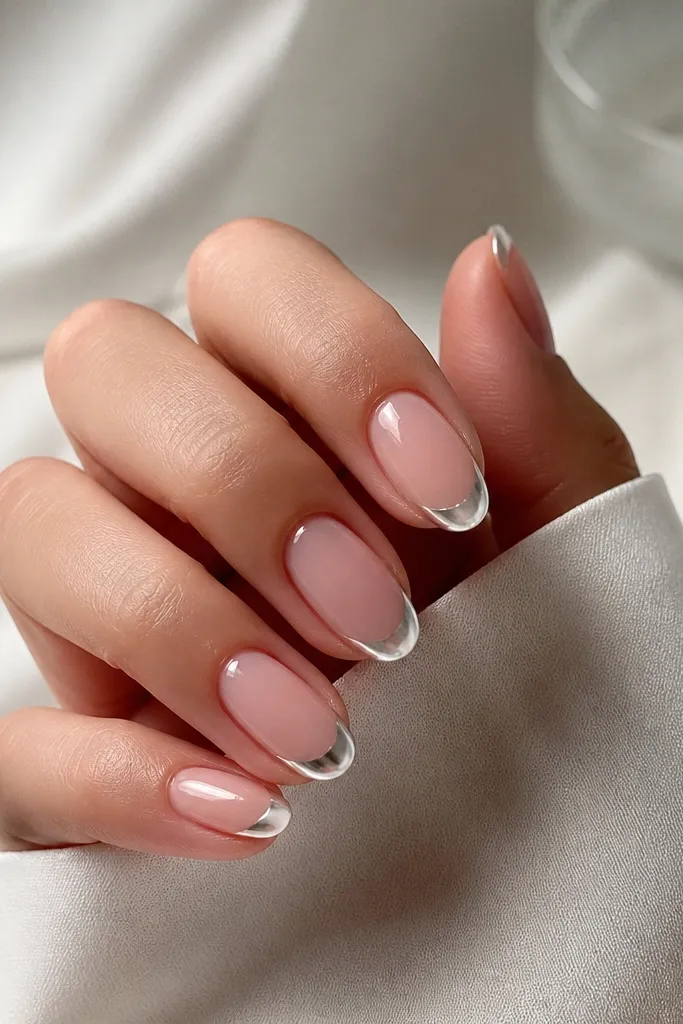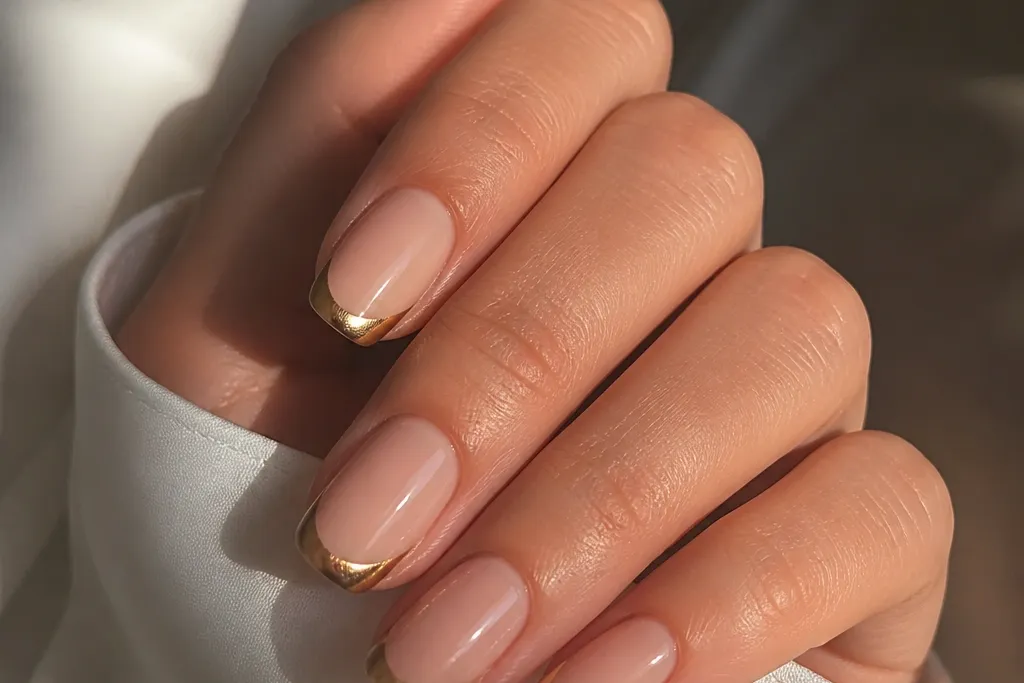
1. Milky nude base with mirror gold French smile line
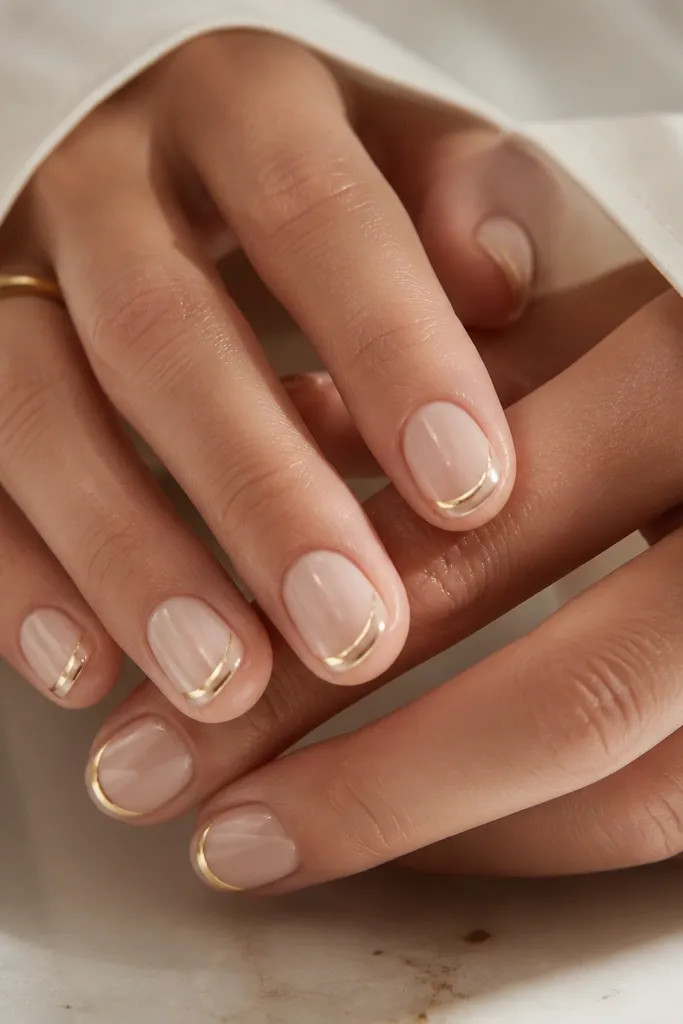
Start with a milky nude gel that looks like warm skim milk - not pink, not beige-heavy. On short oval nails, the mirror gold French line should sit about 2-3 millimeters from the very tip edge so it reads as intentional, not messy. The mirror finish gives that jewelry effect under daylight, and it flatters light to medium skin tones especially well because it doesn't fight your undertone. I like this for work days and weddings because it looks polished without needing extra art.
First, prep and buff the nail surface to a smooth, low-sheen finish. Apply two thin coats of milky nude gel, curing fully between coats. Then use a French line guide or a fine liner brush to paint the gold tip in one controlled sweep, keeping the smile line slightly higher at the corners. Cure, apply gold chrome powder (press lightly so you don't smear), and seal with a glossy top coat in two thin layers, curing each time.
Editor's noteUse a liquid chrome sealer or a tacky gel base for chrome so the powder grabs evenly and you don't get patchy spots.
Watch outDon't paint the gold too close to the sidewalls - it makes the line look thick and cheap instead of crisp.
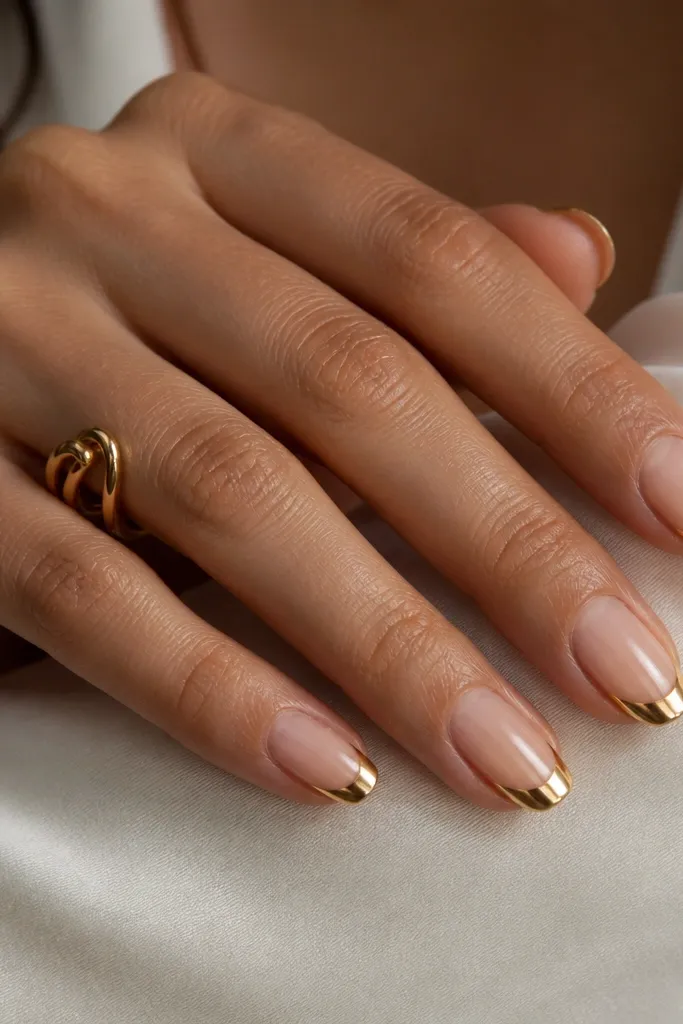
2. Sheer pink French with micro gold border
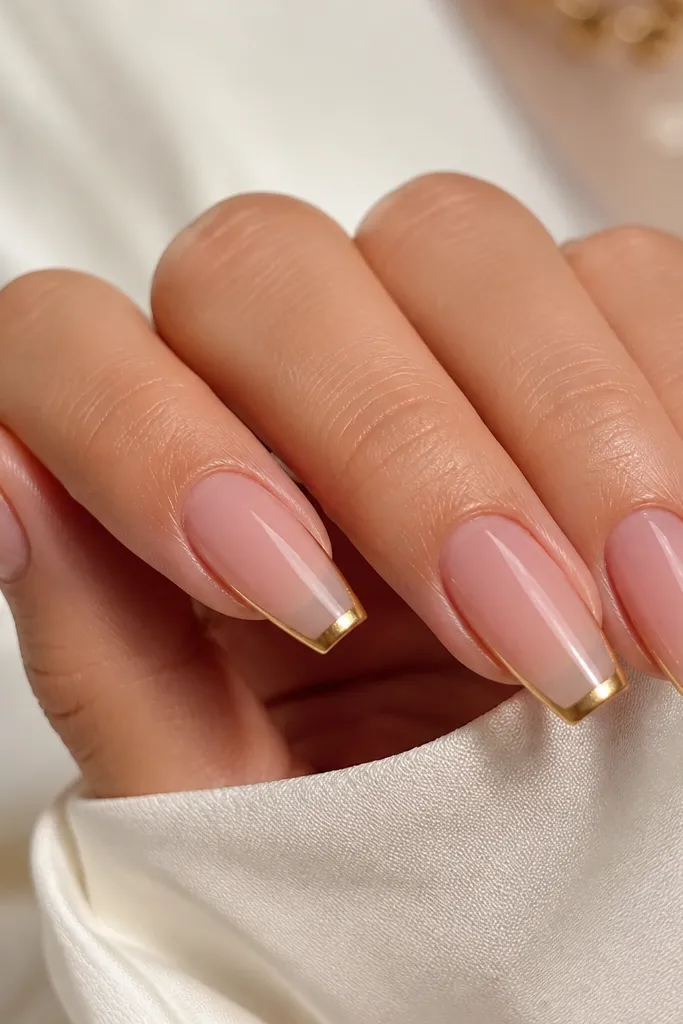
This is the "expensive" version of French because the gold has a double-line effect. The sheer pink base keeps your nails looking fresh and your skin tone still visible, so the chrome reads bright instead of heavy. On medium coffin nails, the micro border makes the tip look longer and more sculpted. It's flattering on hands with shorter nail beds because the thin gold creates a vertical illusion without adding bulk.
Apply a sheer rosy pink gel in two coats so you get an even, jelly-like finish. Draw the main French smile line with a striping gel, then cure. Next, add the micro border by placing a second thinner line 0.5-1 millimeter inside the first, keeping it parallel to the curve. Chrome the border line first, then chrome the main line, and seal with two glossy top coats.
Editor's notePractice the border on one nail with a striping brush before you commit to all ten.
Watch outAvoid thick striping gel - it traps chrome powder and looks raised instead of sharp.
3. Gold chrome French on clear glass nude
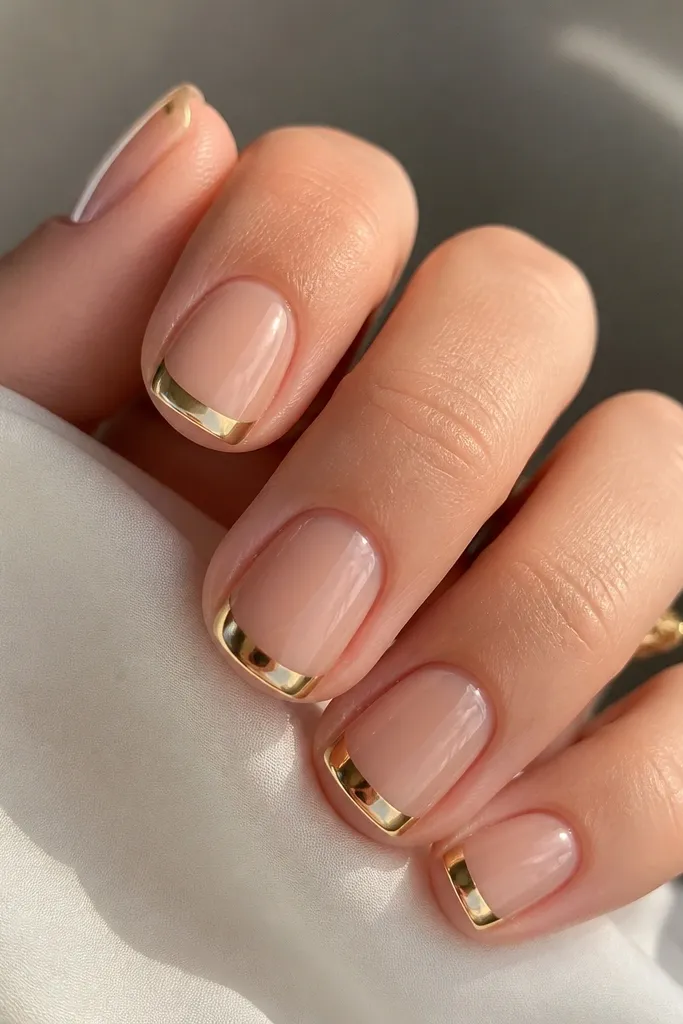
Clear glass nude makes gold chrome look like it's sitting under glass, not painted on top. The effect is bright and modern, and it looks great when your hands are bare-minimum because the base is so clean. On short square nails, the straight edge helps the French line look crisp and graphic. This design flatters fair through deep skin tones because the base doesn't shift undertone.
Start with a clear builder gel or rubber base that dries glossy, then wipe the tacky layer only if your product requires it. Apply two thin coats of clear glass nude and cure until it feels fully set. Paint the French tip area with a thin layer of transparent-to-gold tack gel, then cure. Apply gold chrome powder with a sponge applicator, press gently, dust off, and seal with a thick, glossy top coat that covers the corners.
Editor's noteIf your clear base is too slippery, roughen it lightly with a buffer so the chrome doesn't lift later.
Watch outDon't use a matte top coat under chrome - it kills the mirror effect.
4. Warm champagne nude with brushed gold French
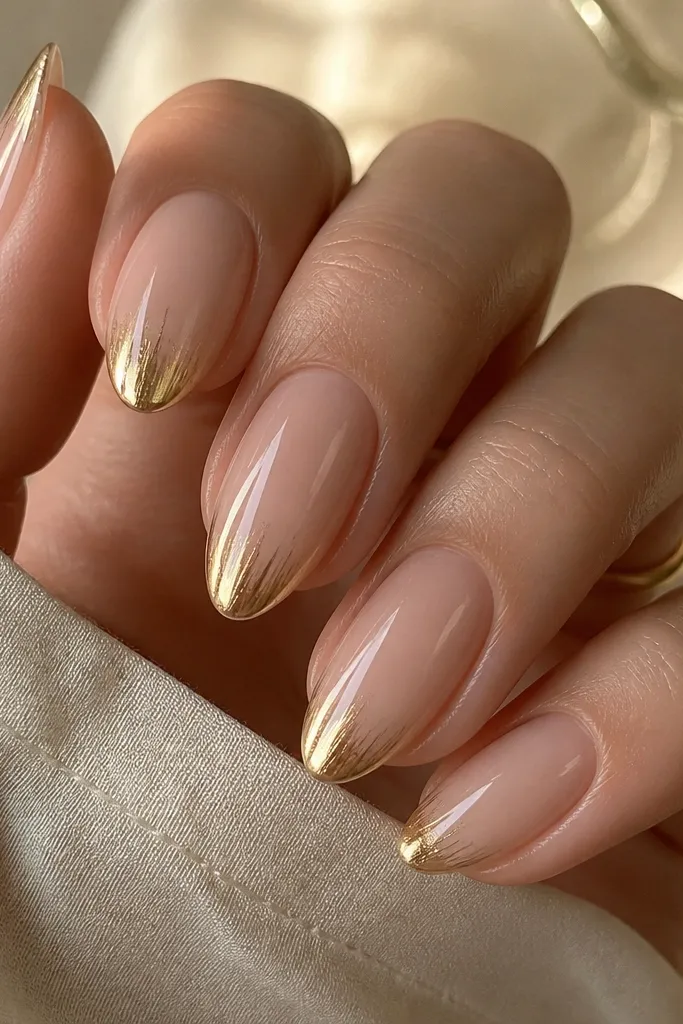
Brushed gold chrome looks softer than mirror chrome and it hides small brush mistakes. I use it when I want the French tip to look "hand-finished" instead of super sharp. The warm champagne nude base makes gold look buttery, not brassy, and it flatters olive and medium skin tones beautifully. It also looks great on almond nails because the brushed streaks follow the curve and make the tip look dimensional.
Apply warm champagne nude gel in two thin coats for a smooth, even glow. For the French area, paint a gold-tinted tack layer at the smile curve and cure. Instead of applying chrome powder straight, rub the powder on lightly with a small sponge so you get streaks, then buff off the loose bits. Seal with glossy top coat, but keep your first coat thin so the brushed texture doesn't get flooded.
Editor's noteUse a smaller sponge than you think - tiny pores make the streaks look controlled, not splotchy.
Watch outDon't over-press chrome powder; it turns brushed into patchy.
5. Gold chrome French with matte nude base
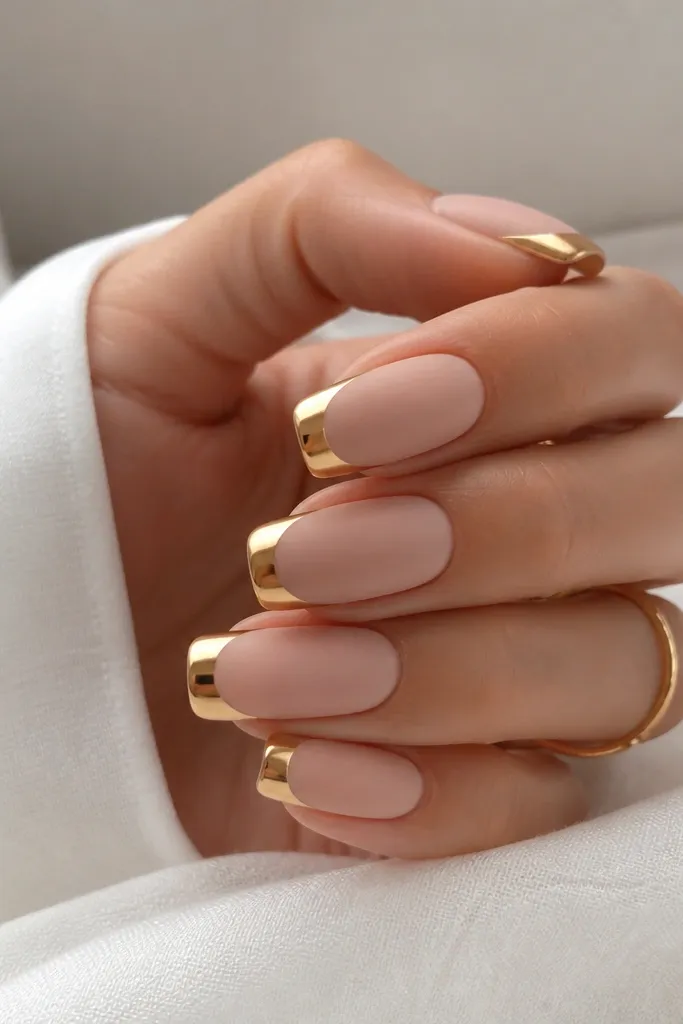
This contrast is the reason I keep coming back to Chrome French Nails year round. Matte nude makes your nails look velvety in indoor lighting, while the gold tips still flash under the sun. It's especially flattering if your natural nails are slightly ridged because matte hides texture better than glossy. I like it on long squoval nails because the matte base makes the gold tip feel even more "jewel-like."
First, apply your nude base in two coats and cure. Then top it with a matte top coat, curing fully so it locks in the matte look. Next, apply the gold chrome French tip using a glossy gel layer only on the tip area, cure, add gold chrome powder, and dust off. Finish with glossy top coat only over the gold tips, not the matte base, so the contrast stays crisp.
Editor's noteIf your matte top coat smears when you touch it, wait an extra minute after curing before chrome application.
Watch outDon't put glossy top coat over the entire nail; it ruins the matte-nude contrast.
6. French tip with gold chrome heart accent at the corner
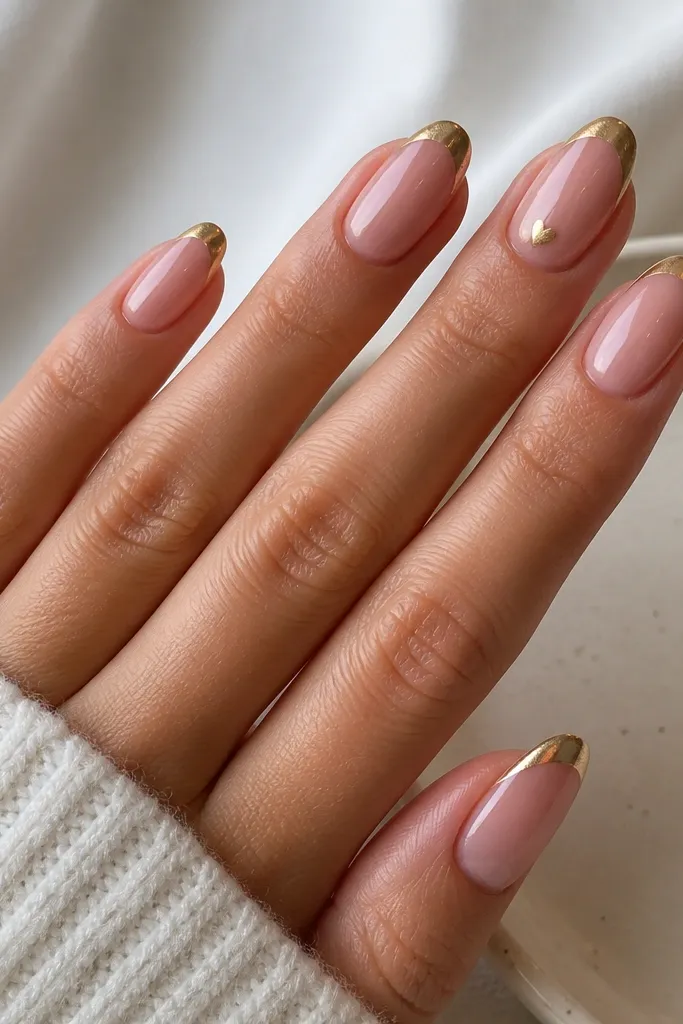
A tiny heart at the corner makes this feel romantic without going full nail art. Because the heart is chrome, it matches the French tip and looks like it belongs there. This design flatters hands that need a focal point; the heart draws attention to the smile line and makes the tip look intentional. I wear it for date nights and bridal showers, and it still works in everyday life because only one nail has the heart.
Paint your French tips first on all nails: sheer pink base, then a gold French curve. Cure and apply gold chrome powder on the tip area, then seal. On the accent nail, use a dotting tool to place a small heart shape with a thin gold-tacky gel at the outer corner of the smile, cure. Apply chrome to the heart, press lightly, dust off, and seal over the heart with a careful, thin top coat so the heart edges stay defined.
Editor's noteKeep the heart size about the width of your pinky nail's cuticle - tiny looks more expensive than cute-big.
Watch outDon't flood the heart with top coat before it's sealed - it can round the edges.
7. Half-moon gold chrome flash under the French
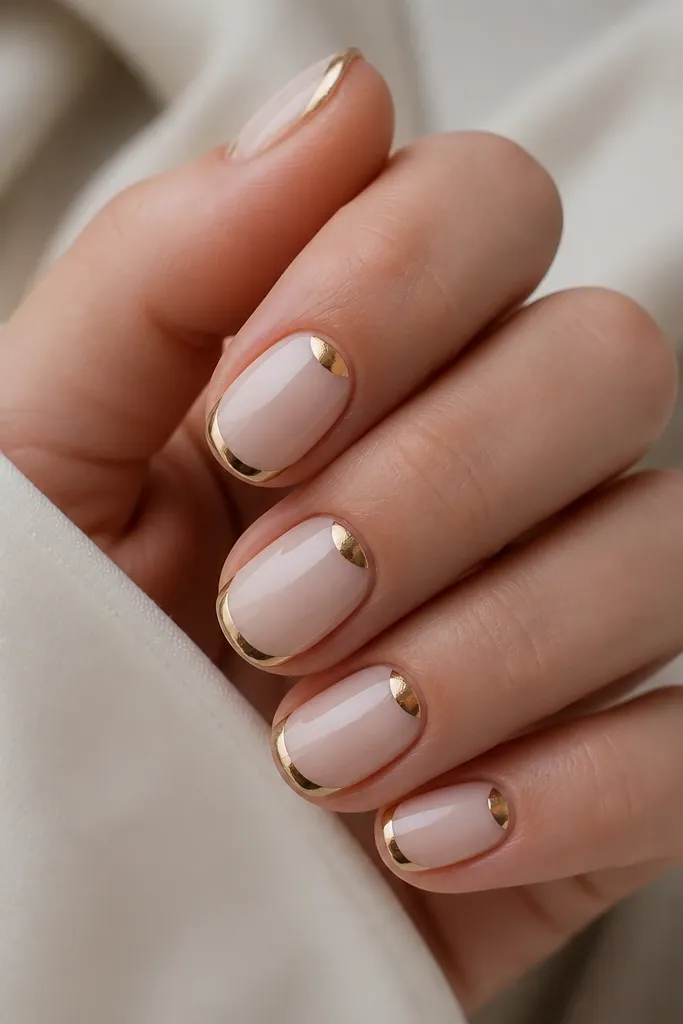
This adds balance because gold shows up at two points: near the cuticle and at the tip. The half-moon flash makes nails look longer and more "designed," especially on short nail beds. It also photographs well because the half-moon catches light even when your hands are at rest. I like this for year-round wear because it feels special without adding lots of color.
Start with a milky nude base and cure. Draw a thin half-moon at the cuticle center using a clear-to-tacky gel, cure, then apply gold chrome powder and seal lightly. Next, paint the gold French tip on the free edge with the same tack gel, cure, chrome it, and dust off. Finish with a full glossy top coat over everything, including the half-moon area so it feels smooth.
Editor's noteUse a toothpick to clean up the half-moon edges so it doesn't look like a smudge.
Watch outAvoid placing the half-moon too high - it can cover the cuticle and look crowded.
8. Stacked French with two gold chrome tiers
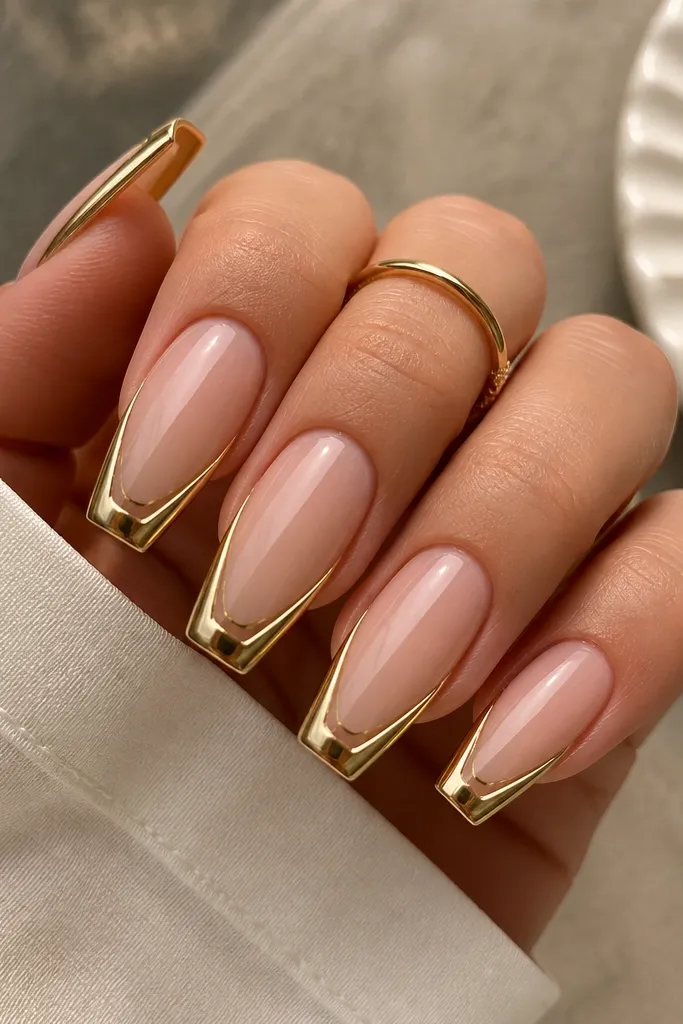
Two-tier French tips make the nail look thicker at the top, which is flattering when you want more structure. The nude base keeps it wearable, and the gold chrome tiers add dimension without adding glitter. This design works best on medium to long lengths where you have enough space for two lines. It's also great if you like a bold look but hate heavy nail art.
Apply nude base in two coats and cure. Paint the outer French band first with tack gel, cure, chrome, then seal lightly. After that cures, add the inner thin line about 1 millimeter inside the outer band, cure, chrome again, and seal. Use a glossy top coat that covers the edge of both tiers so the lines don't lift.
Editor's noteIf the tiers look uneven, adjust only the inner line - it's the easiest to correct and it keeps the outer curve looking clean.
Watch outDon't use chunky gel for the tiers; it makes the chrome look like a sticker.
9. Gold chrome French with rhinestone line at the smile
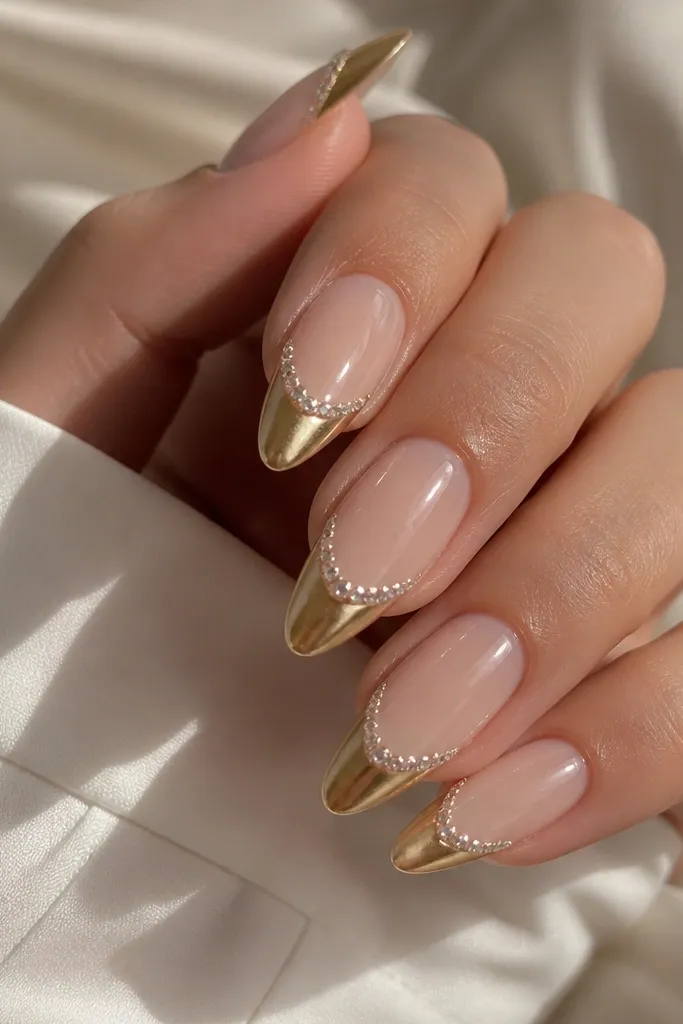
A rhinestone line turns Chrome French Nails year round into evening-ready glam fast. The stones add sparkle even if your gold chrome is covered by a thicker top coat. I like using tiny stones because they look like micro jewelry and they don't overpower the chrome. This is flattering on medium to deep skin tones because the clear stones reflect light back into your hands.
Do your base and French first: sheer nude in two coats, then gold chrome French at the smile curve. Seal with one thin top coat so the surface is stable. Then add a strip of rhinestones along the smile using a gel adhesive, placing them so they follow the curve but leave small gaps for light. Cure, then finish with a final glossy top coat, working slowly so you don't smear gel around the stones.
Editor's notePick rhinestones with the same height so the row looks even under flash photos.
Watch outDon't use large stones - they make the smile line look lumpy and heavy.
10. Gold chrome French with tiny star dust on one nail
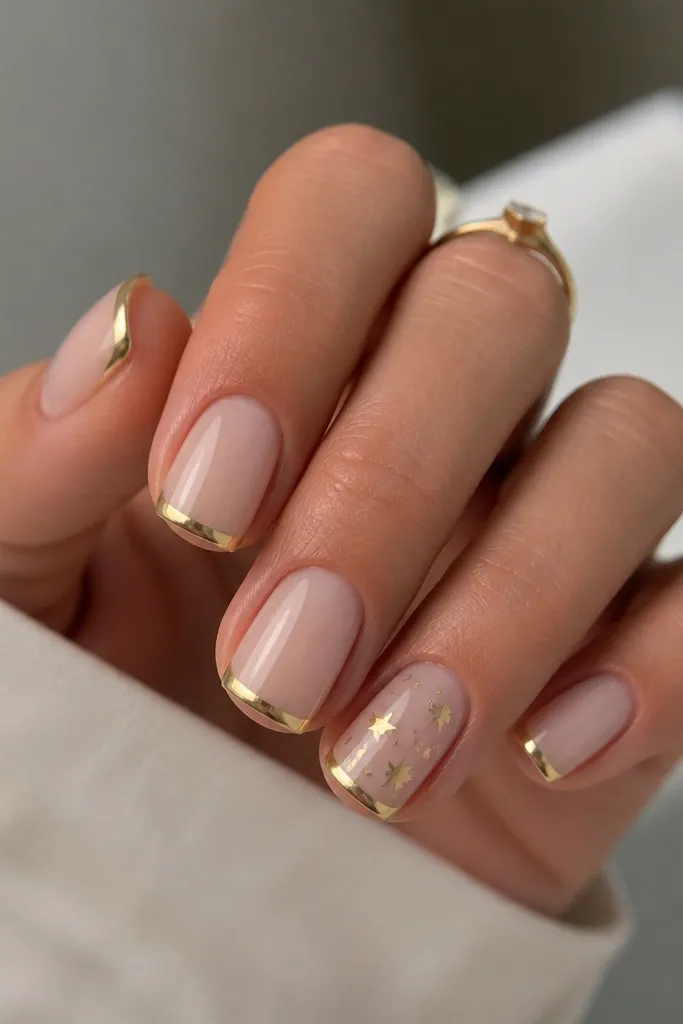
Star dust adds personality without turning the whole set into themed nail art. I keep the stars small and place them near the center so they look like confetti rather than clutter. The base stays neutral, so this works for daily wear and still feels fun. On shorter nails, the tiny star placement prevents the set from looking top-heavy.
Paint and chrome the French tips on all nails first. Seal with a glossy top coat. On the accent nail, use a dotting tool to place 3-5 tiny gold dots with a tack gel, cure, then add chrome or gold foil to the dots. Add one mini star sticker or hand-painted star in gold-tacky gel, cure, and seal carefully with a thin top coat so the star edges don't blur.
Editor's noteKeep the star count low - three well-placed stars look cleaner than ten scattered ones.
Watch outDon't cover the stars with thick gel; it flattens the details.
11. French ombre to gold chrome fade
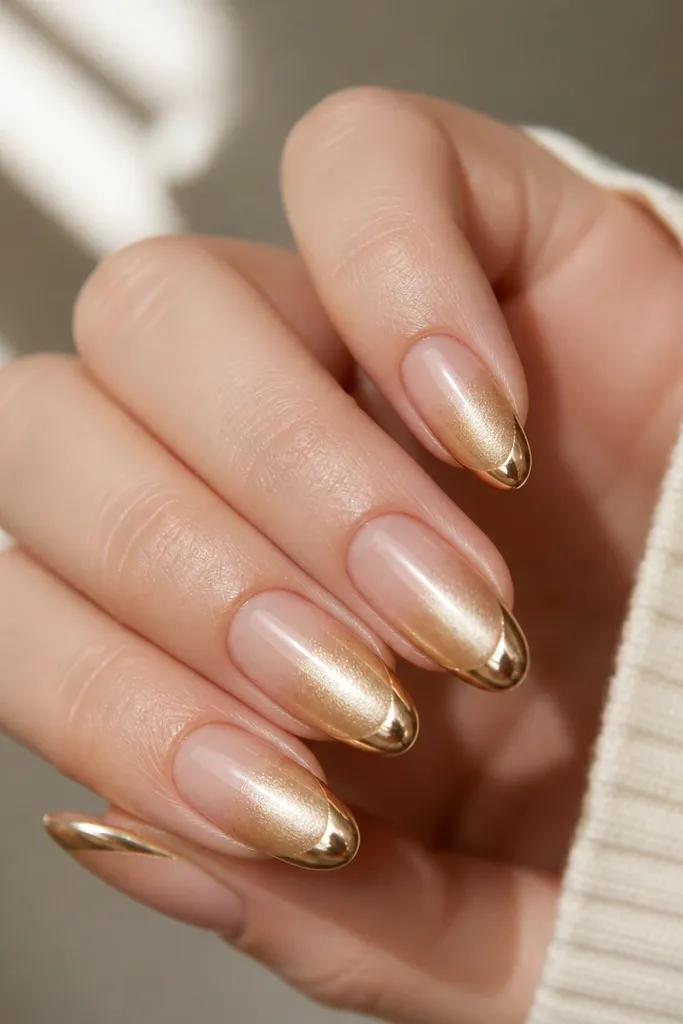
This one is for people who love chrome but want it softer. Instead of a hard French line, you get a gradient that melts into a mirror edge. It looks amazing on almond and oval shapes because the fade follows the natural taper. The set is flattering on hands with longer fingers since the ombre makes the nails look longer and more fluid.
Start with a nude base that matches your skin tone, two coats. For the ombre, sponge a warm gold pigment or gold gel starting about 2 millimeters up from the tip and blend downward toward the free edge. Cure, then apply gold chrome only at the final 1 millimeter of the tip for a sharp mirror edge. Seal with glossy top coat so the gradient stays smooth.
Editor's noteUse a makeup sponge for the ombre and dab lightly - you want a feathered fade, not a speckled texture.
Watch outAvoid chrome across the entire gradient; it makes the fade look harsh.
12. Gold chrome French with thin black underlay
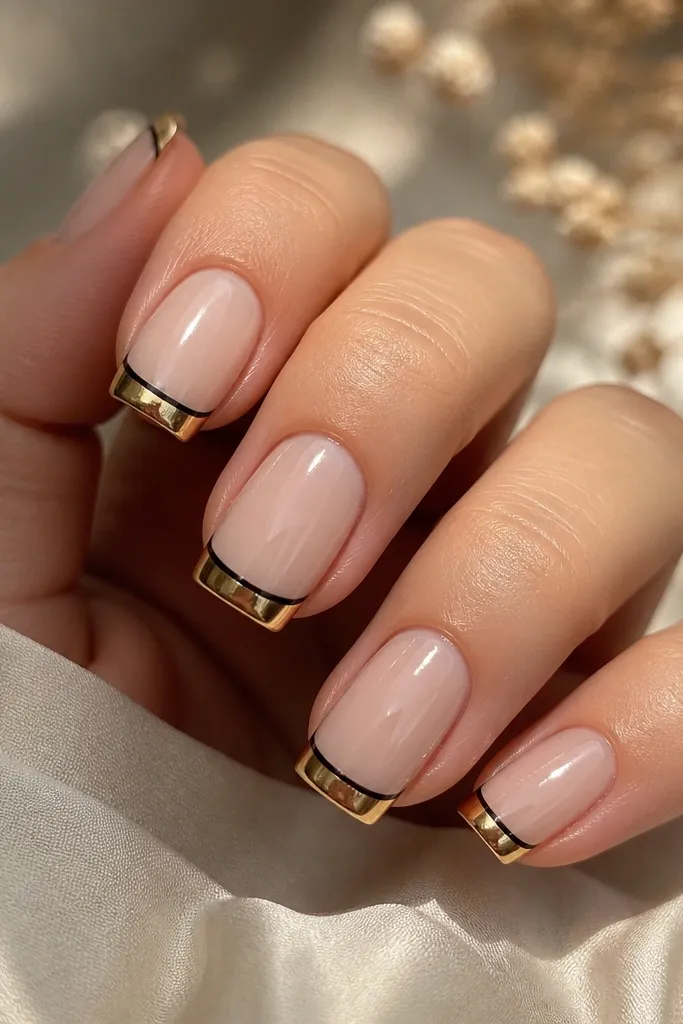
A thin black underlay makes gold look richer and more expensive. The black line is not a full design - it's a shadow that defines the smile curve. This is the set I reach for when I want chrome to look extra crisp without adding rhinestones. It works especially well on fair and light-medium skin because the contrast pops and makes the gold look clean.
Apply sheer nude base and cure. Paint a thin black line where your French smile will be, using a striping brush, cure. Then apply gold chrome tack gel on top of the black line and chrome the gold area. Seal with glossy top coat in two thin layers so the black stays visible as a neat shadow line.
Editor's noteKeep the black line width around a hairline; if it's too thick, it turns into a chunky outline.
Watch outDon't let black bleed into the nude base; it makes the set look stained.
13. Reverse French with gold chrome on the sides
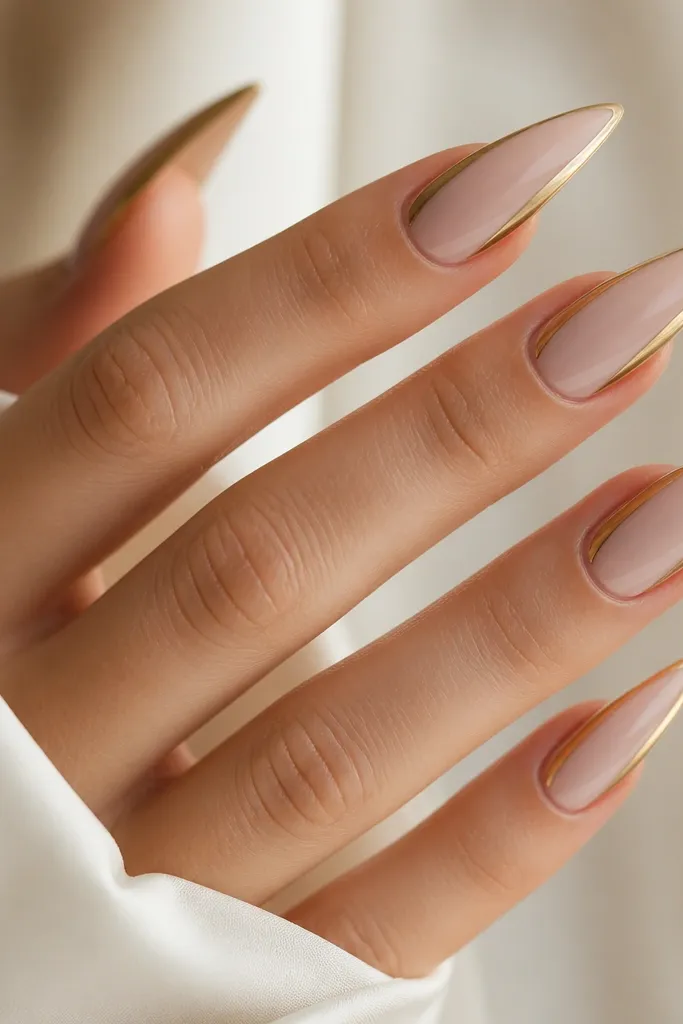
Reverse French is a clever way to keep gold only where it flatters. By placing chrome on the sidewalls near the tip, your nails look narrower and longer. Stiletto shapes benefit because the side shine draws the eye upward. This set flatters hands with wider nail beds because the center stays nude and your nail shape looks more tapered.
Apply milky nude base and cure. Paint chrome tack gel on both sidewalls starting about 1/3 up from the tip and following the nail taper, cure. Apply gold chrome powder along each side, press gently, dust off. Seal with glossy top coat, then use a tiny brush to clean the top corners so chrome doesn't creep onto the center.
Editor's noteUse a nail guide strip on each sidewall so the chrome curve stays even from one nail to the next.
Watch outAvoid chrome on the very bottom edge of the sides - it can look like a thick frame instead of a sleek reverse French.
14. Gold chrome French with pearlized nude base
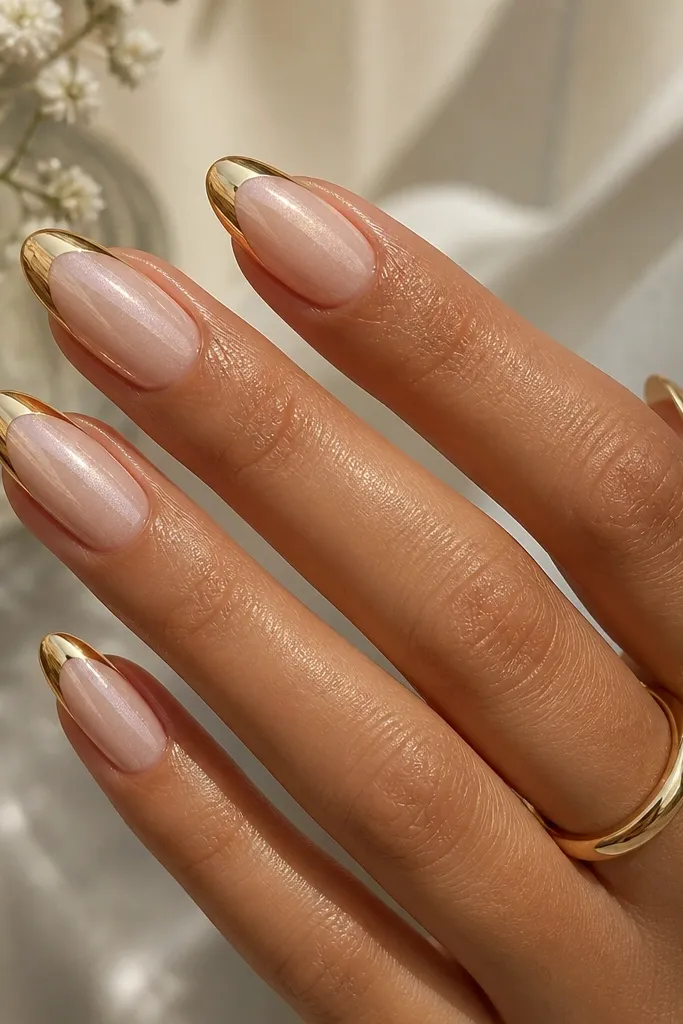
Pearlized nude gives you a second light source, so the set looks expensive even with minimal design. The gold French tip still does the main work, but the pearly base adds glow when you move your hands. This looks great on medium to deep skin tones because the base shimmer blends beautifully with warmer undertones. I wear it for holidays because it reads festive without adding glitter.
Apply pearly nude gel in two coats, curing fully. Paint the gold French smile line with tack gel, cure. Chrome the French tip with gold powder, then dust off. Seal with glossy top coat in two layers, making sure the top coat doesn't mute the pearly base by flooding it too thickly.
Editor's noteIf your base pearl looks patchy, thin the first coat more and cure longer so it levels before you add the second coat.
Watch outDon't overbuff the pearly base - it kills the shimmer.
15. Gold chrome French with tiny bow on accent nail
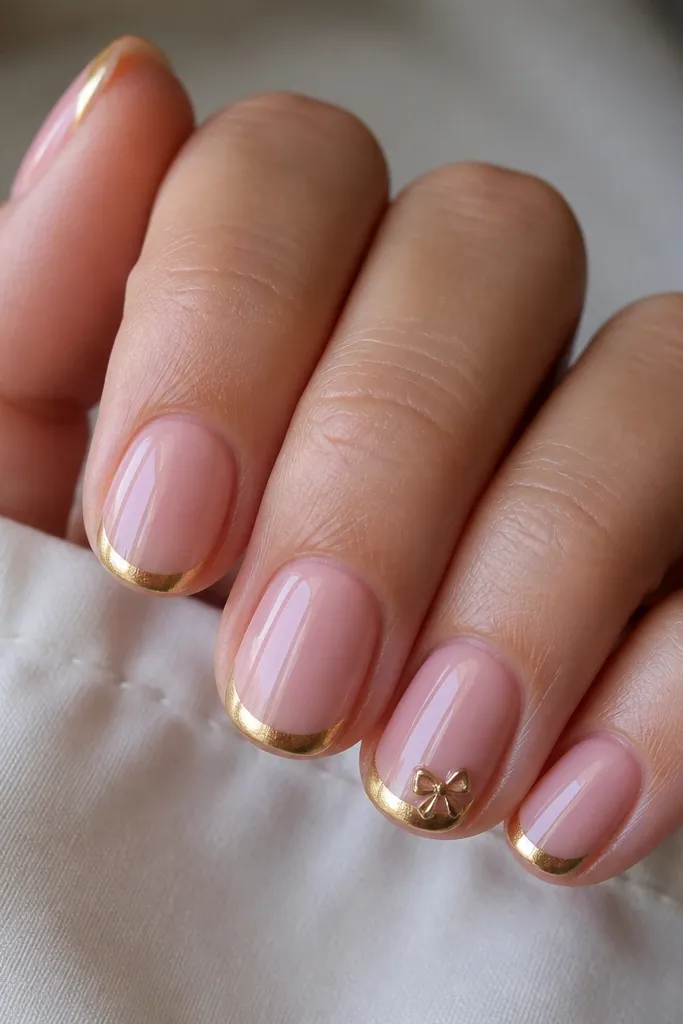
A tiny bow is cute but still clean when you keep it small and place it at the side. Chrome makes the bow match the French tip, so it doesn't look like a separate sticker. This style flatters small nail beds because the bow sits within the French area and doesn't crowd the center. It's perfect for birthdays and casual glam when you want something sweet without heavy rhinestones.
Do the French chrome on all nails: sheer pink base, gold smile line, chrome powder, seal. On the accent nail, use a thin gel to outline a bow shape - two small loops with a center knot - near the outer corner. Cure, chrome the bow, and press lightly so edges stay crisp. Seal with a thin glossy top coat, then cap the bow edges carefully with a second coat once the first sets.
Editor's noteUse a nail art liner brush with a fine point for the bow so the lines stay sharp.
Watch outAvoid placing the bow too close to the cuticle; it can look like it's floating and not attached.
16. Gold chrome French with vertical foil streaks
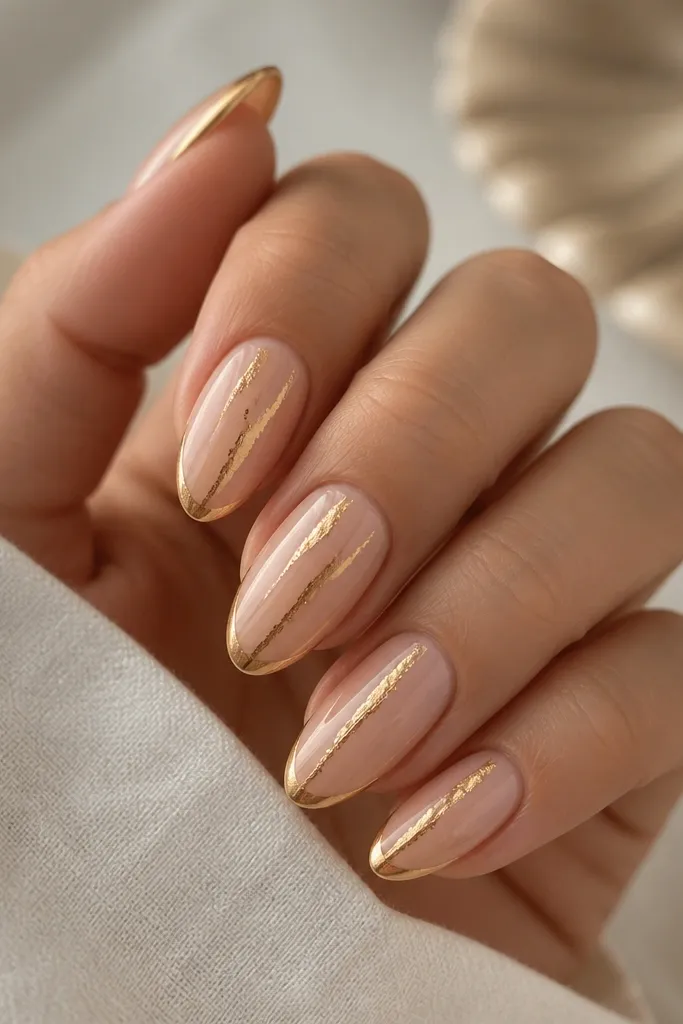
Vertical foil streaks add movement and make your nails look longer, especially when the French tip is already doing the shine. I like this on medium almond because the almond taper makes the streaks look like they follow your nail's natural line. The foil gives a slightly different texture than chrome, so the set has depth. It flatters hands that want a "designer" look without adding lots of paint.
Apply nude base in two coats and cure. Place two thin gold foil strips vertically on each nail, starting about halfway between cuticle and tip, then press foil adhesive lightly so the foil grabs. Cure, then do your gold chrome French tip at the smile curve. Chrome the French, dust off, and seal over both foil and chrome with two glossy top coats.
Editor's noteTrim foil strips so they stop 1-2 millimeters before the French line; it keeps the design separated and cleaner.
Watch outDon't let foil overlap the smile line heavily - it can muddy the French curve.
17. Gold chrome French on glossy nude with negative space gap
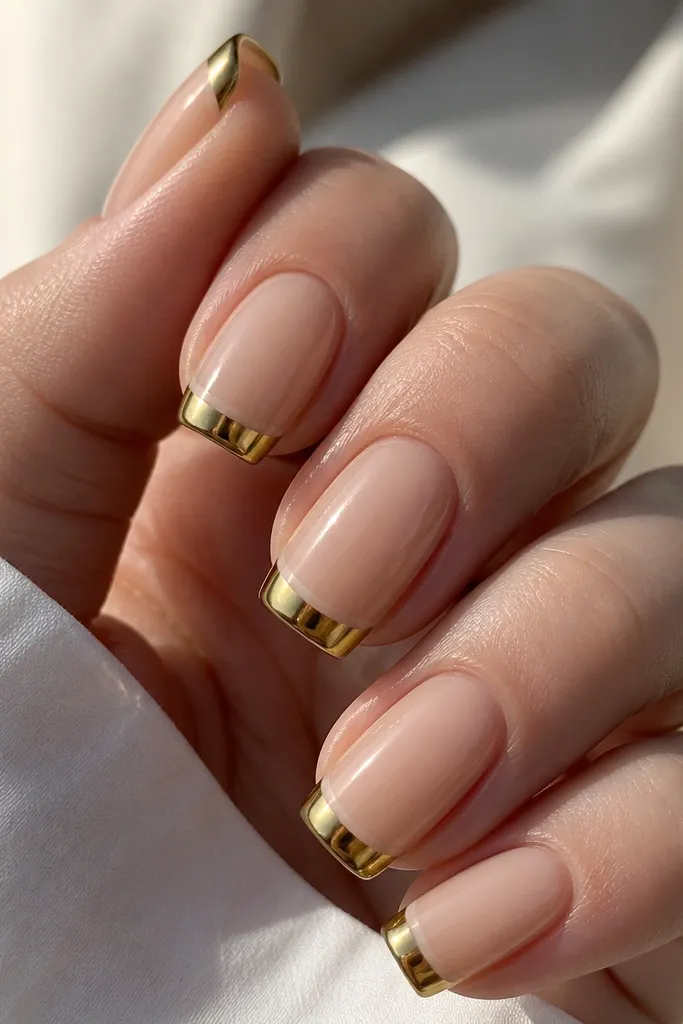
That negative-space gap is what makes this look modern. Instead of gold filling the smile area completely, you leave a thin sliver of nude between the base and chrome, so the French line looks more architectural. It's flattering because it breaks up the nail visually and makes the tip look lighter. I recommend this for medium length because you need enough space to leave the gap without it disappearing.
Apply glossy nude gel in two coats and cure. Paint your French smile line with gold chrome tack gel, but leave a 0.5-1 millimeter gap from the base by pulling the tack gel slightly away from the nude line. Cure, apply gold chrome powder to the tip area only, dust off. Seal with glossy top coat, and keep your first top coat thin so the gap stays visible.
Editor's noteUse a striping tape to create the gap line - peel it slowly while the gel is tacky so you don't pull chrome.
Watch outAvoid over-capping with thick top coat; it can fill the gap and erase the effect.
18. Gold chrome French with micro glitter nude underneath
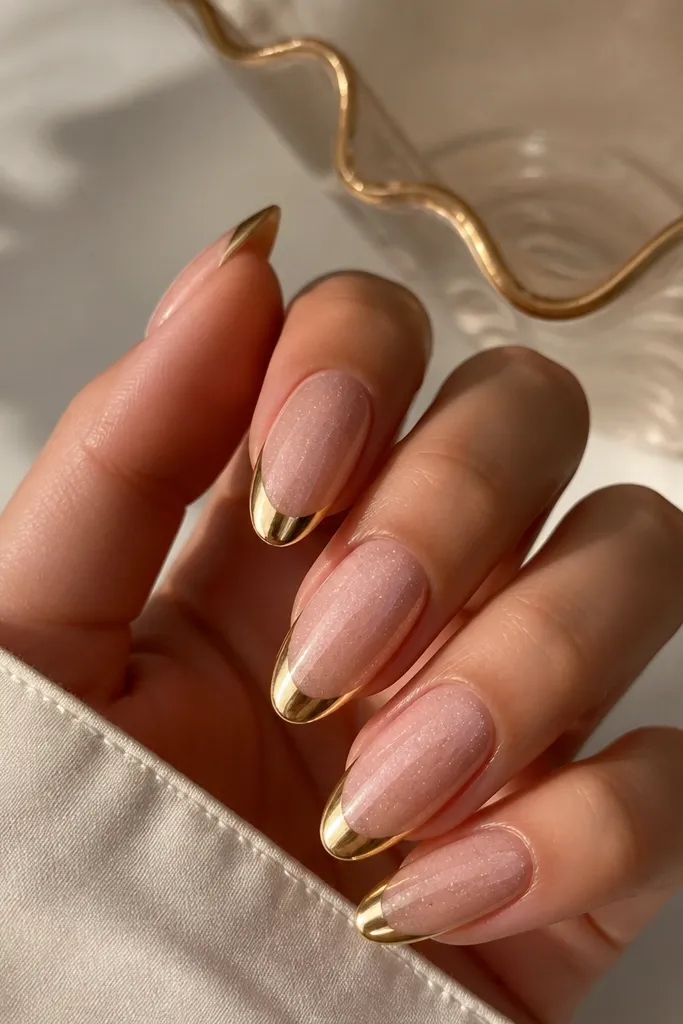
Micro glitter under chrome makes the whole manicure glow, especially at night. The gold French tip stays the focal point, but the base has tiny sparkle that reads "expensive" even when you're not looking directly at the tips. This works best on long oval nails because the glitter has room to distribute and doesn't look like clumps. It's flattering for most skin tones, and it's my go-to for events when you want chrome but also want extra sparkle.
Apply nude gel with a micro glitter pigment mixed in - keep it light so you don't get gritty texture. Cure two coats. Paint the French tip with gold chrome tack gel and cure. Chrome the tip with gold powder, dust off, and seal with a glossy top coat in two thin layers. After curing, check the surface for any rough glitter spots and buff lightly if needed before the final top coat.
Editor's noteUse ultrafine glitter, not chunky - chunky makes the base feel sandy under your hands.
Watch outDon't put chrome over a bumpy glitter layer; it grabs unevenly and looks patchy.
19. Gold chrome French with scalloped edge
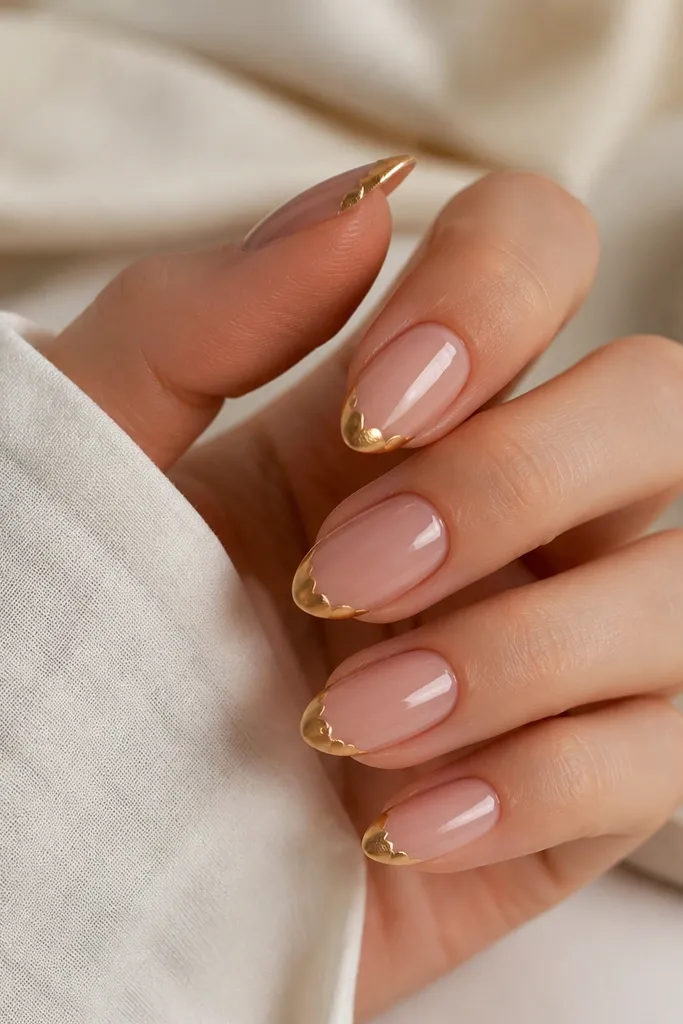
Scalloped French adds a playful shape while still staying within the French category. The scallops make the tip look softer and more detailed, and the gold chrome keeps it crisp. This is flattering on almond and oval nails because the scallops echo the curve of the nail. I like it for spring and summer because it looks light, but it still works year-round since the base stays neutral.
Apply sheer pink base and cure. Add gold chrome tack gel along the smile curve, then use a thin liner brush to create scallops at the top edge, spacing them evenly. Cure, chrome the tip, and dust off. Seal with glossy top coat, making sure you cap each scallop edge so it doesn't catch on fabric.
Editor's noteMark three points across the tip before you start scalloping; it keeps the arcs even nail to nail.
Watch outAvoid uneven scallop sizes - it turns the design into a lumpy edge.
20. Gold chrome French with angled corner tips
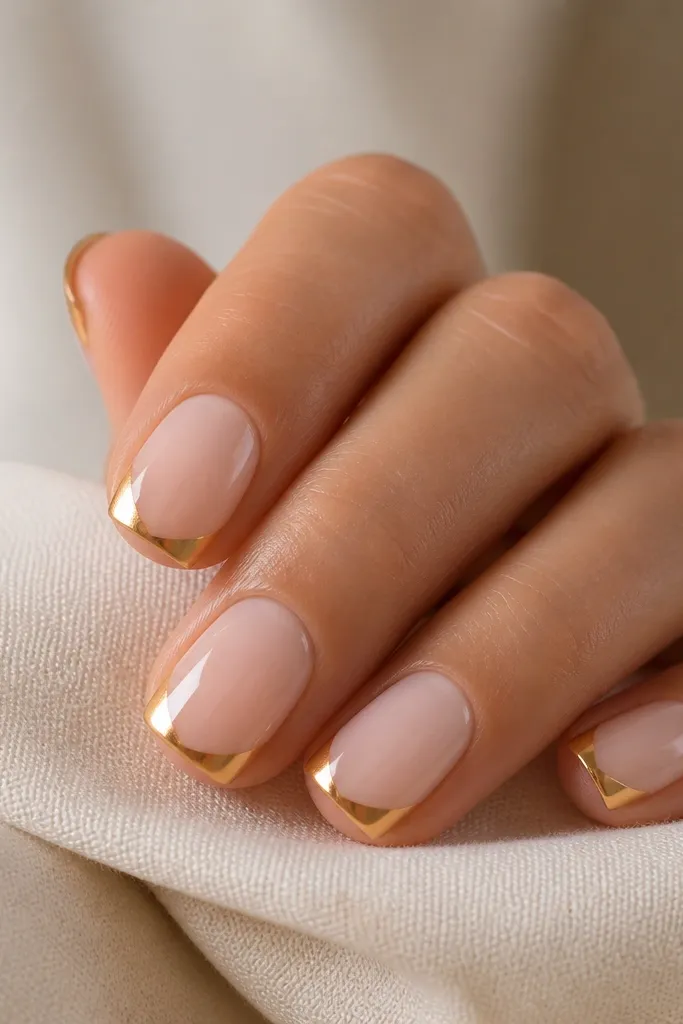
Angled corners make your nails look sharper and more fashion-forward. It's a great option if you don't love a perfect smile curve and you want something graphic that still reads as French. This flatters short nails because the diagonal angles visually lengthen the nail bed. I use it with simple rings and a sleek outfit because the nails look like a clean design, not a loud theme.
Start with a milky nude base and cure. Paint gold tack gel starting at the center of the free edge, then draw diagonal lines up toward both corners, leaving the center slightly lower. Cure, apply gold chrome powder, press lightly, and dust off. Seal with glossy top coat and cap the corners so the diagonal tips don't chip at the edges.
Editor's noteKeep the diagonal lines symmetrical by measuring each corner angle against the nail's sidewall.
Watch outDon't angle too steep - if the corners rise too high, it looks like a mistake rather than a deliberate style.
21. Gold chrome French with ombre nude-to-gold tip edge
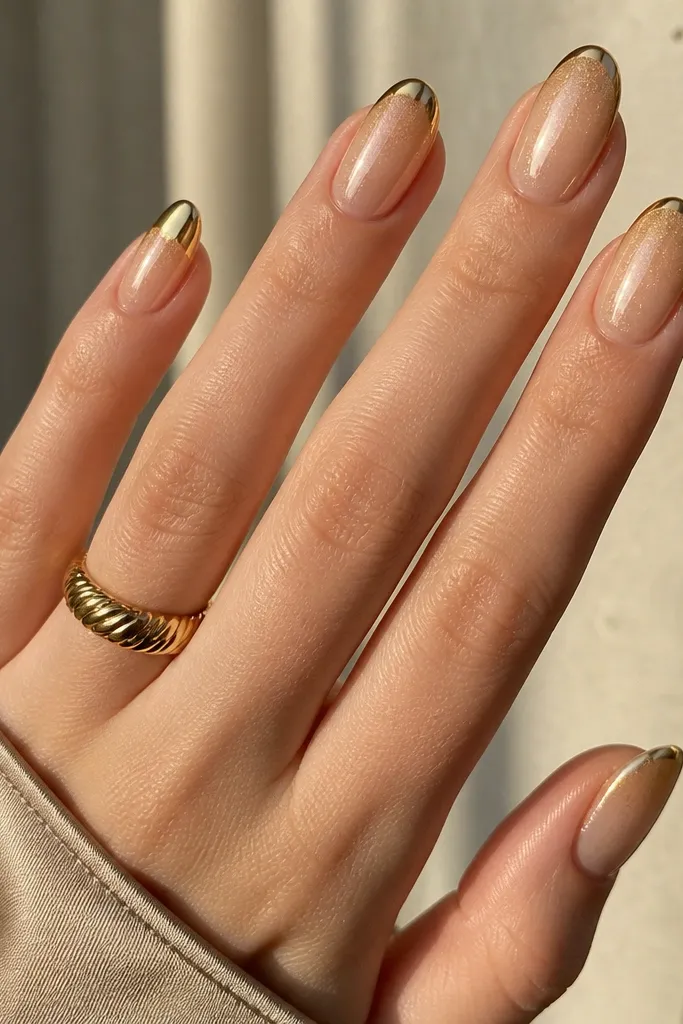
This is a softer cousin to a hard French line. The warm gradient blends the nude into gold, and then the mirror chrome edge makes it look polished. It's flattering on oval shapes because the taper makes the fade look smooth. I like it when my hands are tanned in summer or when I want extra warmth in winter - the gold looks golden instead of yellow-bright.
Apply your nude base in two coats and cure. Sponge a warm gold gel or pigment from about 2 millimeters up from the tip, blending toward the free edge. Cure and then apply gold chrome only at the last 1 millimeter at the edge for a clean finish. Seal with glossy top coat, and wipe any stray chrome dust off the nude area before curing.
Editor's noteIf the gradient looks streaky, apply a thin clear top coat before chrome so the sponge blends smoother.
Watch outAvoid applying chrome too early - if the gradient isn't fully cured, the chrome can bleed.
22. Gold chrome French with thin rose-gold overlay line
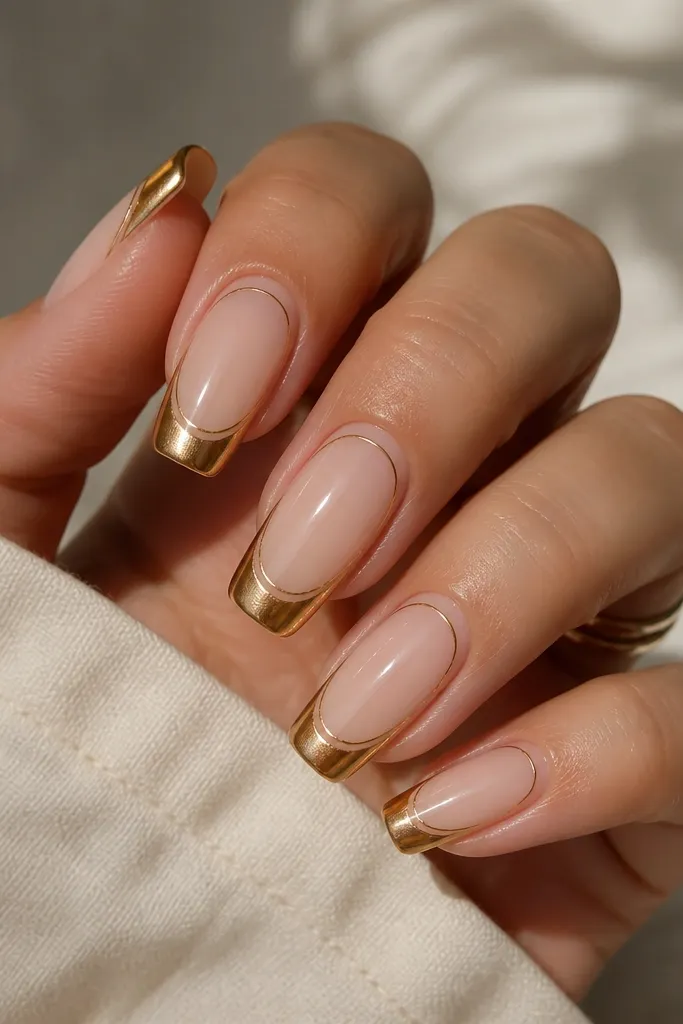
Mixing gold chrome with a rose-gold overlay makes the manicure feel softer and warmer. The rose line adds a second highlight without turning the set into multicolor chaos. This flatters cool skin tones because rose-gold brings warmth while gold chrome keeps it bright. On long squoval nails, the parallel lines make the tip look extra neat and salon-like.
Apply sheer blush base and cure. Paint the main French tip with gold tack gel, cure, chrome with gold powder, and seal lightly. Then add a thin rose-gold line 0.5-1 millimeter inside the gold using rose-gold striping gel, cure. Apply a matching rose-gold chrome powder to that line, dust off, and seal with a final glossy top coat so both metals look smooth.
Editor's noteUse rose-gold striping gel, not regular polish, so the line stays crisp under chrome.
Watch outDon't mix too many metal tones; two lines are enough to look intentional.
23. Gold chrome French with tiny dots at the smile
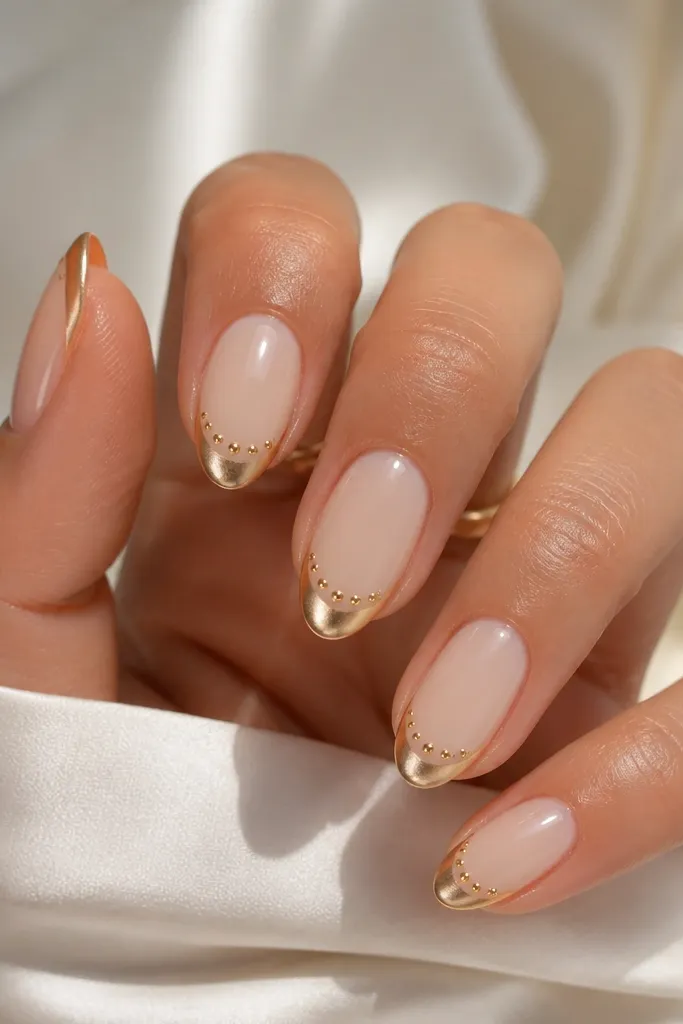
Dots at the smile line give you a "micro detail" without taking over the whole manicure. The gold dots match the chrome, so it looks cohesive. This design flatters hands with shorter fingers because the dots sit near the tip and guide your eye upward. I like it for everyday glam and it works in any season because it stays neutral and metallic.
Apply milky nude base in two coats and cure. Create your gold chrome French tip first and seal. On the accent nail, use a dotting tool to place three small dots along the smile line using a tack gel, cure, then apply gold chrome powder to the dots. Seal with a thin glossy top coat, then cap with one more coat if the dots feel raised.
Editor's noteSpace the dots evenly - one dot too far looks accidental fast.
Watch outAvoid big dots; they look like glue spots instead of nail art.
24. Gold chrome French with pearl dot cluster near cuticle
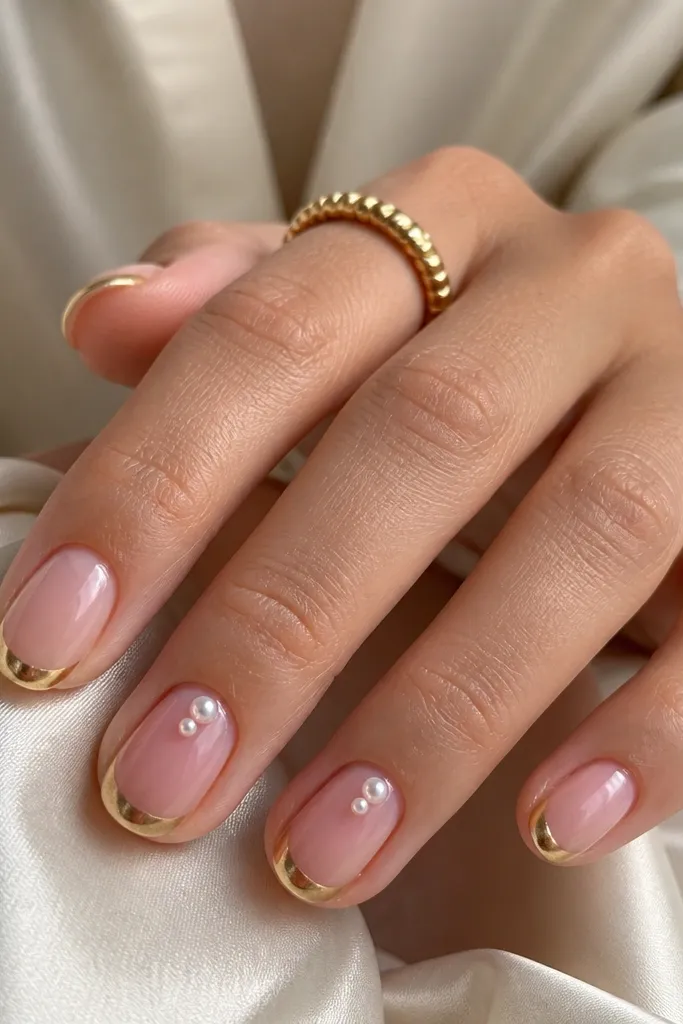
This is a clean way to add texture without glitter. Pearl dots near the cuticle make the nails look styled and delicate, while the gold French tip keeps the set bold. It flatters fair and light-medium skin tones because the pearls brighten the base. I wear this when I want something feminine but still sharp enough for work.
Paint your base and gold French tips first, then chrome and seal. On the accent nails, place a tiny dot of gel near the cuticle center and press a small pearl (or pearl-shaped dots if you use gel pearls) into it. Add 2-3 more pearls around the center dot to form a small cluster, cure, and finish with glossy top coat that covers the pearls lightly so they don't snag.
Editor's noteUse gel pearls or tiny pearl studs so the surface stays smooth against cuticles.
Watch outDon't scatter pearls across all nails; it makes the set feel busy.
25. Gold chrome French with chrome cuticle ring
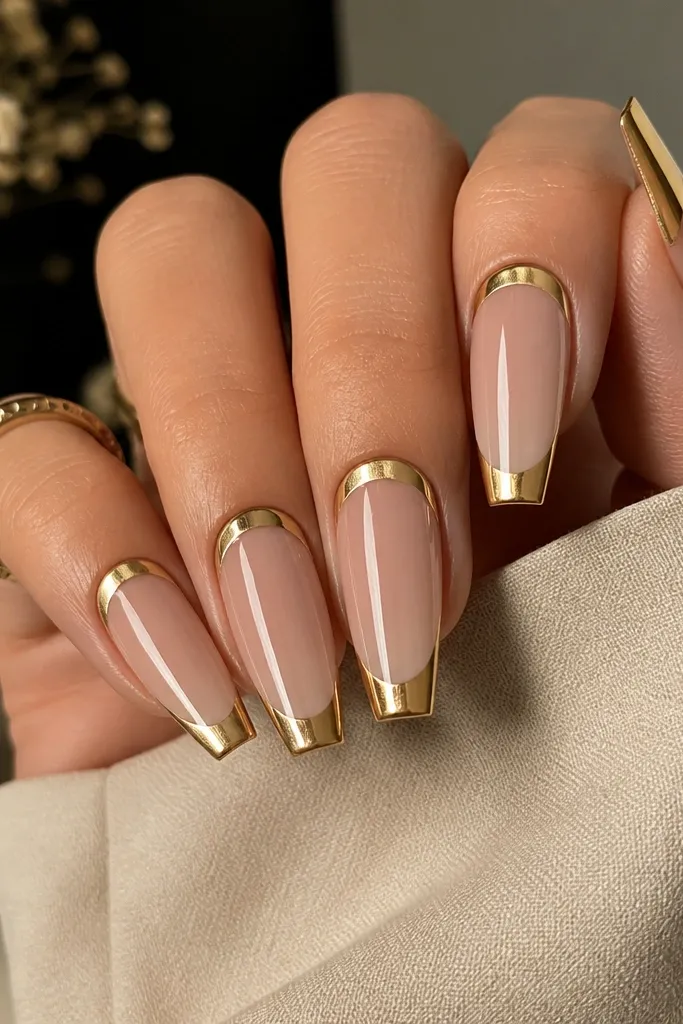
A cuticle ring makes the manicure look like jewelry even when your hands are relaxed. It also balances the French tip so the set feels complete from root to tip. I like it on medium coffin because the shape gives you a smooth surface for the ring line. This flatters all undertones since the gold sits on your nail, not your skin - the reflection gives the brightness.
Apply nude base and cure. Create the cuticle ring first: paint a thin band of tack gel just under the cuticle line, cure, then chrome with gold powder. Seal with a thin glossy top coat. Then do your gold French tip, chrome it, dust off, and seal again with two glossy top coats so both the ring and tip are smooth.
Editor's noteUse a fine liner brush for the ring; a wide brush makes the ring look like a stripe.
Watch outAvoid putting the ring too close to the cuticle edge - it can lift faster there.