1. Milky Peach with Glossy Coral Half-Moons
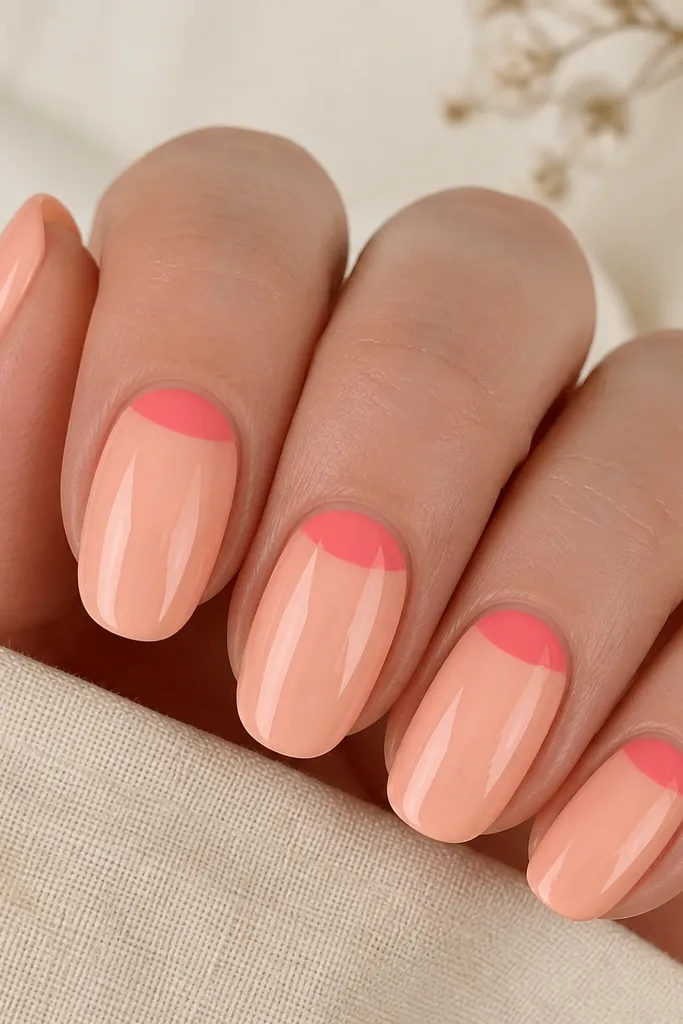
This design is my go-to when I want "summer but soft" on square nails. The milky peach base makes your nail look healthy and bright, even if your nail plate is slightly uneven. The glossy coral half-moons at the cuticle add contrast without taking over the whole nail, which keeps the square shape looking clean. It flatters most skin tones because peach sits in the warm middle - it looks good on fair, medium, and deeper tones. For daytime events, it reads polished instead of loud.
Start by prepping the nail surface and applying a milky peach base coat in two thin layers. Cure fully between layers so it stays smooth, then wipe the tacky layer if your system needs it. Use a striping brush to paint a crescent at the cuticle in glossy coral, keeping the curve narrow so it doesn't flood the sides. Seal with a thick, high-shine top coat, then cap the free edge.
Editor's noteIf your coral looks streaky, thin it slightly with a nail polish thinner and do two coats instead of one heavy coat.
Watch outDon't paint the half-moon too wide - when it touches the sidewalls, square nails start looking messy.
2. Seafoam Gel with White Dotted French Tips
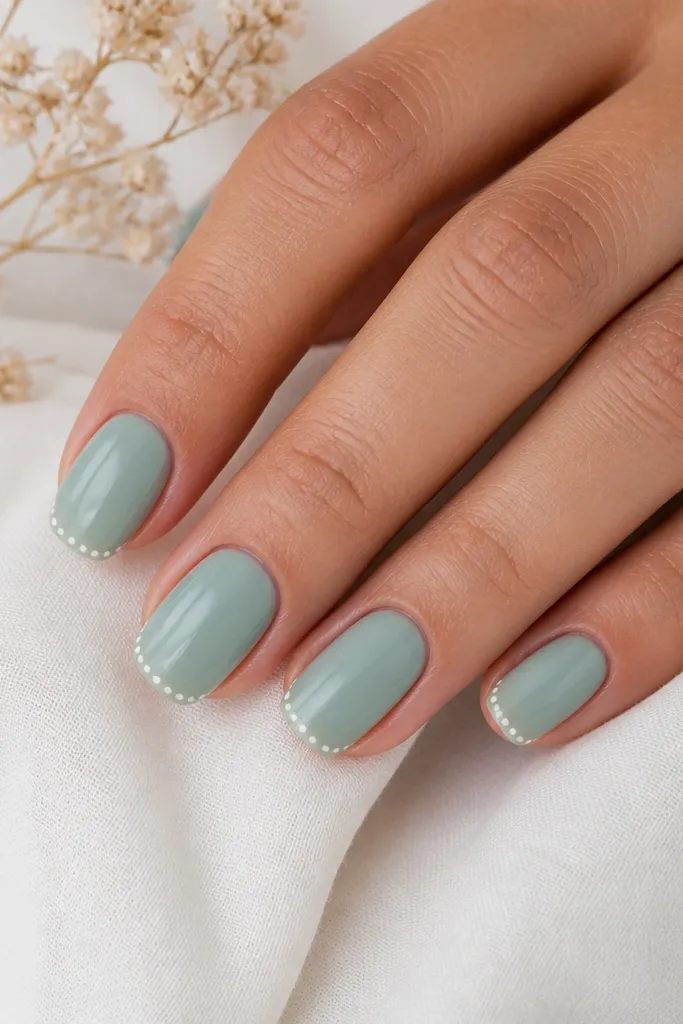
Seafoam is one of the most flattering summer square shades because it looks cool against warm and neutral undertones. The white dotted French tips keep it playful while still feeling "neat," and the negative space stops the tips from looking heavy on a square shape. I like this set for beach trips and casual workdays because it looks fresh even when your hands are dry. It's also beginner-friendly since dotted lines forgive small hand shakes. The contrast between seafoam and white pops in daylight photos.
Apply two coats of seafoam gel (or polish) over a clear base, then cure until fully set. With a dotting tool, place small white dots along the tip edge in a straight line, spacing them about one dot's width apart. Connect the dots lightly with the brush tip only if you need a cleaner arc, then leave the spacing for the dotted look. Finish with a glossy top coat and cap the corners so the square edges stay protected.
Editor's noteUse a smaller dotting tool than you think - tiny dots make the French line look intentional.
Watch outSkipping a top coat thickness check - thin top coat makes the white dots look dull and can peel at the edges.
3. Clear Jelly Base with Hot Pink Skittle Tips
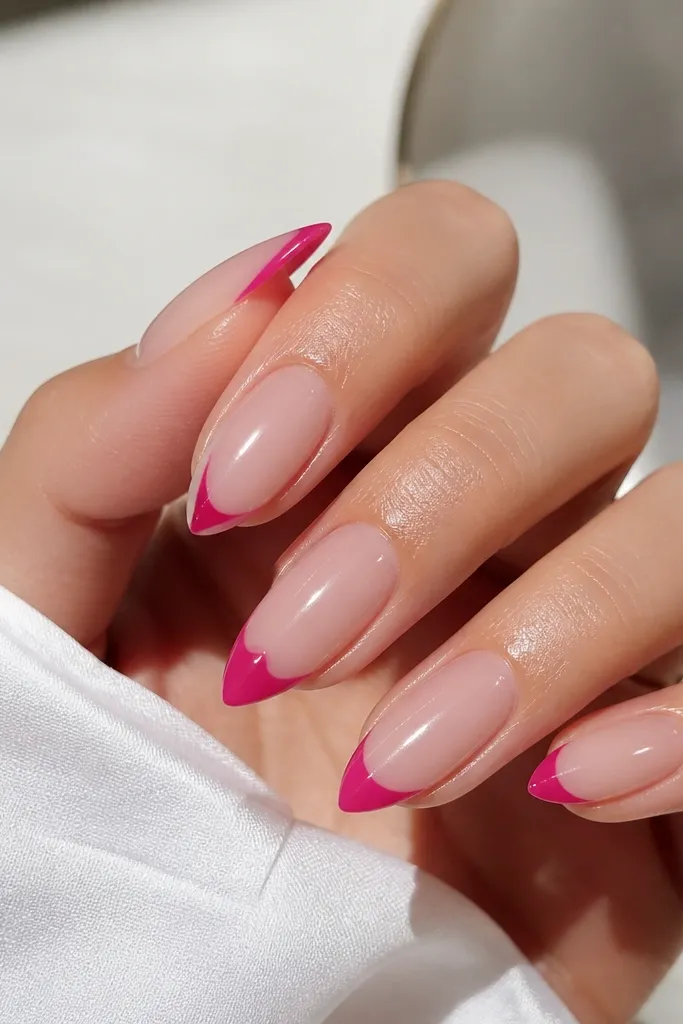
This one looks like candy in the sun. A clear jelly base gives you that "glowy" depth, and the hot pink tips keep it bold without needing nail art lines. Because the jelly layer is semi-translucent, it flatters nail texture and makes short-to-medium square nails look longer. I've worn this during festivals and it still looks cute after a week because the jelly finish doesn't show small chips as harshly. It also looks great on hands that get dry - jelly layers hide the roughness under top coat.
Start with a clear jelly base coat in two layers, curing fully each time. Add hot pink to the tips, but don't paint them identical - vary the tip height by about 1 mm between nails. Keep the hot pink slightly rounded at the inside edge so it blends into the jelly instead of creating a hard line. Seal with a thick glossy top coat, and cap the free edge carefully.
Editor's noteIf your hot pink is too opaque, mix a tiny drop of clear to make it slightly jelly so it blends smoother.
Watch outDon't go full solid to the cuticle - it kills the jelly glow and makes chips more obvious.
4. Lavender Milk Nails with Silver Star Confetti
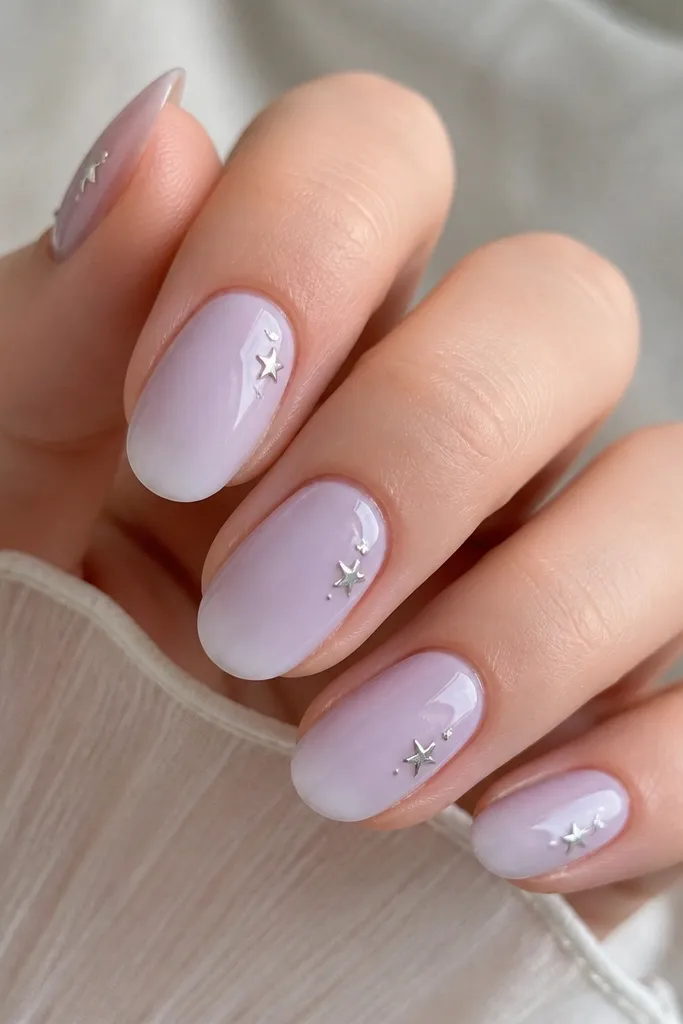
Lavender milk nails look dreamy because they're soft, not flat. The milky base smooths out the nail and gives that "cloud" look that reads expensive in photos. Silver star confetti adds sparkle without feeling like full glitter overload. I like this on square nails because the stars can sit near the corners, which frames the square shape. It flatters cooler undertones and also looks beautiful on warm skin if you keep the lavender on the lighter side. Great for birthdays, showers, and any summer night out.
Apply a lavender milky base in two thin coats for opacity without thickness. Place tiny silver star confetti using a dotting tool, starting with one star near the outer side of each nail. Press gently so it sits flat, then add a thin layer of top coat over the stars to lock them in. Finish with a final glossy top coat and cap the edges so the confetti doesn't snag.
Editor's noteChoose star sizes that are about 1-2 mm wide - anything larger looks costume-y on square tips.
Watch outDon't skip the locking top coat layer - loose confetti catches on hair and lifts.
5. Tangerine to Nude Ombre Square Tips
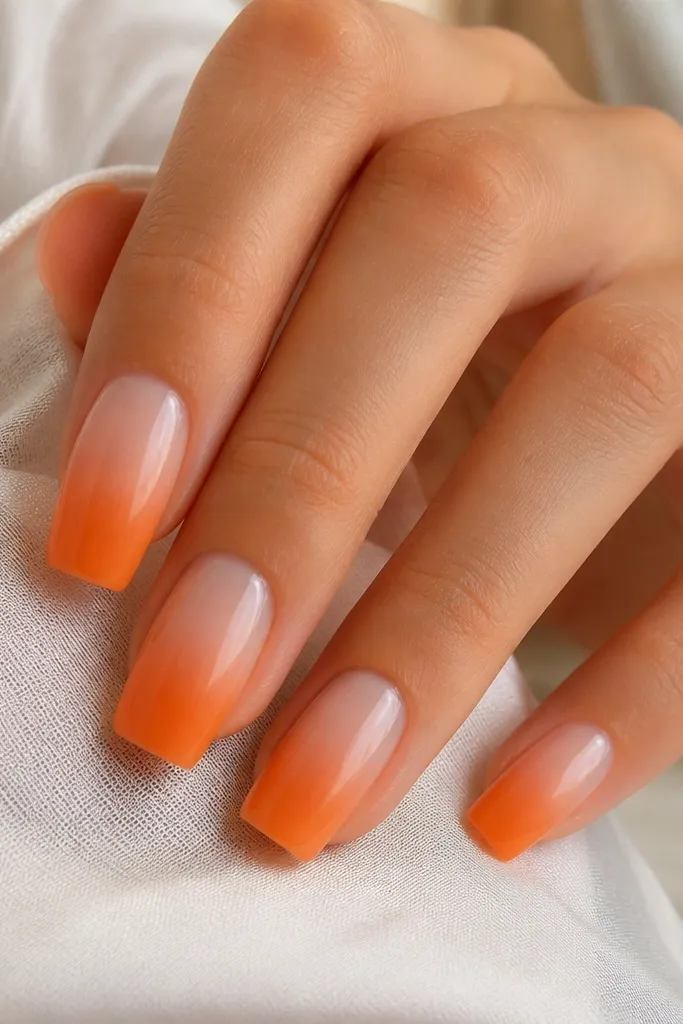
This ombre is the summer version of "clean girl" but with color that still feels wearable. The tangerine tip gives energy, and the nude base keeps it flattering and not too loud. Ombre works especially well on square nails because the gradient visually lengthens the tip and makes the corners look crisp instead of blunt. I've had this on during hot weeks when my hands sunburn easily - it hides redness and looks fresh. It's also great if you want something that grows out nicely; the nude cuticle area blends the regrowth.
Start with a nude base coat in two layers, curing fully. Sponge-paint tangerine at the tip using a makeup sponge, then blend upward 1/3 of the nail. Wipe excess off the sponge between nails so the color stays controlled. Add a second ombre pass only where you want more intensity, then finish with glossy top coat and cap the tip corners.
Editor's noteUse a slightly damp sponge - it softens the fade and prevents harsh edges.
Watch outDon't blend too high - if tangerine reaches the cuticle, square nails look squat.
6. Aquamarine Swirls on Milky White
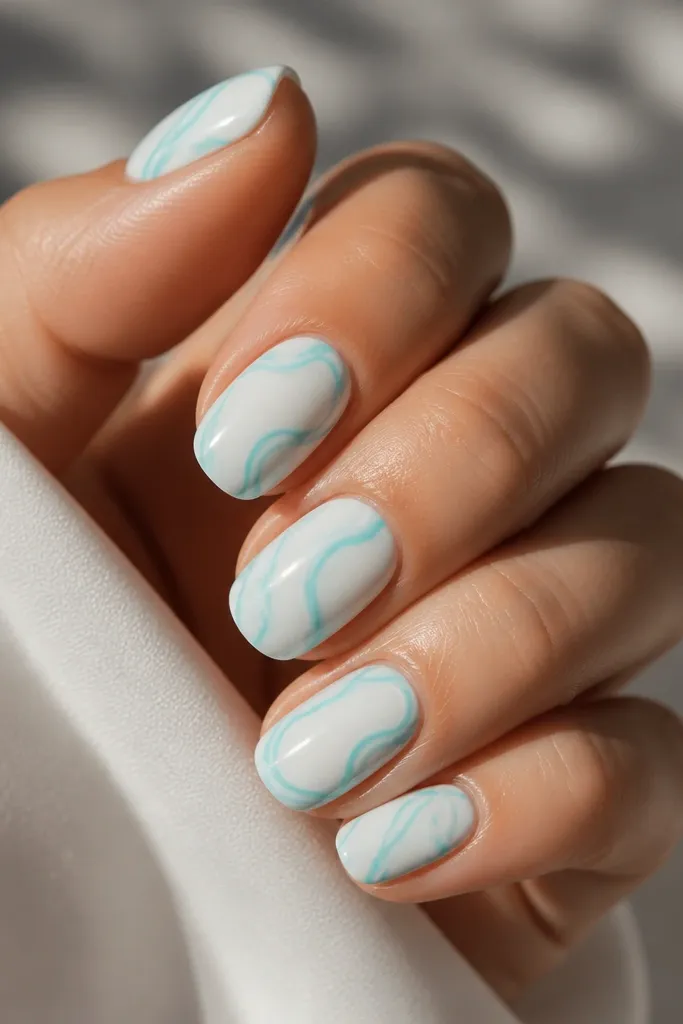
Milky white plus aquamarine looks like ocean foam. The milky base makes the nails look smooth and bright, and the thin swirls add movement without clutter. On square nails, swirls look best when they curve diagonally from the sidewall toward the center, because that shape guides the eye. This set flatters light to medium skin tones especially well, but deeper skin looks gorgeous too since aquamarine has enough contrast. I wear this when I want something beachy but still "put together."
Paint two coats of milky white and cure until fully opaque. With an aquamarine gel or polish and a striping brush, draw one loose S-shaped swirl per nail, starting near the side and ending toward the center. Keep the line thin and consistent - if it thickens, wipe the brush and restart. Seal with a glossy top coat, then do a second top coat if your swirls sink slightly under the first layer.
Editor's noteUse short strokes instead of one long line - it keeps the swirl clean on square edges.
Watch outAvoid thick brush strokes - chunky swirls make square nails look bulky.
7. Neon Yellow Micro-French with Clear Gloss
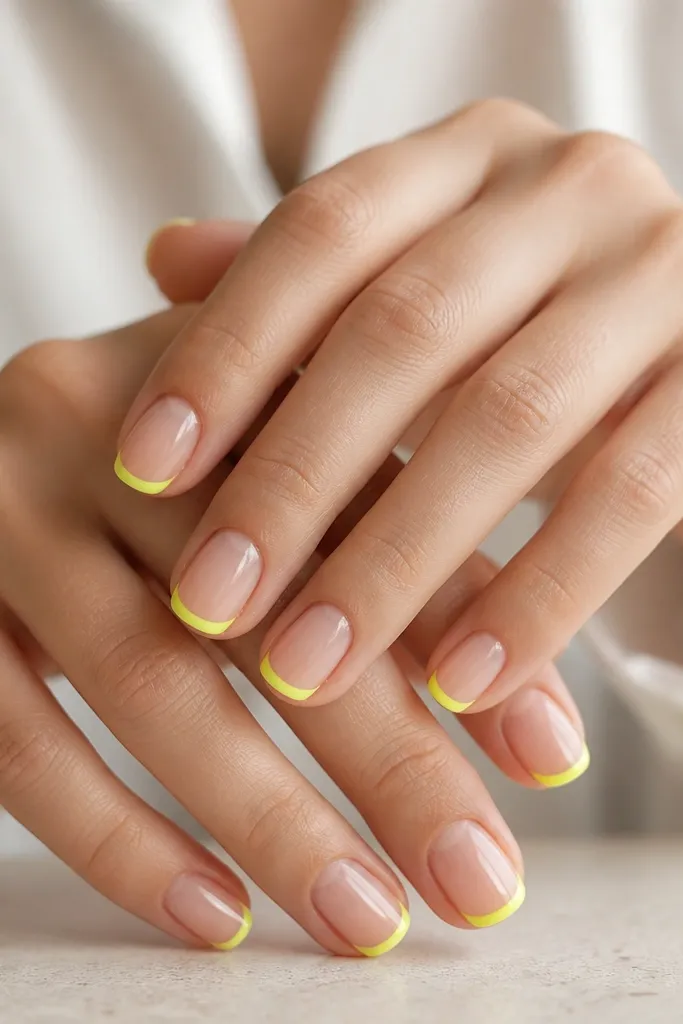
Micro-French is the summer square look that stays classy even when the color is loud. Neon yellow can look messy if it covers too much nail, but a 1 mm tip line keeps it chic and makes your nails look longer. The clear gloss makes everything reflect light like a fresh manicure, and the thin French line frames the square shape. This is a strong choice for fair skin and for anyone who likes bold color without heavy art. It also works well for short nails because the design doesn't demand length.
Start with a sheer nude or clear base so the tip line is the star. Paint the neon yellow French line with a steady hand using a striping brush, and keep it narrow - about 1 mm. Let it dry fully or cure if using gel, then check both sides for symmetry. Finish with a thick glossy top coat and cap the free edge to protect the neon edge from chipping.
Editor's noteIf the neon looks translucent, do two thin French coats instead of one thick coat.
Watch outDon't round the French line - a soft curve turns micro-French into a sloppy smear on square nails.
8. Powder Blue Chrome Tips with Matte Base
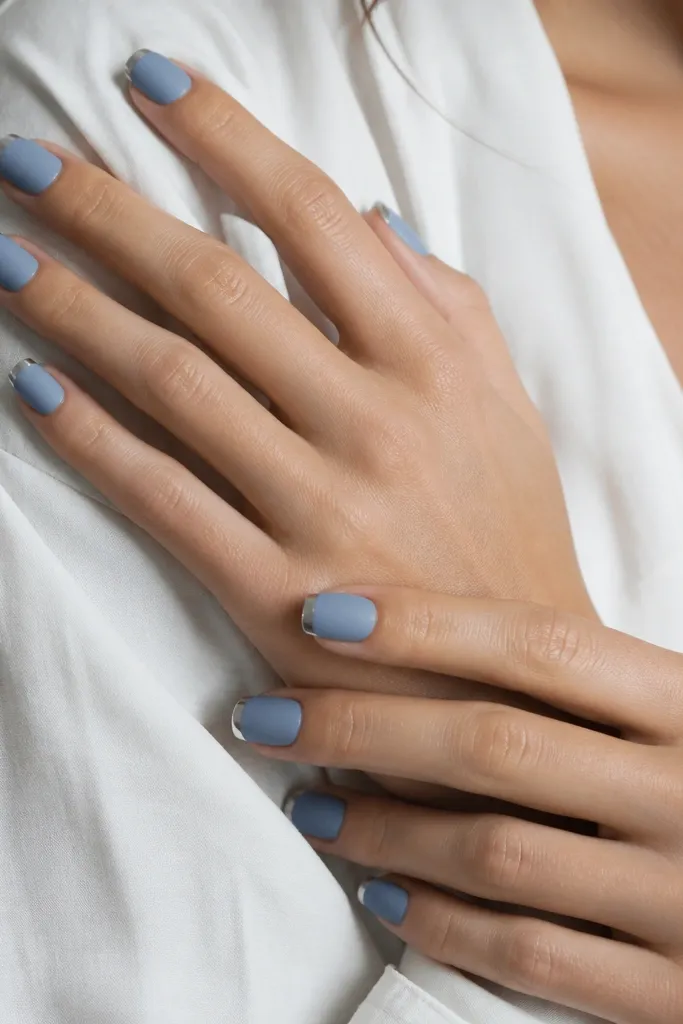
Matte base plus chrome tips looks dreamy because it mixes two textures that catch light differently. The matte powder blue makes the nails feel soft, and the chrome band adds that summer "wow" without needing dots or flowers. On square nails, a chrome tip band looks best when it's straight and thin - it makes the corners look intentional. I like this on medium and deeper skin tones because chrome has enough contrast to show up in shade and sunlight. For events, it reads fashion-forward but still wearable.
Apply a powder blue matte base in two coats and cure fully. Leave a crisp band area at the tip where the chrome will sit, then apply a thin layer of chrome adhesive only on the tip band. Dust chrome powder over it, then brush off excess once set. Seal with a top coat that's compatible with chrome so you don't dull it - I use a chrome-safe top coat and keep it thin over the band.
Editor's noteUse painter's tape to mask a straight band for the chrome - your square corners will look sharper instantly.
Watch outDon't use regular thick top coat over chrome - it can haze the shine.
9. Strawberry Jam Red with Tiny Gold Dot Cuticles
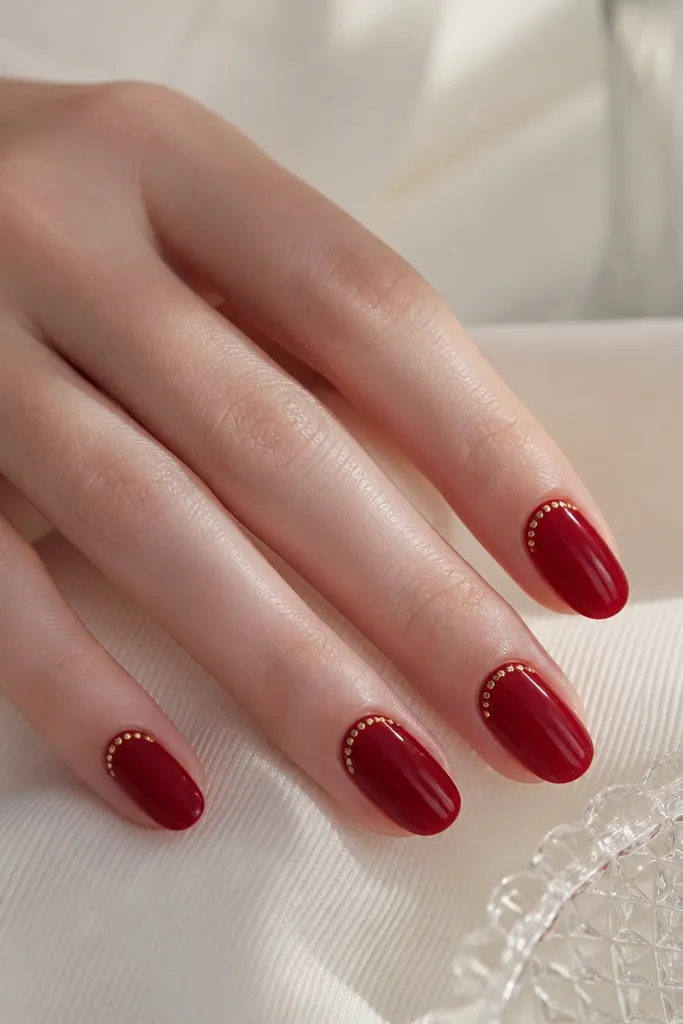
Strawberry jam red is a summer red that doesn't turn orange in sunlight. The glossy finish makes it look juicy, and the tiny gold dots at the cuticle add a jewelry effect. This design flatters almost everyone because red sits close to natural skin warmth, and gold pops against it. Square nails look extra neat here because the dots give a focal point at the cuticle, so the tip stays clean. It's perfect for dinner plans when you want color that looks expensive without complex art.
Paint strawberry jam red in two glossy coats, curing fully between. With a dotting tool and gold nail art paint (or foil gel), place 3-5 tiny dots along the cuticle, staying inside the nail line. Keep dots small - the diameter should be about a third of your cuticle width. Seal with a thick glossy top coat and cap the corners so the dots don't wear off first.
Editor's noteIf your cuticle area is dry, push it back gently before painting so the dots sit on smooth skin-tone-free nail.
Watch outAvoid big gold blobs - they look heavy and make the cuticle area look messy.
10. Tropical Leaf Accent on Clear Pink Base
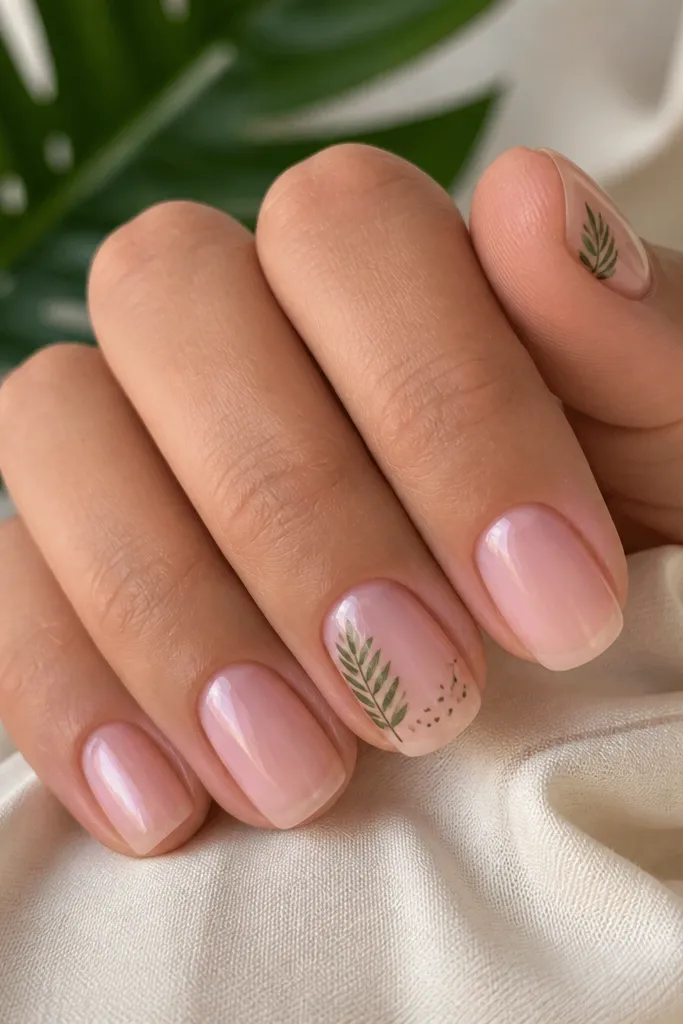
Tropical leaf accents are the easiest way to make square nails feel like summer without covering every nail in busy art. A clear pink base keeps the set fresh and lets the leaf details stand out. I like putting the leaf on the ring finger and maybe one more nail so your hands look intentional, not chaotic. The green shades make your skin look alive in warm weather, especially with a glossy top coat. This works for casual vacations, pool days, and even office outfits if the leaves are small and tidy.
Start with a clear pink base - two coats for an even jelly-like look. Choose either freehand leaves with a fine detail brush or use small nail stickers, then place them near the outer side of the nail, angled upward. Add 1-2 tiny dark green dots around the leaf for balance. Top coat in two layers: one thin layer to lock the sticker or paint, then a thicker glossy coat to smooth everything.
Editor's noteKeep leaves under 1/3 of the nail width - small accents look clean on square tips.
Watch outDon't place leaves too close to the tip edge - they lift sooner on a square shape.
11. Blueberry Purple with Sheer Silver Glitter Fade
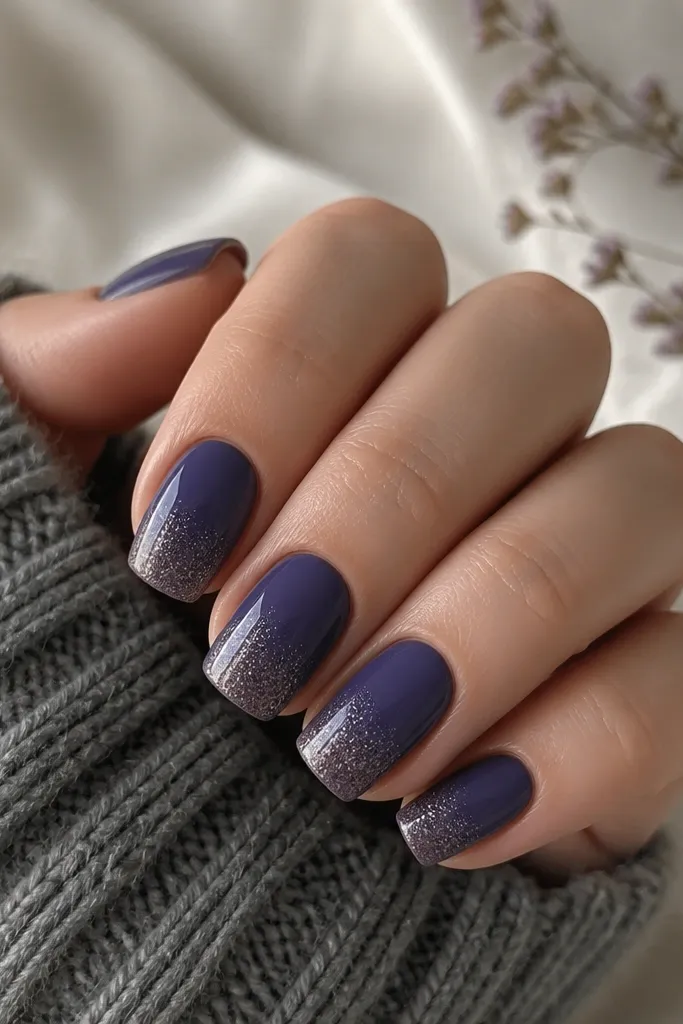
This is the glitter idea that doesn't look like you tried too hard. Blueberry purple is deep and summery at the same time, and a sheer silver glitter fade makes the nails look lit from within. On square nails, a fade looks smoother than glitter blobs because it follows the natural line of the tip. I wear this when I want something party-ready but still soft enough for daytime. It's flattering on all skin tones because the purple is rich and the silver adds cool light.
Apply two coats of blueberry purple and cure thoroughly. Use a makeup sponge to dab sheer silver glitter starting at the tip, then blend up about 1/4 to 1/3 of the nail. Build the glitter gradually - you want it strongest at the edge, almost invisible near the middle. Seal with a glossy top coat, and add a second top coat if you feel texture from fine glitter.
Editor's noteIf you're using loose glitter, mix a tiny amount into clear gel so you get control and less fallout.
Watch outAvoid heavy glitter coverage - it makes square tips feel rough and chips show faster.
12. White Lace Look with Peach Micro-Outline
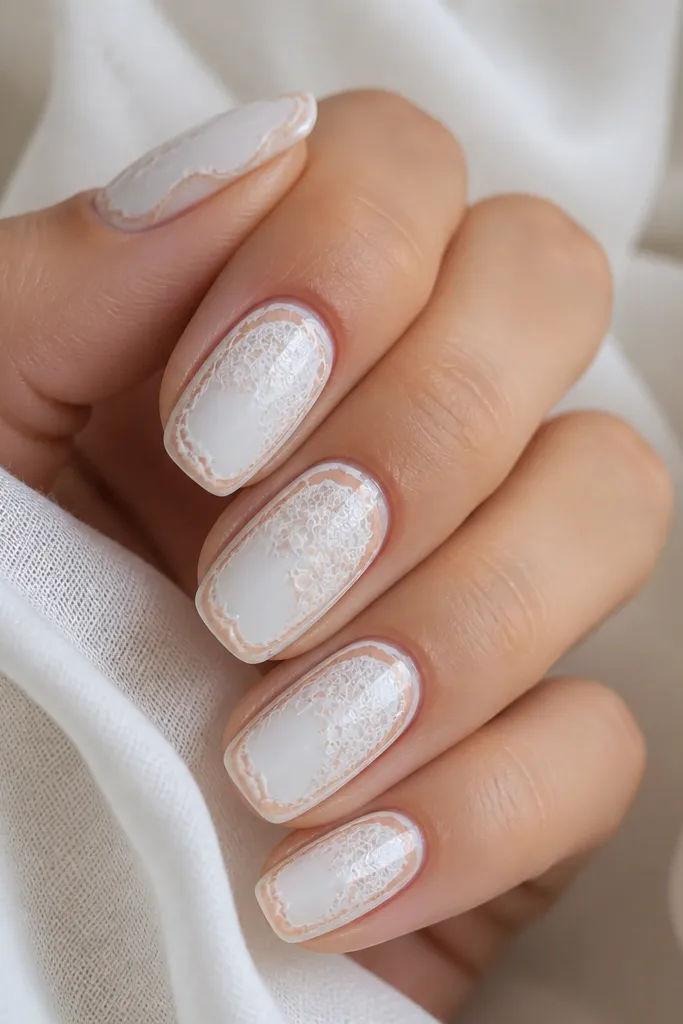
White lace on nails looks dreamy because it reads airy, not bulky. The peach micro-outline keeps it from looking too bridal or too cold, and it gives the square shape a defined frame. This is one of my favorites for summer brunch because it looks like a detail from a top you'd wear, not like random nail art. It flatters fair and medium skin especially well, but on deeper skin the lace still pops because the base is bright and opaque. The trick is keeping the lace lines thin and evenly spaced.
Paint a milky white base in two coats. Using a thin detail brush or lace stencil, draw lace lines across the center of the nail, leaving some negative space so it doesn't feel crowded. Then trace a micro-outline around the lace area in peach - just a thin line, staying parallel to the square edges. Finish with a glossy top coat and cap the free edge so the lace doesn't lift at the corners.
Editor's noteIf the lace line looks messy, erase lightly with a flat brush dipped in polish remover before it fully sets.
Watch outDon't cover the whole nail with lace - it turns into texture and can look cheap fast.
13. Sunburst Orange with Thin Yellow Rays
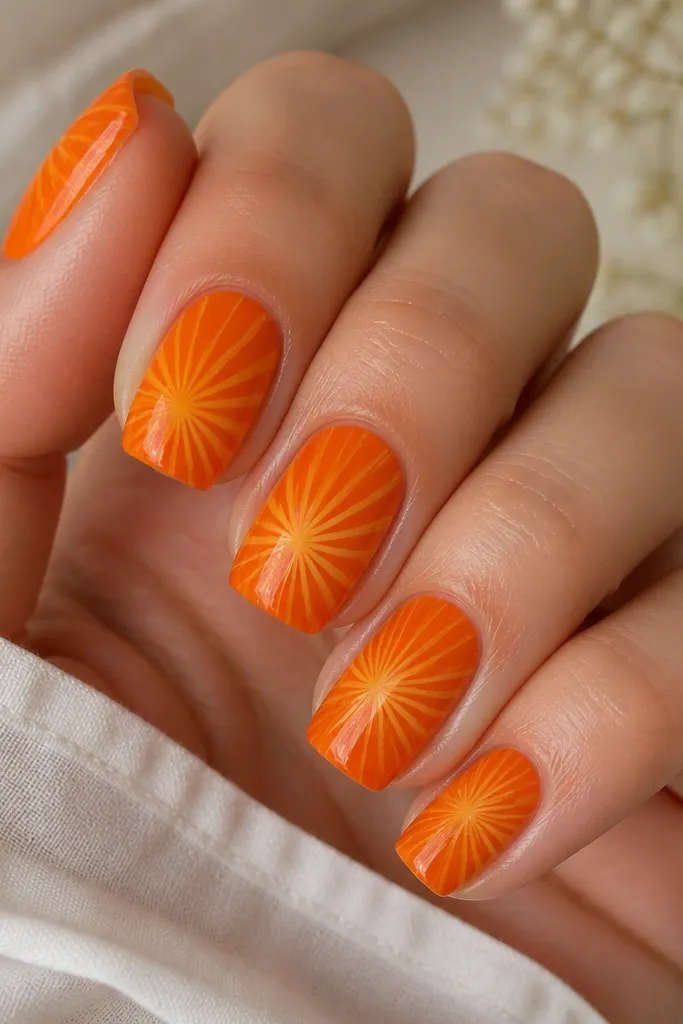
Sunburst nails look like summer energy on your hands. The orange base gives warmth, and the thin yellow rays keep it from turning into a thick, muddy mess. On square nails, rays that aim toward the corners make the nail look sharper and more geometric. I think this looks best on medium to deep skin tones, where orange and yellow show up strongly. It also works for long weekends because it's high-impact even with minimal art on each nail.
Start with an opaque orange base in two coats. With a striping brush and yellow polish, draw 5-7 thin rays starting near the center and pointing toward the square corners, keeping the lines evenly spaced. If you want it extra neat, draw two rays first (top-left and top-right), then fill the middle. Add glossy top coat in two layers if needed to smooth over brush lines and cap the edges.
Editor's noteKeep rays under 1 mm wide - thick rays look like scribbles on square nails.
Watch outAvoid uneven ray spacing - it makes the sunburst look accidental.
14. Rosewater Nude with Tiny Blue Dot Constellations
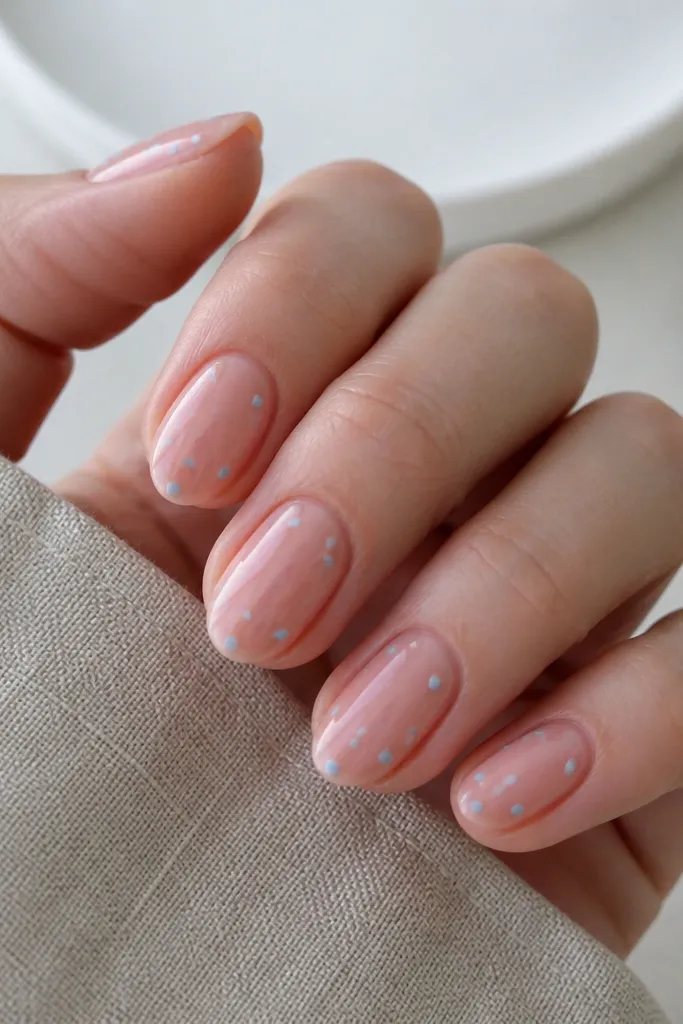
This design is dreamy because it looks like soft sky light, not heavy glitter. A rosewater nude base makes the dots look delicate and keeps your hands from looking overdone. The tiny blue dots feel summery and fun, and they're easy to place so you don't have to be an artist. Square nails suit this because the scattered dots look intentional within the clean edges. I've worn it with gold jewelry and it looks cohesive, especially on warm undertones. It's also great for short square nails because the art is minimal.
Apply rosewater nude base in two coats for an even milky-sheer look. Use a dotting tool to place 4-6 tiny sky-blue dots per nail, varying sizes slightly and keeping the cluster near the center. Add one dot closer to the tip on two nails only so it looks balanced. Seal with glossy top coat and cap the free edge so the dots don't wear down first.
Editor's noteUse a toothpick for the tiniest dots - it gives you more control than a large dotting tool.
Watch outSkip big dots - they turn constellation nails into random spots.
15. Mint French with Clear Negative Space Checkerboard
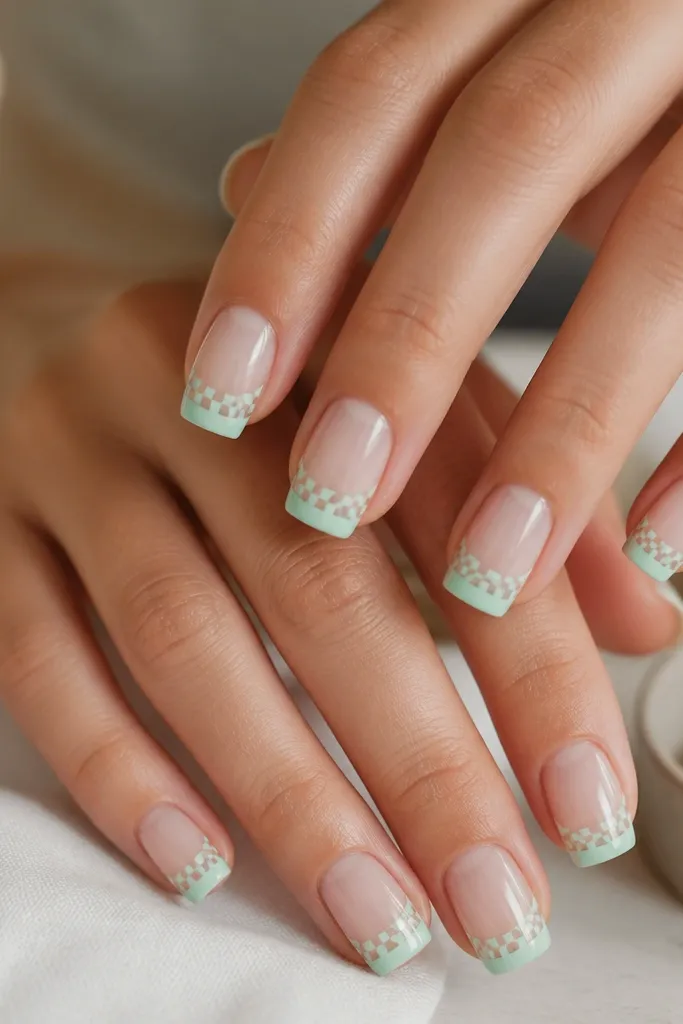
Checkerboard accents on square nails look clean and graphic, and the clear negative space keeps it airy for summer. The mint French gives you the fresh color, while the checkerboard pattern adds interest without needing flowers or glitter. This is one of those sets that looks good in both bright sun and indoor lighting because it's mostly clean lines and contrast. It flatters fingers that look short because the pattern pulls the eye up the nail. If you like modern, slightly sporty nails, this is your match.
Start with a clear or sheer nude base. Paint a mint French tip with a straight line across the square edge. For the checkerboard, use the same mint to paint small squares under the French line, alternating with clear squares by masking with a thin strip of tape or using a stencil. Keep the grid tight so it lines up with the square corners. Finish with glossy top coat and cap the edges.
Editor's noteLet the French tip cure fully before you add the checkerboard so the mint doesn't bleed.
Watch outDon't freehand the checkerboard freehand - uneven squares look messy fast.