
1. Lemon Sorbet Half-Moon Square Set
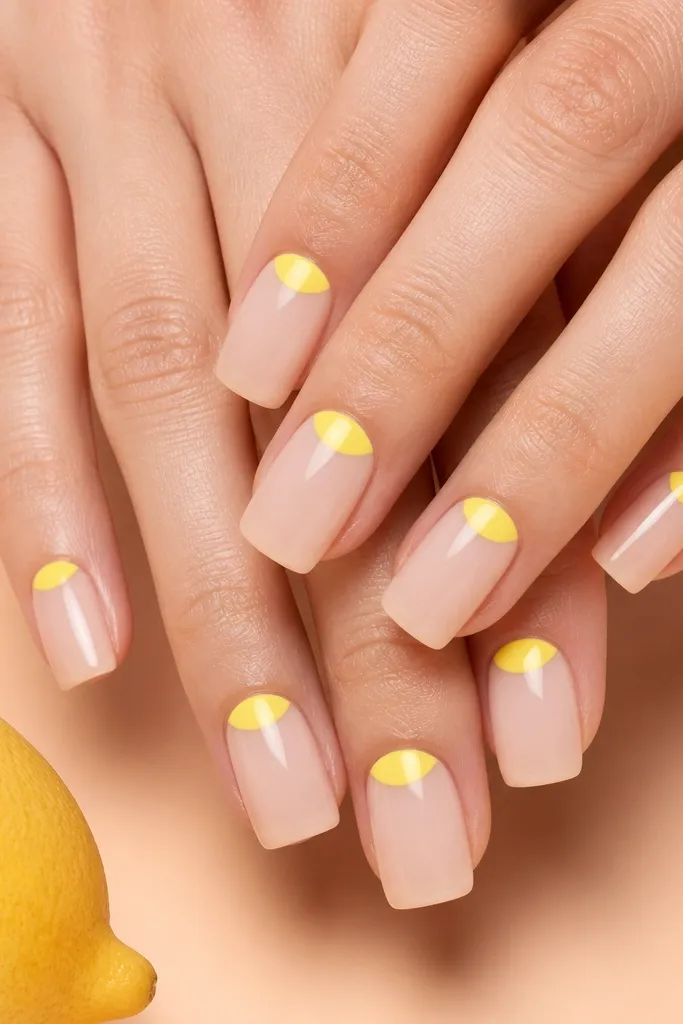
This set flatters warm skin tones because the lemon-yellow pops against a sheer nude base without washing you out. The half-moon placement keeps the design clean and graphic, and it also hides tiny uneven spots at the cuticle line. I like square nails for this because the straight sides make the half-moon edge look intentional instead of accidental. For summer, it feels fresh like citrus and reads well in photos, especially with short square length.
Start with a sheer nude acrylic base and file to a short square with softly rounded corners. Paint a clean half-moon shape at the cuticle using lemon-yellow gel polish, leaving the center of the nail sheer. Cure, then apply a thin gel top coat over the whole nail to lock the edges. Finally, add one extra gloss layer only to the half-moon area so it looks like it’s under glass.
Editor's noteUse a half-moon stencil or a small silicone brush to keep the curve sharp — the shape is the whole point here.
Watch outDon’t paint the half-moon too wide — if it reaches the sidewalls, the look turns messy fast.
2. Hot Pink Micro-French With Clear Nude Base
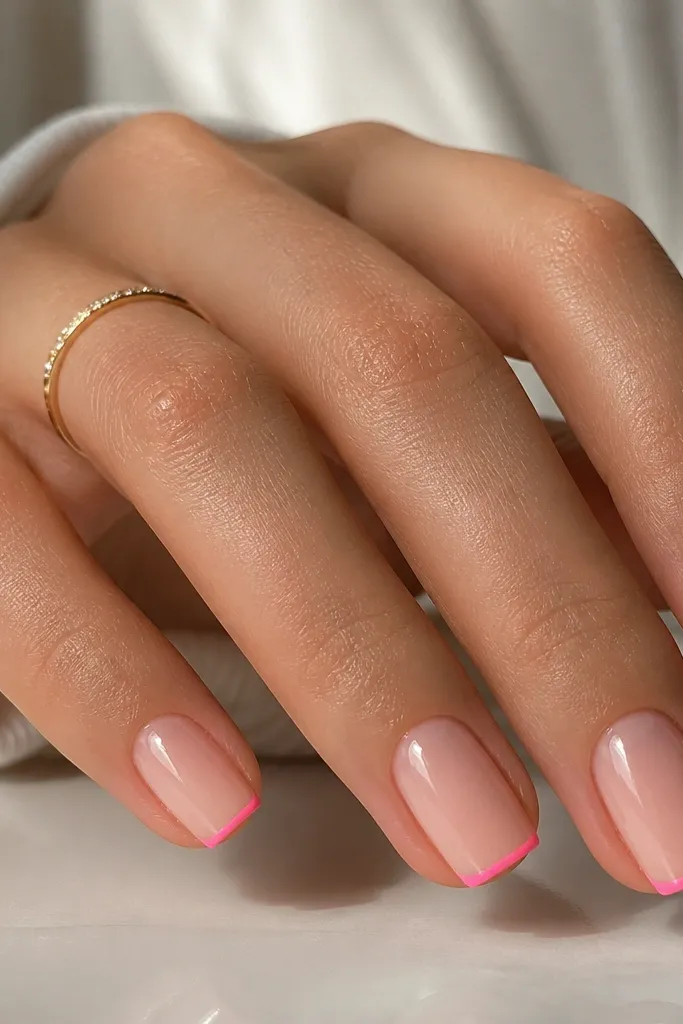
Micro-French is my go-to when I want “easy glam” that still looks expensive. Hot pink on a clear nude base makes your nail bed look longer, which is great if you have shorter nail growth. Square tips hold the line straight, so the French looks crisp instead of wobbly. This set also looks good on cooler skin tones because hot pink has a strong contrast that doesn’t blend away.
Build your acrylic in a clear or sheer nude tone and shape into a short square. Use a fine striping brush to draw a micro French line about 1 mm thick at the free edge. Leave a tiny nude gap between the line and the sidewall so it stays sharp. Cure, then apply a high-gloss top coat, and cap the free edge with one extra thin coat.
Draw the French line in two passes — first the center, then the left and right edges — so it stays even.
Skipping edge capping makes the line chip first when you wash your hands.
3. Sea Glass Marble With White Vein Square
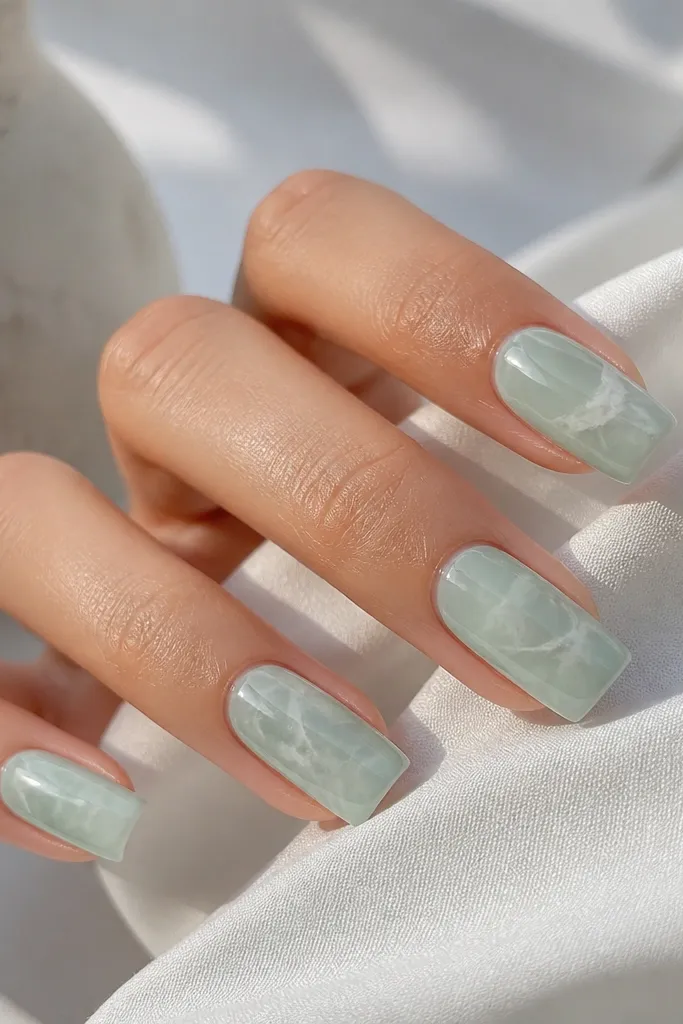
Sea glass marble looks like you dipped your nails in ocean color, and it flatters a wide range of skin tones because the base is semi-transparent. The white veins add movement without needing tiny details or 3D pieces. Square nails make the marble pattern look cleaner because the nail face is flat. I love this for summer because it pairs well with gold jewelry and light-colored outfits.
Start with a sheer seafoam acrylic or sheer gel base, then file smooth. Add a thin layer of sheer white gel and drag small streaks with a dotting tool to create vein lines. Use a clean brush to soften the edges so it looks like marble, not paint strokes. Cure, then finish with two coats of glossy top coat for that glassy sea-glass effect.
Keep the veins uneven — marble looks fake when every line is the same thickness.
Don’t fully cover the nail with opaque white; you want transparency so it reads like sea glass.
4. Coral Chrome Band Across the Middle
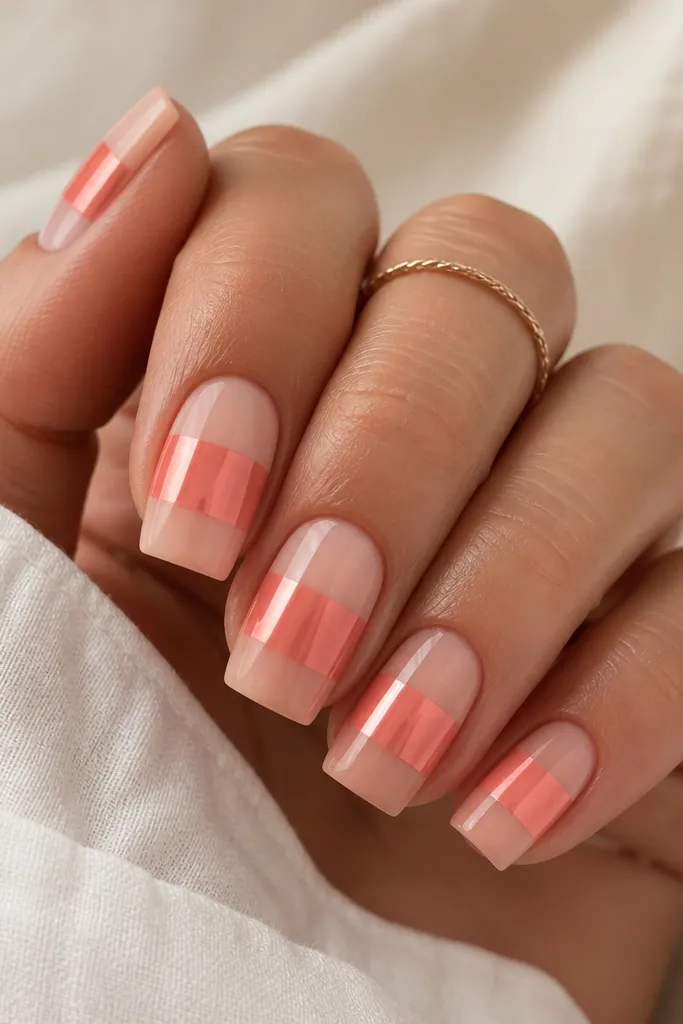
A chrome band looks bold without needing nail art painting skills. The coral color flatters medium to deep skin tones because it has warmth and doesn’t look dull. On square nails, the straight band looks modern and intentional, especially when it’s centered. This design also makes your fingers look longer because the band visually breaks up the nail in a controlled way.
Apply a nude acrylic base and file a smooth square shape. Paint a coral gel strip across the center of the nail, leaving about 1/3 nude space above and below. Cure, then apply chrome powder or chrome gel in the band only, pressing lightly with an applicator. Seal with a top coat that won’t dull chrome too much — use a thin layer and cure fully.
Editor's noteCenter the band by measuring with your eye: align it with the middle of your nail bed, not the fingertip.
Watch outDon’t get chrome powder onto the nude areas; it causes a gray haze that looks cheap.
5. Sky Blue Jelly With White Dot Constellations
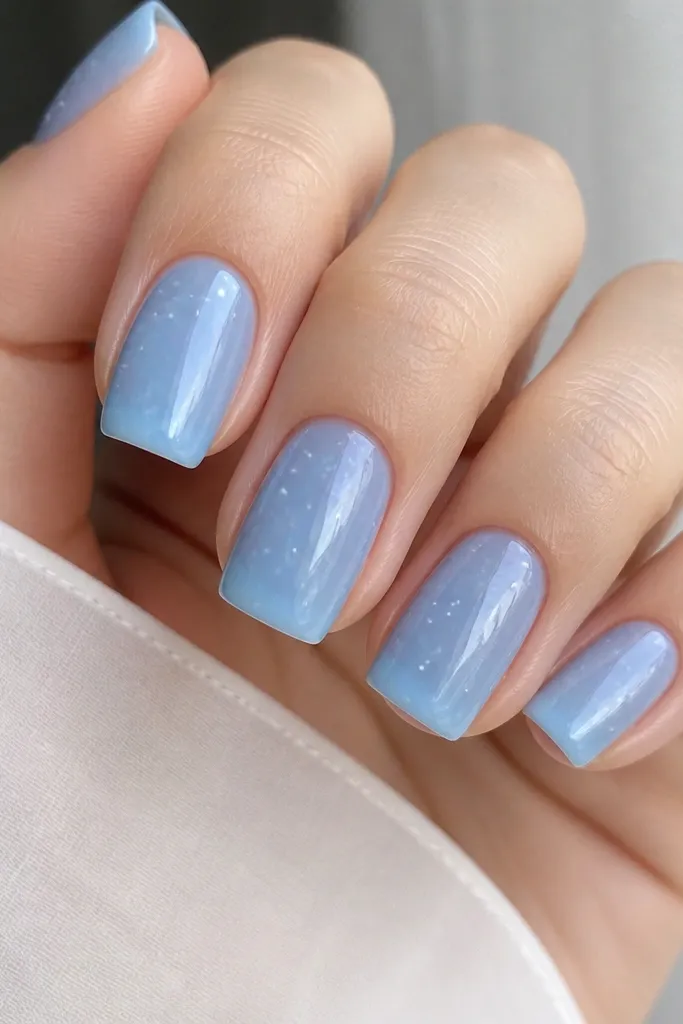
Jelly polish looks summer-cool because it’s glossy and semi-transparent, and it makes short square nails look fresh instead of heavy. White dots give a playful “night sky” feel without turning into detailed art. This flatters fair to olive skin because the sky blue is light and bright, and the jelly finish smooths out minor texture. Square nails keep the dot pattern from warping, since the nail face is flat.
Start with a jelly sky-blue base, either as acrylic pigment or jelly gel layered thin. Cure between layers until you get that translucent glow. Add white dots using a dotting tool, spacing them so each nail has 4-7 stars max. Cure again, then seal with two layers of glossy top coat to keep the jelly look.
Use a toothpick to place the smallest dots — it gives you a tighter circle than most dotting tools.
Don’t overload dots; too many makes it look like accidental speckling.
6. Tangerine Aura Glow With Sheer Nude
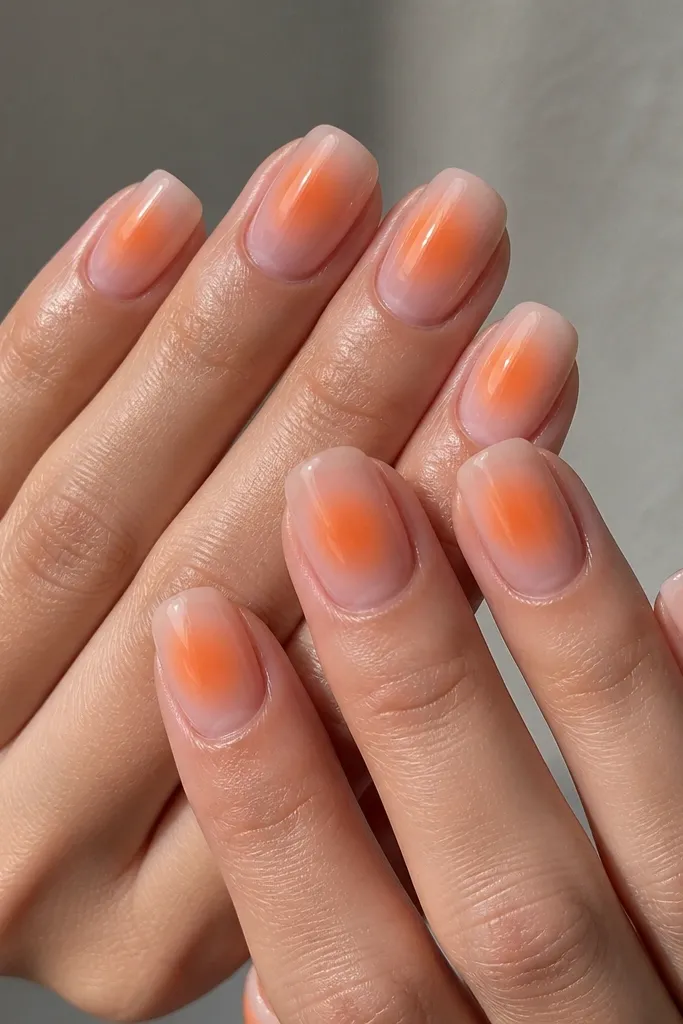
Aura nails look flattering because the glow sits in the middle and draws attention to the nail bed. Tangerine works especially well on medium skin tones because it brings warmth without looking neon. The square shape keeps the aura smooth and balanced, and the sheer nude base prevents the design from feeling too loud. This is easy glam because the gradient hides brush lines.
Apply a sheer nude base and cure. Dab tangerine gel at the center of the nail and blend outward with a makeup sponge, keeping the edges soft. Add a second slightly deeper dab at the center for dimension, then cure. Finish with glossy top coat and cap the free edge.
Editor's noteBlend on a paper towel first to control how much pigment transfers.
Watch outDon’t press hard with the sponge — heavy pressure creates muddy edges.
7. White French Tip With Tiny Black Pinstripe
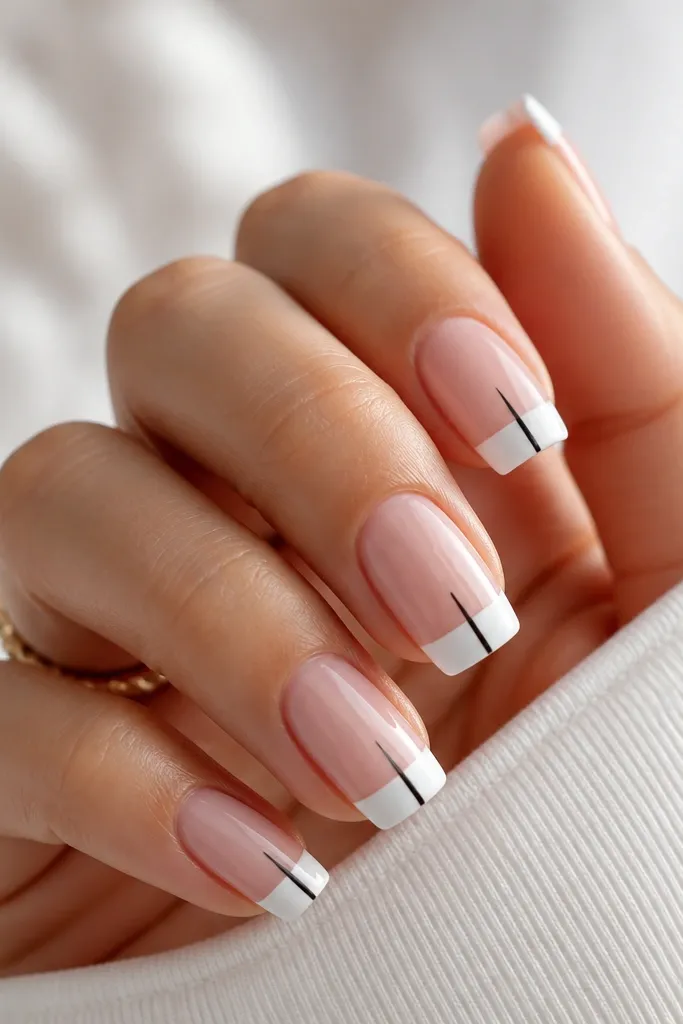
This one is minimal but it looks high-fashion because the black pinstripe adds contrast. It flatters almost everyone because the base is nude and the tip is pure white. Square nails make the French line crisp, and the pinstripe draws the eye straight, which is flattering on shorter nails. It also looks great with black sunglasses, denim, and summer dresses.
Build your nude acrylic base and shape into a short square. Paint a full white French tip, keeping it consistent on each nail. Cure, then use a fine liner brush to draw a single black line down the center of the white tip. Seal with a glossy top coat and cap the tip edge so the pinstripe doesn’t lift.
Wipe the brush on a lint-free pad before you line — it prevents ink blobs.
Don’t make the black stripe thick; thick lines look like a sticker instead of nail paint.
8. Peachy Nude With Gold Foil Cracked Glaze
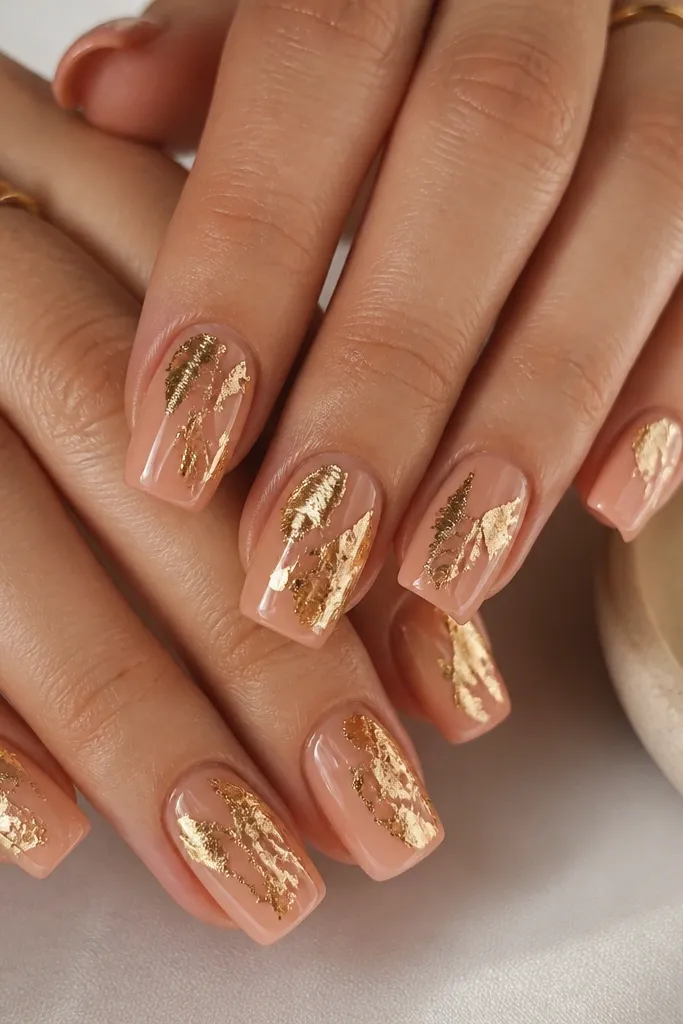
Gold foil cracked glaze looks like expensive jewelry because it catches light in tiny angles. Peachy nude keeps it summer-soft and flattering on fair through deep skin tones. Square nails give you a clean surface for foil placement, and the glaze effect hides small bumps from acrylic application. This set also works for beach weekends and weddings without needing a full character design.
Start with a peachy nude base and cure fully. Apply a thin layer of tacky gel or foil adhesive in small patches, not across the whole nail. Place gold foil pieces and press lightly with tweezers or a silicone pusher. Cure, then apply glossy top coat in thin layers to smooth and seal the foil without flattening the texture.
Editor's noteUse small foil fragments — large shards look heavy on short square nails.
Watch outSkipping thin top coats can trap bubbles and make the foil look lumpy.
9. Mint Green Micro Hearts On Clear Base
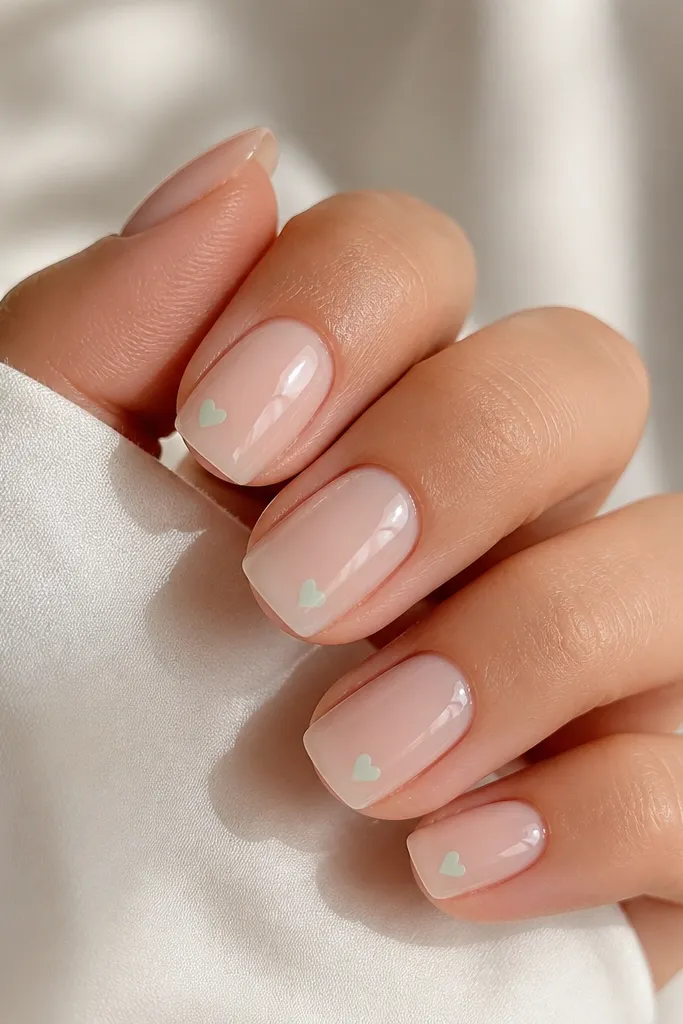
Micro hearts are cute without being childish when you keep them small and place them near the sidewall. Mint green feels fresh in summer and looks best on warm undertones, though it still works on cool tones because the clear base keeps it airy. Square nails help the hearts look crisp because there’s less curvature distortion than with rounded shapes. This is a great “easy glam” set for brunch, festivals, or a casual date.
Apply a clear nude or sheer pink acrylic base and shape short square. Use a dotting tool to place a tiny mint dot, then create a heart by adding two smaller dots beside it and dragging slightly with a thin brush. Keep one heart per nail, positioned slightly toward the ring finger side. Cure and seal with a glossy top coat.
Draw hearts after you do the base color — it keeps you from smearing the acrylic edge.
Don’t place hearts at the cuticle — they get flooded by top coat and lose their shape.
10. Neon Coral Ombre That Stays Clean
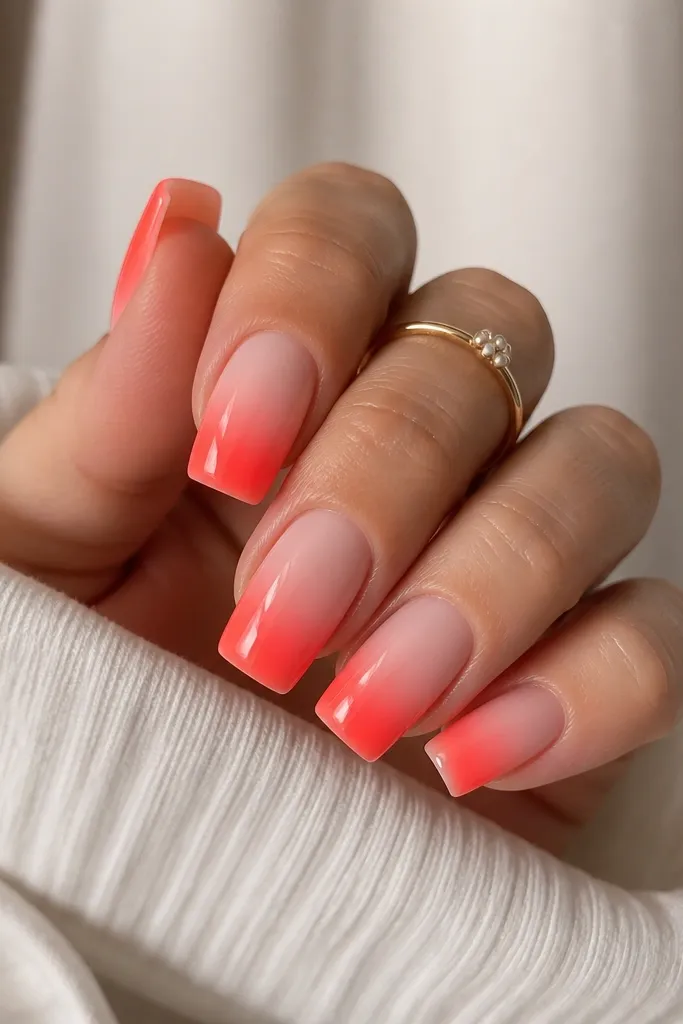
Ombre is easier than nail art because you’re blending, not drawing. Neon coral looks bold in summer and makes your hands look active and tanned. Square nails keep the gradient straight across the free edge, which is the part that usually goes wrong on other shapes. This works on most skin tones because the base is nude and the neon only hits the top portion.
Start with a nude acrylic base and file to a medium short square. Sponge neon coral gel from the tip upward, keeping the darkest area only at the last 1/4 of the nail. Blend until the gradient looks like it’s fading, not streaking. Cure, then top coat with two glossy layers and cap the free edge.
Do two thin sponge layers instead of one heavy layer — it prevents muddy color.
Don’t skip sealing after ombre; unsealed gradients chip faster at the tip.
11. Tropical Palm Leaf Accent On One Nail
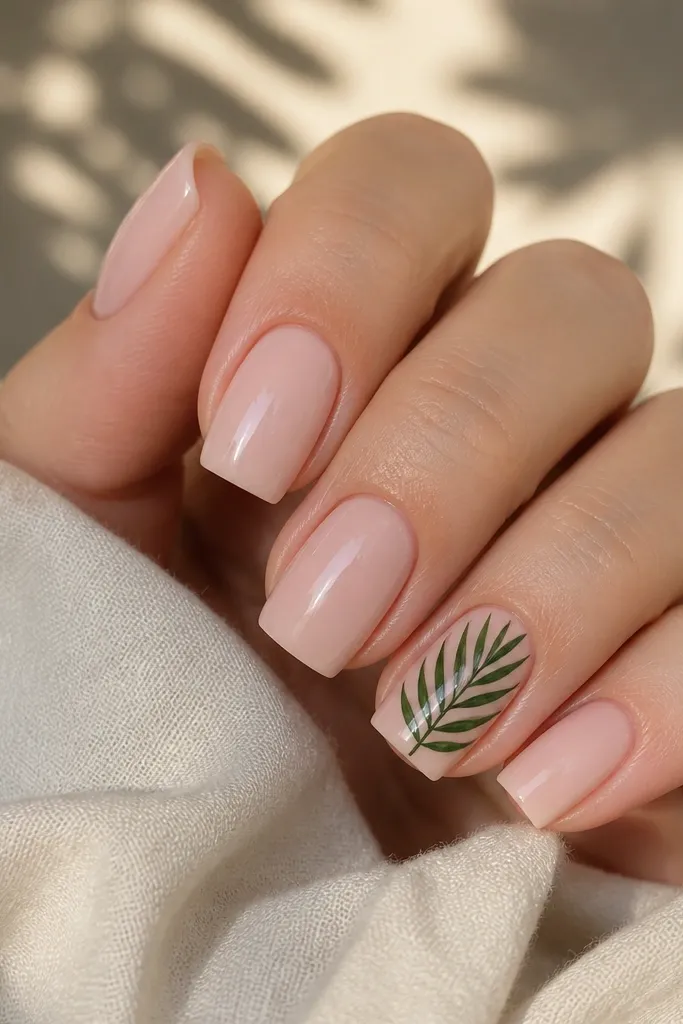
One accent nail keeps the look easy and still summer-specific. Palm leaves read as tropical without needing a full nail mural. This flatters any skin tone because the base stays neutral and the green pops at the focal point. Square nails make the leaf shape look cleaner because you’re working on a flat surface. It also looks good with gold hoops and simple sundresses.
Build a nude pink acrylic base and shape short square. Paint all nails with nude and cure. On the accent nail, draw a single palm leaf using a thin liner brush: start with a center vein line, then add angled leaf lines on both sides. Add one extra small leaf near the base for balance, cure, then apply glossy top coat over everything.
Editor's notePractice the leaf once on a fake nail tab — the center vein placement controls the whole look.
Watch outDon’t put palm leaves on every nail; it turns busy and hard to keep neat.
12. Lilac Cloud Tips With Clear Cuticle
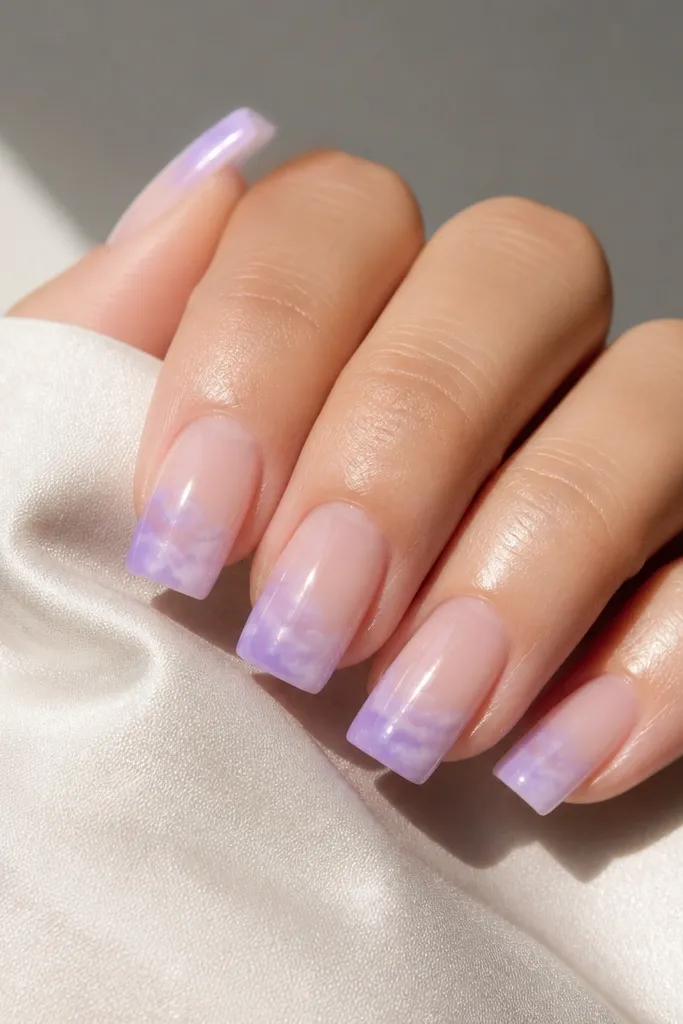
Cloud tips look soft and romantic, and the clear cuticle makes them feel lighter for summer heat. Lilac flatters fair and olive skin tones because it has a cool brightness that doesn’t overpower. Square tips keep the cloud edge from drifting too much, so you still get a defined shape. This design also works if your nails have slight ridges because the cloud effect disguises micro lines.
Apply a sheer base and keep the cuticle area clear with a thin careful layer. Sponge lilac gel onto the tips, then blur the top edge with a clean brush or sponge so it looks like clouds. Cure and repeat if you need more opacity at the tip. Seal with glossy top coat and cap the corners.
Editor's noteUse a small piece of makeup sponge and tap lightly — cloud edges come from tapping, not dragging.
Watch outDon’t make the lilac too opaque at the cuticle; it kills the airy look.
13. Turquoise Waterline With White Edge
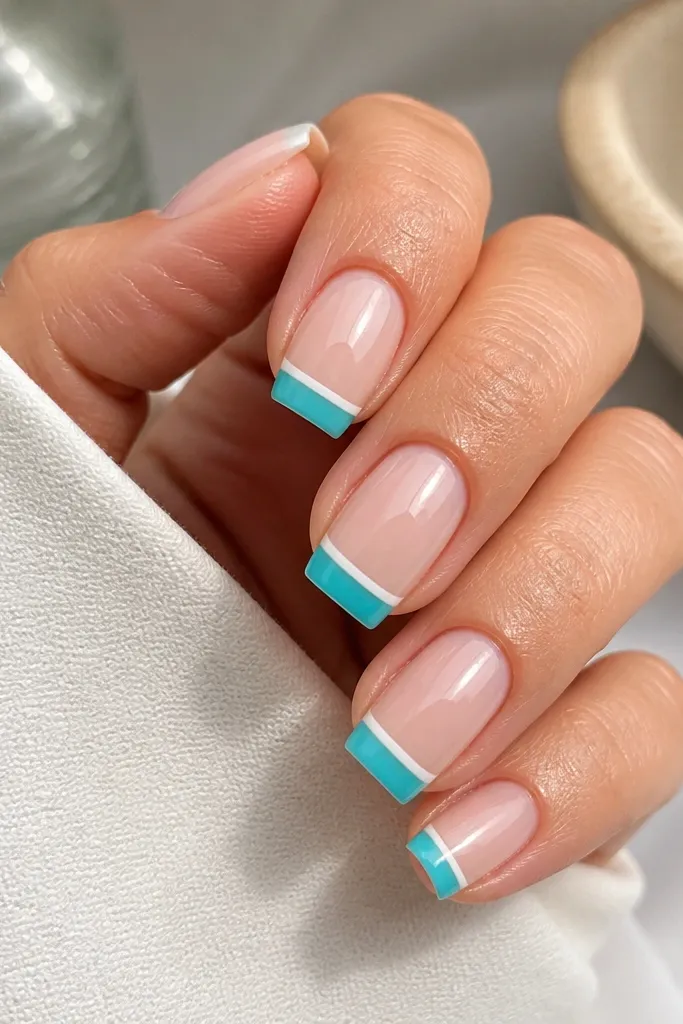
This waterline design looks like a fresh beach photo filter. The turquoise plus white combo flatters medium and deep skin tones because it creates a crisp contrast near the tip, which is where light hits. Square nails make the horizontal band straight, so it looks intentional instead of wobbly. It also stays easy because it’s basically two lines and a solid band.
Start with a sheer nude acrylic base and shape short square. Paint a turquoise band across the nail about 1-2 mm above the free edge, leaving nude space above it. Cure, then add a thin white line just above the turquoise band. Cure again and finish with glossy top coat, focusing on smoothness at the band edges.
Let the turquoise fully level before adding the white line — wet gel makes the white bleed.
Don’t place the band too close to the cuticle; it shortens the nail visually.
14. Rose Nude With One Rhinestone Teardrop
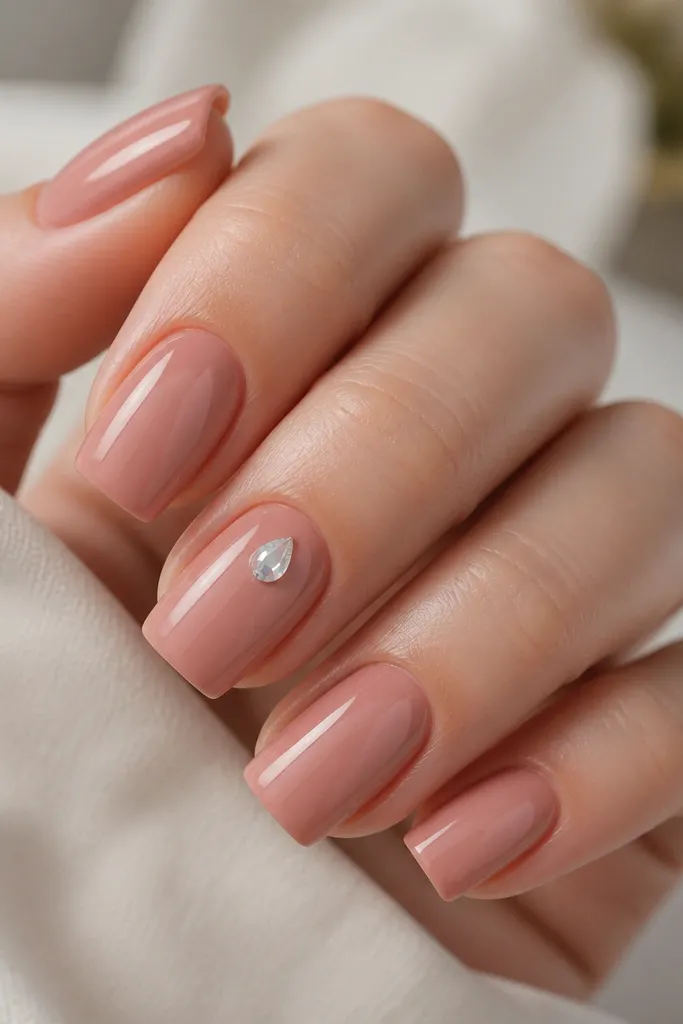
A single rhinestone looks glam without turning into a nail-art circus. Rose nude is the safest base color because it matches most undertones and makes the stone look like jewelry. I like placing one teardrop stone slightly above the center so it catches light when you move your hand. Square nails are perfect for this because there’s enough flat space to seat the stone securely.
Apply rose nude acrylic or gel and shape short square with smooth corners. On one accent nail, apply a tiny dot of clear builder gel where the stone will sit. Place a teardrop rhinestone and press gently, then cure. Cap with a thin layer of clear gel or top coat so the stone doesn’t snag, and cure fully for a smooth surface.
Use a gel glue or clear builder gel, not thick top coat — it holds the stone steady before curing.
Don’t put the rhinestone right on the free edge; it lifts fast with wear.
15. White Eyelet Lace On Nude Square
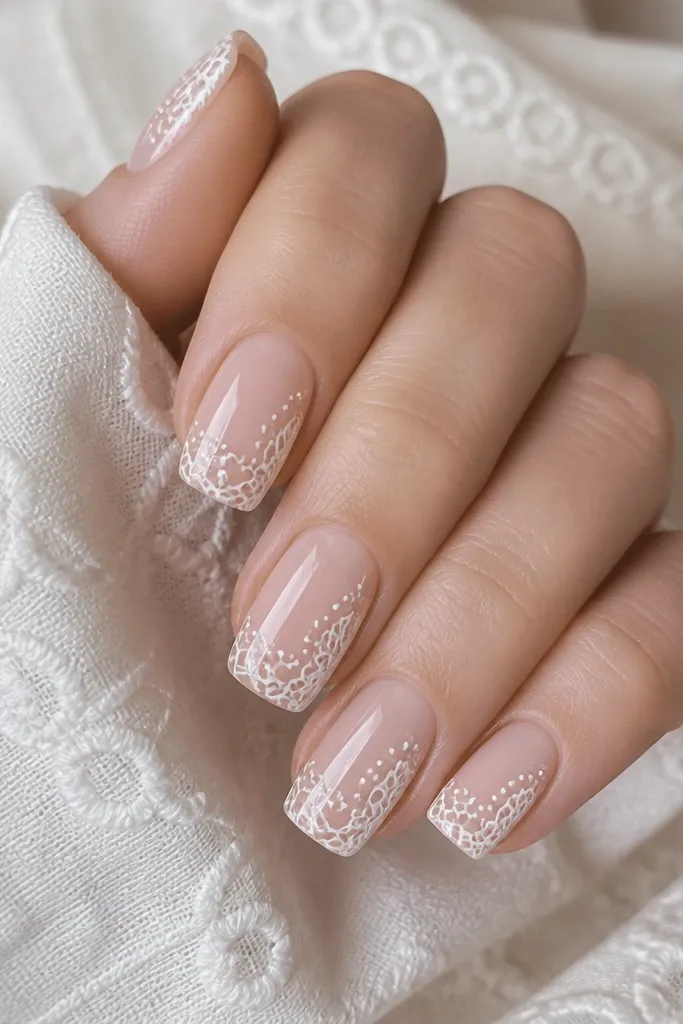
Eyelet lace gives “summer dress” energy and it looks delicate even on bold square nails. The white pattern on nude flatters all skin tones because it reads light and clean rather than harsh. I keep the lace minimal — a few repeating sections — so it stays easy and doesn’t look like you stamped a full doily. Square nails help because the pattern lines stay straight and don’t curve out of shape.
Do nude acrylic base and file smooth. Use a white gel liner to draw a small repeating lace motif near the center, leaving space on both sides. Add tiny dot accents to connect the loops, then cure. Seal with glossy top coat, using a gentle brush to smooth over the lace without dragging the lines.
Editor's noteUse a nail lace stencil if your hand shakes — the stencil keeps the loops consistent.
Watch outDon’t over-thicken the white lines; thick lace looks like plastic.
16. Gold Thread Linework On Barely There Pink
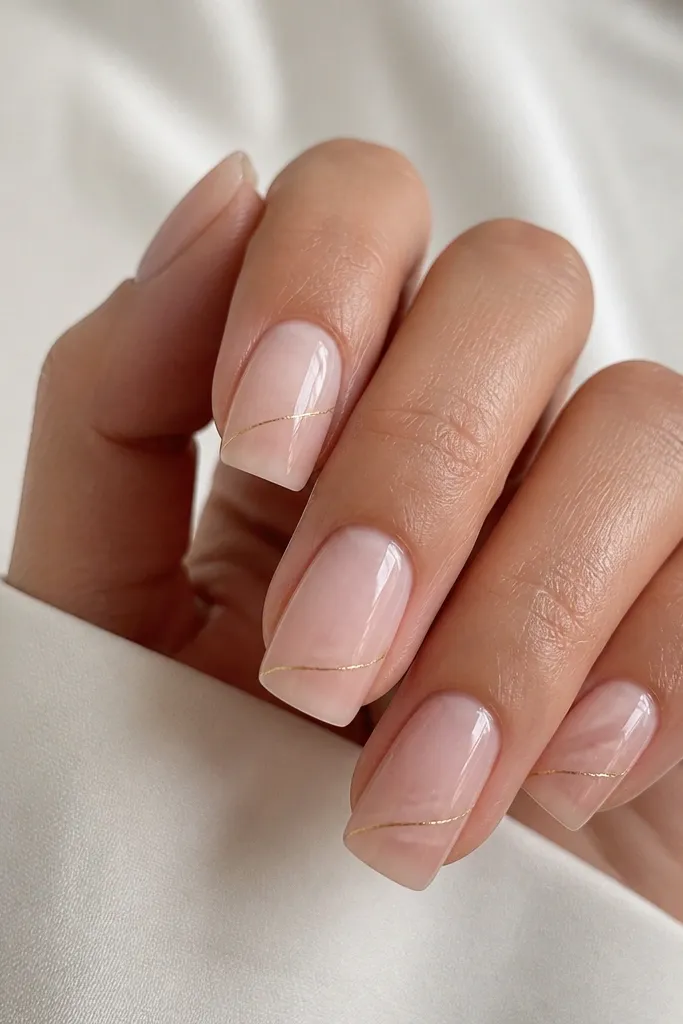
Gold thread linework is easy glam because it looks detailed but it’s just lines. Barely there pink is flattering because it makes your nail bed look healthy and gives the gold a warm backdrop. Square nails keep the line segments straight, so the thread effect looks intentional. I like this for summer because it pairs with everything — sandals, gold bangles, and simple tops.
Apply a sheer barely-there pink base and cure. Use gold striping gel or gold foil gel to draw 2-3 diagonal line segments per nail, leaving gaps so it looks like thread, not a gold sticker. Cure, then add a thin top coat and cap the free edge. If the lines feel raised, do one extra thin clear gel layer over them.
Editor's noteKeep the lines different lengths across nails — it looks more natural than copying the same pattern.
Watch outAvoid covering the lines with matte top coat; thread needs gloss to look like metal.
17. Berry Jam Negative Space Square
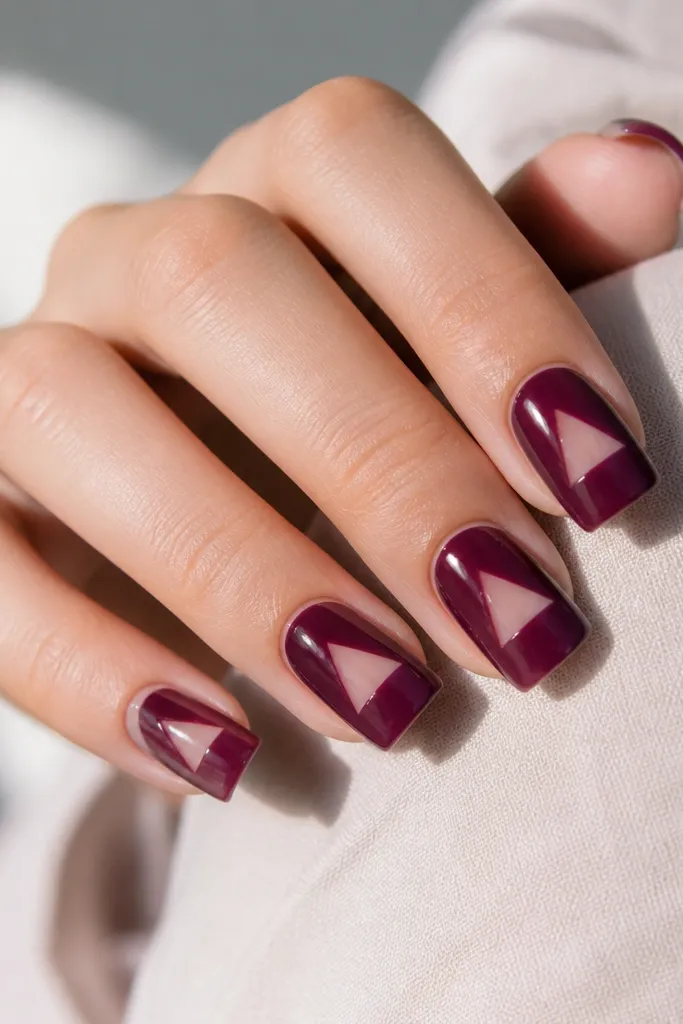
Negative space makes nails look modern, and berry jam purple reads like summer fruit. This design flatters medium to deep skin tones because the purple has enough depth to show up clearly. Clear nude also smooths the look if your nail surface is slightly uneven. Square nails help because the negative-space triangle stays crisp on the flat nail face.
Start with a clear or sheer nude acrylic base and cure. Paint berry jam purple over the top portion of the nail, stopping before the center. With a thin brush, leave a triangle of clear negative space in the middle by pulling the purple away. Cure, then apply two glossy top coats so the edges look sealed and smooth.
Use a small piece of tape as a guide for the triangle edge, then remove it before curing.
Don’t let purple flood into the negative space; once it fills, the whole design loses its clean look.
18. Sunset Gradient Tips In Orange-Peach-Pink
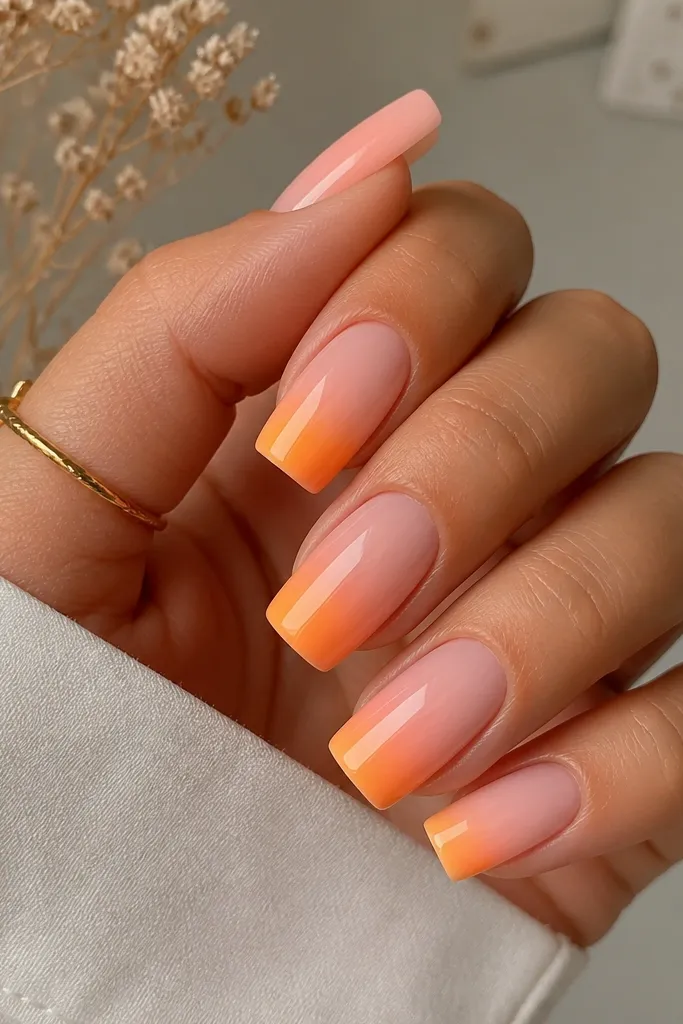
Sunset gradients feel very summer because they mimic the sky at golden hour. This flatters fair, olive, and medium skin tones because the nude base keeps the colors from overpowering your hands. Square tips make gradients look clean since the free edge is flat, and the straight sides keep the color band even. It’s easy glam because it looks complex but you’re using sponges and blending, not detailed art.
Apply nude acrylic base and file short square. Sponge orange gel at the very tip, then blend peach above it, then add a lighter pink at the top edge of the gradient. Keep each color band thin so they blend smoothly instead of forming stripes. Cure, then seal with glossy top coat and cap the free edge.
Wipe excess gel off your sponge between colors so orange doesn’t turn everything muddy.
Don’t overextend the gradient down the nail bed; keep it tip-focused for a flattering shape.
19. Champagne Nude With Tiny Star Confetti
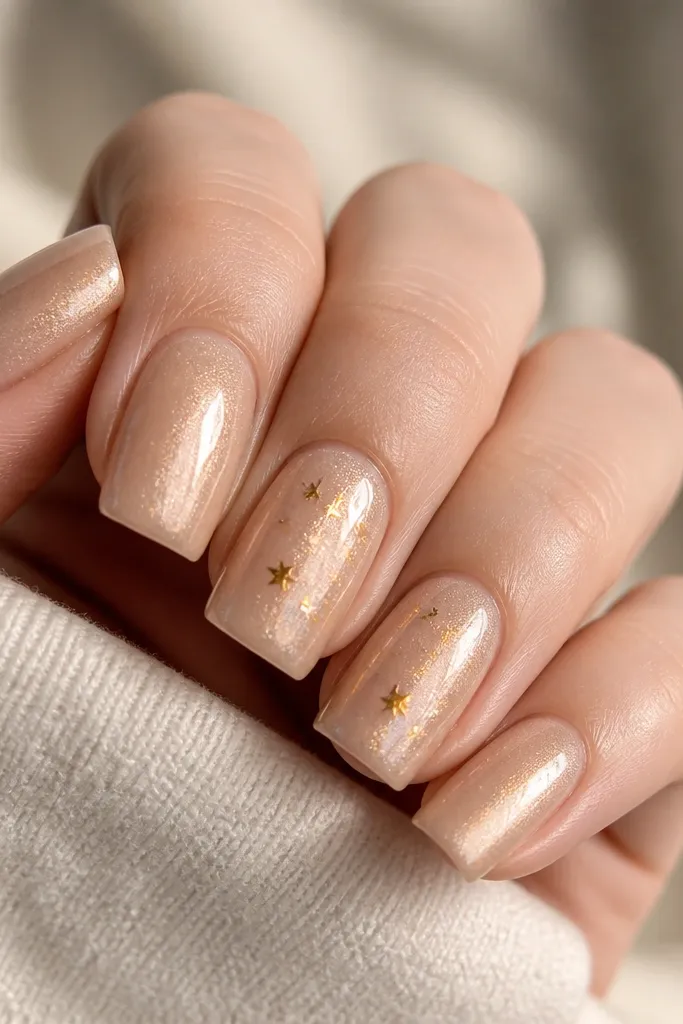
Champagne nude shimmer makes your nails look like they’re lit from within. It flatters almost everyone because it’s close to your natural nail tone but adds sparkle that reads classy, not costume. Tiny star confetti gives you a festive summer vibe without big jewels. Square nails make the sparkle sit neatly because the nail face is flat and the shimmer spreads evenly.
Start with a champagne nude base gel and cure. Add tiny gold star confetti using tweezers on one or two accent nails only. Press lightly so the stars sit flat, then add a thin layer of clear gel over them to embed and smooth. Cure and finish with a glossy top coat across all nails for consistent shine.
Embed confetti with clear gel in thin coats so it doesn’t sink unevenly.
Don’t use chunky glitter; it catches on hair and makes the set feel rough.
20. Tidal Blue French With Clear Outline
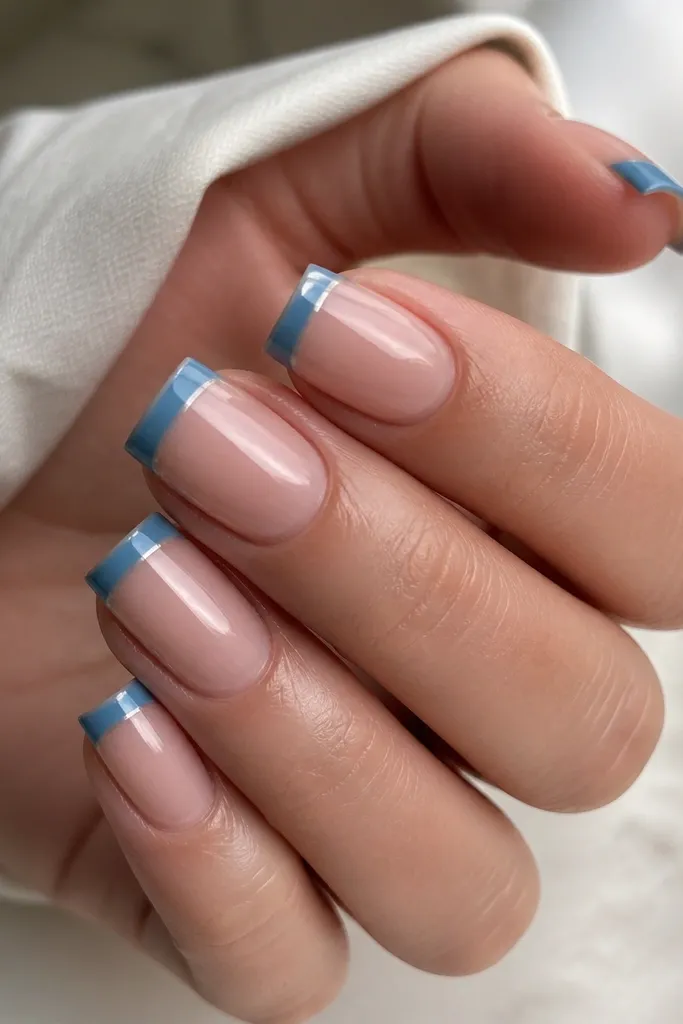
This look gives you a crisp French tip without heavy coverage over the whole nail. The tidal blue flatters hands because it looks clean and cool, and the clear outline makes the tip look extra precise. Square nails are ideal because the outline stays straight and doesn’t blur at the corners. It’s also a good choice if your nail beds are uneven — the clear gap hides small polish pooling.
Apply sheer nude acrylic base and shape short square. Paint the French tip in tidal blue, then leave a narrow clear line right where blue meets nude by pulling the blue away with a fine brush after it’s tacky. Cure fully. Seal with glossy top coat, and cap the free edge with one extra thin layer.
Editor's noteWork with tacky gel for the outline step; it gives you control without bleeding.
Watch outDon’t overfill the tip — if the blue looks too thick, the outline disappears.



