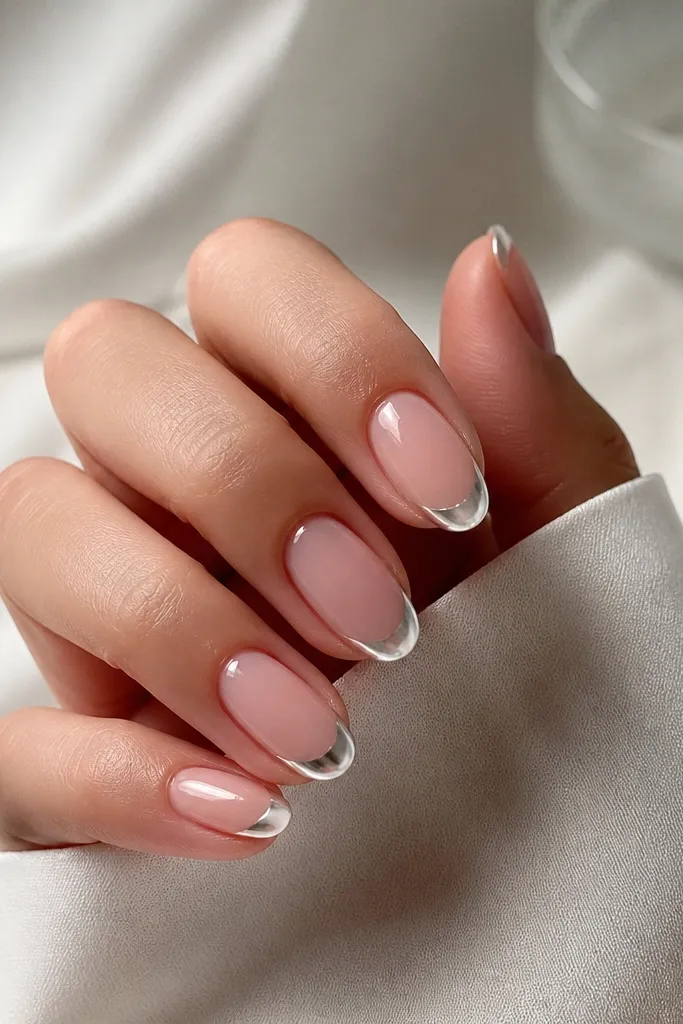
1. Milky Pink Almond With Whisper-French Tips
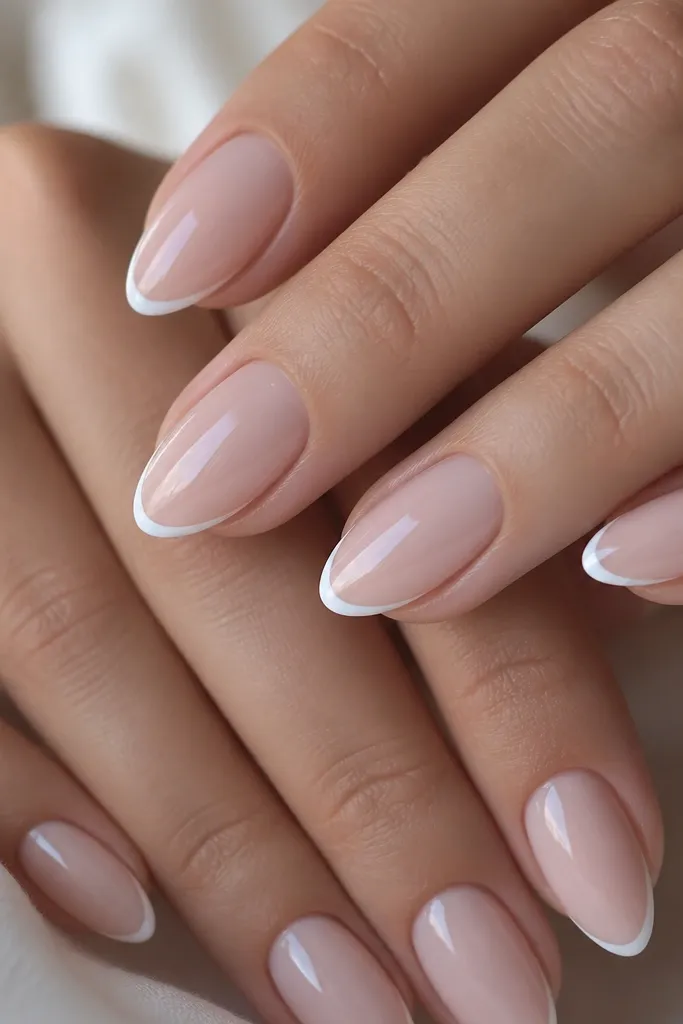
This one is my default when I want Elegant Almond Nails For Summer classy without thinking too hard. The milky pink base looks like your nails but better - it smooths uneven nail tone and makes your skin look fresher. The French tip is a whisper-thin line, not a thick cap, so it keeps the almond shape looking long instead of chunky. It flatters fair to deep skin tones because the base is neutral and the white reads bright in sunlight.
Start by prepping and pushing back cuticles, then buff the surface lightly so the base grips. Apply a milky pink builder gel or gel polish in 2 thin coats, keeping the color slightly sheer near the cuticle so it blends. For the tips, use a fine striping brush and paint a line that's about 1 to 2 mm from the sidewalls, then connect the curve at the center. Seal with glossy top coat, and wipe the tacky layer if your top coat requires it.
Editor's noteIf your French tips look uneven, tape a tiny strip of nail vinyl at the sidewall first, then pull the tape off right after painting.
Watch outAvoid thick French tips - on almond nails they look heavy and start lifting faster at the corners.
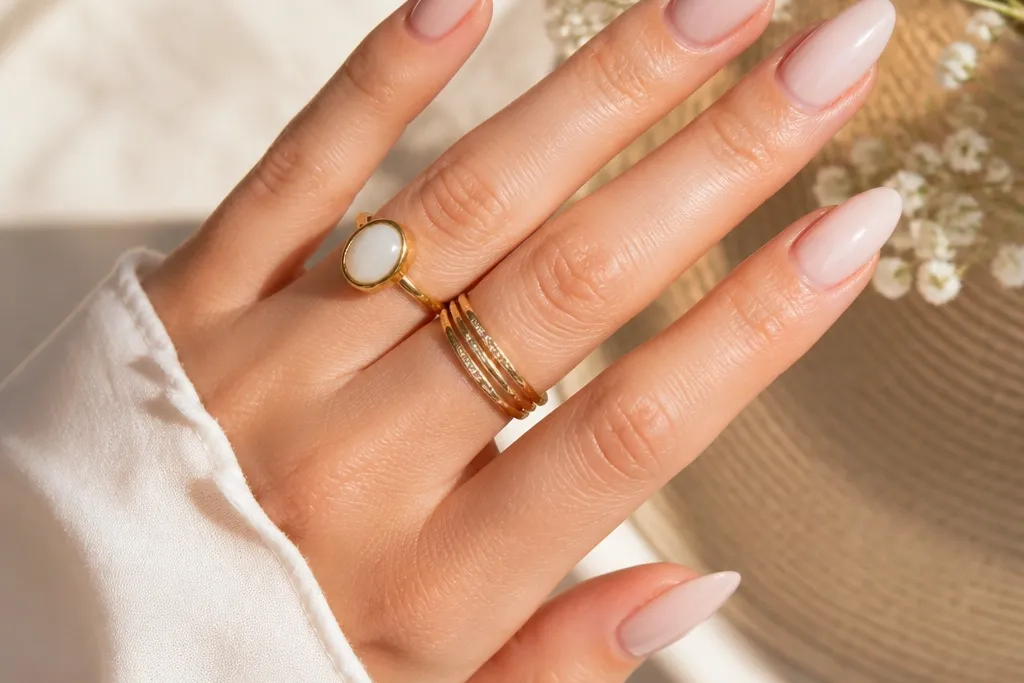
2. Nude-Beige Almond With Tiny Gold Dot Cuticle
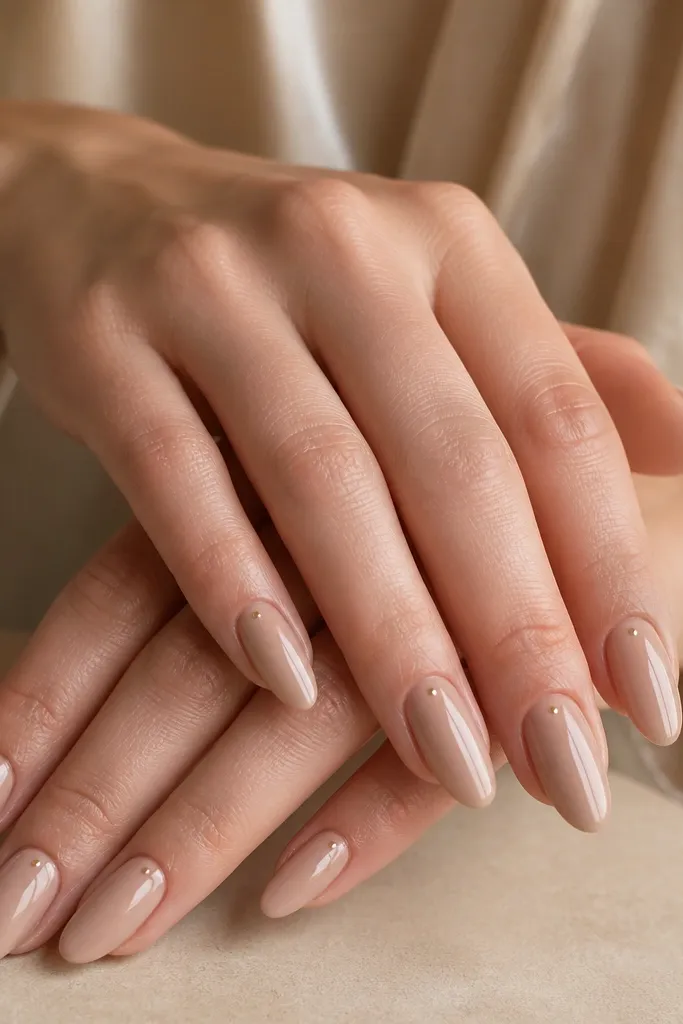
The nude-beige base is what makes this look classy instead of plain. Beige has warmth, so it flatters cool and warm undertones, and it looks especially good with gold jewelry. The tiny dot near the cuticle catches light when you move your hands, giving that "finished manicure" vibe without glitter. I've worn this to brunch and office days - it looks neat even when your nails grow out a little.
Apply a nude-beige gel polish or builder gel in 2 thin coats, then cure fully. With a dotting tool or a tiny bead of gold gel, place one dot about 1 mm away from the cuticle line and centered on each nail. Cure again if you're using gold gel, then add a glossy top coat over the dots so they feel smooth. Keep the dot size small - roughly the head of a sewing pin.
Editor's noteUse gold foil gel or a chrome pen for a sharper dot edge instead of loose gold flakes.
Watch outSkip big clusters of gold near the cuticle - they look disco fast in daylight.
3. Sheer Rosy Almond With Orange Micro-Crescent
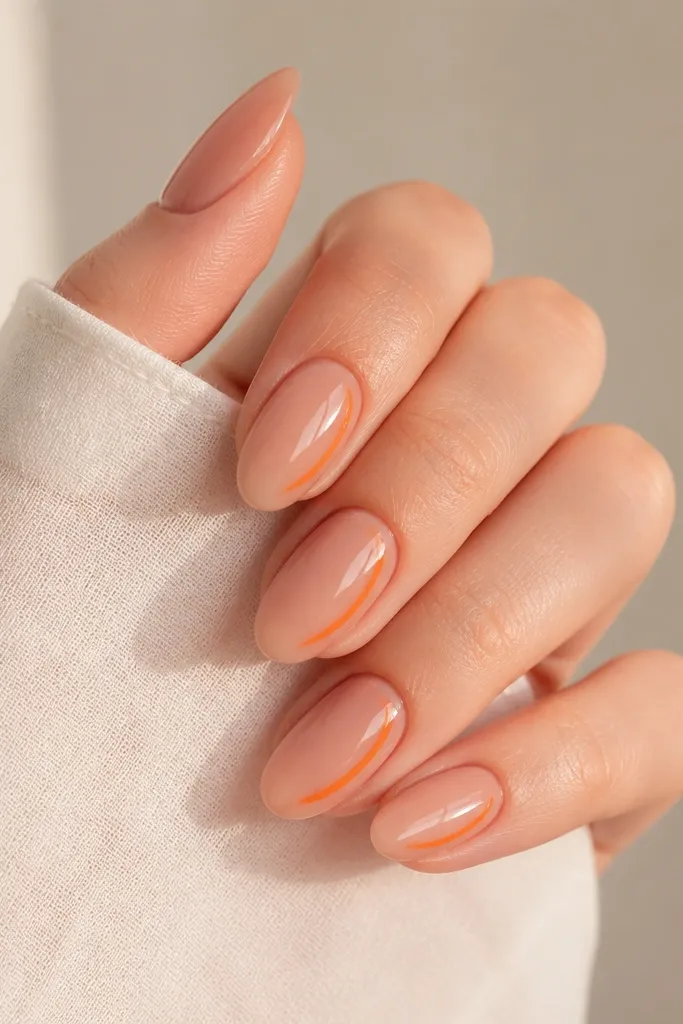
This is summer-classy because it uses color like jewelry, not like paint. The sheer rosy base blends into your nail bed, so the orange micro-crescent looks intentional and clean. Orange can be tricky, but when you keep it small and curved, it flatters every skin tone and looks bright in photos. It also hides imperfections because the base is translucent.
Start with a sheer rosy gel polish - I do 2 coats so it's still see-through but even. Place a thin orange gel crescent on the outer edge, about one-third of the nail width, not across the whole nail. Keep the crescent height small so it sits near the mid-nail, then cure. Finish with glossy top coat, and if you want extra depth, add one extra thin layer only over the crescent to smooth it.
Editor's noteIf your orange looks too bold, mix a drop of white gel into your orange before you draw the crescent.
Watch outAvoid painting orange as a full band - it stops reading classy and starts reading loud.
4. Clear Gloss Almond With Blue Line Art
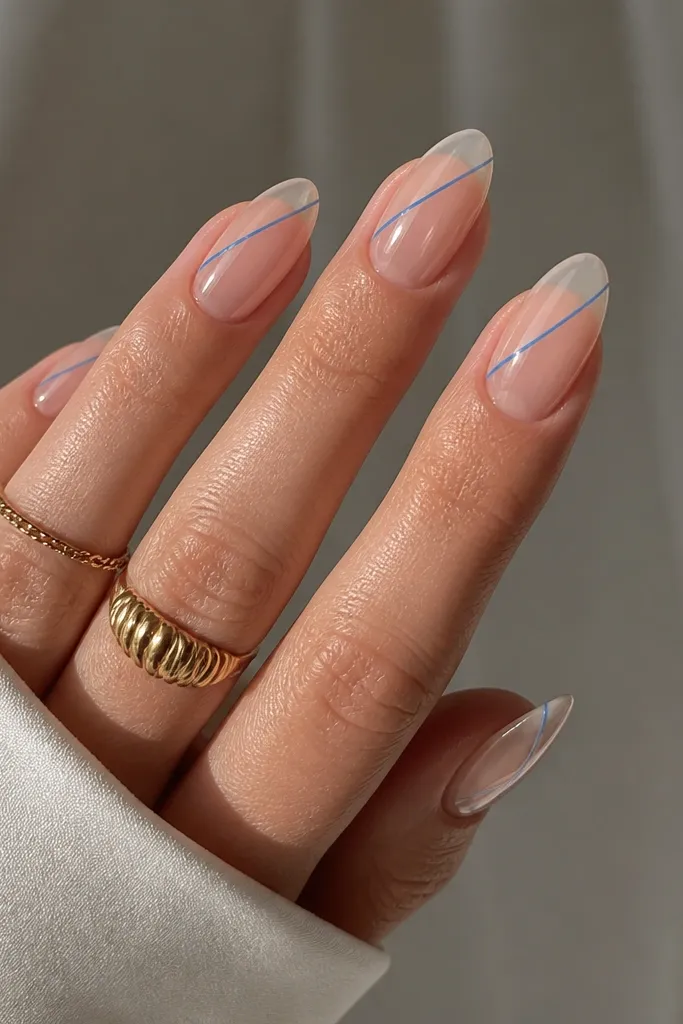
Clear nails with line art are one of the cleanest ways to look put-together in summer. The glossy clear base makes your nail look fresh, and the blue line gives a sharp, modern feel without heavy coverage. Blue is flattering because it contrasts both warm and cool skin tones, especially in sunlight. I like this for vacations because it grows out more gracefully than solid color.
Apply a clear builder gel or clear gel polish in 2 thin coats to create an even glassy surface. With a fine liner brush, draw one diagonal line per nail using medium blue gel, stopping about 1 mm from the sidewalls. Add a second tiny line only if your design looks too empty, then cure. Top coat with a glossy layer and make sure the brush runs along the apex so the nail feels smooth.
Editor's noteFor a crisp look, wipe the brush on a paper towel before you touch the nail so the line isn't watery.
Watch outDon't use thick paint-like blue - chunky lines look cheap on clear bases.
5. Lavender Milk Almond With Silver Foil Edge
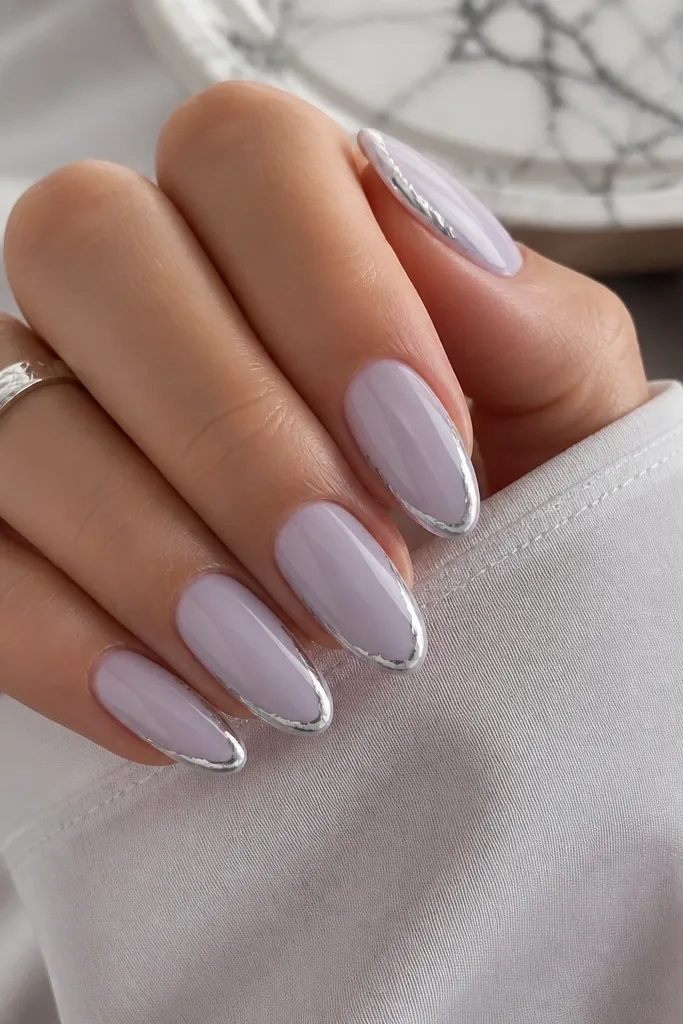
Lavender milk looks romantic and still classy because it's not neon and it stays soft. The silver foil edge acts like a frame, so your nails look more sculpted and less flat. This combo flatters light to medium skin tones especially well, but it still works on deeper tones because the lavender has enough opacity. I've worn this to summer dinners when I wanted something pretty but not glittery.
Start with a lavender milky gel in 2 coats, keeping coverage smooth and avoiding streaks near the cuticle. Place a thin silver foil strip along the outer sidewall, about 1 to 2 mm wide, and press it gently with foil applicator pressure. Seal with a thin layer of clear builder gel to lock the foil down, then cure. Finish with glossy top coat for a glassy look that makes the foil pop.
Editor's noteUse foil that has smaller pieces - big chunks look messy on almond tips.
Watch outAvoid putting foil on the full tip - it makes the nail feel costume-like.
6. Peach Sorbet Almond With Negative-Space Half Moon
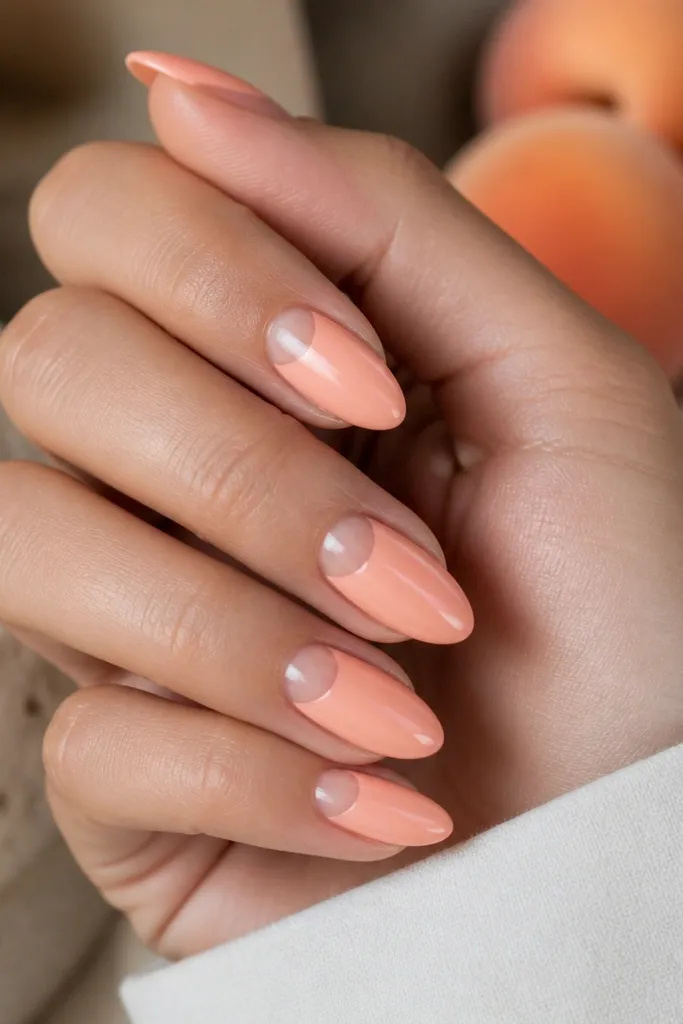
Negative space is what makes this peach look classy instead of childish. The half-moon cutout keeps the design airy, and the peach sorbet shade flatters warm undertones and looks amazing with summer tans. It also makes the almond shape look longer because the clear area draws the eye upward. I like this for weekends and date nights because it looks playful but still neat.
Apply a sheer peach gel in 2 thin coats, leaving the cuticle area unpainted where the half moon will be. For the half moon, use a small stencil or paint a curved guide with gel polish on a thin brush, leaving the inside clear. Cure, then add a second coat of peach around the curve so the line stays crisp. Seal with glossy top coat, and run the brush along the cuticle edge so the design feels smooth.
Editor's noteIf your half moon edges blur, cure each layer fully before adding the next coat.
Watch outDon't overfill the negative space - the cutout should stay clean and defined.
7. Champagne Chrome Almond With Nude Base
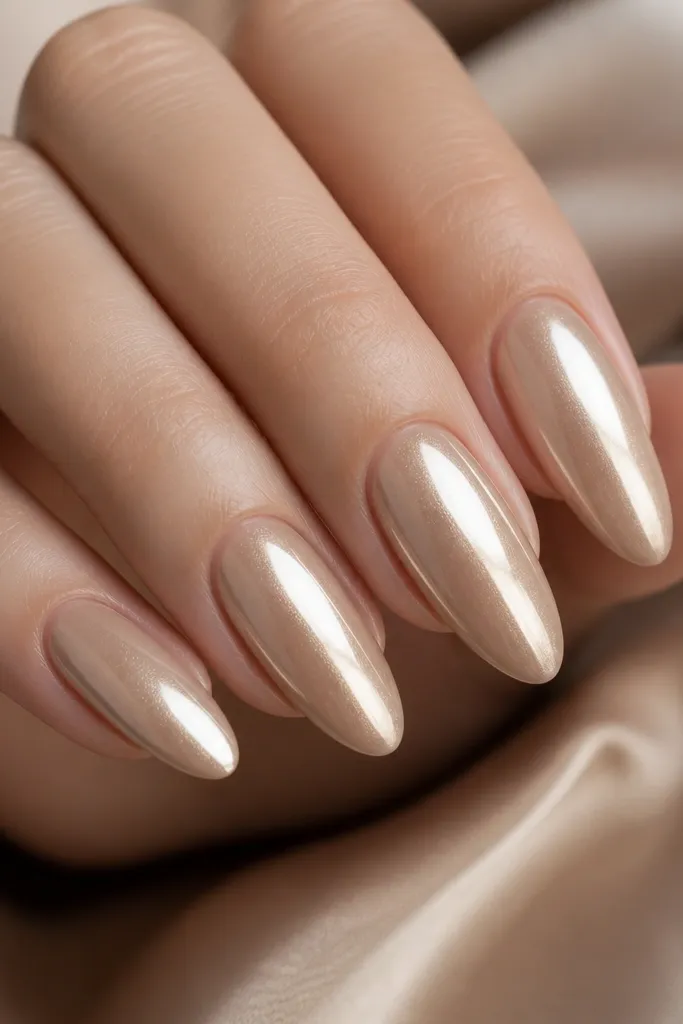
Champagne chrome reads expensive because it's warm, not icy. With a nude-beige base underneath, it looks smooth and flattering rather than harsh. This design is gorgeous for parties, but it also works for summer weddings because it photographs well in direct sun. The almond shape helps the chrome catch light along the curve, which is where the "classy" effect comes from.
Start with a nude-beige base and cure. Apply a thin chrome gel or tacky base where the chrome will go, then apply champagne chrome powder with an applicator sponge. Buff gently to control coverage - you want a soft metallic finish, not a heavy silver wall. Seal with a chrome-friendly top coat if your product supports it, or use a thin layer that won't dull the finish.
Editor's notePress the chrome along the center ridge of the almond for a more reflective highlight.
Watch outAvoid putting chrome over a matte or textured surface - it looks grainy.
8. Seafoam Green Almond With White Vertical Pinstripe
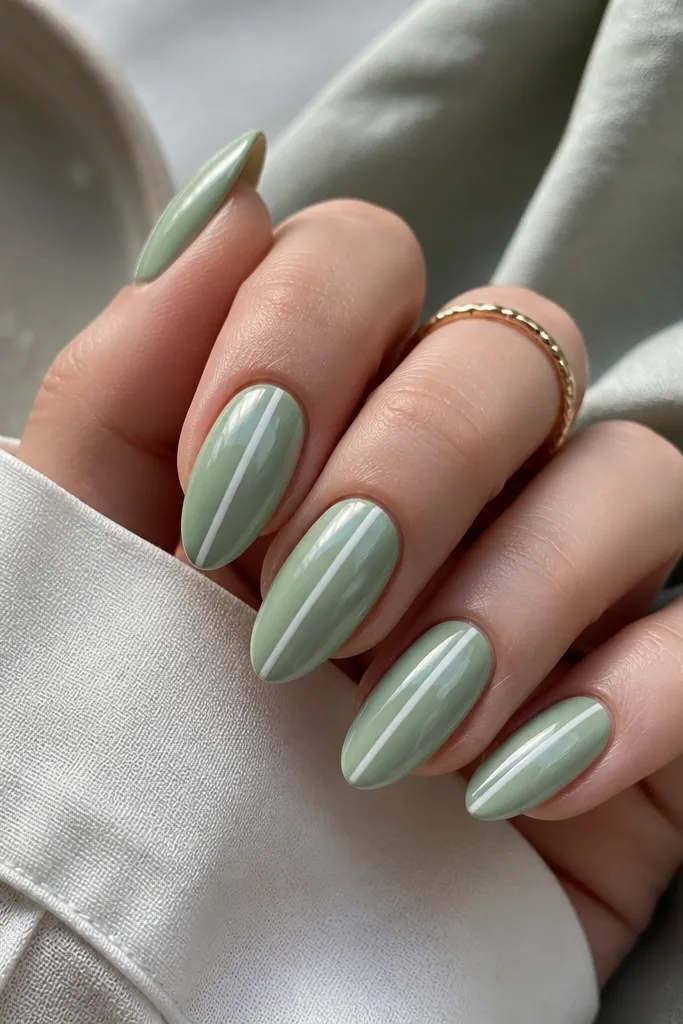
Seafoam green looks fresh in summer, and the white vertical stripe makes it feel tailored. The stripe creates a lengthening effect, which is perfect on almond nails since the shape is already slim. This combo flatters many skin tones because seafoam has a gray-green softness. I've worn it with simple gold hoops and it looked intentional, not random.
Paint seafoam green gel in 2 coats, keeping the base smooth and not too thick. With a striping brush, draw one white line down the center - keep it narrow, about 0.5 mm. Cure, then add a glossy top coat and cap the free edge. If you want it extra classy, do the pinstripe on only 2 nails and keep the rest plain seafoam.
Editor's notePractice the stripe on a scrap nail tip first so your line looks steady.
Watch outAvoid multiple stripes - two lines or thicker stripes start looking like nail art stickers.
9. White Almond With Buttery Yellow Half Tip
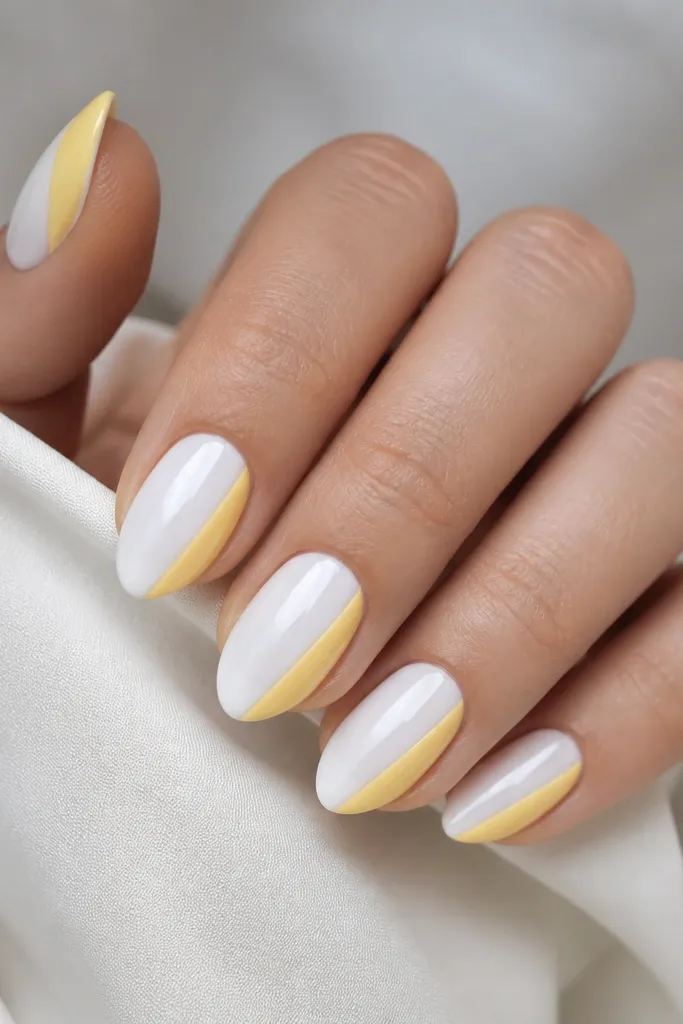
This design is summer-classy because it uses a clean base and a controlled pop of color. The buttery yellow on only half the tip looks like a sunbeam, and the white makes it crisp. Yellow can wash out on some skin tones, but with a warm buttery shade and a white base, it stays flattering. It's also great if you want something bold that still looks tidy.
Apply white gel polish in 2 thin coats, making sure it's opaque by the second coat. Use a thin brush to paint a buttery yellow section that covers the outer half of the tip, curving slightly to follow the almond shape. Keep the border sharp where yellow meets white. Cure fully and finish with glossy top coat, paying attention to the transition so it doesn't feel bumpy.
Editor's noteIf the yellow looks sheer, add a third thin coat only on the yellow area.
Watch outAvoid a messy gradient - the border should look like a deliberate line.
10. Rose Quartz Almond With Clear Gem Dot
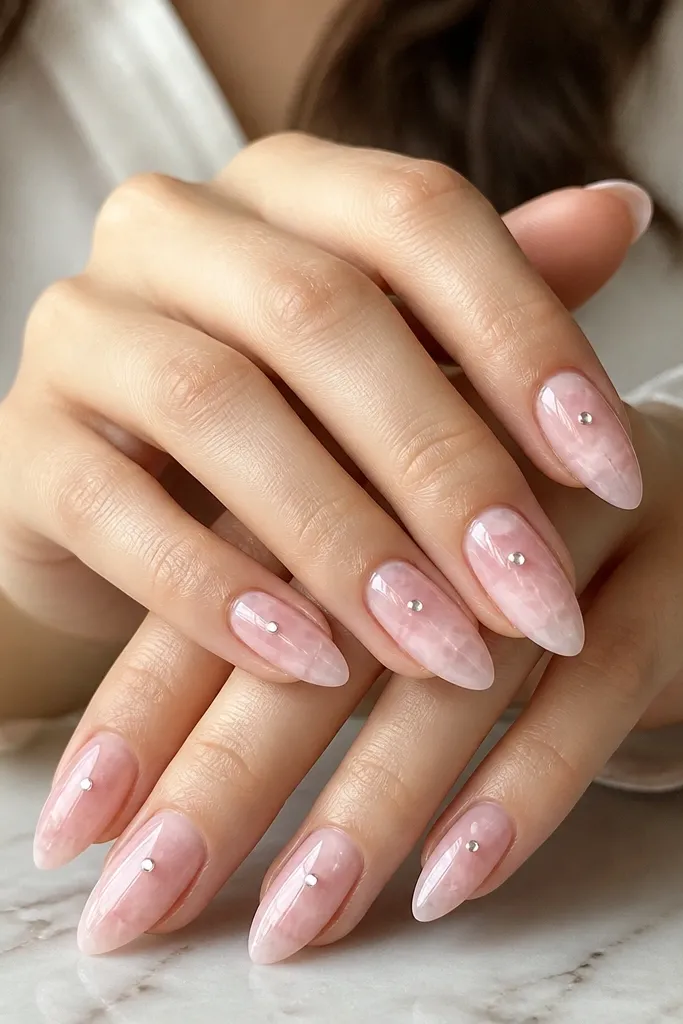
Rose quartz nails look fancy because the marbling mimics stone, and classy because it's soft pink, not neon. The clear gem dot gives a focal point that looks like jewelry. This flatters fair skin especially well, and on deeper skin tones it still reads luxe because the base has enough pigment. I wore a version of this to a bridal shower and got asked where I got my nails done.
Use a pink rose-quartz effect gel or create marbling with two pink shades plus a tiny amount of white. Apply 2 coats of the base color, then drag thin lines with a fine brush and swirl lightly to blend. Cure, then place one clear gel bead or rhinestone at the center - keep it small, about the size of a sesame seed. Seal with glossy top coat, and cap around the gem so it doesn't lift.
Editor's noteUse gel beads instead of loose rhinestones if you want a smoother finish on almond tips.
Watch outAvoid huge gems - they snag on hair and look heavy on almond shape.
11. Coral Gloss Almond With Micro-Glitter Cuticle Halo
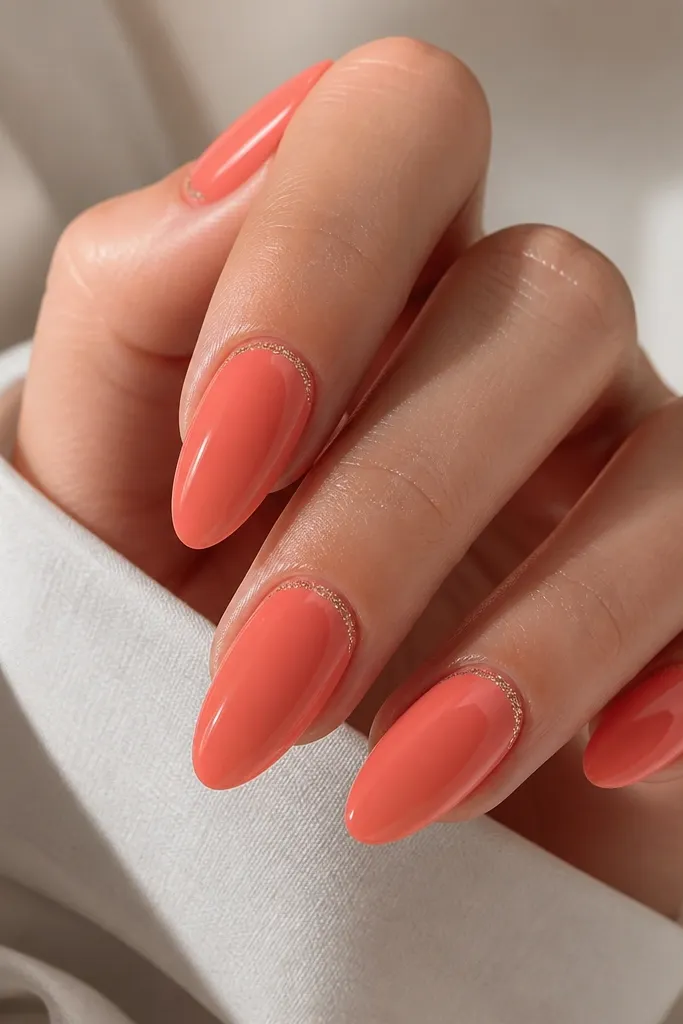
This is one of my favorite summer classy looks because it gives sparkle where your hands naturally show it - near the cuticle. The coral base is warm and flattering, and the micro-glitter stays fine enough to look expensive instead of chunky. It's also easy to wear because you're not dealing with glitter on the whole nail. In daylight, the halo catches light without screaming for attention.
Apply coral gel polish in 2 thin coats and cure. For the halo, use a fine glitter gel or pigment and place a thin line around the cuticle, leaving a small gap so it doesn't touch skin. Use a small brush to keep the line smooth and centered. Cure, then seal with glossy top coat in 2 layers if the glitter feels textured.
Editor's noteIf glitter catches on fabric, add an extra top coat and cap the free edge.
Watch outAvoid thick glitter lines - they create a ridge that feels rough and lifts.
12. Mocha Nude Almond With Espresso Speckle
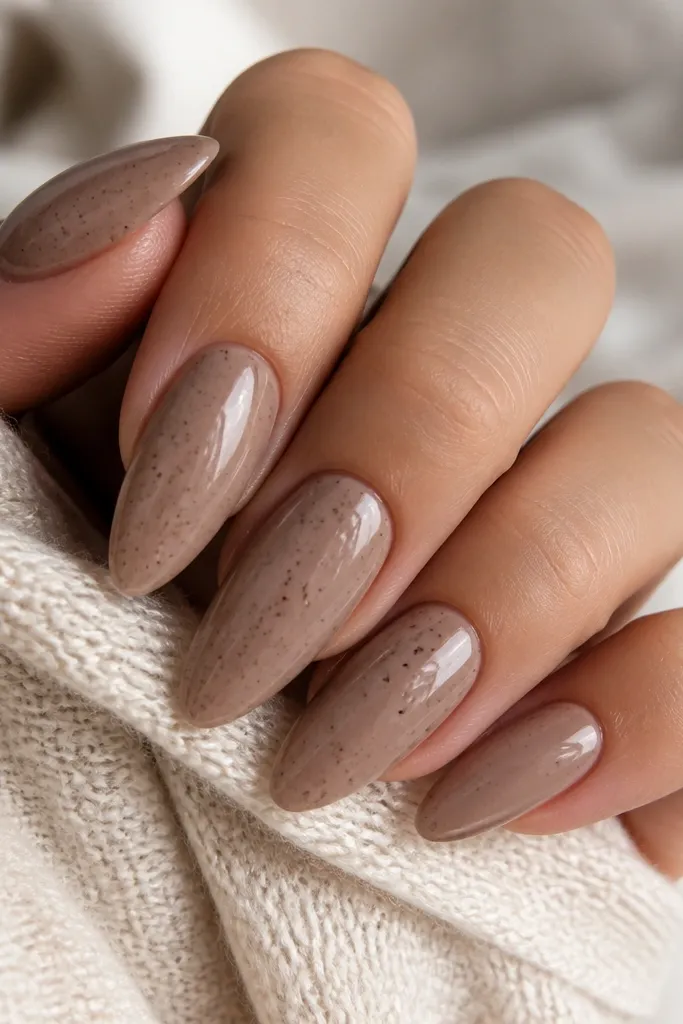
Mocha nude is classy because it looks like a clean neutral, not a trendy color that will date fast. Espresso speckles add texture and a handmade feel without going full art project. This works beautifully on medium to deep skin tones, and it also flatters fair skin when you pick a warm mocha instead of gray-brown. I wore this with a white sundress and the contrast looked intentional.
Paint a mocha nude base in 2 coats, then cure. With a dotting tool or a toothpick, tap espresso-brown gel or polish to create tiny speckles - keep them sparse near the cuticle and slightly denser toward the tip. Cure, then do a glossy top coat to smooth the dots and lock them in. Make sure the speckles don't cluster - you want scattered, not painted.
Editor's noteUse less product on the tool so the speckles stay pin-sized.
Watch outSkip heavy speckling - it turns into a muddy look on almond.
13. Classic Blue Almond With White Daisy Accent
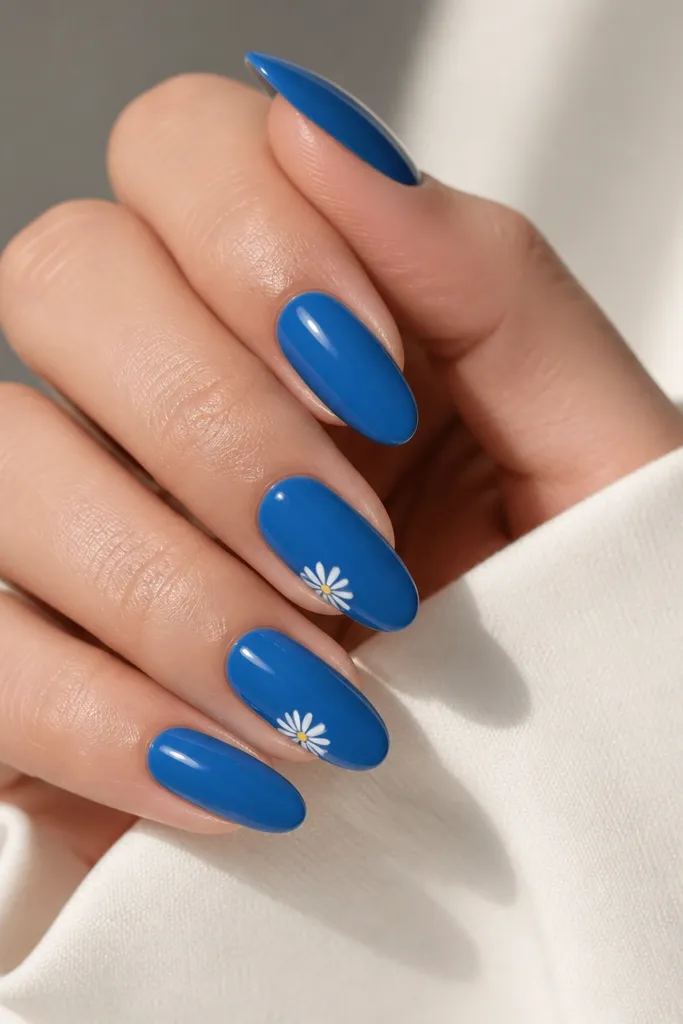
A classic blue screams summer, but it stays classy when you keep the accent minimal. The white daisy gives a crisp focal point and looks cute without turning into full-on cartoon nails. This combination flatters most skin tones because blue has enough contrast and white stays bright. It's especially good for beach weekends because it pairs with denim, stripes, and gold jewelry.
Apply classic blue gel polish in 2 coats across all nails and cure. On the accent nails, paint a tiny daisy: add a white dot for the center, then 5 small white petals around it with a fine dotting tool. Place the daisy near the top third of the nail, slightly to one side so it follows the almond curve. Cure again, then add glossy top coat over the whole nail.
Editor's noteDo the daisy on only 2 nails. One accent nail too many makes it look busy.
Watch outAvoid painting big daisies - the smaller the flower, the more polished it looks.
14. Clear Pink Almond With Peach Swirl Tips
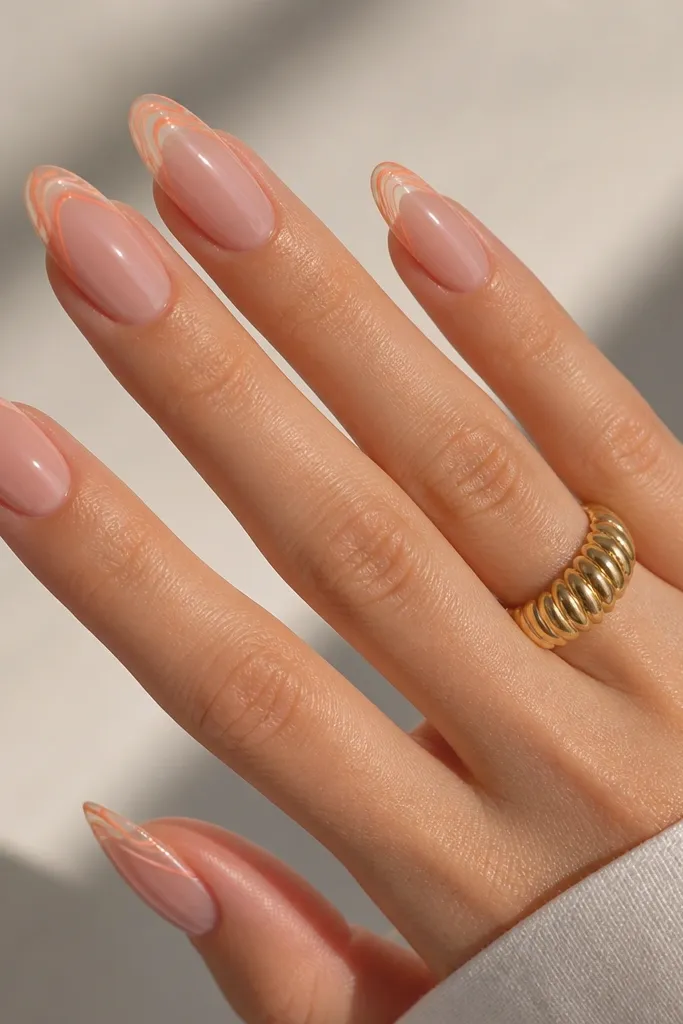
This design looks like summer airbrushing, but it's actually easy to keep classy because the base stays sheer. Clear pink makes the nails look clean, and the peach swirl tips add movement without heavy coverage. Swirls work well on almond because the shape gives the swirl somewhere to taper. It flatters anyone who wants a lighter look but still wants something decorative for photos.
Start with a clear pink jelly gel or sheer builder gel in 2 coats. Create the swirl tips by painting thin peach lines that curl inward from the outer tip, then connect them at the center. Keep the peach confined to the top third so the nail doesn't look crowded. Cure, then top coat with glossy gel and cap the free edge to prevent peeling.
Editor's noteUse a gel liner brush and wipe excess paint off so the swirl lines stay hair-thin.
Watch outAvoid thick swirl lines - they look like marker on a sheer base.
15. Olive Sage Almond With Gold Thin Border
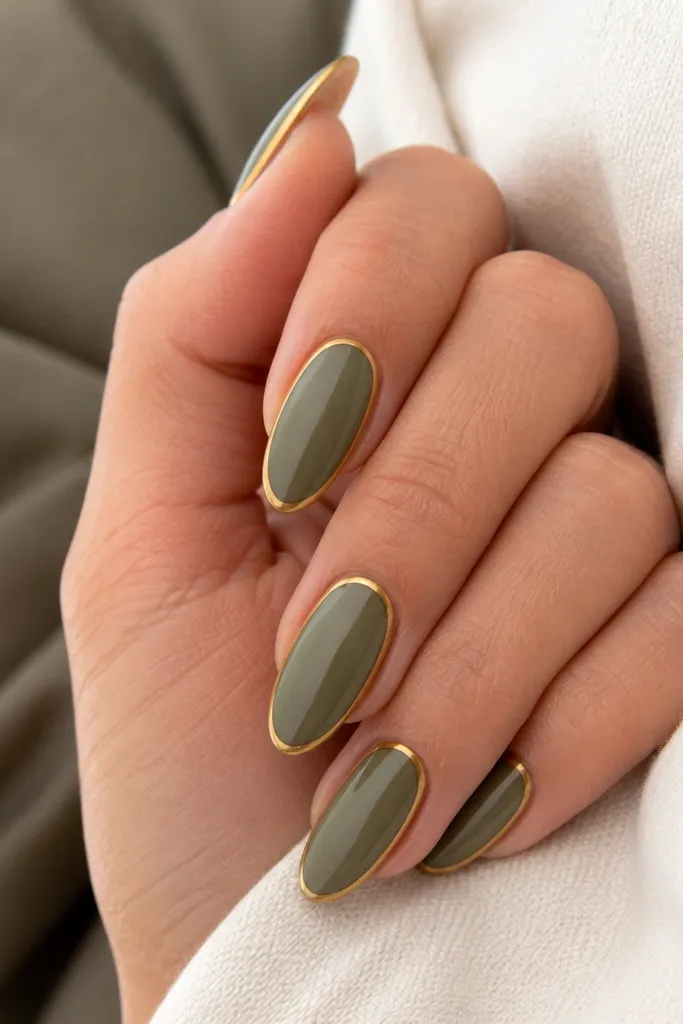
Olive sage is one of the most flattering summer greens because it doesn't scream neon. The gold border makes it look dressed up, like a ring around the nail. This combo is great for warm skin tones and also looks good on cool undertones because the gold adds warmth. I've worn it with tan sandals and it looked expensive even with simple outfits.
Apply olive sage gel polish in 2 coats and cure thoroughly. Using a striping brush, draw a thin gold line along the outer edge of the nail - just one side, not both. Keep the line about 0.5 to 1 mm from the sidewall so it looks intentional. Cure, then seal with glossy top coat and cap the tip.
Editor's noteIf gold looks patchy, use a gold gel liner pen for smoother coverage.
Watch outAvoid outlining both sides - it makes the nail look like a frame sticker.
16. White Almond With Peach Micro-Confetti
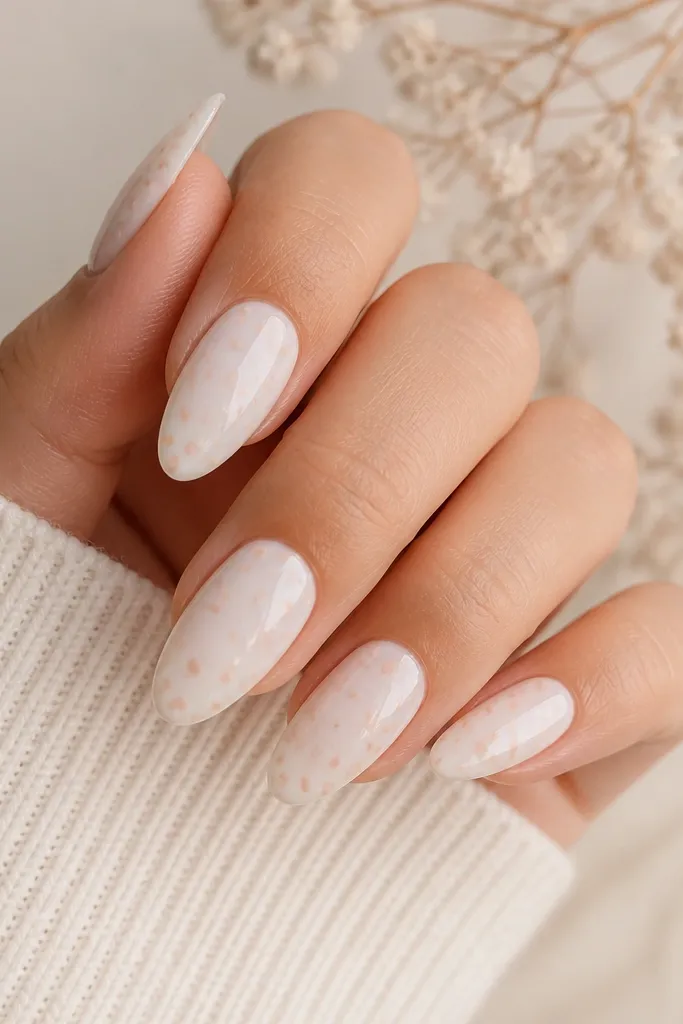
White nails can look sterile if they're flat and plain. Peach micro-confetti fixes that by adding tiny pops of color that look like sun sparkles. The design stays classy because the confetti is small and evenly scattered, not clumpy. It flatters fair skin and also creates a crisp contrast on deeper skin tones. I like it for summer parties because it reads fun but still neat.
Paint white gel polish in 2 thin coats and cure. Dip a dotting tool into peach gel or polish and tap lightly to create micro dots across the nail, leaving some negative space so it doesn't get busy. Cure, then add glossy top coat in 2 layers if the dots feel raised. Make sure the top coat fully covers the edges of the dots so they don't snag.
Editor's noteUse a toothpick for confetti - it creates smaller dots than a thick dotting tool.
Watch outAvoid big circles of peach - they turn into a pattern that looks messy.
17. Nude Almond With Thin Black Outline French
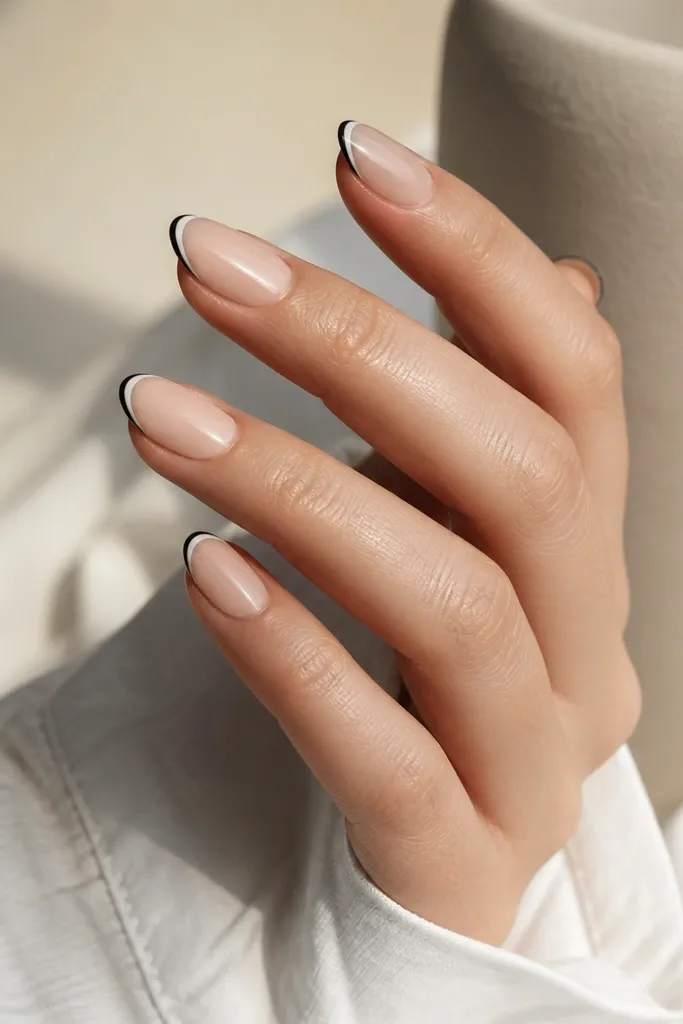
If you want classy with a little edge, nude plus a thin black outline French is it. The nude base keeps it wearable, while the black outline makes the tip look sharp like a graphic liner. This flatters almost every skin tone because the nude neutralizes and the black gives definition. It looks especially good with tortoiseshell sunglasses and gold rings.
Apply nude-beige gel in 2 coats and cure. Paint a thin white French tip, then let it cure fully. Use a fine striping brush to trace the outer edge of the French tip with black gel, keeping the line thin and even. Cure again and seal with glossy top coat, making sure the black outline is fully covered so it doesn't catch on fabric.
Editor's noteDo the black outline in one smooth stroke per side to avoid wobble.
Watch outAvoid thick black - it can look like nail art stickers instead of a refined manicure.
18. Tropical Teal Almond With White Palm Leaf Accent
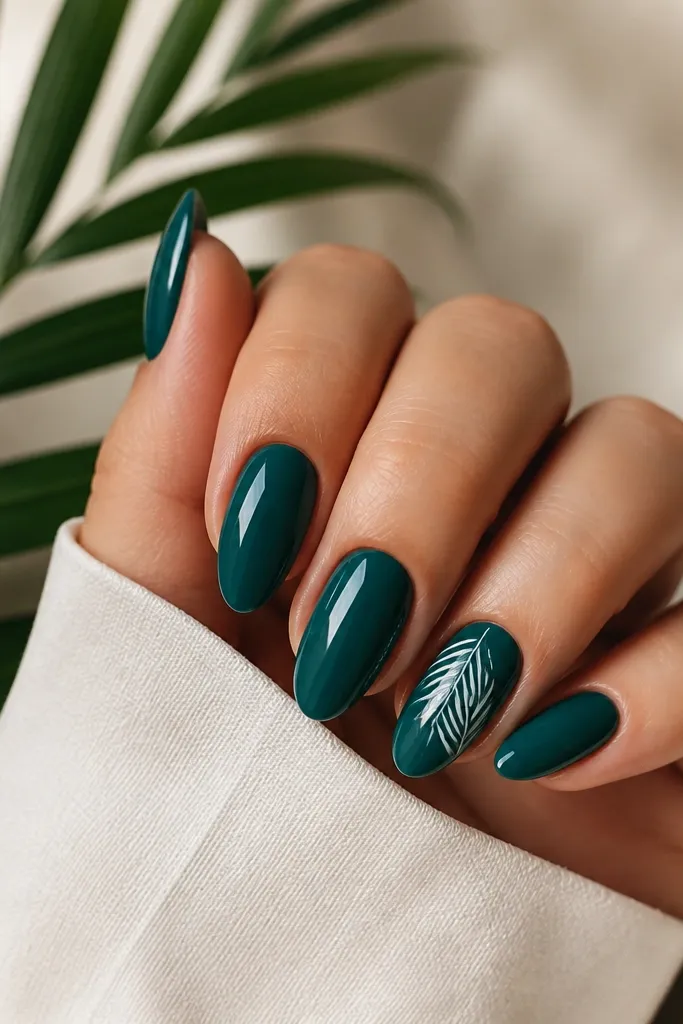
Teal looks instantly summery, but it can tip into bold if you cover every nail with art. Keep it classy by using teal on most nails and adding one small palm leaf. The white leaf stays crisp and reads like linework, not paint splatter. This flatters fair to deep skin tones because teal has enough depth, and white keeps the accent clean.
Paint all nails teal in 2 thin coats and cure. Choose 1 or 2 accent nails and draw a palm leaf using a fine liner brush: a center stem line with 4 to 6 thin leaf strokes branching outward. Place the leaf near the cuticle and angled slightly toward the tip. Cure, then apply glossy top coat over everything.
Editor's noteKeep the palm leaf small - about the width of your thumbnail at the widest point.
Watch outAvoid full-hand tropical scenes - they look busy and chip faster.
19. Soft Nude Almond With Pink Aura Glow
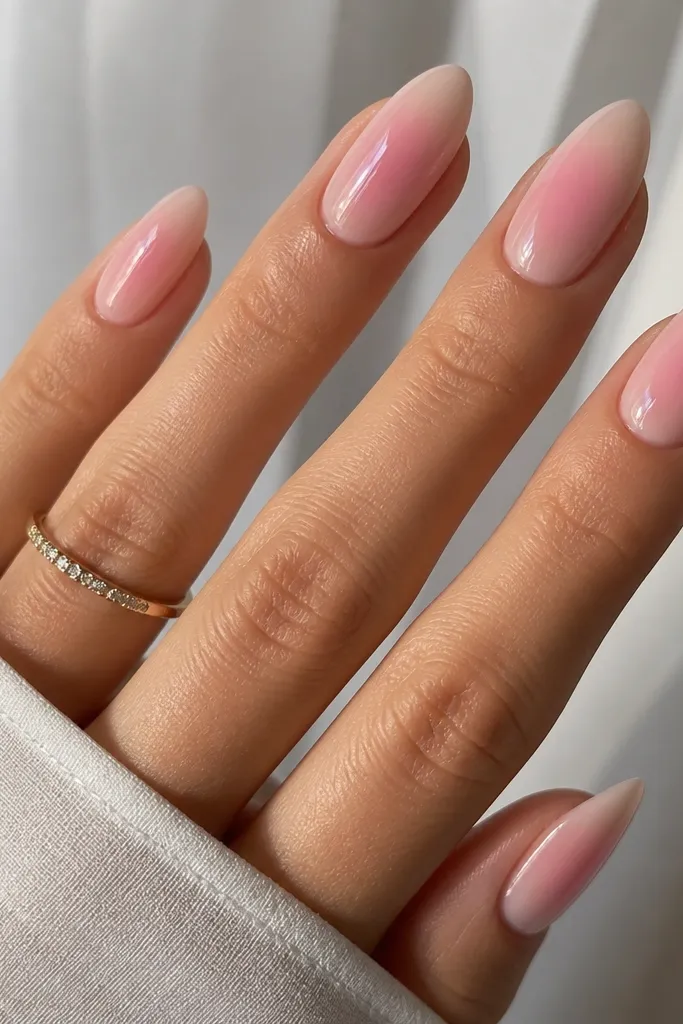
Aura nails are classy when they stay soft and blended. The soft nude base makes the pink glow look like a gentle filter instead of a harsh gradient. This flatters all skin tones because the nude anchors the look, and the pink sits in the sweet spot between rosy and bright. I've found it's also forgiving if your nail beds have slight tone differences.
Apply a soft nude gel base in 2 coats and cure. For the aura, use a light pink gel and a makeup sponge to dab a faint glow around the center of the nail, then blend outward with tiny taps. Keep it strongest at the center and fade toward both the cuticle and tip. Cure, then top coat glossy and cap the free edge so the gradient feels smooth.
Editor's noteIf the glow looks too strong, wipe the sponge lightly on a paper towel before dabbing.
Watch outAvoid sharp edges in the aura - they make it look like a sticker.
20. White Marble Almond With Gold Thread Vein
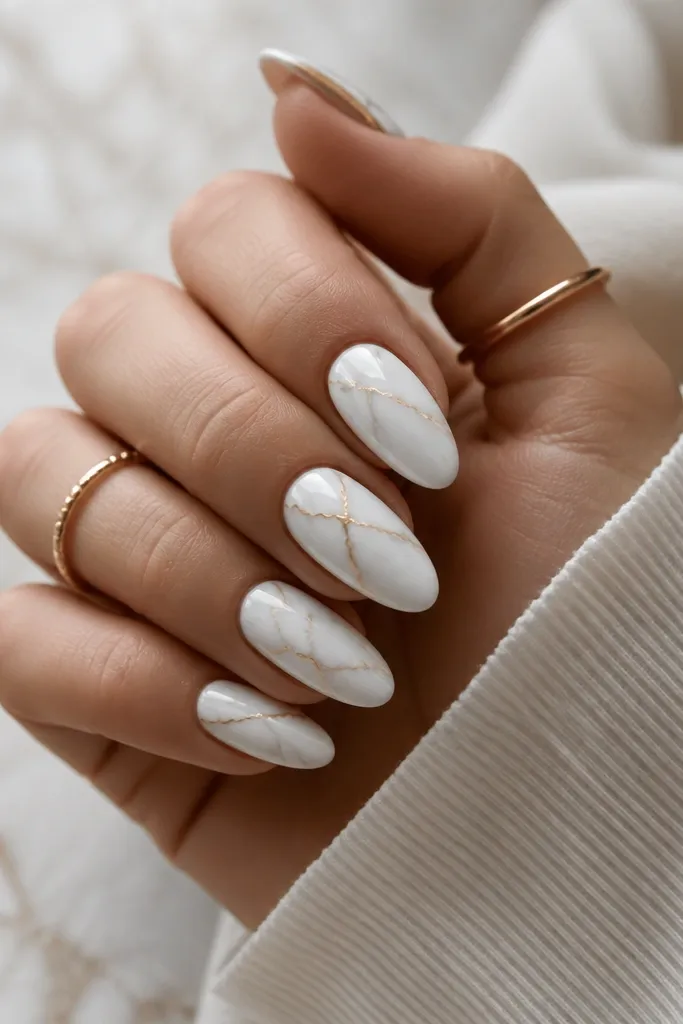
Marble designs can look cheap when the veining is thick and random. This version stays classy because it uses soft white marble with fine gray streaks and one thin gold "thread" line. Gold thread adds warmth and makes the marble look like jewelry stone, not messy paint. It looks great on medium and deep skin tones because the white base pops, and it also flatters fair skin by adding dimension.
Start with a white base in 2 coats and cure. Add gray veining by dragging thin lines with a detail brush, then lightly blur the edges with a sponge for a stone effect. Place one gold thread vein: a very thin line that follows one major gray streak, not crossing the whole nail. Cure, then seal with glossy top coat to lock everything in and smooth the surface.
Editor's noteUse gold gel liner for the thread line so it stays one consistent thickness.
Watch outAvoid lots of gold lines - one thread looks refined; multiple threads look chaotic.
21. Gingham Pastel Almond With Sheer Pink Base
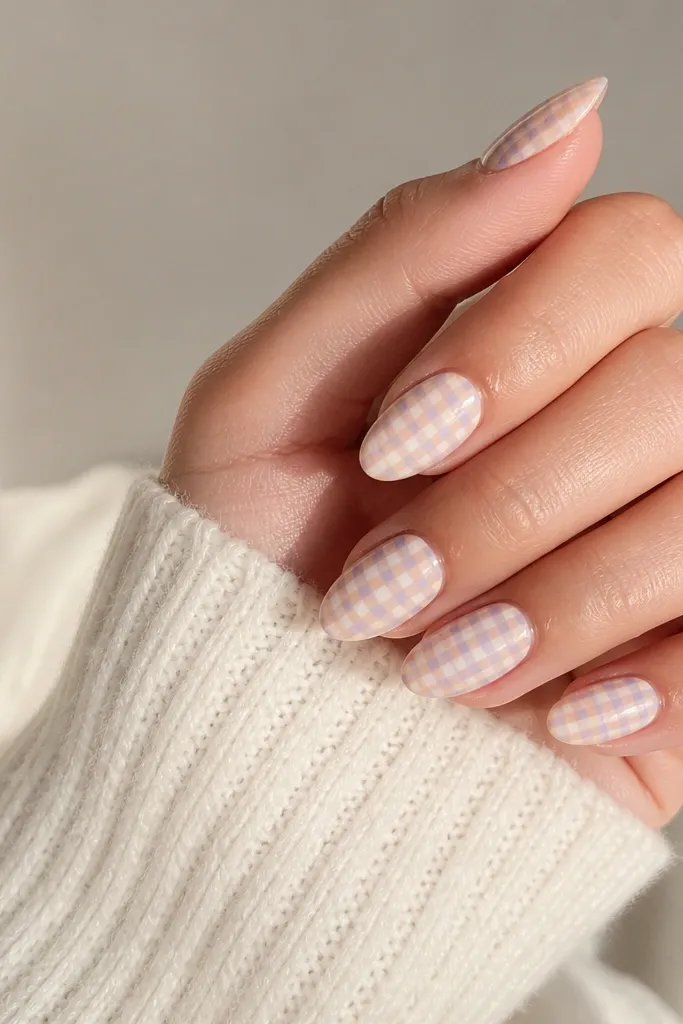
Gingham can look cottagecore or childish, but on almond nails it looks classy when the checks are tiny and the base is sheer. Light blue and cream checks keep it airy for summer, and the sheer pink makes the whole set look romantic instead of chalky. This flatters fair skin and looks sweet on medium skin tones; on deeper tones, the sheer pink still gives a clean background for the pastel checks. It's a great choice for outdoor lunches and garden parties.
Apply a sheer pink base in 2 coats and cure. Paint thin lines to create the gingham grid: start with one direction using a fine brush, then add the cross lines after curing. Keep the squares small - about 2 to 3 mm each - and keep the pattern off the cuticle by leaving a tiny margin. Cure fully, then top coat glossy to prevent the lines from looking dry.
Editor's noteIf your lines wobble, use nail vinyl strips as guides for the first row.
Watch outAvoid big gingham squares - they look more like fabric print than nail art.
22. Chocolate Brown Almond With Nude Tip Blend
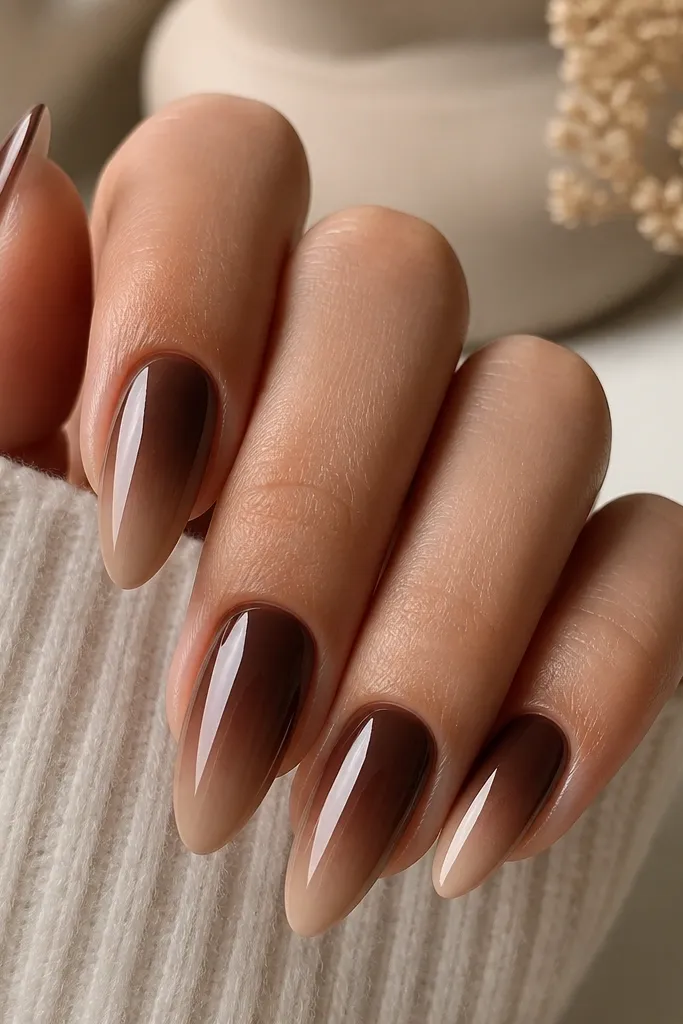
This design is classy because it looks like a deliberate ombré, not a messy fade. Chocolate brown in summer looks warm and grounded, and the nude tip blend lightens the look so it doesn't feel heavy. It flatters medium to deep skin tones especially well, and it also looks sophisticated on fair skin because the nude tip prevents the set from looking too dark. I've worn it with linen shirts and it reads polished.
Apply a chocolate brown gel in a thin coat and cure. Use a makeup sponge to blend nude-beige gel into the top half of the nail, keeping the brown strongest near the cuticle and fading upward. Work in small dabs, then cure, then add one more thin blend layer if you need smoother transitions. Seal with glossy top coat and cap the free edge.
Editor's noteBlend in layers, not one swipe. One swipe creates streaks on almond curves.
Watch outSkip harsh lines at the fade - the blend should look like it melts.
23. Pink Jelly Almond With Gold Micro-Sparkle
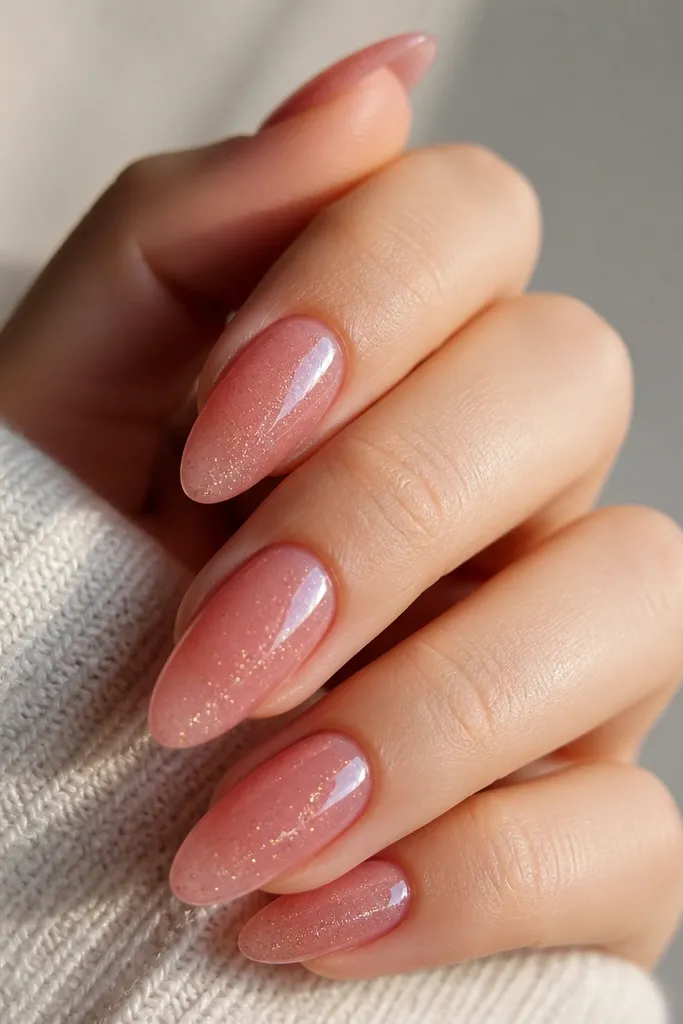
Jelly nails look expensive when the sparkle is micro-fine and evenly dispersed. This pink jelly base gives a juicy summer glow, and the gold micro-sparkle reads like warm sunlight instead of party glitter. It flatters all skin tones because the translucence makes the color look tailored to your nail bed. It also looks great when your nails are slightly longer because the jelly catches light along the almond curve.
Apply pink jelly gel polish in 2 coats, keeping the first coat thin so it doesn't pool near the cuticle. Mix or use a jelly polish that already has gold micro-sparkle so you don't get uneven specks. Cure fully between coats, then check for any dense clusters and smooth them with a final thin layer of jelly gel. Finish with glossy top coat, and cap the free edge so the sparkle doesn't snag.
Editor's noteIf the sparkle looks too strong, cure and then add one more thin jelly coat to dilute it visually.
Watch outAvoid chunky glitter suspended in jelly - it looks gritty and drags the whole look down.
24. Cream Almond With Peach Script Initial Accent
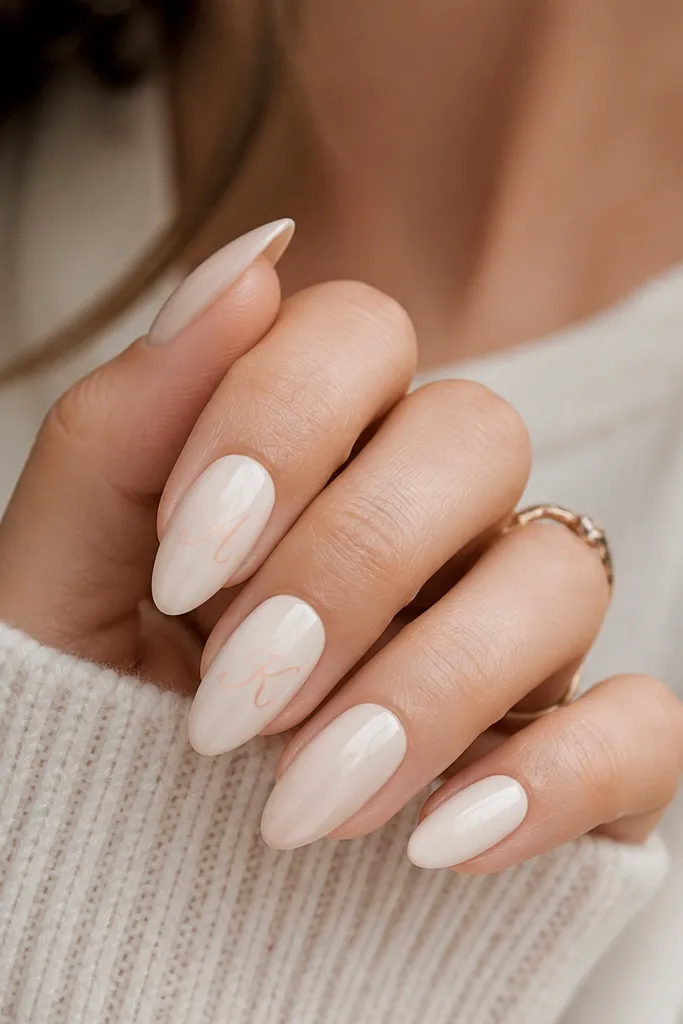
Personal details can look classy when the script is thin and the base is neutral. A cream base keeps your nails bright for summer photos, and peach script adds warmth without going full loud. This works on fair, medium, and deep skin tones because the cream is bright and the peach reads soft. I like this when I want a manicure that feels like me, not like a trend.
Paint cream gel polish in 2 coats and cure. Choose one accent nail per hand and place a thin peach script letter using a fine liner brush - keep it about 4 to 6 mm tall. Let the script sit centered on the nail, then cure. Top coat with glossy gel, and make sure the letter edges are sealed so they feel smooth when you run a finger over them.
Editor's noteWrite the letter on a practice nail tip first. Script looks cleanest when your hand already knows the curve.
Watch outAvoid thick marker-style script - it looks heavy on almond nails.
25. Sage Nude Almond With White Dot Cluster
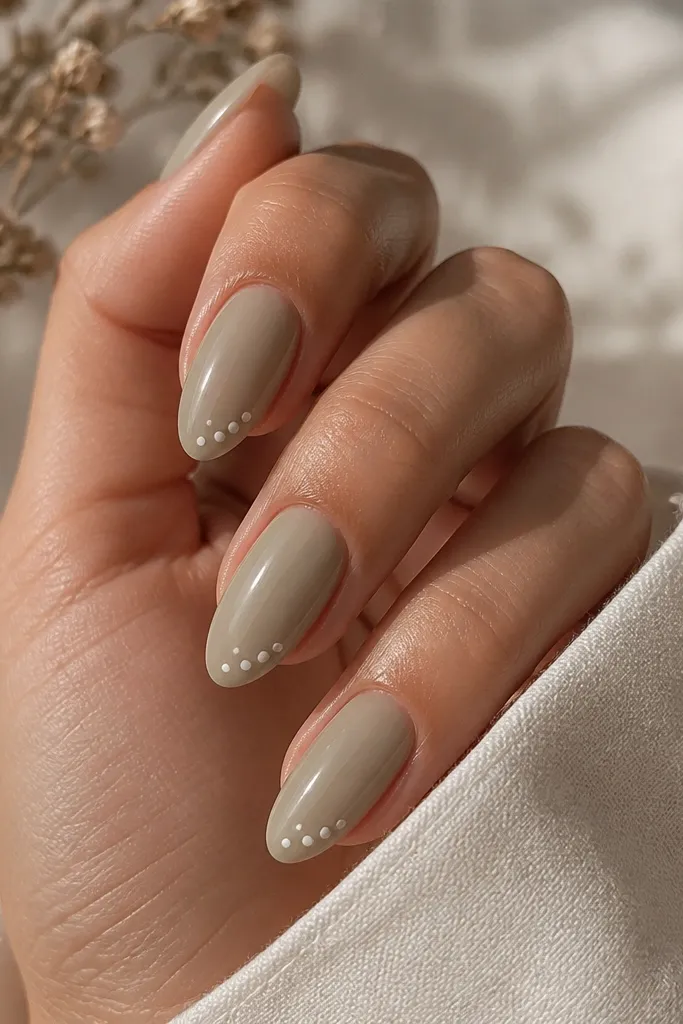
Sage nude is a classy summer neutral because it has just enough green to feel fresh. The white dot cluster adds a graphic feel without needing lines or art scenes. Dots also hide tiny imperfections because they pull attention visually. This set flatters a wide range of skin tones and looks great with casual summer outfits. It's the kind of manicure that still looks neat when you're busy and not babying your nails.
Apply sage nude gel in 2 thin coats and cure. On each nail (or just two accent nails), place a diagonal cluster of 3 to 5 white dots near the top third using a dotting tool. Keep spacing even and dot sizes similar so the cluster looks intentional. Cure, then add glossy top coat, and cap the free edge to prevent edge lift.
Editor's noteUse a clear gel base under the dots if your white polish tends to spread - it keeps the dots round.
Watch outAvoid random dot scattering - clusters look designed; scattered dots look accidental.