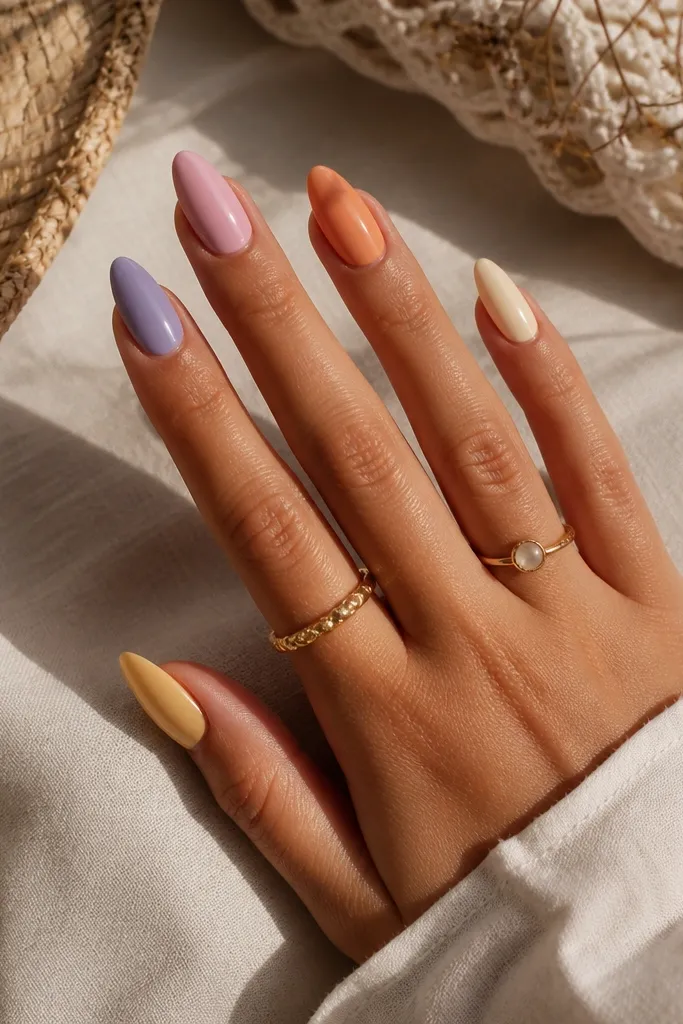
1. Caramel Apricot Cream Base With Tiny Gold Arc Tips
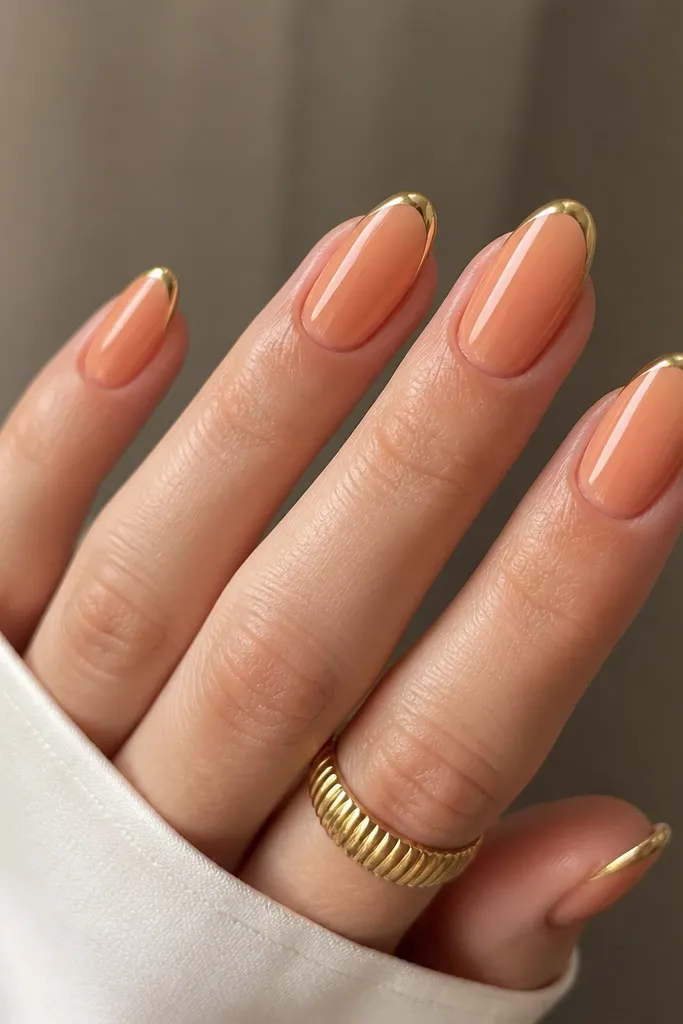
This look is "cozy warm" because the base is a caramel-apricot crème, not a cool nude. On almond nails, that creamy color makes the tip look smooth and slightly rounded instead of sharp. The gold arc is small on purpose - it gives the light a place to land without making the nail feel like a full-on party set. It flatters most skin tones because it sits in the same warm family as your undertones. I've worn it to dinner plans and it still looks right under streetlights because the gold reflects warm, not icy, light.
Start by prepping and pushing back cuticles, then buff the nail surface lightly so the crème base grips. Apply a thin layer of caramel-apricot crème gel and cure. Add a second thin coat for full coverage, keeping it slightly thinner at the very tip so it doesn't flood the sidewalls. Use a striping brush to paint a thin gold arc about 1-2 mm from the free edge, centered, then cure. Finish with glossy top coat and cure fully, wiping the tacky layer if your top coat needs it.
Editor's noteIf you want it to look expensive in photos, use a chrome powder that's labeled "warm gold" and press it with a dry sponge before sealing.
Watch outDon't make the arc too wide - a thick gold band turns this into a candy-strip look.
2. Dusty Peach Jelly Gradient With Warm Nude Cuticle
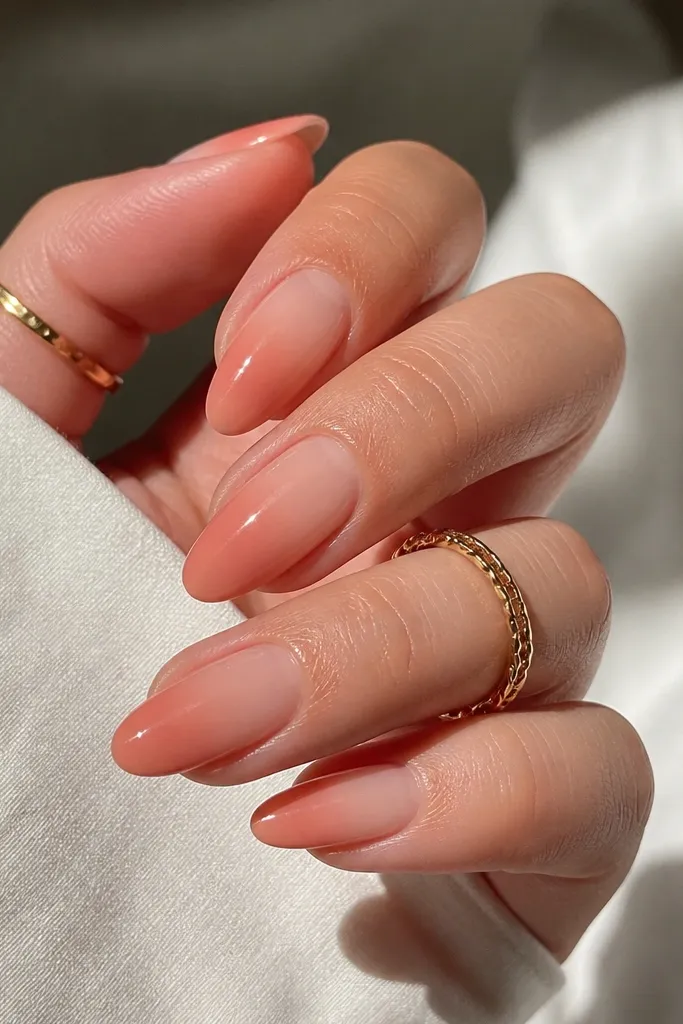
This one looks cozy because the jelly finish has that soft, glassy depth. The warm nude cuticle anchors the nail and makes the gradient feel intentional rather than messy. Dusty peach is the sweet spot - it reads summery in daylight but still feels snug because it's not neon. Almond shape loves gradients like this because the taper naturally blends the color. I've had this set on my nails when my hands look dry from sunscreen, and it still looks smooth because the jelly finish visually evens the tone.
Start with a warm nude base gel at the cuticle area only, extending about 2-3 mm down the nail, then cure. Mix your dusty peach jelly color and apply as a gradient by placing more at the tip and pulling the brush halfway toward the center - don't drag to the cuticle. Cure, then repeat with a second jelly layer to build opacity while keeping the fade. Clean the sidewalls with a small brush dipped in gel cleanser so you don't get a fuzzy edge. Seal with a glossy top coat and cure.
Editor's noteFor extra glow, use a top coat labeled "rubberized" or "glass" style - it makes jelly gradients look wet without looking thick.
Watch outDon't use a matte top coat - it kills the jelly effect and makes peach look flat.
3. Terracotta Micro-French On Almond Tips
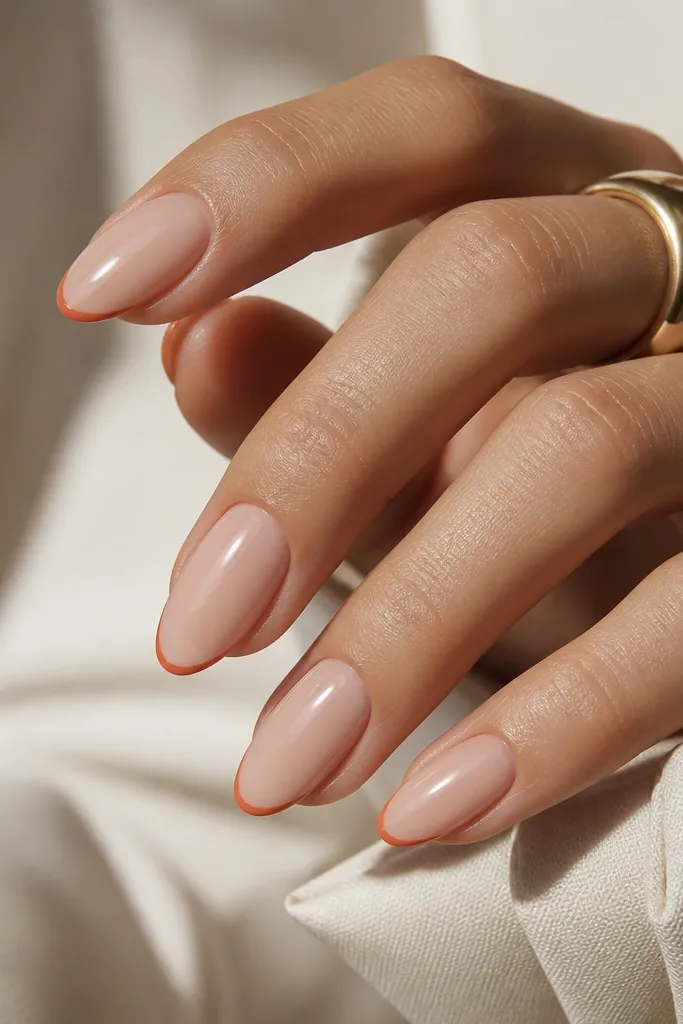
Micro-French is cozy warm because it keeps the nail airy while still giving you color at the tip. Terracotta reads like summer clay and looks good even when your tan fades. The sheer base matters - it should look like your nail but better, not opaque white. Almond nails make micro-French look longer and cleaner because the line can follow the natural taper. This style is also forgiving if your nail beds vary in length, since the base stays consistent.
Apply a sheer warm nude base gel in a thin coat, cure, then add a second for an even opacity. Use French tip guides or freehand with a striping brush to paint a terracotta line only about 0.5-1 mm wide at the tip. Keep the line centered and slightly curved to match the almond shape. Cure and then add a thin top coat, wiping the brush along the sides to keep the edges sharp. If you want extra warmth, add a tiny dot of gold chrome at the center of the French line on two accent nails.
Editor's noteUse terracotta with a hint of brown, not orange - it photographs warmer and less "sunburn."
Watch outSkip thick French lines; they make almond tips look stubby.
4. Honey Gold Shimmer Over Apricot Nude
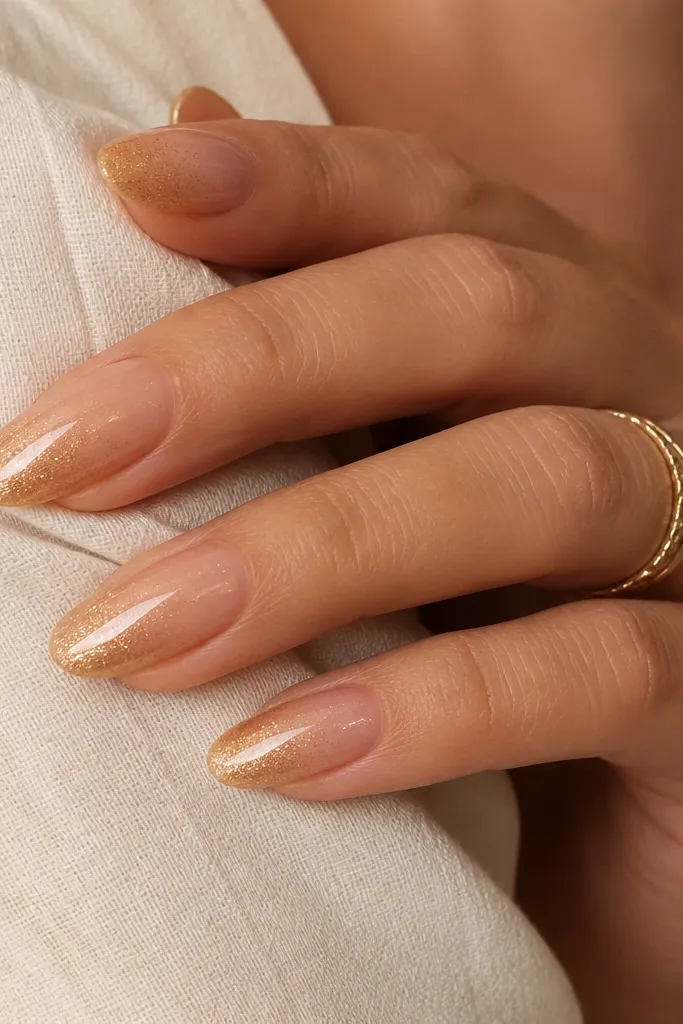
Honey gold shimmer looks cozy warm because it's not bright gold foil. The fine sparkle sits like skin glow instead of glitter flakes. Layering shimmer from mid-nail outward keeps the nail balanced - your cuticle stays soft and the tip catches light. This set works on fair skin and deeper skin because shimmer reflects your undertone. I like it for summer evenings because it makes your hands look done without feeling heavy.
Start with an apricot nude crème and cure. Apply a first sheer shimmer coat only from mid-nail to the tip, pressing the brush so the glitter lays flat, then cure. Add a second shimmer coat to deepen the tip and keep the gradient effect. Use a clean-up brush with gel cleanser to remove any stray shimmer at the sidewalls. Finish with a glossy top coat that fully seals the glitter so it doesn't snag.
Editor's noteIf your shimmer catches on fabric, add one extra thin top coat and cure longer on the free edge.
Watch outDon't use chunky glitter - almond tips snag and look messy fast.
5. Warm Chocolate Brown Gloss With Micro Peach Specks
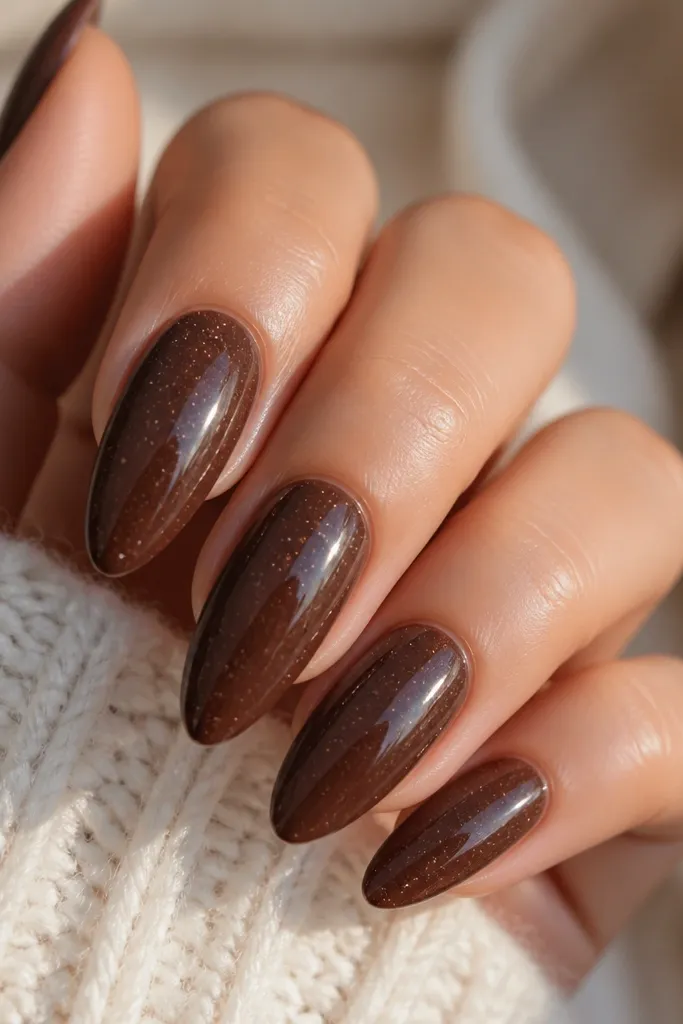
This look is cozy warm because chocolate brown is grounding, and the tiny peach specks add summer energy without turning it into a "fall" set. The glossy finish makes the brown look rich and smooth, not dull. Almond nails benefit from this because the specks are small enough to avoid visual clutter at the taper. It's flattering if you wear gold jewelry because warm browns and peach specks reflect the same warmth. I've worn it when my summer wardrobe is mostly light neutrals - it makes the hands look intentional.
Apply two thin coats of warm chocolate brown gel and cure between each. Keep the coats even and slightly thinner near the cuticle so the nail doesn't look bulky. For the specks, use a dotting tool or a small sponge to dab peach micro glitter or pigment into a loose scatter - focus on the center and tip, less near the cuticle. Cure once more and seal with a glossy top coat, making sure the free edge is fully coated. Clean around the cuticle line so specks don't smear.
Editor's noteUse peach pigment that's finely milled; it looks like natural freckles instead of glitter dust.
Watch outAvoid heavy speck coverage - too many dots make chocolate look dirty.
6. Apricot Rose Swirl Tips With Nude Base
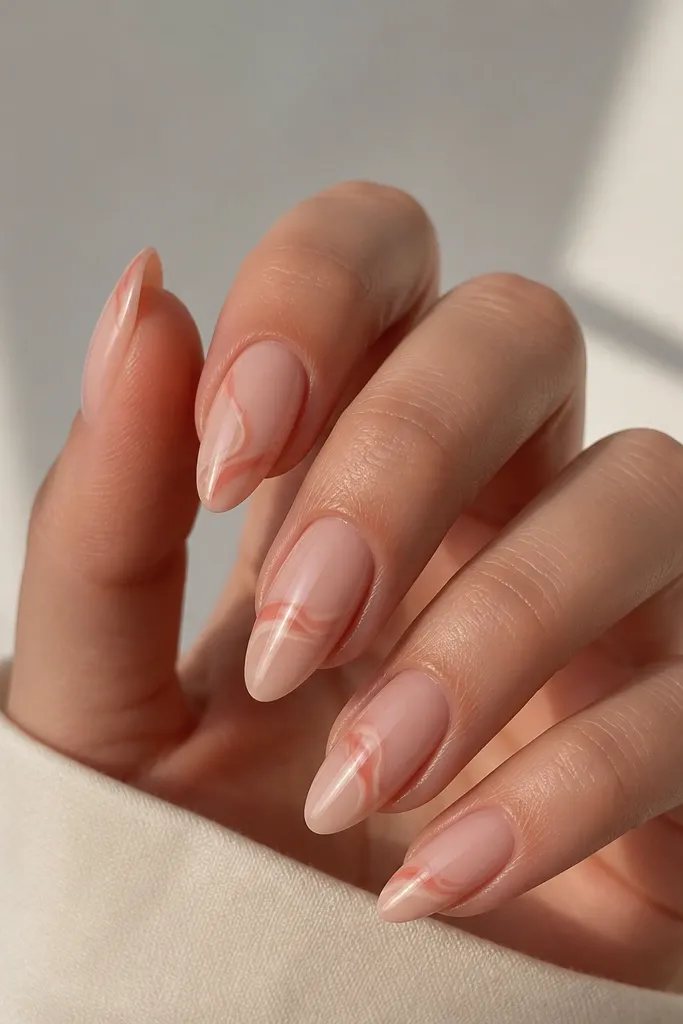
Swirls look cozy warm when they're thin and placed only on the tip. The nude base keeps it wearable, while the apricot rose swirls add movement that still feels soft. Almond nails are perfect for this because the tip area is where the swirl can taper and look graceful. This flatters hands that have longer fingers because it creates a visual curve rather than blocking the nail. I like this for brunch or casual work days because it looks artsy without being loud.
Start with a nude warm base gel and cure, then add a second coat for smooth coverage. Paint thin apricot rose lines at the tip, using a striping brush, and swirl inward about 2-3 mm. Keep the swirl lines consistent thickness so they don't look shaky. Cure and then add one more nude gel layer only if you need to smooth the swirl edges. Finish with glossy top coat and cap the tip carefully.
Editor's noteIf your brush is too thick, wipe most gel off on the palette - you want a line, not a blob.
Watch outDon't cover the whole nail in swirls; it makes almond tips look crowded.
7. Jelly Olive Nude With Warm Gold Half-Moons
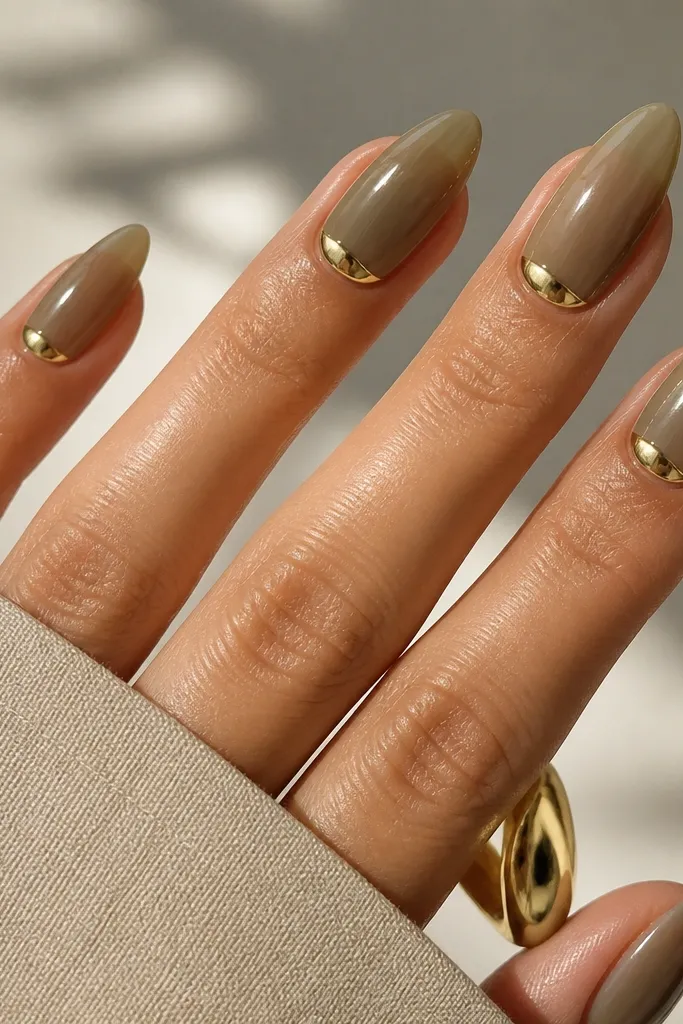
This set is cozy warm because olive nude sounds odd, but the trick is the undertone. You want an olive that leans warm (more khaki than gray) so it reads wearable in summer. The warm gold half-moons at the cuticle make the nail look "finished" and visually lift the nail bed. Almond shape loves half-moons because they follow the nail curve and keep attention near the base. It's flattering on medium to deep skin tones because the gold pops without looking harsh.
Apply a jelly olive nude in a thin coat and cure, then repeat for the right translucency. Use a half-moon stencil or freehand with a small flat brush to paint warm gold at the cuticle, leaving a tiny gap so it looks crisp. Cure again. If the gold looks too flat, add a second gold layer only inside the half-moon and cure. Seal with a glossy top coat, paying attention to the cuticle edge so it doesn't lift.
Editor's noteChoose gold that looks more champagne than yellow; it matches the warm olive better.
Watch outSkip cool gray-toned olive - it turns ashy on almond and makes hands look tired.
8. Peachy Beige Marble With Cinnamon Veins
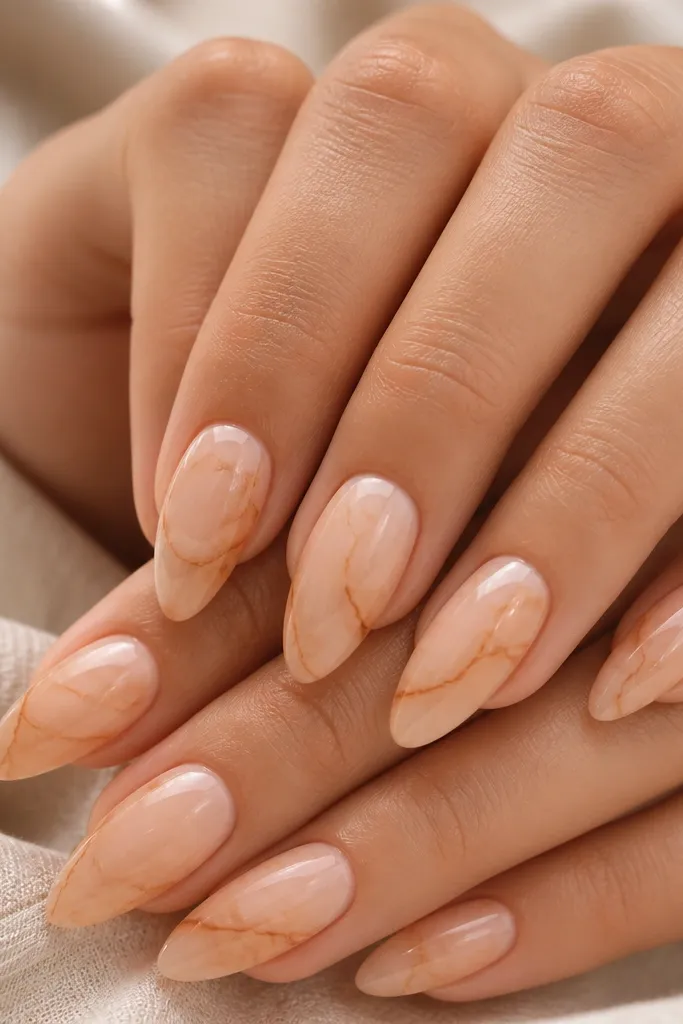
Marble nails feel cozy warm when the base is peachy beige and the veins are cinnamon, not black. The warmth keeps it summery, and the stone effect makes almond nails look longer. I like this for people who want art without tiny flowers everywhere - it reads sophisticated. It flatters light to medium skin tones because peachy beige blends with skin and the cinnamon veins add contrast. On deeper skin, it still works if the base has enough warmth and opacity.
Start with a peachy beige crème base and cure. For the marble, take a thin brush and drag cinnamon-brown gel in broken, vein-like lines, then soften the edges with a second light peach gel swipe around the veins. Cure after the pattern looks right. Add a thin clear or milky gel coat to smooth the surface if the veins feel raised. Finish with glossy top coat for that wet-stone look.
Editor's noteDo the marble on the nail while it's still tacky - the veins spread just enough to look natural.
Watch outDon't use thick black lines; it makes marble look like salon stickers.
9. Sunset Gradient From Apricot To Warm Pink
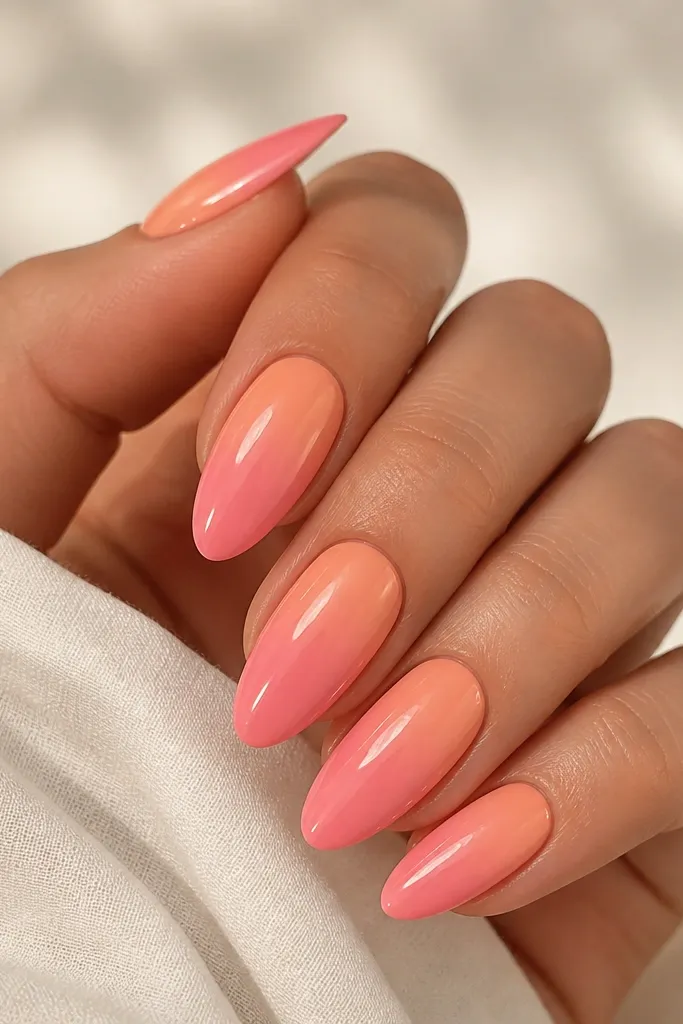
This is cozy warm because it mimics late afternoon light. Apricot to warm pink stays in the same family, so it doesn't look like two colors fighting. Almond shape helps the gradient look smooth because the taper gives you a natural blend zone. This one looks great on hands with short nail beds because the warm cuticle area makes the nail look taller. I've worn it to weddings when I wanted color that still looks classy in photos.
Apply an apricot nude base and cure. For the gradient, sponge or brush warm pink gel onto the tip area first, then pull it upward about two-thirds of the nail, leaving the cuticle apricot untouched. Cure and add a second gradient layer for richer pink at the tip. Use a clean-up brush to tidy the sidewalls and remove any pigment that spreads. Seal with a glossy top coat and cap the free edge.
Editor's noteIf you sponge, use a makeup sponge cut into a tiny wedge so the blend stays controlled on almond.
Watch outDon't overdo the pink - if the whole nail turns pink, it loses the sunset effect.
10. Warm Nude Base With Thin Terracotta Grid Lines
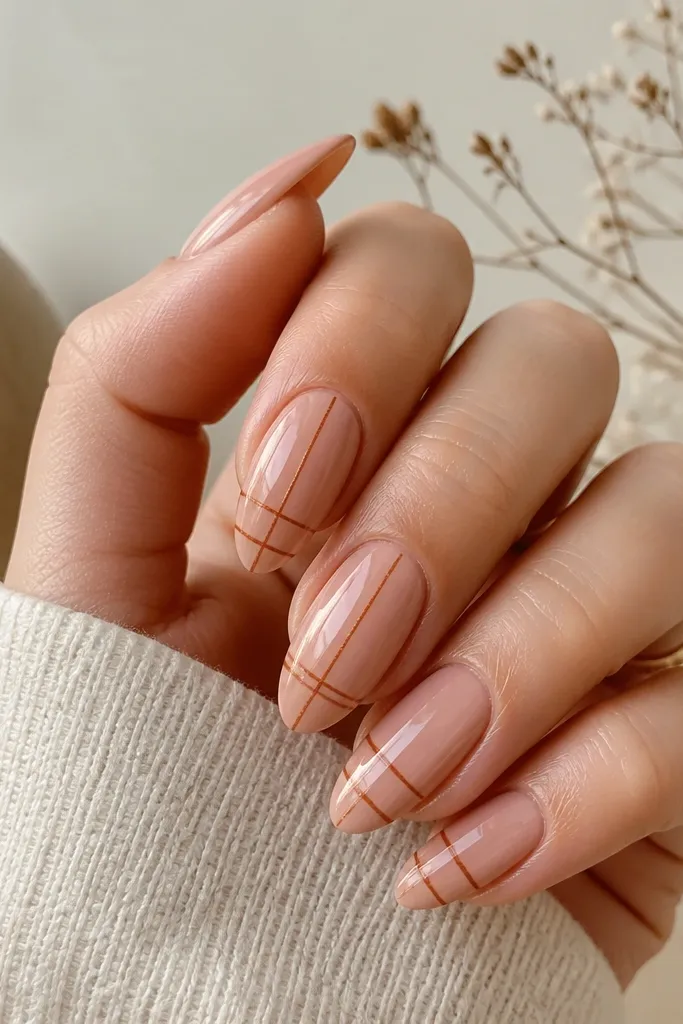
Grid lines look cozy warm when they're fine and spaced out, not bold. A warm nude base keeps it soft, while terracotta grid lines add a modern, airy feel. On almond nails, this pattern elongates the surface because the lines follow the nail's length. It works for casual days because it's graphic but still grounded in a nude. I like it when I wear simple outfits - the nails become the detail without screaming.
Start with a warm nude crème base and cure, then apply a second thin coat for smoothness. Use striping tape or a fine liner brush to draw vertical terracotta lines from mid-nail to near the tip, then cure if needed. Add horizontal lines crossing those vertically, spacing them so the grid cells stay small. Cure fully, then top coat with a glossy finish, making sure the pattern is sealed so it doesn't chip at the edges. For two accent nails, add a tiny gold dot at the intersection near the tip.
Editor's noteUse tape for straight lines - freehand grid lines usually wobble and look cheap fast.
Watch outSkip thick lines; they make the design feel like stickers.
11. Peach Cream Base With Bronze Foil Leaf Flicks
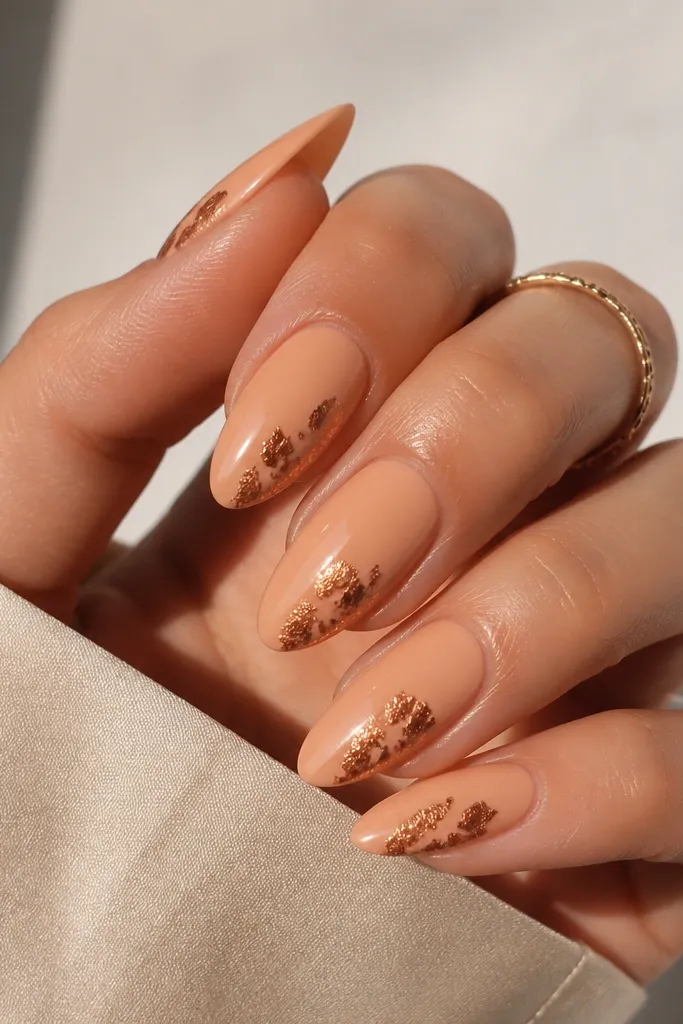
Bronze foil leaf flicks look cozy warm because they mimic dried leaves and sunlit metal. The peach cream base keeps everything soft and wearable. Foil leaf is best when it's not everywhere - one side placement makes it feel intentional and flattering. Almond nails show foil beautifully because the foil edges catch light along the curve. This set looks great with short-sleeve outfits and gold rings.
Apply a creamy peach base gel and cure, then do a second thin coat for opacity. Tear small pieces of bronze foil leaf and press them lightly onto one side of the nail, using gel tack or foil adhesive. Pat gently so the edges stick without covering the whole nail. Cure and then seal with a glossy top coat in thin layers so you don't trap bubbles. If foil texture shows through, add one more thin top coat and cure longer on the free edge.
Editor's noteUse a small silicone tool to press foil - it gives cleaner edges than fingers.
Watch outDon't stack foil layers - it turns bumpy and can lift at the tip.
12. Warm Pink Nude With Cinnamon Ombré Fade
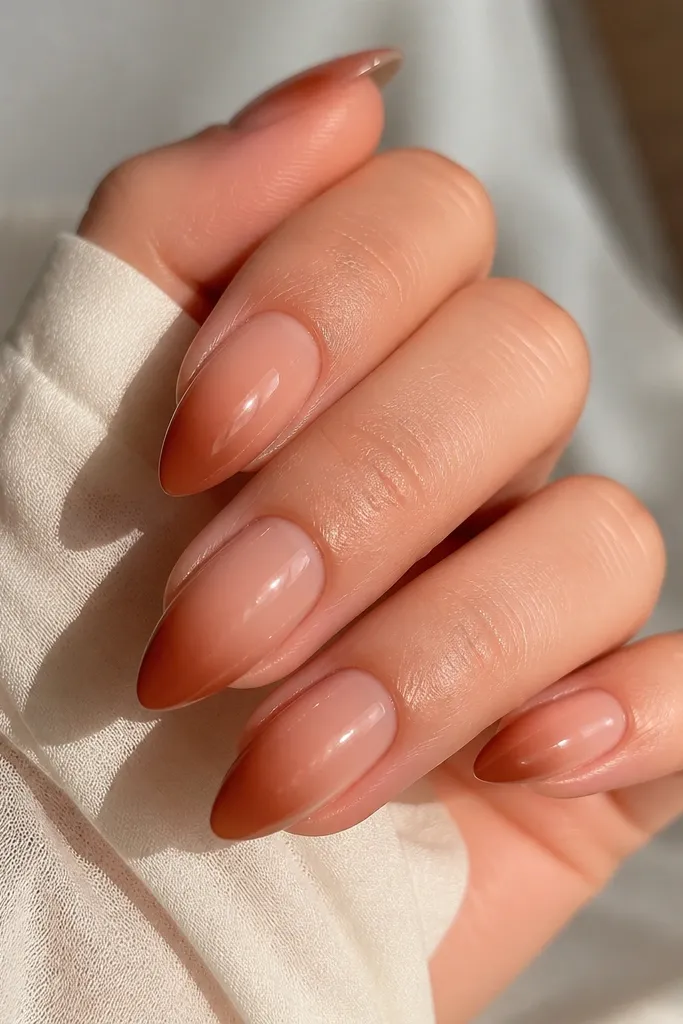
Cinnamon ombré feels cozy warm because it reads like spiced latte tones. The warm pink nude base keeps the overall look summery and fresh, while the cinnamon fade adds depth at the tip. Almond shape is perfect because ombré naturally follows the nail's tapered line. This one flatters hands with uneven nail lengths since the fade hides small differences. I wear it when I want color but I don't want to think about detailed art.
Start with a warm pink nude crème base and cure. For the ombré, sponge cinnamon-brown gel at the tip only and blend upward about one-third of the nail. Cure, then repeat with a second layer to deepen the tip while keeping the middle translucent. Use a brush dipped in gel cleanser to smooth the blend line if it looks rough. Finish with glossy top coat and cap the tip to lock the ombré edge.
Editor's noteBlend on the nail - don't build the ombré too high in one go or it turns muddy.
Watch outAvoid gray-brown cinnamon - it makes the fade look dirty.
13. Apricot Nude With Micro Daisy Accent On Ring Finger
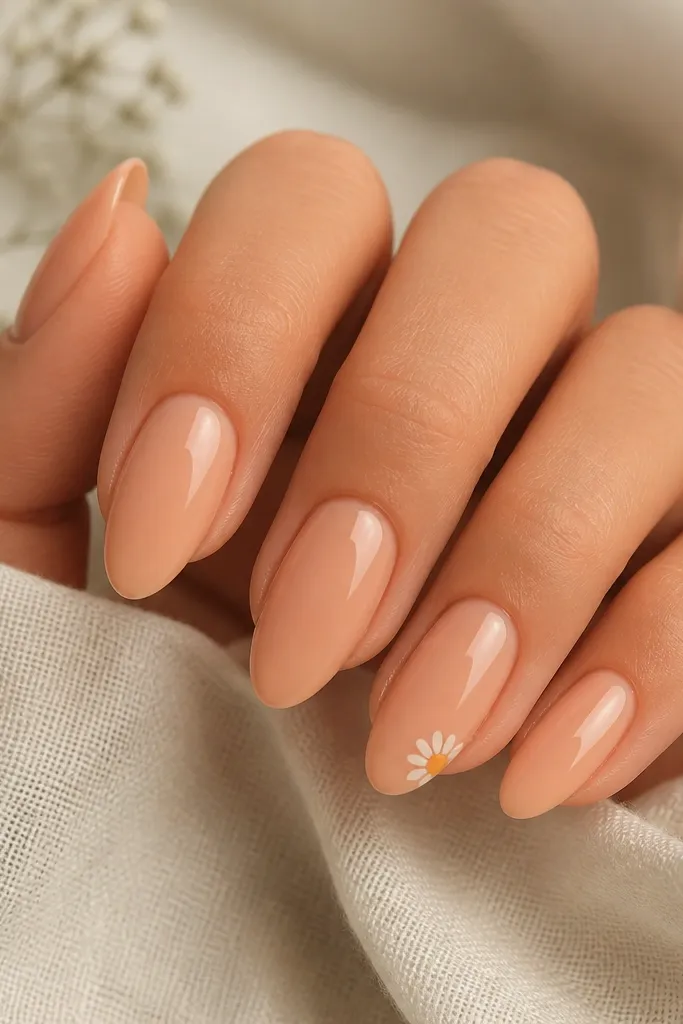
Micro daisies are cozy warm when the rest of the set stays clean. Apricot nude keeps the summer tone soft, and the daisy adds that friendly sunshine vibe without taking over every nail. Almond shape works because there's enough tip space for the daisy to sit neatly. This flatters hands with short to medium nails since the design reads small and tidy. I like it for everyday wear because it grows out without looking messy.
Paint all nails with apricot nude crème gel and cure, then add a second coat for full coverage. On the ring finger only, place a small warm yellow dot where you want the daisy center, cure. Using a dotting tool or nail art brush, add 5 tiny white petals around the center, keeping the petals short so they don't spread. Cure and then top coat over everything, sealing the petals so they don't catch. Clean the cuticle edge so the set looks crisp as it grows.
Editor's noteUse a toothpick for tiny petals - a nail art brush can make them too thick.
14. Warm Nude With Peachy Rose Dot Constellation
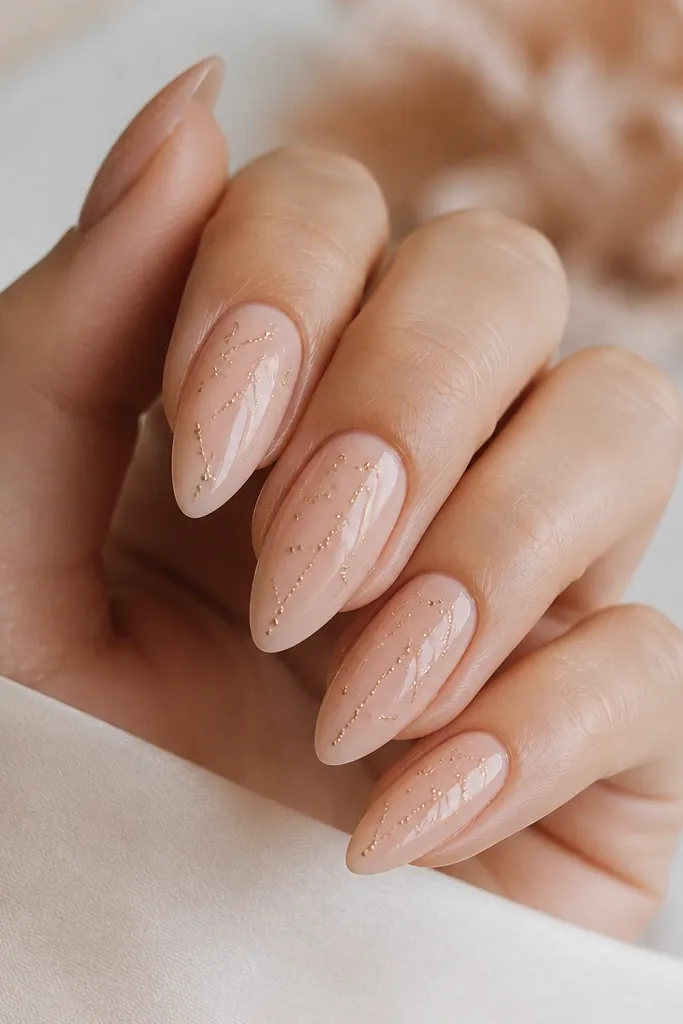
Dot constellations feel cozy warm because they're playful but controlled. Warm nude is the calm base, and peachy rose dots add that summer blush color you can wear with anything. Almond nails look extra long with dot placement because dots draw the eye down the nail. This style is flattering for almost every skin tone because the nude adapts, then the rose pops. I've done this when I wanted something cute but didn't want to commit to a full design on every nail.
Apply a warm nude base gel and cure, then add a second coat for even coverage. Dip a dotting tool into peachy rose gel or pigment and place 6-10 tiny dots per nail, focusing most dots in the center and fewer near the tip. Keep the dot size consistent; vary only placement, not size. Cure and then apply a glossy top coat in two thin layers so the dots feel smooth instead of raised. If your dots smear, wipe the dotting tool tip on a lint-free wipe before each dot.
Editor's noteMake one accent nail with a slightly larger cluster - it makes the set look designed, not random.
Watch outDon't put dots right on the cuticle line - it makes the growth line look messy.
15. Terracotta Half-Shadow Under the Tip
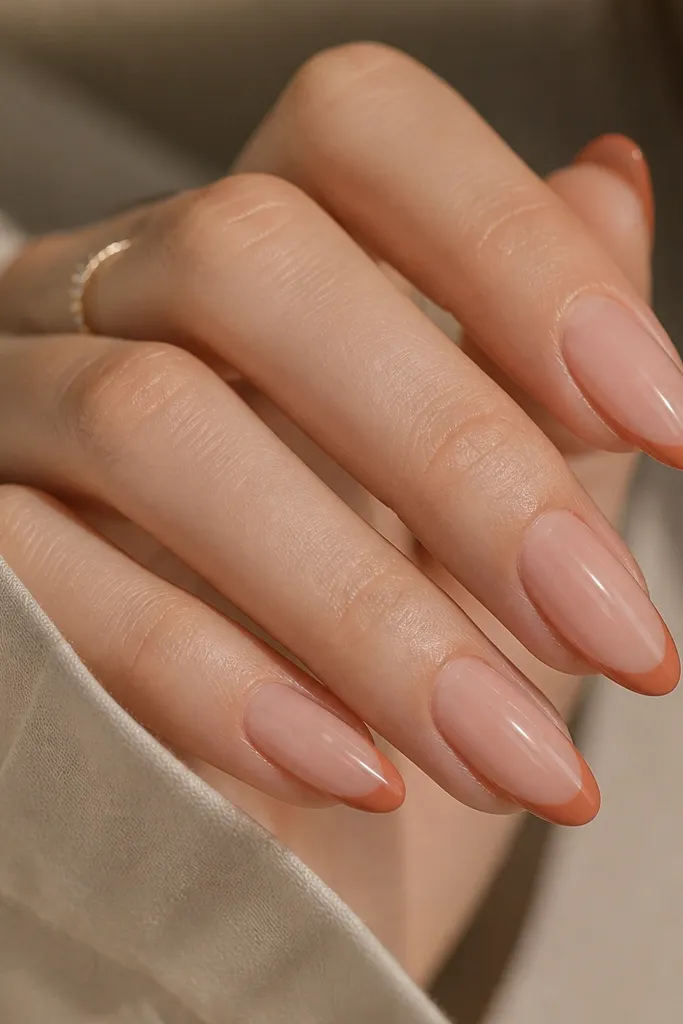
A half-shadow under the tip looks cozy warm because it's color concentrated where almond tips naturally taper. Instead of a hard French line, you get a soft atmospheric tint that looks polished even with minimal art. Terracotta keeps it summer-leaning, and the sheer nude base keeps it light. Almond nails love this because the shadow follows the nail curve and makes the tip look fuller. I wear this when I don't want sharp lines but still want the nails to look done.
Start with a sheer warm nude gel base and cure, then apply a second thin coat for coverage. For the shadow, load terracotta gel on a small sponge or makeup wedge and dab it starting just below the free edge, blending down about 1-2 mm. Cure and add another dab layer if you want deeper color. Use a clean brush to blur the bottom edge so it fades smoothly. Seal with glossy top coat, making sure the free edge is fully capped.
Editor's noteUse a sponge - it creates the soft fade that makes this design look expensive.
Watch outDon't make it opaque - a solid band looks like you painted over a chip.
16. Warm Plum-Brown Creme With Peachy Chrome Edge
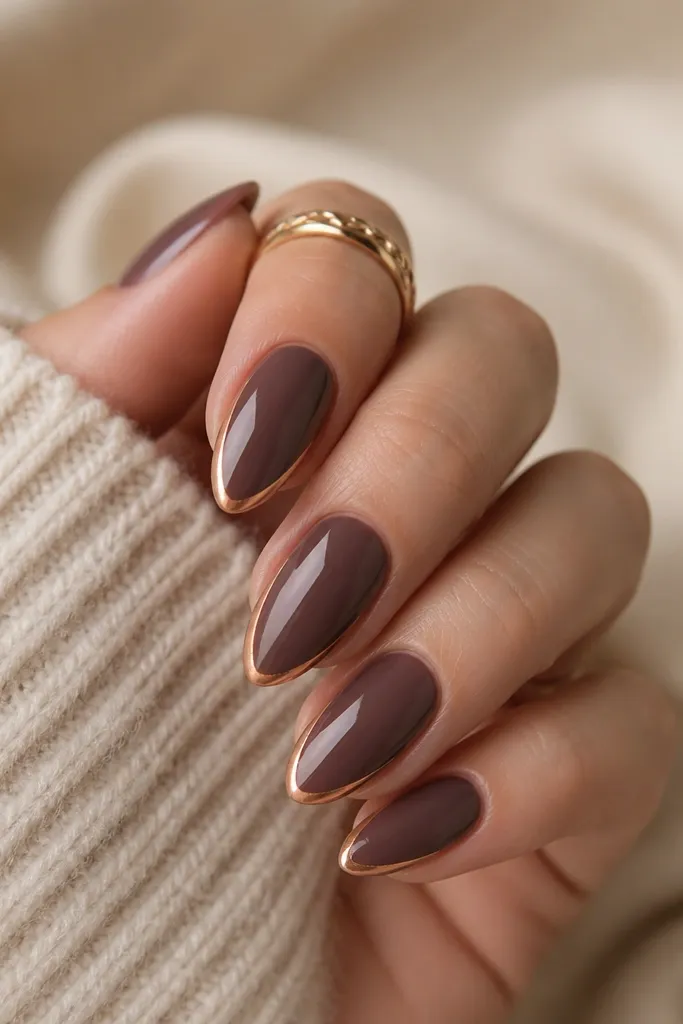
This is cozy warm because it combines a rich plum-brown with a peachy chrome edge that feels like late sunset. The chrome is only at the edge, so it reads sleek instead of flashy. Almond nails look flattering in darker cremes because the taper makes the color look intentional, not heavy. This set works great for deeper skin tones and also looks beautiful on fair skin when the plum-brown is warm, not berry-cool. I wore it to a summer night event and got compliments because it looked smooth and not overly decorated.
Apply two thin coats of warm plum-brown crème gel and cure. Let the surface fully level between coats so the chrome line stays clean. With a liner brush, paint a thin crescent of peachy chrome gel along the outer edge near the tip, about 0.5-1 mm thick. Cure, then rub a tiny amount of peach chrome powder over the wet line if your system supports it. Seal with glossy top coat and cap the free edge so the chrome doesn't lift.
Editor's noteKeep the chrome line only on the outer edge, not across the entire tip - that's where it stays classy.
Watch outSkip icy silver chrome - it clashes with the cozy warm plum.
17. Apricot Nude Base With Bronze Thread Line Art
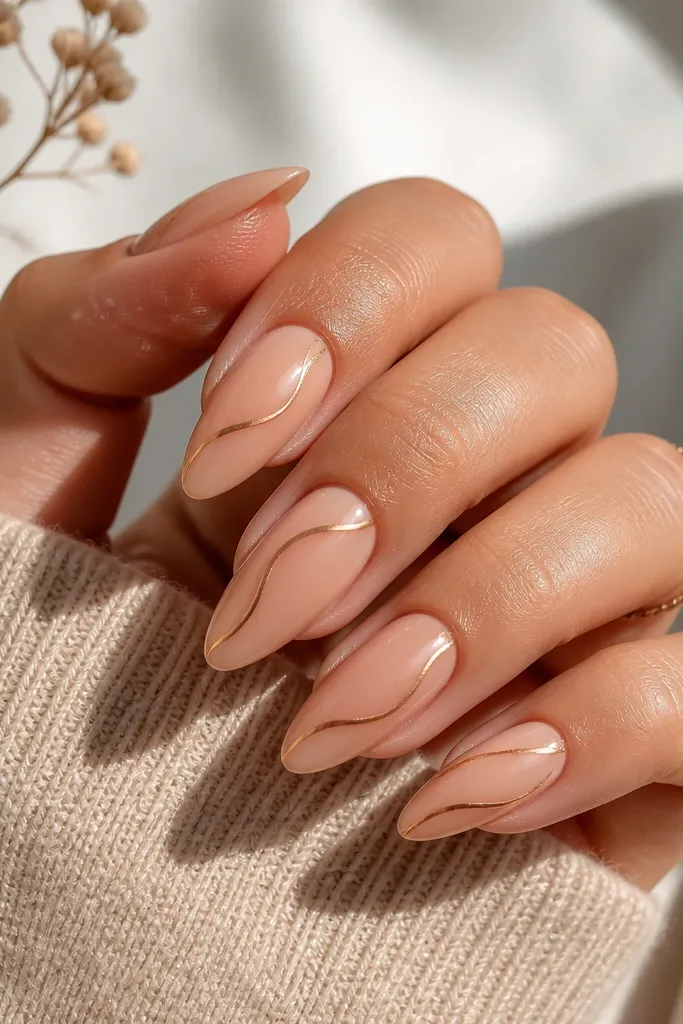
Thread line art looks cozy warm when it's metallic bronze and the base is apricot nude. The bronze line gives a hand-drawn feel, and the nude base keeps it airy. Almond nails suit diagonal lines because they follow the natural length and keep attention moving. This is flattering when you want a set that looks artistic but still wearable at work. I like it because it doesn't matter if your nails are long or slightly grown out - the line art stays neat.
Paint apricot nude crème on all nails and cure, then add a second coat for a smooth, even surface. Use a fine liner brush and bronze metallic gel to draw one continuous diagonal line starting around the middle and pulling it toward the tip. Add one small curve or loop near the tip so it looks like thread rather than a straight scratch. Cure and then apply glossy top coat, keeping it thin so the metallic line doesn't blur. Clean the sidewalls carefully so metallic doesn't smear.
Editor's noteIf your line looks thick, wipe your brush on a lint-free wipe and reload less product.
Watch outDon't draw multiple dense lines - three or four makes it look messy quickly.
18. Warm Beige Crème With Tiny Peach Flame Tips
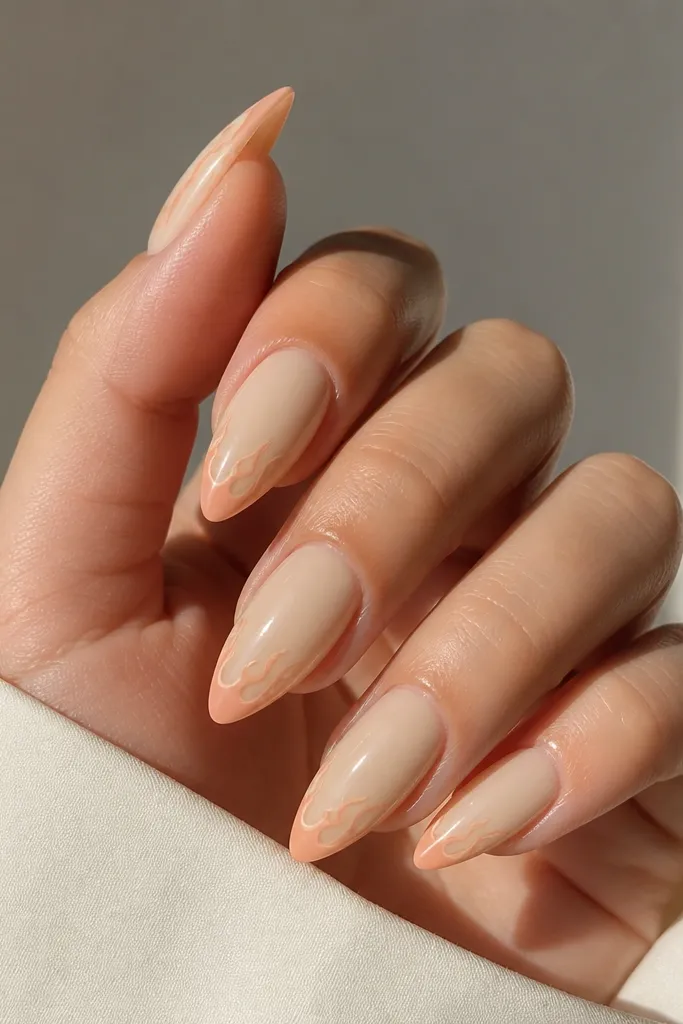
Flame tips feel cozy warm when they're small and peach-toned, not fiery red. A warm beige crème base keeps the overall set soft and neutral, which makes the flame detail feel playful instead of aggressive. Almond nails make flame tips look like stylized summer heat without covering the whole nail. It flatters hands that need a bit of visual structure because the flame shape focuses attention at the tip. I wore this on a vacation day and it held up well because the detail stays on the free edge as it grows.
Apply warm beige crème gel and cure, then add a second thin coat for full coverage. On each nail, paint a tiny flame at the tip: start with a peach oval shape at the center, then taper two points slightly left and right. Outline lightly with a slightly deeper peach or terracotta gel if you want definition, then cure. Keep the flame height under 2 mm so it stays delicate. Finish with glossy top coat and cap the tip carefully so the flame edges don't lift.
Editor's noteUse a gel that's slightly thicker for flame fills so the shape stays crisp.
Watch outAvoid big flames that reach too far down the nail - it overwhelms almond taper.
19. Creamy Cinnamon Nude With Soft Rosey Marble Accent
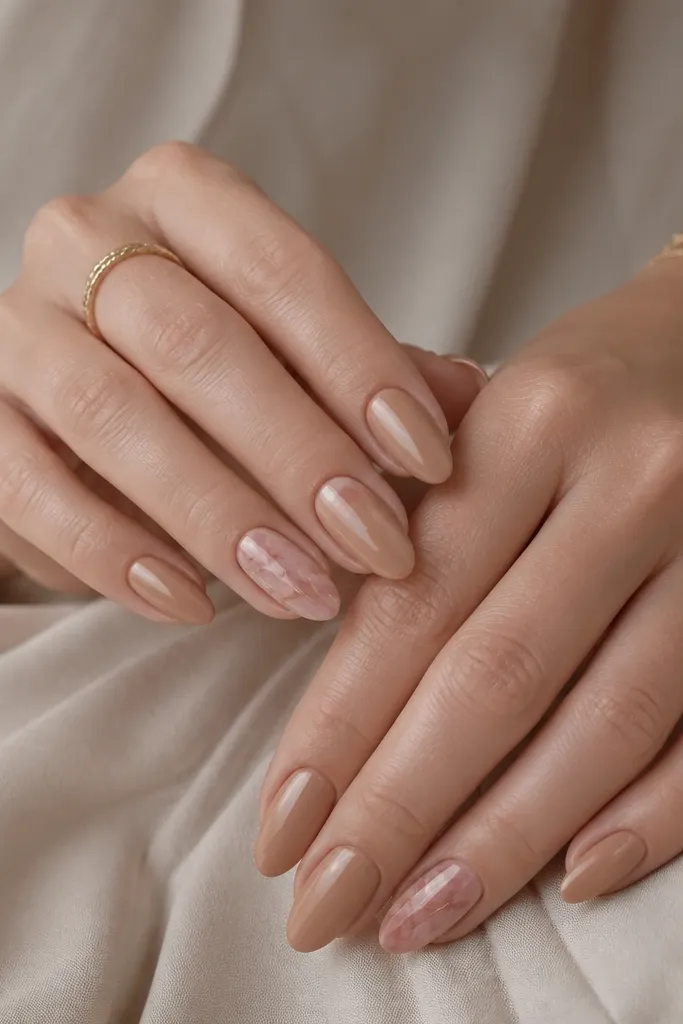
This set is cozy warm because it gives you a calm base first, then a gentle marble accent that looks like warm stone. Cinnamon nude makes almond nails look tidy and healthy, even when your cuticles need a touch-up. The rosy marble patch keeps it summer-friendly without going full floral. I like it for days when you want something different but still easy to wear with casual outfits. It flatters most undertones because cinnamon nude sits between beige and brown, so it blends nicely.
Paint all nails creamy cinnamon nude and cure, then add a second thin coat. Choose two accent nails and apply a light rosy gel wash in a patch from mid-nail to tip, leaving edges slightly irregular. Drag a thin brush through the rosy patch with a deeper rose-cinnamon gel to create faint veining, then cure. Add a thin clear or milky gel coat over the accent to smooth the marble surface. Finish with glossy top coat over all nails and cap the free edge on every nail.
Editor's noteKeep the marble veining faint - heavy contrast makes marble look harsh on almond.
Watch outDon't marble all ten nails; the set starts to feel busy fast.
20. Peachy Nude With Warm Pink Side-Swoop Lines
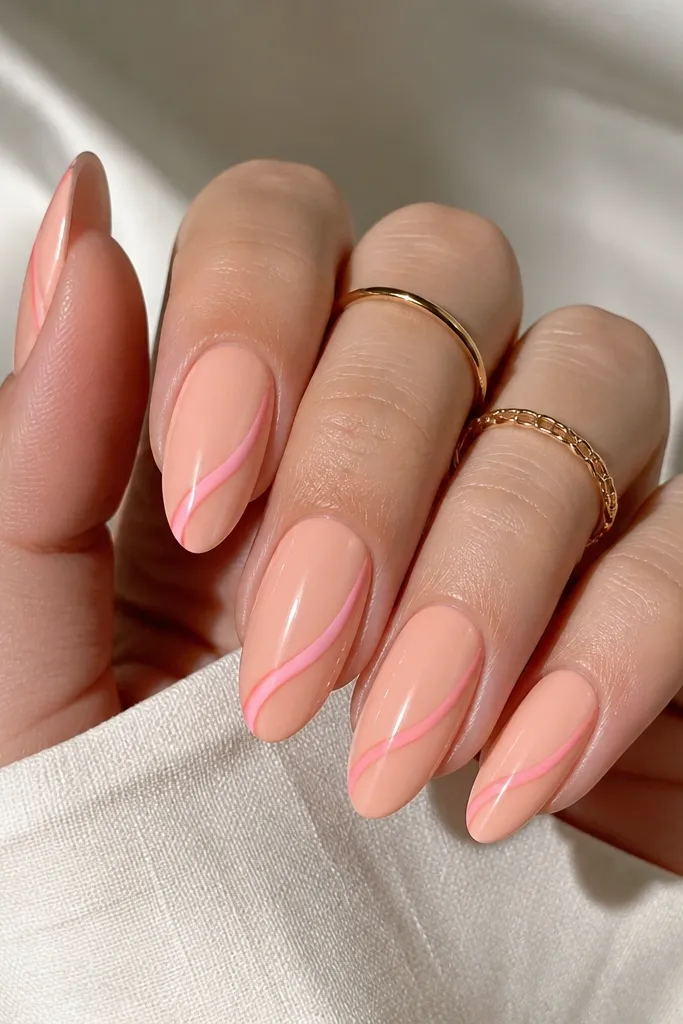
Side-swoop lines look cozy warm because they guide the eye along the nail curve. A peachy nude base keeps the look soft, and warm pink lines add a gentle pop that still feels summery. Almond nails look longer with this because the line sits to one side instead of crossing the whole nail. This is flattering for hands that look better with diagonal details, especially if you have wide nail beds. I wore this with a plain white dress and it looked intentional without needing extra jewelry.
Apply peachy nude base gel and cure twice for opacity. With a striping brush, draw a thin warm pink line starting around mid-nail on the right or left side - pick one side for consistency. Swoop the line toward the tip and taper it off before the free edge so it doesn't look like a stripe. Cure and add a second line layer only if you need more coverage. Seal with glossy top coat, keeping it thin so the line stays crisp.
Editor's noteUse one consistent direction for every nail so it looks like a planned set, not random art.
Watch outDon't let the line touch the cuticle - it makes the nail look uneven.