
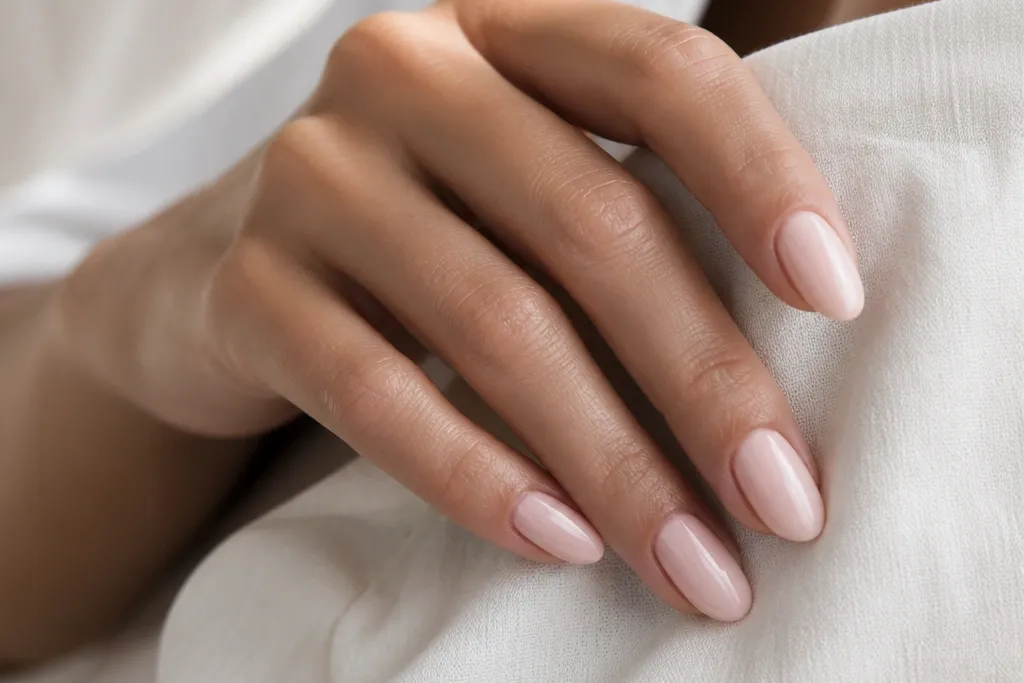
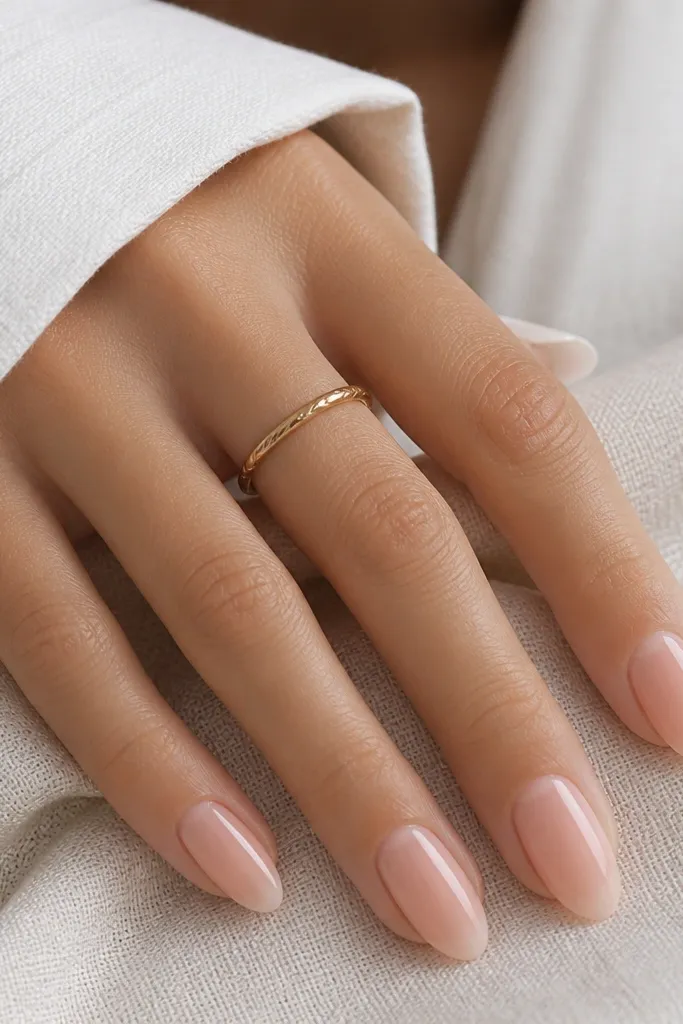
1. Butter Yellow Micro-French on Almond
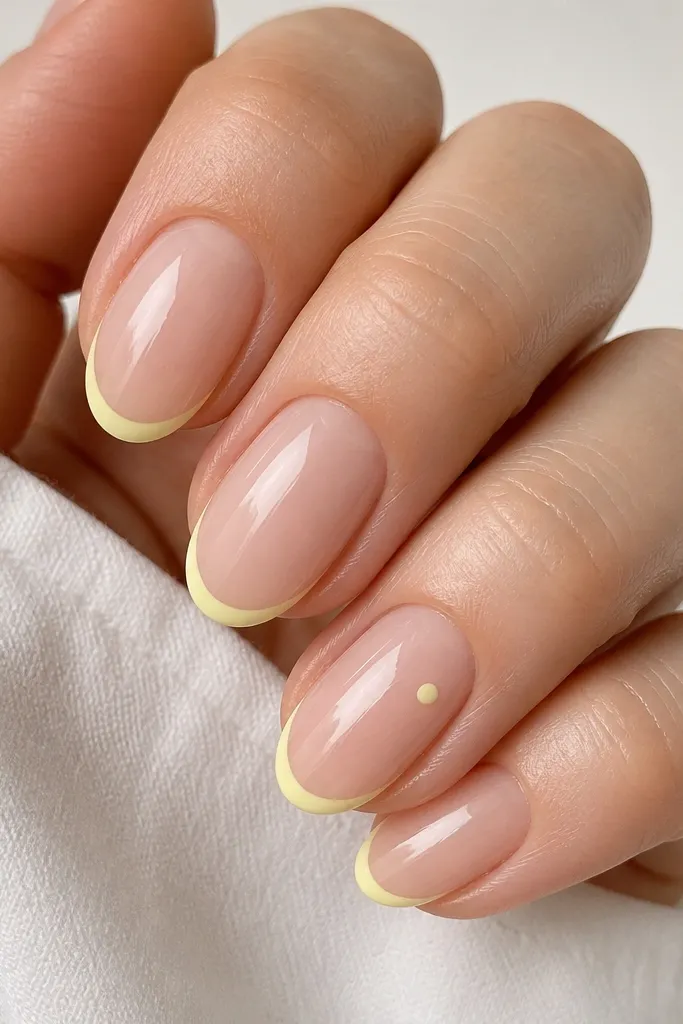
This look is my go-to when I want “summer nails almond year round” without going full neon. The sheer nude base (a milky pink or skin-tone jelly) keeps the almond shape looking natural and lengthening. The butter yellow French line is thin enough that it reads classy, not school-summer. I see it flatter fair to medium skin tones especially well, because the yellow stays soft against warm undertones. Wear it to work, then swap into weekend mode by adding a single tiny dot of gold on the ring finger.
Editor's noteIf butter yellow stains your brush, clean it with gel cleanser right after painting the line — don’t wait until it’s cured.
Start by filing your almond shape and pushing back cuticles, then apply a sheer nude base gel or polish in two thin coats. Cure each coat if you use gel. Next, paint a micro French line with a fine striping brush, keeping it about 1-2 mm from the tip edge — thin lines look more expensive on almond. Add one tiny dot of gold chrome or gold polish on the ring finger, centered under the French line. Finish with a glossy top coat and cap the free edge so the line doesn’t chip first.
Watch outAvoid a thick French band; it makes almond tips look stubby and cheap.
2. Sea Glass Nude with One Turquoise Side Stripe
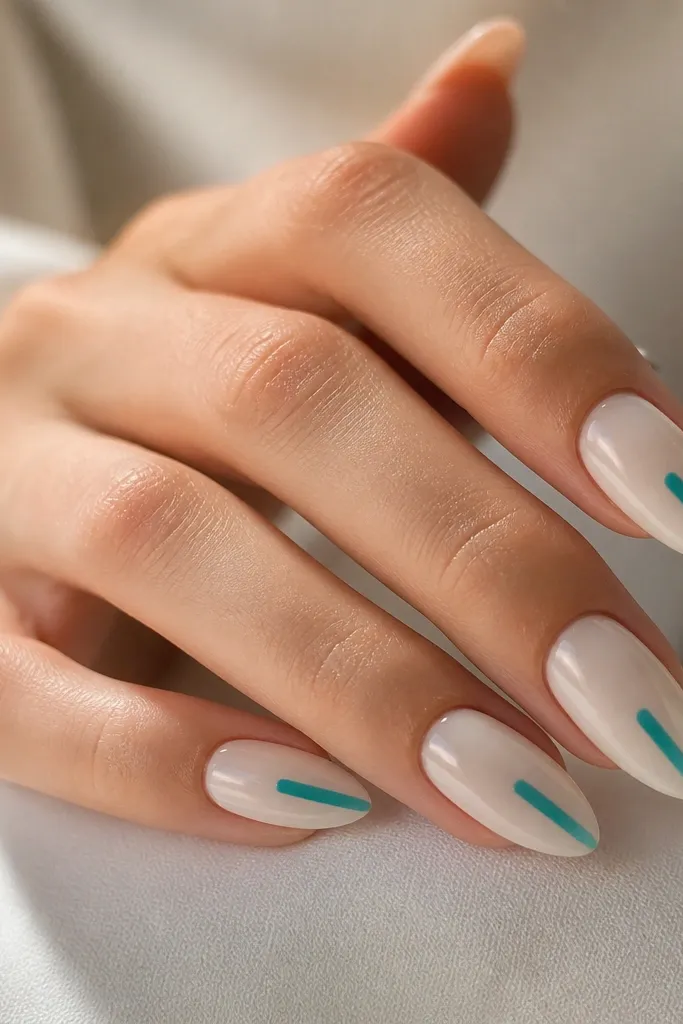
This is the “summer but grown-up” manicure. The sea-glass nude base is a pale, slightly cool pink-beige with a faint green cast, so it works in winter too. The turquoise stripe is placed on one side, which makes the nail look slimmer and longer — that almond shape does more work here. I like it on medium and olive skin because the turquoise pops without screaming. It also looks great for short almond sets because the stripe gives a clean vertical focus.
Editor's noteUse a liner brush with a short bristle length; long brushes drag and make the stripe uneven.
Apply a milky sea-glass nude base in two thin layers, keeping the center slightly more opaque than the edges. Cure, then use striping tape or a steady freehand to place a thin turquoise stripe on the left or right side of the nail. Paint the stripe with a gel turquoise or opaque acrylic paint, then cure again. Leave the cuticle area clean — don’t flood under the skin line. Seal with glossy top coat, cap the tip, and wipe the tacky layer if your top coat requires it.
Watch outDon’t put the stripe dead-center; center stripes make nails look wider.
3. Peach Jelly Base with Gold Foil Corner
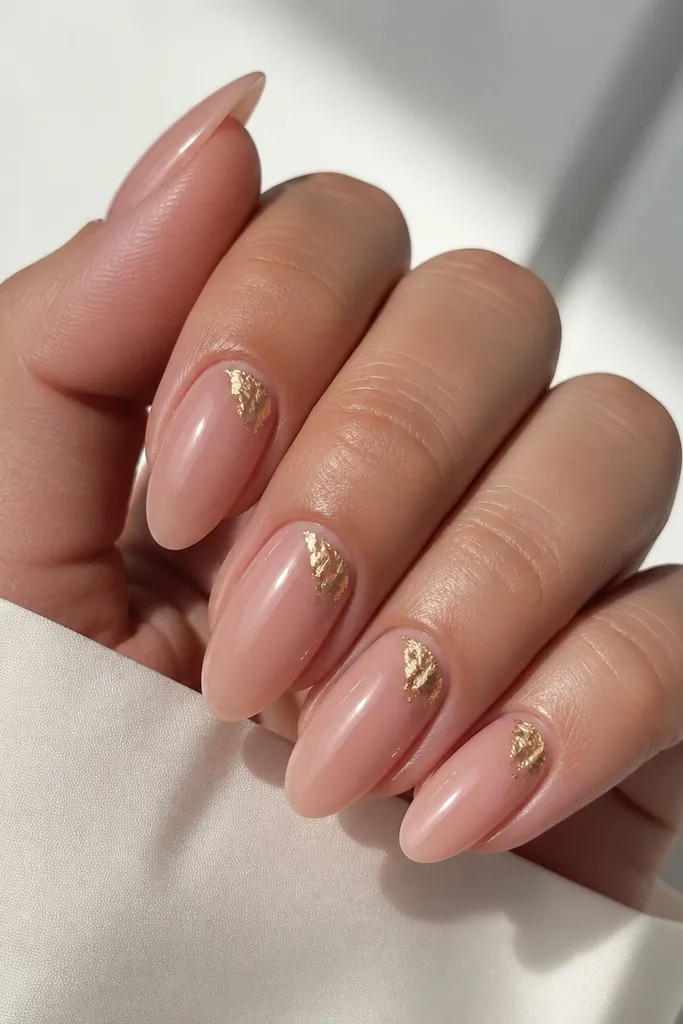
This one looks expensive because foil looks like jewelry, even when the rest is simple. The peach jelly base is forgiving and flattering since it mimics a healthy nail color — it works on fair, warm, and deeper skin tones. The gold foil corner sits near the tip but stays off the center, so it adds sparkle without taking over. I wear it year-round because peach jelly is soft and gold makes it feel like “evening summer” instead of beach summer. It’s also perfect if you hate detailed nail art — the foil does the work.
Start with a peach jelly polish or gel in two thin coats. Cure fully, then use tweezers to place small pieces of gold foil in the upper outer corner, leaving a tiny negative gap so it doesn’t look messy. Press lightly with a silicone tool, then seal with one careful layer of top coat. If the foil lifts, add a thin gel layer over just that corner and cure. Finish with a final glossy top coat to smooth the edges.
Trim foil pieces into smaller triangles; tiny shapes sit cleaner on almond tips.
Don’t cover foil with thick top coat on the first pass — it turns bumpy.
4. White Cloud Swirl on Nude Almond
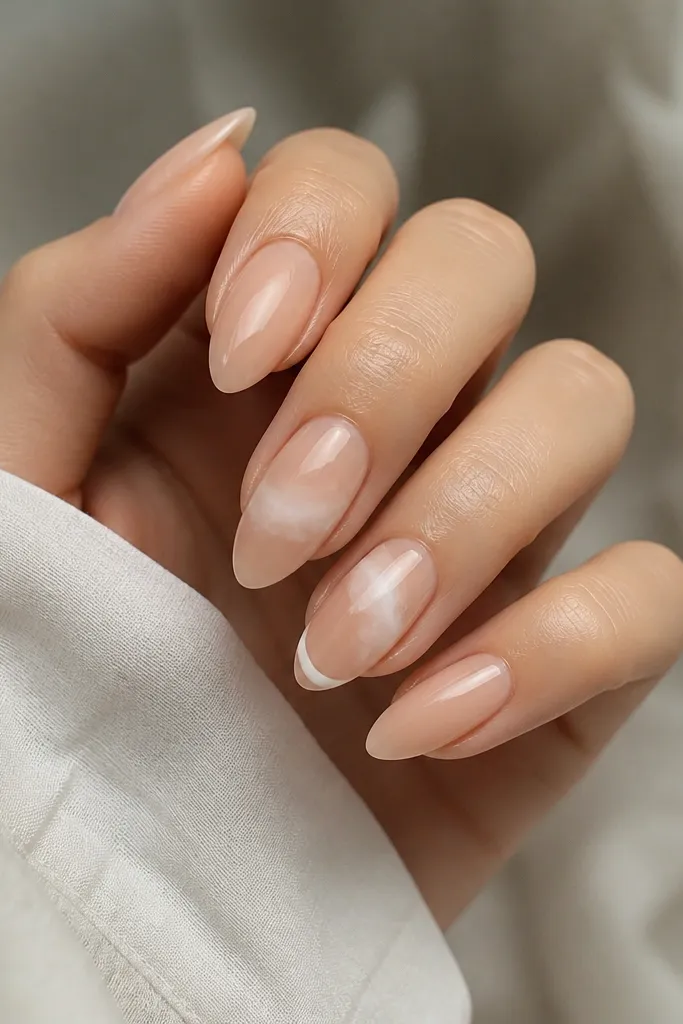
Cloud swirls make almond nails look airy and fresh even when you’re not doing bright colors. The nude base keeps it wearable, and the white swirl is semi-transparent so it reads like watercolor. I do this on my nails when I want summer vibes but I’m wearing neutrals — it looks clean with jeans and a tank, and it still works with sweaters. Fair skin sees the white more vividly, while deeper skin tones benefit from a slightly warm nude base so the white doesn’t look stark. The swirl placement gives movement without covering the whole nail.
Paint a nude base in two thin coats and cure. With a dotting tool or fine liner brush, dab a few wispy white strokes in a curved path near the mid-nail — keep it loose, not sharp. Add a smaller second curve near the tip on one or two nails only. Cure, then apply a glossy top coat carefully around the swirl to avoid smearing. If your white looks too opaque, mix white with clear gel or use a slightly translucent white polish next time.
Practice the swirl on a scrap nail or paper first; cloud shapes look right when they’re slightly irregular.
Avoid full coverage white swirls across every nail; it turns into a busy sticker look.
5. Rose Pink Almond with Tiny Gem Teardrops
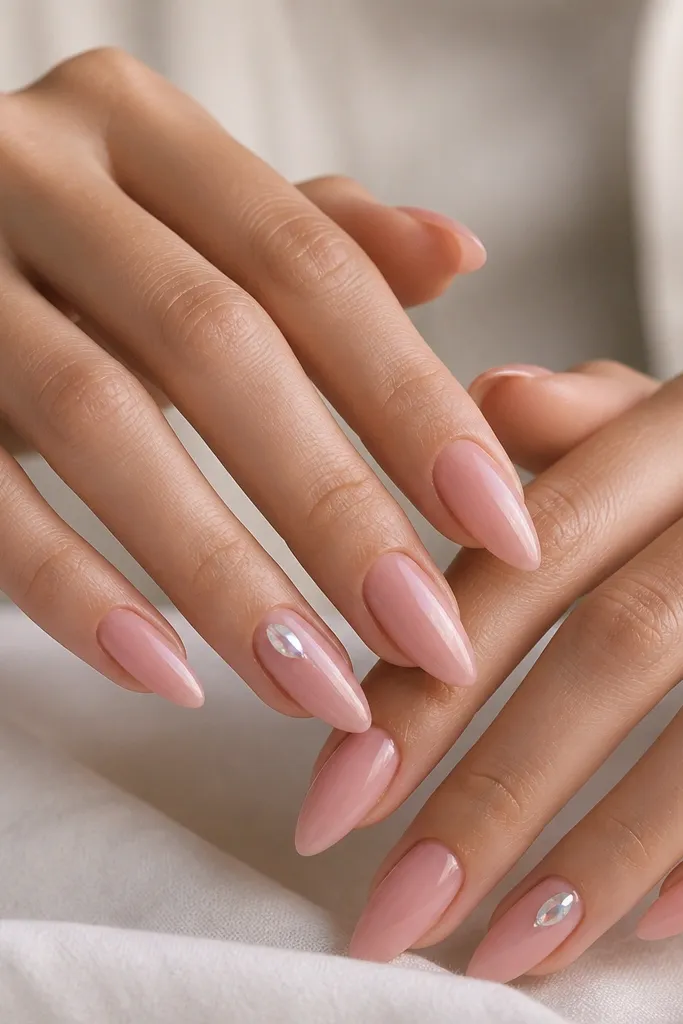
This is “cheap glam” that still looks like effort. The rose pink polish is flattering because it’s close to a natural flush on most skin tones. Tiny teardrop gems add dimension without turning your nails into a craft project. I like placing them diagonally because it elongates the nail visually, which pairs perfectly with almond tips. It’s also a great option for events because the sparkle reads at a distance, not just up close. You can keep the rest of the set clean and still get compliments.
Editor's noteUse matte top coat only on the base, then keep gems glossy; it makes the gems pop more.
Apply a rose pink base gel or polish in two thin layers and cure. Use a small dot of clear gel or gem glue where you want the gems, then place one teardrop gem close to the cuticle line on a diagonal. Add a second smaller gem below it, leaving a tiny gap so it doesn’t look crowded. Cure if using gel, then seal with a thin top coat layer over the gems — press gently so the edges don’t snag. Finish with a final glossy top coat for a smooth surface.
Watch outDon’t glue gems too close to the skin crease; they lift faster there.
6. Tangerine Half-Moon with Clear Negative Space
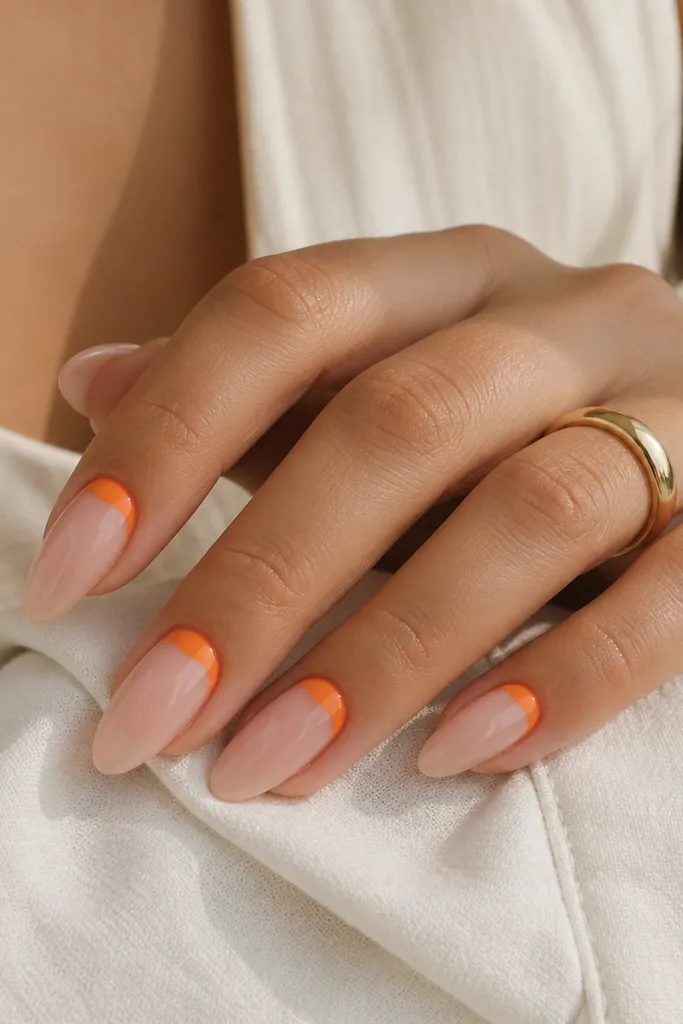
Half-moons are the quickest way to make a manicure feel designed, not random. Keeping negative space at the center makes the almond shape look longer and cleaner, which matters when you want Summer Nails Almond year round. Tangerine is bright, but the cuticle-only placement makes it feel like a detail, not a full-color commitment. I like this on fair to deep skin tones because the tangerine half-moon reads like warm jewelry. It also hides growth better than full coverage because the negative space stays consistent as your nail grows.
Editor's noteUse a makeup sponge to soften the base around the half-moon edge for a more seamless blend.
Start with a clear base or sheer nude jelly so your cuticle area looks natural. Paint the tangerine half-moon using a curved stencil or freehand with a small brush, keeping the arc about 1-2 mm from the cuticle edge. Cure, then add one thin top coat layer to seal the edges of the half-moon. If you want extra crisp lines, do a second micro layer only on the arc and cure again. Finish with glossy top coat and cap the free edge.
Watch outAvoid a half-moon that bleeds into the center; it should stay crisp and small.
7. Mint French Tips with Nude Base
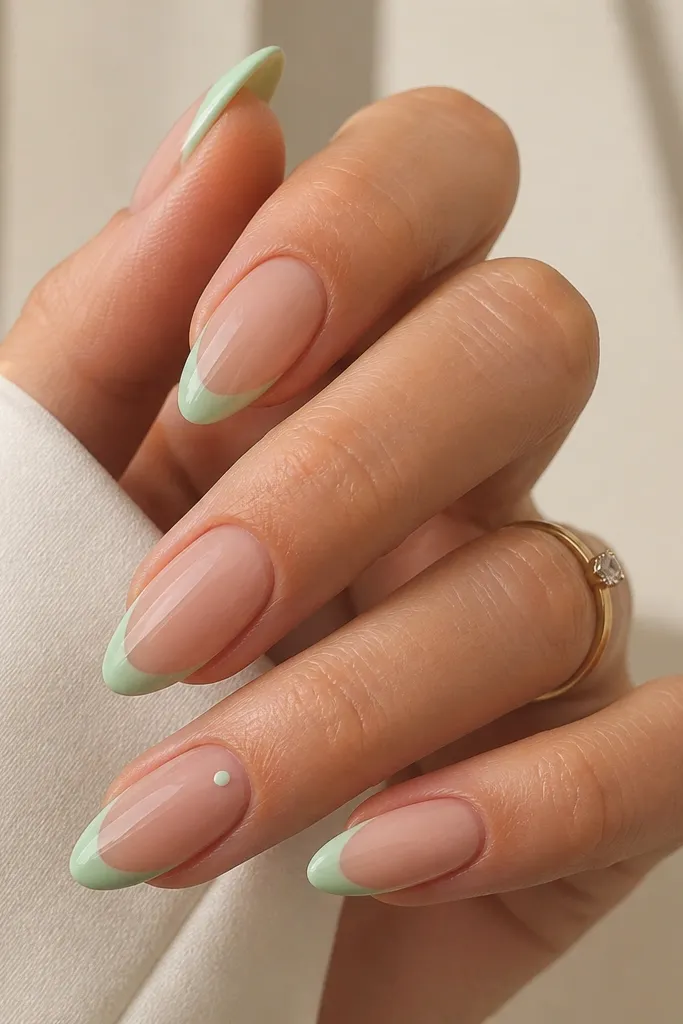
Mint tips make your nails look fresh without requiring neon. I keep the base nude and the mint color opaque so it reads clean, not sheer or streaky. Mint works year-round because it looks like a clean color with a cool undertone, not a beach color. This is flattering on hands that get warm sunlight — mint keeps everything looking crisp. If your skin is cool-toned, mint looks especially clean; if you’re warm-toned, pair it with a slightly peachy nude base to balance.
Editor's noteWipe the tape line with gel cleanser before top coat so the mint edge stays razor sharp.
Apply nude base gel/polish in two coats, curing each. Tape off a French line with striping tape so the mint tip is consistent across fingers. Paint mint over the exposed tip area, then cure. Remove tape slowly at a 45-degree angle to keep edges sharp. Add a tiny white dot on the ring finger near the cuticle line, then top coat glossy and cap the tip.
Watch outDon’t freehand wide French lines on almond — uneven tips scream at close range.
8. Lavender Skittle Almond with One Glitter Nail
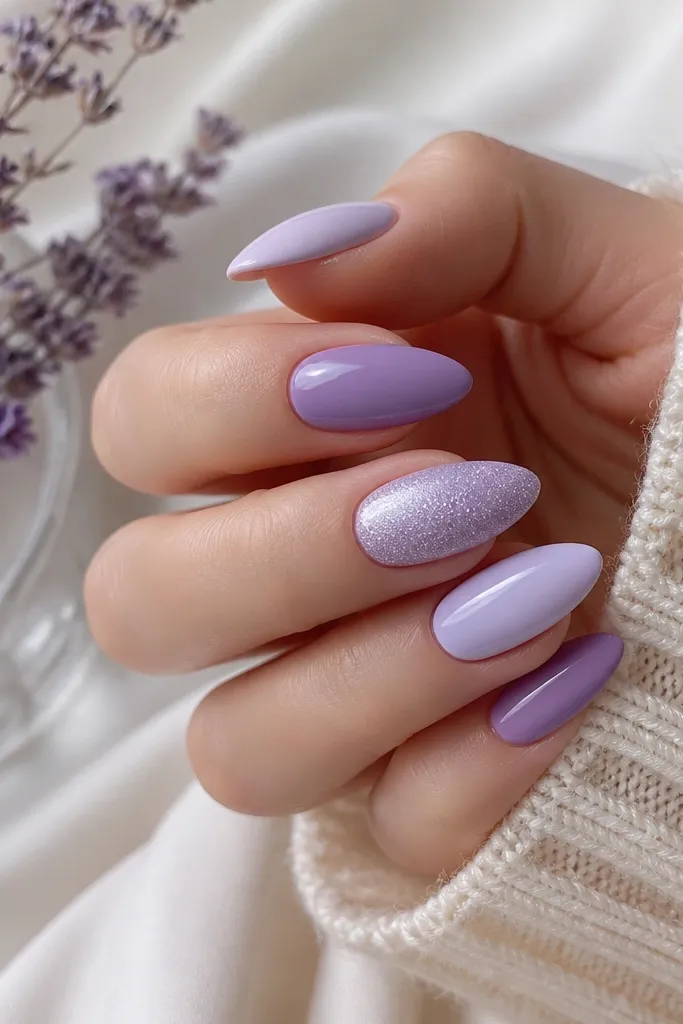
Skittle nails are fun, but I keep this one controlled so it stays affordable and wearable. Lavender shades look soft on almond and don’t overpower your fingers the way hot pink can. Adding only one glitter nail keeps it from turning into a full set of party nails. I like this for summer-to-fall because lavender reads romantic in heat and still looks calm with knits. On deeper skin tones, the grape shade gives contrast; on fair skin, the pale lilac keeps everything light and pretty.
Editor's noteIf glitter feels gritty, add a thicker clear gel layer over it to smooth the texture.
Paint a sheer nude base first, then apply a different lavender shade to each finger in thin coats. Pick three solids and one slightly deeper shade so the gradient feels intentional, even without a true ombre. Make only the ring finger a micro-glitter nail by layering fine silver glitter over sheer nude, then cure and press down gently. Finish with a satin-gloss top coat on solids and a glossy top coat on the glitter nail so it reflects light differently. Cap all free edges to prevent early chipping.
Watch outAvoid glitter on every nail; it makes the set look heavy and harder to keep neat.
9. Coral Ombré Fade from Tip to Nude
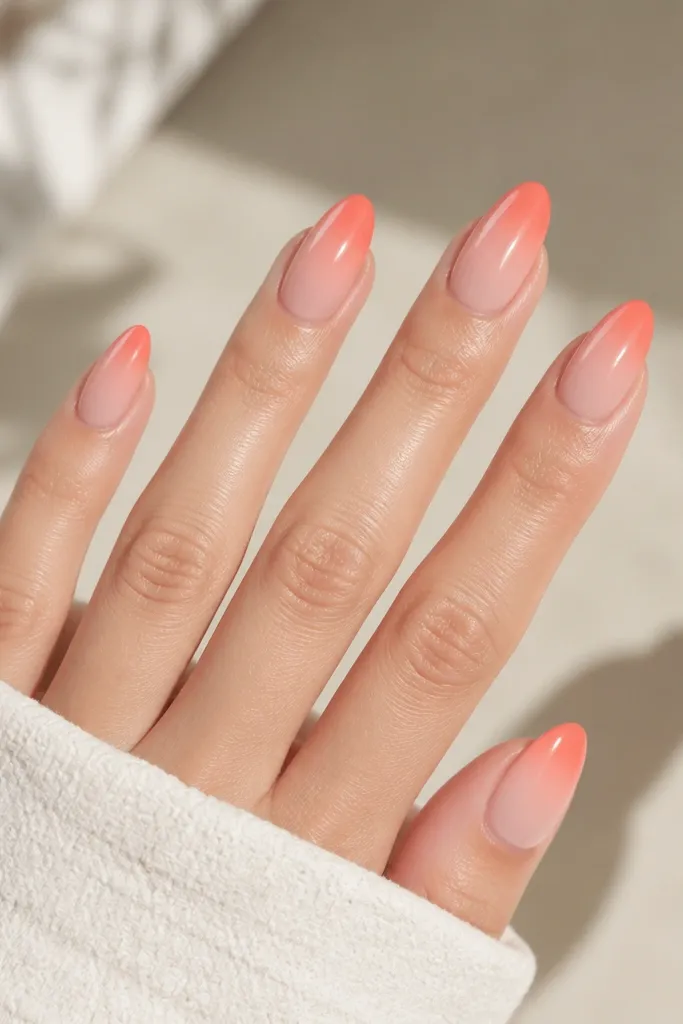
An ombré fade is one of the best ways to make a summer color feel subtle. Coral at the tip only keeps it flattering and hides any minor growth because the fade blends naturally. I use a nude base with a pink undertone so the coral looks clean instead of orange. This design looks great on short almond too, because the fade creates the illusion of extra length. It works across skin tones — fair hands look bright and fresh, while deeper skin looks rich and warm without needing extra accents.
Start with a nude base in two thin coats. Sponge on coral gel/polish using a makeup sponge: tap the sponge at the tip first, then drag slightly upward for a fade. Wipe off excess and build in thin layers until the fade looks even. Cure between layers if you use gel so you don’t get pooling. Seal with glossy top coat, and cap the tips so the coral edge doesn’t lift.
Use a smaller sponge than you think; too much sponge area makes the fade blurry on almond.
Don’t paint coral all the way up the sides; it makes almond tips look wider.
10. Tropical Leaf Accent on One Nail Only
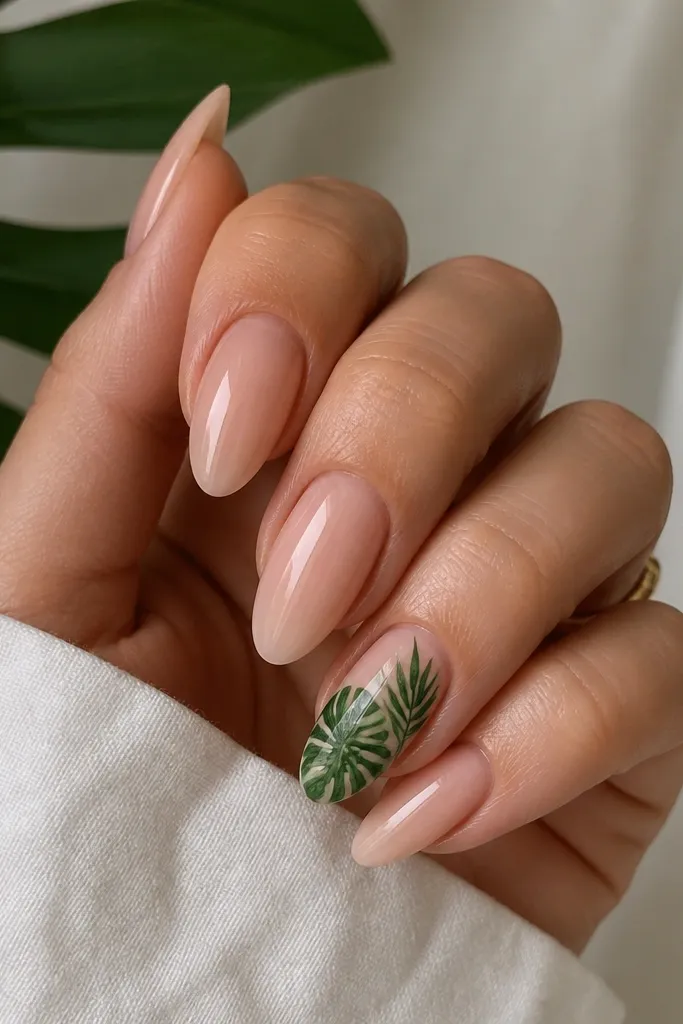
Tropical leaf art can look messy if you put it on every nail. This version stays wearable by putting the leaf cluster on one nail only and keeping the rest nude. The deep green leaf gives contrast, while the sheer base keeps it from looking heavy. I wear this when I want summer personality but I’m keeping my outfits simple — it adds a focal point without being loud. On fair skin, the green pops sharply; on darker skin, the lighter green leaf strokes keep the design readable. The leaf sits near the center so it looks like a tiny botanical sticker you actually meant to do.
Editor's noteUse a dotting tool for the leaf vein — one tiny line looks more realistic than trying to draw veins perfectly.
Apply a sheer nude base in two thin coats and cure. On one accent nail, use a fine brush to paint one leaf shape in deep green near the center of the nail, then add two smaller leaves branching out. Add a lighter green highlight line on each leaf for dimension. Let it dry fully or cure, then seal with glossy top coat in two layers so the leaf edges don’t snag. Keep the cuticle area clean — wipe around it with a lint-free wipe and gel cleanser.
Watch outAvoid leaf clusters that reach the cuticle; they make the nail look crowded as it grows.
11. Gold Outline French on Sheer Nude Almond
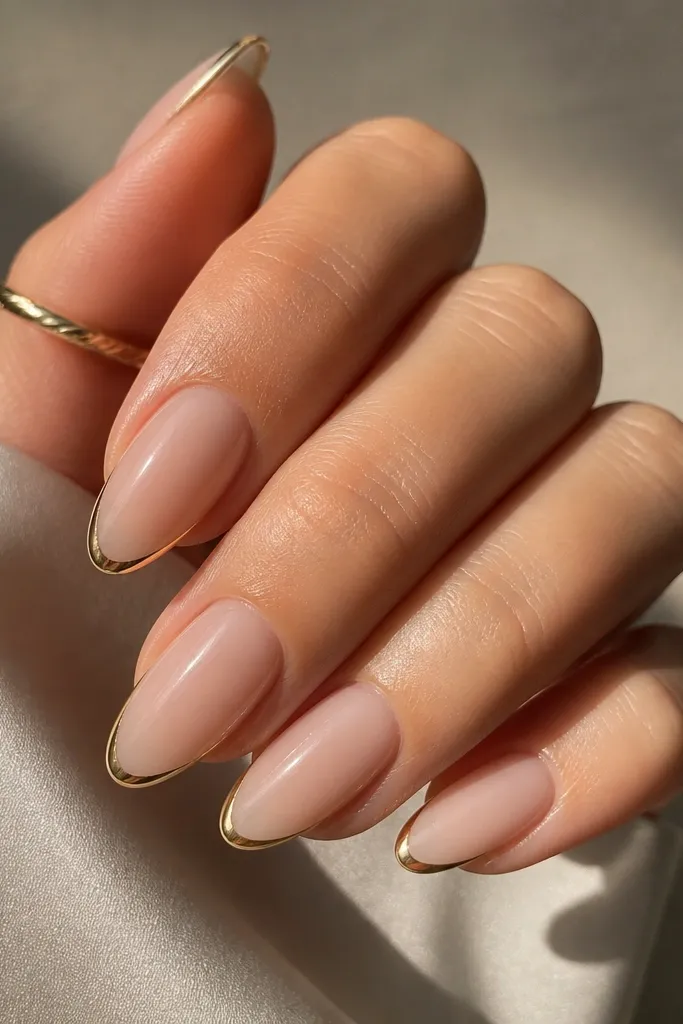
Gold outline French is the cleanest way I know to make almond nails look expensive without using a lot of color. The sheer nude base keeps it wearable year-round, and the gold line adds brightness in a way that reads like jewelry. I like this for hands that get dry — the sheer base hides uneven tone better than opaque colors. It flatters most skin tones, and it looks especially good when your jewelry is gold. This design also photographs well because the gold line catches light even if the rest of the nails are simple.
Paint a sheer nude gel or polish base and cure. Use a fine liner brush and gold gel polish to draw a thin line at the tip edge, then repeat with a second line slightly below it to create an outline effect. Keep the outline consistent across nails, but vary it slightly on the ring finger for a more natural look. Cure fully, then apply a glossy top coat carefully over the lines to protect them from chips. Cap the free edge so the gold outline doesn’t catch on fabric.
If your gold line looks too thick, do two thin passes instead of one heavy stroke.
Avoid covering the gold line with matte top coat; it dulls and looks patchy.
12. Lavender Glitter Cuticle Halo
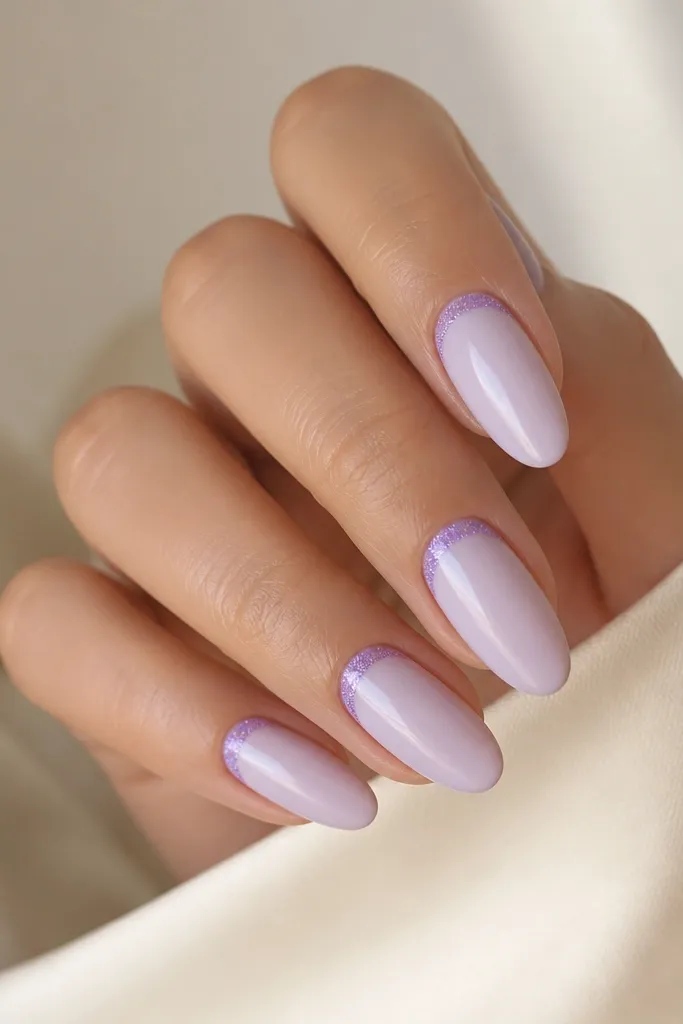
A cuticle halo is small, but it makes the whole set look intentional. The milky lavender base is soft and flattering, and the glitter ring draws attention right where your nail bed is. I love it for year-round because it feels like a “spring sparkle” detail rather than a full glitter nail. The halo placement makes nails look longer as they grow since the shape is near the cuticle and stays readable. This works on fair through deep skin — the glitter color stays visible without needing bright neon.
Editor's noteUse a cuticle brush, not a regular nail brush, so the glitter ring stays tight to the curve.
Apply a milky lavender base in two thin coats and cure. Use a small flat brush to apply a thin clear gel just along the cuticle curve, then sprinkle fine lavender glitter lightly — don’t pack it on. Tap off excess, cure, and then seal with a thin top coat layer over the glitter so it doesn’t snag. If you see uneven glitter density, add a micro second layer only where it’s sparse. Finish with glossy top coat and cap the free edges.
Watch outDon’t let glitter reach the sidewalls; it grows out looking fuzzy.
13. Coral Dot Grid on Nude Almond (Three Nails Only)
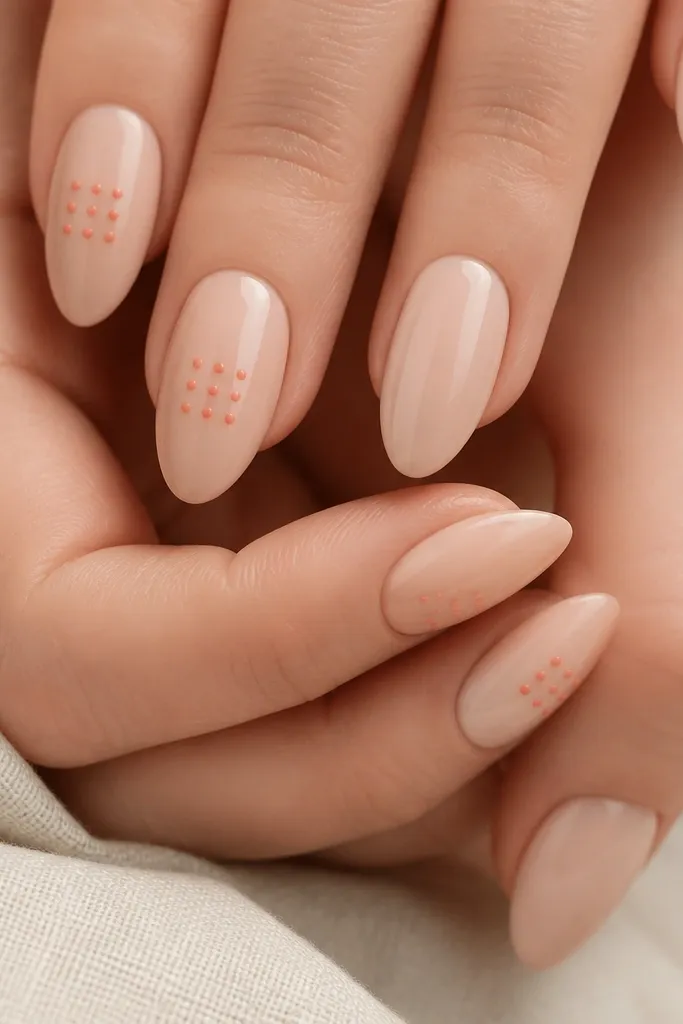
Dot grid art looks graphic and modern, and it reads summer without needing a full-color manicure. By limiting it to three nails, you keep the set balanced and more grown-up. The coral color gives warmth and looks great against nude, especially on almond where dots can sit in a neat pattern. I recommend this if you want something cute but you hate complicated lines. It also works with short almond sets because the pattern stays compact near the center. On fair skin the coral looks bright; on deeper skin it shows up as a warm accent rather than a neon blast.
Editor's noteMeasure dot spacing by using the dotting tool tip width as your ruler — if spacing varies, the grid looks off.
Start with a nude base in two thin coats and cure. On three accent nails, use a dotting tool and coral gel/polish to place dots in a grid: two rows of three dots, with the top row slightly higher than the bottom row. Keep spacing consistent by counting the same dot size each time. Cure, then top coat glossy in one careful layer, focusing on sealing around each dot. Cap the tips so your nude base stays smooth as it grows out.
Watch outAvoid dotting too close to the cuticle edge; it blurs as your nail grows.
14. Sky Blue Half-Top Coat Overlay
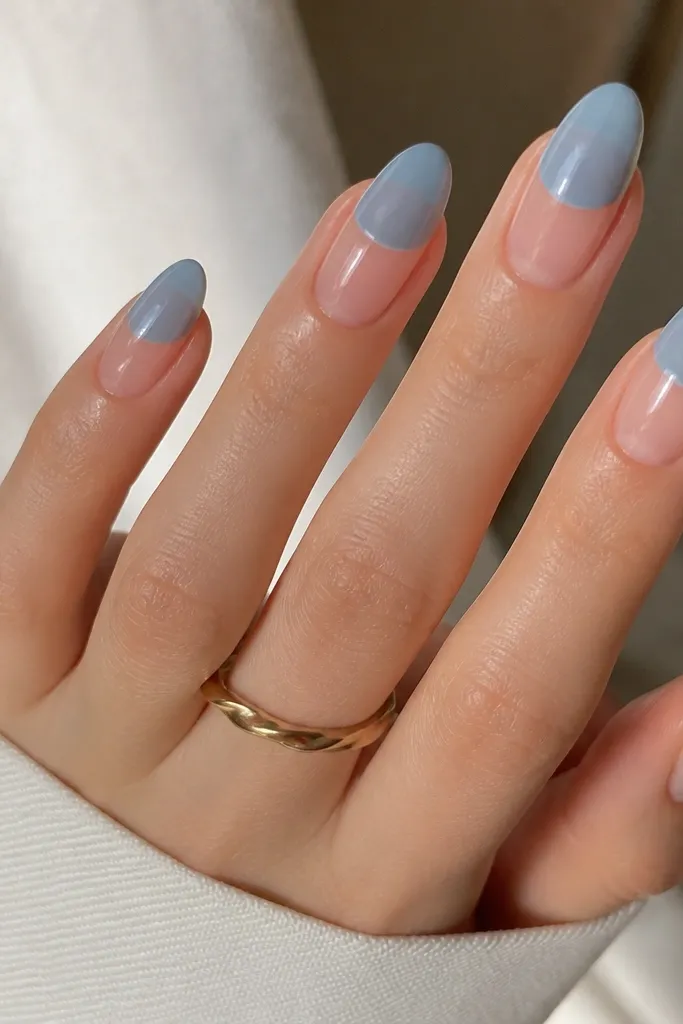
This design looks like a clean watercolor wash and it’s one of the easiest ways to make summer color feel subtle all year. The sky-blue overlay is translucent, so it doesn’t overwhelm your skin tone or make your nails look heavy. Leaving the bottom half clear keeps the almond shape airy and makes your nails look longer. I like it on both fair and deep skin because the blue stays light and doesn’t turn muddy. It also works for everyday because it’s basically a gradient idea without the time-consuming fade.
Editor's noteUse translucent polish or mix blue with clear gel so you get a milky sky effect instead of solid block color.
Apply a sheer nude base in two thin coats and cure. With a flat brush, paint translucent sky blue starting halfway up the nail and stopping with a straight or slightly curved line. Keep the blue thin at first, then add one more thin layer to build opacity only at the top. Cure fully, then apply glossy top coat to blend the line and smooth the surface. If the edge looks too sharp, gently feather it with a second ultra-thin layer of clear gel right at the boundary and cure.
Watch outAvoid a fully opaque blue overlay; it looks like a sticker and chips faster.
15. Champagne Shimmer on All Nails with Clear Base
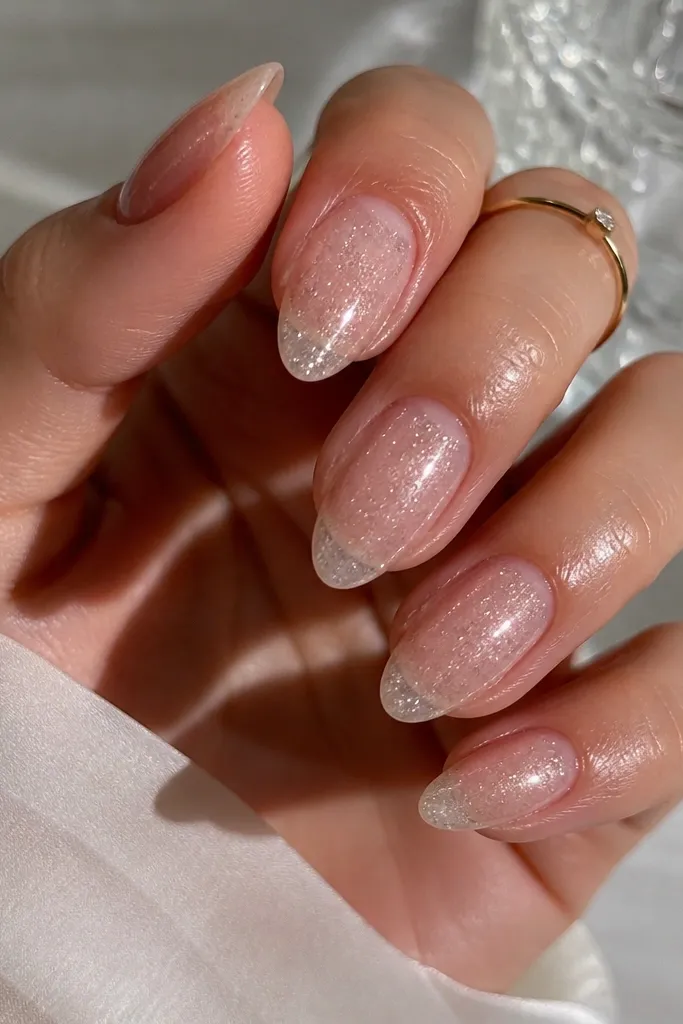
This is the “I want nails that look done” option when you don’t want to pick colors. Champagne shimmer is neutral enough to feel year-round, but it still looks like summer light. On almond, micro shimmer makes the nail surface look smoother and longer, because it reflects along the tip. I wear it when I’m in between seasons and my skin tone changes with sun — it stays flattering either way. It also pairs with any outfit because it’s basically jewelry for your nails.
Editor's noteIf shimmer feels gritty, do one layer of shimmer and one layer of clear gel over it for a smoother finish.
Start with a clear base gel or sheer nude that matches your natural nail tone. Apply a thin layer of champagne shimmer polish or gel — keep it even and avoid thick clumps near the cuticle. Cure, then add a second shimmer layer only if you want more opacity at the tip. Seal with glossy top coat in two thin layers so the shimmer looks like it’s under glass. Cap the free edge so the shimmer doesn’t peel.
Watch outAvoid chunky glitter; it catches on hair and makes almond tips feel rough.



