1. Lemon Drop Center Gel Dot
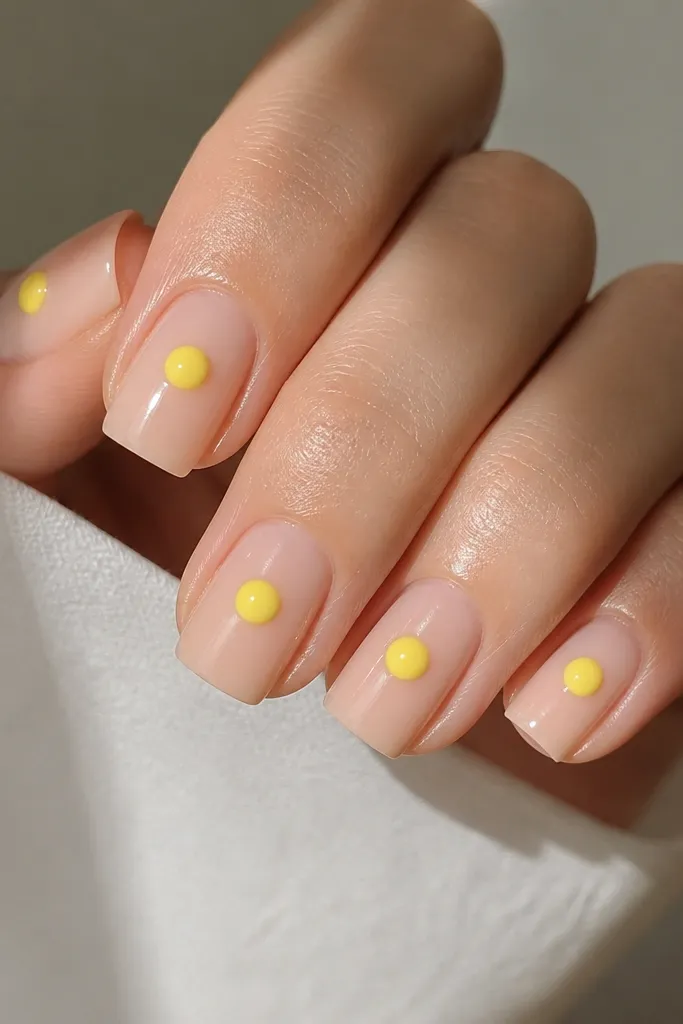
This is the easiest "fun Summer Nails Square details" look that still looks custom. I use a sheer nude or pale pink base so the yellow dot pops without making your nails look bulky. The raised dome catches sunlight and reads like a highlight, which makes square tips look crisp instead of flat. It flatters most skin tones because the base stays neutral, and the color detail does the work. For short nail beds, the centered placement visually stretches the nail.
Start by prepping and pushing back cuticles, then apply two thin coats of sheer nude gel and cure each layer. With a dotting tool, place a small mound of yellow 3D gel at the exact center of the nail, about halfway from cuticle to tip. Cure, then add one more thin top layer over the dome so it looks glassy, not grainy. Keep the dome diameter around 1.5-2 mm so it stays dainty on square edges.
Editor's noteIf your dot looks lumpy, wipe the tool on a lint-free wipe before picking up gel and keep the mound small.
Watch outAvoid putting the dot near the cuticle - it makes square nails look bottom-heavy.
2. Watercolor Peach Fade With Micro White Lines
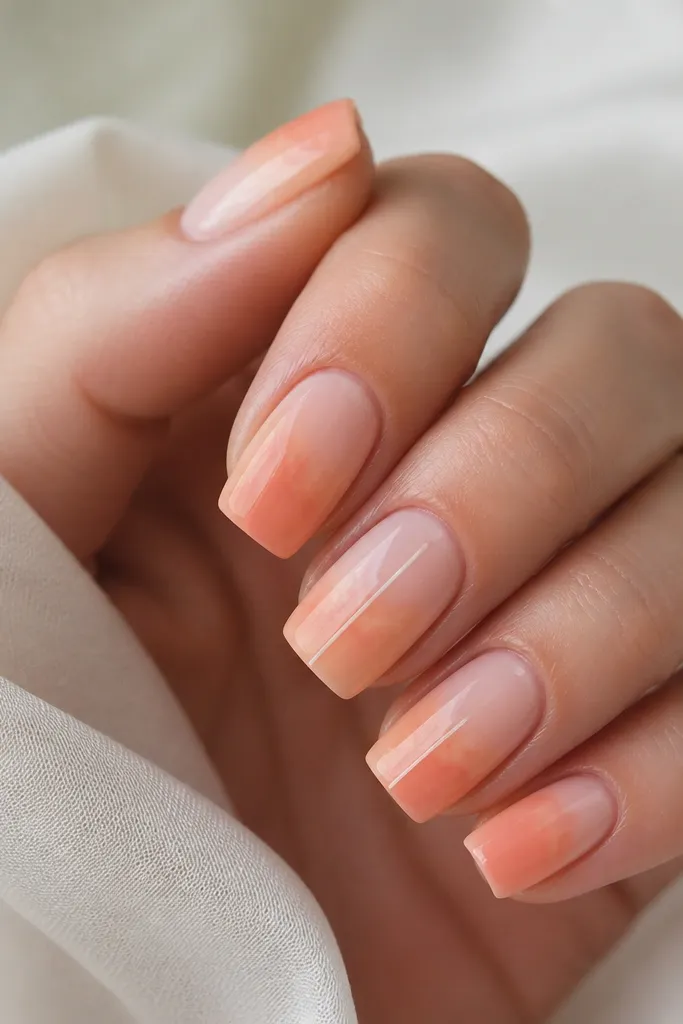
Peach watercolor fades look like summer without screaming neon. The trick for square nails is keeping the gradient translucent and letting the nail bed show through - it makes the square shape feel lighter. I add micro white lines because they create a "drawn" effect that elongates the nail. This flatters warm undertones and also looks great on cool skin when you keep the peach toward orange rather than pink. It works for casual days, brunch, and even a simple white dress.
Apply a sheer peach base or a nude builder gel with a peach-tinted top coat, then cure. For the watercolor effect, sponge very light peach and a touch of orange at the center, blending outward with a clean sponge edge. On two accent nails, use a striping brush to paint one thin white line down the middle, then add a second line just beside it if you want extra movement. Finish with a glossy top coat to smooth the watercolor texture.
Editor's noteUse a makeup sponge corner for watercolor blending - the flat sponge edge leaves streaks.
Watch outDon't paint thick white lines; they widen the square tip and look clumsy.
3. Sea Glass Chrome Half-Moon
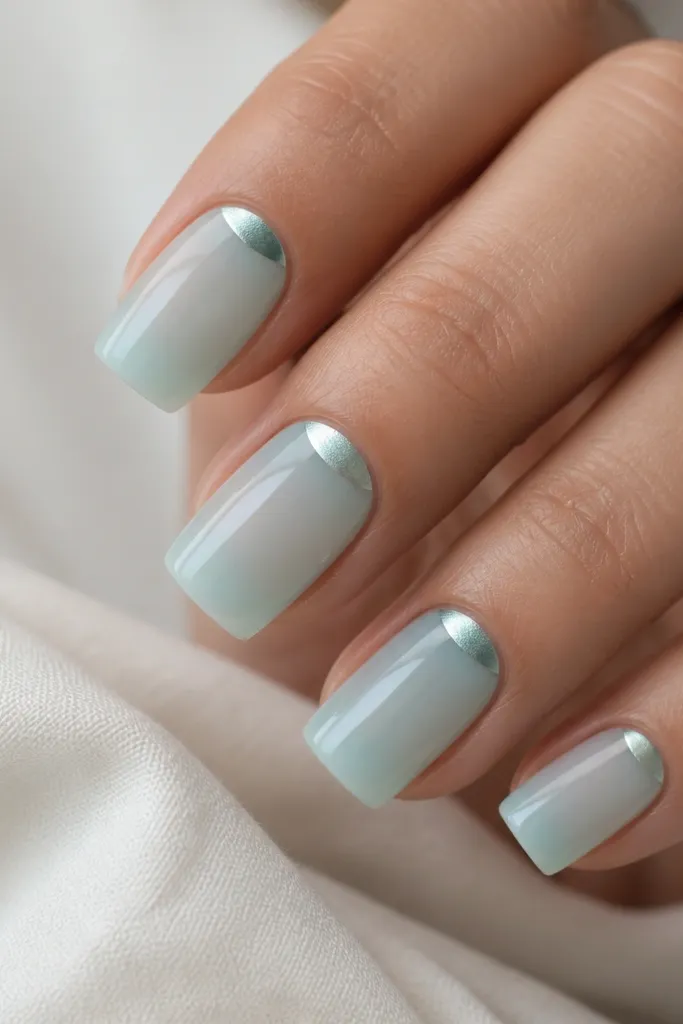
Sea glass chrome makes square nails look like beach jewelry. The half-moon placement is key: it frames your cuticle and pulls attention upward, so the square tip doesn't look heavy. I like a pale aqua jelly base because it gives that translucent ocean feel, and the chrome reads like light hitting glass. This works on fair to deep skin tones, since chrome reflects your undertone and the aqua base stays bright. It's a great choice for weddings at the shore or a vacation set you'll keep wearing.
Start with two coats of pale aqua jelly gel, curing fully for a smooth glass look. Use a small half-moon stencil or freehand with a thin detail brush to apply sea-glass chrome gel at the cuticle, leaving the center clear. Lightly cap the chrome with a thin layer of top coat so it doesn't catch or lift at the edges. Finish with one full top coat for that wet-gloss surface.
Editor's noteIf chrome looks patchy, apply a thin chrome base gel first and cure - it gives more even reflection.
Watch outAvoid covering the entire nail with chrome; it makes square nails look flat and chunky.
4. Blueberry Jam Tips With Negative Space Sides
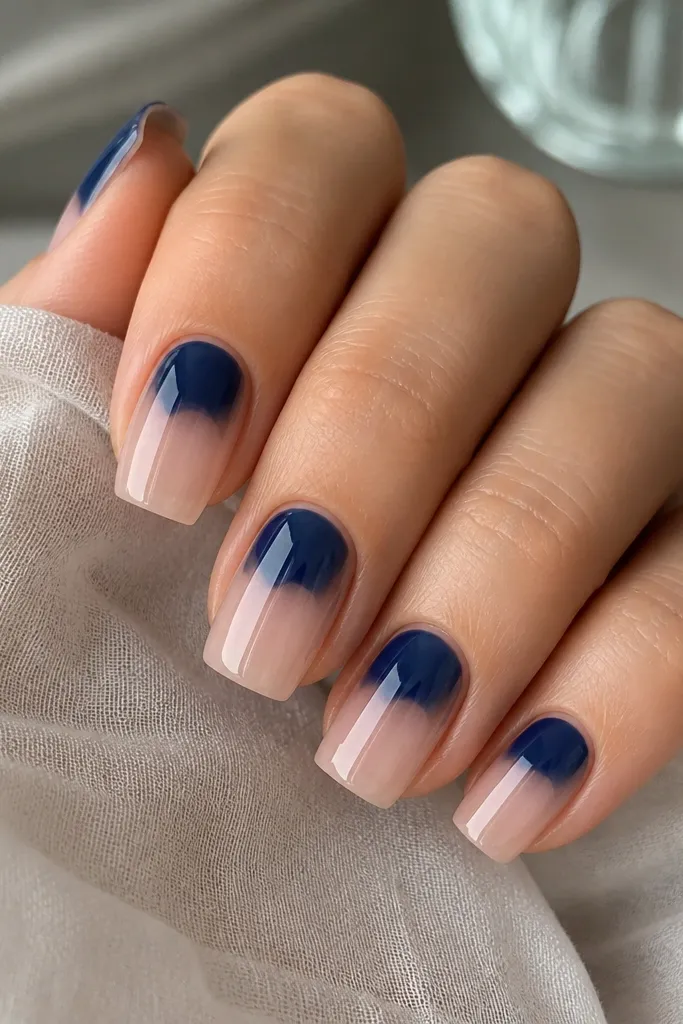
This design is bold but controlled, and it's one of my favorites for square nails because it keeps the shape sharp. Negative space on the sides stops the color from swallowing the whole nail, so your hands look longer. The blueberry jelly top third looks like jam in sunlight, especially if you add a tiny dome effect. It suits cool undertones, but warm skin looks great too because the jelly is deep and saturated. Perfect for nights out when you want color without busy art.
Apply sheer nude or clear builder gel as your base, cure, then use a striping tape to mask the sidewalls about 1 mm from each edge. Paint deep blueberry jelly on the top third, blending slightly downward in the center for a soft gradient. Remove the tape while gel is still tacky so the edge stays crisp, then cure. Add a thin second blueberry layer to build gloss and dome, then top coat the whole nail.
Editor's noteUse tape that's low-tack and remove it at the tacky stage for the cleanest edges.
Watch outDon't paint all the way to the corners; flooding the sidewalls kills the negative-space effect.
5. Tangerine French With Sunburst Corner Sparkle
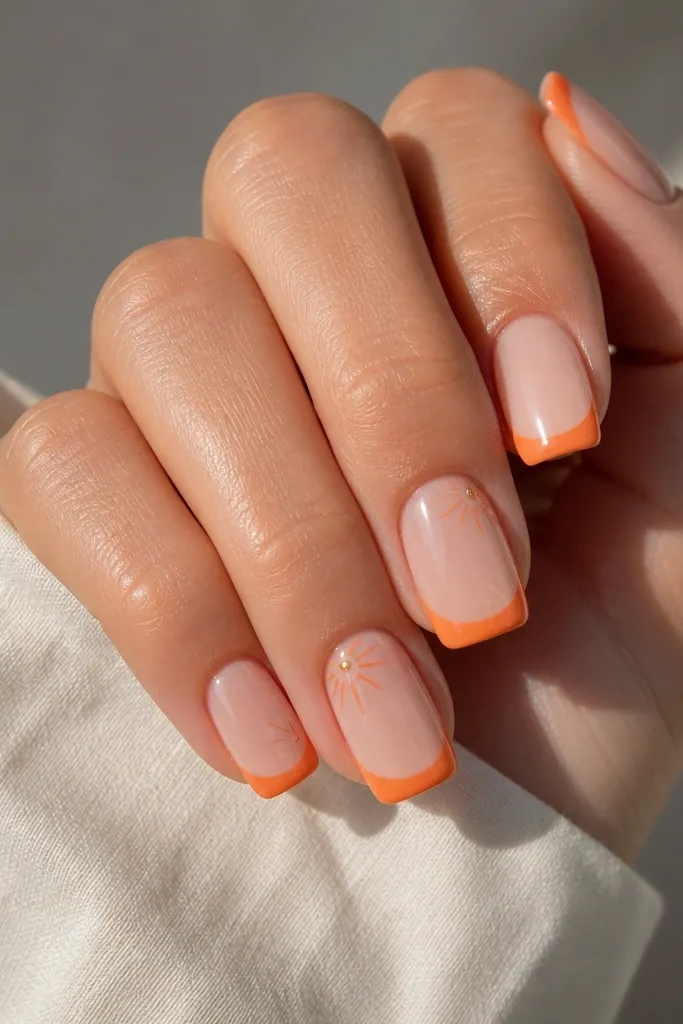
French tips already flatter square nails, and tangerine makes them feel like summer candy. The fun detail is the sunburst corner - it adds motion without taking over the whole nail. I keep the sunburst only in one corner so it doesn't compete with the French line. This looks great on hands that have shorter nails because the French edge adds structure. It also pairs well with gold jewelry, since orange + gold-like sparkle looks warm and intentional.
Start with a nude base and cure, then use a French guide or freehand tape to paint a tangerine tip line about 2-3 mm wide. Cure and clean the edges. In one top corner of each tip, draw 4-6 thin lines radiating out from a single point using a striping brush, then place a micro glitter dot at the center using gel. Cap the corner area with top coat so the sparkle is smooth.
Editor's noteIf your French line looks shaky, cure after the first thin layer, then reinforce with a second pass.
Watch outAvoid big sunbursts; tiny corners look crisp, big ones look like holiday decals.
6. Strawberry Milk Chrome Fade
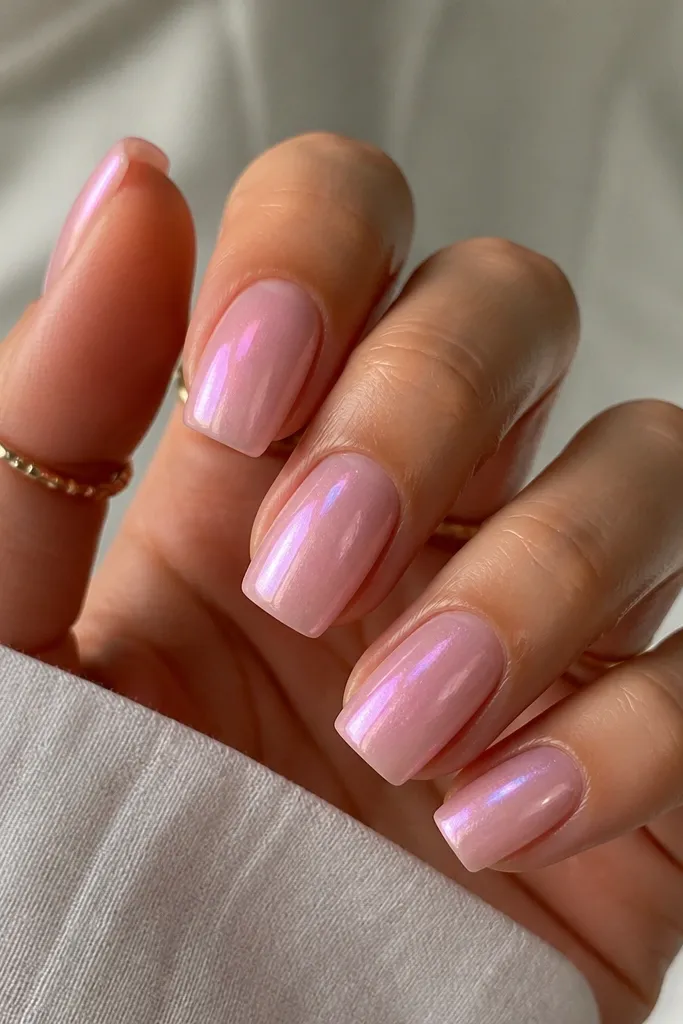
Strawberry milk chrome is playful and flattering because the base is milky and the chrome is controlled. The fade keeps it from looking like full chrome "party nails," and it still gives that summer shine in photos. Square nails look especially good with a tip-to-mid fade because it emphasizes the geometry of the shape. This works on every skin tone because the milky pink sits in a safe middle zone. Wear it for birthdays, beach trips, or any time you want your nails to look like they're lit from within.
Apply a pale milky pink base gel, cure, then lightly buff if needed for adhesion. Add a chrome gel at the tip area only and work it halfway down with a small sponge applicator or chrome brush. Blend downward with less product so the fade looks soft, then cure. Finish with one glossy top coat that covers the chrome and smooths the gradient.
Editor's noteUse a fine chrome powder - chunky chrome makes the fade look striped on square tips.
Watch outDon't let chrome creep to the sidewalls; it can make square nails look wider.
7. Mint Checkered Accent Nail
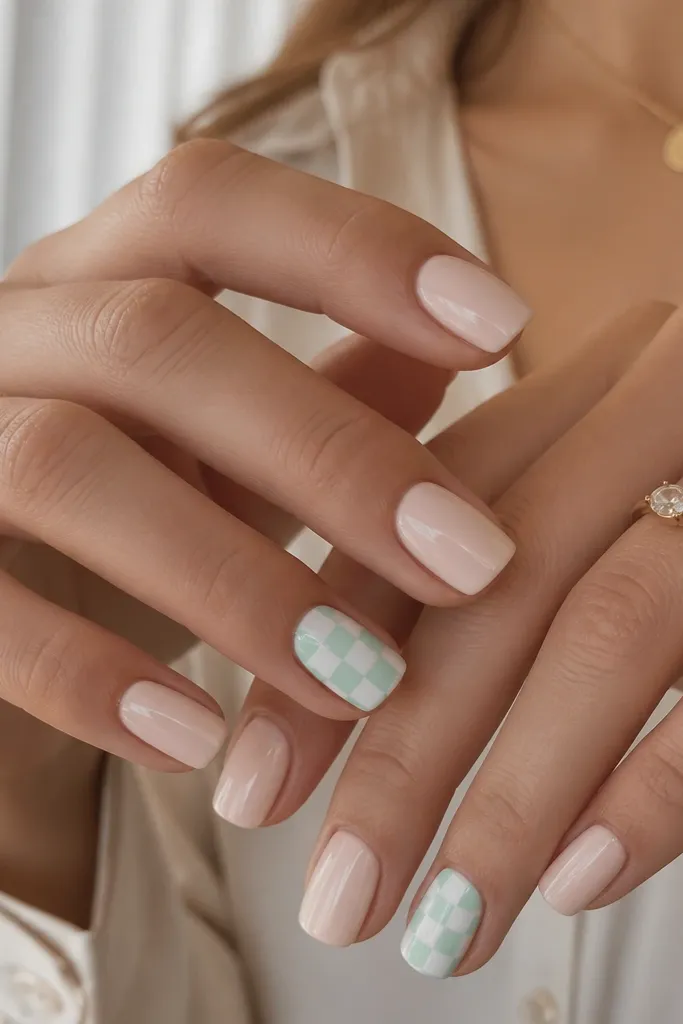
Checkers look fun on square nails because the shape already has corners, so the pattern looks intentional instead of messy. I keep it to one or two accent nails so the set stays wearable. Mint and white is summer-friendly without being loud, and the glossy finish keeps the grid looking sharp. This flatters hands with short nails because the pattern gives structure across the width. If you wear lots of neutrals, this brings a fresh pop.
Paint all nails with milky nude and cure. On the accent nail, apply a thin white base and cure. Use a striping brush and your nail's width as a guide: paint small mint squares, then fill the gaps with white by tracing the grid lines. Keep each square about 1-1.5 mm so the pattern looks neat on square edges. Top coat twice - the first is thin to lock the lines, the second is full gloss.
Editor's noteDraw a light guide line down the center first, then build squares from there.
Watch outAvoid uneven square sizes; one tall square makes the whole nail look off.
8. Coral Seashell Outline
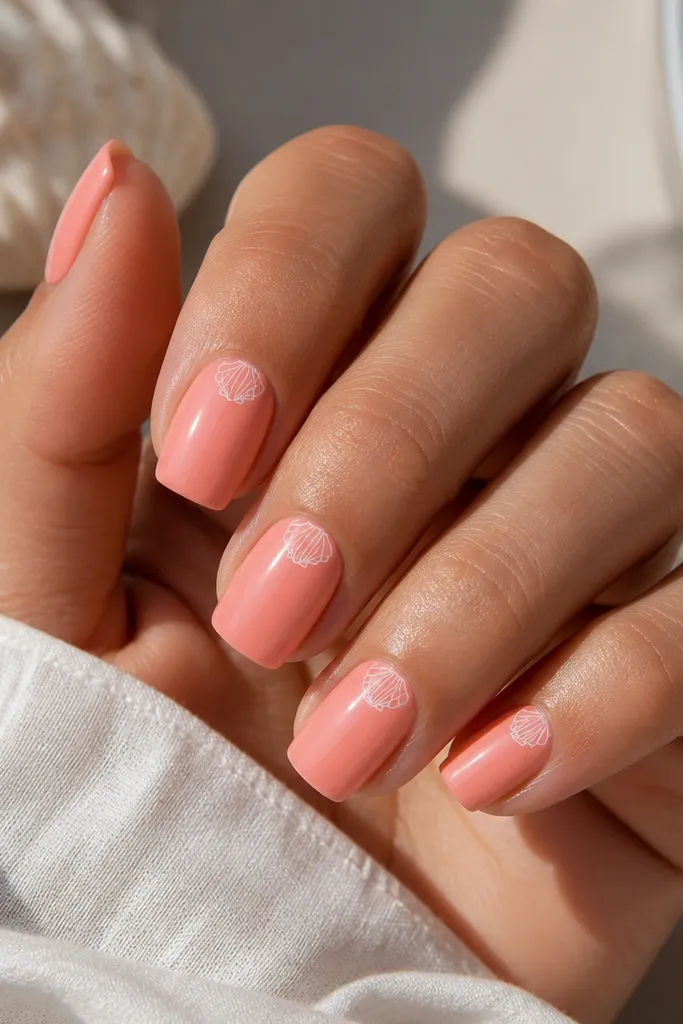
Line art looks clean on square nails when you keep it small and place it near the cuticle. The coral base gives that sunset vibe, and the white outline makes the shell read clearly even in low light. I use a thin brush to keep the lines crisp so the nail doesn't look like it has thick stickers. This is a great choice for everyday summer because it looks cute without full coverage art. It also flatters medium to deep skin tones when you choose a coral that leans orange rather than dusty pink.
Apply two coats of coral-pink gel and cure. With a detail brush, draw a simple seashell outline starting near the cuticle, centered on the nail. Add 2-3 curved inner lines so it looks like a shell, not a doodle. Cure in short bursts if your line art is thick, then top coat carefully around the design to keep it smooth. One shell per nail is enough - don't crowd.
Editor's noteIf your lines flood, wipe your brush on a lint-free wipe, then reload with a tiny amount of gel.
Watch outAvoid putting the shell near the tip; it makes square nails look top-heavy.
9. Hot Pink Jelly With Clear Side Stripes
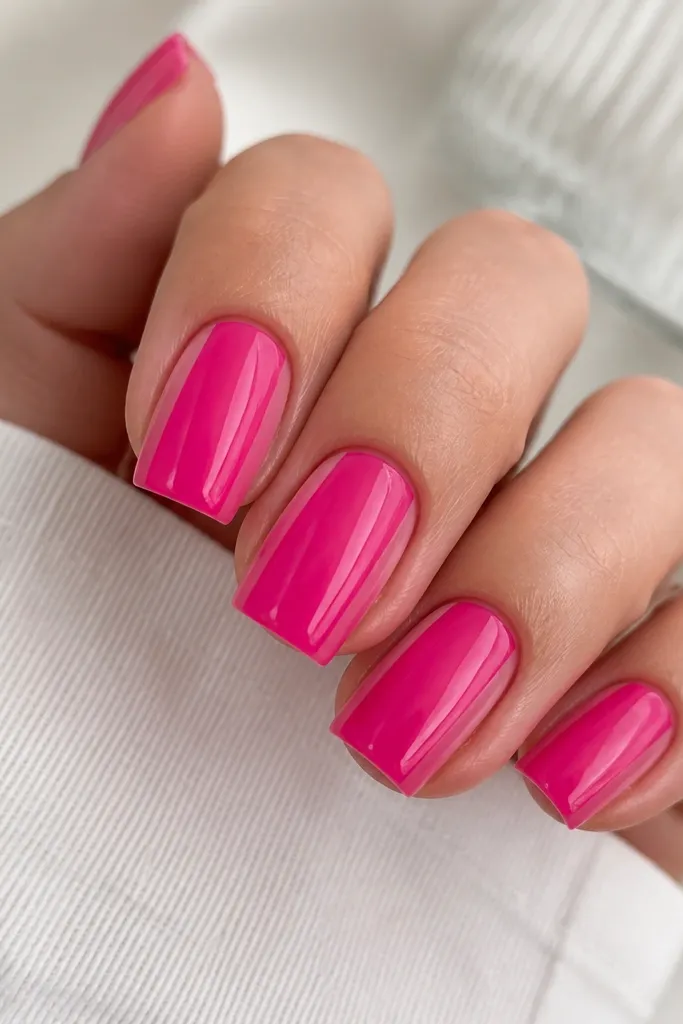
Clear stripes make hot pink feel modern instead of loud. The jelly finish gives that summer "candy" look, and the negative space stripes keep your square shape from looking flat. I like this for hands with medium nail beds because the vertical lines add length. On fair skin it looks bold; on deeper skin it looks crisp and graphic. This is a great "festival but still polished" set.
Start with a base that matches your skin tone or a clear builder gel, cure. Paint hot pink jelly over the nail, but apply it carefully so you leave two thin channels on each side. You can do this with striping tape or by painting the stripes after the pink is cured and using clear gel to fill them. Cure fully, then top coat with one glossy layer to unify everything. Keep the clear stripes about 0.5-0.8 mm wide for a clean look.
Editor's noteUse a gel striping brush for the clear stripes - regular polish brushes smear edges.
Watch outAvoid thick tape lines; they can leave ridges under top coat.
10. Gold Foil Drip Over Milky Nude
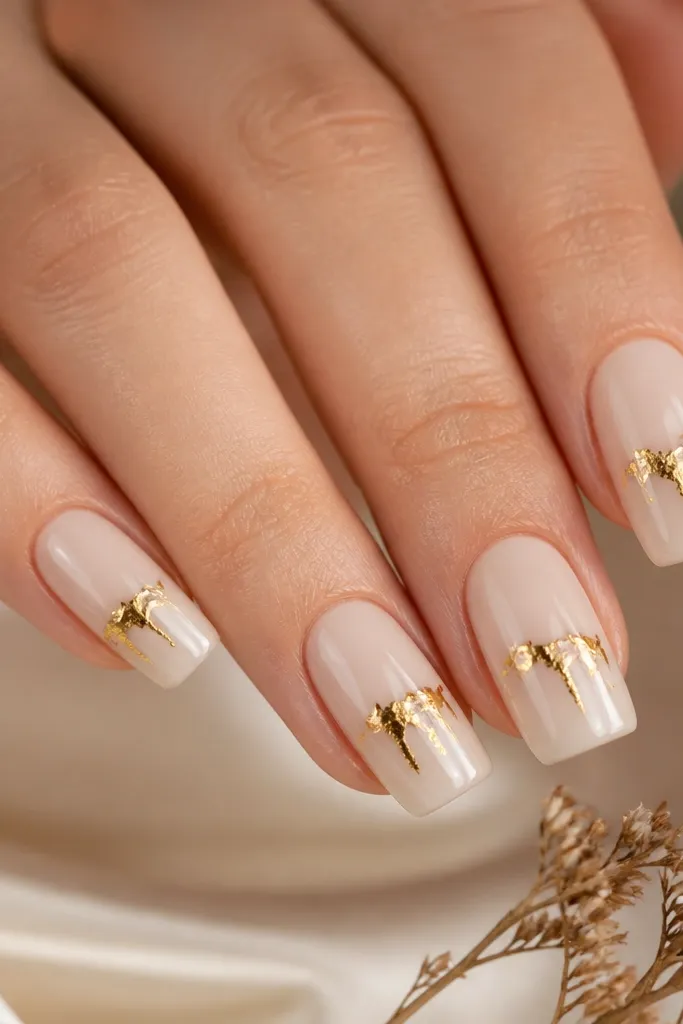
Gold foil drip is my go-to when I want "summer detail" without tiny hand-painted art. The milky nude base makes the foil look like it's floating on top, and the drip shape adds movement that suits square nails. Foil also hides small imperfections in application because it's naturally irregular. This works for warm and cool undertones, and it looks great with bronzy makeup and gold rings. It's also forgiving if you're new - you're placing foil, not drawing perfection.
Apply milky nude gel and cure. Use a small brush to place a thin line of gold foil gel at the center of the nail, about 3-4 mm long, then pull it slightly downward to create a drip shape. Press gold foil onto the tacky area, then press again lightly to transfer more pieces. Cap with a thin layer of top coat, then add a second top coat for full smoothness. Keep the drip centered so square corners stay clean.
Editor's noteTear foil into small irregular pieces instead of using one big sheet - it transfers better and looks more natural.
Watch outAvoid placing foil too close to the sidewalls; edges lift faster on square shapes.
11. Sunflower Micro Dots On Sheer Base
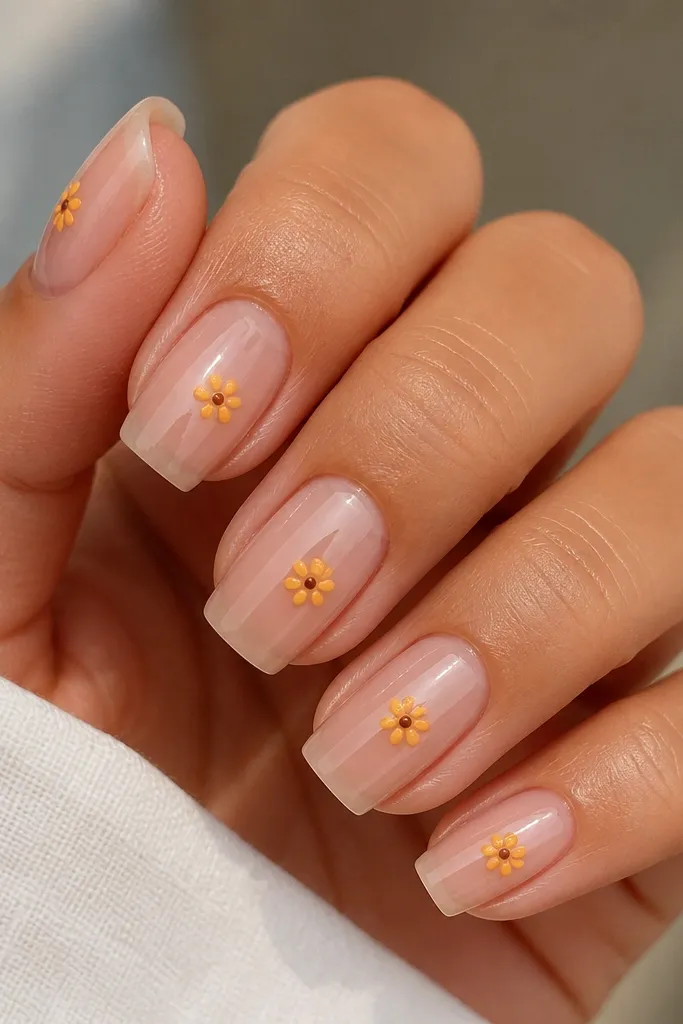
Micro-dotted sunflowers look sweet and sharp on square nails because the dot texture reads clearly at small scale. I keep the flower only in the center so the nail stays balanced and doesn't look crowded. The sheer base makes it feel airy for summer, and the glossy top coat turns the dots into tiny light points. This flatters fair skin and also looks amazing on deeper tones because the sunflower colors stay bright against the nude. Great for picnics, outdoor dinners, and spring-to-summer transition.
Start with a sheer nude base and cure. For each nail, place a small dark dot at the center (about 1 mm). Around it, place 10-14 tiny yellow dots in a circle, spacing them evenly with a dotting tool. Add a second ring of slightly larger yellow dots if you want a fuller bloom. Cure, then cap with top coat in a thin layer first, then a full layer to smooth the surface.
Editor's noteIf your dots merge, let each dot set tack-free for a few seconds before adding the next.
Watch outAvoid painting sunflower shapes with lines; dots look cleaner and more summer-real.
12. Aqua Ombre With White Shell Edge
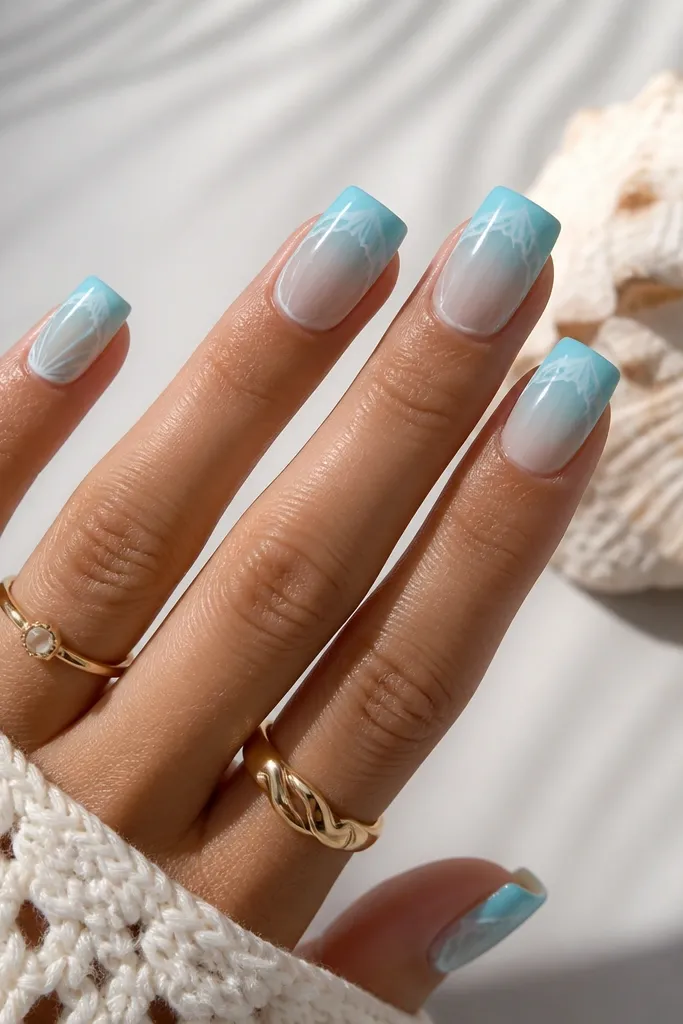
Aqua ombre looks like pool water, and the white shell edge makes it feel like an actual beach design instead of just color. The ombre stretches the nail, and the wave line adds a crisp finish at the tip, which matters for square shapes. I keep the wave line thin so it doesn't thicken the nail tip visually. This works on most skin tones, and it looks especially good if you wear turquoise, silver, or white sandals. It's a strong choice for vacation photos because the gradient reads from a distance.
Apply a sheer nude base and cure. Sponge aqua gel at the tips first, then blend upward to create a soft ombre that stops 1-2 mm below the cuticle. Cure, then use a striping brush to paint a thin white wave line across the tip edge, like a row of shell scallops. Add a second thin wave line just above it if you want more definition. Finish with glossy top coat to lock in the gradient and smooth the wave line.
Editor's noteFor a cleaner ombre, wipe excess gel off the sponge before you blend upward.
Watch outAvoid harsh boundaries in the ombre; square nails show banding more than rounded shapes.
13. Pink Confetti Flakes With Clear Window
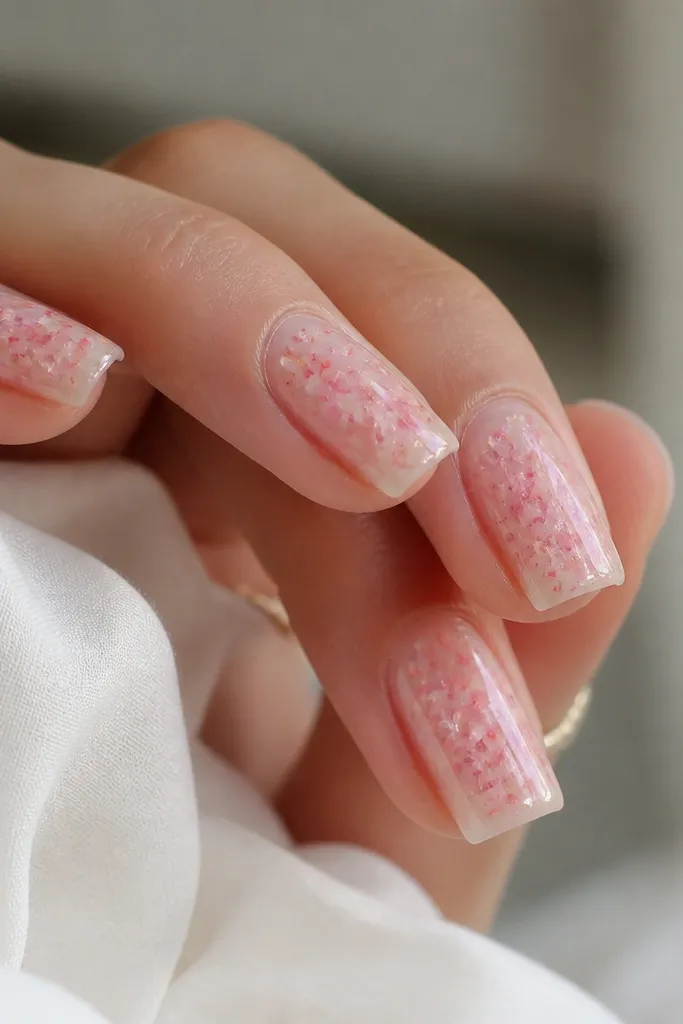
Confetti flakes look like you trapped a summer drink in gel. The clear window effect keeps flakes concentrated and makes the nail look intentional rather than busy. I use a sheer base so the flakes feel light, not heavy, and square nails benefit from that airy look. This flatters hands that look dry because flakes catch light and distract from texture. It's also a good option if you want something fun but you don't want to draw tiny details.
Start with a sheer base gel and cure. Apply a thin layer of clear gel in the center only, leaving a small margin around the sides and cuticle. Sprinkle pink and coral micro flakes into the wet center and press lightly so they sit flat. Cure, then cap with top coat in two thin layers so flakes don't lift at the edges. Keep the flake pile height low for a smooth square tip.
Editor's noteIf flakes stick too much, tap the nail lightly on a folded wipe to remove loose pieces before curing.
Watch outAvoid covering the entire nail with flakes; it makes square tips look thick.
14. Neon Outline Frame On Nude
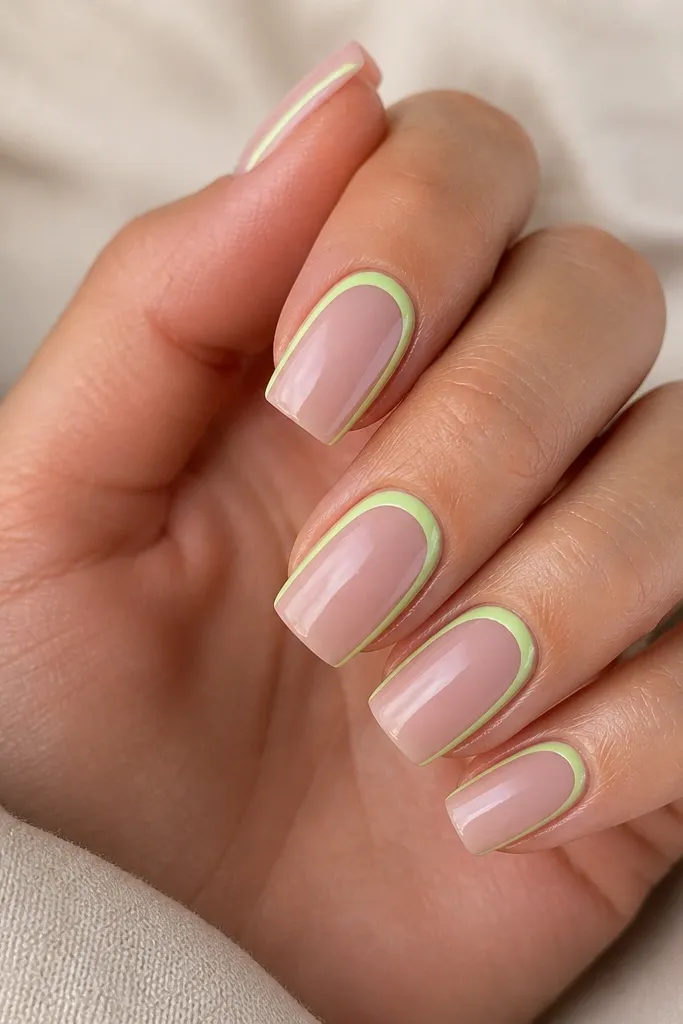
This is the cleanest way to wear neon on square nails. Instead of filling the whole nail, you outline the shape, which keeps your nails looking neat and lengthened. The nude center makes the neon feel modern, and the frame detail catches light because it's thin and glossy. I've worn this with everything from white tees to black dresses - it always looks intentional. It flatters all skin tones, but it pops most on medium to deep skin because neon contrast is stronger.
Apply nude pink gel and cure. Use a striping brush to draw a thin line 0.5-1 mm inside the sidewalls, starting near the cuticle and running down toward the tip. Add a top line near the free edge, and keep the center empty. Cure, then top coat carefully so the outline stays crisp and doesn't blur. If you want extra pop, add a second neon layer on top of the outline only.
Editor's noteUse gel, not neon polish, for outlines - polish bleeds into square corners too easily.
Watch outAvoid thick frames; they make square nails look like they have a border sticker.
15. Turquoise Brick Pattern Accent
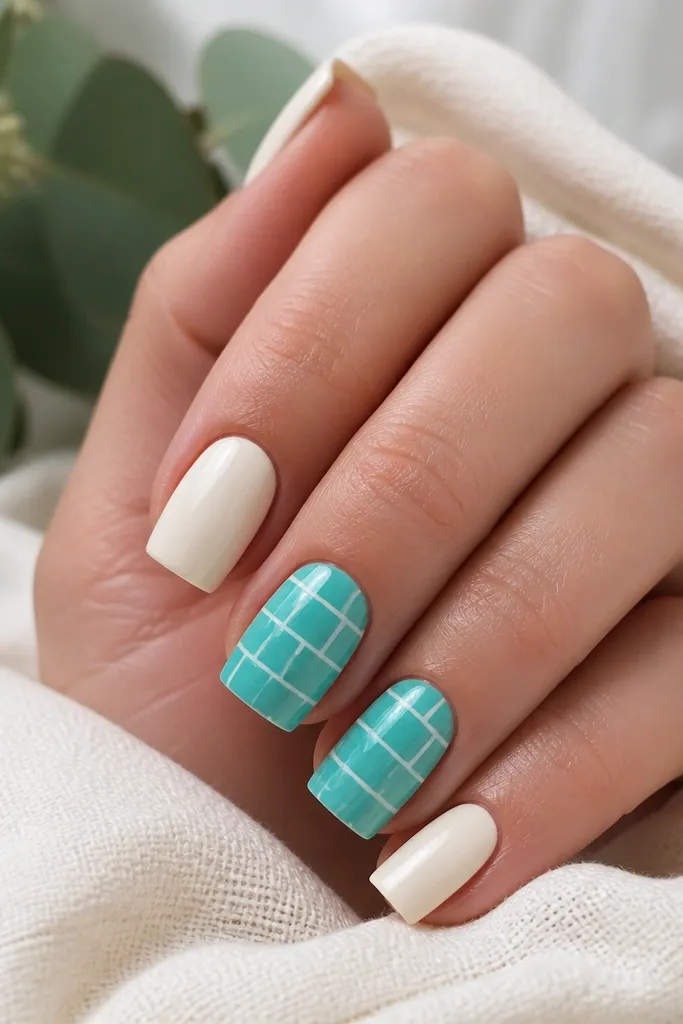
Brick pattern nails look graphic and summery because they're clean, not flowery. I keep it on accent nails so it feels like art, not wallpaper. Cream base makes the turquoise look fresh, and the thin white grout lines keep it crisp. Square nails are perfect for this because the geometry matches the shape. It looks great for summer brunch, and it also pairs well with denim and gold jewelry. Works across skin tones because the base is neutral and the pattern is high-contrast.
Paint all nails cream and cure. On the accent nails, apply a thin turquoise base coat, cure, then paint staggered rectangles with a striping brush. Use white gel to draw the grout lines between rectangles, keeping them thin so the pattern stays delicate. Stagger the rows like real brick - don't align every corner. Cure and cap with two thin top coats to keep the surface smooth over edges.
Editor's noteMark two guide dots on the nail first to keep your rectangle rows straight.
Watch outAvoid random rectangles; consistent staggering looks intentional, random looks sloppy.
16. Strawberry Red Micro Rhinestone Line
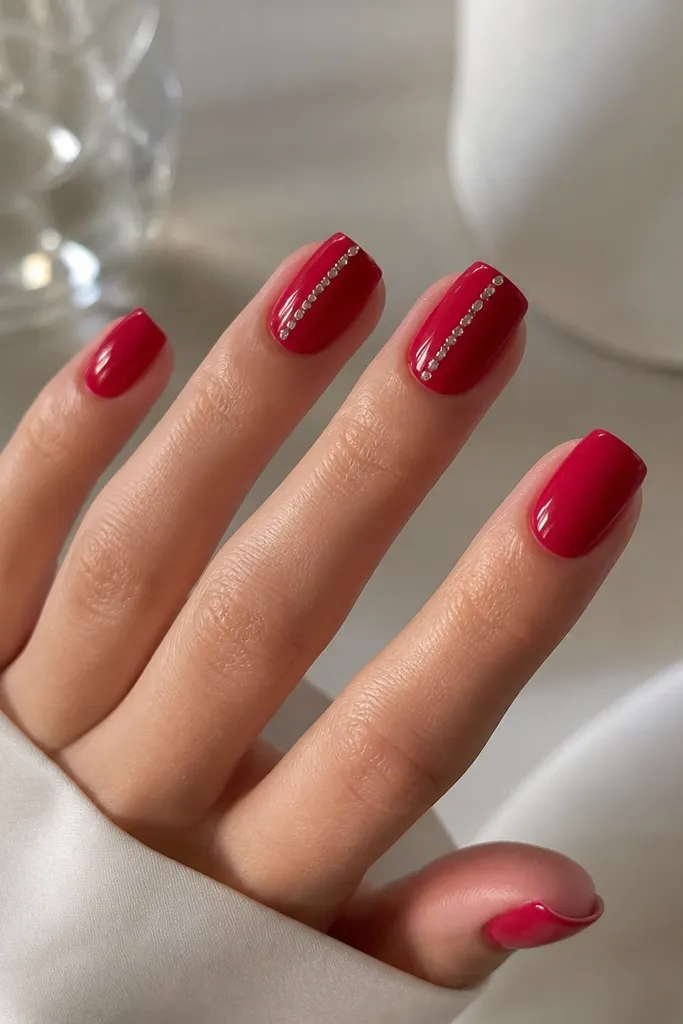
Micro rhinestones add sparkle without turning square nails into a disco ball. Strawberry red looks juicy in summer, and the diagonal line makes the nail look longer and more dynamic. I place rhinestones on only two nails per hand so the set stays wearable. This design flatters hands that like a little glam but don't want heavy 3D stuff. It also looks great in photos because stones throw light even in shade.
Apply strawberry red gel in two thin coats and cure. On two nails, lightly sketch the diagonal path with a dot guide, running from near the center to the upper corner. Use nail glue or rhinestone gel to place micro stones, spacing them about 0.5-0.8 mm apart. Press each stone down gently and cure if using gel. Cap carefully with top coat around the stones, then add a second top coat to fully seal.
Editor's notePick stones that are flat-backed and small; larger stones rock on square edges.
Watch outAvoid placing rhinestones right at the tip edge; they catch on hair and lift faster.
17. Lavender Jelly With White Star Cluster
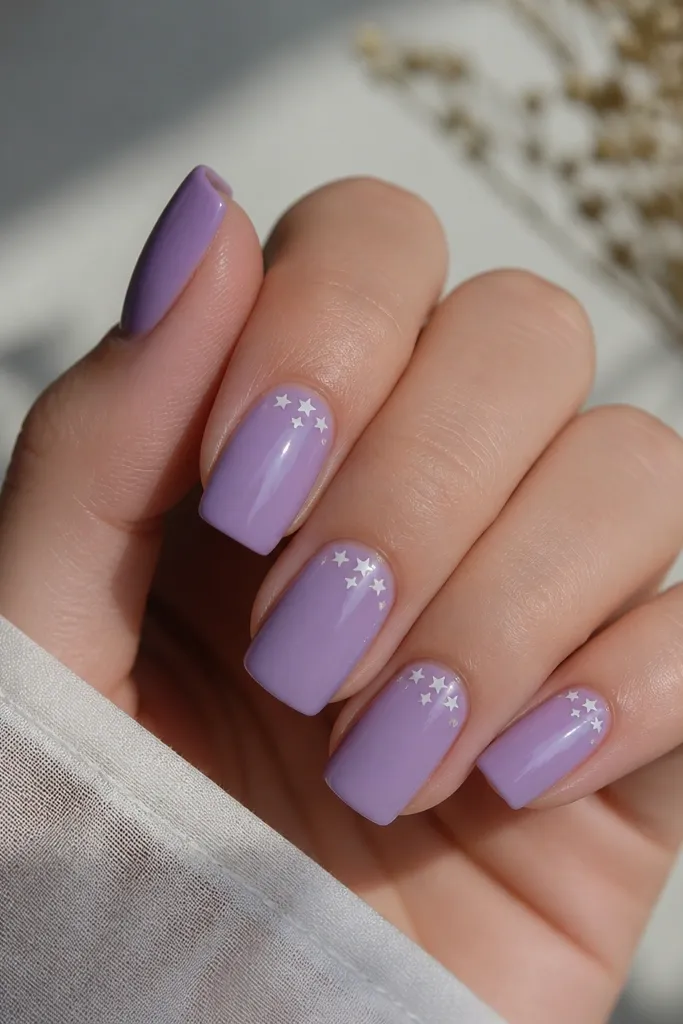
Lavender jelly is soft summer - it looks cool, dreamy, and still bright. The white star cluster near the cuticle keeps it playful while keeping the nail area clean. Square nails can look harsh with heavy art, so tiny stars in a tight group make the shape feel gentler. This flatters fair to medium skin tones really well, but it also looks great on deeper skin if you keep the lavender saturated. Wear it with denim, lilac clothing, or silver hoops.
Apply lavender jelly gel in two thin coats and cure. Using a star stencil or freehand with a dot-and-line approach, place 3-5 tiny white stars in a cluster near the cuticle, centered. Keep the biggest star small, around 1.5-2 mm, so it doesn't overpower the square tip. Cure and top coat with a glossy finish, making sure the top coat covers star edges for a smooth feel.
Editor's noteIf you freehand stars, make them all the same size - mismatch looks like a mistake, not design.
Watch outAvoid spreading stars across the whole nail; it makes square tips look busy and uneven.
18. Citrus Gradient With Clear Cuticle Half-Moon
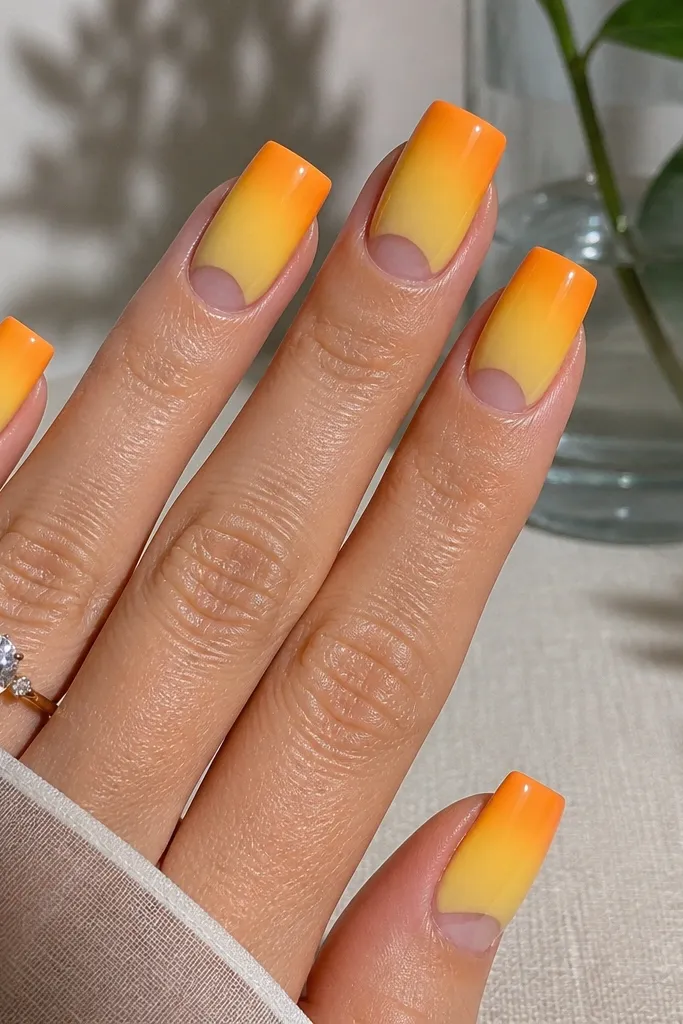
This design gives you citrus brightness but keeps your cuticle area airy. The clear half-moon makes the gradient look more intentional and prevents the nail from looking like it's fully painted, which can shrink the nail visually. Square nails look best with a gradient that's strongest at the center and soft at the edges. It flatters warm undertones and also brightens cool skin because the yellow pops against it. Great for summer weekends and any time you want "fresh nails" without complicated art.
Apply a clear base and cure. Tape a small half-moon mask at the cuticle so you leave a clean window, then sponge or brush yellow gel starting under the mask and blending downward into orange. Build the gradient in thin layers and cure between each so it stays smooth. Remove the tape carefully while gel is still tacky for a crisp half-moon edge. Finish with glossy top coat and cap the gradient lightly at the tip.
Editor's noteUse thin layers for the gradient - thick citrus gel turns chalky on square tips in heat.
Watch outAvoid covering the cuticle window with top coat overflow; it blurs the half-moon edge.
19. White Marble Vein Over Baby Blue
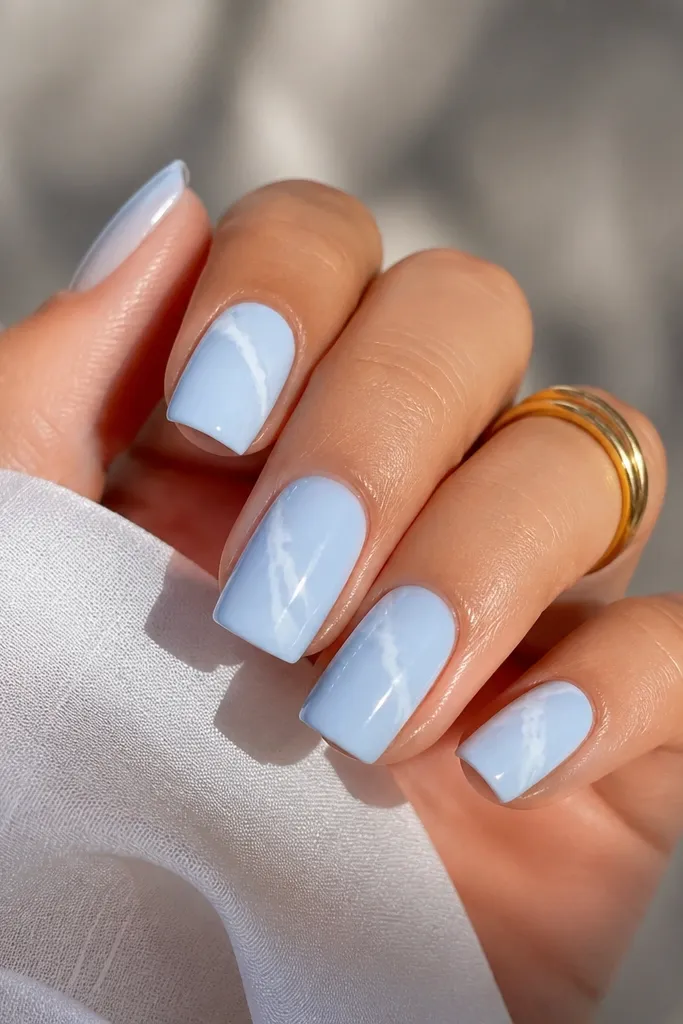
Marble veins make square nails look expensive without needing rhinestones. Baby blue keeps it summer, and thin white veins create movement that flatters the square geometry. I like to place veins diagonally instead of straight down because it makes the nail look less stiff. This design suits people who want a clean look but still want "details" that show up in close-up photos. It flatters cool undertones, and warm skin looks great too if the blue is light enough to avoid looking muddy.
Paint baby blue gel in two thin coats and cure. Add a thin layer of clear builder gel or base coat so the marble lines glide, then use a striping brush to pull thin white gel veins across the nail. Keep the lines uneven, like real marble - add one thicker vein and two thinner ones, spaced apart. Cure and cap with top coat in two layers for a smooth, glassy surface. Clean the edges so the square corners stay sharp.
Editor's noteIf your marble veins look too opaque, wipe the brush and drag the line again with less gel.
Watch outAvoid thick marble swirls; they make square nails look chunky.
20. Pastel Rainbow Micro Stripes
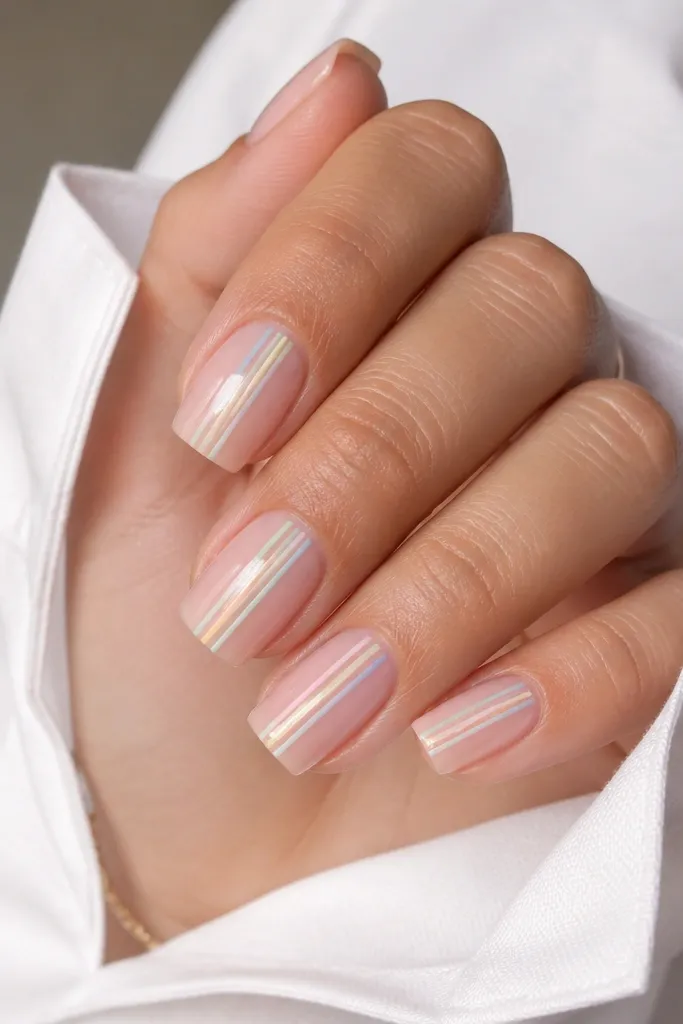
Micro stripes are tiny, but they change the whole nail silhouette. On square nails, vertical stripes make the shape look longer and slimmer. Pastel rainbow feels summer without turning into a loud neon set, and the sheer pink base keeps it soft. I like this for everyday because it's detailed up close but not overwhelming from a distance. It looks good on nearly every skin tone because the pastel colors are light and balanced. Perfect for school, office days, and casual weekends.
Start with a sheer pink base gel and cure. Use a striping brush to paint one vertical line at the center, then add two more lines spaced evenly on each side. Keep stripes thin - about 0.3-0.5 mm - and stop them 1-2 mm before the free edge. Alternate colors across nails so each one has a slightly different set of pastels. Cure and finish with one glossy top coat to lock everything in.
Editor's noteUse gel polish with a fine brush or a striping brush - regular polish won't keep micro lines straight.
Watch outAvoid thick stripes; they turn square nails into blocks of color.