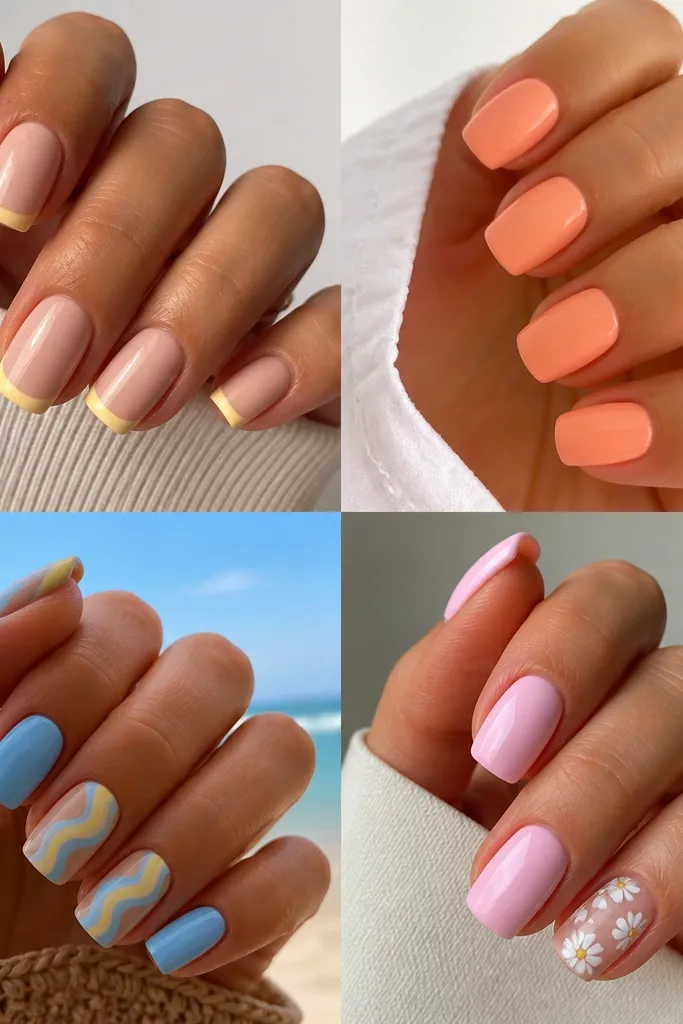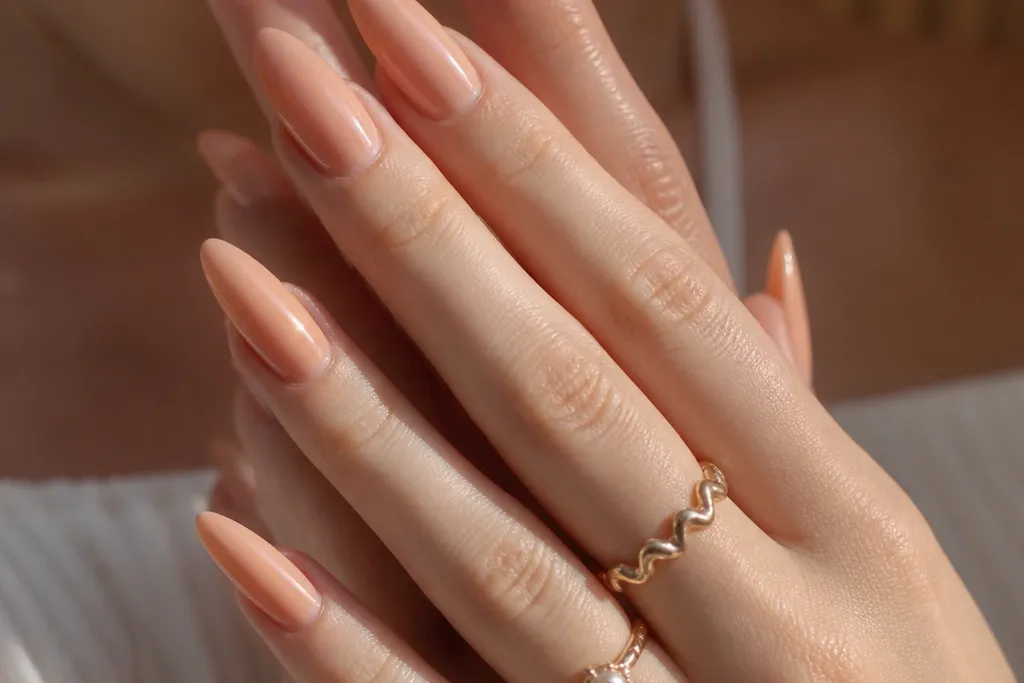
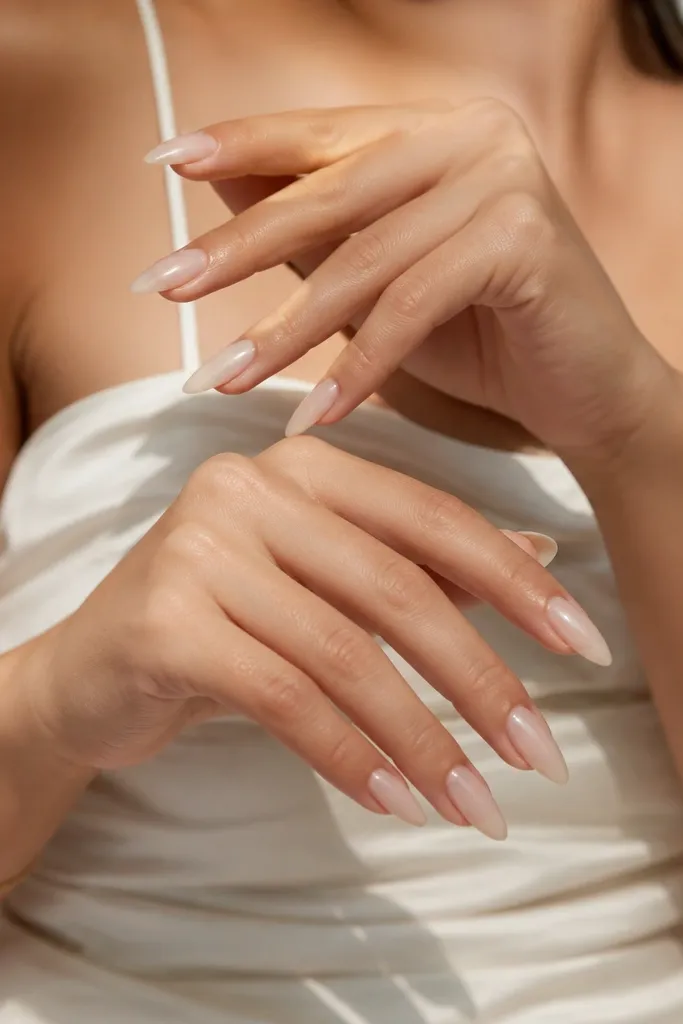
1. Coral Chrome Cuticle Fade with White Micro Dots
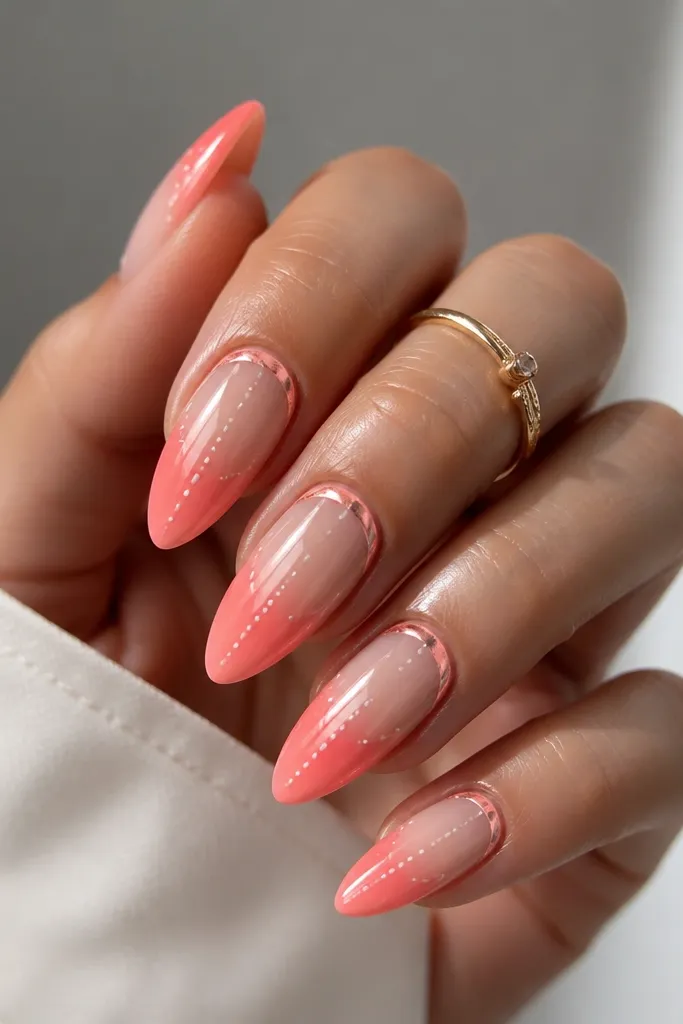
This set uses coral as the summer anchor and chrome as the drama driver. The cuticle band catches light when you move your hands, while the rest stays airy with a nude fade so your almond shape still looks long. I like it on light to medium skin tones because coral warms the complexion fast, and the chrome makes it look "lit" without glitter everywhere. For deeper skin tones, use a richer coral base (more orange, less pink) so the chrome reads bright instead of dusty. The key is keeping the white dots small and spaced - they look like fun summer confetti, not clown-sized blobs.
Start with a nude jelly base gel, then sponge on coral gel from the cuticle outward about one-third of the nail. Cure. Apply coral chrome powder only on the cuticle zone and blend the edge with a thin layer of coral gel so it fades, not stops. With a liner brush, place 4-6 tiny white dots in a vertical line down the center of each nail, leaving gaps between dots for breathing room. Seal with a thick glossy top coat, and cap the free edge so the tips stay crisp.
Editor's noteIf chrome gets patchy, buff the chrome area lightly with a soft foam buffer before top coat - it makes the shine even.
Watch outDon't use big dots or heavy white opacity - on almond, it shortens the nail visually.
2. Tangerine French with Thin Gold Side Lines
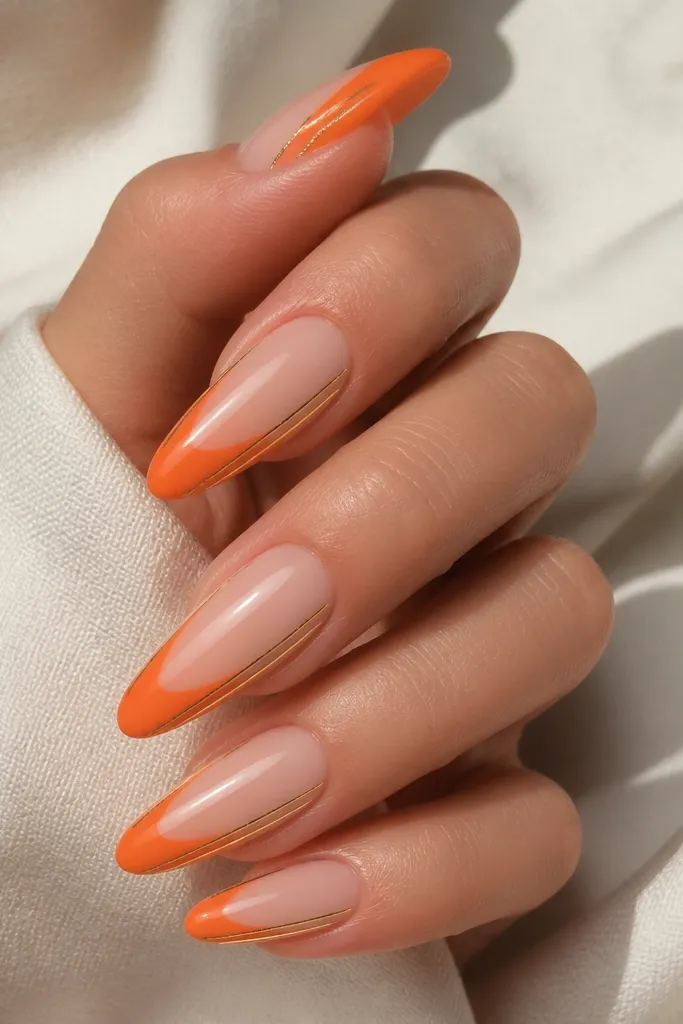
A French tip is drama that stays clean. Tangerine on a sheer pink base looks like you just left a salon, and the thin gold side lines give you movement when your hands are in motion. This flatters most skin tones because French color sits at the tip where your eye expects color, and the gold adds warmth without needing extra glitter. On olive or warm undertones, tangerine reads extra sunny; on cool undertones, it still works if you keep the gold lines super thin so it doesn't turn brassy. The styling principle is restraint: one bold tip color plus two delicate accents.
Prep the nail surface and apply a sheer pink or nude base gel, cure it well. Paint a French tip in tangerine, using a 2-3 mm tip width on the almond - not too wide. Cure. With a striping brush, draw one thin gold line on each sidewall starting around the middle of the nail and stopping just before the tip. Clean up the edges with a detail brush dipped in gel cleanser. Finish with two layers of glossy top coat, and cap the gold lines by brushing a thin coat over them.
Editor's noteUse striping tape as a guide for the French edge - it keeps the smile line sharp.
Watch outAvoid a thick French tip - it makes long almond look stubby.
3. Neon Pink Negative Space Skew Lines
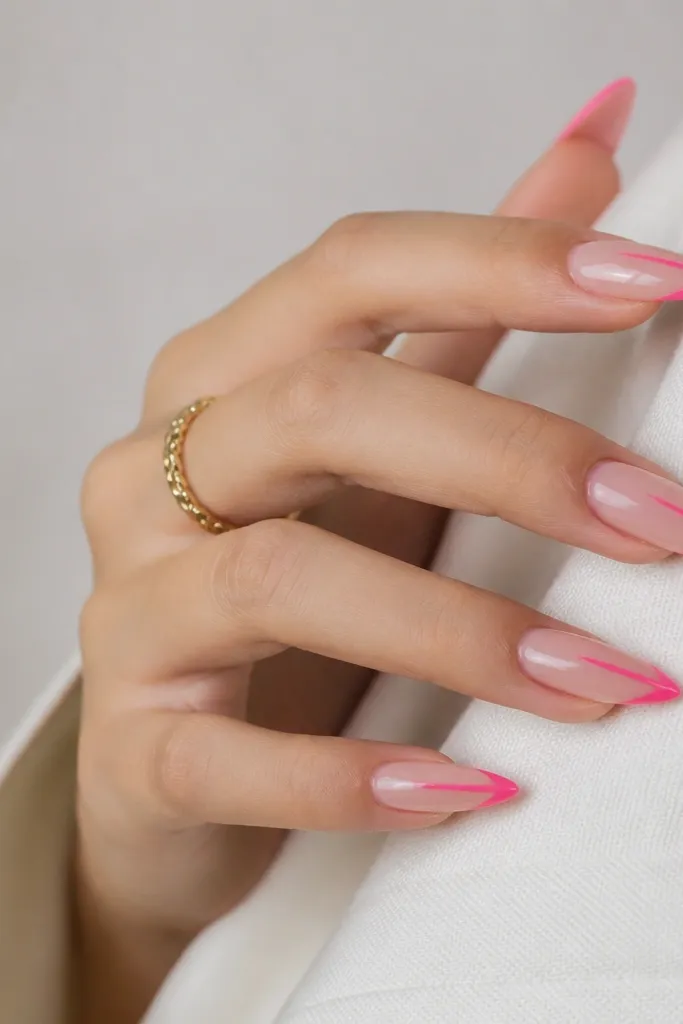
Negative space is the fastest way to get drama without a heavy pattern. Neon pink skews create a "graphic" look that feels modern for summer, especially because almond already has a natural taper that guides the eye. I like this on fair to medium skin because the nude base stays bright and the neon pops; for deeper skin tones, choose a nude base that's slightly warm (not gray) so the negative space doesn't look washed. The styling principle is symmetry in placement, not in thickness - keep the lines consistent across nails, but let one line be slightly thicker for a designer feel.
Apply a clear builder gel base or a nude jelly that matches your skin tone, cure. Use striping tape to block off two diagonal sections across each nail, leaving the rest nude. Paint neon pink gel in the exposed sections, cure, then remove tape while the gel is fully cured. Add a tiny neon triangle at the tip corner on two accent nails only, not every nail. Seal with glossy top coat, and use a small brush to clean gel on the sidewalls so the negative space stays crisp.
Editor's noteIf neon gel is streaky, do two thin coats instead of one thick coat - neon levels out in thin layers.
Watch outDon't let neon spill over the negative space edges - it kills the graphic effect.
4. Seafoam Jelly with Iridescent Holo Flakes
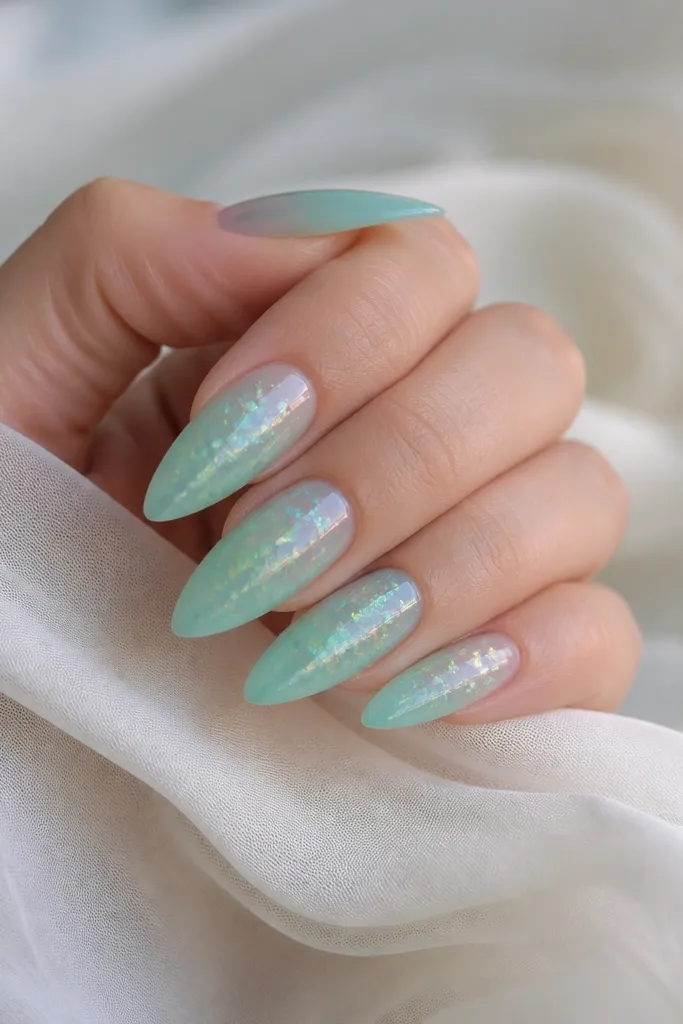
This set looks like ocean light trapped under glass. Seafoam jelly gives you that summer freshness, and holo flakes add drama that changes color when you tilt your hand. It flatters light to deep skin because the jelly is translucent - your natural tone still shows through, so it never looks too heavy. I've worn this on vacation with a lot of sunscreen exposure, and it held up best when the flakes were sealed under a thicker top layer. The styling principle is concentration: flakes sit in the mid-nail so the nail doesn't look sparkly from edge to edge.
Build a seafoam jelly layer and cure. While it's tacky (or after using a tack layer), place small iridescent holo flakes mostly in the center of each nail, leaving the cuticle area cleaner. Press gently with a silicone tool so flakes sit flat. Cure. Apply a thick gel top coat in two layers, dragging the brush from base to tip to smooth over the flakes. Cap the free edge so the surface doesn't catch on fabric.
Editor's noteUse fewer, larger flakes instead of lots of tiny ones - the holo looks more intentional on almond.
Watch outDon't overpack flakes at the tip - it makes long nails feel top-heavy.
5. Lavender Satin Matte with Glossy Heart Tips
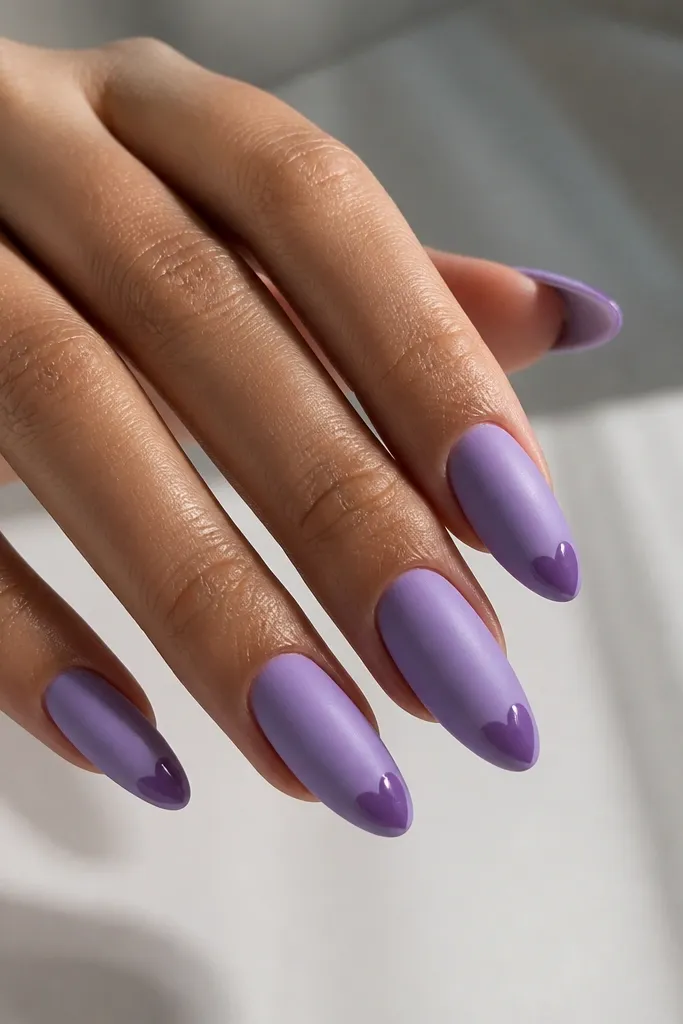
Matte lavender feels summer-soft, and the glossy hearts at the tip give you a "sweet drama" contrast. The satin matte hides tiny surface imperfections, which is why this design looks good even if you're not using a perfect base. I love it on fair to medium skin for a romantic look, and on deeper skin it looks stunning if the lavender is more periwinkle than gray. The styling principle is contrast: matte body, glossy micro art. Keep the hearts small and centered so they don't widen the almond shape.
Apply lavender gel in two thin coats for even coverage, cure fully. Buff lightly if your matte top coat needs a smoother surface. Apply a satin matte top coat across the entire nail and cure. With a fine detail brush, paint tiny hearts at the tip using a darker purple gel, cure. Finally, paint a glossy top coat only over the hearts, then cure again. Clean the edges with gel cleanser so the matte-to-gloss transition stays sharp.
Editor's noteDraw the heart with a dot for each lobe first, then connect - it keeps the symmetry.
Watch outSkip thick heart lines - chunky hearts look like stickers.
6. Sunflower Accent with Bare Mid-Negative Space
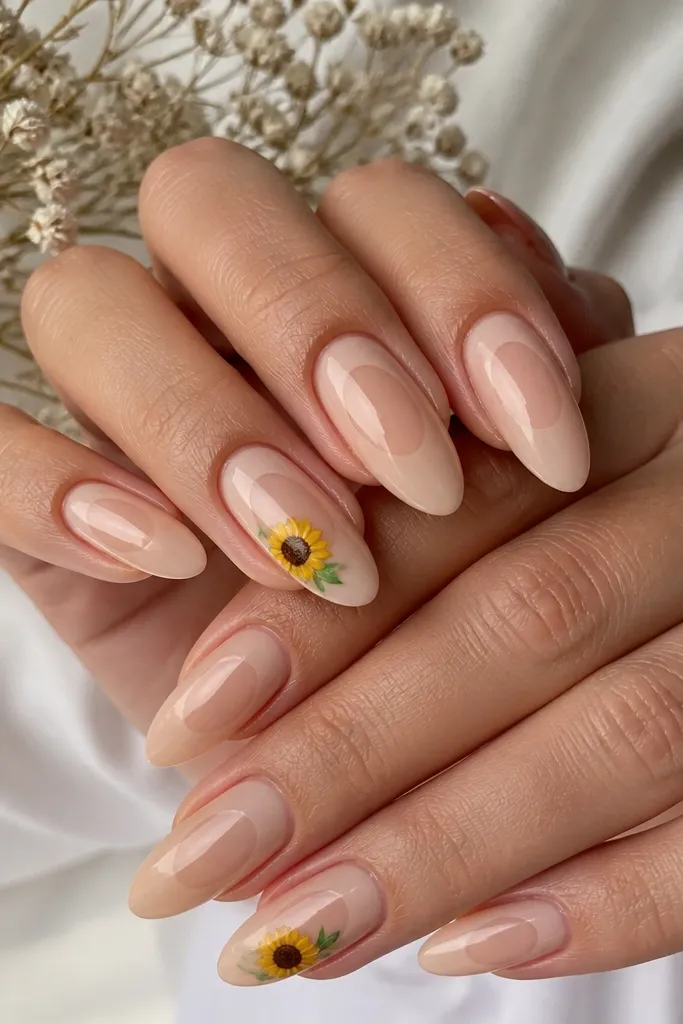
This is the summer set that gets compliments because it looks like real art, not a sticker. The nude base keeps it wearable, and the bare mid-negative space makes the sunflower feel like it's floating. I've worn it to brunch and got asked where I got the nails - the sunflower reads bright without needing full coverage glitter. It flatters any skin tone because the base is nude and the sunflower colors do the work. The key is placing the sunflower slightly toward the cuticle so the whole nail still looks long.
Start with a nude jelly base and cure. On each nail, leave a thin vertical strip of negative space down the center by masking it with striping tape while you apply a sheer nude wash only on the sides. Cure. On accent nails, paint sunflower petals in a soft yellow, add a dark brown center dot, and add two tiny green leaves angled outward near the lower half. Add a light outline around petals with a slightly darker yellow to make them pop. Seal with glossy top coat, and keep the negative space area clean so it stays see-through.
Editor's noteUse a dotting tool for the center first, then build petals around it - the flower looks more balanced.
Watch outDon't cover the whole nail in sunflowers - it turns into a busy print.
7. Citrus Drip Tips in Gold Leaf
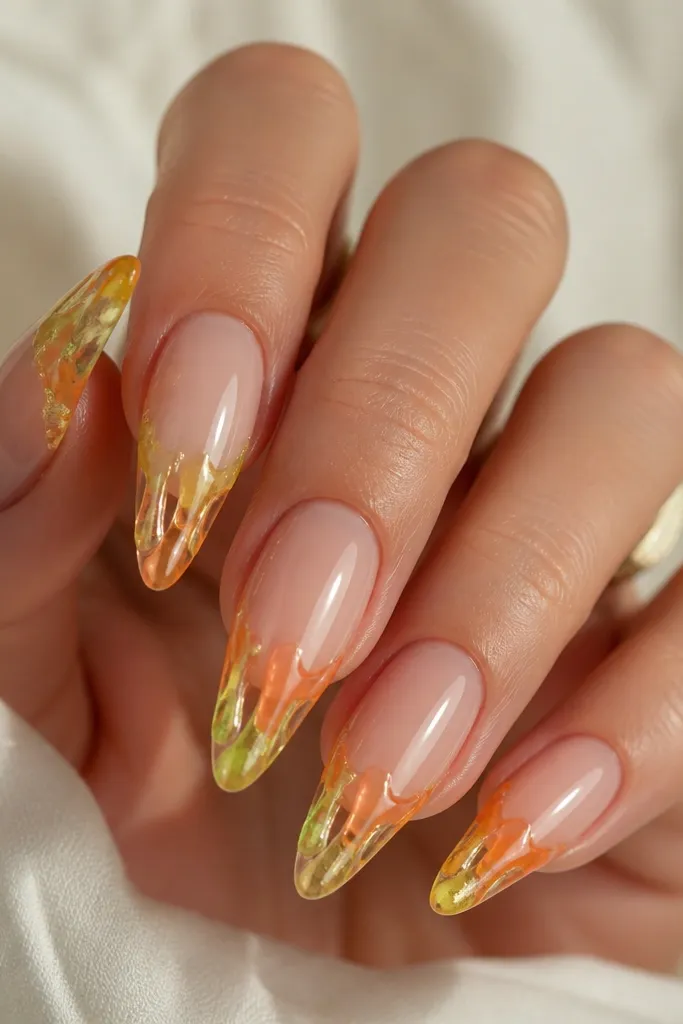
Drip tips are drama because they look like motion, but the nude base keeps them from feeling childish. Lime-to-orange citrus gives you that summer punch, and gold leaf makes it look like jewelry instead of candy. This one flatters most skin tones because the base is clear and the color sits at the tip where almond already tapers. I like this for vacations and festivals because it photographs well in sunlight. The styling principle is trapped texture: gold leaf goes inside the gel drip, not scattered on top.
Apply a clear or nude builder gel base and cure. Paint a thin lime gel band at the tip, then add an orange gel over it and pull both colors downward with a small brush to create 2-3 drip streaks per nail. Don't overdo the drips - keep them short so you still see almond taper. While the gel is tacky, press small pieces of gold leaf into the drip areas. Cure. Add a gel top coat in two layers, smoothing over the drips so they feel glossy and not bumpy. Cap the free edge carefully so the drips don't lift.
Editor's noteGold leaf sticks better if the gel is tacky, not fully cured.
Watch outAvoid heavy gold leaf coverage - it looks messy instead of luxe.
8. Sky Blue Ombré with Silver Cloud Line Art
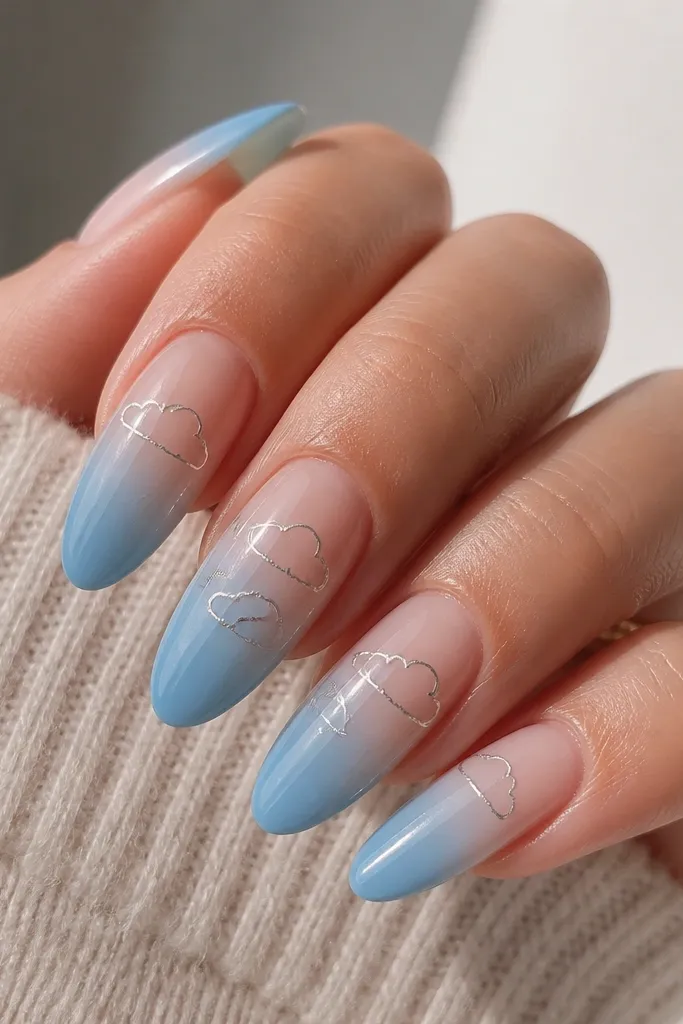
This set looks like a clear day on your hands. The sky blue ombré does the color drama, and the silver cloud line art adds movement without covering the entire nail. I've found it flatters fair, medium, and deep skin because blue sits cleanly against nude. For deeper skin tones, use a slightly deeper cobalt tip so the gradient stays visible. The styling principle is line art restraint - keep the clouds thin and spaced so the almond shape still reads long.
Start with a sheer nude base and cure. Sponge sky blue gel from the tip upward, leaving about one-third of the nail sheer at the cuticle. Cure. With a striping brush, draw small cloud outlines in silver gel near the cuticle on two nails and in the mid-nail on the other nails. Let the lines be thin - 1 hairline stroke - then cure. Seal with glossy top coat, and add an extra thin coat on the ombré area so the gradient doesn't look grainy.
Editor's noteIf your ombré looks streaky, sponge with a makeup sponge using tiny dabs instead of swiping.
Watch outDon't make the cloud art thick - thick lines flatten almond.
9. Pearlized Nude with Rose-Gold Foil Half-Moons
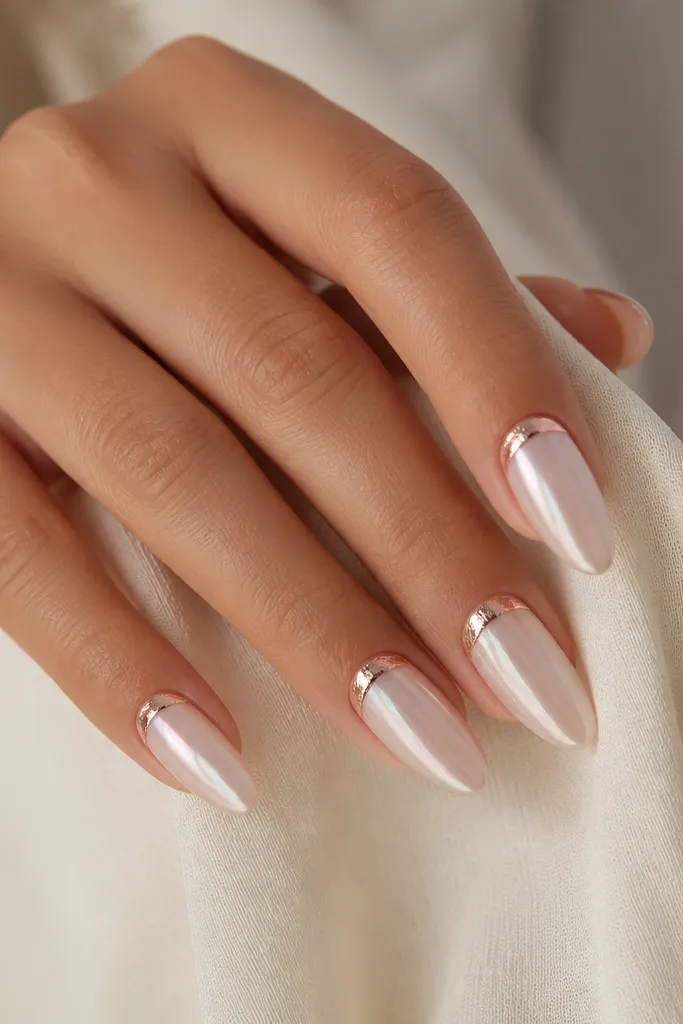
Pearlized nude is the secret weapon for summer drama that still looks classy at work. The rose-gold foil half-moons reflect light right at the cuticle, so your hands look polished even when the rest is simple. I like this on every skin tone because it doesn't fight your undertone - the base stays soft, and the foil does the bright part. For warm skin, rose gold looks extra golden; for cool skin, it still reads flattering because it's warm-adjacent. The styling principle is a single strong shape: half-moons, same size, same placement.
Apply a pearlized nude gel and cure. Use a small brush to apply rose-gold foil transfer gel only in a half-moon shape at the cuticle, about 1-2 mm wide and centered. Press foil onto the tack area and lift carefully. Cure. Add a thin layer of top coat over the foil to lock it in, then a second full glossy top coat. Clean around cuticles with a lint-free wipe so the half-moon edges stay crisp.
Editor's noteMatch half-moon height across nails - even 0.5 mm differences show on long almond.
Watch outAvoid covering the whole cuticle with foil - it turns into full glitter instead of drama.
10. Tropical Leaves on Clear Jelly Base
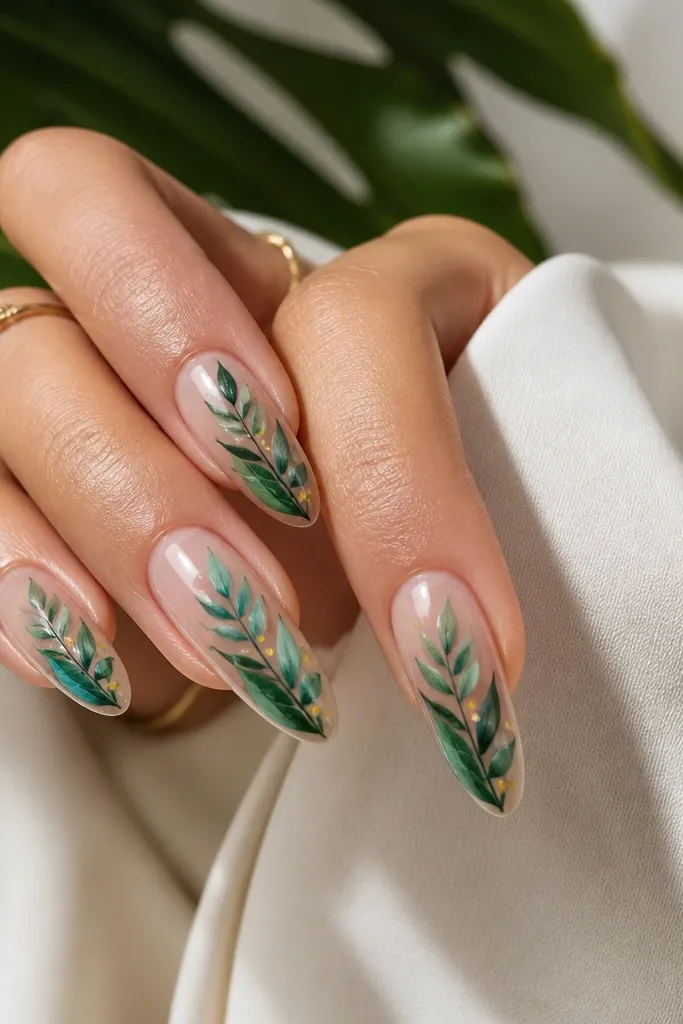
Clear jelly with tropical leaves looks fresh without making your nails feel heavy. The leaf cluster along one side makes your almond taper look even sharper, and it gives you that vacation vibe in a clean way. I've found this works best when you keep the leaves to one main stem and a couple of offshoots, not a full jungle pattern. It flatters light to deep skin because the base is transparent and the greens show through smoothly. The styling principle is negative space around the leaves - let the jelly glow.
Start with a clear builder gel base and cure. Mix two greens - a darker teal-green and a lighter leaf green - and paint one leaf stem angled slightly toward the tip. Add 2-3 leaf shapes branching off the stem, keeping them mostly on one sidewall. Add tiny yellow dot accents near the leaf veins for sun spots. Cure. Seal with glossy top coat in two layers, and cap the free edge so the clear jelly doesn't get rough at the tip.
Editor's noteUse a fine liner brush for leaf veins - one or two thin lines makes it look hand-painted.
Watch outDon't fill every inch with leaves - sparse clusters look more expensive.
11. Hot Pink Micro Glitters Center Stripe
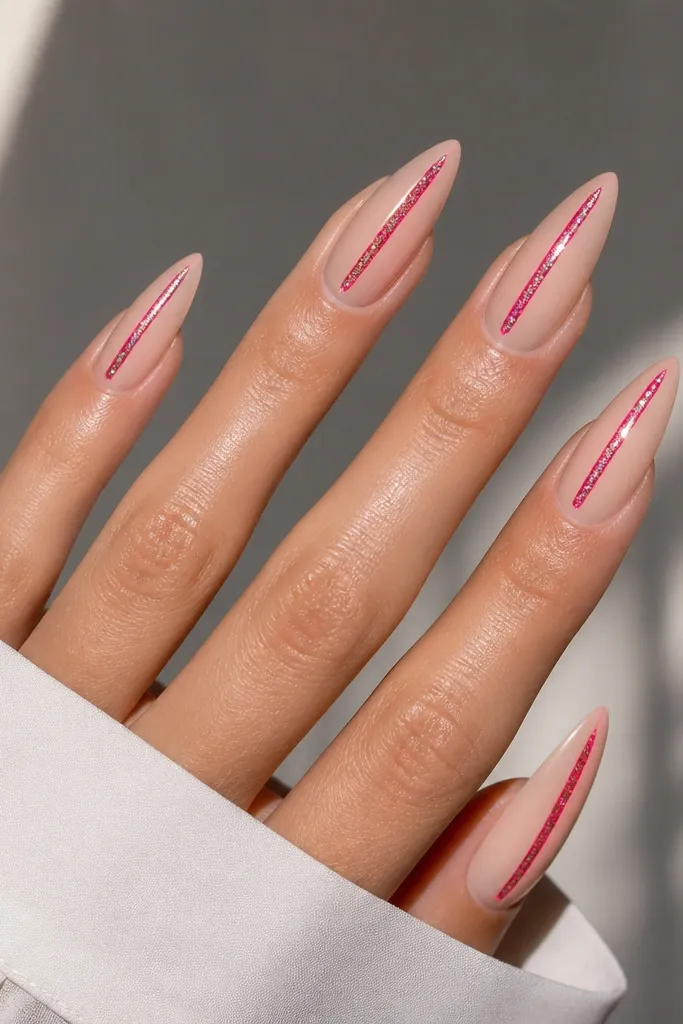
This set is drama through texture, not coverage. A hot pink micro glitter stripe in the center draws the eye lengthwise, which is exactly what long almond needs. The matte border makes the glitter stripe look sharper and more "graphic," and then you add glossy top coat only on the stripe so it catches light. I wear this when I want something loud but still clean for summer nights. It flatters all skin tones because the base is nude and the glitter is the only saturated element. The styling principle is one stripe, one direction - no extra sparkles competing.
Apply a sheer nude base gel and cure. Paint a narrow hot pink stripe down the center using a glitter gel or dense micro glitter mixed into clear gel, about 1 mm wide. Cure. Apply matte top coat to the rest of the nail surface, but avoid the glitter stripe area. Then apply glossy top coat only over the stripe and cure again. If you see any matte dust on the stripe, wipe gently before top coat so the shine stays crisp.
Editor's noteIf the stripe looks uneven, use a gel pen or a striping brush to re-line it before curing.
Watch outAvoid glitter scatter - it makes long almond look messy fast.
12. White 3D Seashells on Nude Almonds
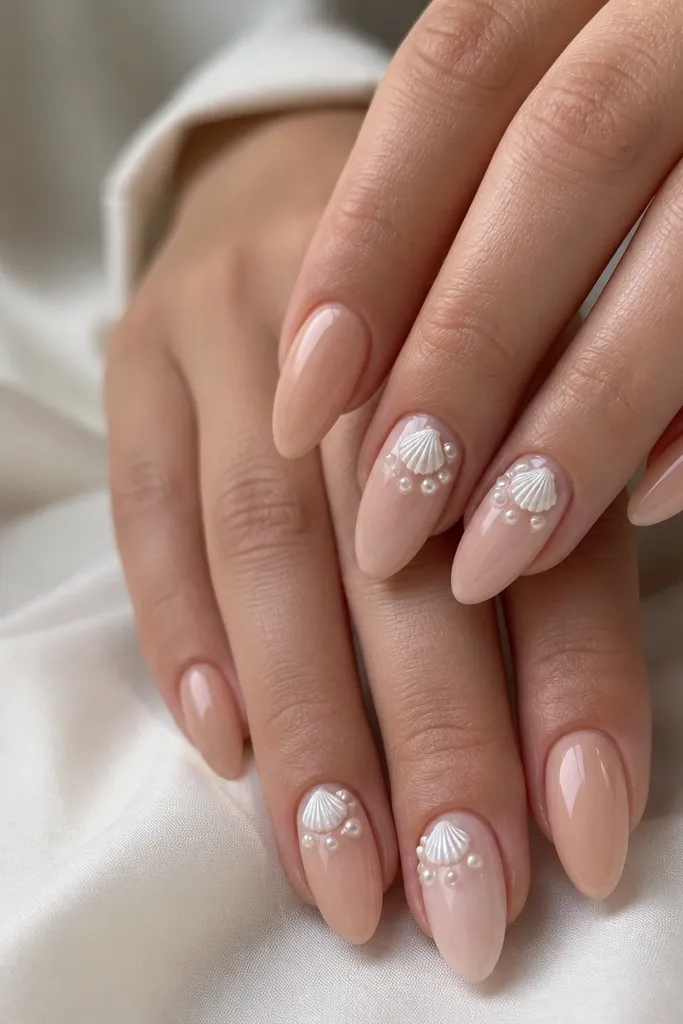
3D seashells scream summer, but only if you place them correctly. When shells sit near the cuticle, they look like a jewelry charm instead of a bulky add-on, and your tip stays smooth. I use a glossy nude base so the shells pop against the skin-tone warmth. This looks great on fair to deep skin because white seashell pieces keep the design bright, and the nude base prevents it from feeling costume-like. The styling principle is scale: small shells, minimal number, and clean spacing.
Apply a nude base gel and cure, then add a glossy top coat layer. Use a dot of thick gel or shell glue on the nail near the cuticle - not at the tip. Place pre-made 3D seashell charms or hand-molded shell gel pieces and press lightly so they sit flat. Cure. Add a thin gel layer around the shell base to seal edges, then cure again. Finish with one more glossy top coat over everything except the shell texture if it looks too flat.
Editor's noteSeal the sides of the charm with gel - lifting starts there.
Watch outDon't glue multiple shells on every nail - it snags and chips faster.
13. Black Liner Cat-Eye with Neon Green Edge
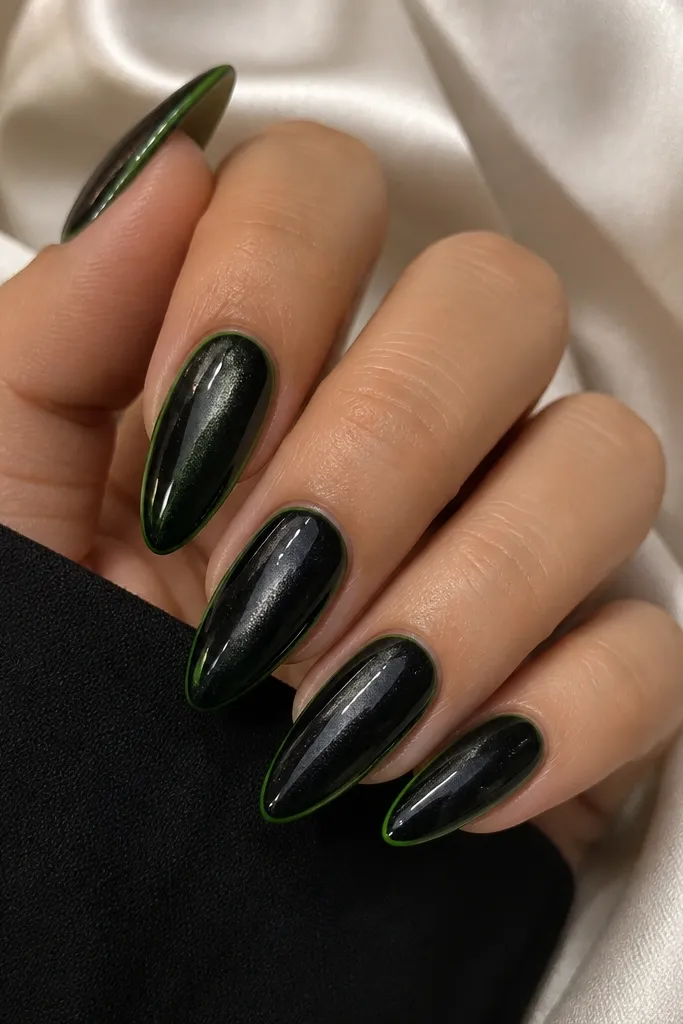
This is summer drama for people who don't want pastels. Black cat-eye gel gives you that reflective stripe when you move your hand, and the neon green edge adds a pop that looks sharp with sunglasses and gold jewelry. I've worn this with denim and a white linen shirt and it still looked bold without being chaotic. It flatters medium to deep skin especially well, because the neon reads loud against dark polish. The styling principle is one neon accent line - keep it thin so the black cat-eye stays the star.
Apply black cat-eye gel to each nail and cure, then magnet it for the reflective center line. Use a magnet for 10-20 seconds while it's still tacky so the stripe lands evenly. Cure. With a striping brush, draw a thin neon green line along the outer edge of the nail from mid-nail to the tip, staying about 0.5-1 mm from the sidewall. Cure again. Seal with glossy top coat in two layers, and brush extra top coat over the neon line so it feels smooth.
Editor's noteMagnet twice - first for the stripe, second to sharpen it - but don't move the magnet mid-cure.
Watch outAvoid a thick neon outline - it makes the nail look outlined in marker.
14. Peach Marble Swirls with Gold Fleck Veins
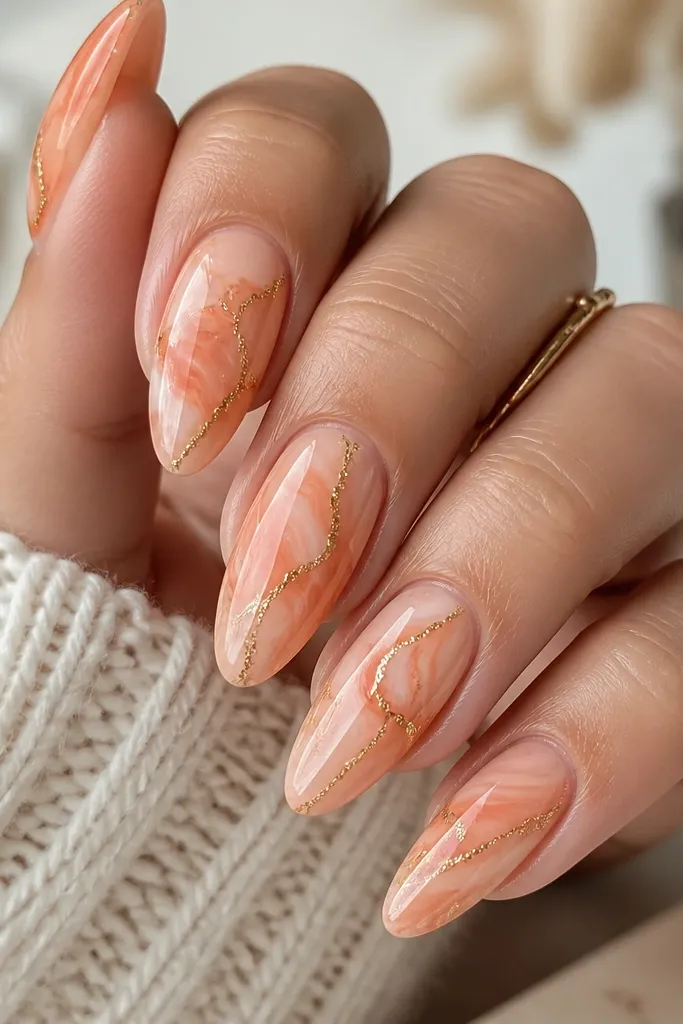
Marble looks fancy in summer when it stays light and warm, not gray and heavy. This peach marble set gives you movement, and the gold fleck veins make it feel like high-end stone jewelry. I like it on fair to medium skin because the peach tones look sunlit; on deeper skin, use a slightly deeper peach or apricot so the marble doesn't wash out. The styling principle is thin swirls - marble that's too thick looks like paint splatter on almond. Keep the main swirl centered so the nail looks longer.
Start with a peach cream base gel and cure. Drop in lighter cream gel and slightly darker peach gel, then use a marbling tool or toothpick to swirl gently, creating 2-3 main curves per nail. Add tiny gold flecks by pressing micro gold pigment into the wet marble lines, then cure. Clean the edges with a brush dipped in cleanser so the marble doesn't creep into the sidewalls. Finish with two layers of glossy top coat, and cap the free edge to prevent chipping on the marble texture.
Editor's noteLet the marble gel settle for 20-30 seconds before swirling - it spreads more evenly.
Watch outDon't use black marble lines - it makes summer peach look dirty.
15. Blueberry Jam Gradient with Jelly Dot Clusters
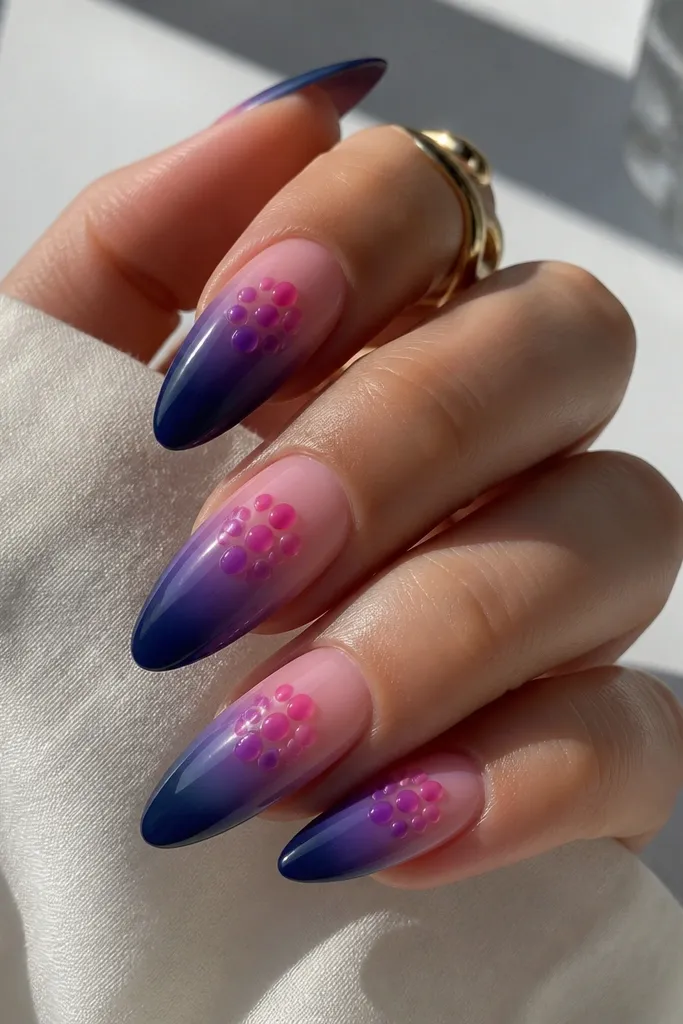
This set looks like a dessert - glossy, juicy, and very summer. The blueberry gradient gives you drama at the tip, while the jelly dot clusters add playful texture without turning into full glitter. I've had this paired with white dresses and it looked incredible under natural light because the jelly dots catch reflections. It flatters most skin tones because the base transitions from sheer nude into saturated berry, which keeps it balanced. The styling principle is cluster placement: keep dots grouped in small islands so the nail still reads sleek.
Apply a sheer nude base gel and cure. Sponge or brush blueberry gel from the tip upward, stopping around one-third of the nail for a strong gradient. Cure. For the dot clusters, use a jelly gel in bright pink and purple and place 3-5 dots per cluster near the center, with one cluster closer to the cuticle. Use a dotting tool and cure each color layer if needed to prevent smearing. Seal with a glossy top coat that's thick enough to level the dots, then cap the free edge.
Editor's noteUse a dotting tool size that matches your nail - tiny dots look sharp on long almond, big dots look childish.
Watch outDon't spread the dots across the whole nail - clusters look intentional.