
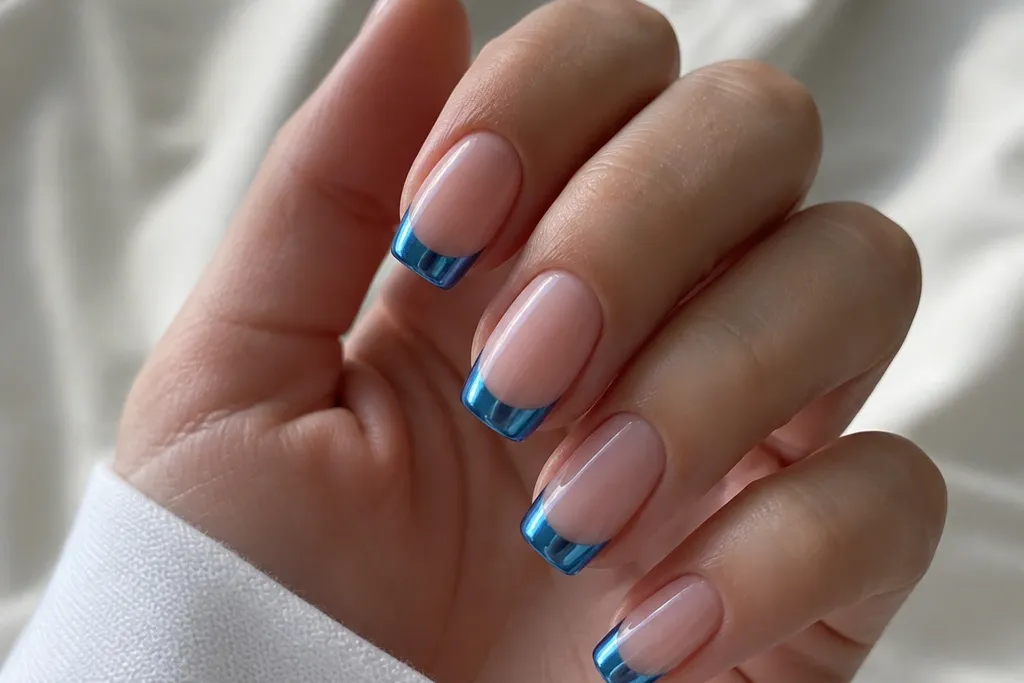
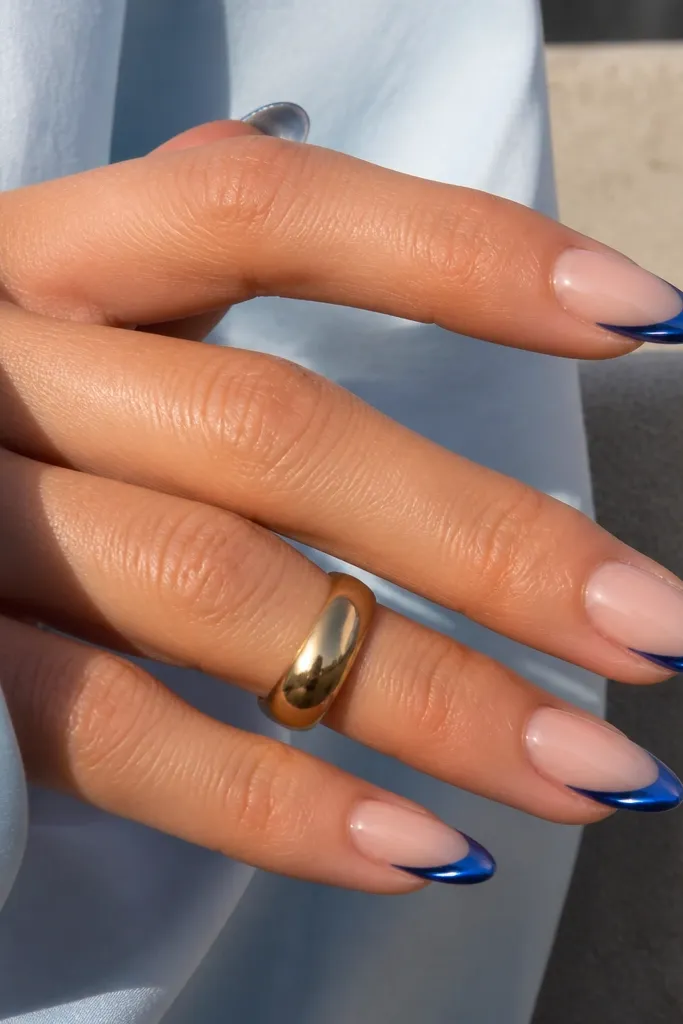
1. Icy Blue Chrome Micro French With Single Rhinestone Dot
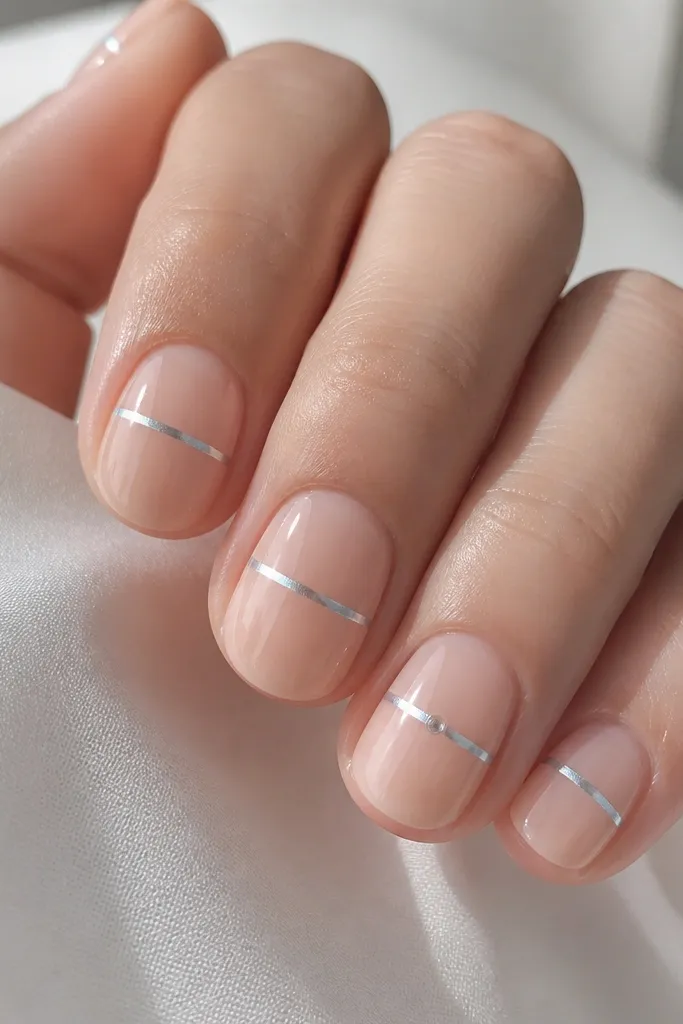
This one is for when you want chrome drama but your nails are on the shorter side. The base is a sheer nude that matches your natural nail tone, and the French line is a thin icy blue chrome that reads almost silver in bright light. The single rhinestone dot sits exactly where the smile line curves up, not near the cuticle, so the eye travels across the French shape. It flatters most skin tones because the nude base stays neutral and the chrome catches cool highlights. Wear it for office days, because the detail is small enough to look intentional rather than party-only.
Start by pushing back cuticles and lightly buffing only the shine off your nail plate, then wipe with alcohol or nail prep solution. Place the removable French tips so the blue line sits about 2 mm from the fingertip on short nails, keeping the curve even across all fingers. Press firmly at the center first, then smooth the sides with a rubber-tipped tool or your clean thumb. Finally, add one clear rhinestone with a tiny dot of gel glue or removable tacky adhesive on the outer corner of the blue line, then seal with a thin top coat that stays glossy.
Editor's noteIf your rhinestone pops off, swap to a micro gel dot and cure under a lamp - it holds through washing and hand lotion.
Watch outAvoid placing rhinestones on multiple nails - it turns into scattered sparkle instead of a clean French focal point.
2. Denim Blue Chrome French With Reverse Half-Moon Cuticle
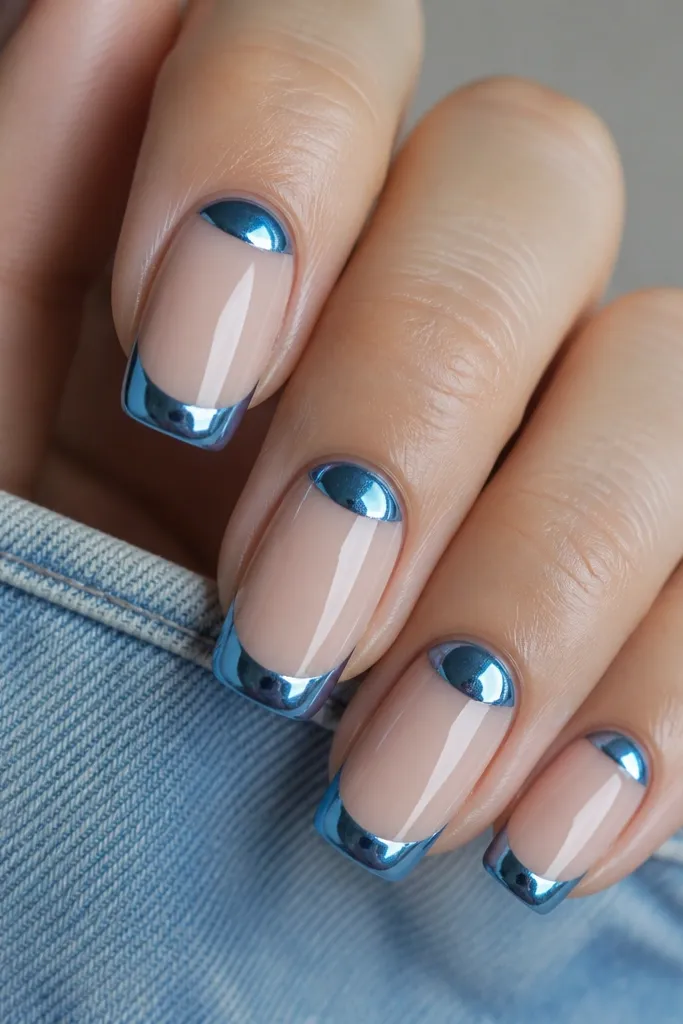
This design makes the chrome look "built-in" instead of taped on. Denim blue chrome is deeper than icy chrome, so it reads stronger against warm and cool skin tones, especially in indoor lighting. The reverse half-moon at the cuticle frames the nail bed and makes your fingers look longer because it creates a vertical line from cuticle to tip. I like squoval for this because the edges catch the light without looking sharp. It's a great pick for nights out when you want a bold blue without adding extra colors.
Begin with a sheer nude base layer and let it dry fully, then place your removable denim blue French tips with the smile line centered on each nail. Use a small strip of chrome foil or a peel-off half-moon decal to create the reverse half-moon at the cuticle, keeping it about 1 mm away from the skin so it doesn't lift. Press the half-moon gently, then run a clean microfiber brush along the edge to remove any stray chrome dust. Seal with a glossy top coat over both the French tip and the half-moon, and cure/dry according to your product directions.
Editor's noteTo keep the cuticle half-moon crisp, use a cuticle pusher to press from the center outward - chrome transfers look cleaner that way.
Watch outAvoid letting the half-moon touch your skin - contact makes lifting show up in a day or two.
3. Blue Chrome French With Silver Foil Lightning Bolt
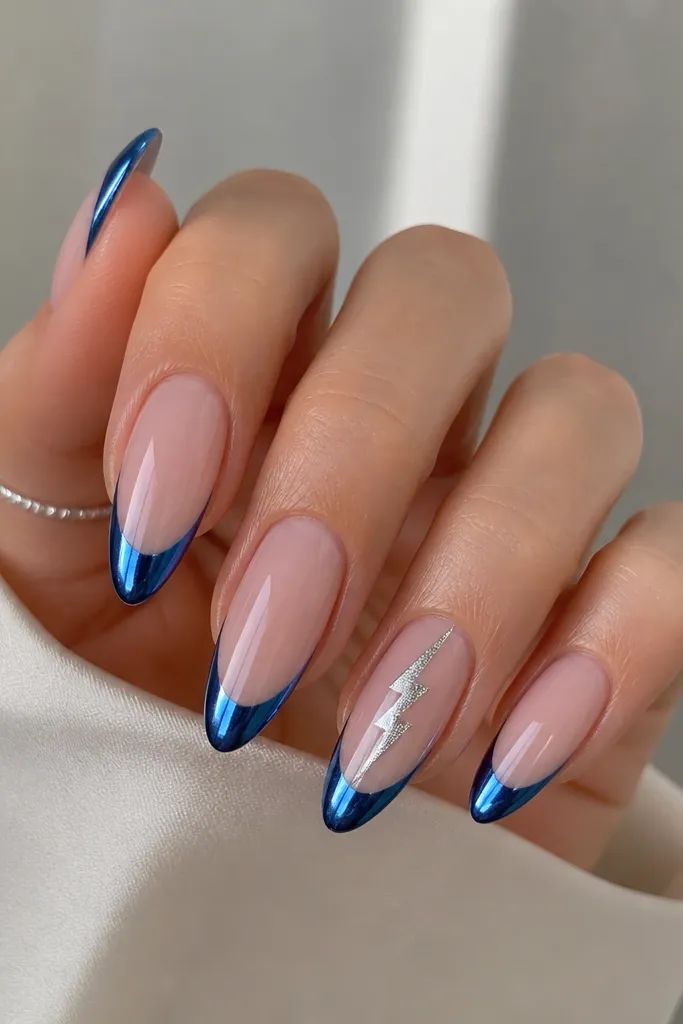
If you like your French tips with a little attitude, this lightning bolt detail does it without turning the whole nail busy. The base stays nude, the French line stays classic and centered, and the silver foil bolt adds contrast that reads sharp in photos. The silver foil works like a highlight, so even if your blue is dark denim, the bolt keeps it from looking flat. Almond nails make the diagonal bolt feel intentional and long rather than awkward. This is a fun choice for concerts, birthdays, and any weekend you want your nails to look like jewelry.
Start with removable blue chrome French tips placed so the smile line is high enough to show the nude space below it - aim for about 2-3 mm nude at the tip area on longer nails. Add the lightning bolt detail on the ring finger only: press small silver foil pieces onto a clear tacky layer under the French line, then shape it into a bolt with a fine brush or foil tool. Keep the bolt narrow - about the width of a matchstick - so it stays sleek. Finish by sealing everything with a glossy top coat, focusing on the edges of the foil so it doesn't peel.
Editor's noteIf foil wrinkles, dab a tiny amount of tacky adhesive on the wrinkle and press again - do not drag the foil.
Watch outAvoid adding the bolt to more than one nail; the design loses its focal point fast.
4. Pearl-Edge Blue Chrome French (Micro Beads Along the Smile)
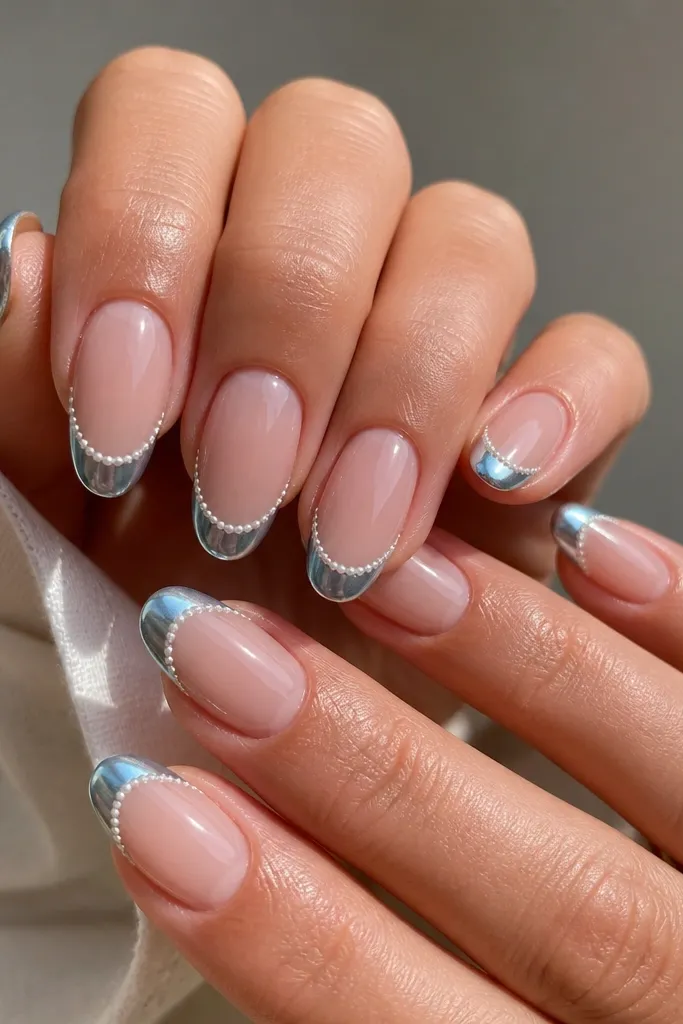
This is the soft version of chrome French, and it looks expensive because the pearls trace the smile line instead of sitting randomly. The icy blue chrome stays light and reflective, while the pearls add texture that catches light differently than the mirror finish. It flatters hands with slender fingers because the pearl border creates a gentle arc that draws attention to the nail shape. If you're warm-toned, the white pearls keep things clean rather than yellow. I wear this when I want something "pretty" but still modern.
Apply your nude base, then place removable icy blue chrome French tips with the smile line centered and evenly curved. On each nail, add micro pearl beads only along the blue curve: start at the outer corner, place one bead, then move toward the center with tiny spacing. Press each bead down carefully so it sits flush; if beads lift, the top coat will snag later. Seal with a top coat in two thin passes, letting the first set up before the second - thick coats can smear chrome edges.
Editor's noteUse a dotting tool to pick up beads; fingertips leave oil that makes the pearls slide.
Watch outAvoid a thick bead line - it turns into a lumpy trim instead of a crisp border.
5. Blue Chrome French With Negative-Space Slash
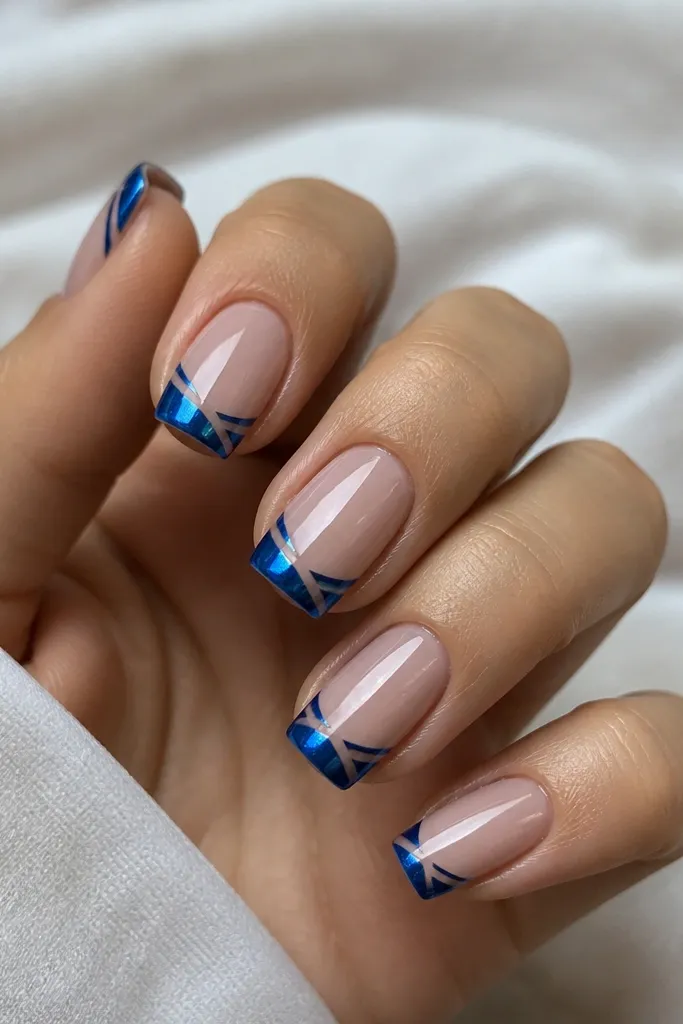
Negative space is what makes this feel graphic instead of decorative. The blue chrome stays as a solid French band, and the slash creates a sharp break that makes your nails look more structured. Square nails work best because the edges make the geometry look deliberate. This design flatters medium to deep skin tones because the nude negative space gives the eye a clean contrast without needing extra colors. It's a great pick for people who love chrome but don't want rhinestones.
Start by placing removable blue chrome French tips, but before sealing fully, add a small strip of temporary tape where you want the negative-space slash to be. The tape should be narrow, about 1-2 mm wide, and angled so the slash points toward the center of the nail. After the chrome tip is pressed down, remove the tape carefully to reveal the nude line. Seal with top coat, then check all edges with a lint-free wipe to make sure no chrome dust bridges into the slash.
Editor's noteMake the slash slightly off-center on each nail; matching angles can look too stiff.
Watch outAvoid a slash that's too wide - it starts looking like a mistake instead of a design.
6. Ocean Teal Blue Chrome French With Tiny Star Confetti
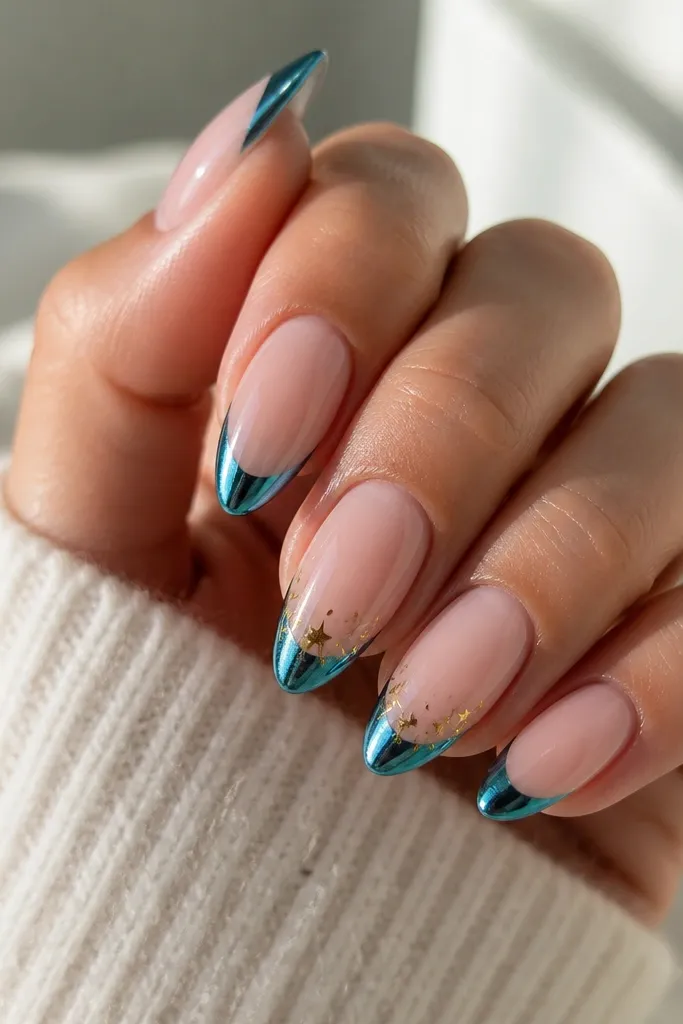
This one gives you a beach-night vibe without using actual glitter. Ocean teal chrome sits between blue and green, so it looks great on both cool and warm skin tones. The star confetti stays tiny and sits under the French line, which keeps the top of the nail clean and makes the stars look like they're floating. Stiletto gives the stars a little sparkle movement, but the design still looks chic because the rest of the nail is nude and glossy. It's perfect for festivals, vacations, or any time you want a playful detail that still reads "neat."
Apply nude base and place ocean teal blue chrome French tips with the smile line centered and slightly higher than usual so the stars have room underneath. On two accent nails only, dab a thin layer of clear tacky adhesive in a small crescent shape under the chrome line. Sprinkle tiny gold star confetti into the tacky area, then tap off excess. Seal with a glossy top coat, using a light brush pass so you don't drag the stars out of position.
Editor's noteChoose star confetti around 0.5-1 mm pieces; larger stars make the French look messy.
Watch outAvoid loading confetti across the whole tip - it kills the crisp French look.
7. Blue Chrome French With Matte Nude Base and Glossy Chrome Top
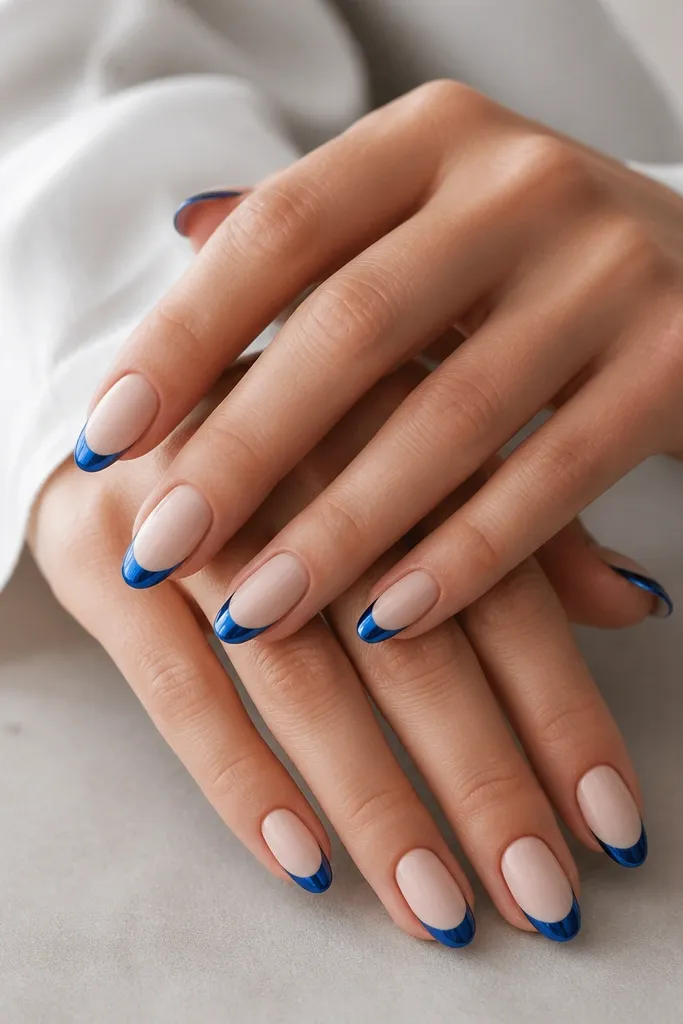
Matte base plus glossy chrome is the easiest way to make removable French nails look custom. The matte nude hides tiny imperfections on your nail surface, so the chrome line looks extra crisp. Blue chrome reads cooler and sharper against matte, which makes your hands look refined instead of shiny-all-over. This design flatters nails that have slight ridges because matte reduces shine that would otherwise highlight texture. I wear this for work and dinners because it looks polished even when you're not dressed up.
Start by applying your base in a matte finish. If your kit doesn't come with matte, you can use a matte top coat over a clear base and let it dry fully. Place removable blue chrome French tips, then press down firmly at the center and sides. After placement, seal only the chrome portion with glossy top coat - keep the matte over the nude area so the contrast stays obvious. Cure/dry and then gently wipe the surface to remove any residue.
Editor's noteIf your top coat dulls the chrome, do a quick test on one nail before you coat all of them.
Watch outAvoid putting glossy top coat over the whole nail - you lose the matte/gloss contrast that makes it look special.
8. Silver Halo Line Under Blue Chrome French
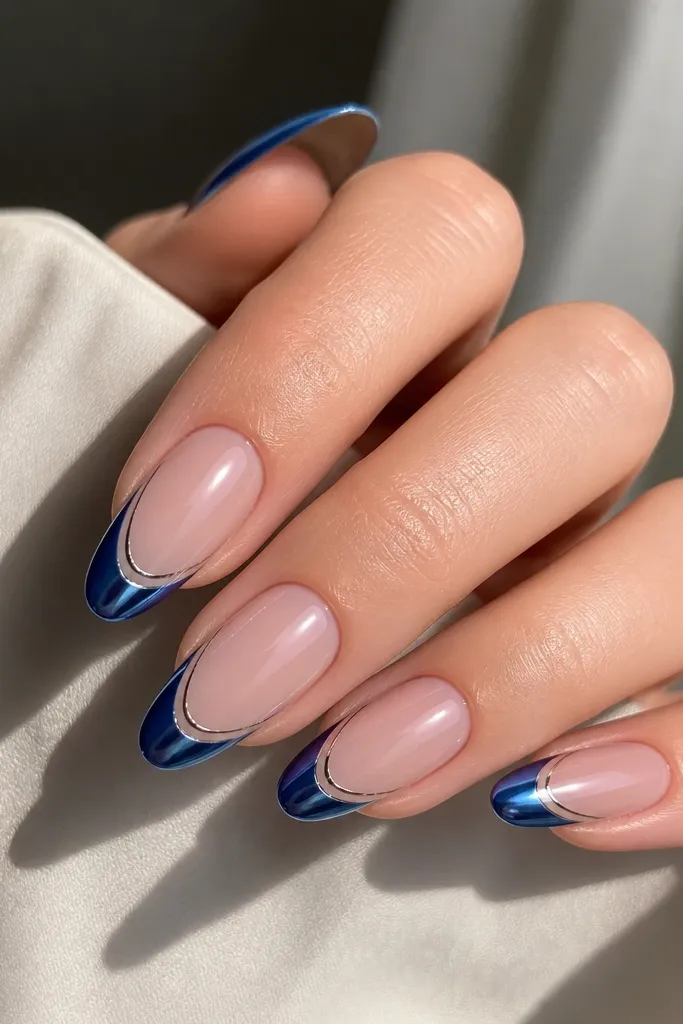
This is the "double French" look without making it thick. The silver halo line creates a glowing border effect that makes the blue chrome feel more dimensional. It flatters short-to-medium nail beds because the second line adds visual structure and makes the tip look longer. The silver also plays nicely with both cool and neutral skin undertones. I like this for formal events because it looks like a design, not a sticker.
Place removable blue chrome French tips with a classic smile line centered on each nail. Next, add a thin silver strip or silver foil line just under the blue edge - about 0.5-1 mm below it - leaving the nude area between them. Press the silver line down lightly, then seal with top coat in a thin layer so the halo line stays sharp. If you're using foil, burnish gently with a soft tool instead of dragging - dragging smears the edge.
Editor's noteKeep the halo line straight across - a wobbly line makes the whole nail look rushed.
Watch outAvoid a halo line that's too thick; it turns into a heavy border instead of a delicate glow.
9. Blue Chrome French With Blue-to-Silver Gradient Fade
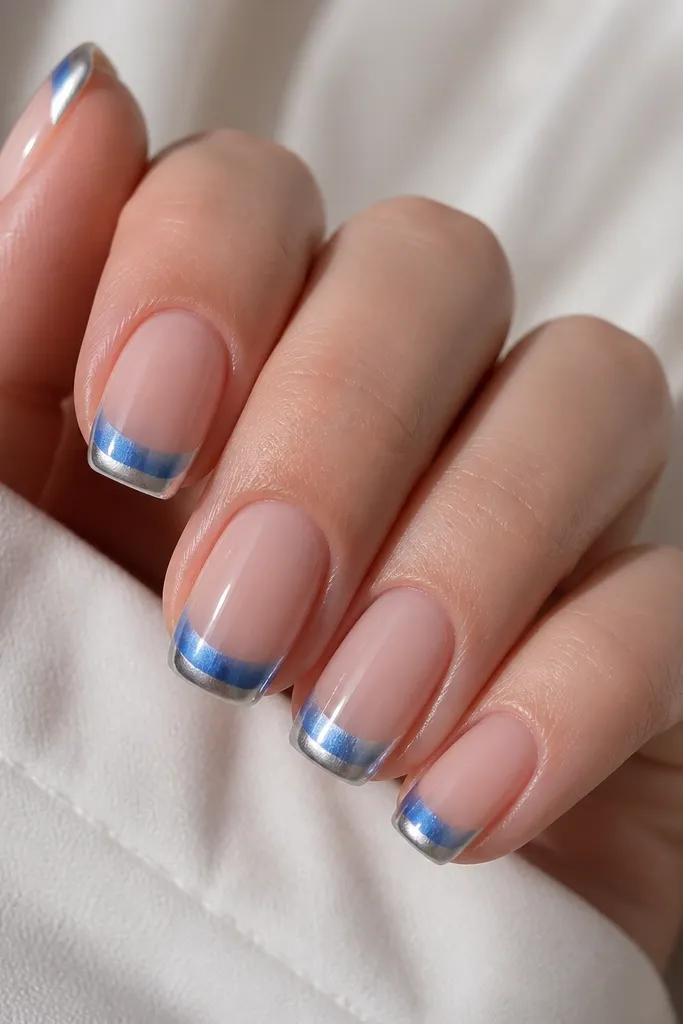
A gradient French tip looks like you paid for nail art, even when it's removable. The center of the French is deeper blue, then it fades into silver toward the outer edge, which makes the nail look wider at the tip in a flattering way. This works on almond, squoval, and short oval because the fade follows the smile curve. It also photographs well because the chrome catches light differently across the gradient. I pick this when I want something softer than plain blue but still very "chrome."
Start with a nude base and place removable French tips that are either blue chrome or a base layer you can foil over. Create the gradient by applying silver chrome foil or powder to the outer half of the French line, then lightly blend it toward the center using a small sponge applicator. Keep the fade inside the French area only, not into the nude - that keeps the French look clean. Seal with a glossy top coat in two thin layers so the gradient doesn't dull or crack.
Editor's noteBlend with a tiny amount of pressure; chrome gradients smear if you push hard.
Watch outAvoid extending the gradient into the nude base - it turns the design into an ombre rather than a French.
10. Blue Chrome French With Cuticle Crystals in a V Shape
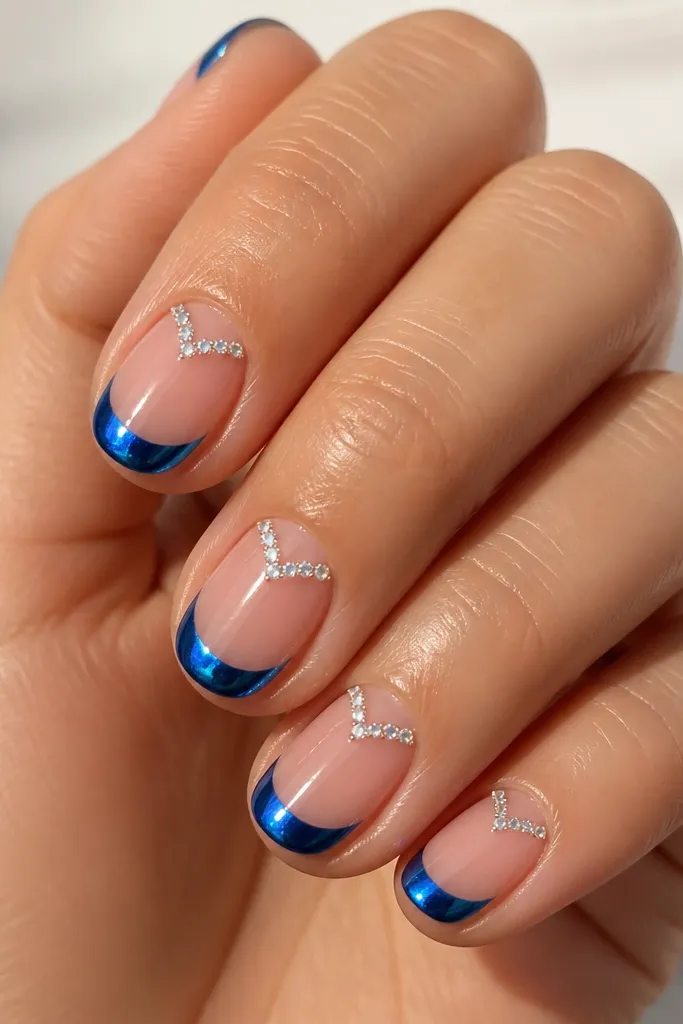
Crystals near the cuticle make your hands look lifted because they pull the eye upward. The French tip stays clean and blue, while the V-shaped crystal cluster at the cuticle adds a controlled sparkle. Bright blue chrome is bold, so pairing it with clear crystals keeps the look from feeling too heavy. This style flatters most skin tones, especially if your nails are shorter because the cuticle detail adds interest at the top. It's great for weddings, date nights, and holiday parties.
Apply a nude base and place removable bright blue chrome French tips with the smile line even across all nails. For the crystal V, place two tiny crystals on either side of the cuticle center, leaving a small gap in the middle. Use gel glue or removable adhesive, then press each crystal down so it sits flush. Seal with a top coat that doesn't flood the cuticle line; focus on sealing the crystal edges so they don't snag. After drying, wipe the cuticle area with a lint-free pad to remove any excess adhesive.
Editor's noteIf crystals roll, use tweezers with a fine tip and place them one at a time - don't try to "set" five at once.
Watch outAvoid crystals too close to the skin edge; lifting shows up immediately there.
11. Icy Blue Chrome French With Micro Hearts on the Ring Finger
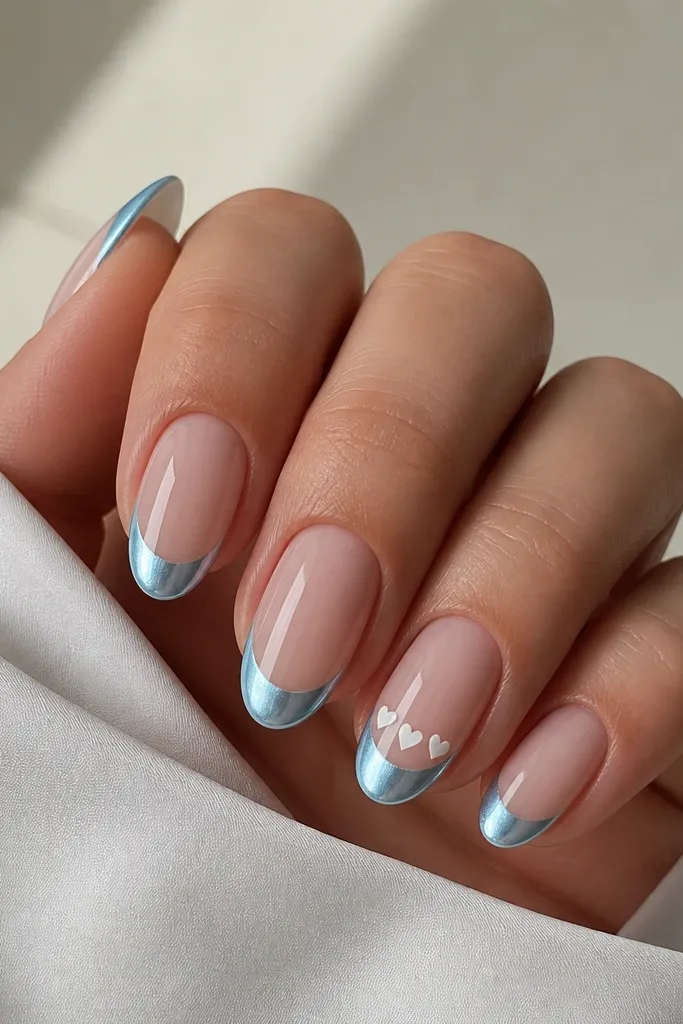
Micro hearts are sweet but still modern when they're tiny and placed under the French line. The icy blue chrome gives you a clean, cool look, and the white hearts add a soft contrast that doesn't compete with the mirror shine. I like this on ring fingers because it looks intentional without turning every nail into a theme. It flatters medium and lighter skin tones especially well, because white details pop without looking harsh. This is my go-to for birthdays when you want cute without going full pink.
Place removable icy blue chrome French tips on all nails with the smile line centered, then press and seal lightly. On the ring finger only, add a clear tacky spot under the French curve about 1-2 mm below the blue edge. Use a micro nail heart sticker or paint tiny hearts with white gel using a dotting tool; space them evenly so the line feels neat. Seal with top coat carefully - brush from the cuticle down and avoid dragging across the hearts.
Editor's noteUse the smallest hearts you can find; big hearts look cartoonish on chrome French.
Watch outAvoid placing hearts on the tip itself - they catch light unevenly and look raised.
12. Blue Chrome French With White Marble Vein Accent
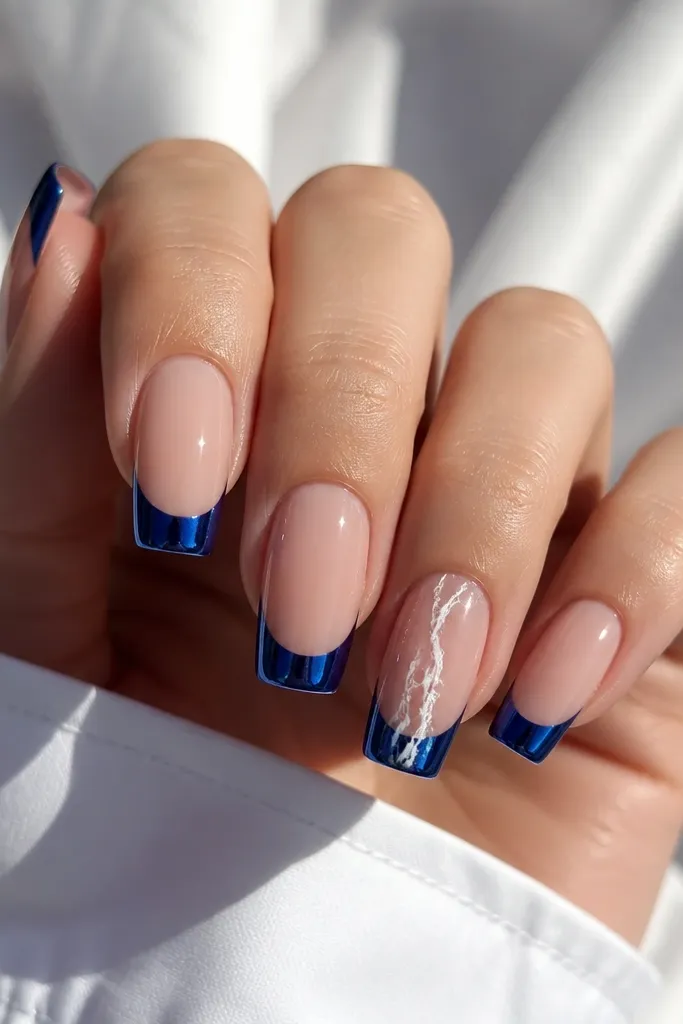
Marble veins make chrome French look like a designer manicure. The royal blue chrome is the anchor, and the white marble veins add movement without adding color clutter. I like doing marble on one or two nails because too many marbled nails make the set look chaotic. This flatters longer nail shapes because the veins can travel down the nail bed and make it look sleek. It also works for deeper skin tones because the high-contrast white lines stay crisp.
Place removable royal blue chrome French tips on every nail, keeping the smile line smooth and symmetrical. Choose one accent nail and add marble veins: use a white gel or semi-transparent white polish on top of a clear base, then drag thin lines with a fine brush and soften them with a dry brush. Keep the veins mostly in the center third of the nail so the design feels balanced. Seal with glossy top coat, then check the French edge to ensure the top coat doesn't bridge into the chrome line and dull it.
Editor's noteFor cleaner marble, wipe your brush on a paper towel between each vein so the lines stay thin.
Watch outAvoid thick marble blocks; they make the chrome look less sharp.
13. Blue Chrome French With Metallic Striped Sidewalls
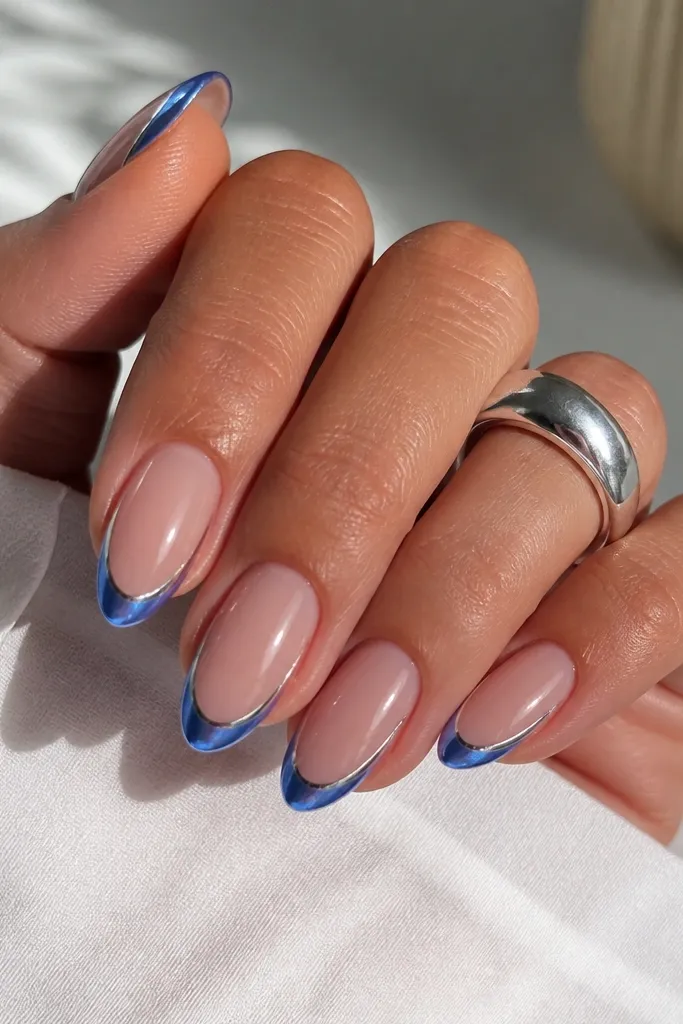
Pinstripes on the sides make your French tip look framed, not floating. The blue chrome stays the main event, while the silver side stripes add structure and make the nail look slimmer and longer. This is flattering if you have wider nail beds because the stripes pull attention toward the center line. It also looks crisp in daylight and doesn't rely on rhinestones. I wear this when I want "clean but interesting."
Start with nude base and place removable blue chrome French tips so the smile line is centered. Add two thin silver stripes on each nail: one on the left side near the outer half and one on the right, keeping them parallel to the nail edge. If you're using striping tape, apply the tape along the sidewall, press firmly, then remove slowly after the stripe is set; if you're painting, use a striping brush and keep the line width around 0.5 mm. Seal with glossy top coat over the chrome and stripes, but keep the nude base neat by wiping excess polish around the edges.
Editor's noteUse striping tape only if it releases cleanly - some tapes leave a sticky edge that lifts on removables.
Watch outAvoid thick stripes - they turn into chunky borders and overpower the French.
14. Blue Chrome French With Starburst Foil Burst at the Tip
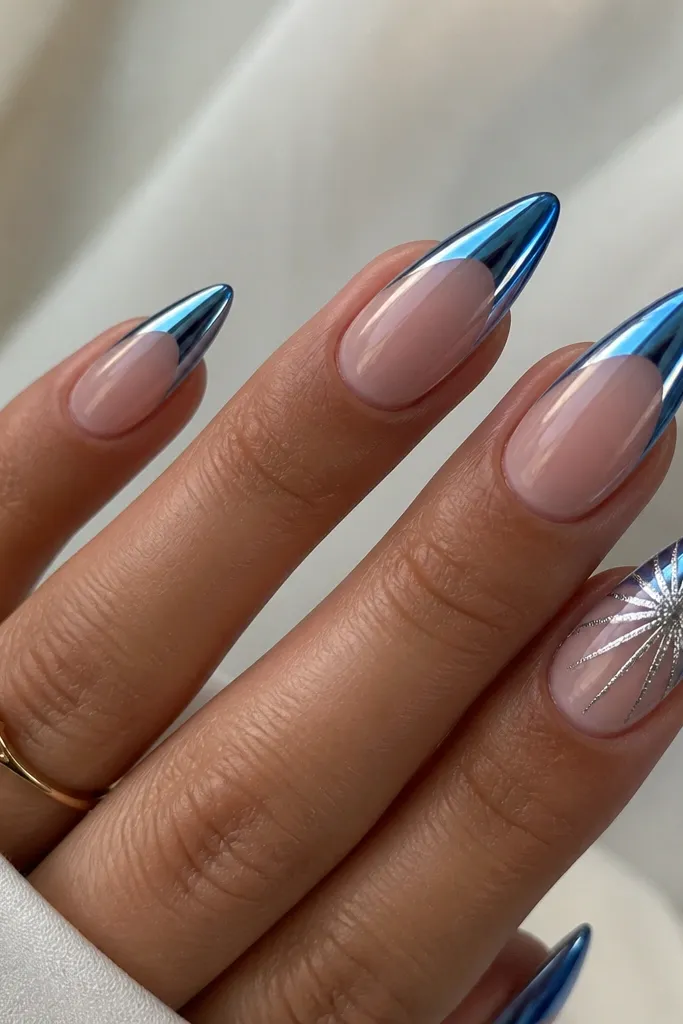
A starburst burst makes chrome French feel like wearable art. The blue French tip is still the foundation, and the silver foil starburst adds a spotlight effect right where light hits first. This looks best on long almond or long oval because the burst has space to radiate without bumping into the corners. It flatters all skin tones because silver reads neutral and the blue gives the color punch. I do this for photo days because it catches flash beautifully.
Place removable blue chrome French tips on all nails and press down firmly so the edge is sealed. On the accent nail, create the starburst by applying small silver foil pieces radiating from the center of the French area, then lightly pressing them into a cohesive burst using a foil tool. Keep the radiating lines narrow and angled so they look like rays, not blobs. Seal with glossy top coat in a thin layer, then do a second thin pass once dry to lock the foil edges down.
Editor's noteIf you see gaps, add tiny foil shards between rays instead of redoing the whole burst.
Watch outAvoid putting the starburst too low into the nude - it should sit inside the French zone.
15. Blue Chrome French With Black Micro Outline at the Smile Line
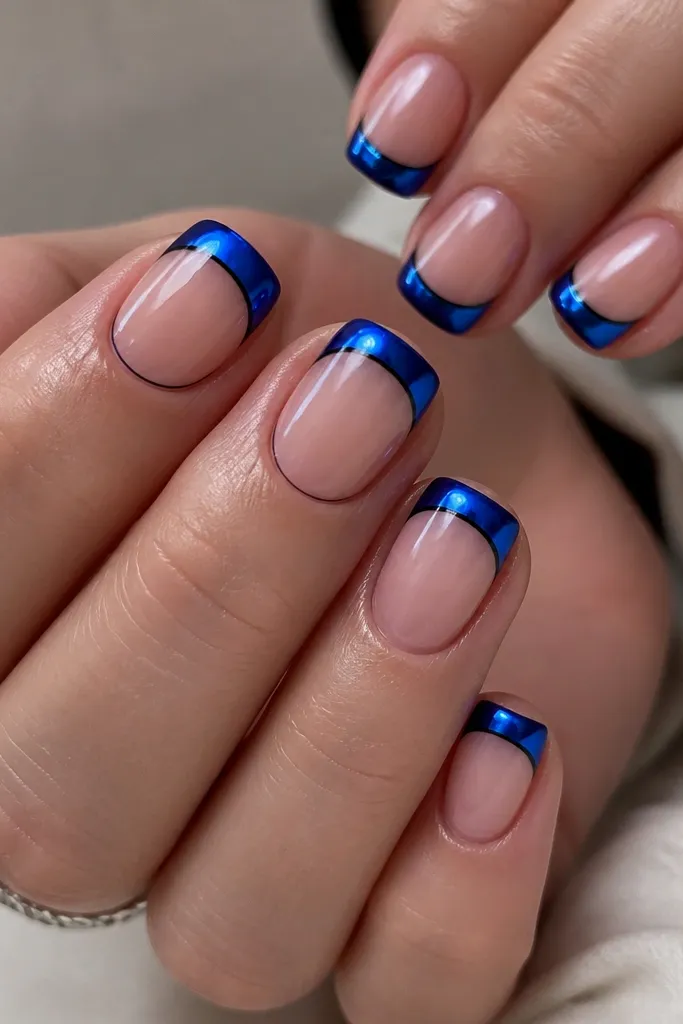
Black outlining makes blue chrome look sharper and more architectural. The outline is tiny, but it creates a crisp border between the nude base and the chrome tip, so the French line looks professional even on removables. This design flatters short nails because the bold outline defines the shape without requiring length. It also looks amazing on medium to deep skin tones because black has enough contrast to pop. I pick this when I want chrome that looks edgy, not cute.
Place removable bright blue chrome French tips and press the edge down with extra care. Then, add a black micro outline on the nude side of the smile line: use a fine liner brush and black gel, tracing just inside the curve so it's only a hairline thick. Let it dry or cure, then apply top coat over the chrome and lightly over the outline without flooding the nude base. Clean the edges with a small brush dipped in cleaner so the outline stays crisp.
Editor's noteUse gel for the outline if you want a clean edge that doesn't smear when you wash your hands.
Watch outAvoid thick black lines - they make the manicure look like a sticker outline.
16. Blue Chrome French With Pearl Bow on the Ring Finger
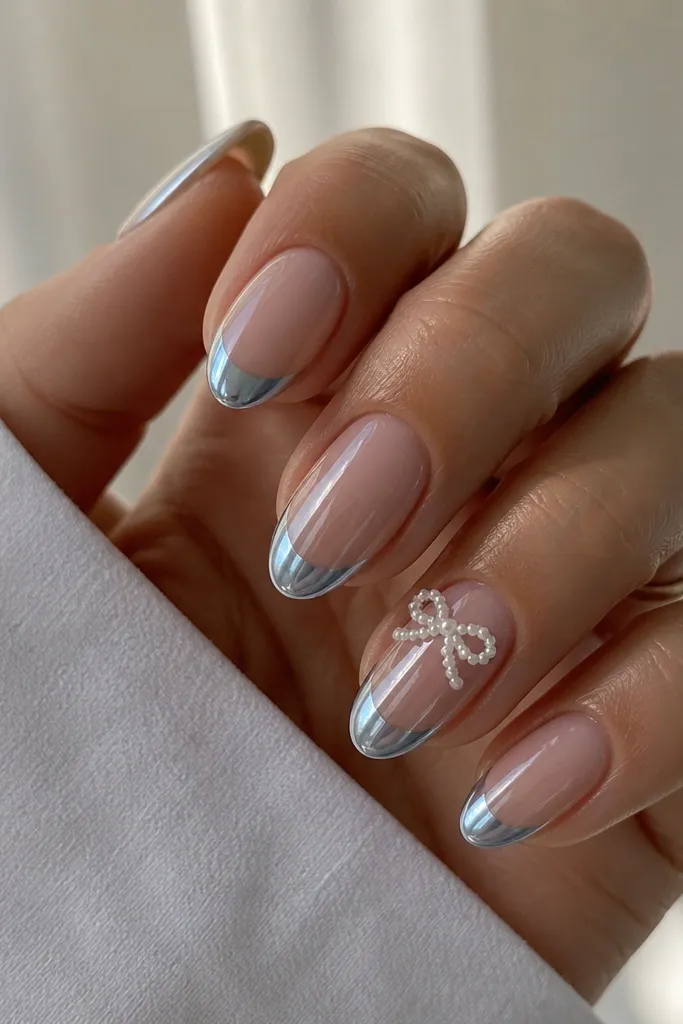
A pearl bow adds a "gift wrap" feeling to chrome French while staying classy. The bow sits under the French line so the blue stays crisp and the bow reads like an accent, not a sticker piled on top. Icy blue chrome is light and airy, which makes the bow look delicate instead of heavy. This flatters hands with medium nail beds because the center placement balances the nail shape. It's a strong choice for events, anniversaries, and any time you want something feminine with a modern edge.
Start with a nude base and apply removable icy blue chrome French tips on all nails. On the ring finger, place the bow: use small pearl bow charms or build one with two tiny pearl clusters and a small center pearl, anchored with gel glue. Position it about 1-2 mm below the blue line so it doesn't overlap the chrome edge. Seal with top coat around the bow first, then one light pass over it to keep it shiny and smooth. Avoid heavy top coat on charms - it can make pearls look cloudy.
Editor's noteIf the bow feels too tall, use a thinner charm or flatten it slightly with gentle pressure while the adhesive sets.
Watch outAvoid putting the bow directly on the chrome - it looks uneven and can lift at the edges.
17. Blue Chrome French With Silver Chain Link Accent
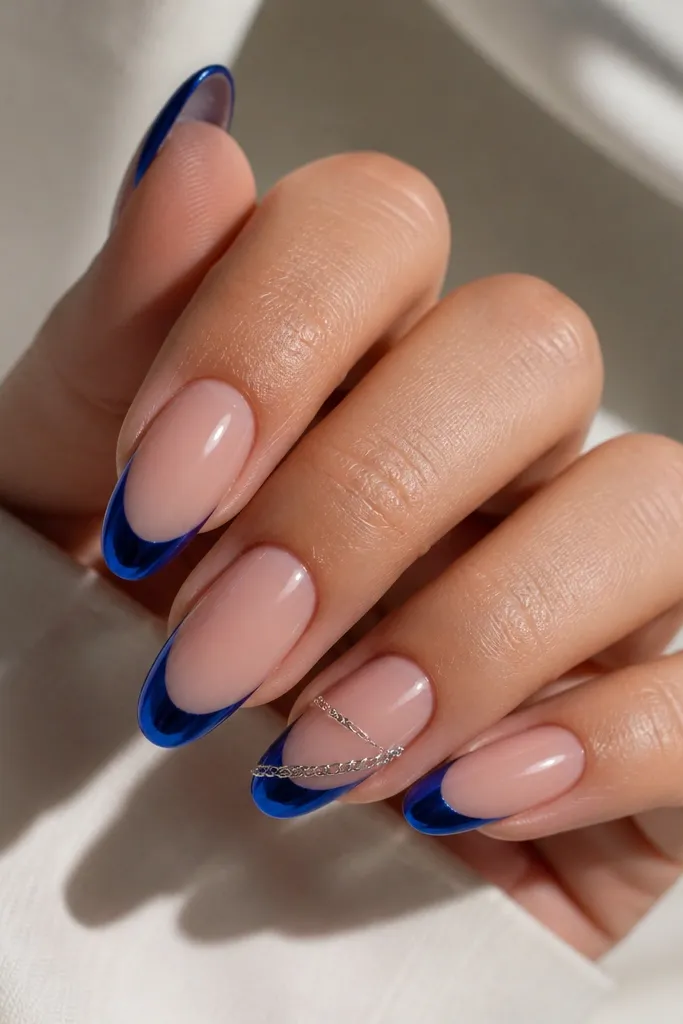
Chain link details make French nails feel like jewelry. The royal blue chrome is bold and reflective, and the silver chain adds texture that looks expensive without needing lots of extra color. I prefer placing the chain on one accent nail because the shine already does a lot on chrome tips. This flatters hands with longer nail beds because the diagonal line elongates. It's perfect for nights out when you want your nails to match a silver bracelet vibe.
Apply removable royal blue chrome French tips across all nails, keeping the smile line consistent. On the accent nail, add a small diagonal strip of clear tacky adhesive under the French line, then lay a tiny silver chain link segment into it. Press gently and trim any excess chain with fine scissors. Seal with a glossy top coat over the chain links - do it in thin layers so the chain doesn't lift and catch fabric.
Editor's noteUse chain pieces with flat backs; round backs lift more on removables.
Watch outAvoid chain on every nail - it turns into clutter once chrome is already reflecting light.
18. Blue Chrome French With Holographic Edge Micro Shimmer
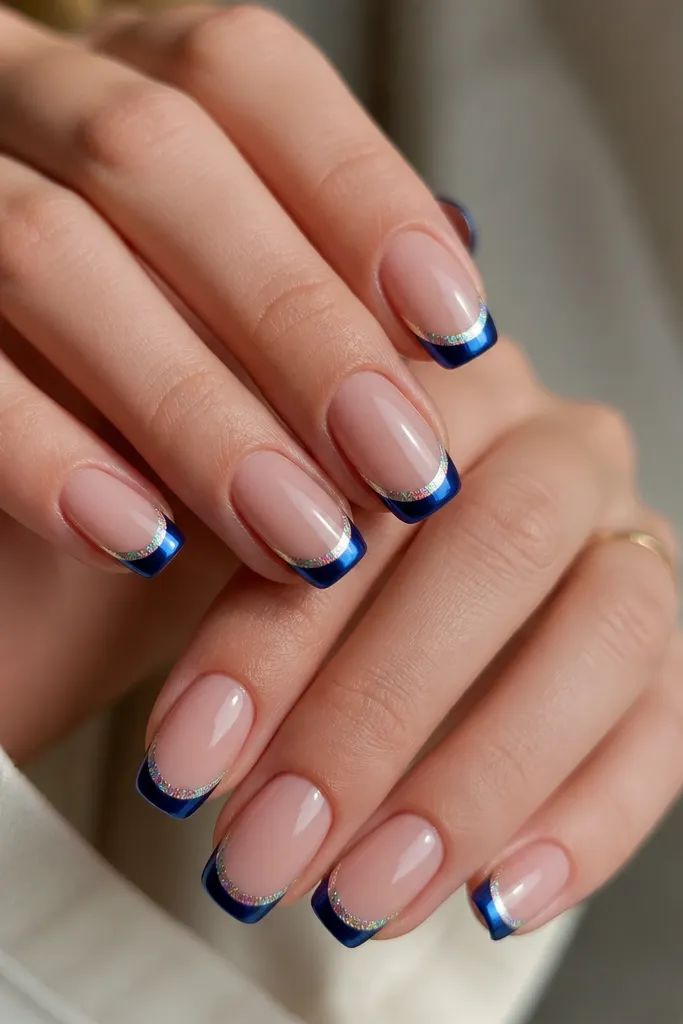
This is the "something extra" French tip that still looks wearable. The blue chrome gives you the main color, and the holographic micro shimmer band adds a subtle rainbow edge that shows up in sunlight and flash. It flatters all skin tones because holographic shimmer doesn't fight with blue - it just animates it. I like this on squoval because the straight sides make the shimmer band look like a clean highlight strip. It's a great choice for summer photos when you want color but not heavy glitter.
Place removable blue chrome French tips with a crisp smile line. Add holographic shimmer only along the very edge of the French line: use a holographic transfer foil strip or a fine holographic pigment pressed into a thin tacky line. Keep the shimmer band under 1 mm thick so it stays micro. Seal with glossy top coat, then check under a lamp for any dull spots where pigment didn't fully seal.
Editor's noteIf shimmer looks uneven, press it with a foam applicator instead of brushing - pigment sticks cleaner that way.
Watch outAvoid full glitter tips - micro edge shimmer keeps the French looking sharp.
19. Blue Chrome French With White Lace Ribbons (One Accent Nail)
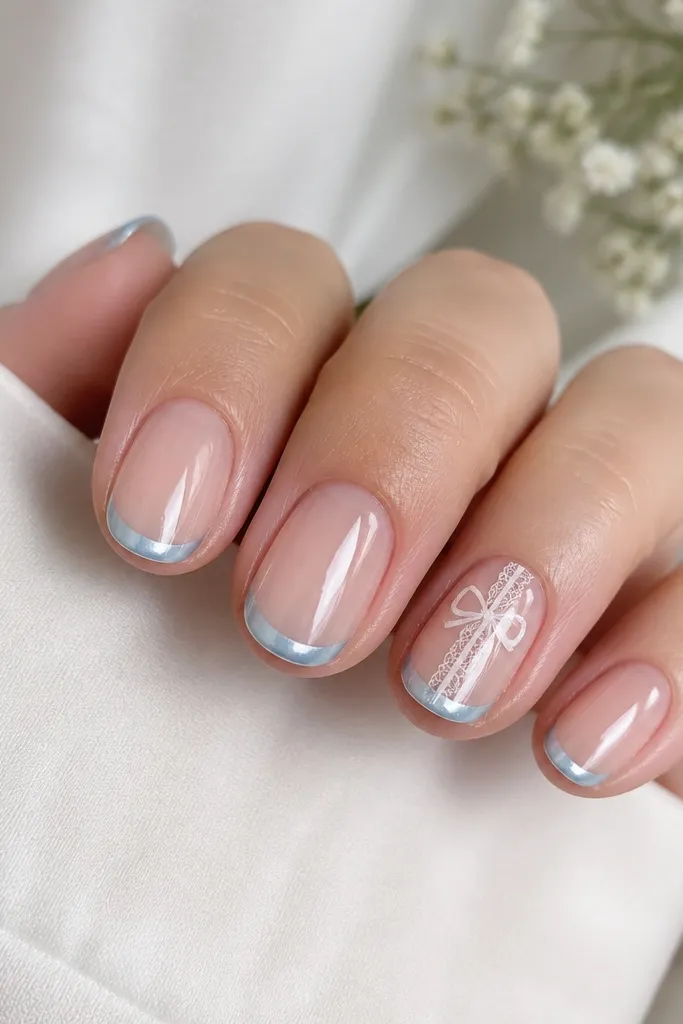
Lace details look delicate against chrome, and that contrast is why it works. The lace is white and slightly sheer, so it doesn't overpower the blue French tip. I keep it on one accent nail so the set stays sleek, not busy. This flatters small nail beds because the lace ribbon can be narrow and vertical, which makes the nail look longer. It's a good option for bridal events, date nights, and any time you want "soft glamour."
Apply removable icy blue chrome French tips on all nails with the smile line centered. On the ring finger only, add a narrow vertical lace ribbon decal or lace strip under the blue line, centered and about 3-4 mm wide depending on nail size. If you're using lace fabric, seal it with a thin clear gel layer first so it doesn't fray, then top coat over it. Finish with glossy top coat on the accent nail, but keep the other nails simple so the lace stays the focal point.
Editor's noteTrim lace close to the nail shape and test-fit dry first so it doesn't buckle at the sides.
Watch outAvoid bulky lace - it makes the nail feel thick and shows lifting faster.
20. Sky Blue Chrome French With Clear Acrylic Jelly Tips and Tiny Blue Studs
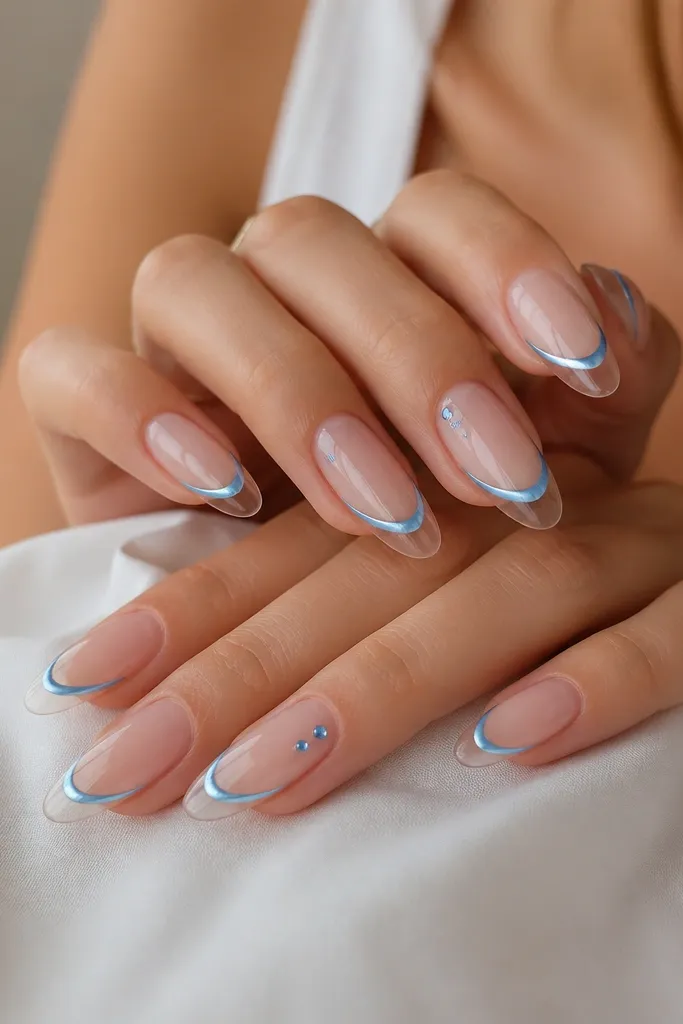
This one looks like a French manicure got dipped in a glass jar of clear gel. The sky-blue chrome French line stays crisp and reflective, while the jelly clear tip adds that wet, dimensional shine that chrome alone can't give you. I like this design for parties because it photographs like 3D without needing big gems. It also feels wearable because the base stays transparent, so your nail bed still shows through under the clear layer. The small studs give it enough "detail" to look intentional, not random.
File your nail to an almond shape and keep the tip length consistent. Push back cuticles, then wipe the nail plate with acetone or alcohol to remove oils, because chrome lifts fast on oily nails. Apply a sheer nude or clear base, then cure. Paint a thin French line with sky-blue gel and cure fully, then rub chrome powder over only that French area and seal with a thin top coat. Build the jelly tip by mixing a clear builder gel (or clear acrylic) with a little extra slip so it self-levels. Place the clear jelly over the entire free edge and blend it into the chrome line so the chrome looks "suspended" just under the clear layer. Cure in short bursts to avoid flooding onto the sidewalls. After it's cured, place two tiny flat blue studs near the outer half of the ring finger and press them into the top layer before curing again. Finish with a glossy top coat that you brush only after wiping the nail with alcohol so you don't smear chrome. Clean up edges with a small brush dipped in acetone along the sidewalls. If you want extra depth, add one more thin jelly layer just on the free edge and cure.
Editor's noteUse a striping brush to keep the French line razor-thin, then rub chrome only on that line - if chrome touches the clear jelly area, it can look grainy instead of glassy.
Watch outSkip thick chrome on the French line - it makes the clear jelly layer look cloudy instead of deep.



