1. Lemon Micro-French With Sheer Nude
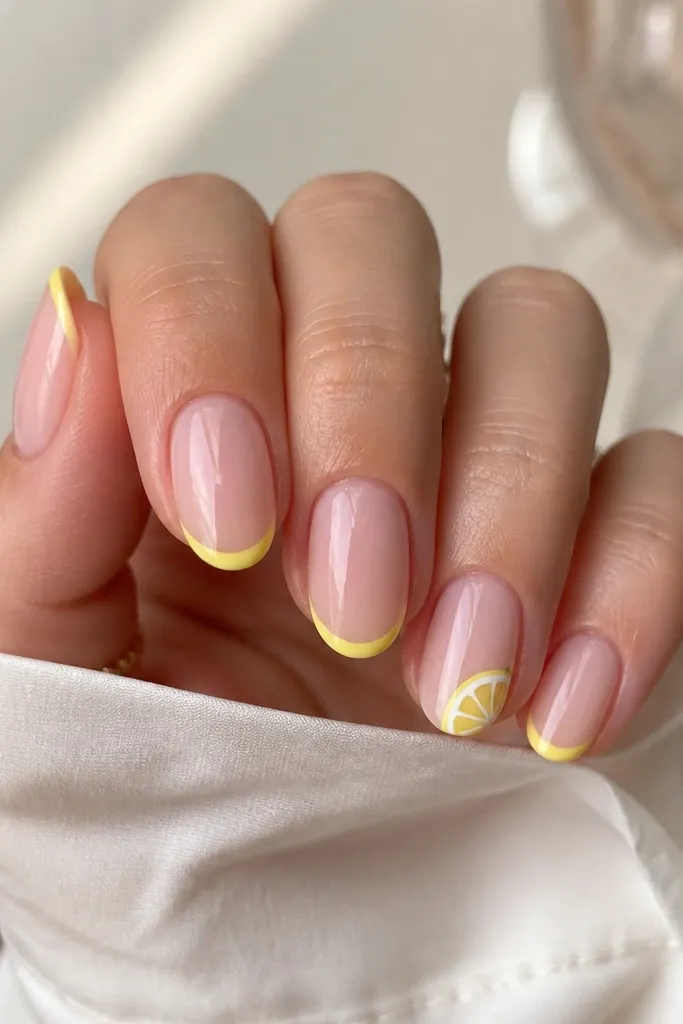
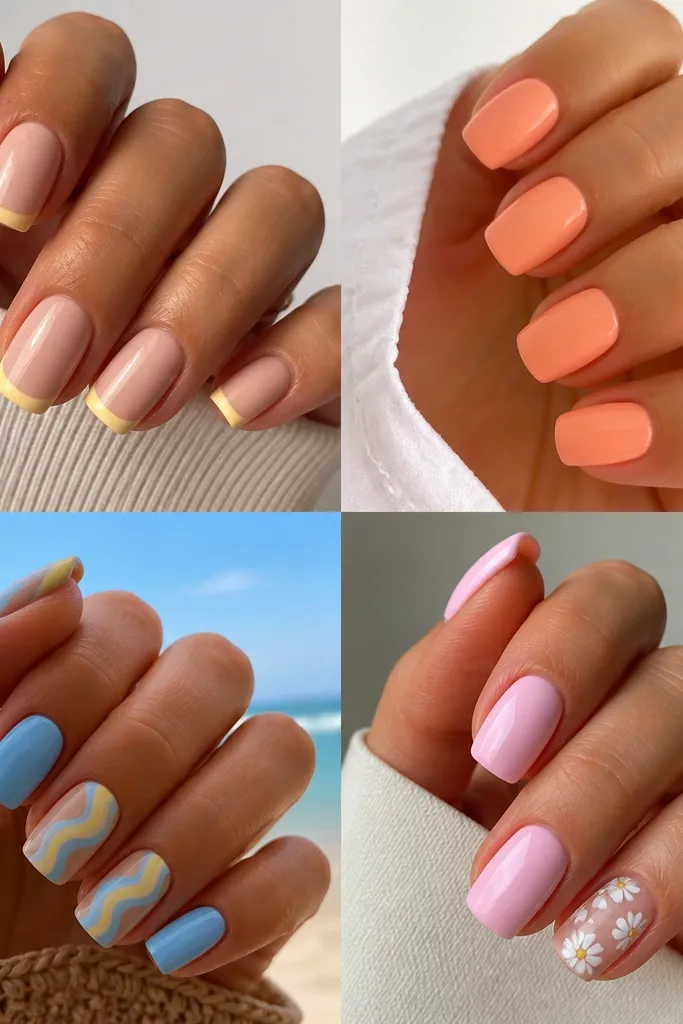
This look works because micro-French creates a clean edge that visually lengthens short almond nails. I use a sheer nude base so your nail bed shows through - that's what keeps it "compact" instead of heavy. The lemon yellow is vivid but controlled because it stays only on the tip line, so it doesn't overwhelm small nails. I've worn this on light to medium skin tones and it still pops without looking neon. For summer, it fits daytime brunch, beach days, and even casual office outfits because the design stays tidy.
Start by pushing back cuticles and wiping nails with acetone-free prep, then paint a sheer nude gel polish in two thin coats. Cure fully, then use striping tape or a fine brush to pull a very thin French curve across each tip - aim for 1/2 the width of the nail tip. Place a tiny lemon slice on the ring finger only using white for the rind and pale chartreuse for the interior, then add two small dots for seeds. Finish with a high-gloss top coat in one smooth layer, curing each hand.
Editor's noteIf your yellow looks streaky, mix a drop of clear gel into your yellow and paint two thin coats instead of one thick one.
Watch outDon't make the French line too wide - on short almond nails it turns into a thick stripe and looks bulky.
2. Watercolor Peach Swirl Tips
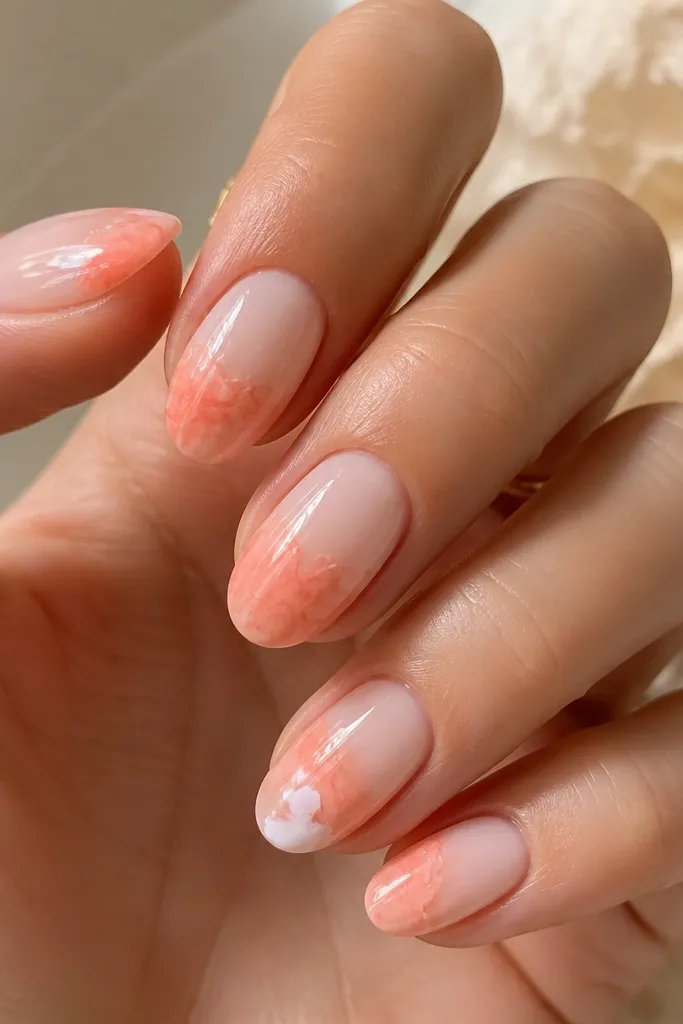
Watercolor swirls look soft on short almond nails because the design has movement but no sharp points. I like a creamy sheer base (not fully opaque) because it keeps the fade airy and makes your nails look healthy. Peach and coral flatter warm undertones and also look good on cool undertones because the colors are light and not too orange. This design feels like summer sunscreen and iced drinks - it reads "cute" without being childish. It's perfect for vacations, weddings with a relaxed vibe, and days when you want compliments but don't want loud nail art.
Start with a sheer milky pink base in two coats, curing each coat. Then, for the tips, sponge or dab a light peach gel mixed with a touch of white gel, keeping it concentrated at the very edge and fading inward. Use a thin liner brush to drag two or three swirl lines through the peach - don't fully fill the tip, leave gaps. Add one tiny white splash on the middle finger for variation, then seal everything with a glossy top coat.
Editor's noteUse a sponge for the first color deposit; a brush can create hard edges that fight the watercolor look.
Watch outSkip dark orange - it makes the fade look like a stain instead of a soft watercolor wash.
3. Sky Blue Reverse French Half-Moons
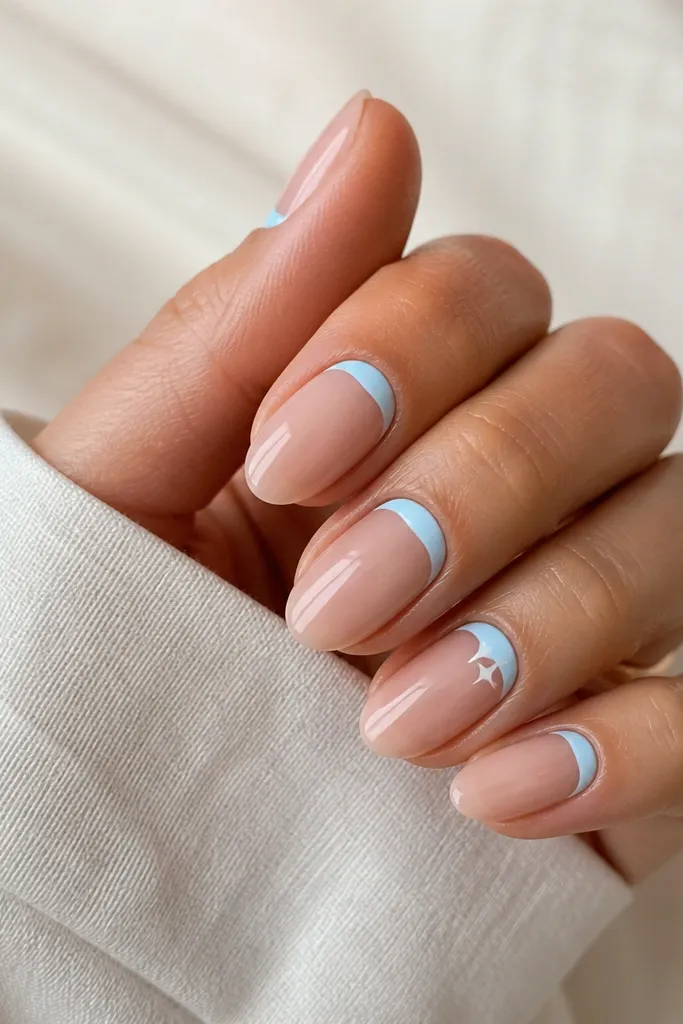
Reverse French is magic on short almond because it draws the eye toward the cuticle area and makes the nail bed look longer. The sky-blue half-moon feels fresh in summer, and keeping the rest nude prevents the design from looking heavy. I've worn this with both gold and silver jewelry; the blue sits nicely with either metal. It's especially flattering if your nail beds look a bit short - the cuticle curve gives the illusion of more space. This is a great "clean but not boring" option for hot weather when you want your hands to look polished fast.
Paint a nude sheer base, cure, then use a thin brush to sweep sky blue in a tight arc at the cuticle, leaving a small gap from the skin line for a crisp border. Keep the arc thicker at the center and slightly thinner at the sides so it follows the almond shape. Add a tiny white star with a dotting tool on one nail only, then clean up edges with a small brush dipped in gel cleanser. Finish with a glossy top coat and cure thoroughly to smooth the surface.
Editor's noteFor sharper lines, chill your gel for a few minutes - it flows less and helps the half-moon stay crisp.
Watch outDon't let the blue touch your cuticle skin; it lifts faster in summer heat and sweat.
4. Pink Nude Base With Tiny Starburst Corners
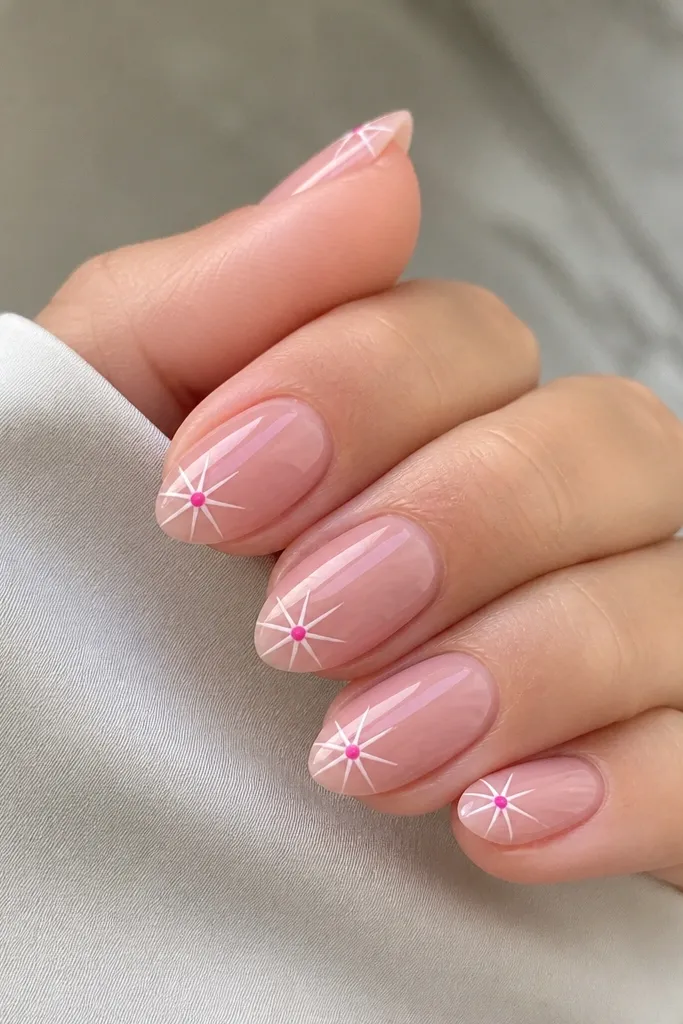
Starburst corner art looks playful while still reading "compact" because the design lives in one small zone. I start with a pink nude base that matches my skin tone closely, then place the starburst only near the outer corner so it doesn't shrink the nail visually. Hot pink dots add a summer punch without needing full coverage. This is a good choice for people who like fun nails but hate maintaining a lot of color. It also photographs well because the tiny white lines catch light.
Apply a pink nude polish in two coats, cure, then use a fine detail brush to draw a tiny burst shape near the outer corner of each nail. Make each burst symmetrical with 6 short rays around a center dot, keeping the size about the width of a pencil eraser. Color the center dot hot pink, then outline rays in white so it pops. Seal with top coat, making sure the brush lightly sweeps over the corners to prevent snagging.
Editor's noteDo corners only on 4-5 nails if you want it calmer; one burst per hand looks intentional and clean.
Watch outAvoid giant bursts - on short almond they turn into chunky blocks.
5. Mint Green Micro Stripes Over Nude
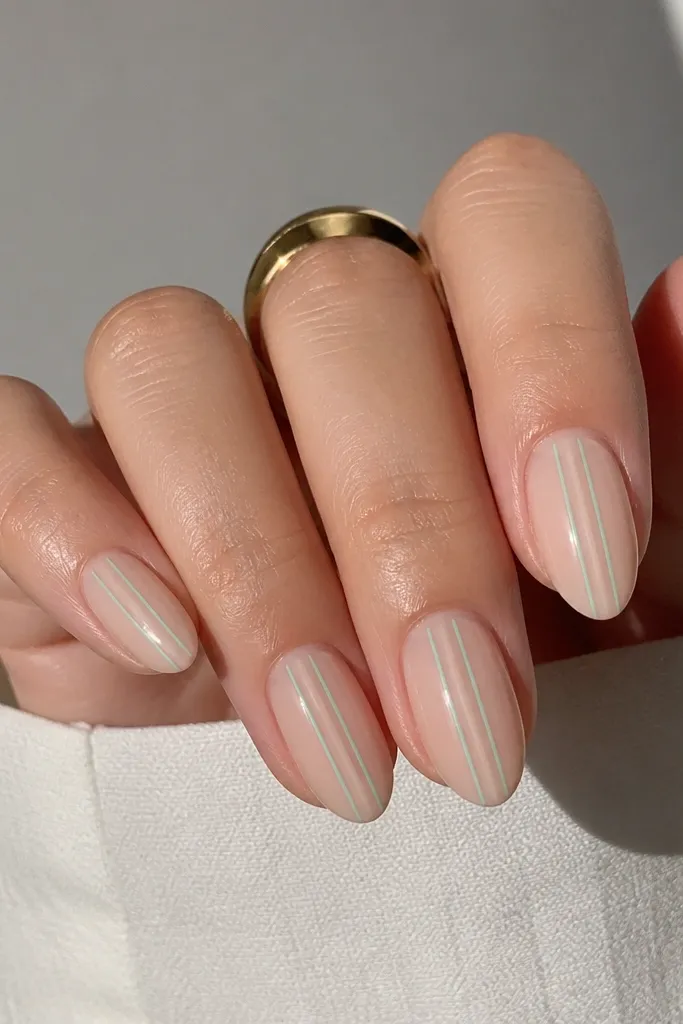
Micro stripes are the easiest way I've found to make short almond nails look longer without adding length. Mint green reads summery, and thin lines create a clean "frame" for your nail. This works especially well on medium and deeper skin tones because the nude base gives contrast and the mint stays bright. It's also beginner-friendly because you're not painting full shapes - just controlled lines. Wear it with denim, linen, and gold hoops and it still looks put-together.
Start with a nude base that matches your undertone - if you're warm, pick a peachy nude; if cool, pick a rosy nude. Paint two thin coats, cure. Using striping tape or a liner brush, place two vertical mint stripes down the center, then remove tape immediately if you used it. Add a diagonal tiny stripe on the ring finger near the tip for variation. Finish with a glossy top coat and cap the free edge.
Editor's noteIf your stripes look wobbly, run a second pass with the brush after the first line sets for 10-15 seconds under the lamp.
Watch outDon't use thick stripes - they make short nails look wider.
6. Seafoam Jelly Tips With Clear Gloss
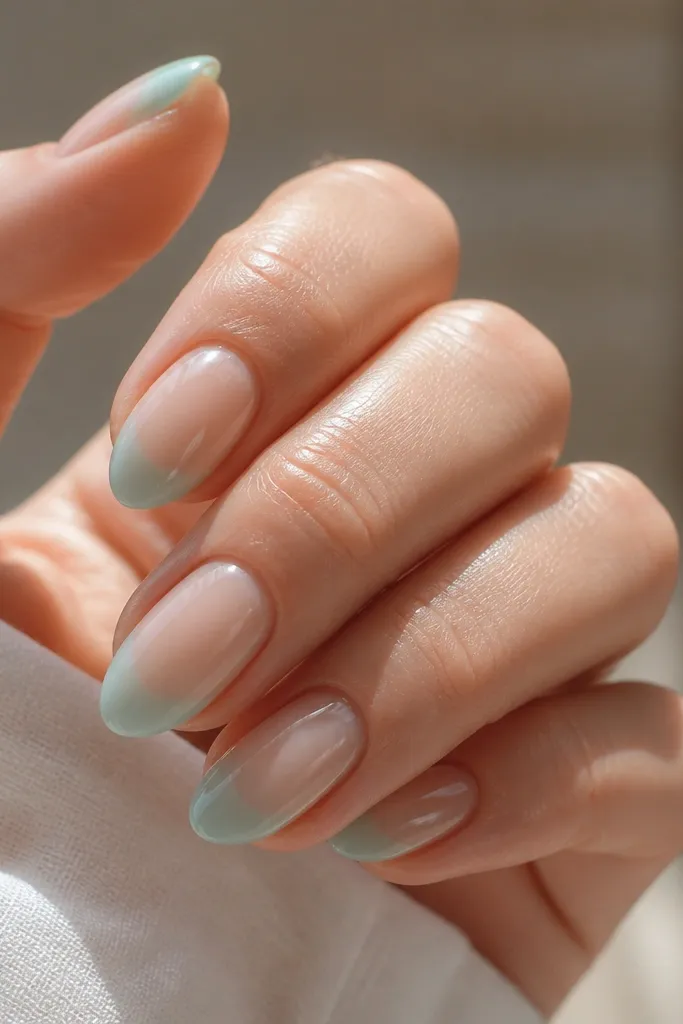
Jelly tips look expensive on short almond nails because they mimic the look of tinted glass. Seafoam is perfect for summer because it sits between green and blue, so it works with both cool and warm wardrobes. I like this on hands that get sun exposure because the jelly color blends naturally with skin tones. It's also comfortable because the tint is lighter than opaque paint. This is my go-to when I want "pretty nails" without any drawing work.
Apply a sheer nude gel base in two coats, cure. Then sponge or brush a seafoam jelly gel only on the bottom third of the nail, keeping it semi-transparent. Layer it in thin coats - two to three layers - so the tint looks even but not thick. Wipe any gel onto the sides lightly so it follows the almond shape, then cure each layer. Finish with a clear, high-gloss top coat to make it look like glass.
Editor's noteUse jelly gel with a slightly runnier consistency; it settles smoother over short almond curves.
Watch outSkip opaque seafoam - it kills the jelly effect and can look chalky.
7. Coral Outline French With Nude Center
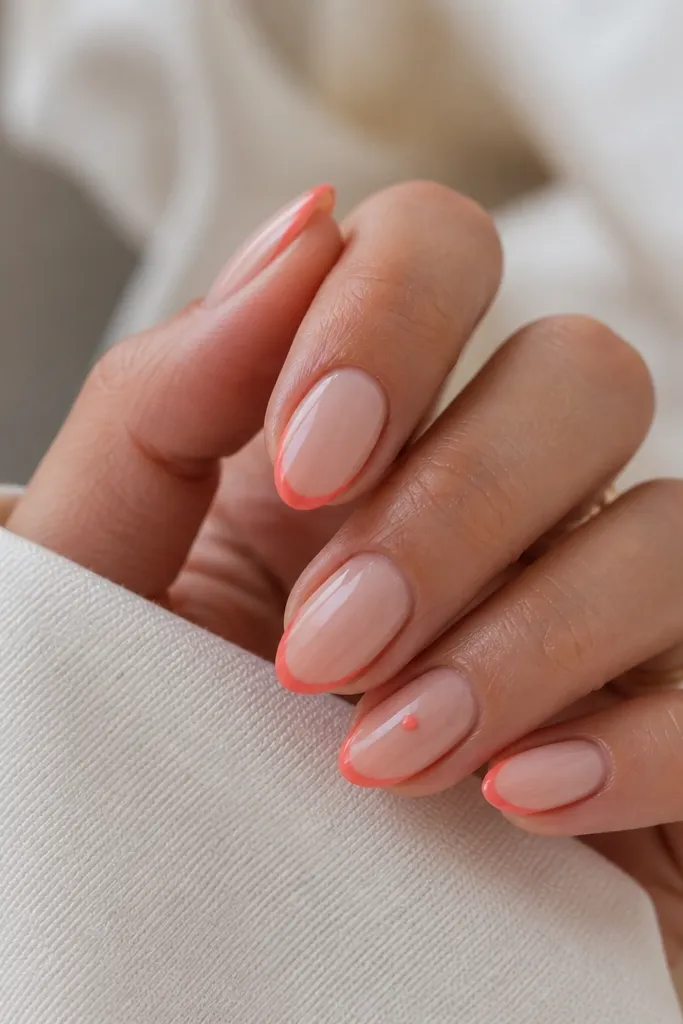
An outline French gives you the look of a French manicure without painting a full color block that can look heavy on short nails. Coral outlines are bright but still friendly, and the nude center keeps everything airy. This is flattering if your nails are naturally wider at the tip because the outline stays thin and guides the eye. I've worn it on vacation and it still feels fresh weeks later because the design grows out cleanly. It's also great if you don't want glitter or heavy art.
Start with a nude base and cure. Use a fine liner brush to draw a thin coral curve at the tip edge only, then connect it with a second thin line slightly inside the first line to create an outline. Leave the middle area nude so the tip looks outlined, not filled. Add a single coral dot in the center of the ring finger if you want a focal point. Seal with glossy top coat, and cap the tip so the outline doesn't catch.
Editor's notePull your coral line from the sidewall toward the center for cleaner curves on almond tips.
Watch outDon't fill the outline - if you start coloring the whole tip, it turns into a standard French and loses the airy effect.
8. Sunset Gradient Almond Tips
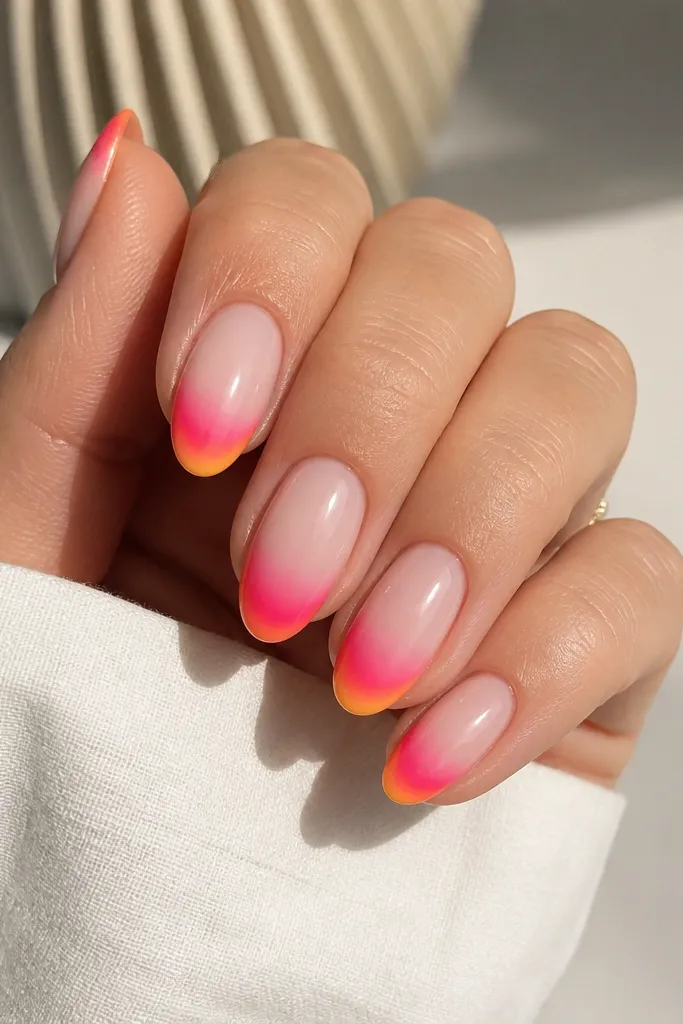
Gradient tips look like summer even when your nails stay short because they guide the eye along the nail length. I love sunset colors because they mix warm tones that look good with almost every skin tone - fair, tan, and deep. The nude base matters; it keeps the gradient from feeling too loud. This design is also forgiving if your nails aren't perfectly even, because the fade hides small differences. It's perfect for beach parties, festivals, and any day you want your hands to look like they're lit up.
Paint a sheer nude base in two thin coats, cure. Sponge a pale peach gel at the tip, then blend a hot pink gel slightly above it toward the center. Add a tiny amount of orange at the extreme tip edge only, so it looks like the "sun" glow. Clean the edges with a brush dipped in gel cleanser. Finish with a glossy top coat that smooths the gradient and makes it look seamless.
Editor's noteUse a small makeup sponge and press lightly; hard pressing makes the gradient banded.
Watch outDon't skip blending - if peach and pink meet with a hard line, it looks like two blocks.
9. White Daisy Accent On One Nail
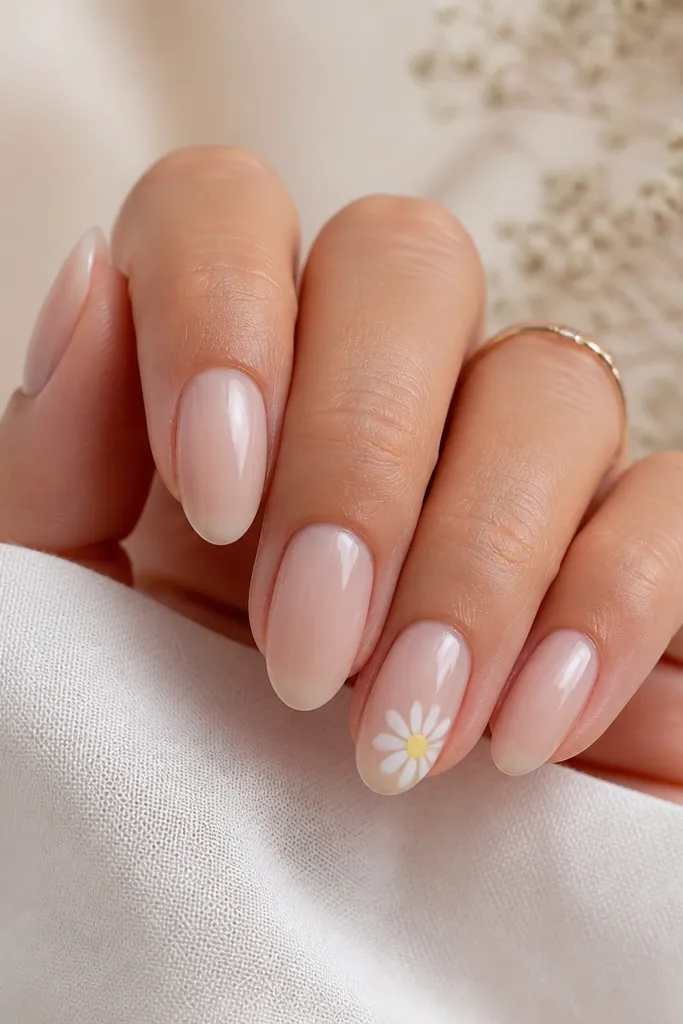
If you're doing compact short almond nails, one detailed accent nail is the sweet spot. Milky nude is my base here because it makes the white daisy look crisp without needing a full white manicure. Yellow centers add summer warmth and look great with both minimal makeup and bold lipstick. This design is flattering on all nail beds because it keeps the nail shape clean and lets the accent sit near the tip. It's also low maintenance because you only have to keep one nail looking perfect.
Apply a milky nude gel polish in two coats, cure. Leave most nails plain. On the ring finger, dot a small yellow circle for the center, then paint five white petals around it using a dotting tool or liner brush. Add a tiny green accent in the center if you want realism, but keep it subtle. Seal with glossy top coat, and cap the painted daisy edges to prevent lifting.
Editor's noteFor clean petals, let the yellow center cure fully before touching the white - it keeps the colors from bleeding.
Watch outDon't put daisies on every nail; it makes short almond look crowded and harder to keep neat.
10. Tangerine Half-Moon Cuticle Fade
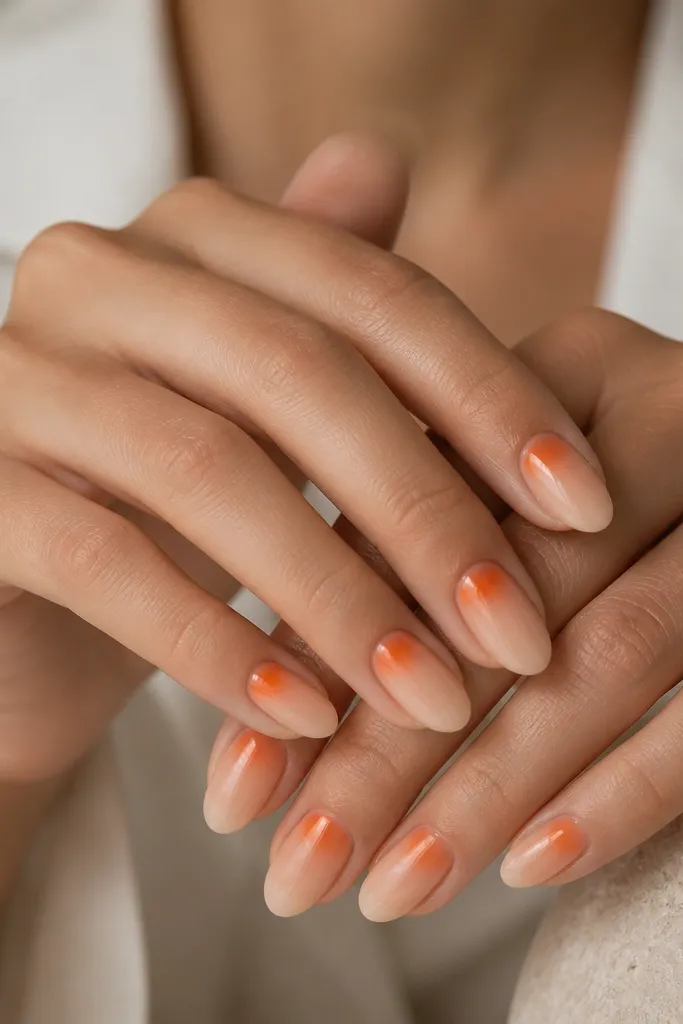
Cuticle fades are my favorite when I want color but I don't want to repaint the whole tip every week. Tangerine is bright in summer without being as harsh as neon yellow, and the half-moon placement makes short almond look longer. This is flattering when your nail beds are slightly flat because the fade adds dimension near the cuticle. I've worn it with orange linen and it looks cohesive, but it still works with neutral outfits. It's also a good "starter nail art" because it's one shape with a soft blend.
Start with a sheer nude base and cure. Using a small brush, place tangerine gel right at the cuticle in a half-moon shape, then blend it outward with a clean sponge or a soft brush so it fades as it moves toward the center. Keep the fade light - you should still see the nude base through it. Add a second thin layer for opacity where the half-moon is strongest, then cure again. Finish with glossy top coat and clean any gel on the sidewalls with a tiny brush.
Editor's noteBlend with a damp brush (gel cleanser on the brush) so the edges melt instead of staying fuzzy.
Watch outDon't push the tangerine too far down the nail - if it reaches the free edge, it looks like a stain.
11. Gold Foil Confetti Tips
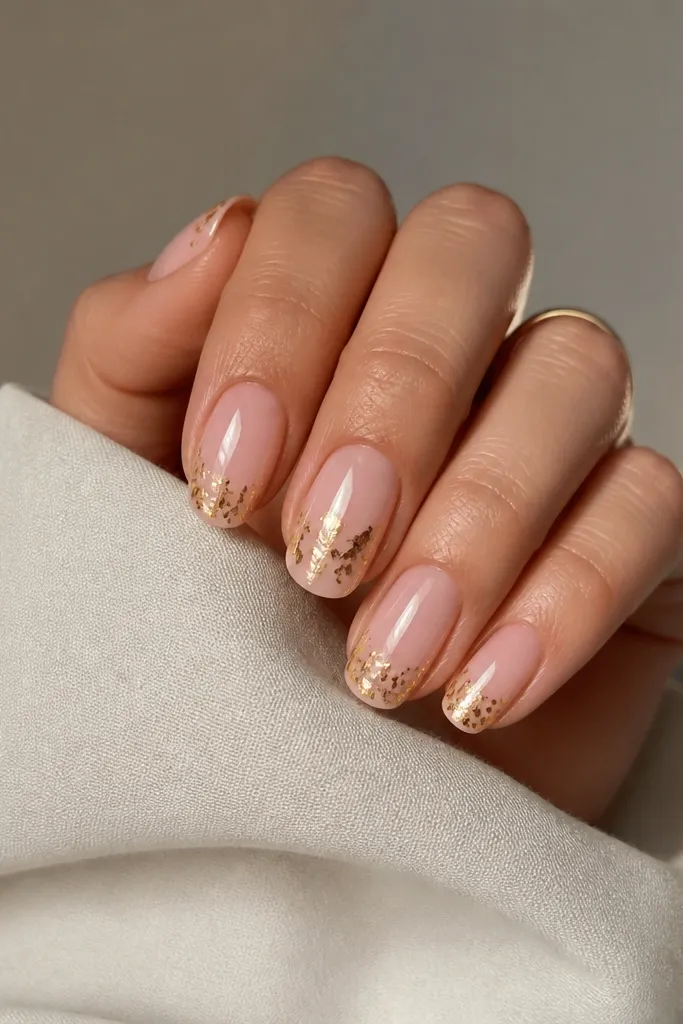
Gold foil confetti turns short almond nails into a "summer party" look without needing long length. The foil catches sun, so it reads bright even on cloudy days. I like a nude base because it keeps the foil from looking like glitter overload. This works well on light to deep skin tones because gold pairs with everything, and it doesn't clash with warm or cool jewelry. It's perfect for dinners, rooftop hangs, and any day you want your hands to sparkle when you move.
Paint nude base polish and cure. Apply a thin layer of clear or gold-foil tack gel only on the bottom third of the nail, staying away from the skin line. Press small gold foil pieces into the tack - use tweezers for control - and keep the distribution heavier on the ring finger. Seal with a foil-friendly top coat in two thin layers so the foil doesn't lift. Cure fully and lightly buff the top if you feel any rough spots.
Editor's noteIf foil lifts at the tip, add a tiny amount of top coat only over the free edge cap - that's where it usually fails.
Watch outDon't use thick glitter top coat over foil; it dulls the shine and can feel bumpy.
12. Iced Pink Jelly One-Line Detail
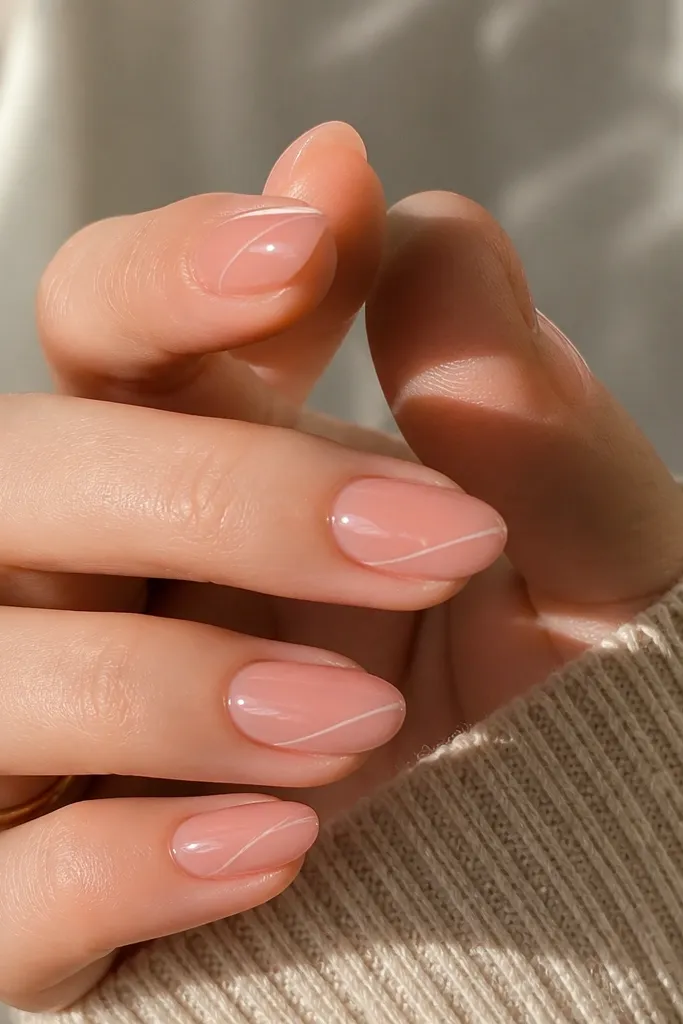
This design is clean, modern, and it looks good on short almond because the one line gives direction. Iced pink jelly polish makes the nails look hydrated and fresh, like a cool drink in the shade. The thin white diagonal line adds contrast without covering the whole nail. I've worn it on days when I didn't want to commit to full nail art but still wanted something that looked styled. It flatters hands with shorter nail beds because the diagonal line draws the eye upward toward the tip.
Apply an iced pink jelly gel in two thin coats, cure between coats. Use a fine liner brush to draw one thin white diagonal line on each nail, starting around the center and ending near the tip corner. Keep the line thickness consistent and leave space between the line and the sidewalls. Cure, then add glossy top coat in one smooth layer. Check the surface for streaks and fix with a second top coat if needed.
Editor's noteUse gel liner, not acrylic paint, if you want the line to stay sharp through wear and washing.
Watch outDon't draw the line too close to the cuticle; it makes the nail look shorter.
13. Blueberry Jam Dots On Nude
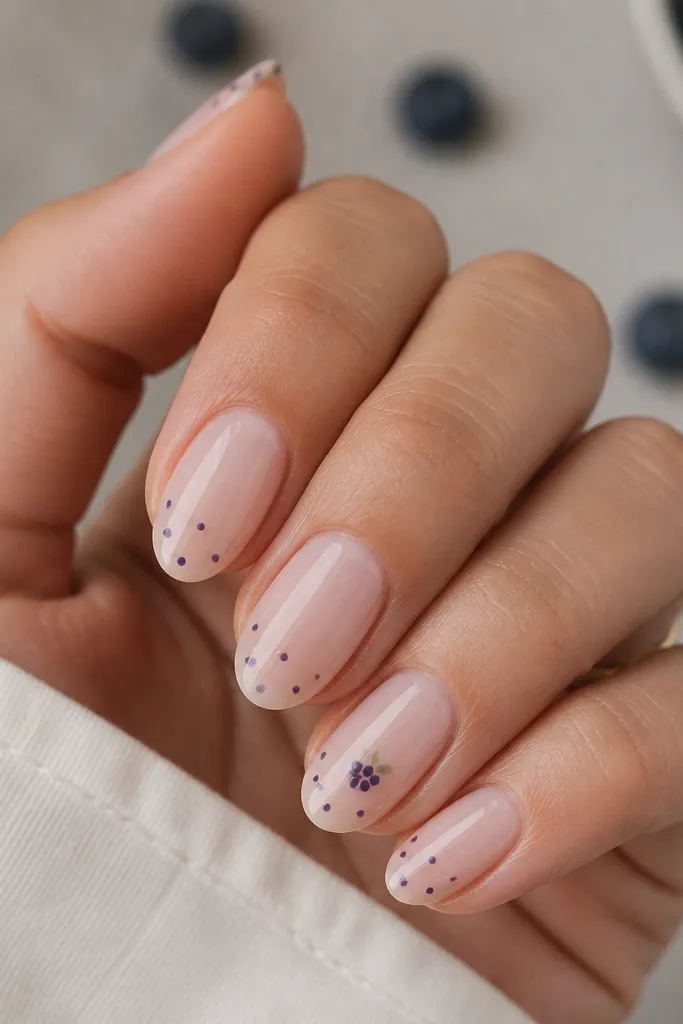
Dot patterns look summery when the dots are small and placed near the tip. Blueberry purple has that deep berry vibe without turning the manicure dark for summer. A sheer nude base keeps the overall look light so your hands don't look heavy in heat. This design is flattering on all nail shapes and especially nice if your nails have a slight curve, because the dots follow the nail surface. It's also forgiving for DIY: dots are easy to place and easy to correct.
Start with a sheer nude base and cure. Choose a blueberry purple gel and dot it near the tip on each nail using a dotting tool - aim for 4-6 dots per nail, not a full scatter. On the middle finger or ring finger, make one cluster of 7-9 dots slightly closer together for a focal point. Let the dots cure, then seal with a glossy top coat. Cap the free edge lightly so the glossy layer locks the dots in place.
Editor's noteIf dots look uneven, tap the dot tool once on a paper towel first to control the gel amount.
Watch outAvoid big dots - they look like bumps on short almond and catch on fabric.
14. Tropical Leaf Half-Matte Tips
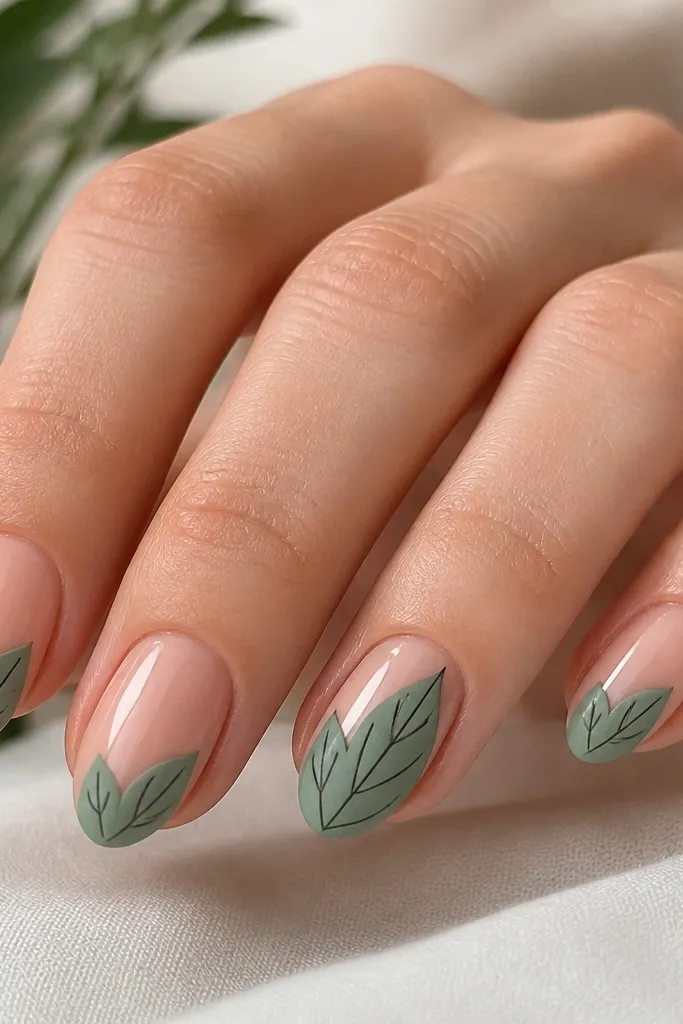
Leaf art is bold, but you can keep it compact by placing it only on the lower half and using matte on the tips. The matte sea-green looks like pressed foliage and hides minor brush strokes. The black vein lines give structure so the leaf reads clearly even at short length. This design flatters hands with warm or neutral undertones because green pops against nude. It's a great choice for beach houses, resort weekends, and casual summer photos where you want something more than polish.
Apply a nude base and cure, then top coat with glossy for the full nail. For the leaf tips, paint sea-green gel on the bottom third and cure. Add leaf vein lines with a thin liner brush using black gel - keep them narrow and angled. After curing, apply matte top coat only over the leaf area on the bottom half, leaving the top glossy for contrast. Cure again and inspect the edges so the matte line looks intentional.
Editor's noteUse matte top coat sparingly on only the leaf area; the glossy top makes the design feel fresher instead of flat.
Watch outDon't matte the whole nail - it makes short almond look dull and can exaggerate ridges.
15. Coral Checkered Accent Strip
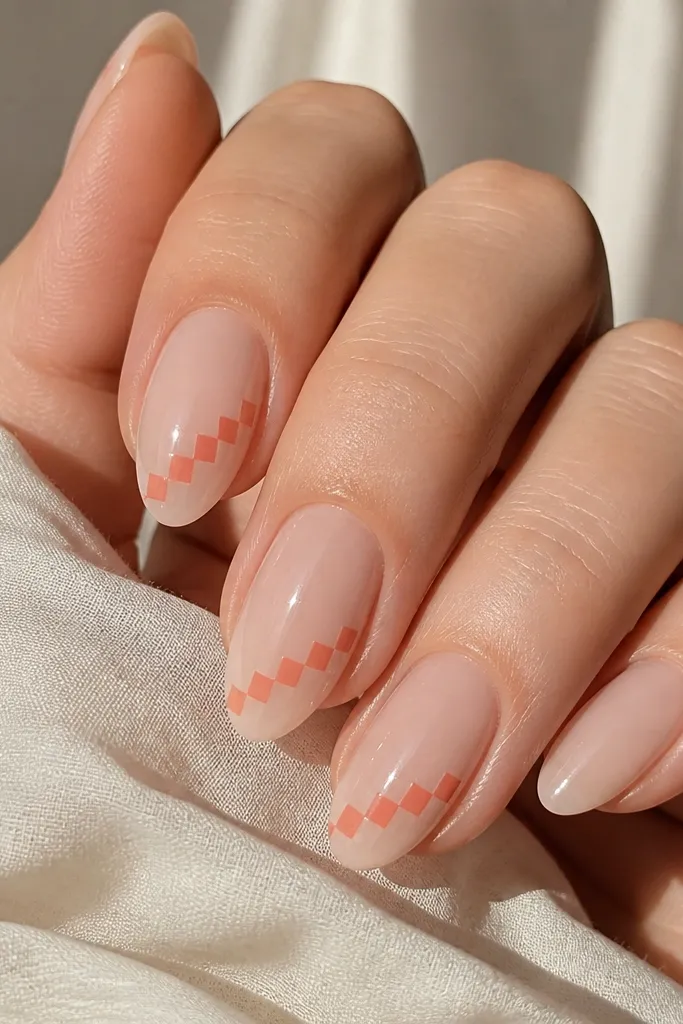
Checkered strips look playful and structured, and they work on short almond because you're not covering the whole nail. The diagonal placement keeps the design moving and visually lengthens the nail bed. I use coral because it matches summer accessories and it stays cheerful without going neon. This manicure is also practical because only a small strip needs detail - the rest stays simple. I like it for barbecues, park days, and outfits with stripes or gingham, where the pattern makes everything feel coordinated.
Start with a sheer nude base in two coats and cure. Choose 3 nails for the accent so it doesn't look busy. Paint a thin coral diagonal guideline near the tip using a striping brush, then fill the area with tiny squares using a dotting tool or the flat end of a detail brush. Keep the squares about the width of a sesame seed so they read checkered instead of blobby. Finish with glossy top coat and smooth over the strip to prevent snagging.
Editor's noteSketch one diagonal line first, then fill squares between the line edges so your pattern stays straight.
Watch outSkip full checkers on every nail - it turns compact nails into a busy block.