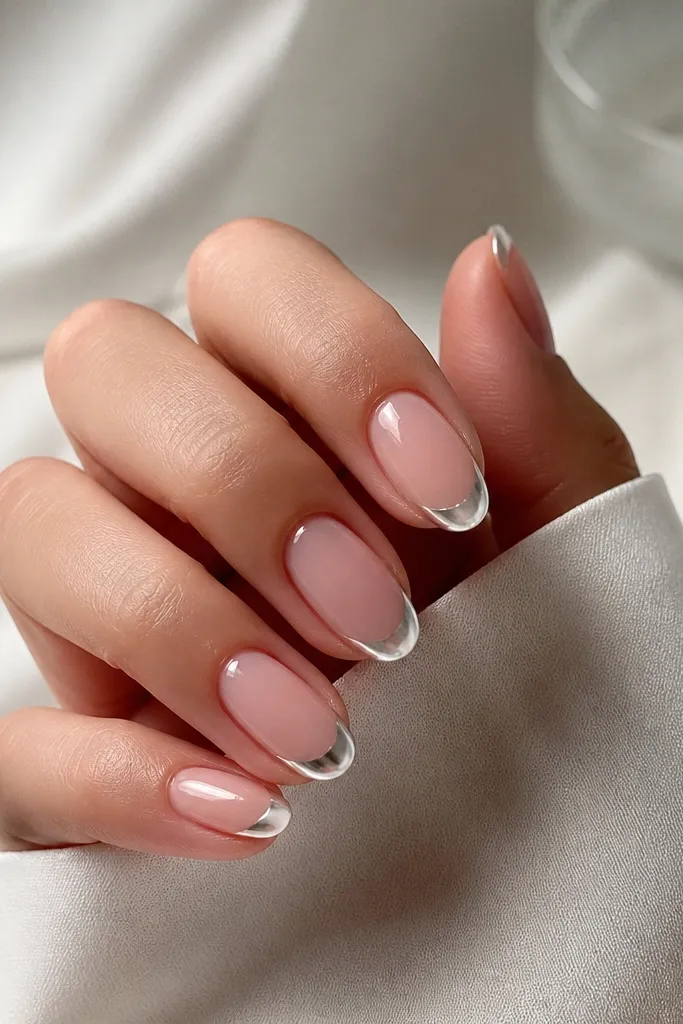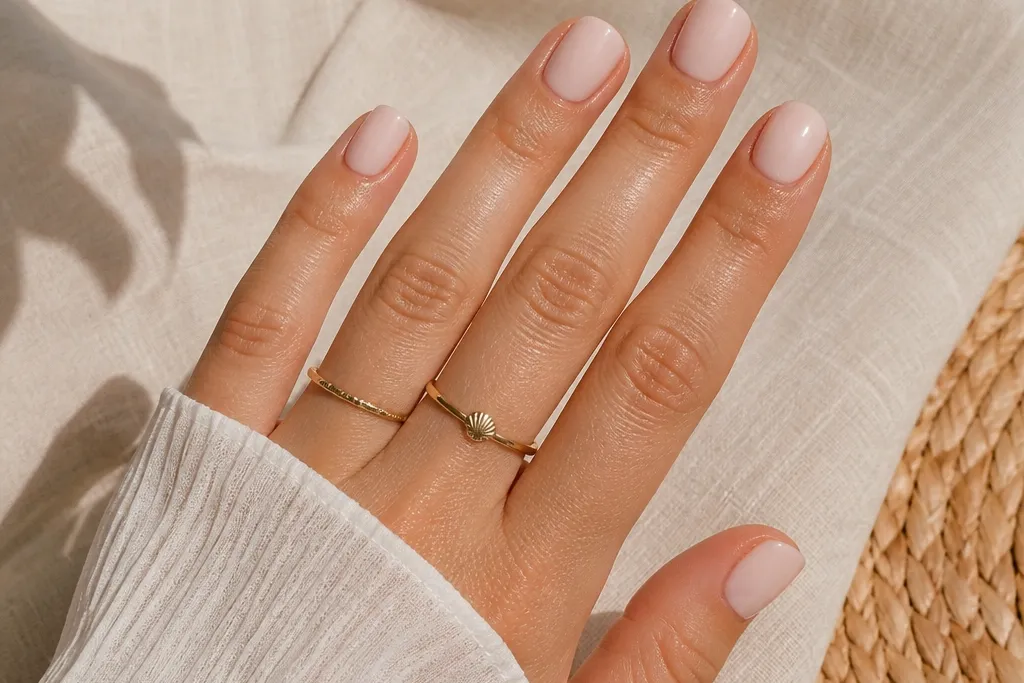
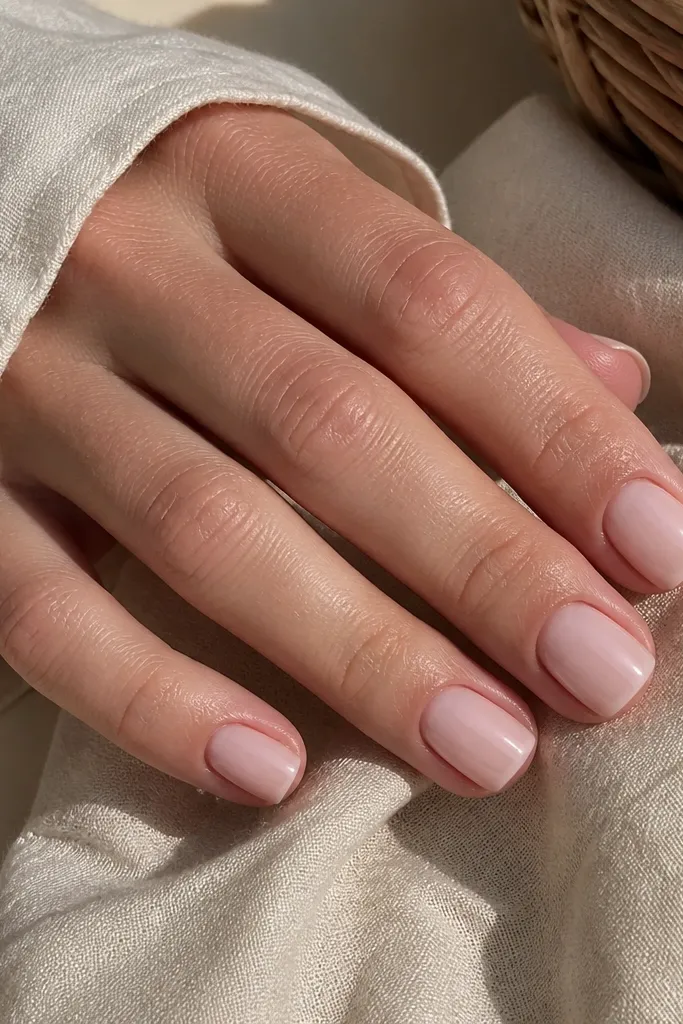
1. Crisp White French Twist on Nude Square
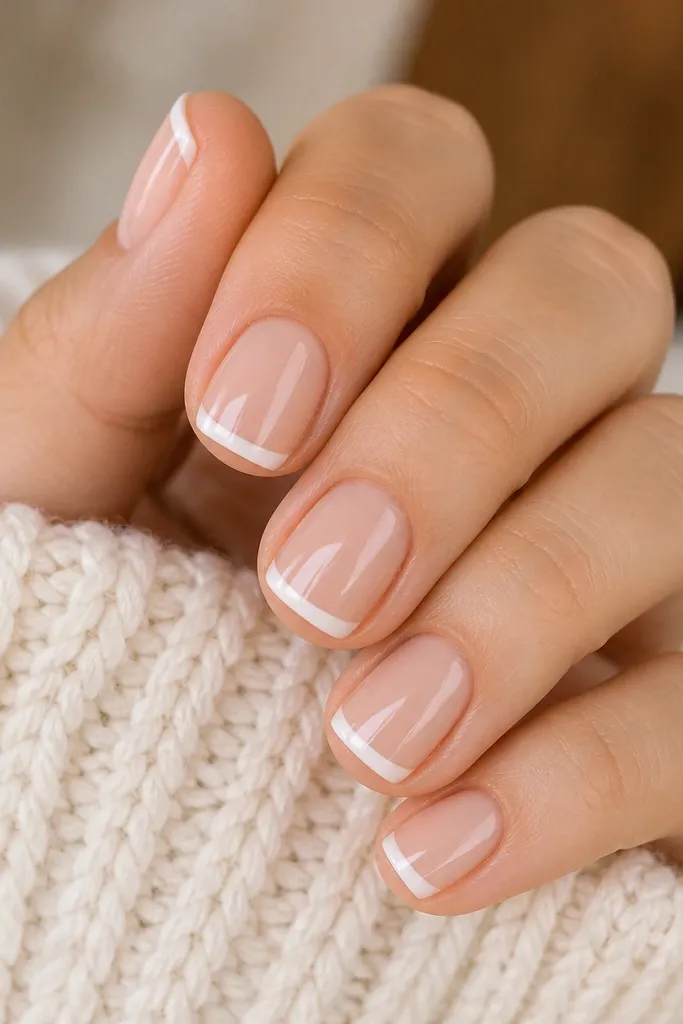
This look is the one I reach for when I want "fresh nails" without thinking. The nude base makes your nail bed look longer, and the short square shape keeps the French line sharp instead of softening into a blob. The angled white tip adds movement - it reads modern in photos even on short length. It flatters most skin tones because nude is the bridge color: choose a nude that matches your undertone (pink-leaning for cool, beige-leaning for warm). It also works for work, weddings, and summer outfits because white + skin always looks clean.
Start by buffing the surface lightly and applying a sheer nude gel or polish in 2 thin coats. Cure each coat if you're using gel, then wipe with alcohol to remove tack. For the twist, use a striping brush to draw a small white wedge on the tip - keep it narrower at the center and slightly wider toward one side. Clean up the edges with a tiny flat brush dipped in acetone, then seal with a glossy top coat in 2 careful strokes.
Editor's noteIf your French line tends to look shaky, place a small piece of nail tape as a guide for the first nail, then reuse it for the next three.
Watch outAvoid thick white on a short tip - it can make the nail look stubby.
2. Milky Pink Jelly Base With One Tiny Gold Dot
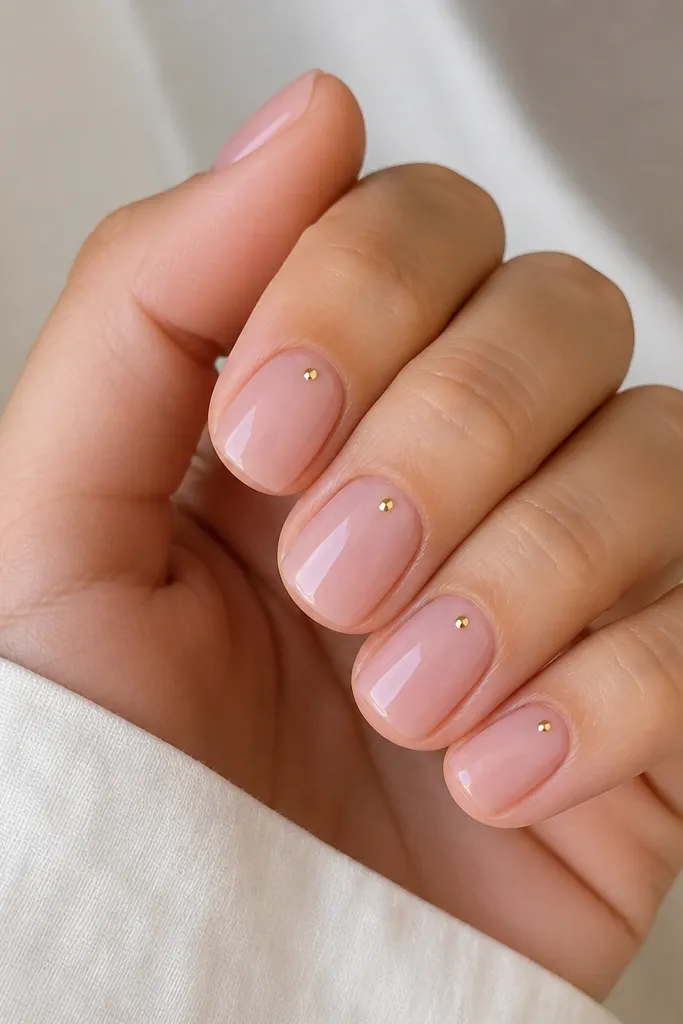
This is soft-summer minimalism that still looks intentional. The milky pink jelly finish gives that "healthy nail" glow, and gold adds a tiny focal point without covering the nail bed. On short square nails, one dot near the top elongates the eye line - your nails look a bit longer. It's flattering on fair, medium, and deep skin tones because the jelly base stays light while the gold catches light. This is also the easiest design to maintain if you're active in summer.
Start with a milky pink jelly polish or gel - I like ones that show a hint of nail line underneath. Apply 2 coats for opacity without turning it chalky; cure and wipe if gel. Use a dotting tool or toothpick to place one gold dot in the upper third of each nail, leaving a small gap from the cuticle. Finish with a high-gloss top coat, and be sure the top coat fully covers the dot so it doesn't catch.
Editor's noteUse gold foil glue or a gold chrome dust mixed with clear top coat if you want the dot to look more dimensional than flat nail art stickers.
Watch outDon't place the dot too low; it makes short nails look even shorter.
3. Pastel Ombre From Nude Square to Peach
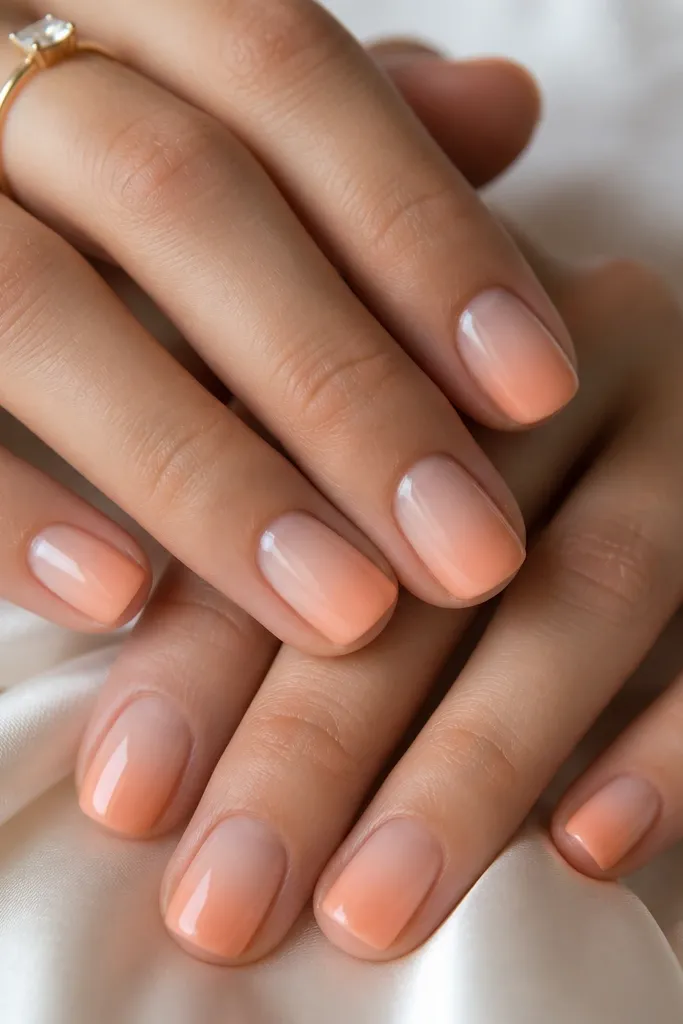
A peach ombre is summer in nail form because it looks like you're wearing a sun-kissed tint. The nude-to-peach gradient keeps the nail edges looking clean, and the square shape makes the fade look neat rather than messy. This flatters a wide range of skin tones because the transition color is warm and forgiving. If your nails stain easily, a milky nude base helps hide that and keeps the ombre looking fresh. It also looks amazing with shorts, sandals, and any warm-weather wardrobe.
Prep and apply a nude base gel or polish in 2 thin layers. Then sponge on peach pastel starting about one-third down the nail - I use a makeup sponge dabbed lightly until the gradient looks smooth. Blend the boundary by dabbing with the sponge using fewer product. When you like the fade, let it dry fully or cure, then apply a glossy top coat to smooth the texture and make it look salon-finished.
Editor's notePractice the fade on a scrap nail or finger first so you don't over-sponge the nail bed.
Watch outAvoid heavy saturation at the tip; it can turn the ombre into a flat peach block.
4. Sea Glass Accent With Clear Negative Space
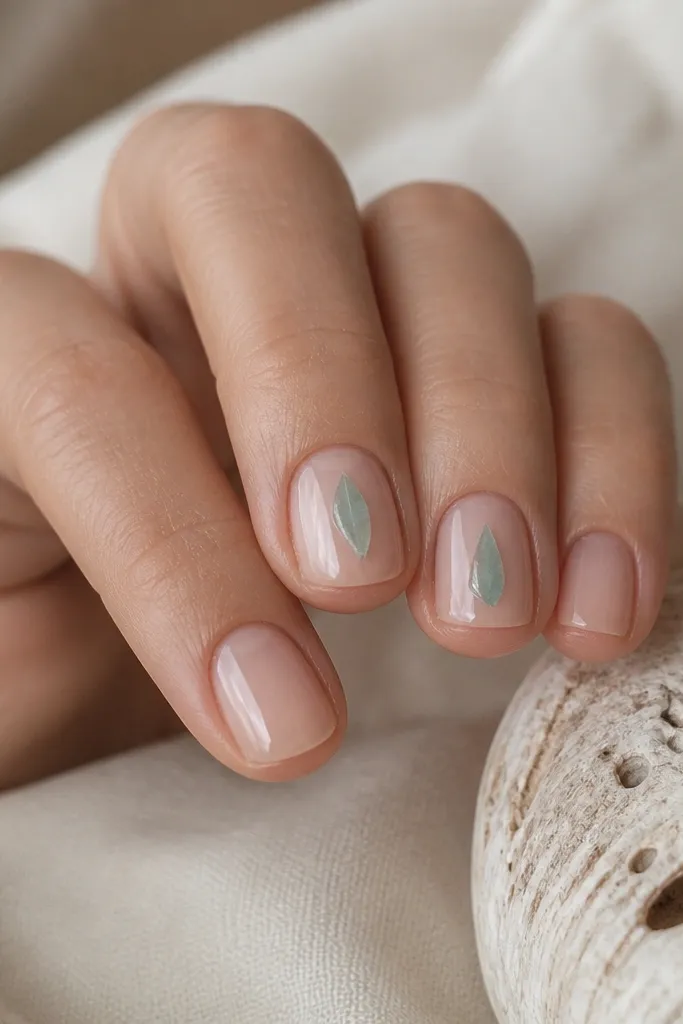
Negative space is the secret weapon for short nails, and sea glass color makes it feel summery. The clear-ish base keeps the nail visually longer, while the centered aqua shard adds an art element without crowding the cuticle area. I like this on medium to deep skin because the aqua pops hard against the sheer base, but it works on fair skin too. It's also great for people who hate busy nail art yet still want something that looks styled. The glossy finish makes the "glass" effect look real.
Start with a sheer nude or clear builder gel layer so you get a smooth, glossy surface. On the accent nails, paint a small vertical aqua shape in the center - think a narrow leaf with slightly rounded sides. Leave space around it so the negative space stays visible. Add a second thin aqua layer for opacity, cure, then top coat over the whole nail.
Editor's noteIf you want it to look extra sea-glass, add a tiny white highlight line at the edge of the aqua shape using a fine brush.
Watch outDon't fill the entire nail with aqua - it defeats the lengthening effect.
5. Cobalt Micro-Polka Dot Over Bare Nude
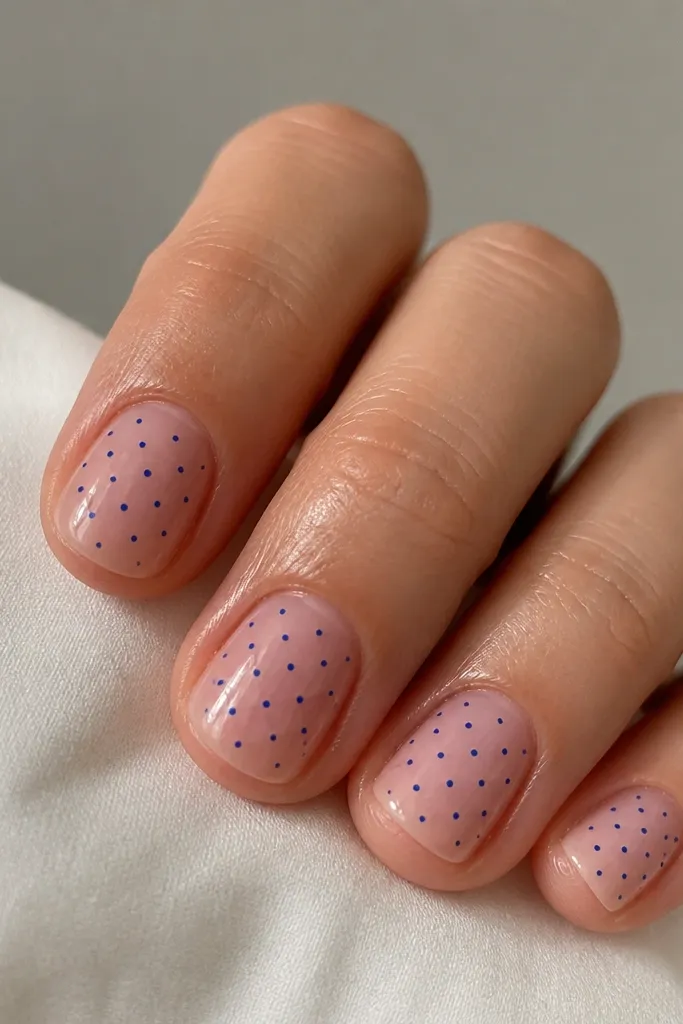
Micro dots make short nails look playful without adding bulk. A cobalt dot on nude reads crisp and summery, and the small scale keeps the nail from shrinking visually. This look is flattering because the nude base matches your skin tone, and the blue gives contrast that frames the nail. I've worn it on vacation and it still looks cute when your hands are sun-tanned because the blue stays bright. It's also beginner-friendly if you use a dotting tool with consistent pressure.
Apply a sheer nude base in 2 coats so it's even but still see-through enough to look natural. Dip a dotting tool into cobalt polish and press lightly to create small dots - start with 3 dots in a triangle, then fill gaps. Keep dots away from the sidewalls so they don't look messy as they grow out. Once dry or cured, seal with a glossy top coat in 2 passes.
Editor's noteWipe your dotting tool between nails to keep dot size consistent.
Watch outAvoid big dots - they overwhelm a short square tip.
6. Tangerine Half-Moon Cuticle With Clear Pink Base
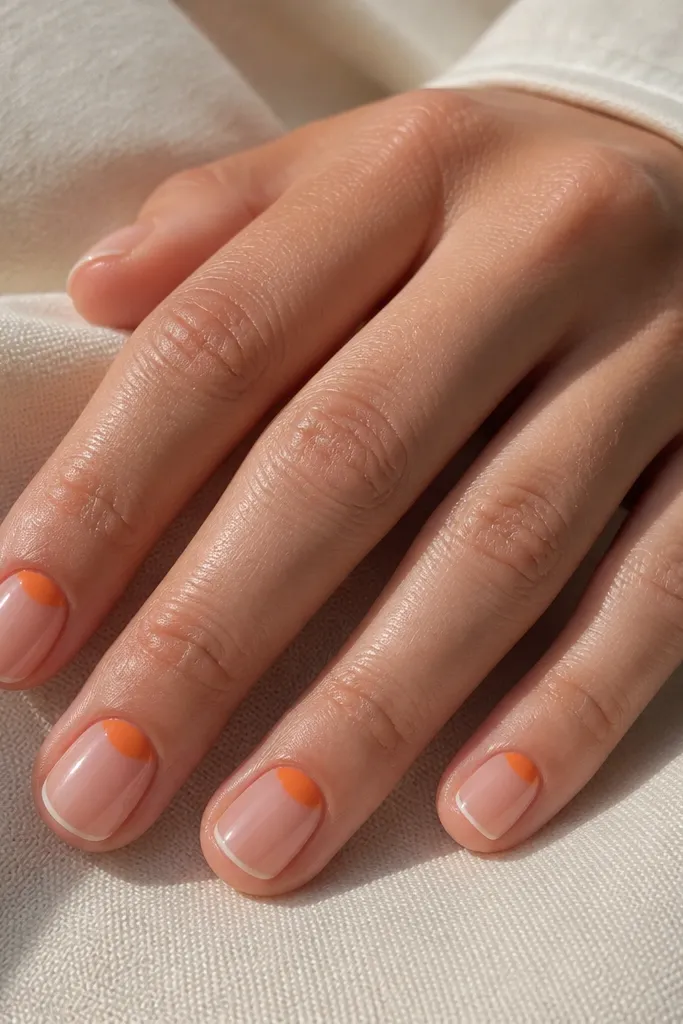
Half-moons are flattering on short square nails because they draw the eye to the cuticle area without covering the free edge. The tangerine color is bright but warm, so it looks good on both cool and warm undertones. A clear pink base keeps the look airy, which matters in summer when you want nails that don't feel heavy. I also like this for people who want nail art that grows out cleanly because the half-moon is at the top. It's a great choice for festivals and beach weekends.
Start with a clear pink gel or polish that gives a glassy look - apply 2 thin coats. Use a small detail brush to paint a tangerine half-moon at the cuticle, following your natural crescent shape. Keep the half-moon narrow so it doesn't cover the whole nail bed. Cure, then apply top coat carefully around the cuticle edge so it doesn't peel.
Editor's noteIf you struggle with the curve, use a half-moon nail stencil for the first two nails and then freehand the rest.
Watch outDon't bring the tangerine too far down the nail - it will make the nail look shorter.
7. Lime Green Skittle With Two Accent Nails
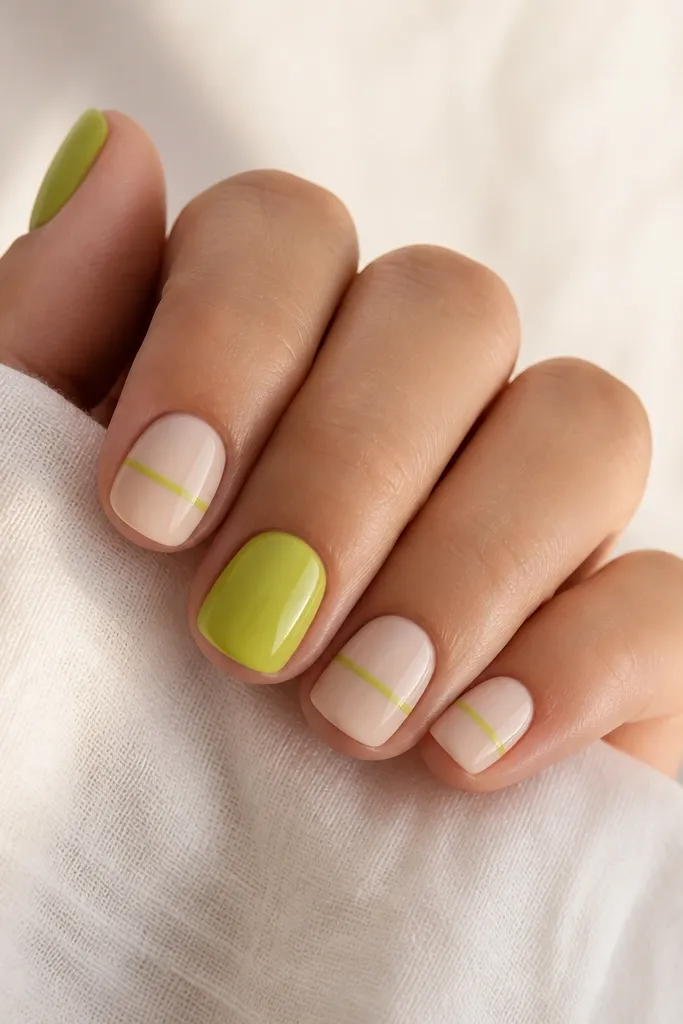
This is summer energy without being loud on every single finger. The creamy nude base makes it wearable, and lime green on two nails gives you that "cute manicure" impact for photos. I like the skittle approach because it balances attention - your nails still look cohesive, but you get two hero moments. It flatters people with medium to deep skin because lime creates a bright contrast, but I've worn it on fair skin too and it looks fresh. It's also good if your nails chip easily because the accent coverage gives you more leeway.
Paint all nails with a creamy nude in 2 coats. Pick two accent nails and apply lime green full coverage in 2 thin coats, curing between. On the remaining nails, use a striping brush to paint a short horizontal stripe in lime across the center - keep it about one-third of the nail width. Clean edges with a flat brush, then top coat everything glossy.
Editor's noteMake the stripe slightly higher than the center on your ring fingers; it looks more proportional when you rest your hands.
Watch outAvoid uneven stripe thickness - thin on one side looks sloppy fast.
8. White Crochet Texture Look on One Accent Nail
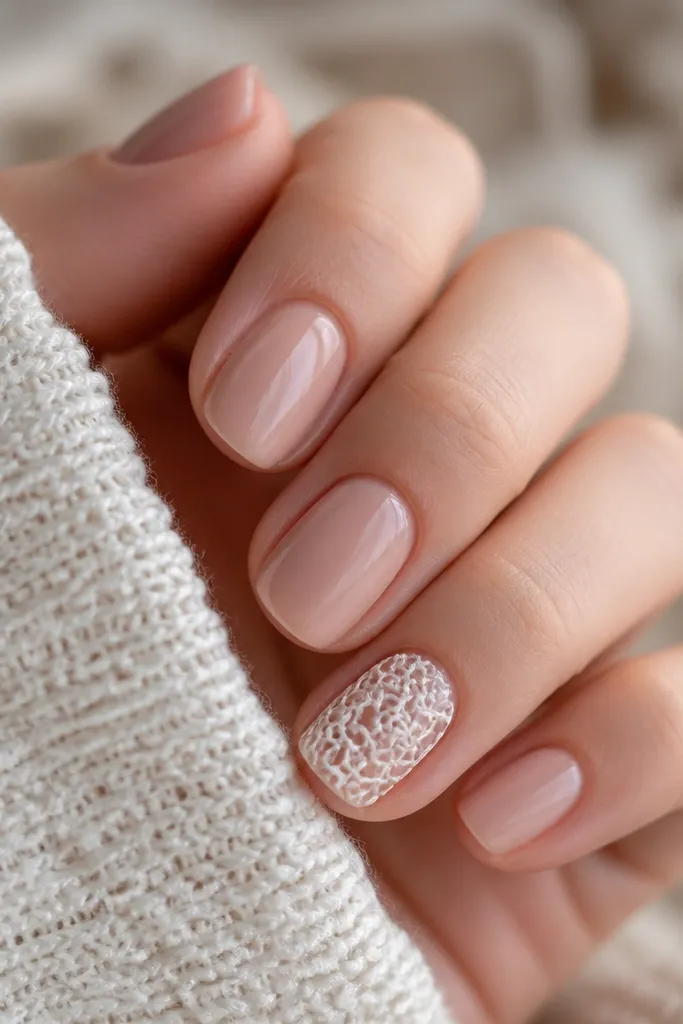
Texture makes short nails feel special, and crochet-style patterns scream summer because they look like lace. Keeping the texture on one accent nail keeps it wearable and prevents your manicure from looking bulky. The raised white pattern against nude reads crisp, and it catches light differently than flat polish. This suits almost everyone because nude backgrounds blend with your skin tone, and white texture looks clean even if your nails are short. It's also a nice option for weddings, brunch, and anything dressy-casual.
Start with a sheer nude base and let it fully level. Choose one nail per hand as the accent and apply white gel polish in a thin layer on top of the nude. Use a dotting tool and fine brush to create the crochet loops: tiny dots connected by short lines, spaced evenly. Cure, then seal with a top coat that smooths slightly without flattening the texture completely.
Editor's noteIf your pattern looks too flat, add a second thin layer of white gel only to the loop ridges, then top coat.
Watch outAvoid doing the texture on every nail - it turns into chunky clutter on short squares.
9. Pink Lemonade Swirl on Clear Base
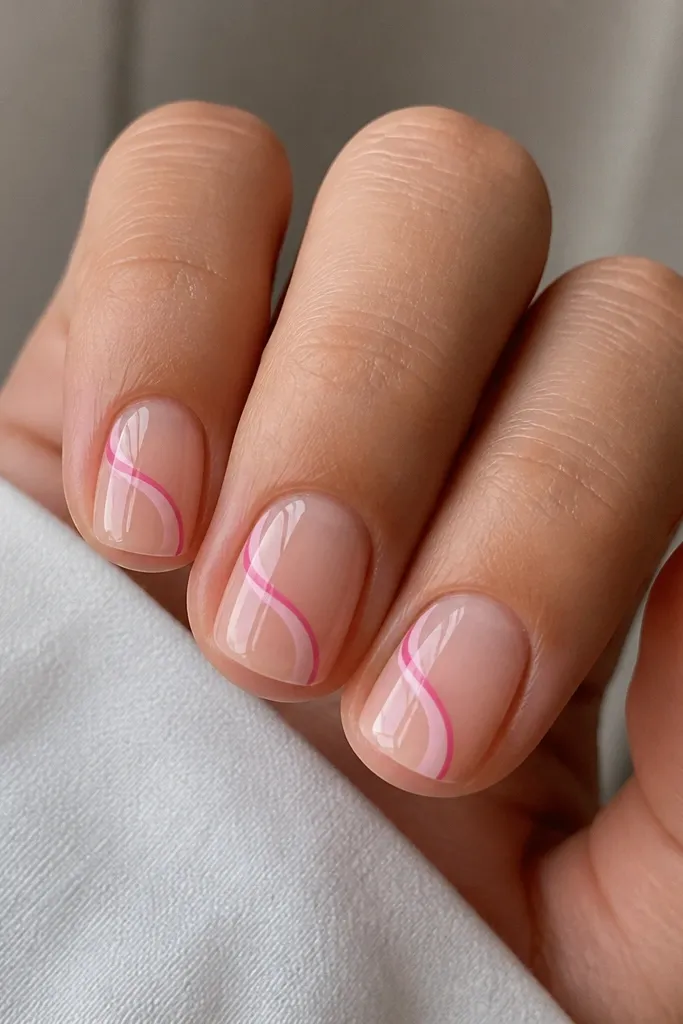
Swirls look delicate, but they're actually super flattering on short square nails because the line guides the eye up and across. A clear or sheer pink base makes the swirl look floating, like it's drawn on glass. Hot pink and lighter pink together create depth without adding extra elements. This is one of my favorite summer looks for people who want art but hate heavy coverage. It's also great for fair skin because the clear base stops the hot pink from looking harsh.
Apply a sheer base, either clear gel or a very light pink, in 2 thin coats for even shine. Use a fine liner brush to draw one hot pink swirl on each nail, starting near the side wall and curving toward the center. Add a second thinner line in lighter pink along part of the swirl to create a highlight effect. Cure if gel, then finish with glossy top coat and cap the free edge lightly.
Editor's noteUse liner polish with a thin brush - thick nail art paint makes swirls look like blobs on short nails.
Watch outAvoid swirls that touch the cuticle - leave a small gap so it looks intentional.
10. Coral Outline Frame on Nude
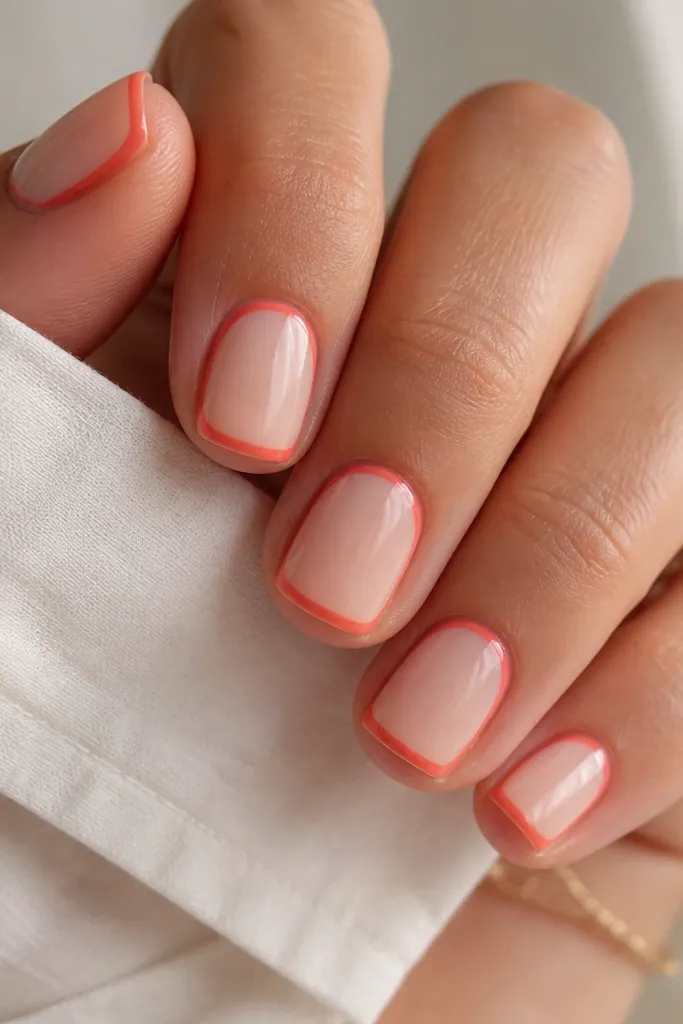
This is the nail design equivalent of a clean frame on a photo. The thin coral outline makes the nail look more structured, and because the center stays nude, the nail still looks longer. Coral is a summer color that works with bronzy skin and also with cooler undertones if you choose a slightly peach-leaning coral. It's also great if you want something graphic but not loud. The square shape makes the frame lines look sharp rather than rounded.
Paint a nude base in 2 coats so it's smooth. With a detail brush, draw a thin coral line along the sidewalls, stopping a tiny distance from the cuticle and free edge. Then add a thin coral line across the top edge of the nail (just under the cuticle), forming a simple frame. Clean up around the edges with a brush dipped in acetone, then top coat glossy.
Editor's noteMake the frame line slightly thicker at the top edge - it balances the nail and hides tiny application unevenness.
Watch outAvoid covering the whole nail with coral - outlining is what makes it look sleek.
11. Black-and-White Zebra Accent With Sheer Pink Base
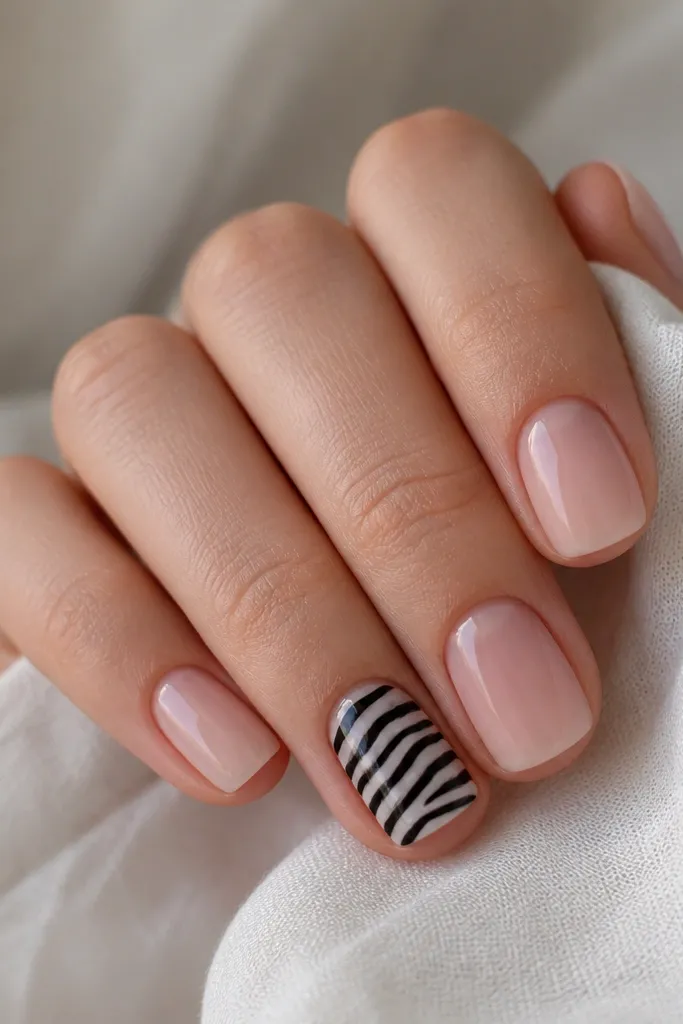
Zebra looks wild, but on short nails it needs restraint. Keeping zebra to one or two nails makes it wearable, and the sheer pink base keeps the overall look sweet instead of harsh. The black-white contrast is high-impact, so it reads clearly even when your nails are short. I like this combo for summer nights because it pairs with gold jewelry and black sandals. It flatters most skin tones, especially when the base has a hint of warmth.
Apply a sheer pink base in 2 thin coats. Choose an accent nail or two and paint the base of those nails white first, then let it dry or cure. Draw zebra stripes with a striping brush: alternate black lines with white negative gaps, keeping the stripes slightly different widths. Add top coat over everything, and for the zebra nails, cap the stripes with a slightly thicker top coat so they don't feel rough.
Editor's noteIf the stripes look too perfect, that's a good sign - zebra should look a little organic, so vary the spacing on purpose.
Watch outAvoid zebra on every nail; it turns into a pattern overload on short squares.
12. Matte Seafoam With Glossy Half-Top Coat
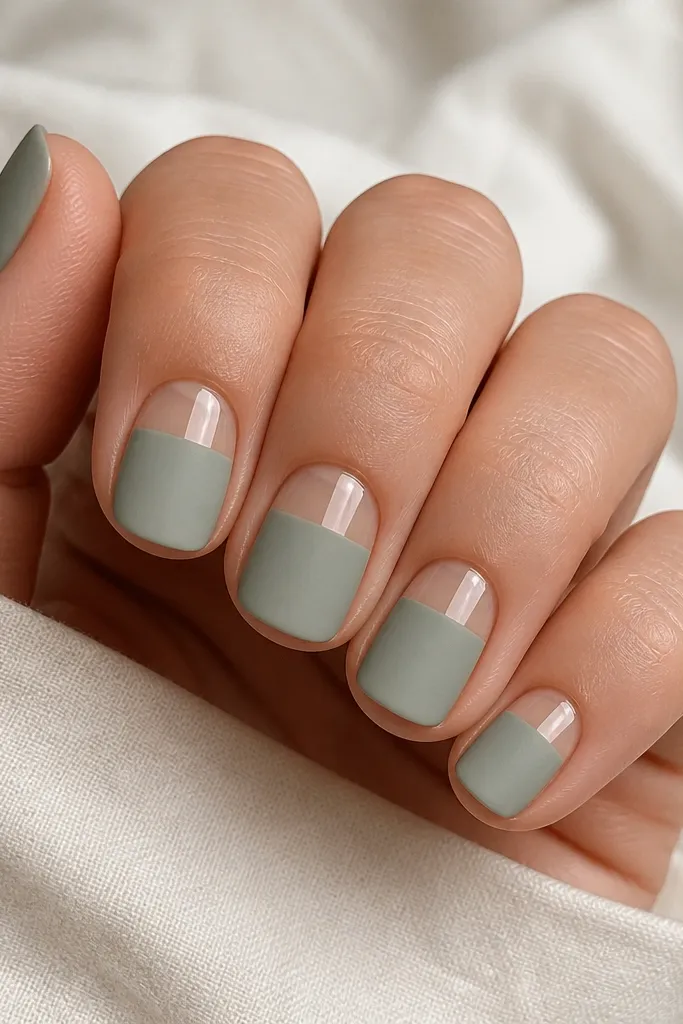
Matte polish is my summer switch-up because it looks cool in heat and hides micro-ridges. Seafoam feels light and beachy, and the glossy half-top gives you contrast without extra art. On short square nails, the straight boundary makes your nail shape look crisp. This works on fair and medium skin tones especially well, but deep skin looks gorgeous too because seafoam pops against warm undertones. It's also a nice choice if you want something different from glitter and stripes.
Apply a solid seafoam base, 2 coats, and cure or let it dry fully. Use a matte top coat on the entire nail except the area you want glossy - I paint a thin boundary strip near the top, then wipe carefully. If you're doing it with gel, apply glossy top coat to the upper half using a striping brush so the line stays straight. Cure everything and check under light to make sure the matte isn't streaky.
Editor's noteLet the matte base cure fully before adding the glossy half, or you'll get a cloudy boundary.
Watch outAvoid a wobbly boundary line - matte + gloss makes mistakes show more.
13. Glazed Strawberry Micro-Glitter Fade
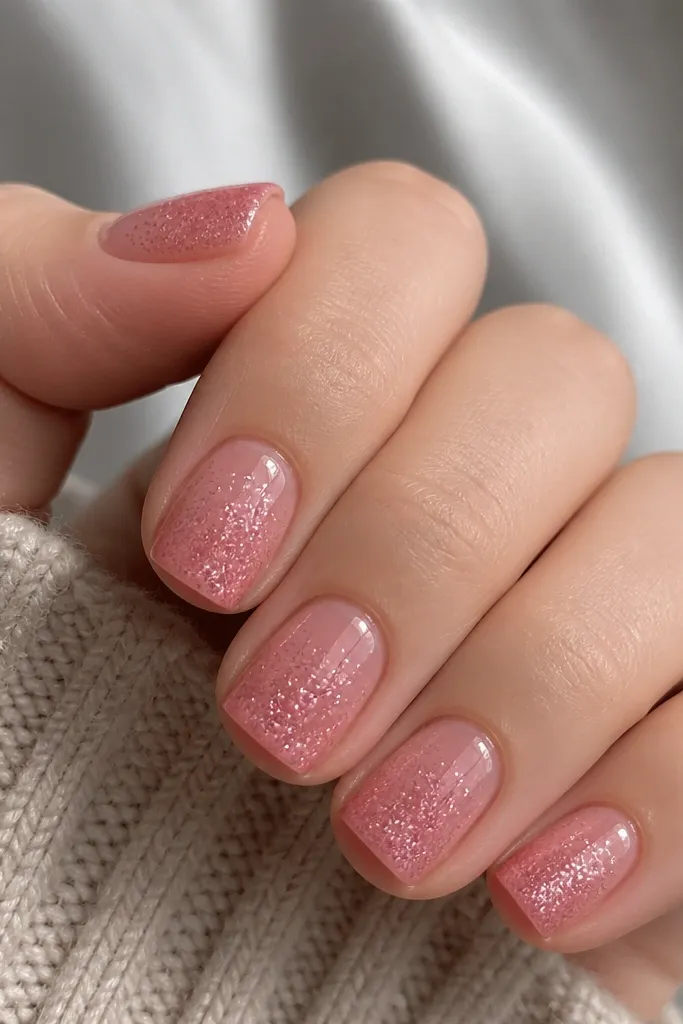
This is the "juicy nails" look that still works on short square tips. The strawberry pink base gives you that summery berry vibe, and the glitter fade stays concentrated where the nail is naturally brighter in daylight. I like this for outdoor plans because the glitter catches in the sun without covering the entire nail. It flatters a range of skin tones since pink is easy to tune - go more sheer for fair skin, more opaque for deeper skin. It also looks great with gold hoops and a simple sundress.
Start with a strawberry pink polish or gel in 2 coats, making sure it's even at the edges. For the glitter, dab micro-glitter only on the top third of the nail toward the free edge - use a makeup sponge or a flat brush for control. Blend the glitter upward by lightly dragging the sponge once, then stop. Seal with a thick glossy top coat so the glitter looks suspended and smooth.
Editor's noteUse a glitter that is fine and "micro" instead of chunky; chunky glitter can feel gritty on short nails.
Watch outAvoid glitter right up to the cuticle - it makes the nail look heavy.
14. Sunflower Accent With Yellow Center on Nude
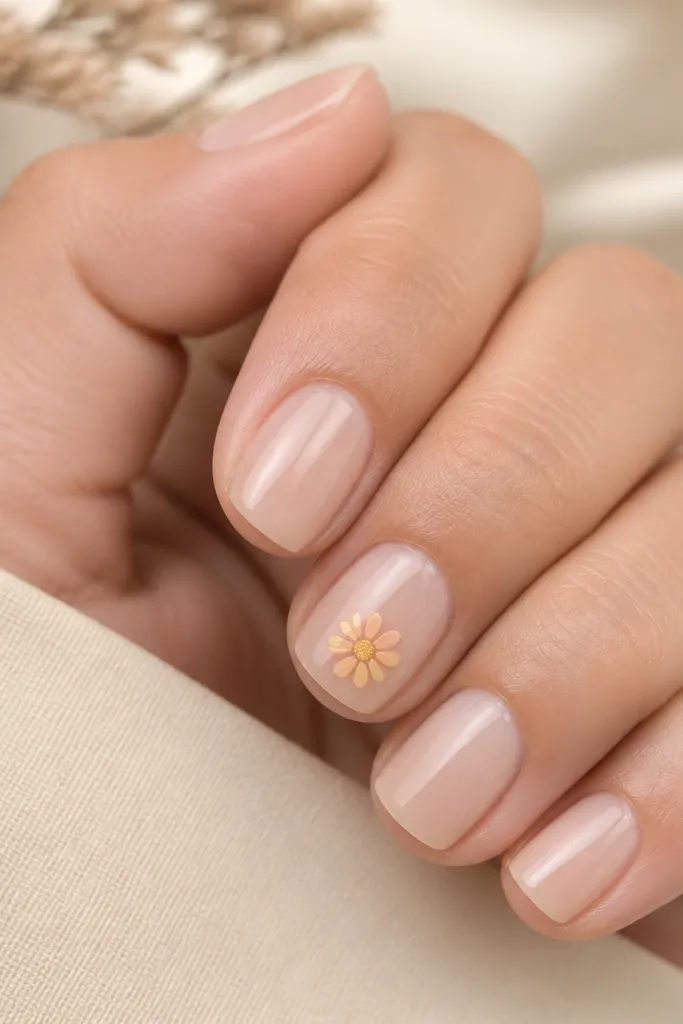
Sunflowers look adorable on short nails because you can keep them tiny and still get the theme across. The nude base stays wearable, and the sunflower sits like a sticker in the center - no need for long stems or extra leaves. Yellow centers bring warmth, and the pale petal tones keep it from looking too harsh. I've worn this with denim shorts and it looks right at home. It's flattering on all skin tones because the nude background makes the flower the focus.
Apply a nude base in 2 coats and cure or dry fully. Pick one accent nail per hand and paint a small yellow center circle using a dotting tool. Add petals with a thin brush or nail art pen: small curved strokes radiating outward, keeping them symmetrical enough to look "sunflower-like" but not perfect. Finish by outlining the center ring lightly in a deeper orange and top coat everything glossy.
Editor's noteIf you mess up one petal, fix it by painting the center circle again; it covers a lot of small errors.
Watch outAvoid large flowers that touch the sidewalls - tiny placements look cleaner on short squares.
15. Tropical Palm Leaf Tips on Clear Pink
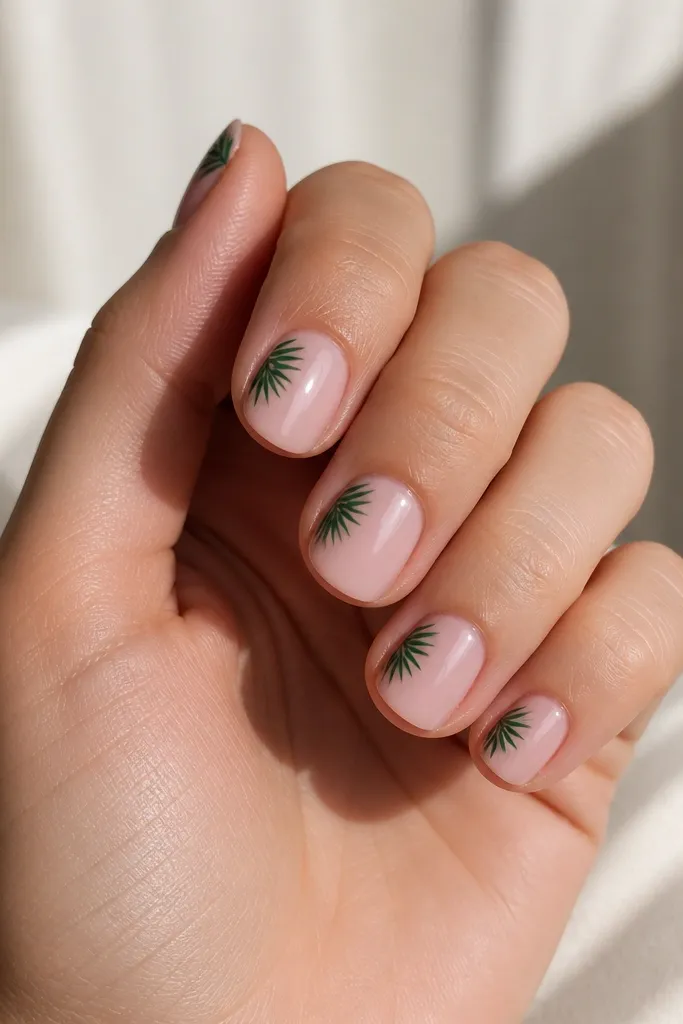
Palm leaf tips give you that vacation look without making your nails feel busy. The clear pink base keeps it light, and the leaf at the tip reads like a stylized accent instead of full nail art. Deep green is strong enough to show up on camera, especially in daylight. This design flatters short square nails because the leaf shape follows the nail's vertical line. It also works for people who want something tropical but not neon.
Start with a clear pink base in 2 coats for a glossy, glassy finish. Use a fine brush to paint a deep green palm leaf near the free edge, starting slightly toward one side and curving inward. Add 3-5 leaf lines with a lighter green to create depth, keeping them thin. Clean the edges with a flat brush and top coat over the whole nail, capping the tip so it lasts.
Editor's noteHold your brush like a pencil and pull short strokes - palm leaves look better when they're not drawn in one long line.
Watch outAvoid covering the entire nail with leaves - tips only look more polished on short squares.