
1. Watermelon Tip Squares
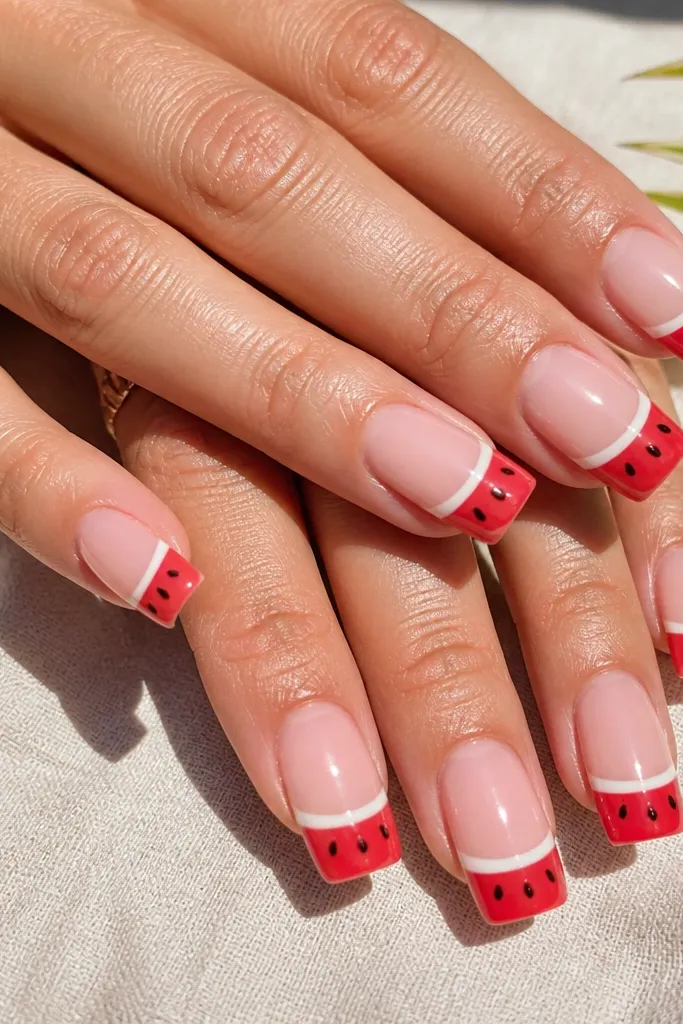
This one looks like summer in a snack-sized manicure. Start with a sheer pink-nude base so your nail bed color still shows through, then paint a bold watermelon red tip that covers the outer third of the nail. The thin white stripe makes the red look brighter and cleaner, and the black dots read like real seeds. It flatters most skin tones because the base is translucent and the tip color does the heavy lifting. It also works on short square nails because the design stays centered and doesn’t sprawl.
Editor's noteIf your corners get rounded, use a nail file to sharpen just the outer 0.5 mm before you paint the red tip.
First, paint two thin coats of a sheer nude gel and cure fully. Then use a striping brush to draw a white line horizontally across the middle of the tip area and cure. Next, fill the tip with watermelon red, keeping the red edges straight at the square corners. Finish by dotting tiny black seeds with a dotting tool near the white stripe; cure again and seal with a high-gloss top coat.
Watch outSkipping the white stripe makes the red look muddy and the tip edge looks less “designed.”
2. Lemon Jelly Clear Overlay
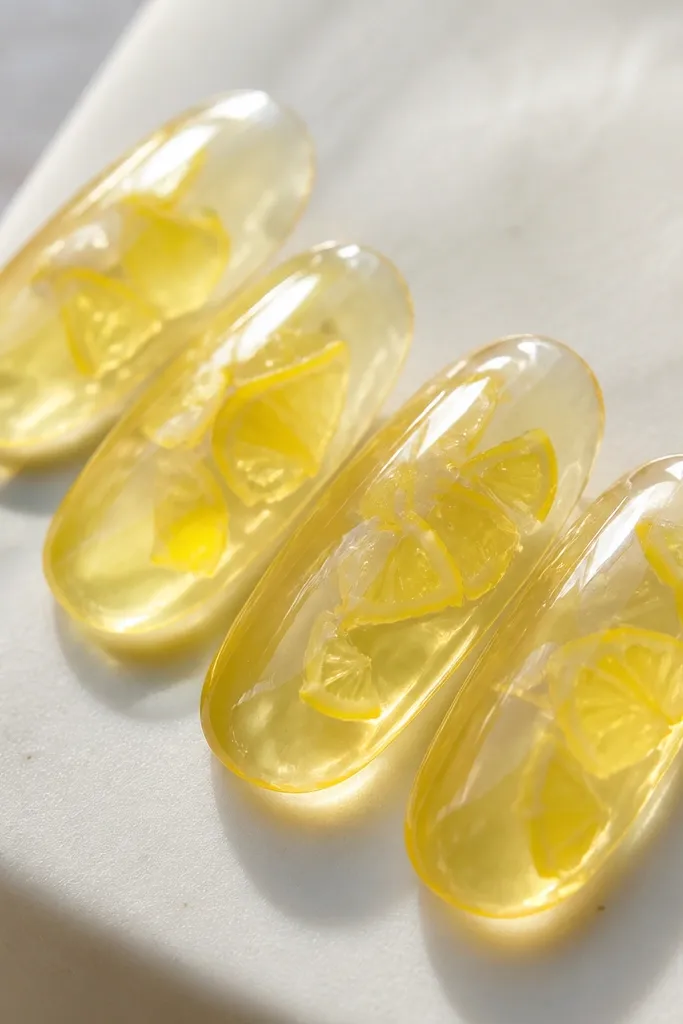
This is the manicure I reach for when I want something bright but not loud. A clear jelly base with a soft lemon tint looks glossy and juicy, like the inside of a lemon candy. The wedge shapes stay small and centered, so square nails look neat instead of cluttered. It flatters fair to medium skin because the jelly stays airy, and it still works on deeper skin because the yellow glows against the nail bed. Best part: it grows out gracefully because the base is clear and the art stays compact.
Editor's noteUse a dotting tool to place tiny highlight dots on the wedges so they look like light is bouncing off the gel.
Start with a clear builder gel or clear jelly polish as your base and cure. Add a thin translucent lemon layer in the center only, feathering out so it fades toward the cuticle and tip. Then paint two or three small lemon wedge shapes using a slightly darker yellow, keeping them irregular and organic. Cure, then top coat with a thick glossy layer to create that “wet” look.
Watch outPainting lemon art too close to the sidewalls makes square corners look bulky.
3. Sky Blue Micro-French
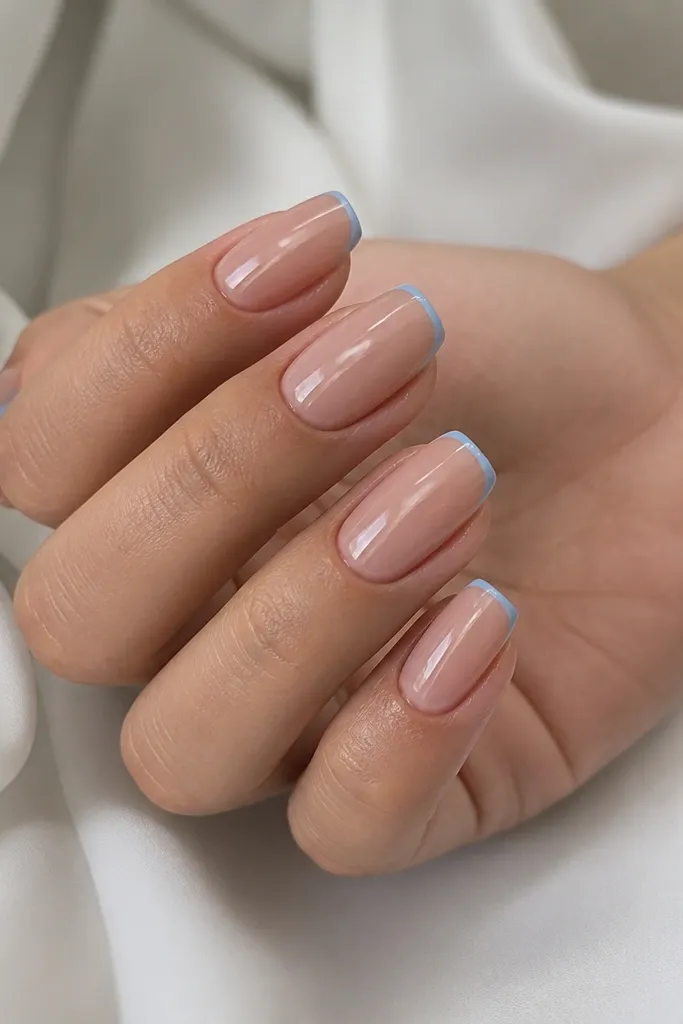
Micro-French looks current because it’s clean, minimal, and still screams summer. The trick is keeping the blue line thin — think hairline, not stripe. A sheer nude base keeps the nail light and makes your hands look fresh even with minimal jewelry. Square tips make the line look sharper than on rounded nails, so it reads crisp in photos. It flatters everyone because the base is neutral and the blue is bright without being neon.
First, apply a sheer nude gel base and cure. Use a fine striping brush to paint a 1 mm sky-blue line right along the free edge of the square tip; keep it even from corner to corner. Clean up the edges with a flat brush dipped in gel cleanser before curing. Cure again, then finish with one coat of glossy top coat.
If your French line wobbles, pause and straighten the brush by pulling it back toward the center before you hit the corner.
Making the French too thick turns it into a chunky block that looks heavy on square tips.
4. Tangerine Chrome Half-Moon
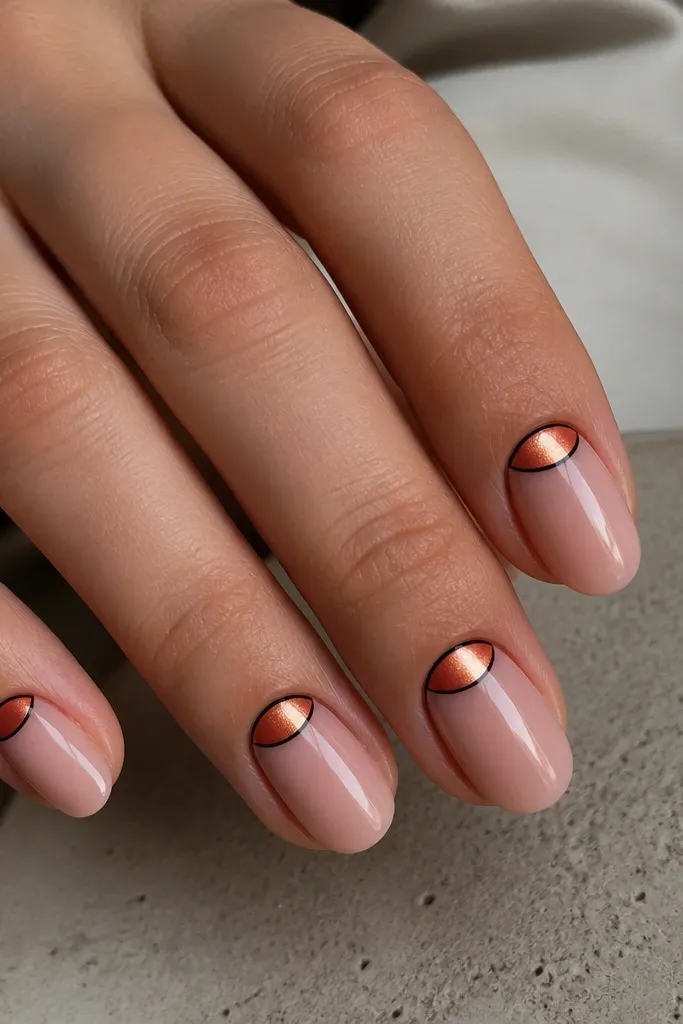
Cuticle half-moons look sharp because they frame your nail bed and make square shapes look intentional. The tangerine chrome pop at the base catches light when you move your hands, and the thin black outline keeps the shape crisp. I like a nude base because the chrome can look too intense if you go full color. This flatters warm undertones beautifully, but it also looks great on cool undertones because tangerine adds energy. It’s also a practical summer choice since half-moon placement hides tiny growth lines.
Start with two coats of a nude glossy gel and cure. Paint a small half-moon at each cuticle using a tacky gel layer or foil transfer gel, then dust tangerine chrome over it and tap off the excess. Use a super-thin striping brush to trace a narrow black outline around the chrome shape and cure. Finish with glossy top coat, keeping it thin over the chrome so it doesn’t dull.
Seal chrome with top coat by dabbing at the edges first, then spreading lightly — this keeps the center reflective.
Overloading top coat over chrome can turn it grey instead of bright.
5. Mint Candy Stripes
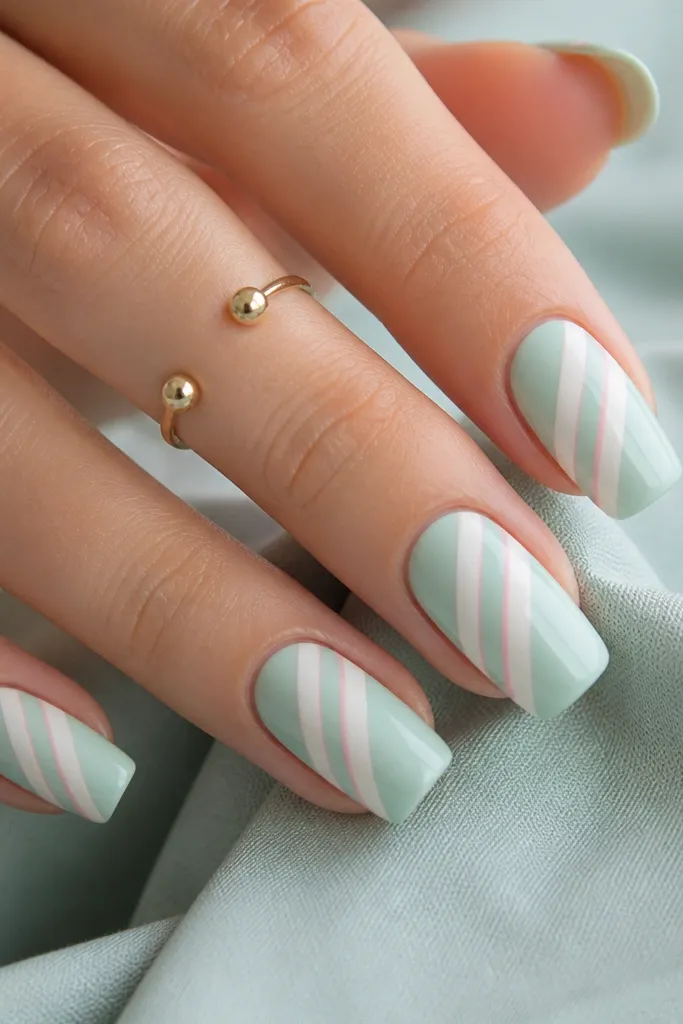
Candy stripes are cheerful without needing tiny art everywhere. The mint base feels summer-cool, and the white stripes keep the look clean, not busy. I like adding one thin pink stripe so your set has a second color note that looks good with summer outfits. Square nails handle diagonal stripes well because the angles emphasize the shape. This flatters hands that look better with lighter tones since mint is airy, but the design still reads bold due to the contrast.
Apply a pale mint gel base in two thin coats and cure. Then place two diagonal white stripes using striping tape as a guide, or freehand with a steady striping brush. Add one thin diagonal pink stripe in between the white ones for contrast. Cure, remove tape if used, and seal with glossy top coat.
If you use tape, press it down firmly at the corners so the stripe edge stays razor-sharp.
Trying to paint wide stripes freehand usually makes edges look wavy and cheap.
6. Sea Glass Sparkle Corners
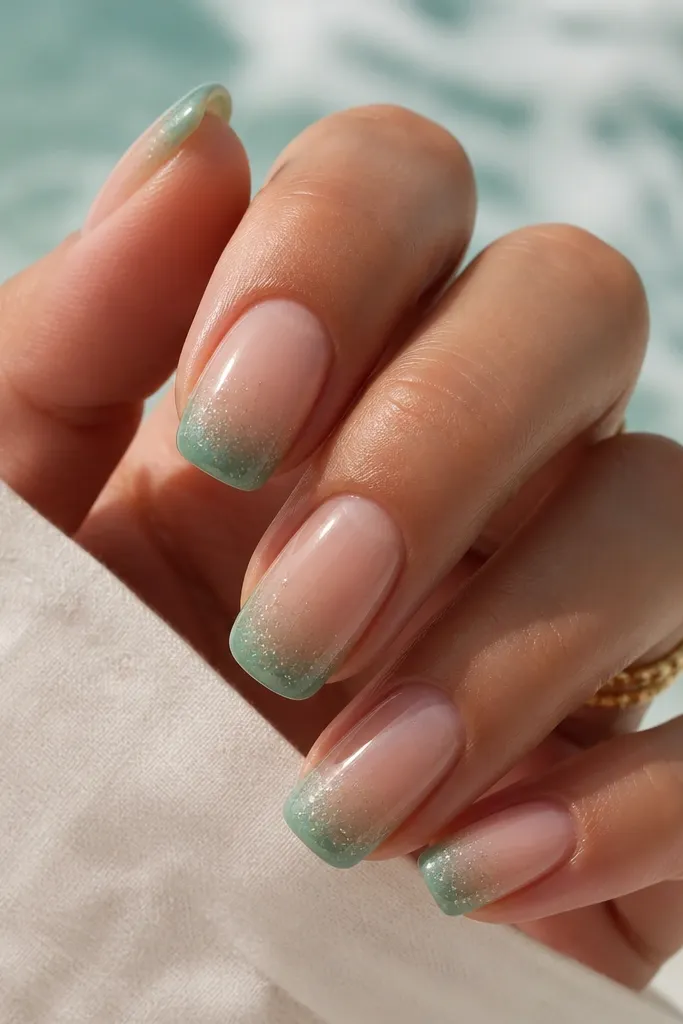
This is my favorite “low effort, high payoff” design for summer. Sea-glass teal in only the corners keeps the nails light and modern, while the iridescent glitter adds just enough sparkle when the light hits. Square tips make corner placement look intentional instead of random. It flatters all skin tones because the base stays neutral and the color sits where your nails naturally catch light. It also hides chips well because the glitter is concentrated where wear shows first.
Start with a sheer nude glossy base and cure. Paint a small triangle wash of sea-glass teal at each tip corner, leaving the center of the nail clear. Add micro glitter only on top of the teal corners using a glitter gel or loose glitter pressed into tacky gel, then cure. Finish with top coat over the whole nail for a smooth surface.
Use a makeup sponge to dab the teal wash — it makes the sea-glass look soft, not painted solid.
Putting teal across the full tip makes it look like a costume nail instead of sea-glass.
7. Coral Blossom One-Line Art
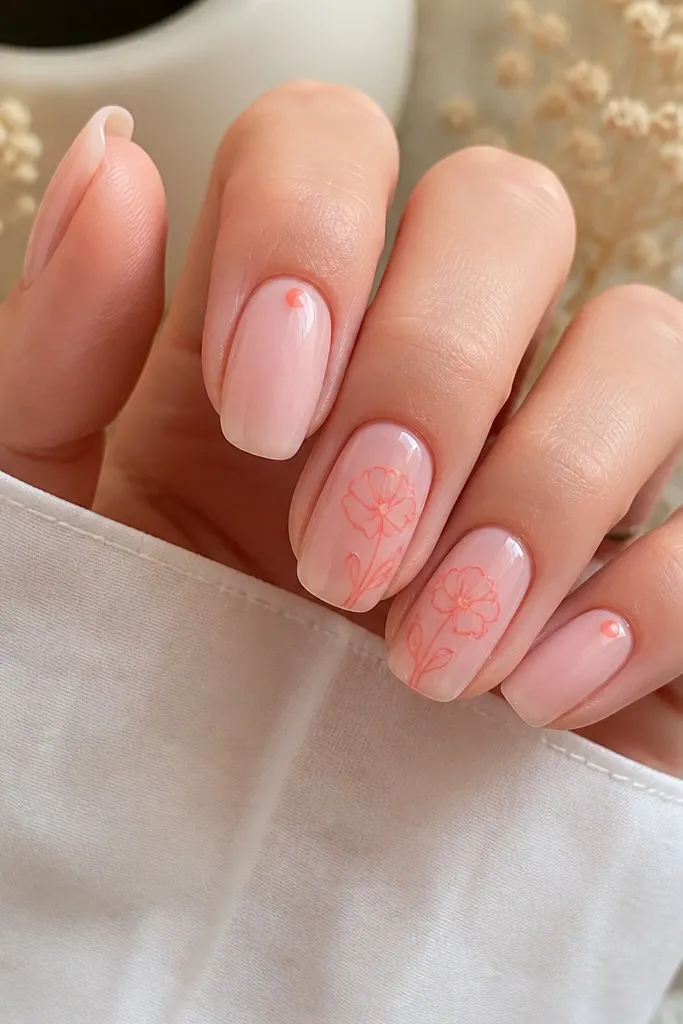
One-line art looks current because it’s graphic, not crowded. A coral outline on a sheer pink base feels like fresh summer flowers without the heavy fill that can look dated. I place the line-art on two nails and keep the rest simple with tiny dots, so your hands look polished instead of “busy.” Square nails make the lines look crisp and modern. It flatters fair and medium skin especially well, but it also looks great on deeper tones because coral pops against the sheer base.
Paint two coats of a sheer pink gel and cure. On the accent nails, use a fine liner brush to draw a simple flower outline in coral, with a tiny dot center. On the remaining nails, add one or two small coral dots near the cuticle area. Cure each nail, then apply glossy top coat and cap the free edge.
Before you commit, mark the flower center lightly with a dot so your lines don’t drift toward the corners.
Filling the whole flower solidly makes it look like stickers instead of fine art.
8. Hot Pink Jelly Full Nail
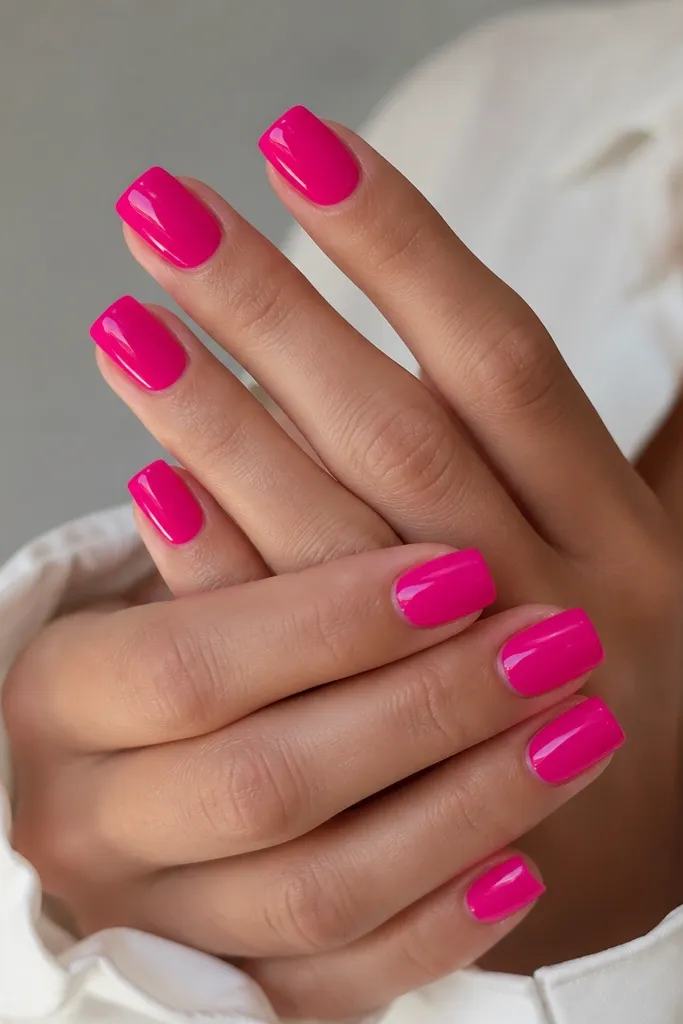
A hot pink jelly manicure is the summer uniform for people who want color without patterns. The jelly finish looks like it’s glowing from inside, especially on square nails where the flat surface reflects light evenly. I do a slightly deeper center to create dimension, which keeps the set from looking flat or chalky. This flatters most skin tones because the color sits on top of your natural nail bed and doesn’t fight undertones. It’s also perfect for beach days since it looks good through minor chips.
Editor's noteIf you see streaks, add a third thin layer rather than thickening — thick gel shows ridges on square tips.
Apply a clear or sheer pink base layer and cure. Then paint hot pink jelly polish in two thin coats, keeping the center slightly thicker and the sides slightly lighter. Use a clean brush to smooth the center so it looks even, not domed. Cure thoroughly, then add one more glossy top coat layer for that wet shine.
Watch outUsing opaque creme hot pink instead of jelly can make it look harsh and less “summer-glow.”
9. Nude + Black Graphic Tip
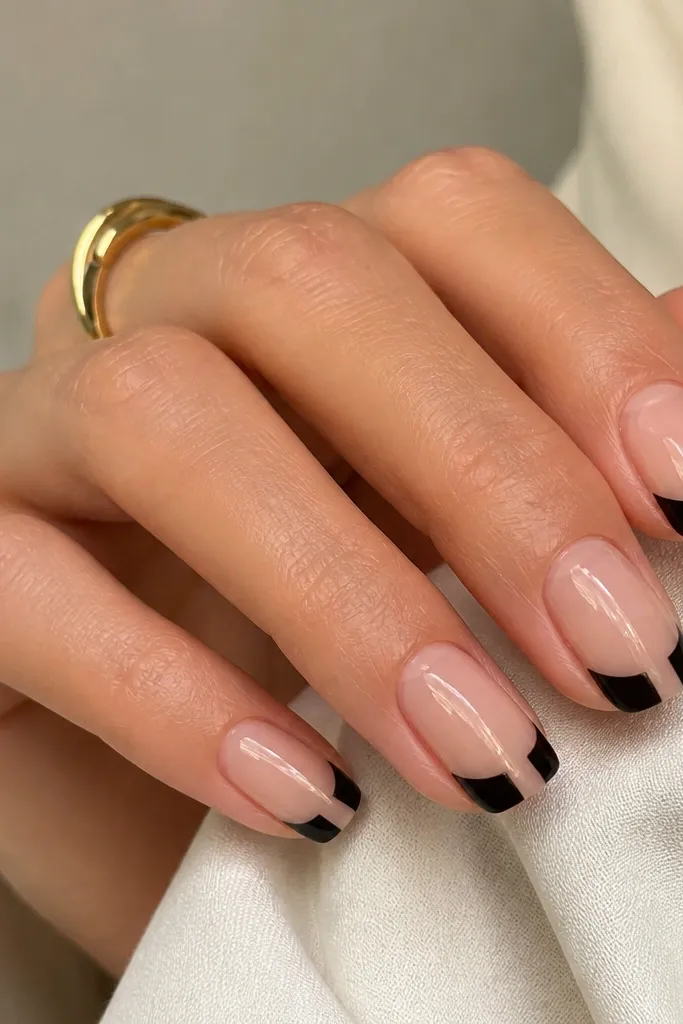
This design is clean, modern, and it makes your hands look sharper instantly. The nude base keeps it wearable, while the black graphic tip adds that street-style edge. The small notch in the center gives the tip a break so it doesn’t become one solid block. Square nails help this look because the geometry lines up with the corners. It flatters almost everyone since the contrast is strong, and it works for both casual and dressed-up days.
Editor's notePress the tape down at the corners with a cotton swab so the black edge stays straight.
Start with a nude glossy gel base and cure. Use striping tape or a steady brush to block out the outer third of the tip in black, leaving a small center notch area unpainted. Carefully fill the black area and remove tape right away if you used it. Cure, then top coat with gloss to seal the edges and smooth the surface.
Watch outTrying to freehand both corners at once — do one side, cure, then do the other.
10. Poolside Blue Gradient
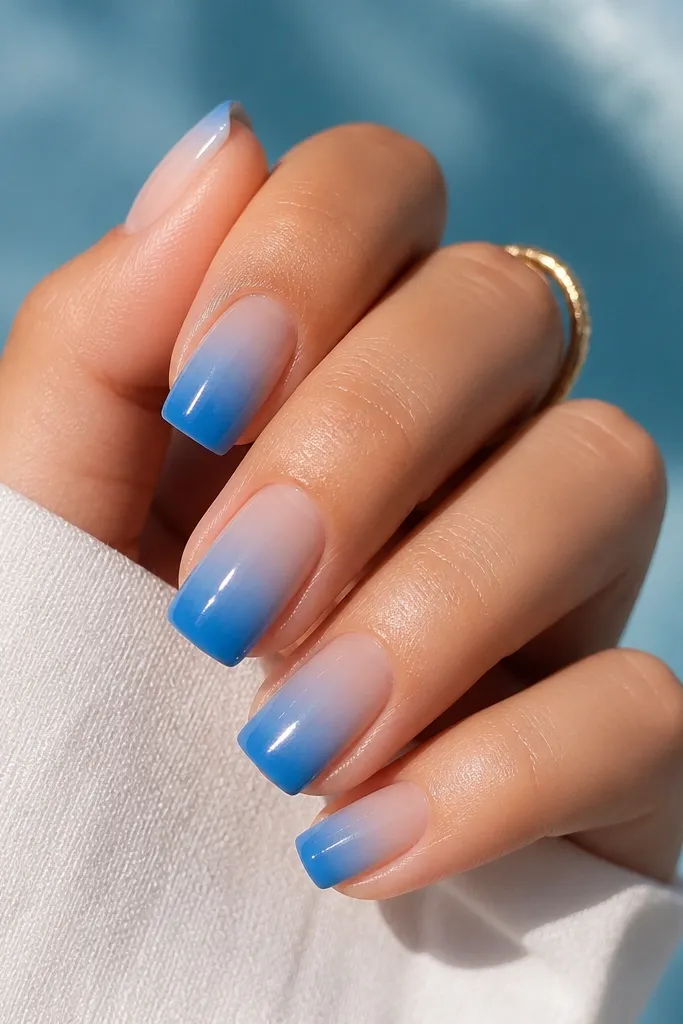
Gradients look expensive when they’re smooth and start sheer. This poolside blue fades from a light watery tone near the cuticle into deeper blue at the tip, which makes square nails look longer. I like this for summer because it looks like sunlight on water, not like a single flat color. It flatters fair to deep skin tones because blue sits in a flattering range and the gradient adds depth. It also looks great with gold jewelry and white outfits.
Apply a sheer nude or clear base and cure. Sponge on light pool blue near the cuticle, then add a darker pool blue on the tip area, blending where they meet with a gentle sponge tap. Keep the gradient only on the top half so the nail bed stays airy. Cure, then top coat with glossy finish to smooth any sponge texture.
Wipe excess polish off your sponge before you blend so the fade stays soft.
Leaving a hard band line between colors makes the gradient look like a sticker.
11. Strawberry Milk Dots
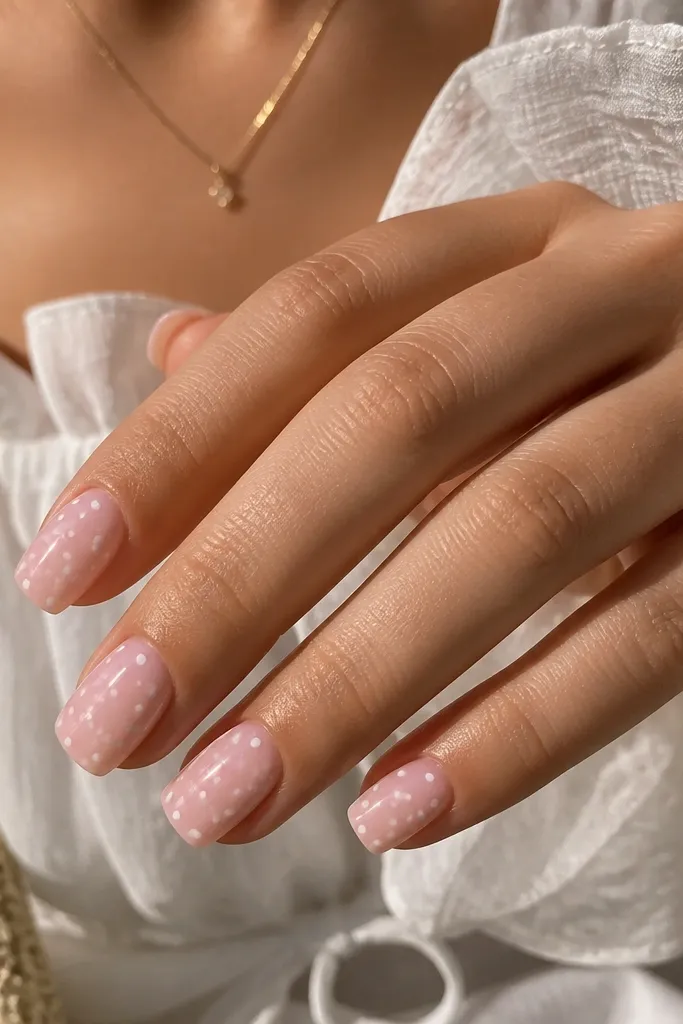
Tiny dots look cute in summer because they feel playful but still clean. The creamy nude base makes the red dots look like strawberry milk, and the larger dots near the tip add a gentle focal point. Square nails are great for dot patterns because the flat surface gives even dot placement. This flatters hands that look better with lighter neutrals, and it still pops on deeper skin tones because the red stays strong. It’s also super fast when you want a manicure after work.
Editor's noteLet each dot cure for a few seconds before you move on so you don’t smudge wet gel.
Paint a creamy nude gel base in two coats and cure. Use a dotting tool to place small strawberry-red dots starting near the mid-nail, spacing them evenly. Add two or three slightly larger dots near the tip corners to balance the design. Cure and seal with glossy top coat, making sure the dots don’t get dragged.
Watch outDotting too close together makes it look like nail dust instead of intentional pattern.
12. Sand Matte + Glossy Shell
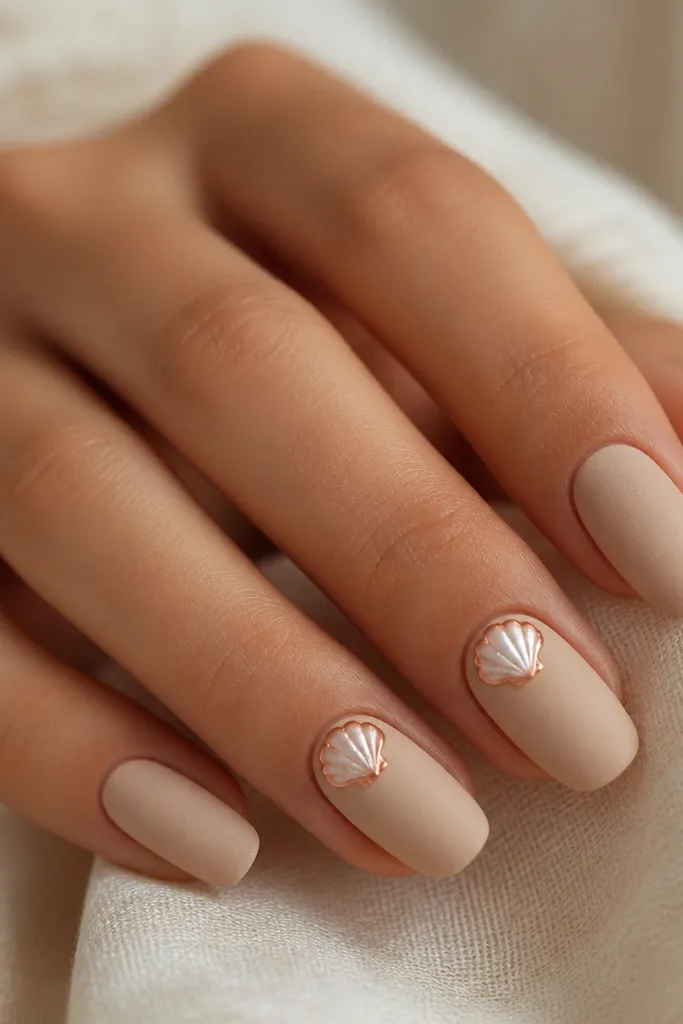
This is the beach manicure that doesn’t look like a costume. The matte sand color gives you that dry, beachy texture, while a glossy shell accent adds contrast so it looks dimensional. Square nails make the matte base look smooth and modern, not streaky. I recommend this for people who like neutral palettes but want one clear summer theme. It flatters warm and neutral undertones, and on deeper skin tones the sand beige still shows as a soft warm neutral.
Editor's noteUse a small detail brush and keep the shell size to about the width of the cuticle, so it stays elegant.
Apply two coats of sand-beige matte gel and cure fully. On two accent nails, paint a small shell shape near the cuticle using a glossy gel — peach outline plus thin white highlight lines. Cure and then apply glossy top coat only on the shell area, not the whole nail. Finish by sealing the matte nails with matte top coat to keep the sand texture.
Watch outPutting matte top coat over the entire shell kills the shine and makes it look flat.
13. Neon Lime Micro Dots
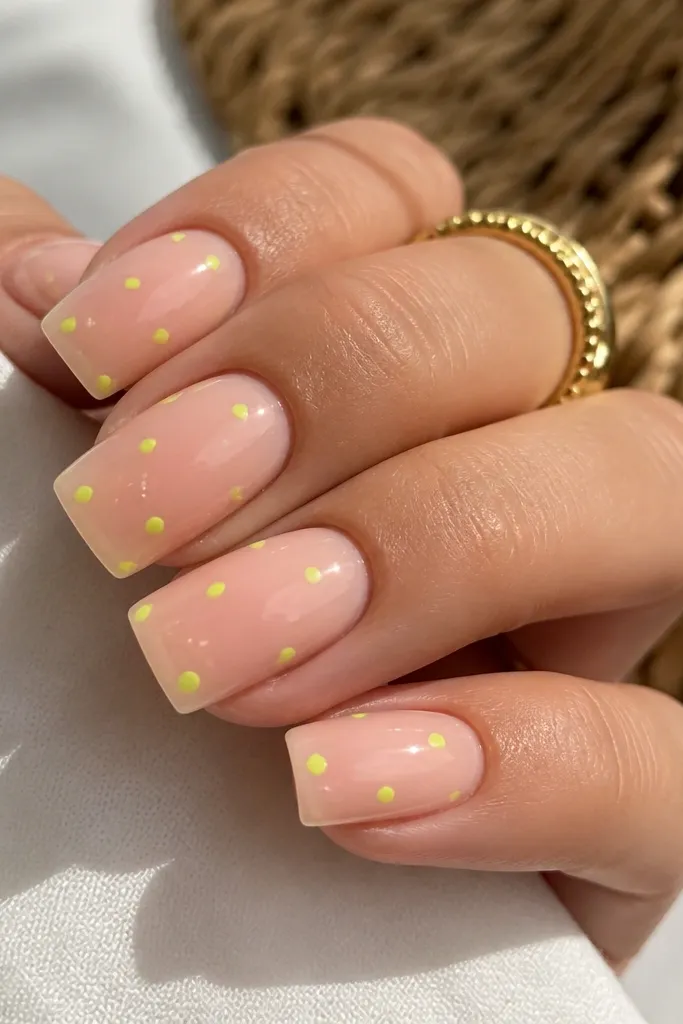
Neon lime micro dots are the kind of trend that looks fresh because the pattern is simple. The dots are small enough that it still looks clean, but bright enough that it reads summer instantly. I keep the base sheer so the neon feels light, not heavy. Square nails show the dot line sharply, especially if you cluster the dots along one side. This works on all skin tones because the neon is the star and the base stays neutral.
Start with a sheer nude or clear jelly base and cure. Use a dotting tool to place micro neon lime dots clustered along one side of the nail — stop about 2 mm before the tip edge. If you want extra energy, add one single dot near the cuticle on the opposite side. Cure and seal with glossy top coat, keeping the top coat thin so the dots stay crisp.
If you want a cleaner dot line, use a strip of thin nail tape as a guide for the first dot placement.
Covering the whole nail in neon dots makes it look too intense for everyday.
14. Tropical Leaf Half-Frame
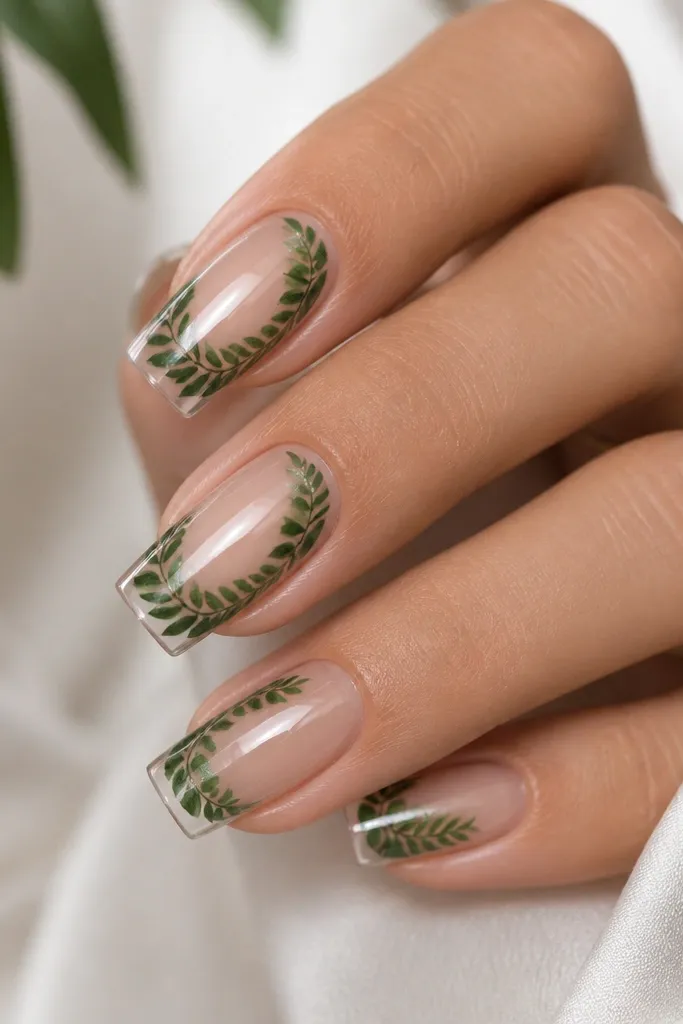
Tropical leaves can get messy fast, but a half-frame placement keeps it modern. This design puts leaf lines on only the outer half of each nail, leaving the center clear so your square shape still looks crisp. The nude base keeps it wearable, and the green lines look like a palm frond against skin. I like it for medium to deep skin tones because the nude base gives you contrast, but it also works on fair skin if you choose a slightly deeper green. It fits summer vacations, but it’s still office-friendly if you keep the leaves thin.
Editor's noteUse a liner brush and keep leaf stems thin; thick leaves look cartoonish on square tips.
Paint a nude glossy base and cure. On each nail, draw a thin leaf line starting near the cuticle on the outer side, then add smaller leaf branches that angle toward the tip corners. Keep the center of the nail empty so the square shape stays readable. Cure the art carefully, then top coat with gloss and cap the free edge.
Watch outFilling the leaves solidly makes the design too heavy and it hides the nail shape.
15. Matcha Marble Swirls
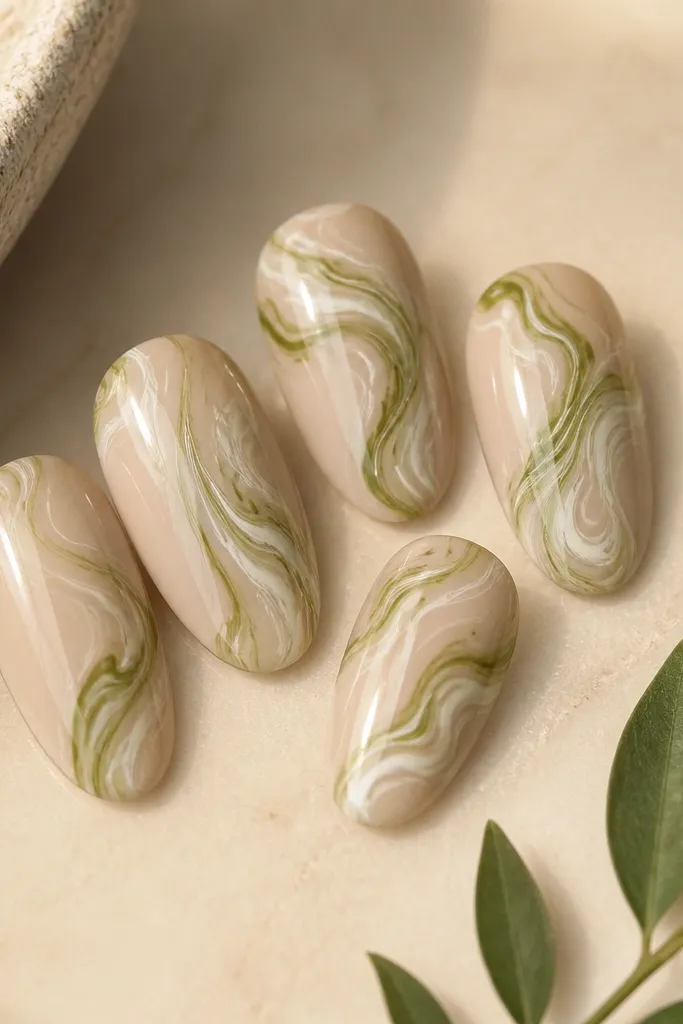
Marble nails look current when the lines are thin and the base is sheer. Matcha green reads fresh in summer and feels softer than neon while still looking bright. I keep the swirls mostly centered so square corners don’t get overwhelmed. This flatters fair and medium skin tones because the base is light, and it flatters deeper skin too when you choose a matcha green with a slight yellow undertone. It’s a great option if you want something artsy but not themed with cartoon fruit.
Editor's noteDo marble on only one or two nails per hand if you’re prone to smudging — the rest can stay solid nude.
Apply a sheer nude gel base and cure. Add a thin layer of pale off-white gel in the center if you want more marble contrast, then cure. Use a detail brush to draw thin matcha green lines and add a few smaller white streaks that cross them. Drag the lines lightly with a toothpick tip for a marble effect, cure, then seal with glossy top coat.
Watch outThick marble lines make square nails look bulky and messy.
16. Peach Foil Accent Strip
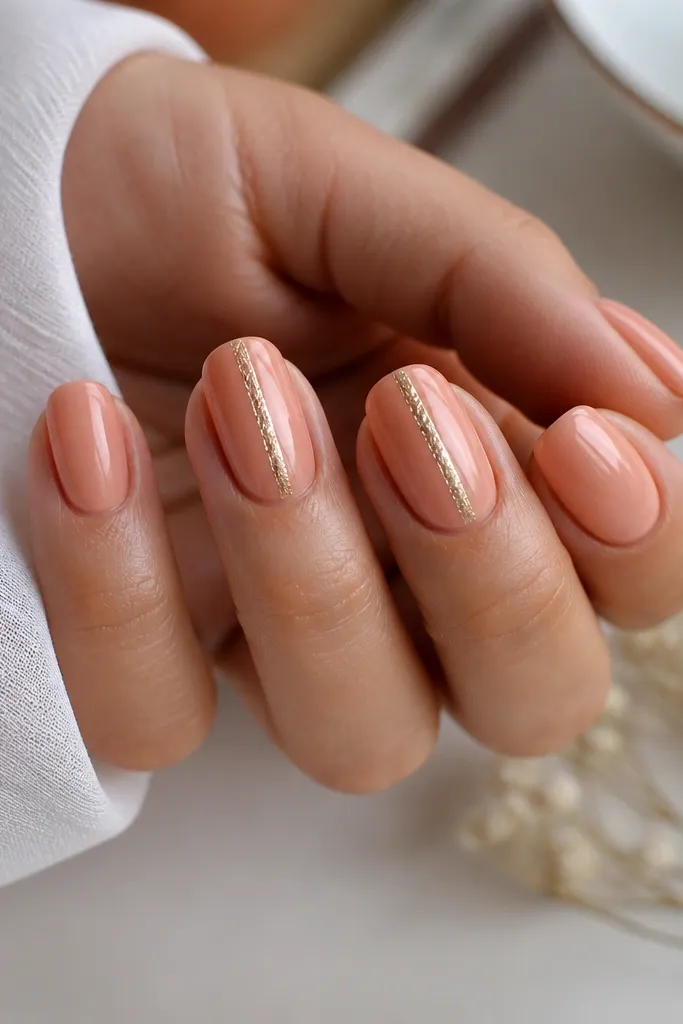
Foil strips look like jewelry for your nails. A narrow vertical strip elongates square nails visually, and the peach-gold tone looks warm and summery. I like this with a solid glossy base on most nails so the foil has something clean to contrast against. It flatters warm undertones best, and it also works on cool undertones because peach-gold adds warmth to the whole look. It’s also one of the easiest ways to look “done” without painting tiny details.
Paint all nails a glossy peach-pink gel base and cure. On two accent nails, apply a tacky foil adhesive gel in a thin vertical strip centered on the nail. Press peach-gold foil onto the tacky area, then pull away to reveal the pattern. Cure, then apply glossy top coat over everything, keeping the foil area sealed but not overly thick.
Cut the foil strip a little wider than your adhesive line so you can trim the edges after top coat.
Using a foil strip across the full width makes square nails look heavy.
17. Blueberry Jam Negative Space
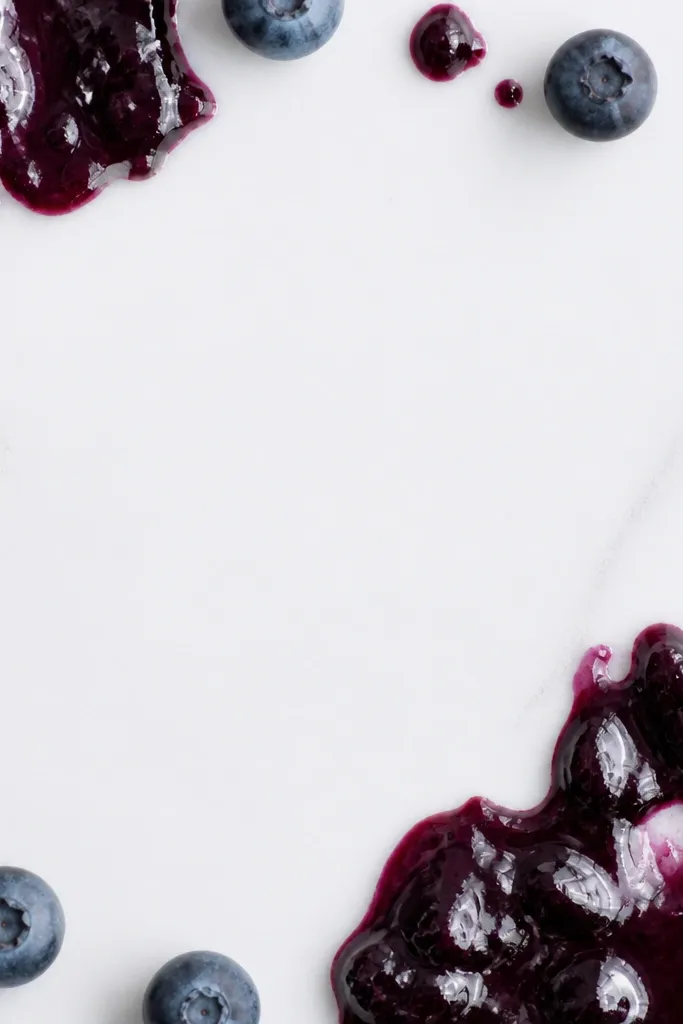
Negative space makes dark summer colors look modern instead of heavy. Deep blueberry purple reads rich, but the clear center keeps it light and current. I paint the “jam” shape like a swoop that starts near the tip and curves toward the middle, leaving a clean window of bare nail. Square nails show negative space edges sharply, so this design looks extra crisp. It flatters cooler undertones beautifully, and it also looks great on warm undertones because blueberry purple contrasts nicely.
Editor's noteOutline the edge of the negative space with a thin purple line so the shape looks intentional.
Start with a clear base or sheer nude and cure. Use a small brush to paint a deep blueberry purple swoop on one side of the nail, leaving a clear oval window in the center. Add a second, slightly smaller swoop on the other side so it frames the negative space. Cure, then top coat with a glossy gel that thickens the “jam” look without flooding the clear window.
Watch outFilling the negative space too much turns it into a solid dark nail that feels heavier than you want.
18. Pink Lemonade Half Tip
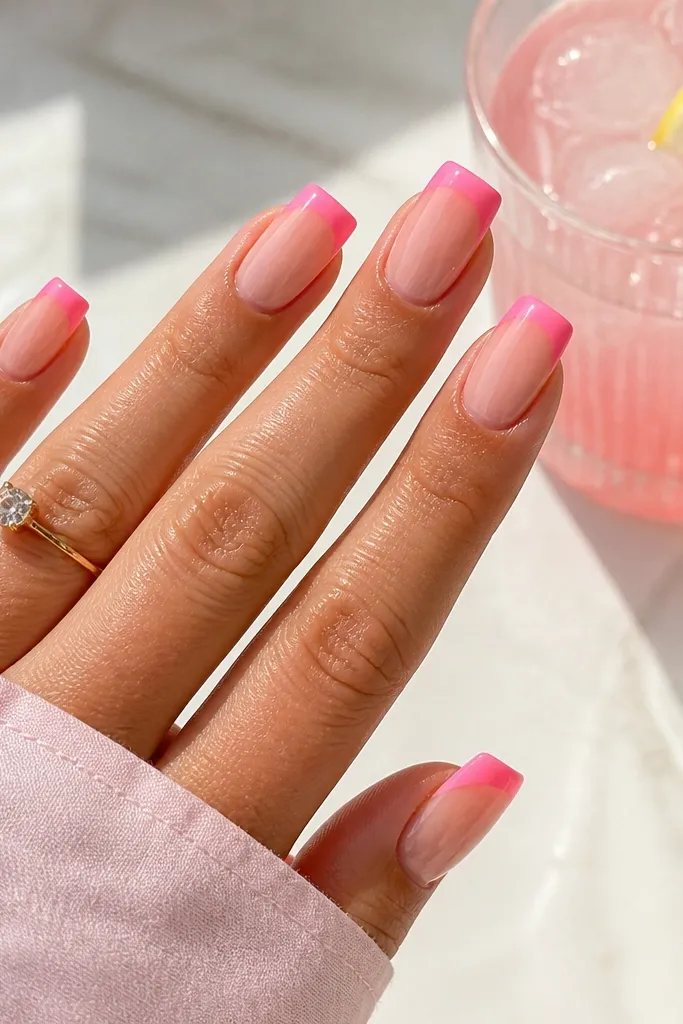
Half tips feel fun because they’re not full coverage, and they show off the square shape. Pink lemonade pairing gives you a fresh two-color summer vibe: soft pink base plus sunny yellow tip. The thin white line makes the transition look crisp, especially on flat square surfaces. This flatters hands that look best with lighter tones, but it also works on deeper skin tones because the yellow is bright and the pink stays sheer. It’s also great for short square nails because the design stays at the tip.
Apply a sheer pink gel base and cure. Paint a thin white separator line where the tip will begin, keeping it straight across. Then paint yellow only on the outer half of the tip area, stopping short of the center so it feels like a slice. Cure and finish with glossy top coat, making sure the yellow edge is sealed.
Use a flat brush and keep the yellow slightly translucent so it looks like lemonade, not solid candy coating.
Painting yellow over the whole tip can overpower the nude base and make it look too loud.
19. Rose Quartz Micro Gems
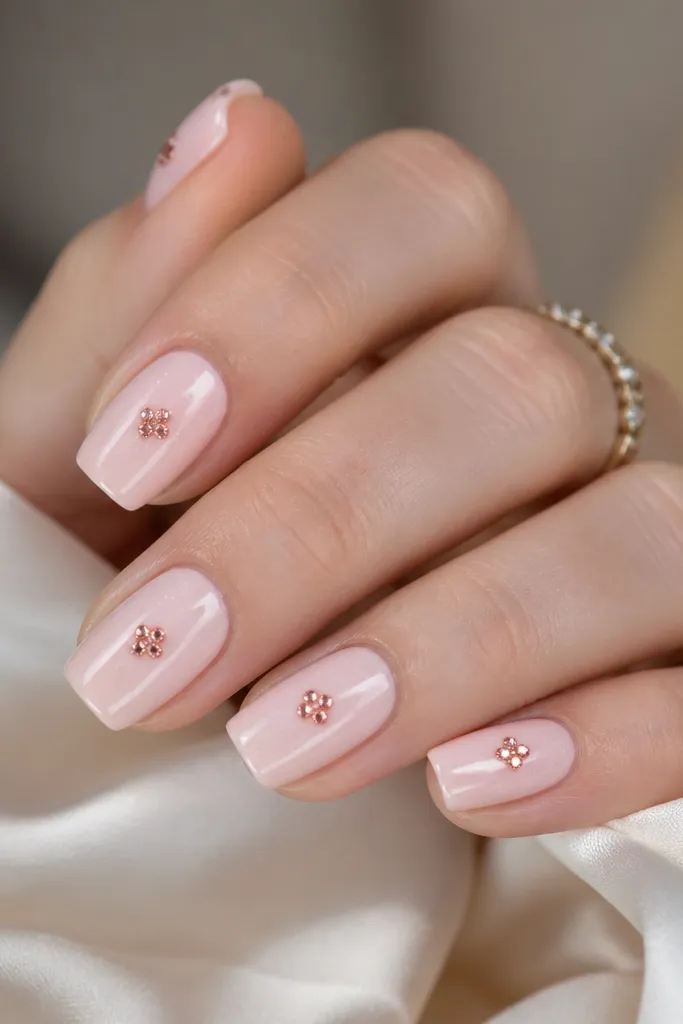
Micro gems look trendy when they’re small and placed with intention. A pale blush base keeps the set soft, and rose-gold micro gems catch light like little summer sparkles. I place gems in the center or slightly toward the cuticle so the nail looks balanced, not weighed down. This flatters fair skin by giving a soft glow, and it flatters deeper skin by adding sparkle without needing bright color. It’s a great choice for weddings, birthdays, and nights out when you want something that still feels light.
Start with a pale blush glossy gel and cure. Apply a thin layer of clear gel where you want gems, then place 3-5 micro gems per nail using tweezers. Add a tiny amount of fine rose-gold glitter under the gems if your base looks too plain, then cure. Seal with glossy top coat in two thin layers, focusing on capping the gem edges so they don’t snag.
Avoid big gems on square tips — micro gems stay sleek and don’t catch on towels and hair.
Skipping a second top coat over gems leads to lifting at the edges within a week.
20. Coral + Sky Split Nail
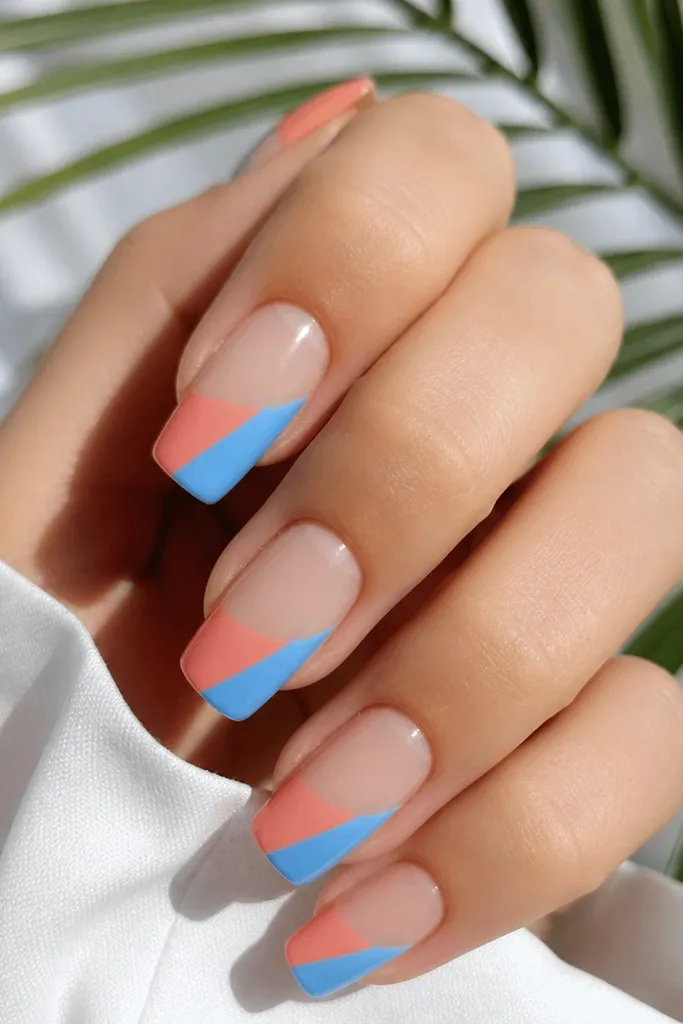
Split nails look modern when the line is clean and the colors are bright but not neon. Coral and sky blue together feel like summer swim days, and the diagonal divide makes square nails look longer. I keep the split starting at mid-nail so it doesn’t overwhelm the cuticle area. This flatters almost every skin tone because coral adds warmth and sky blue adds contrast. It also photographs really well because the diagonal line creates a sharp highlight.
Editor's notePress tape down firmly at the corners so the diagonal edge stays sharp on square tips.
Apply a clear or sheer nude base and cure. Use striping tape to create a diagonal line from lower center to upper side of the nail, leaving the cuticle area clear. Paint one side coral and the other sky blue, then cure. Remove tape after curing, clean the edges, and seal with glossy top coat.
Watch outPainting over wet gel colors together — you’ll get fuzzy edges at the split.
21. Lavender Cloud Matte
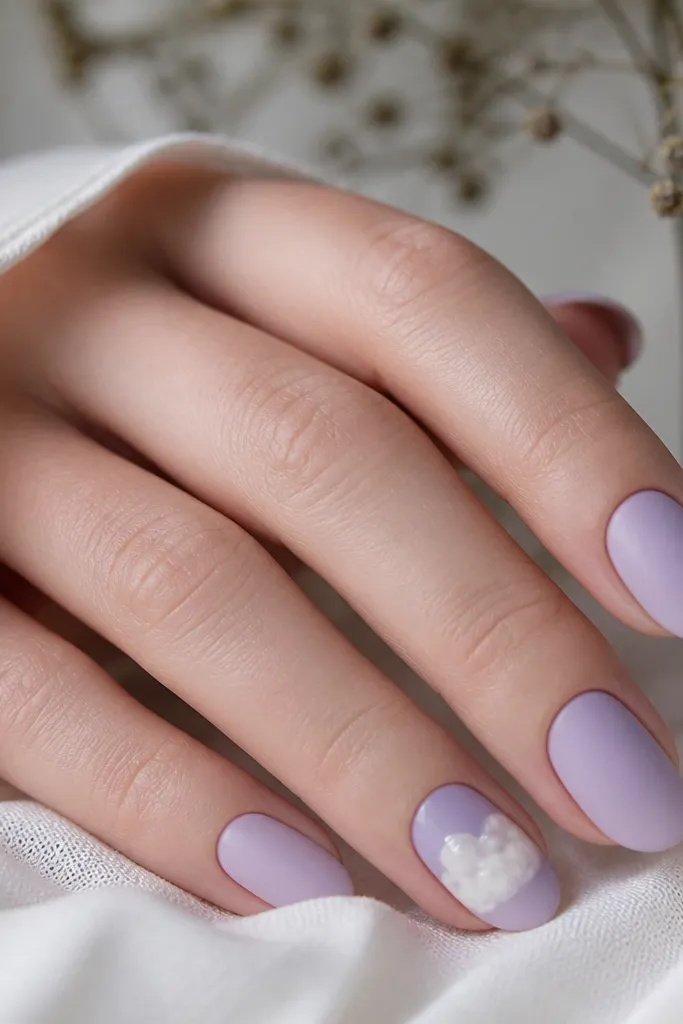
This one feels like summer mornings even if the weather is hot. Matte lavender gives a soft, calm look that still feels trendy, and a glossy cloud accent adds contrast without making the set too busy. Square nails look smooth with matte polish because the flat surface holds the color evenly. It flatters fair to medium skin tones because lavender is light and airy, and it flatters deeper skin tones when you use a slightly richer lavender so it doesn’t disappear. It’s also a good set if you want something different from the usual bright neons.
Paint all nails with matte lavender gel and cure. Pick one accent nail per hand and paint a cloud shape near the center using white gel, then add a tiny grey shading under the top curves. Cure and apply glossy top coat only on the cloud area. Finish by sealing the rest of the nails with matte top coat so the texture stays consistent.
Wipe your brush with gel cleanser before pulling through matte polish so you don’t get streaks.
Using glossy top coat over the whole nail removes the cloud contrast.
22. Green Olive Outline Lines
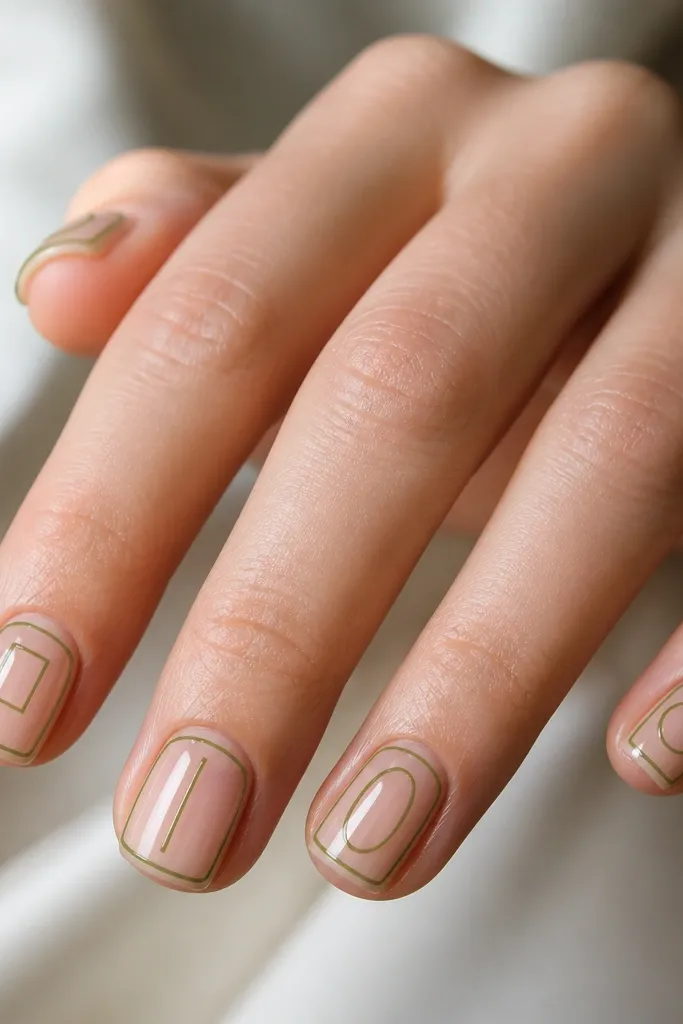
Outline-only designs look current because they feel graphic and clean. Olive-green lines on a sheer nude base look like minimal summer art, not a full pattern. The lines stay inside the nail border, which makes square nails look extra neat and controlled. This flatters hands that look better with subtle color because olive is muted but still interesting. It also works on deeper skin tones because olive shows up clearly against the nude.
Editor's noteDo the outline first, then go back and add one tiny detail dot or dash for interest.
Start with a sheer nude glossy base and cure. Use a fine liner brush to draw thin olive-green lines that form a simple inner frame — one line near each side and a few short connectors across the center. Keep the shapes small and centered so the nail corners stay clean. Cure and finish with glossy top coat to smooth and lock the lines in place.
Watch outThick outlines make the design look like marker art instead of a nail illustration.
23. Beachy Blue Star Dots
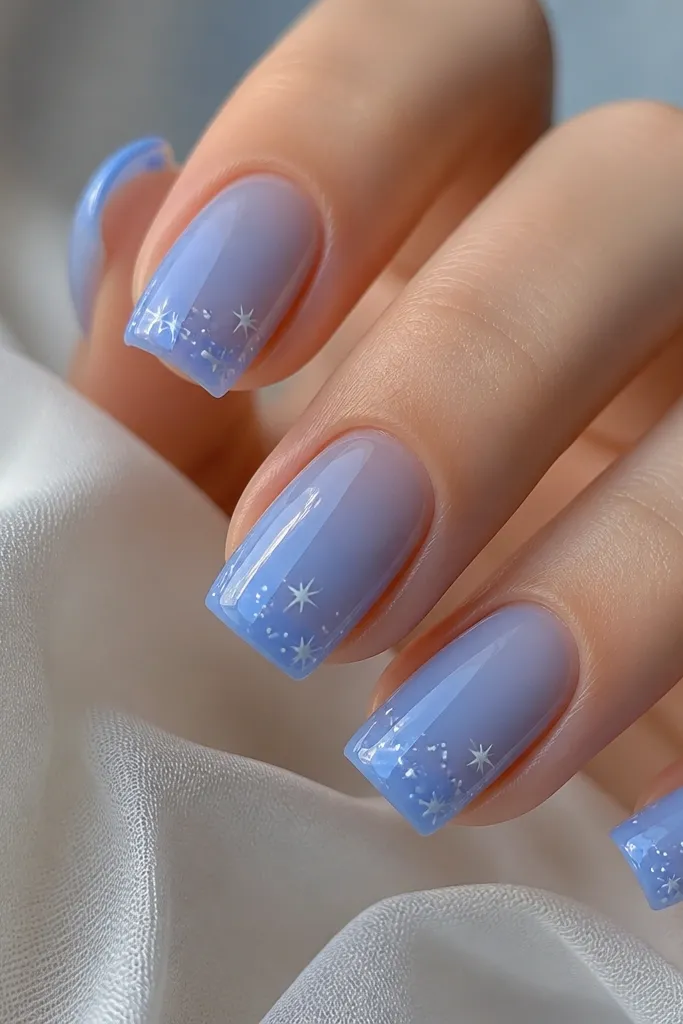
Stars and dots feel playful, but they can look messy when you spread them everywhere. Keep the pattern concentrated near the tip corners and let the center stay simple. A sheer blue base makes the white stars pop without needing heavy opacity. Square nails are perfect for corner clustering because the corners give you natural space for the stars. This flatters fair and medium skin tones with a soft summer glow, and it flatters deeper skin tones because the white stars stay crisp against the blue.
Apply a sheer blue jelly polish base and cure. On each nail, place two tiny white star shapes near the outer tip corners using a star stencil or a dotting tool for star points, then add a few tiny white dots between them. Leave the center of the nail blank so the pattern stays airy. Cure and seal with glossy top coat.
Use a small star stamp once, then hand-draw only the missing star points to keep them consistent.
Overcrowding stars across the whole nail makes it look like confetti instead of a design.
24. Sunset Gradient French Block
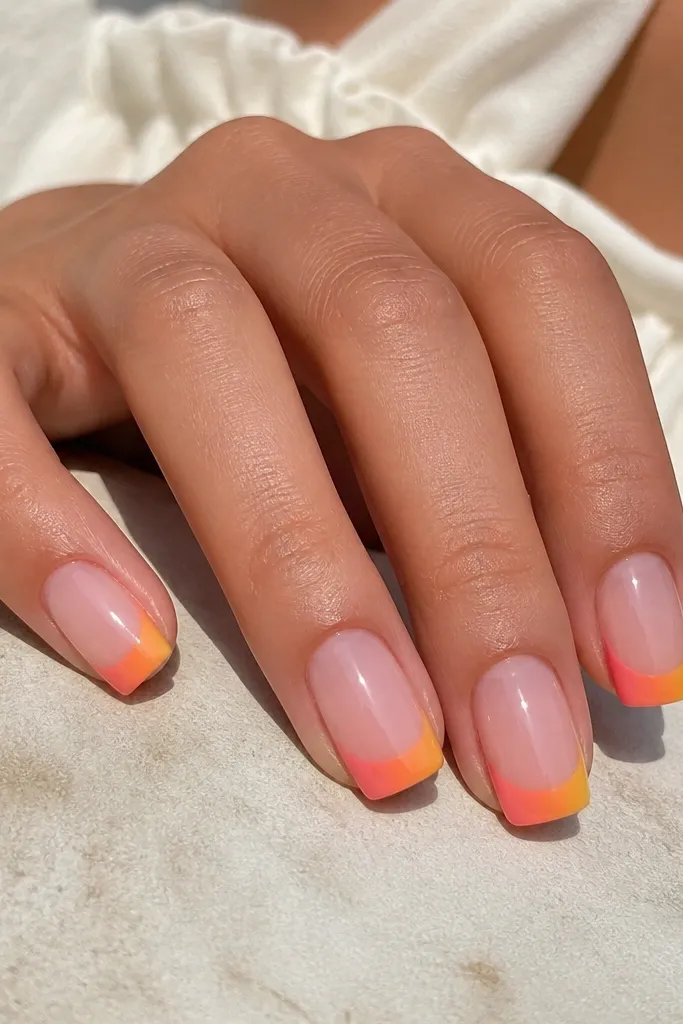
This is a French tip with a sunset twist, and it’s one of the most flattering looks on square nails. The blocky tip shape stays crisp at the corners, while the gradient inside the tip creates that sunrise/sunset glow. I like using three colors so the transition looks intentional: coral, orange, and golden yellow. It flatters every skin tone because the base is neutral and the tip is bright. For summer evenings, the gradient catches light and looks even more saturated in natural sun.
Start with a sheer nude base and cure. Tape or guide the tip so you keep the French block straight across the square shape. Sponge coral onto the left portion of the tip, orange in the center, and golden yellow on the right, then blend the edges with a clean sponge tap. Cure, remove any tape, then top coat with gloss to smooth the sponge texture.
Blend with tapping, not swiping — swiping smears and ruins the sharp block edge.
Skipping the straight tip guide makes the corners look uneven and less “square”.
25. Metallic Silver Micro-Check
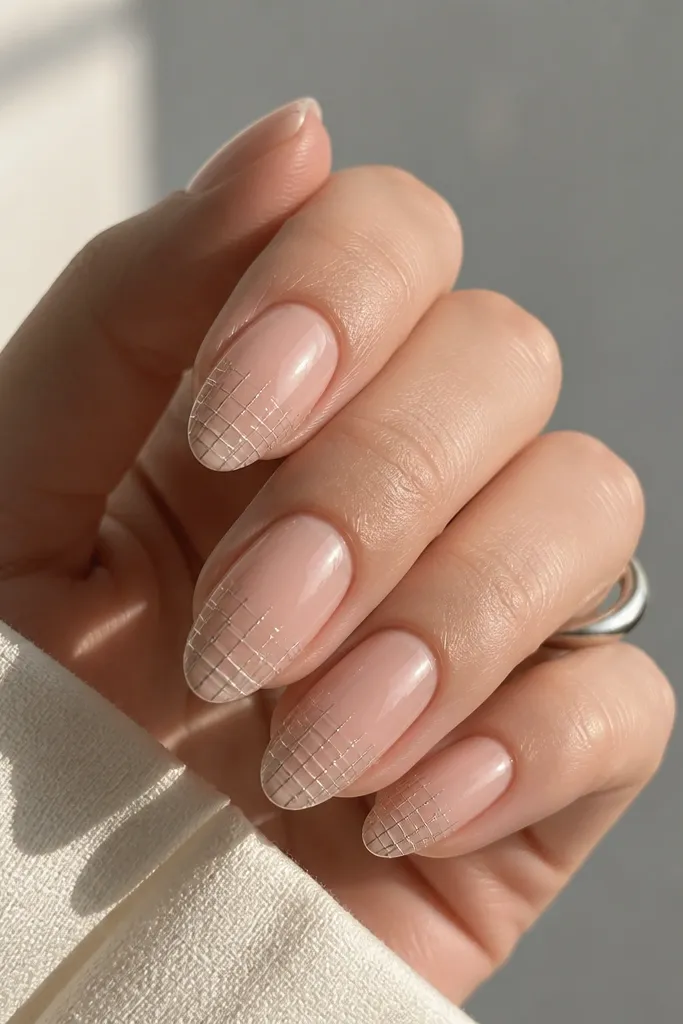
Micro-check looks trendy because it’s structured but still fun. Metallic silver on a nude base reads like summer jewelry, especially when you’re wearing simple outfits. I keep the pattern only on the tip area so it doesn’t take over your whole hand. Square nails make the tiny grid look cleaner, since the flat surface helps the lines stay straight. It flatters cooler undertones and also works on warm undertones because silver adds contrast and makes your hands look brighter.
Apply a nude glossy base and cure. Paint a thin band at the tip area with clear gel as an adhesive zone. Use a fine striping brush to draw vertical lines across the band, cure lightly, then draw horizontal lines to form micro checks. Cure fully and seal with glossy top coat, making sure the grid lines don’t get flooded.
If your lines wobble, draw four vertical lines first, cure, then add the horizontals for cleaner alignment.
Making check squares too large can make square nails look like a chessboard toy.



