
1. Watermelon Aura Almonds
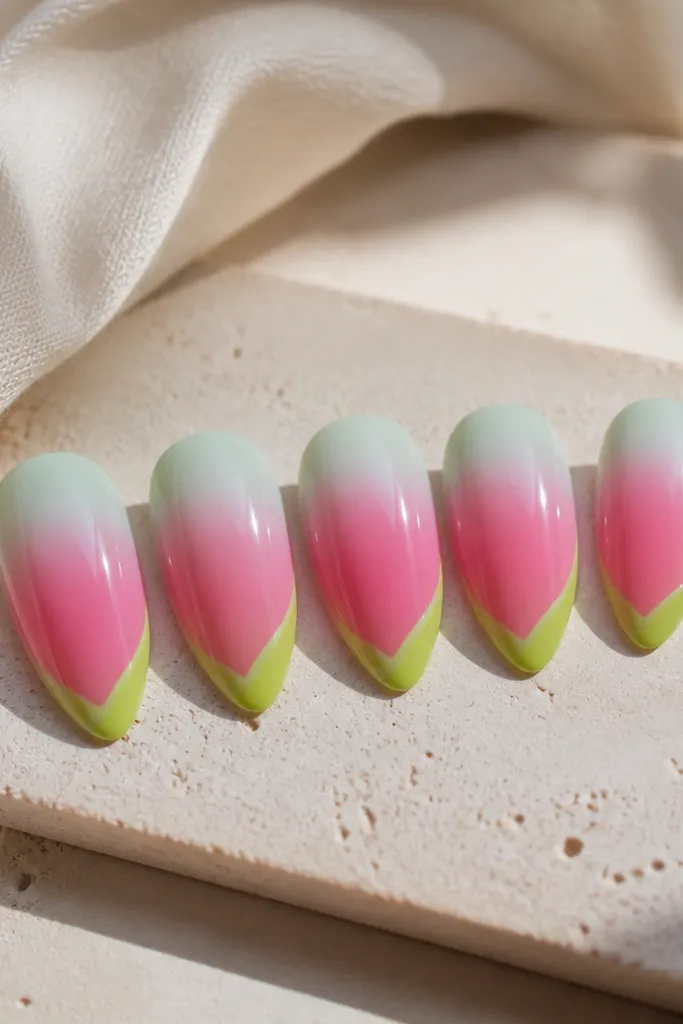
This set gives you that watermelon drink vibe without looking like candy stickers. The cuticle area is soft mint, then it melts into pink toward the center, and a lime-green arc sits just above the free edge like a rind detail. It flatters warm and neutral skin tones because the mint-pink pairing brightens the nail bed, making your hands look more even and awake. I like almond here because the taper makes the aura glow look intentional instead of blob-like.
Start by applying a sheer nude base layer on the press-on nail, then sponge on mint at the cuticle and blend it into pink with a makeup sponge. Add a thin lime arc using a striping brush, placing it about 1 millimeter above the tip for a clean rind line. Seal everything with glossy top coat, then run the brush along the free edge so the aura doesn’t chip at the corner. Finally, cap the sidewalls lightly — just enough to smooth the seam where the tip meets your nail.
Use a makeup sponge that’s slightly damp and wipe excess pigment off on paper first, or the gradient will look chalky.
Don’t put the lime line too close to the tip — it will look thick and blunt instead of like a rind.
2. Citrus Marble Almond Tips
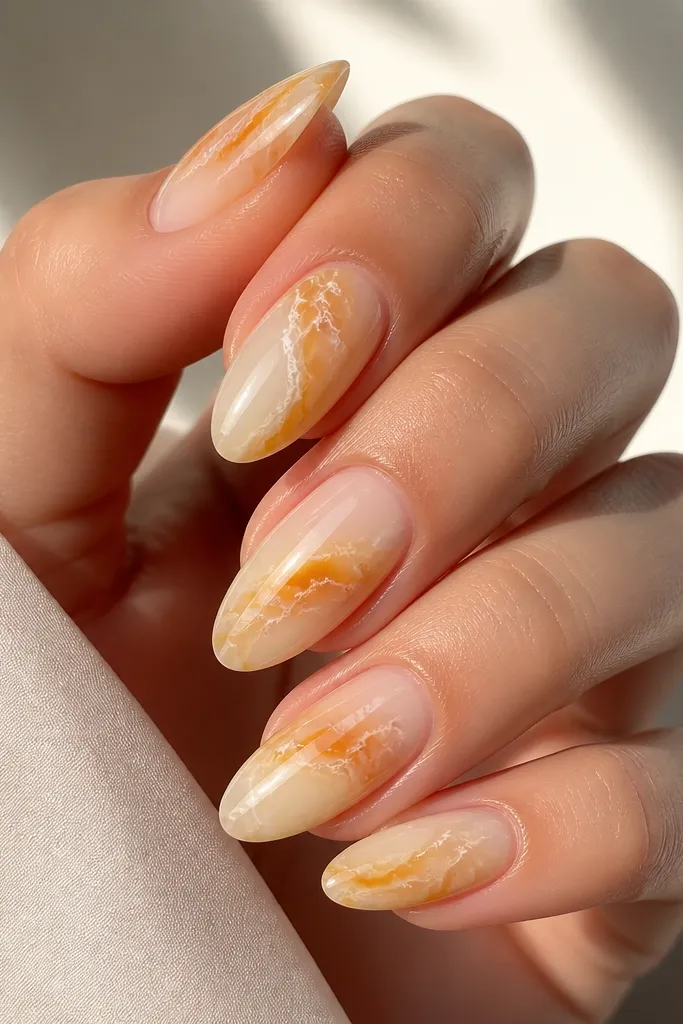
Citrus marble looks bright in summer but still polished, because the white veining keeps it from turning into flat color. The base is milky sheer so it catches light, then the yellow-orange marble sits like thin glass. This works on fair, medium, and deep skin tones — the milky base makes the art look airy, and the warm pigments keep your hands from looking washed out. Almond shape helps the marble veins flow naturally toward the tip.
Editor's noteIf your marble looks muddy, use smaller drops and less dragging — citrus marble should look airy, not blended into one color.
Start with a milky nude base layer and let it dry fully. Drop tiny dots of translucent lemon yellow and orange gel on the nail, then drag them with a toothpick or marbling tool to form veins. Add thin white lines last so they look like cracks in glass, not thick stripes. Seal with a glossy top coat in two passes, and make sure the top coat covers the veins so they don’t catch on fabric.
Watch outSkip full-coverage opaque orange — it kills the glass effect.
3. Sky Blue Micro French Almond
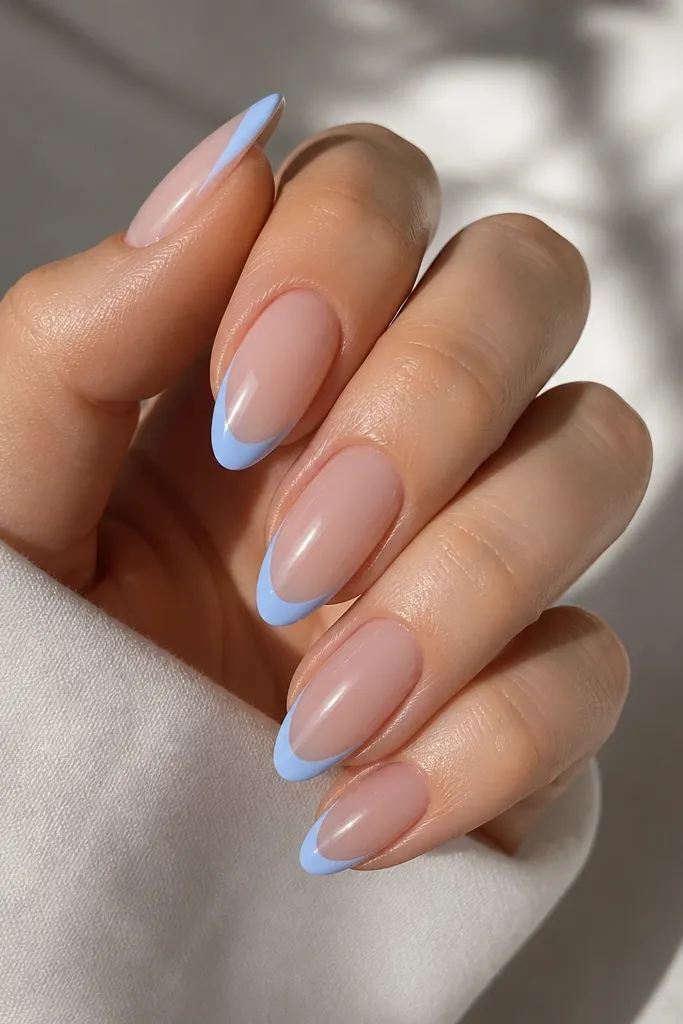
Micro French is the summer version of “clean, put together” that still feels fun. The key is a super thin sky-blue smile line — like 0.5 to 1 millimeter — over a clear nude base. This looks great on short-to-medium almond nails because the thin line elongates the nail without making it look heavy. I’ve worn this with linen shirts and it matches everything, especially on hands with visible nail ridges because the clear base hides the harsh contrast.
Start by using a clear or nude sheer base on each press-on nail. With a striping brush, paint a thin sky-blue smile line centered on the tip, then extend it slightly at the corners to match your almond curve. Let it dry, then add a second pass only if the line looks uneven. Finish with glossy top coat and cap the free edge so the smile doesn’t chip at day two.
Use tape to steady your brush for the first nail; once you nail the spacing, you can freehand the rest.
Don’t thicken the French line — bold French can make almond look wide at the tip.
4. Peach Milk Chrome Almond
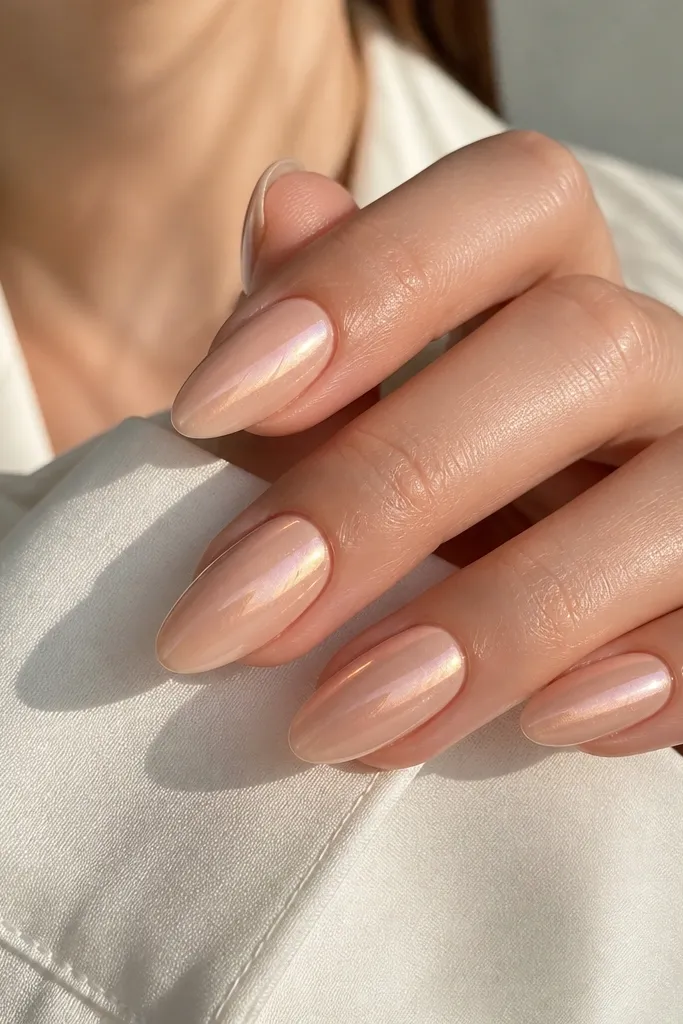
This set is for days you want “pretty” without obvious artwork. The base is peach-milk, and the chrome powder gives a soft shift that reads pink in daylight and warm gold indoors. It flatters most skin tones because peach sits close to natural nail color, and chrome adds that summer glow. Almond shape makes the reflection sweep from cuticle to tip, which looks more expensive than chunky glitter.
Editor's noteDon’t press the chrome too hard — gentle buffing keeps it smooth instead of grainy.
Apply a milky peach base and let it get tacky if you’re using chrome on tacky layers. Buff chrome powder gently with an applicator sponge, focusing from the cuticle area toward the tip so the shift looks directional. Tap off excess, then seal with a thin layer of chrome-safe top coat. For extra durability, cap the free edge and the side seam with the top coat.
Watch outAvoid using regular thick top coat right away — it can dull chrome and make it look flat.
5. Tropical Leaf Negative Space Almond
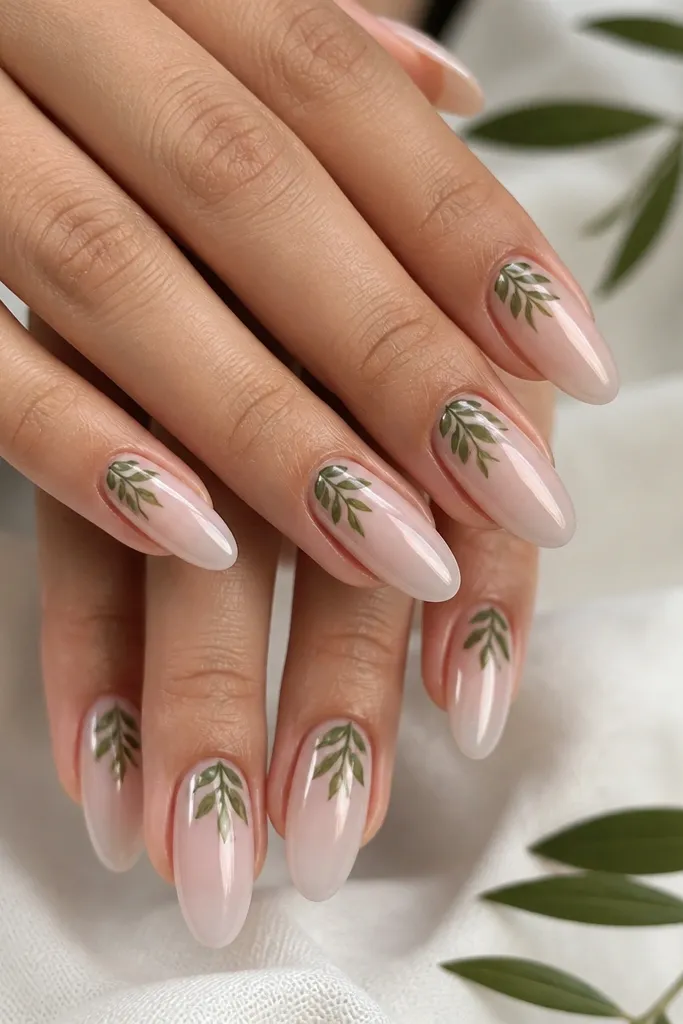
Negative space leaf art looks clean even when it’s bold. The nails stay mostly clear, so the green leaves pop without covering the whole nail. This is flattering because it keeps the nail bed looking longer and makes your hands look slender, especially with almond taper. I’ve done this for vacations and it looks great in photos because the leaf shapes catch light on the clear base.
Start with a sheer clear nude base so your nail looks like it has a natural glow. Paint leaf outlines in deep green near the cuticle, then fill a few leaves solid and leave some lines transparent for dimension. Add tiny yellow-green highlights with a lighter green dot or thin line. Seal with glossy top coat and make sure the leaves are fully covered so you don’t feel edges when you run your thumb over them.
Use a dotting tool for leaf centers — it keeps the leaves symmetrical fast.
Don’t crowd the cuticle — leave at least 1 millimeter of clear space so the design doesn’t look messy.
6. Pink Lemonade Drip Almond
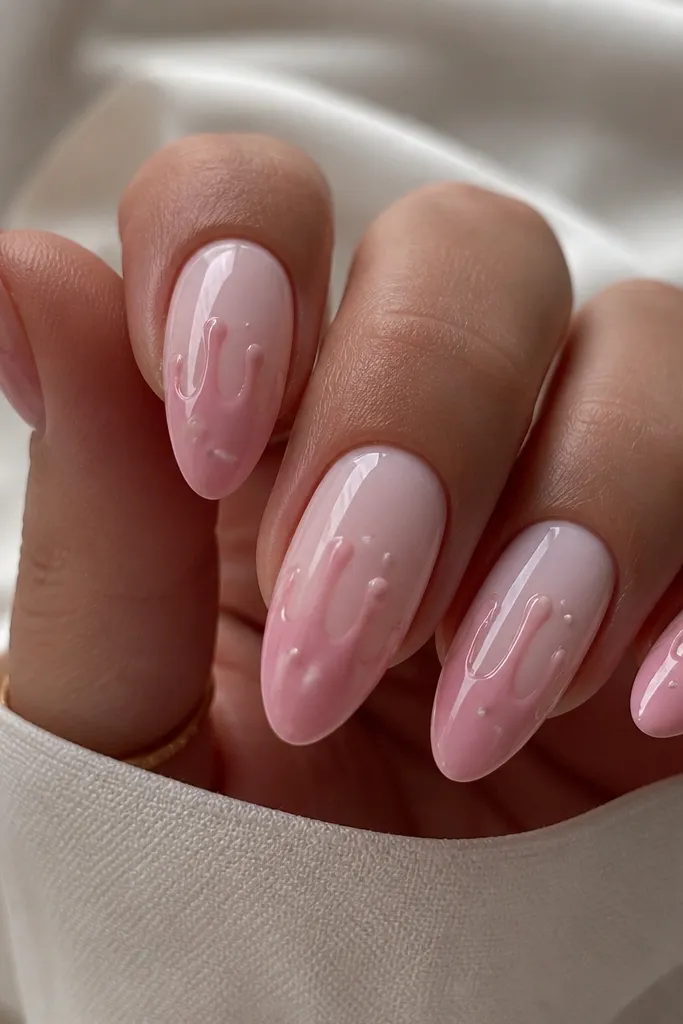
Drip nails look playful, but you need the right scale so they don’t look childish. The drip here starts around the middle of the nail and stops before the very edge, so it stays wearable. The base is pale pink lemonade, and the drips are a glossy translucent pink that catches light like sticky juice. This flatters fair and medium skin tones because the pink reads bright without being neon.
Editor's noteIf the drip looks too tall, wipe the brush and shorten the next drip — height is the whole look.
Paint a pale pink base and let it dry fully. Apply thicker translucent pink gel in small “runs” from the mid-nail toward the tip, then gently drag the gel down with a brush tip to form controlled drips. Add two or three tiny white dots like bubbles around the drip area. Cure/dry, then top coat twice, paying extra attention to smoothing the drip edges so they don’t catch on hair or fabric.
Watch outSkip matte top coat — drip nails need gloss to look like liquid.
7. Sea Glass Teal Almond
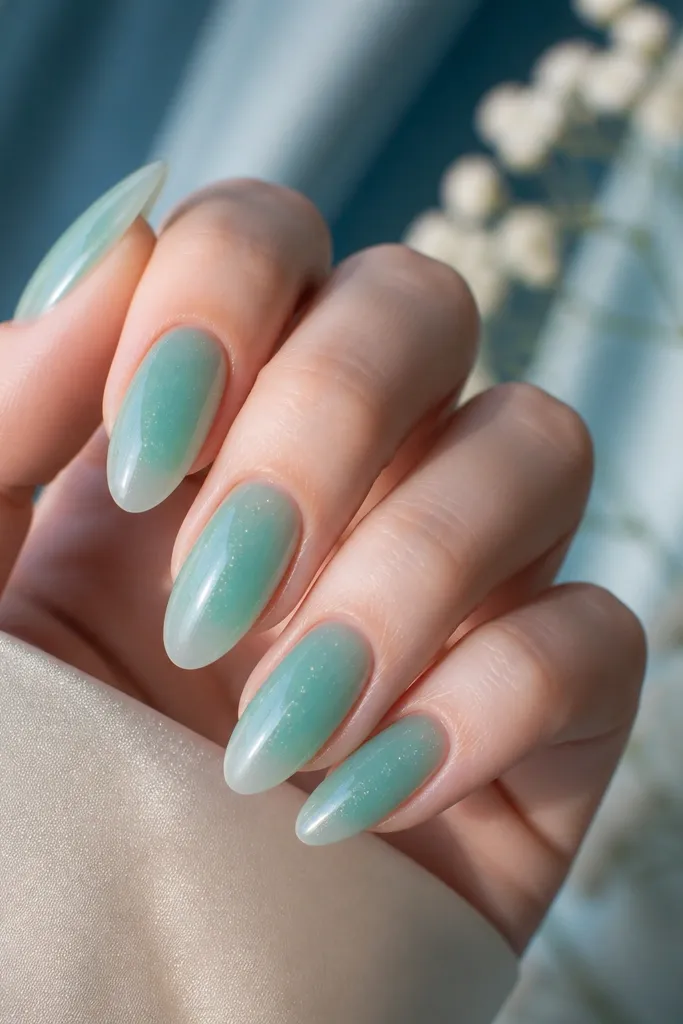
Sea glass nails make your hands look like they’ve been swimming — in a good way. The color is seafoam teal with a slightly translucent finish, then you add subtle frosty specks near the edges so it looks like salt and sand. This design flatters cool undertones and also looks great on warm skin because the teal balances the warmth. Almond shape makes the semi-translucent teal look like it’s glowing, not flat.
Start with a sheer seafoam teal layer so the nail still shows through. Add a second layer focusing on the center, leaving the edges slightly lighter for the sea glass feel. Sprinkle micro shimmer flecks sparingly and tap them into place with a clean brush. Finish with glossy top coat, and lightly file any roughness after curing so the surface stays smooth.
Use a small amount of shimmer — sea glass should look dusty, not glittery.
Don’t go fully opaque teal — it loses the glassy depth.
8. Lavender Cloud Almond
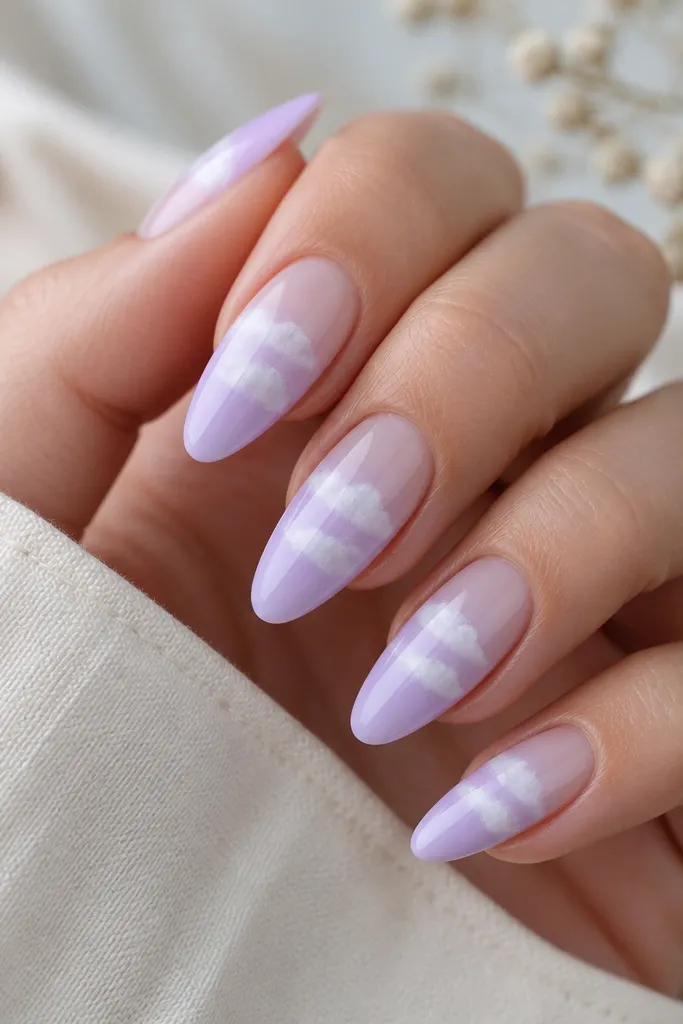
This one is soft and dreamy, but it still reads as summer because lavender is light and the white cloud shapes keep it fresh. The gradient is the main work — lavender at the cuticle fading to a paler lilac at the tip. The cloud puffs are painted with a sponge so they look airy instead of like stickers. Almond shape makes the clouds feel centered and gives your nails a “longer” look.
Apply a light lavender base and sponge a slightly deeper lavender at the cuticle. Blend upward until the fade looks smooth, then let it dry. Dab white cloud puffs in the center using a stippling sponge, then add one or two tiny soft gray shadows with a barely-there gray-lavender. Seal with glossy top coat and cap the free edge so the cloud texture stays protected.
If you want clouds to look fluffy, use a sponge with uneven edges and dab rather than swipe.
Don’t paint clouds with a thick brush — they’ll look like blobs.
9. Sunflower Stem Accent Almond
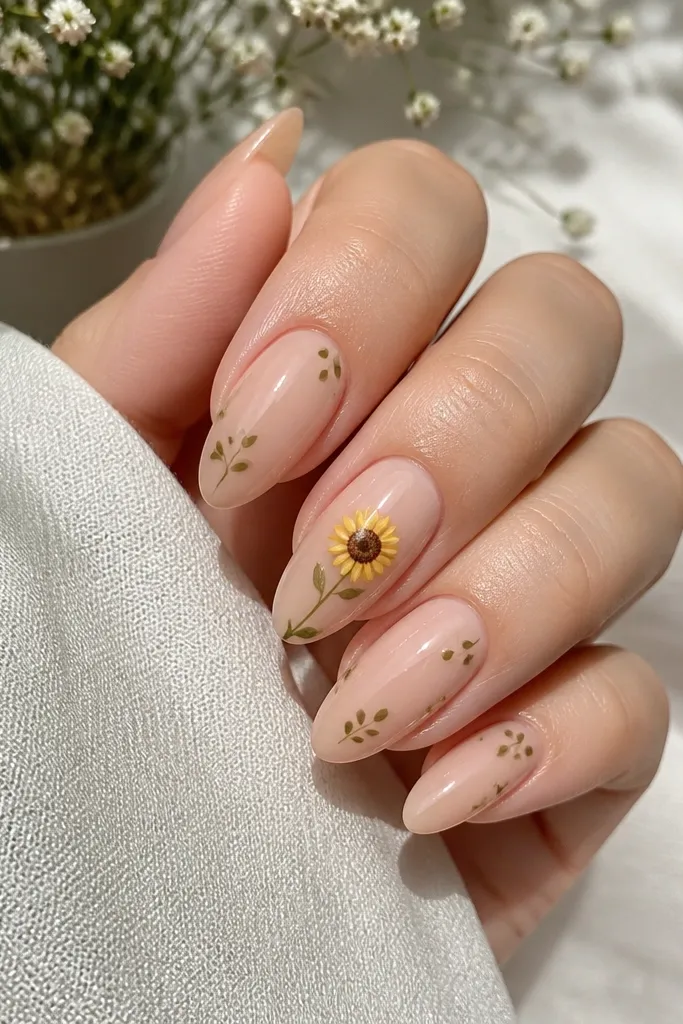
Sunflower accent nails look like you planned them — even if you did them in an hour. Keep the rest of the set simple with a nude base and tiny leaf dots, then put the sunflower on one or two nails only. The yellow petals pop against nude, and the brown center adds warmth that flatters both light and deeper skin tones. Almond shape makes the sunflower art feel like it sits on a clean canvas.
Start with a nude sheer base on all nails. On the accent nails, paint a small green stem first, then add sunflower petals as curved strokes around a brown dot center. Add a couple of tiny leaf dots on the other nails so the set feels cohesive. Finish with glossy top coat over everything, and cap the edges of the petals so they don’t lift as you wear the set.
Use a dotting tool for the brown center — it keeps the circle crisp.
Don’t put sunflower art on every nail — it turns into clutter fast.
10. Coral Pop Glitter Cuticle Almond
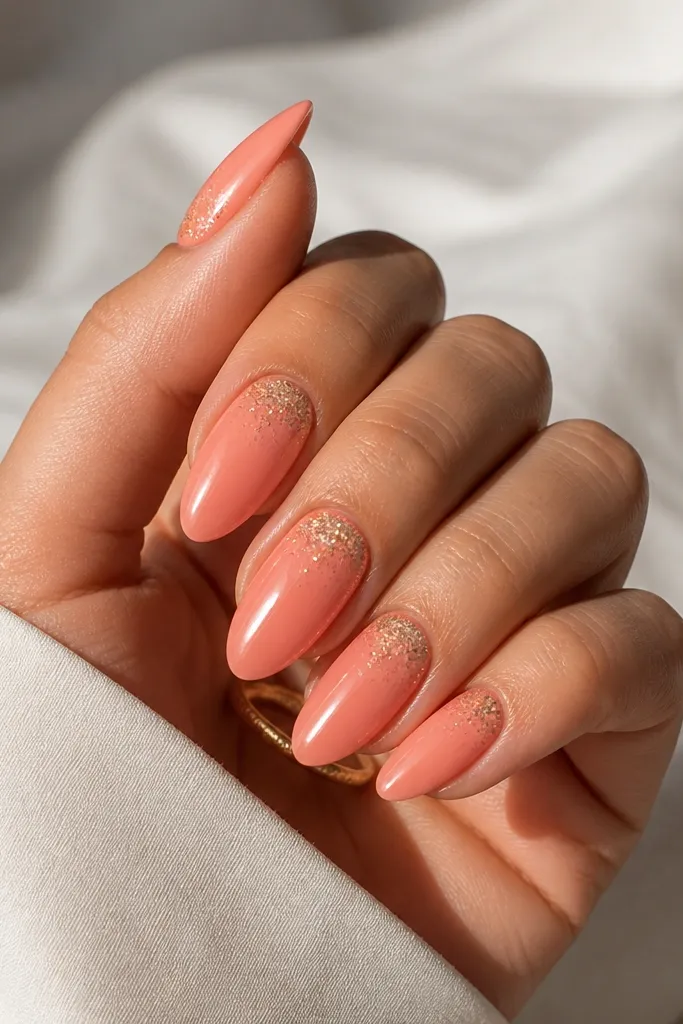
Cuticle glitter is the easiest way to make press-ons look high-end. The glitter band starts right at the cuticle line and fades down so your nail still looks clean. Coral is flattering in summer because it warms your skin without going neon, and the sparkle at the top draws attention to your nail bed. Almond shape helps because the cuticle band follows the taper and looks smooth.
Editor's noteIf loose glitter is catching on fabric, press a thin gel layer over it before top coat.
Paint a sheer coral base and let it dry. Apply glitter gel or loose fine glitter at the cuticle line only, then drag a tiny amount downward with a clean brush to create a fade effect. Keep the glitter concentrated — you should be able to see the gradient. Seal with glossy top coat in two thin layers so the glitter doesn’t feel gritty and the edges stay protected.
Watch outDon’t cover the whole nail with glitter — it hides the almond shape.
11. Ocean Ombre Nude Almond
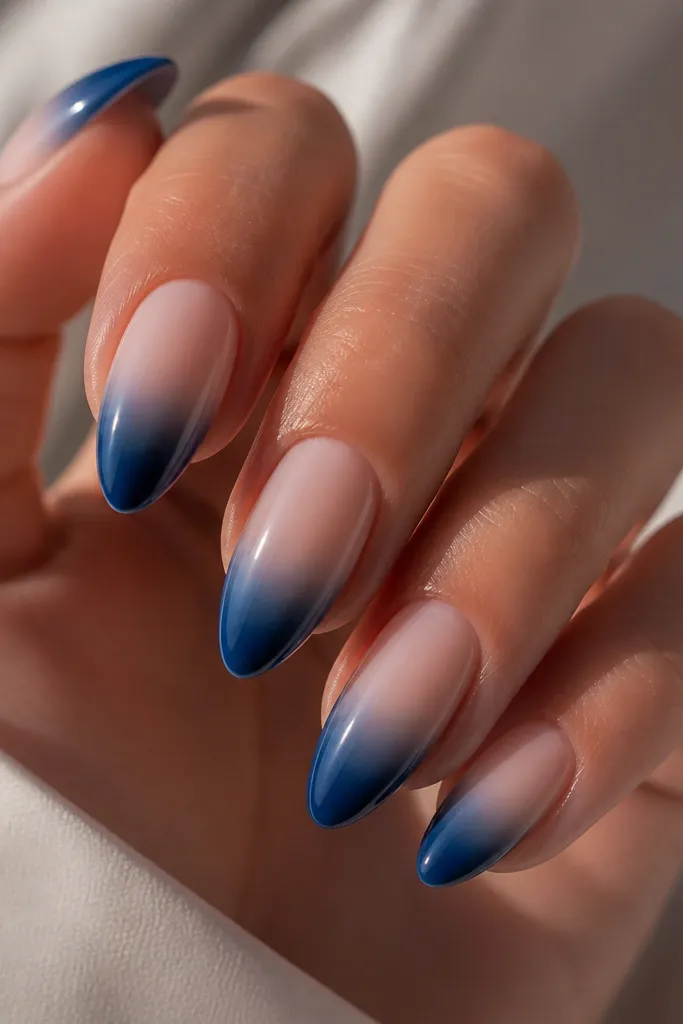
This is a wearable ombre that still looks like “summer evening.” The nude base keeps it soft and flattering, while the deep ocean blue at the tip adds contrast and makes your nails look longer. It works with almost any outfit color because the base is neutral and the blue is rich. Almond shape makes ombre look controlled, since the taper gives you a natural fade path.
Editor's noteBlend in small stages. One heavy sponge pass makes ombre look striped.
Start with a nude sheer base and let it set. Sponge ocean blue from the tip upward, blending toward the center so the ombre is darkest at the free edge. Use a second lighter blue layer mid-nail to smooth the transition. Seal with glossy top coat and cap the free edge thoroughly so the ombre doesn’t get streaky or chip.
Watch outSkip thick gel at the tip — it creates bumps that show through press-ons.
12. White Daisy Half-Moon Almond
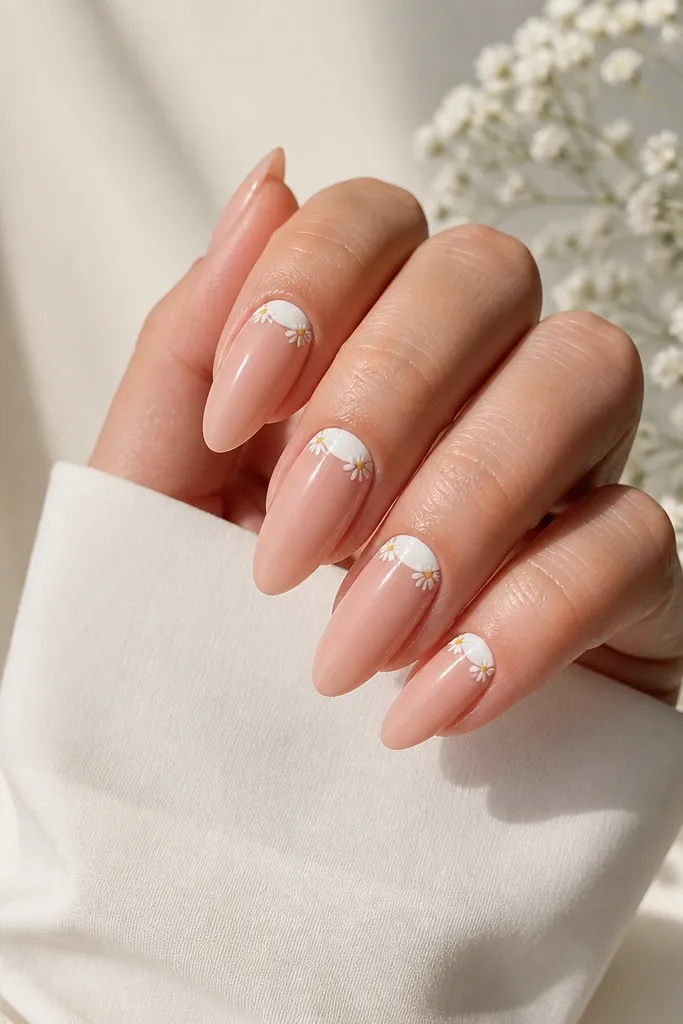
Half-moon designs look cute in summer because they frame the nail bed like a little window. The white half-moon at the cuticle brightens your hands, and the tiny daisy accents keep it playful without covering the entire nail. This flatters short almond nails because the half-moon draws the eye up and makes the nail look clean and intentional. I like it on medium and deep skin tones because the white reads crisp and crisp lines show well.
Editor's noteUse a tiny makeup sponge to place the half-moon first, then clean the edges with a cotton swab dipped in remover.
Apply a nude base on the press-on. Paint a clean white half-moon near the cuticle, keeping the curve parallel to your nail shape. Add a small daisy with five white petals and a yellow dot center tucked beside the half-moon on one or two nails. Seal with glossy top coat and make sure the half-moon edge is fully coated so it doesn’t peel.
Watch outDon’t make the half-moon too wide — it can shorten the nail visually.
13. Hot Pink Pop Art Specks Almond
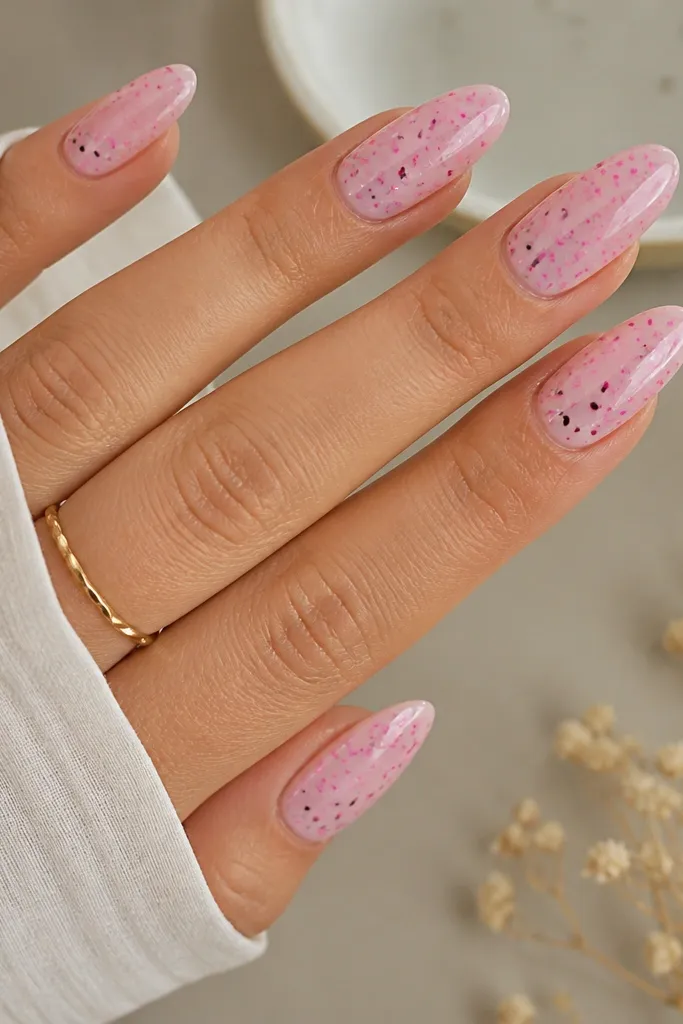
Pop art specks feel loud in a good way, but you still keep the nails wearable by using a milky base instead of full neon. The hot pink speckles pop against the soft base, and a few tiny black dots add contrast like comic ink. This looks great with sunglasses, summer dresses, and basic tees because the nail color adds the fun. Almond shape keeps the specks from looking random by giving you a natural vertical canvas.
Editor's noteTap the dotting tool straight down for perfect circles — dragged dots look messy.
Start with a milky pink base layer and let it dry. Use a dotting tool to place hot pink specks in clusters — keep most specks in the center third of the nail. Add a couple of small black dots as punctuation. Seal with glossy top coat, and check the texture after curing; if specks feel raised, add one more thin top coat pass.
Watch outDon’t cover the whole nail with specks at equal density — it looks like dust.
14. Mint + Gold Foil Almond
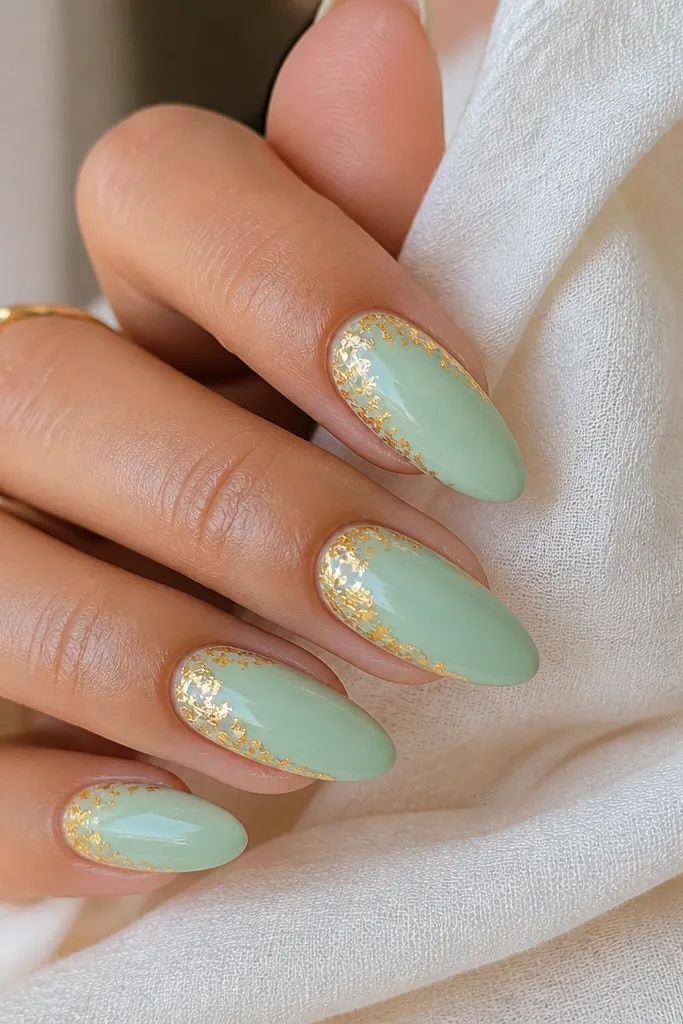
Gold foil on mint looks like sunshine without needing extra art. The mint base stays fresh and clean, and the foil flakes add that warm flash when you move your hands. This flatters neutral undertones and looks especially good with gold jewelry. Almond shape makes the foil placement feel intentional because you can concentrate it near the cuticle and let it taper toward the tip.
Editor's noteUse tweezers to place foil pieces — fingers smear and you lose the sharp edges.
Apply a mint base and let it dry to tacky if your foil needs adhesive. Press gold foil flakes onto the cuticle area first, then add a few flakes along one side seam for direction. Leave negative space so the foil looks like sun rays, not a sticker sheet. Seal with glossy top coat, pressing the brush lightly over foil edges so they stay flat.
Watch outAvoid full coverage foil. It makes press-ons look bulky.
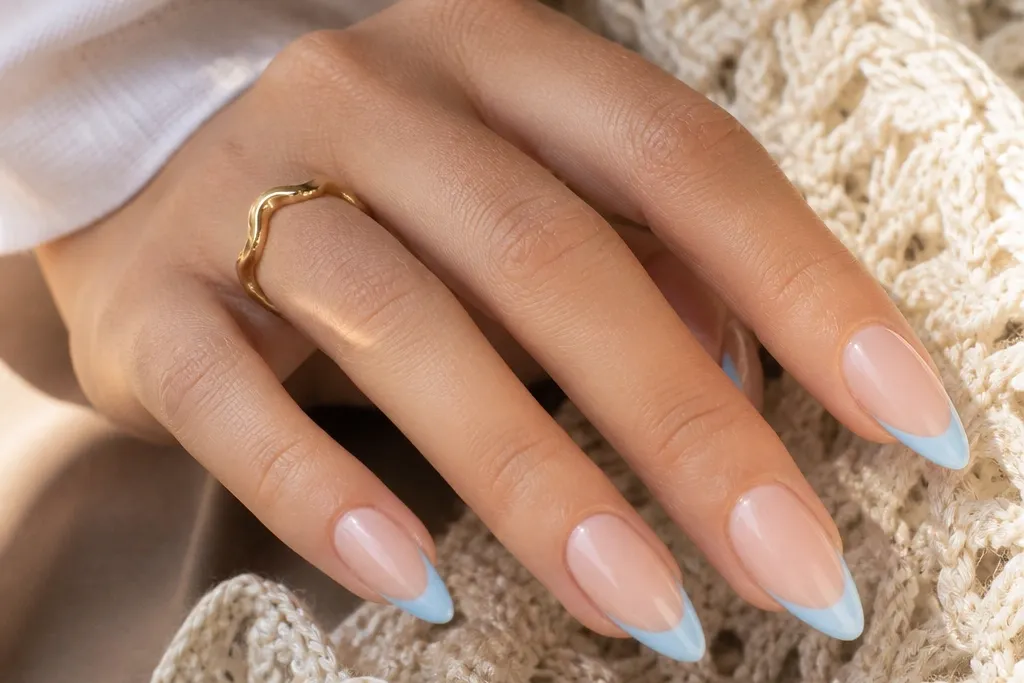
15. Nude Almond with Blue Glass Tips
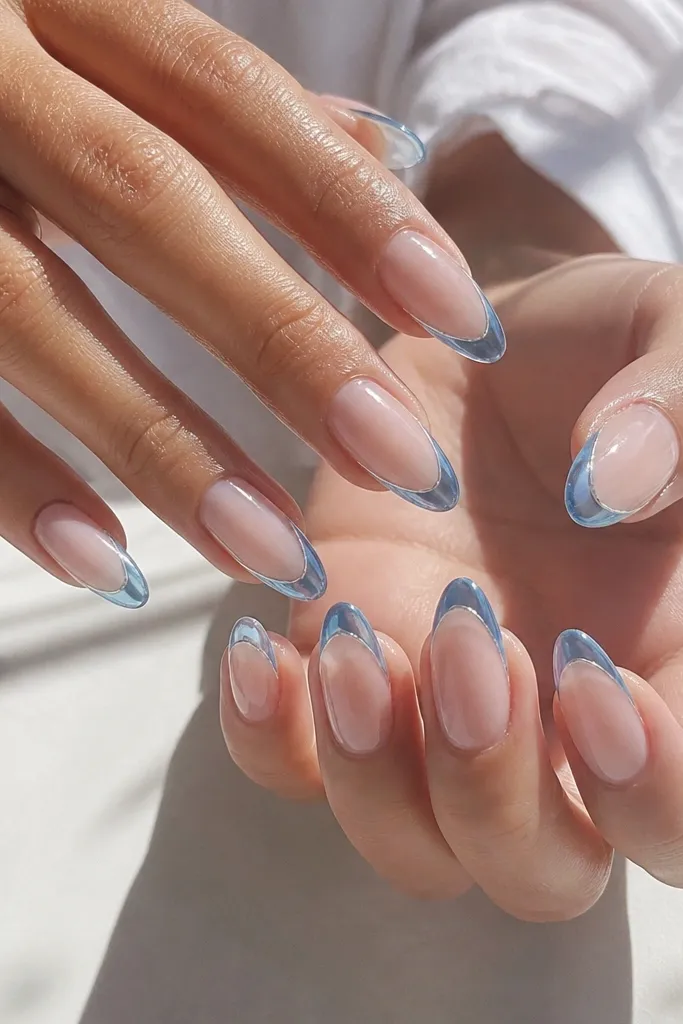
This design is clean enough for work and fun enough for summer nights. The base is nude sheer, and the tips are translucent blue that looks like glass. A thin white outline around the tip makes the blue edge crisp, like a stained-glass window. It flatters almost everyone because the nude base matches your natural nail bed color and the blue adds the pop without overwhelming your hand.
Editor's noteUse translucent gel for the tips. Opaque blue makes it look like a sticker.
Start with a nude sheer base. Paint translucent blue only on the tip, blending slightly into the nail so the edge isn’t a hard block. Add a thin white outline along the blue boundary to define the shape. Seal with glossy top coat and cap the free edge, since the glassy tip finish is where chipping shows first.
Watch outDon’t outline too thick — thick white turns the look into a cartoon French tip.
16. Strawberry Jam Gloss Almond
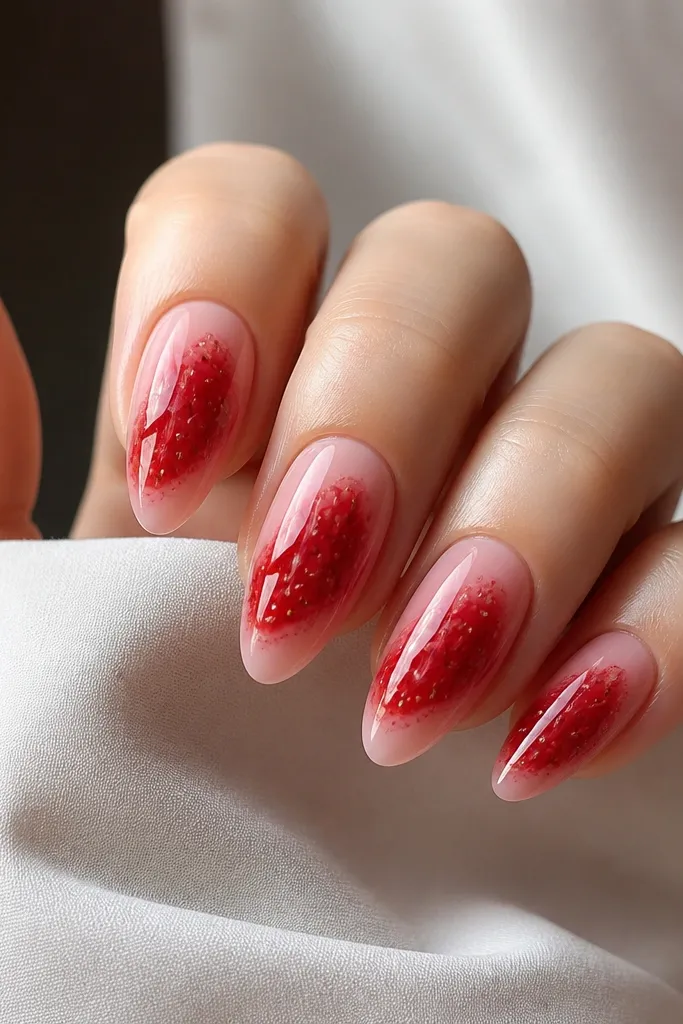
Jam nails look juicy because the red smear sits on top of a sheer base. The technique is simple but the effect is big: translucent pink underlayer, then glossy red gel pulled into a smear across the middle. Add tiny seed dots with a dark red or brown gel for realism. This flatters fair and warm skin tones because the pink base makes your nails look naturally healthy, and the red reads like summer fruit.
Editor's noteKeep the smear width about half the nail — too wide makes it look like a stain.
Apply a sheer pink base and let it dry. Add a glossy red gel smear across the center, then drag it slightly toward the sides to make it look spread, not painted. Dot tiny seed shapes near the smear edges using a fine dotting tool. Cure/dry, then seal with glossy top coat twice so the jam texture stays smooth and doesn’t snag.
Watch outSkip matte finishes. Jam nails need shine to look like gel.
17. Peachy Nude Jelly Dots Almond
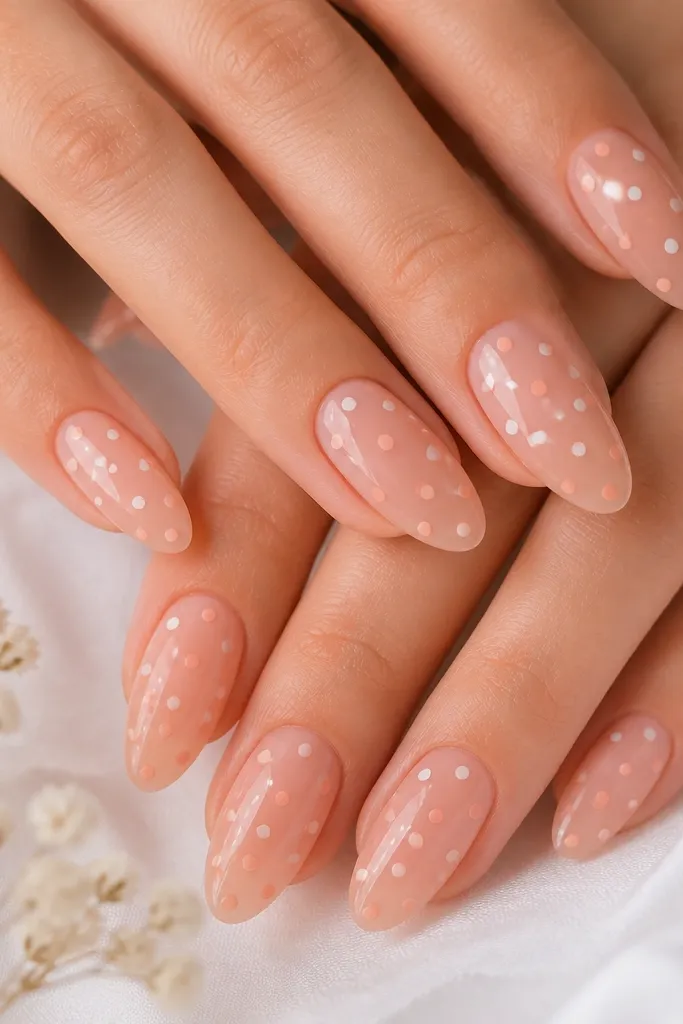
Jelly dots are a summer staple because they feel light and playful while still looking neat. The base is a peachy nude jelly that has a slightly translucent look, then you place tiny dots in white and lighter peach. This flatters every skin tone because the base sits close to your natural nail color, and the dots add interest without heavy contrast. Almond shape makes the dot pattern look more symmetrical as it tapers.
Editor's noteIf your dots spread, use gel with a slightly thicker consistency for better control.
Apply a peachy nude jelly layer and keep it even. Use a dotting tool to place small white dots in a vertical line down the center, then add a few peach dots off to the side for balance. Make sure dots are the same size so the set looks intentional. Finish with a glossy top coat and cap the tips so the jelly finish stays smooth.
Watch outDon’t make dots too large. Big dots turn cute into clownish fast.
18. Coral Seashell Side Accent Almond
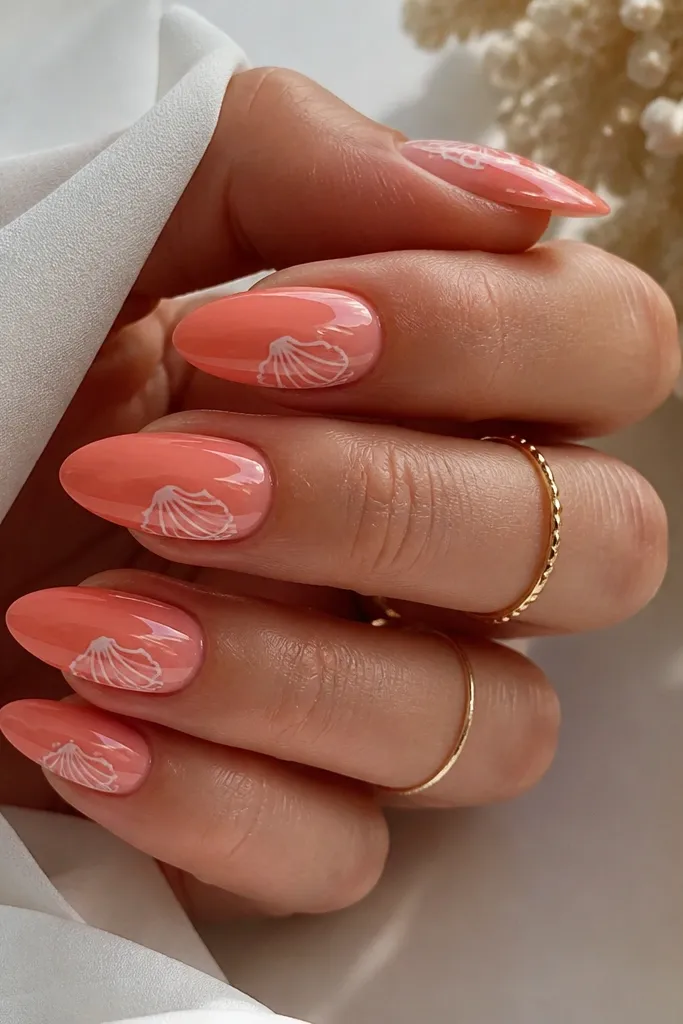
This is one of my favorite summer looks because it’s beachy without being obvious. The coral base gives warmth, while the white seashell line art along one side looks like a delicate bracelet for your nails. It flatters hands with cooler undertones because coral warms the skin, and the white lines give clean contrast. Almond shape helps the side accent follow the nail curve so it looks crisp, not crooked.
Editor's noteUse a nail art liner brush with a fine tip. Thick brushes make the shell look chunky.
Start with a coral-pink base layer, keeping it smooth and opaque. On each nail, paint a thin white seashell outline along the right or left side — keep direction consistent. Add a tiny spiral detail near the middle of the shell and a few short shell ridges. Seal with glossy top coat, and brush extra top coat along the side accent so it doesn’t lift at the seam.
Watch outAvoid placing the shell accent too close to the cuticle — it can look messy when you move your hands.
19. Neon Yellow Outline Almond
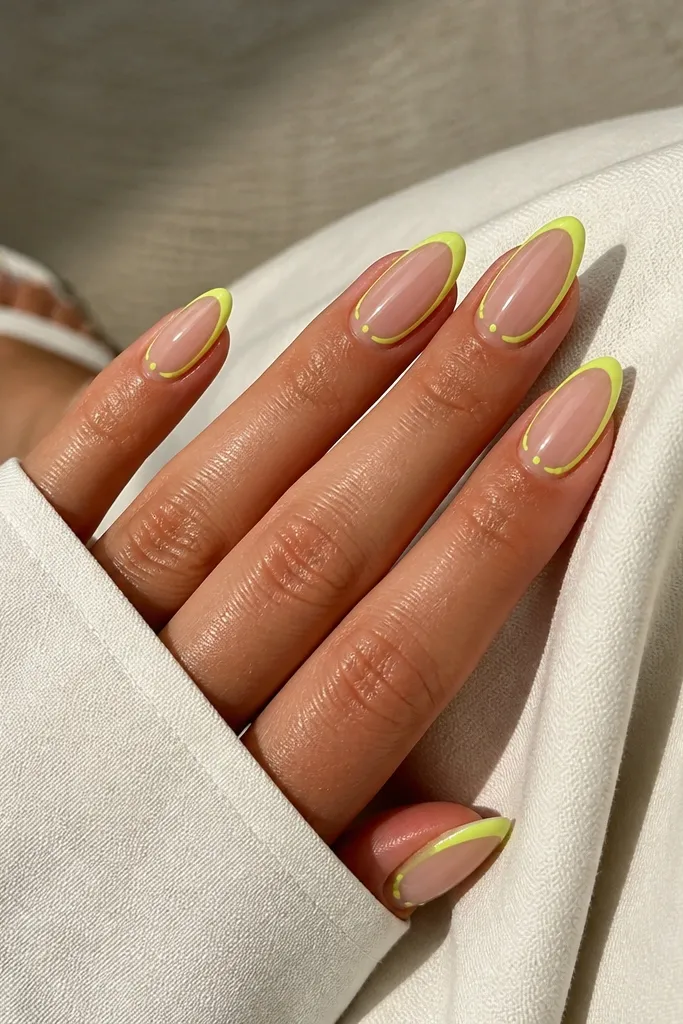
Neon outlines look sharp and modern, and they’re easier than full neon painting. The nude base keeps it wearable, while the neon yellow outline makes the nail shape pop — especially in summer light. This flatters medium and deep skin tones because neon yellow gives strong contrast, but it also works on fair skin if the base is clear rather than milky white. Almond shape is perfect because the outline follows the taper and makes your nails look longer.
Start with a clear nude base. Paint neon yellow outline along the outer edge of the nail, tracing the almond curve and stopping about 1 millimeter before the very tip point. Add two small neon dots near the top corners or along the side edges to balance the design. Seal with glossy top coat, and cap the tip edge so the outline stays smooth.
Do outlines in two thin passes. One thick line cracks and looks uneven.
Skip matte top coat — neon outlines look best glossy and glass-like.
20. Blueberry Gloss Accent Almond
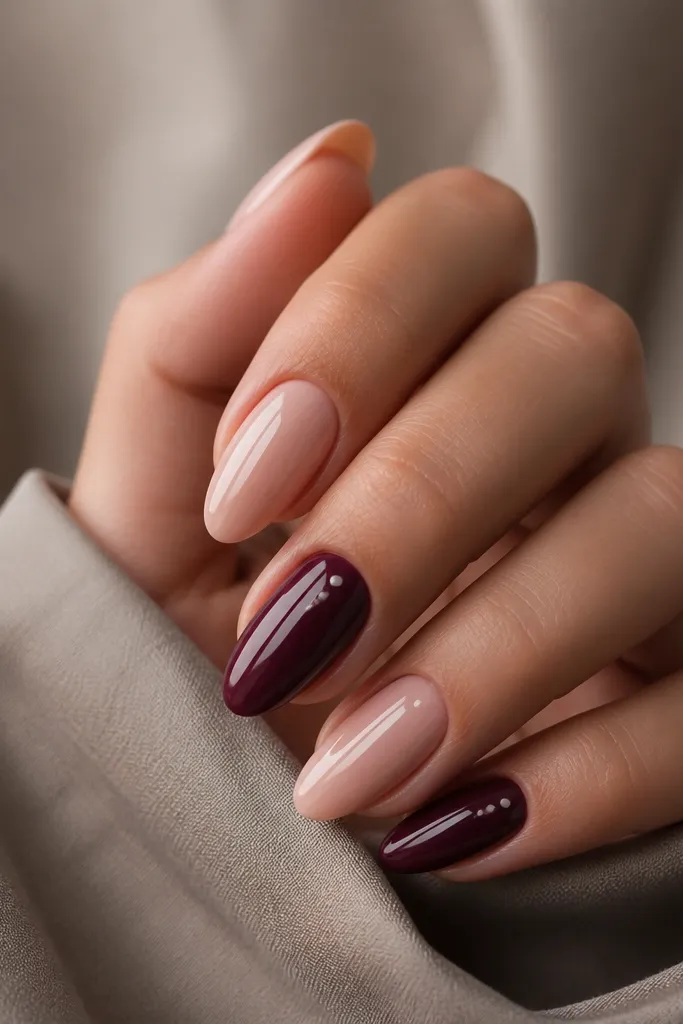
Blueberry accents feel summer because the color is dark but still juicy. The set uses two finishes: most nails are sheer nude, and one or two nails are deep berry with tiny white highlight dots. The highlights make it look like the fruit has shine, and it keeps the design from feeling flat. This flatters all skin tones because the nude nails balance the darker berry and the almond shape stays clean.
Paint a sheer nude base on every nail. Choose two nails for the berry color and apply a deep blueberry gel, keeping the edges smooth. Add two or three small white dots on the berry nails, then drag one dot slightly to mimic shine. Seal with glossy top coat over all nails, and make sure berry nails get extra top coat to lock in the highlight dots.
If your berry color looks streaky, do two thin coats instead of one thick coat.
Don’t put berry color on every nail — it overwhelms and turns heavy.
21. White Star Confetti Almond
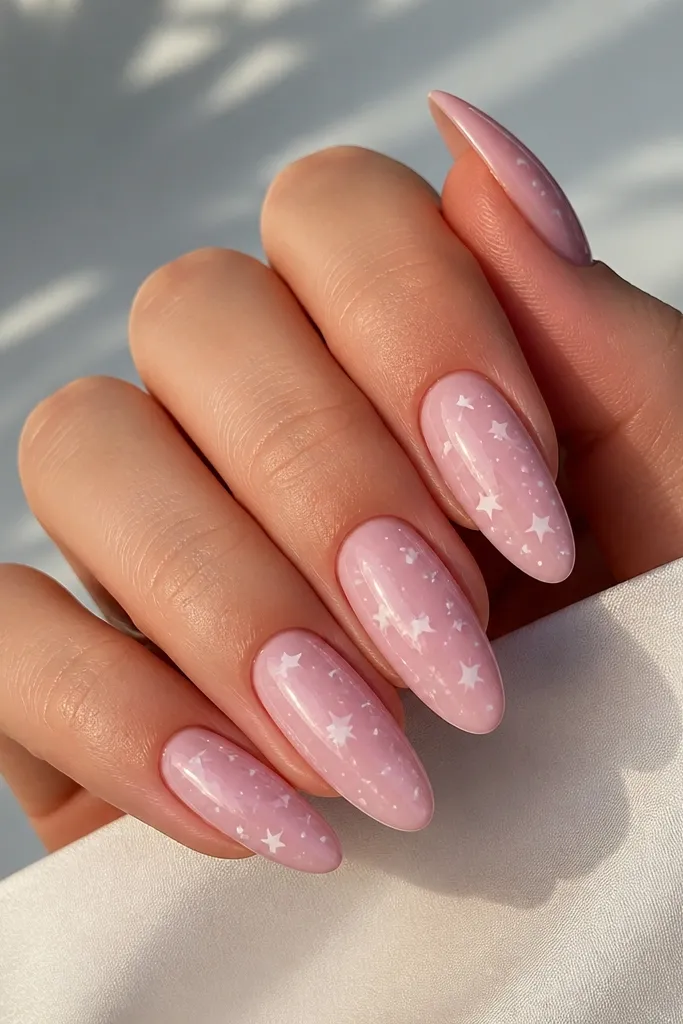
Stars and confetti feel like summer fireworks, but the pastel base keeps them from being too loud. The base is pastel pink, and the stars are clean white with a few tiny dot confetti pieces. Almond shape makes the stars look like they’re drifting from cuticle to tip, which looks cute in motion. This flatters fair skin and also brightens medium skin because the white stars add crisp contrast.
Editor's noteUse a stencil once for the first nail, then freehand star size from that template.
Start with a pastel pink base and let it dry. Use a star-shaped dotting tool or a small stencil to place tiny white stars in a loose cluster on each nail. Add micro white dots around the stars so the spacing feels random but balanced. Seal with glossy top coat and pay attention to edges where the stars sit so they do not lift.
Watch outAvoid overcrowding stars — leave some clear space or it looks messy.
22. Coral Ombre with White Edge Almond
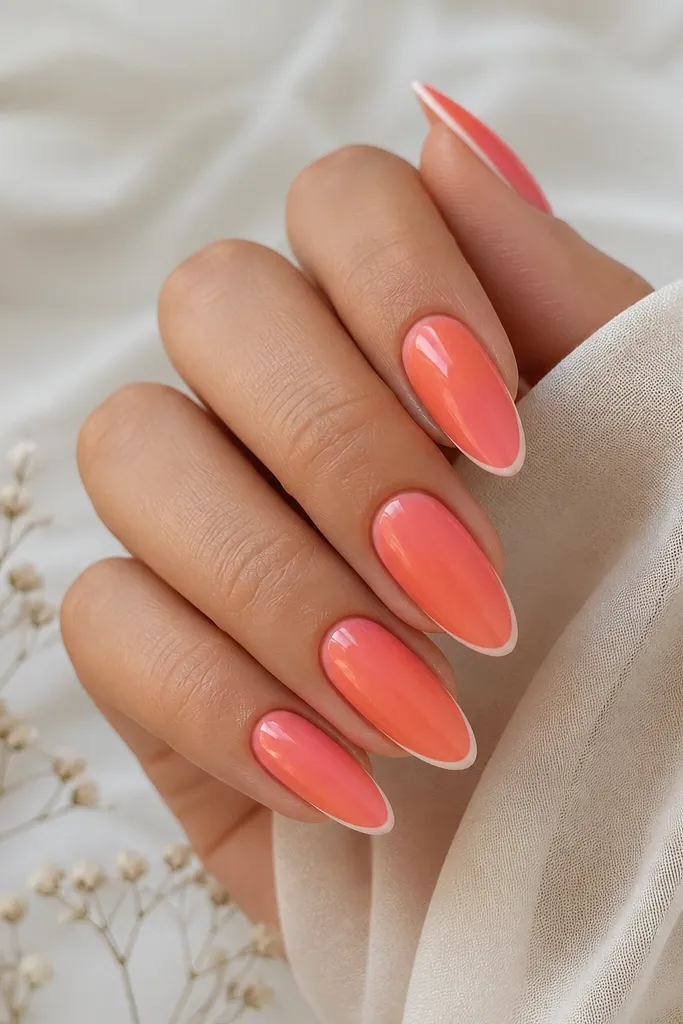
This is the “summer manicure” look that still feels tidy. The coral ombre gives warmth, and the thin white edge line makes the tip look sharply finished even if the ombre fades slightly as it wears. It’s flattering because coral sits warm on the nail bed, and the white outline adds definition. Almond shape makes the edge line follow the taper, so it reads sleek rather than childish.
Editor's noteLet the ombre dry fully before you paint the white line so it stays crisp.
Apply a sheer nude base first. Sponge coral from the tip upward until you get a soft fade, then blend with a clean sponge lightly so there are no harsh stripes. Paint a thin white line right at the free edge boundary, keeping it centered and even. Seal with glossy top coat and cap the white edge so it doesn’t chip right away.
Watch outDon’t make the white line too thick — thick lines look like tape.
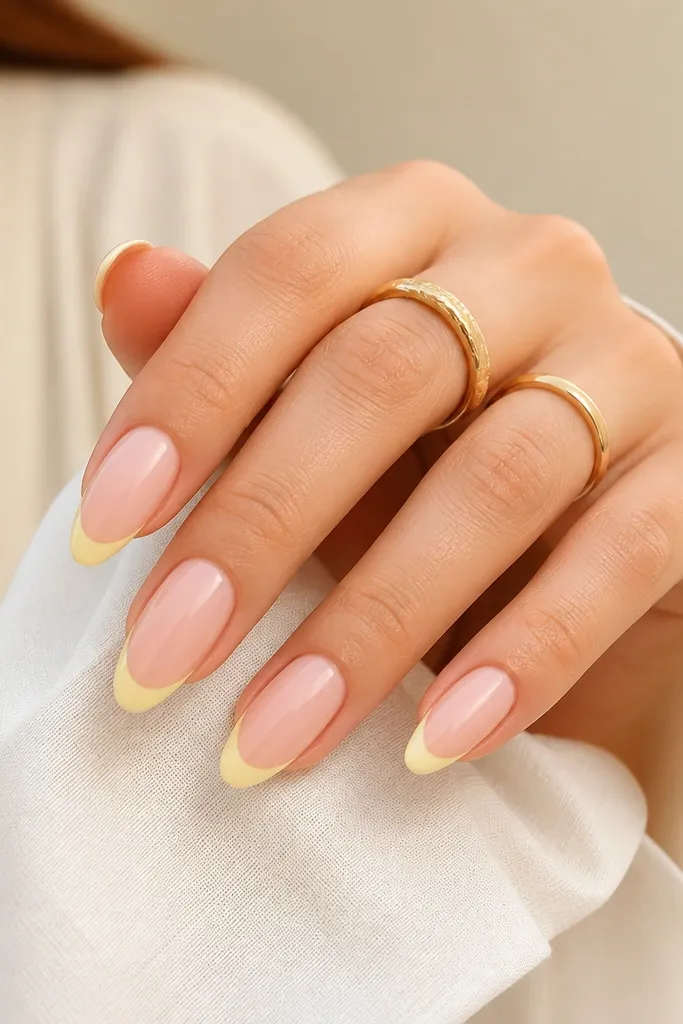
23. Mint French with Tiny Pearls Almond
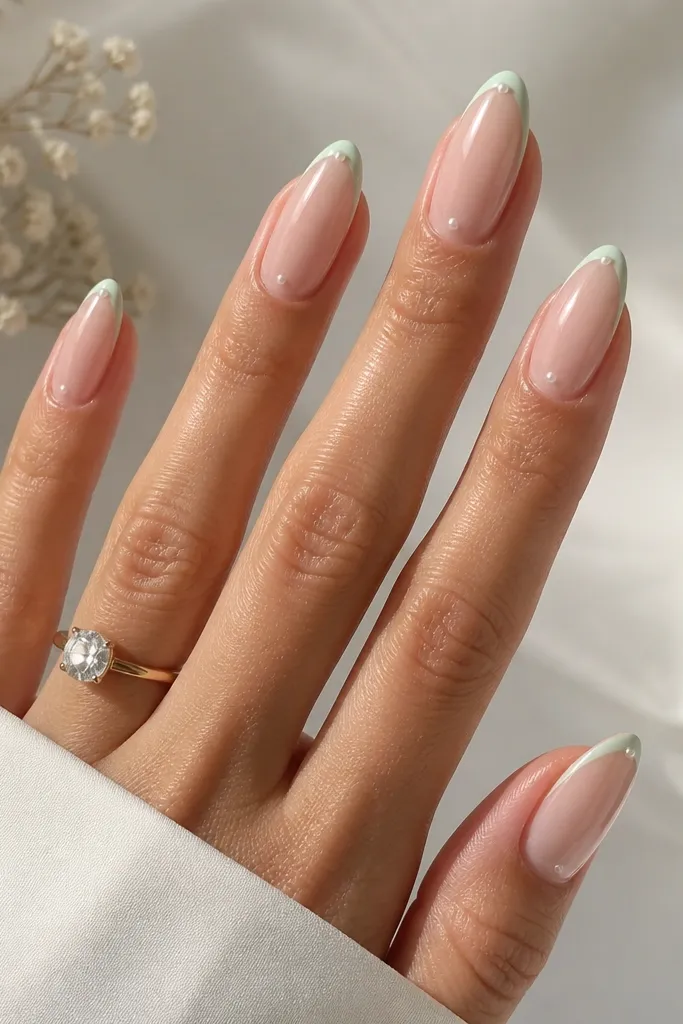
Pearls on nails look summer-dressy, not formal, when you keep them small. The mint micro French gives freshness, and the tiny pearl at the tip center acts like a highlight. This flatters hands because the pearl draws attention to the almond point and makes the nails look clean and intentional. I’ve worn this with white sundresses and it looked like salon work.
Start with a nude sheer base. Paint a mint micro French line at the tip, keeping it thin and centered. Place one tiny pearl on each nail tip line using nail glue or gel adhesive, then cap around it with a thin layer of clear gel so it feels smooth. Finish with glossy top coat on top of the pearl cap and along the sidewalls.
Let the pearl glue set before top coat — moving it half-set makes the pearl slide.
Don’t place pearls near the sidewalls — they lift and snag.
24. Sunset Gradient Almond with Orange Rim
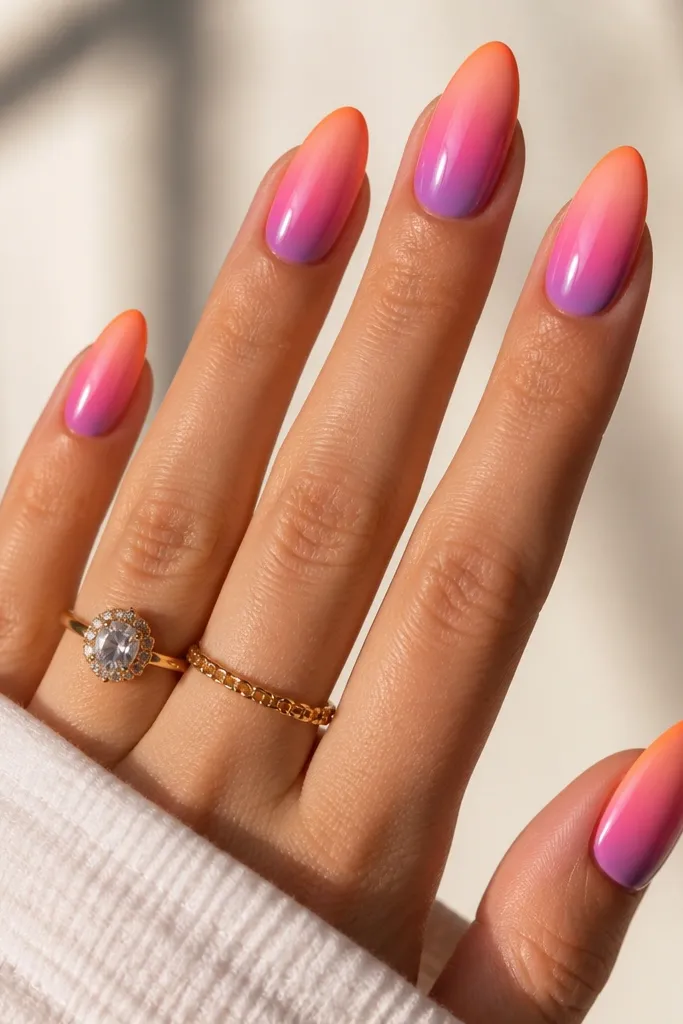
This sunset set looks like golden hour on your hands. The gradient goes peach at the cuticle into pink mid-nail and soft purple toward the tip, and the orange rim adds a warm border that ties the colors together. It flatters deep skin tones because the purple and orange give contrast that looks bright in sunlight. Almond shape makes the gradient feel smooth because the taper helps you blend naturally toward the tip.
Editor's noteUse three sponge pieces or three corners of the sponge so each color stays clean.
Apply a sheer nude base or a very light milky base. Sponge peach at the cuticle, blend into pink in the middle, and fade into a soft purple near the tip. Add a thin orange rim line just inside the free edge to frame the gradient. Seal with glossy top coat, and do a careful second coat over the rim so it doesn’t wear off first.
Watch outAvoid harsh color bands — if you see lines, blend with a barely-damp brush.
25. Lemon Slice Half-Nail Almond
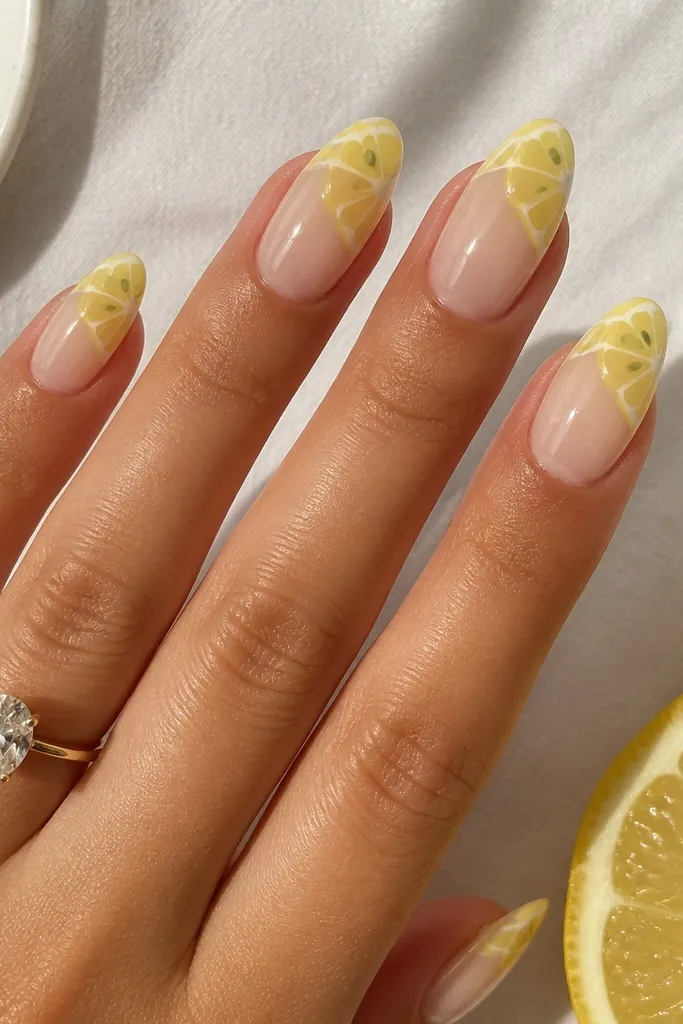
Half-nail lemon slices look graphic and fun, like a summer drink menu. Keeping the lemon on the top half makes it feel intentional, and the nude lower half keeps the nail looking long. The rind line in white makes the lemon slice crisp and prevents the yellow from blending into the base. This flatters fair and medium skin tones because the translucent yellow reads bright without going neon.
Editor's noteUse translucent gel so the lemon looks like stained glass, not flat paint.
Start with a nude base, then paint translucent yellow on the top half of the nail. Add a thin white rind line around the lemon wedge edge, then add a few tiny green seed dots near the center. Keep the lemon wedge centered and angled to match the almond tip. Seal with glossy top coat and cap the free edge so the graphic stays smooth.
Watch outDon’t extend the lemon slice to the full nail — it will shrink the nail visually.



