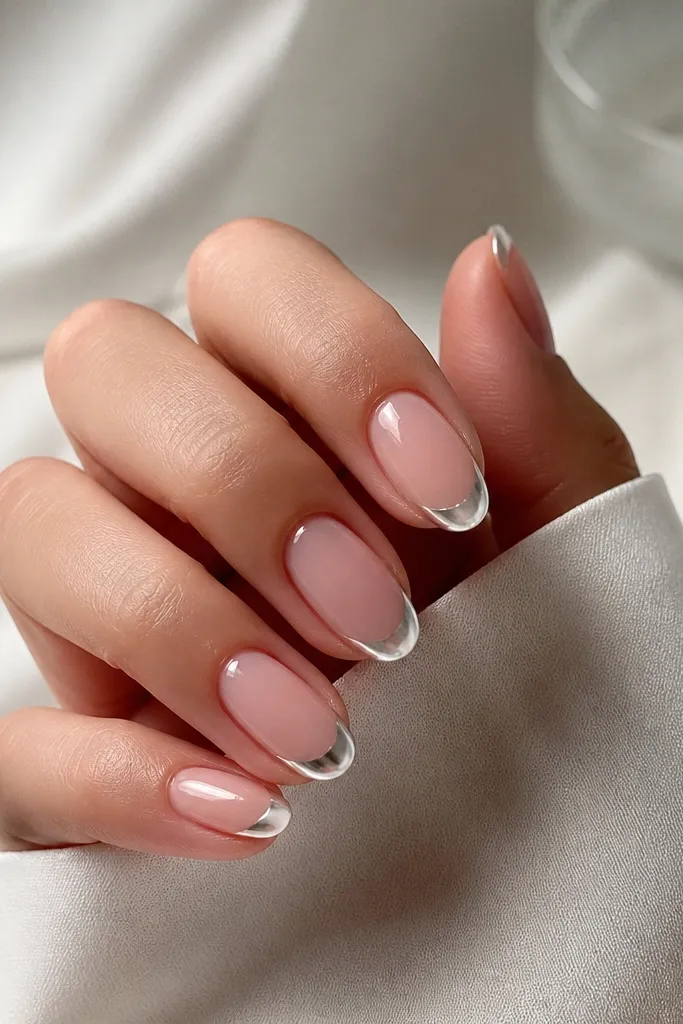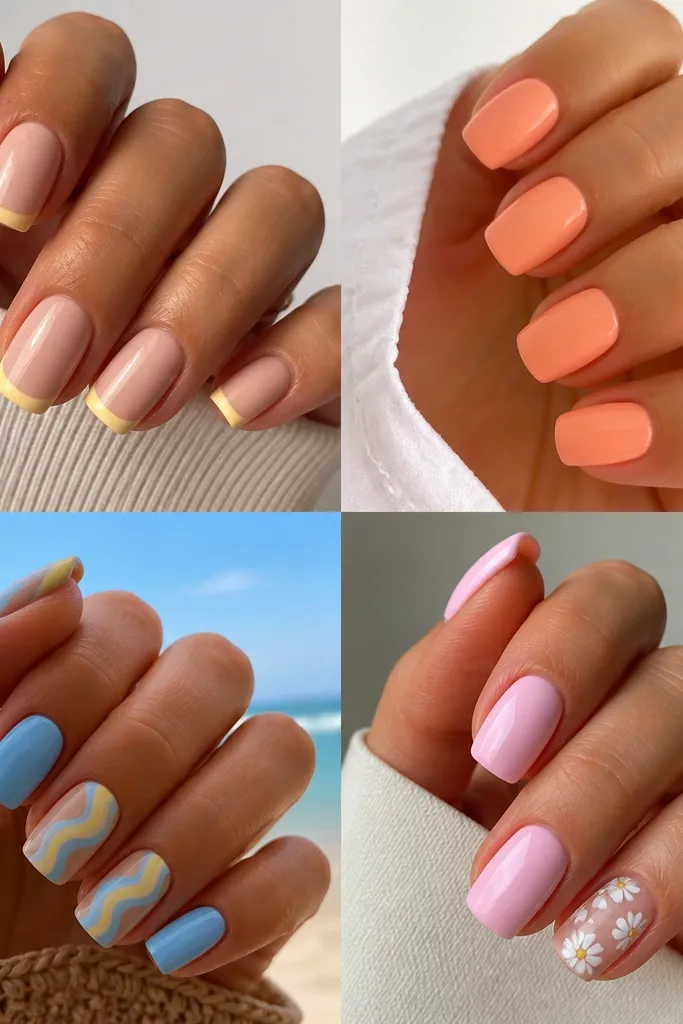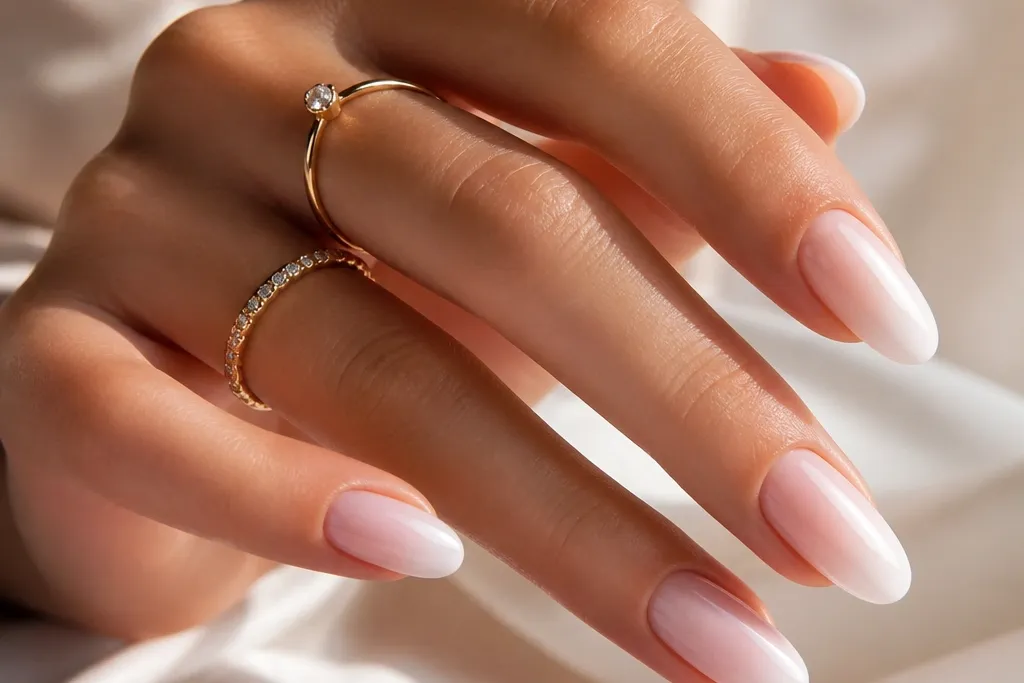
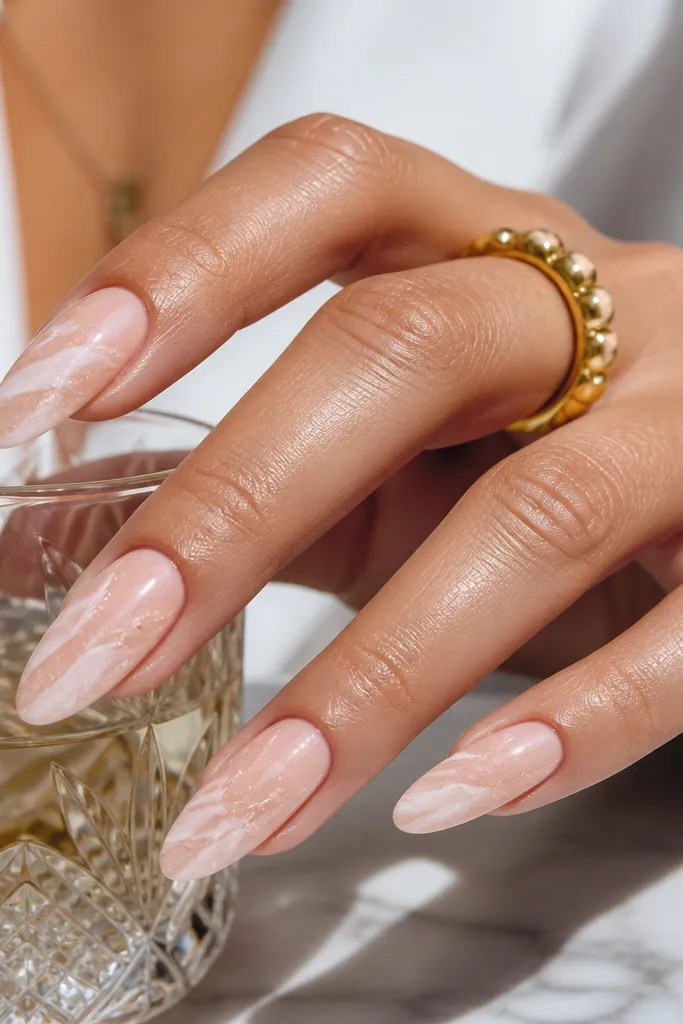
1. Milky Nude Almond With Stained-Glass French Tip
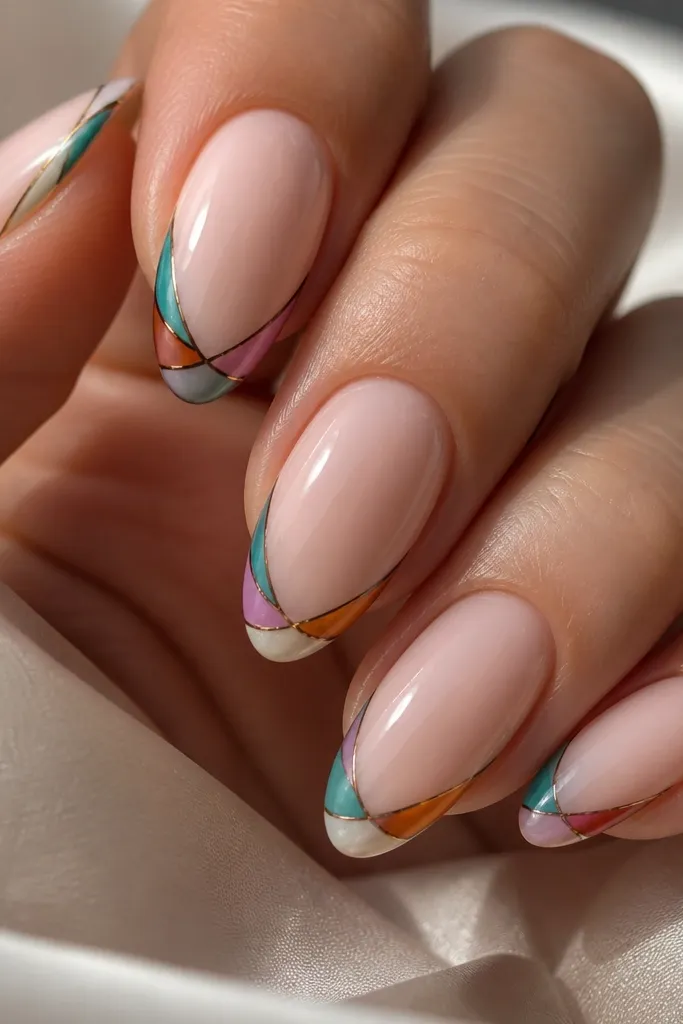
This is the set I reach for when I want "luxury high end" without going full sparkle. The milky nude base matches almost any skin tone - it looks clean on fair skin and still flattering on deeper tones because it's sheer, not chalky. The French tip is the standout, but it's done with thin stained-color lines instead of one thick stripe, so it reads expensive and airy. It works especially well on short-to-medium almond because the thin tip keeps the taper crisp.
Start by prepping the cuticle line and applying a sheer milky nude gel base, then cure fully. Paint the French tip as a guide first with a nude-to-white jelly (thin layer), cure, and then add stained-glass lines using striping gel in teal and amber - keep each line under 0.5mm. Add a faint violet line between the colors to blend the edges, then cure again. Finish with two coats of high-gloss top coat, focusing extra thickness on the stress point just behind the tip.
Editor's noteIf your French tips look wobbly, place a small dot at the center of the tip guide and drag outward with a fine brush - steady pressure beats speed.
Watch outAvoid one-color French tips that are opaque and thick - they look like press-on art instead of gel.
2. Peach Jelly Almond With Ultra-Fine Gold Microline
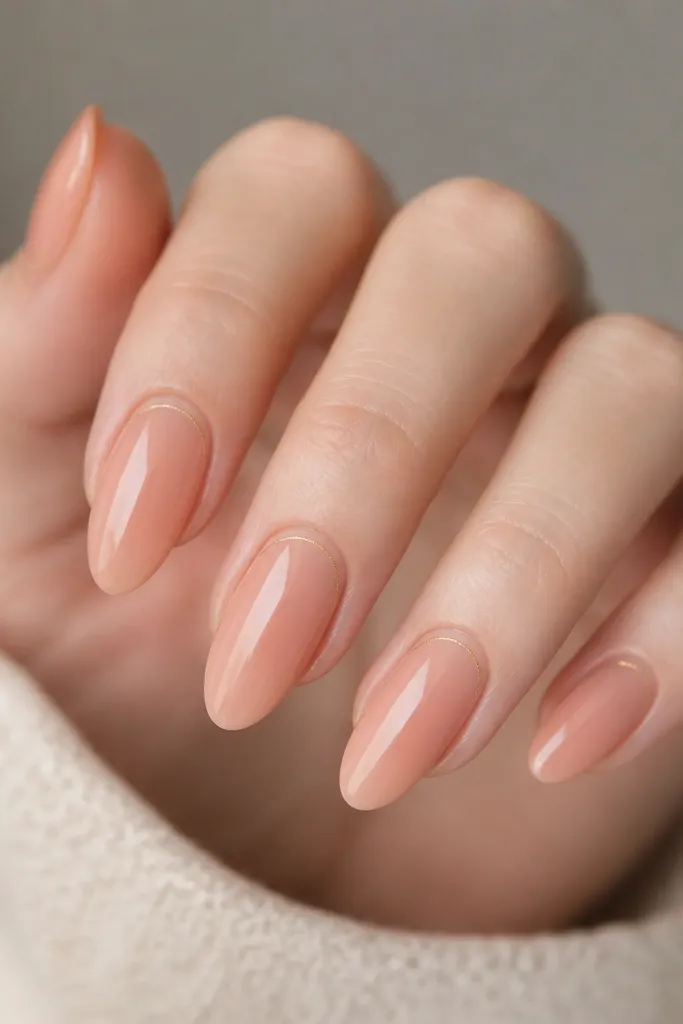
Peach jelly looks like summer in daylight - it flatters warm undertones and also brightens neutral skin. The trick is using a jelly base that stays translucent, so your natural nail tone still shows through. The gold microline gives that expensive jewelry feel without looking busy. This style is perfect for brunch, date nights, and when you want color but still need your nails to look "clean" in photos.
Apply a peach jelly gel in two thin coats so it stays glassy, curing between each coat. With a striping brush, draw a microline starting 1-2mm above the cuticle on the center and curve it slightly toward the sidewalls. Add a tiny second microline only if you want more contrast, but keep spacing even. Seal everything with a glossy top coat and cap the free edge so the line doesn't snag.
Editor's noteUse foil gel or gold chrome powder mixed with top coat for the microline; plain gold polish is too opaque and can look heavy.
Watch outSkip chunky gold glitter - it dries textured and kills the glassy jelly look.
3. Iced Lemon Almond With Negative-Space Smile Line
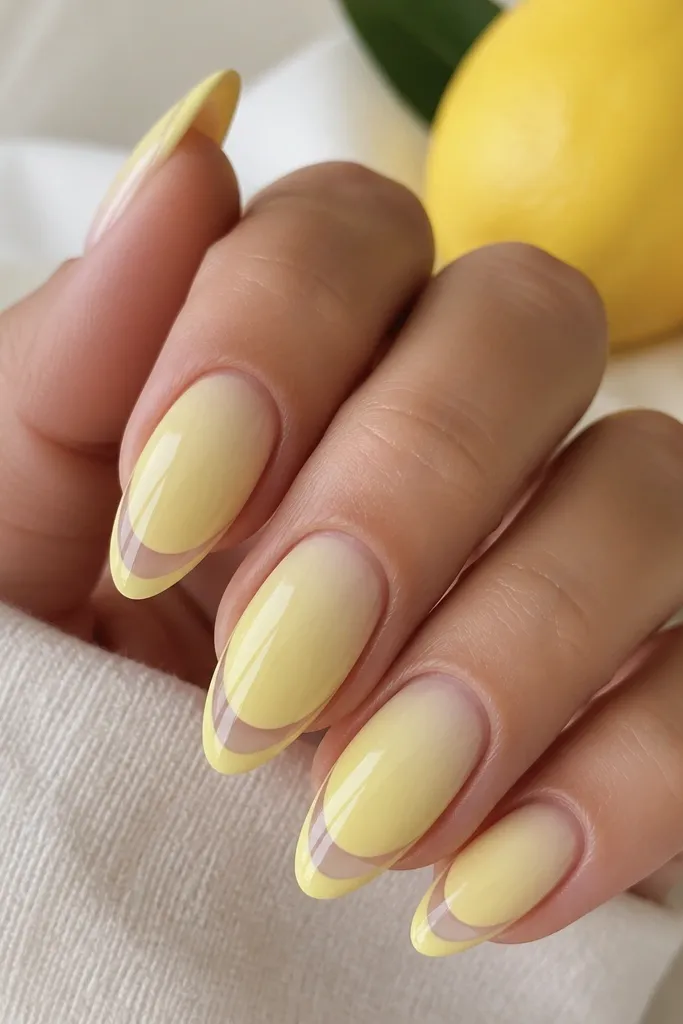
This set is for the days you want your hands to look instantly brighter. The iced lemon shade is light enough to flatter fair skin without washing it out, and on medium-deep skin it creates a clean contrast instead of looking neon. Negative space keeps the design from feeling childish and makes the almond shape look longer. It's also great for photos because the clear smile line catches highlights.
Start with a sheer nude base so the lemon sits smoothly, then sponge or airbrush a pale iced lemon gradient from mid-nail to tip, curing. Use a liner brush to outline a smile line close to the free edge, leaving the center of the smile line bare. Fill only the border line with lemon gel - keep it thin - then cure. Finish with a top coat that's slightly thicker over the center to smooth the gradient.
Editor's noteIf your negative space looks messy, use a thin strip of gel nail tape to block the smile area while you paint the outline.
Watch outDon't fill the entire tip with lemon; a solid block makes almond tips look shorter.
4. Ocean Blue Almond With Wet-Look Sea Glass Tips
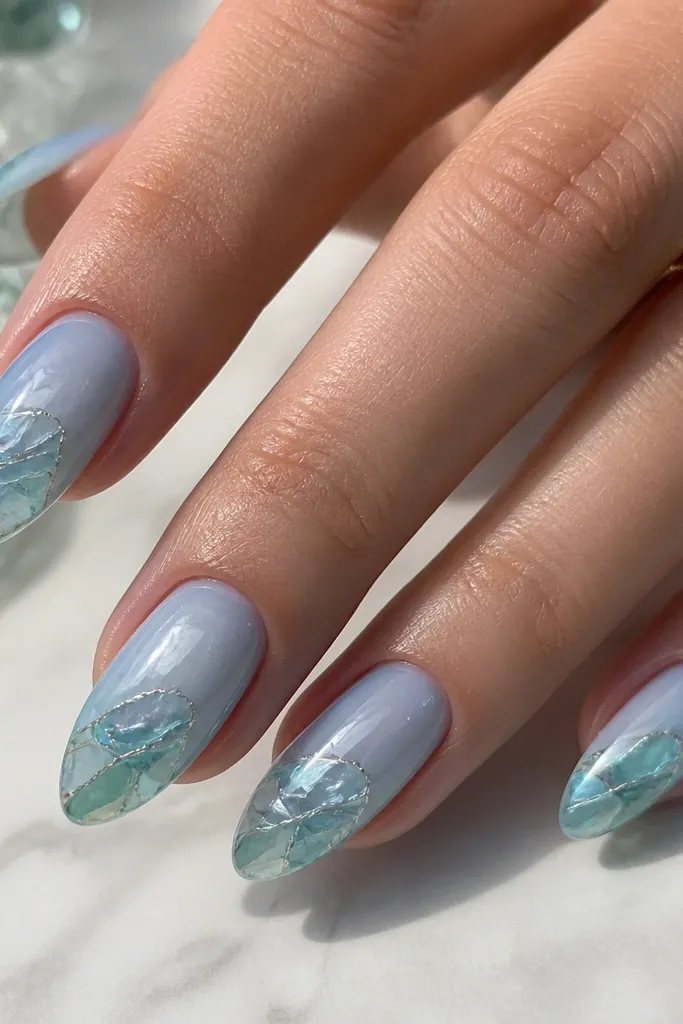
Ocean blue is one of the most flattering summer shades when you keep it sheer. The key is the sea-glass panels at the tip - they look like glass because they're translucent, not opaque stickers. This flatters cool undertones and also makes warm skin look fresher. Wear it to beach trips, pool days, or anywhere you want your nails to look like sunlight on water.
Apply a sheer ocean blue gel base in one thin coat, then cure. Build depth by adding a second thin layer only around the mid-to-tip, leaving the base slightly lighter. Add sea-glass panels using translucent aqua and icy green gel - place irregular shapes and don't overblend the edges. Cure each panel layer, then seal with a thick, wet-look top coat and cap the tip edges.
Editor's noteFor glass edges, use a stippling tool with a tiny amount of top coat to soften transitions without turning them cloudy.
Watch outDon't use opaque turquoise - it kills the sea-glass effect and makes the tips look like decals.
5. Rose Quartz Almond With Shimmer Vein Accent
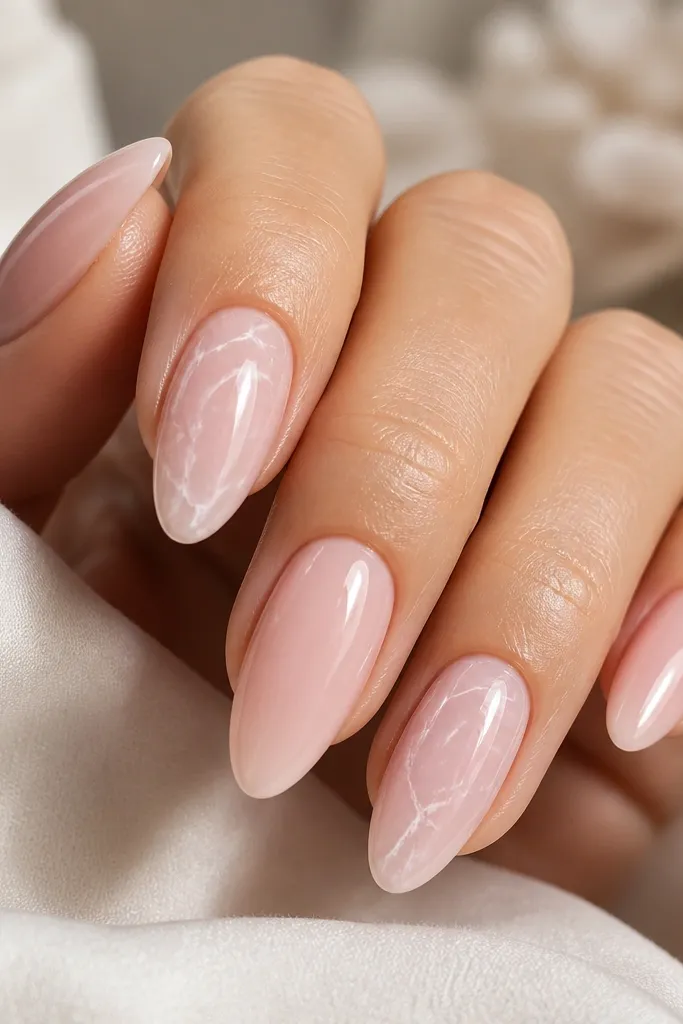
Rose quartz is the "quiet luxury" summer nail when you want something soft but not boring. It flatters almost every skin tone because it's close to natural nail color, just warmer. The shimmer vein accent gives movement - it looks different when you turn your hand. This set works for weddings, office weekends, and even casual days when you still want your nails to look intentional.
Start with a milky rose base, then cure. Add a second coat slightly thicker at the center to create a smooth apex feel, curing again. On accent nails, paint thin vein lines in a white-pink gel - keep them irregular and let gaps show through the base. Dust a micro shimmer over the veins lightly, cure, then top coat with two coats for that glass finish.
Editor's noteUse a detail brush and drag the gel in one stroke per vein; multiple passes make the lines look cloudy.
Watch outAvoid heavy glitter veins - they look textured and cheap under direct light.
6. Hot Pink Jelly Almond With Clear Cuticle Halo
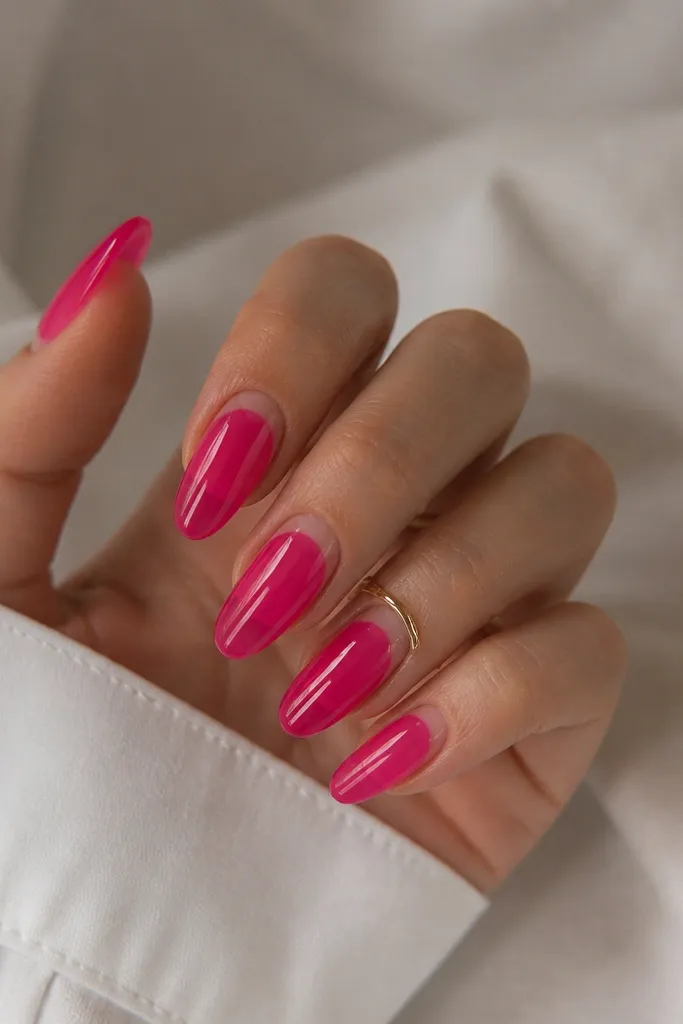
This is the set that makes your hands look instantly polished in summer heat. The hot pink jelly is bold but because it's translucent, it doesn't feel heavy. The clear cuticle halo keeps it modern and makes the almond shape look longer, especially on shorter nail beds. It flatters medium and deeper skin beautifully, but it also pops on fair skin without turning orange.
Apply a sheer base coat and cure. Paint hot pink jelly starting at 1-2mm away from the cuticle area, leaving a clear ring. Cure, then do a second thin jelly coat to even the tone while keeping the halo intact. Clean the cuticle edge with a small brush dipped in gel cleanser, then seal with top coat and cap the free edge.
Editor's noteIf the halo fills in, wipe your brush on a lint-free pad before touching the cuticle area - gel floods when the brush is too wet.
Watch outDon't paint hot pink opaque; opaque pink makes the set look thick and less expensive.
7. Lavender Cloud Almond With Micro French Fade
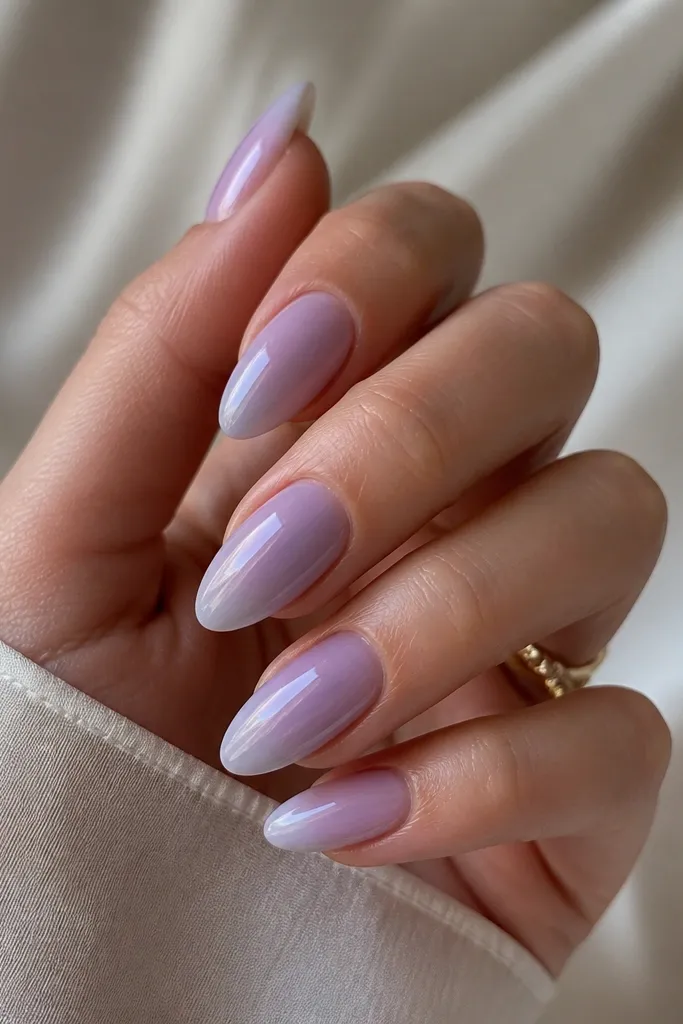
Lavender cloud nails look dreamy in summer photos and still feel wearable for everyday. The cloud effect flatters fair skin by adding color without harsh contrast, and it gives medium skin a gentle cool glow. I like this on almond because the fade follows the taper naturally. It's also great when you don't want art - just a smooth, expensive gradient.
Start with a milky lavender base, then cure. Sponge a slightly lighter lavender at the tip using a makeup sponge, keeping the blend soft around the sides. Add a micro French fade by tracing a thin curved line near the free edge, then blur it with the sponge for 10-15 seconds of gentle tapping and curing. Finish with a glossy top coat and cap the tip to lock the blend.
Editor's noteUse a fresh sponge edge for each hand - reuse makes the fade stripey.
Watch outSkip thick gel for the fade; thick layers show texture and ruin the cloud softness.
8. Tangerine Chrome Almond With Thin Black Outline
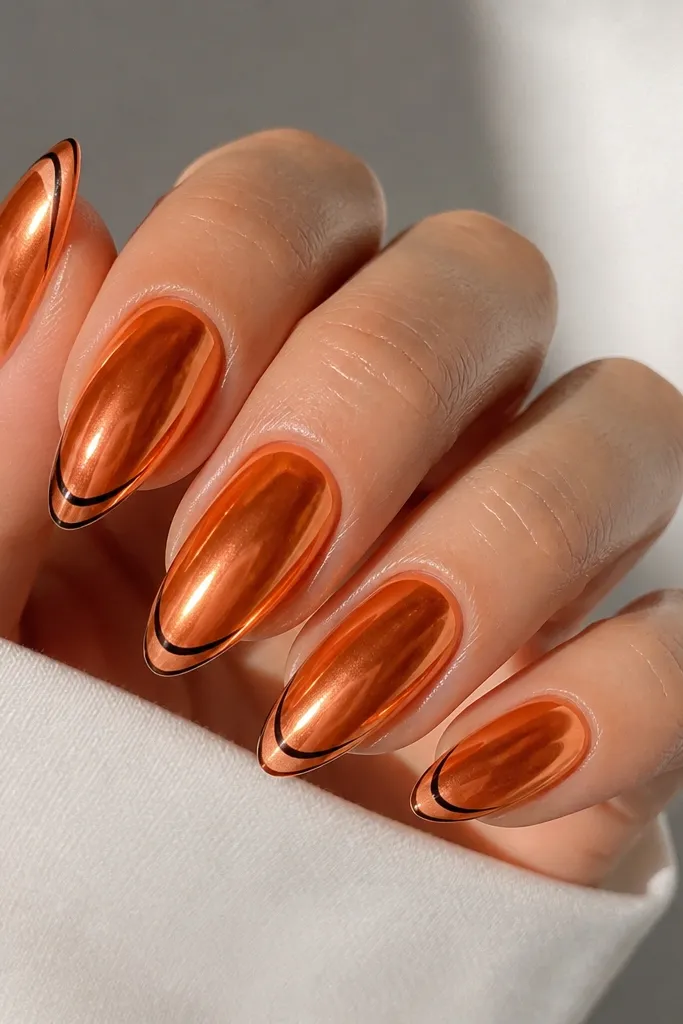
Tangerine chrome is loud in the best way, but thin black lines keep it from looking like costume nails. This set flatters warm undertones and makes tan skin look extra sun-kissed. The outline also makes your almond shape look sharper, especially if your natural nail plate is wide. It's a great choice for festivals, vacation dinners, and nights out when you want compliments.
Apply a smooth base and cure, then paint a tangerine gel base layer that matches your chrome. Use chrome gel or a tacky base layer for the chrome application, then apply tangerine chrome powder with a sponge applicator. After sealing the chrome, draw a thin black outline along the tip edge using a liner gel and cure. Finish with a top coat that doesn't dull chrome - use a chrome-safe top coat and cap the free edge carefully.
Editor's noteIf your chrome looks patchy, press the chrome powder gently for 20-30 seconds before buffing off excess.
Watch outDon't use regular thick top coat over chrome; it turns mirror shine into a dull film.
9. Sea Salt Nude Almond With White Micro Speckles
Sea salt nude is the one I wear when I want summer nails that look clean even after a few days. The cool nude base keeps it modern, and the tiny speckles read like beach texture instead of nail art. It flatters all undertones because it's close to natural color, and the speckles add interest without making your nails look busy. Wear it to work, then still feel summer-ready on weekends.
Apply a cool sheer nude gel base, cure, then add a second thin coat for even coverage. Use a dotting tool or a toothbrush with gel paint to tap micro speckles - keep them sparse, especially near the cuticle. Cure the speckle layer, then top coat in two smooth passes. Cap the free edge to prevent chips from forming where speckles meet wear.
Editor's noteDo speckles on one layer only; stacking them makes the surface bump and catches lint.
Watch outAvoid big dots and chunky white paint - it turns into cartoon snow instead of subtle speckle.
10. Sage Green Almond With Half-Moon Negative Cuticle
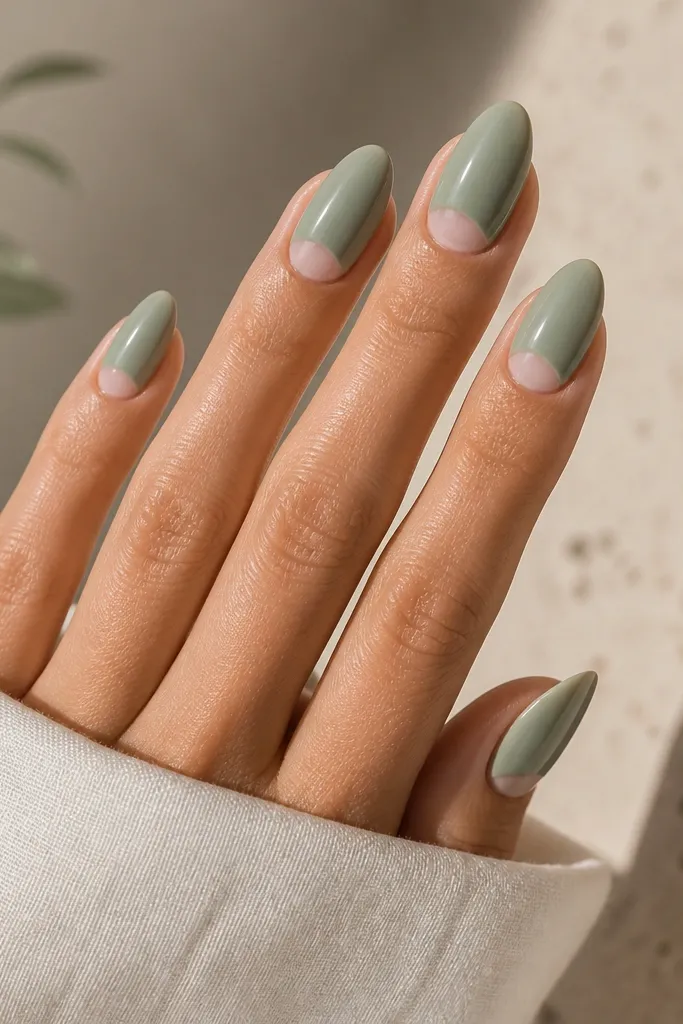
Sage green feels calm and expensive when the shade is soft and slightly gray. The half-moon negative cuticle makes the manicure look intentional and elongates the nail bed. This one flatters fair skin by adding color without going neon, and it looks stunning on deeper skin because the negative space breaks up the tone. It's great for summer weddings and dinner dates when you want something different than pink.
Start with a sheer nude base, cure. Paint sage green gel starting from the mid-nail and stop so you leave a clean half-moon cuticle area. Use a small cleanup brush to sharpen the crescent edge. Cure, then add a second thin sage layer for full coverage while keeping the half-moon clear. Finish with glossy top coat and cap the tip.
Editor's noteIf you struggle with the crescent edge, use a half-moon nail stencil for the first pass, then remove and refine with a brush.
Watch outAvoid painting over the cuticle area; flooding makes the half-moon look fuzzy.
11. Champagne Pearl Almond With Tiny Star Confetti
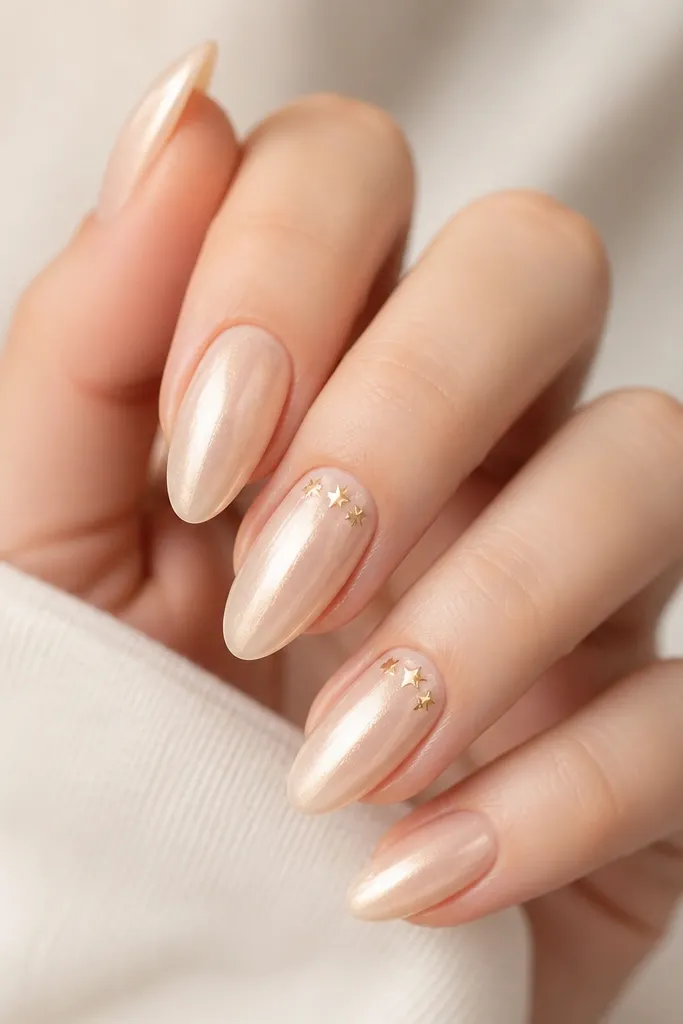
Champagne pearl looks like jewelry even in daylight. It flatters warm undertones and also looks gorgeous on cool skin because pearl has a neutral, forgiving glow. The tiny star confetti keeps the set playful but still high end because the stars are small and placed near the cuticle, not at the tip. This is a strong pick for nights out and holiday-adjacent summer events.
Apply a sheer nude base, cure. Add champagne pearl gel in two thin coats for an even glow. Place micro gold star confetti on accent nails - keep it close to the cuticle and spread it sparingly so it doesn't thicken. Cure, then seal with two coats of top coat, pressing the top coat into the star edges so they sit flat.
Editor's noteUse a dot of top coat to "glue" each star - don't drop them dry or they shift under top coat.
Watch outSkip large sequins; they lift at the edges and catch on hair.
12. Coral Sorbet Almond With Glossy Waterline
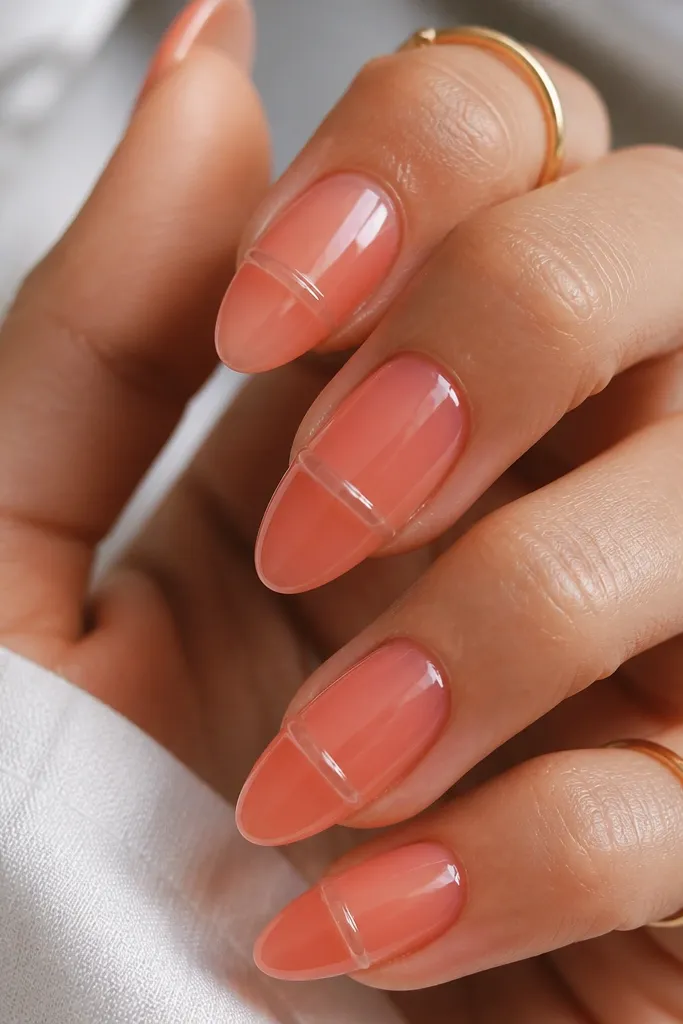
Coral sorbet is the summer shade that makes skin look healthy. The jelly base keeps it bright without feeling neon, and the glossy waterline band adds a "wet" look that reads expensive. This flatters golden and neutral undertones, and it also works on fair skin because coral sorbet has a soft, milky base. It's great for vacation and beach days when you want something that looks like sunlight.
Start with a coral sorbet jelly base in one thin coat, cure. Add a second thin coat for full coverage and even tone. Using clear gel, draw a curved waterline band across the lower half of the nail, slightly thicker in the center and thinner toward the sides, then cure. Finish with top coat around the band edges and cap the free edge to keep it smooth.
Editor's noteFor a realistic waterline, keep the band width under 1.5mm and don't let it touch the sidewalls.
Watch outDon't make the band too wide - thick clear gel looks like a blob instead of a water reflection.
13. Deep Berry Almond With Sheer Black Veil
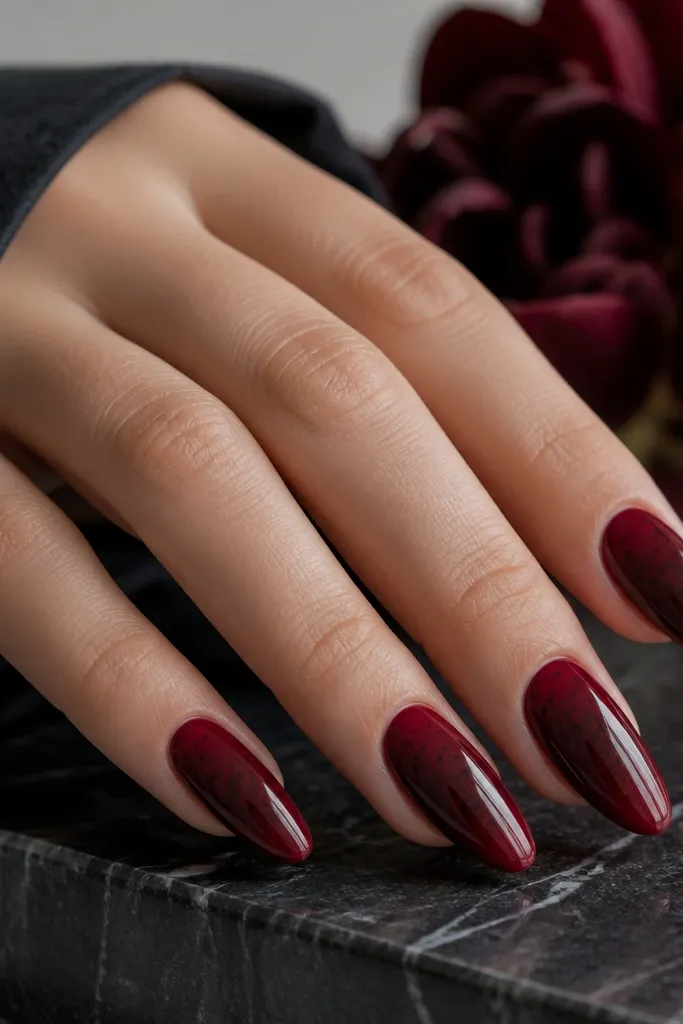
This is dramatic summer nail art that still looks classy. The deep berry base flatters most skin tones, and the sheer black veil gives depth without turning the whole nail heavy. It's especially flattering on medium-deep to deep skin because the black adds contrast and makes the almond taper look sharp. Wear it for evening events when you want your nails to look like a dark dress.
Apply a deep berry gel base and cure. Add a sheer black veil by painting a translucent black gel from mid-nail toward the tip, fading as you move down. Cure, then repeat with another thin veil layer only where you want extra depth. Keep the veil edge soft - blend with a clean brush and gel cleanser. Top coat in two coats to keep the veil glossy and prevent graininess.
Editor's noteUse sheer black gel, not black glitter - glitter adds texture that shows under gloss.
Watch outAvoid sharp lines in the veil; straight edges scream "DIY sticker" instead of blended gel.
14. White Milk Almond With Peach Cuticle Brushstroke
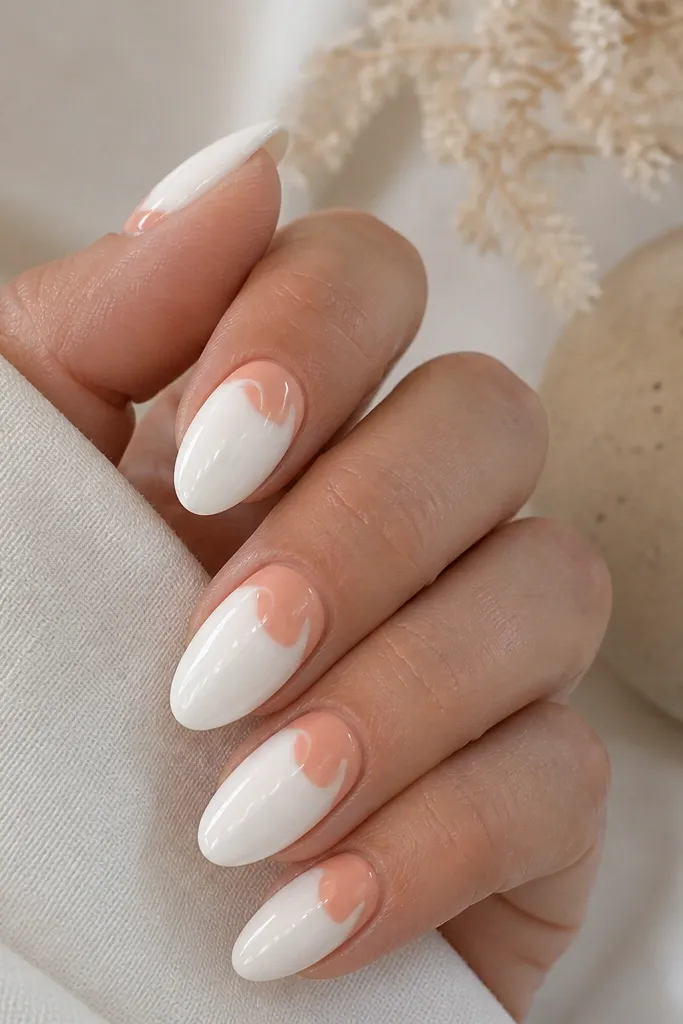
White milk gel looks clean and expensive when it's smooth, not streaky. The peach cuticle brushstroke adds warmth and keeps the set from feeling wintery. This flatters fair skin because the white makes hands look bright, and it still works on deeper skin if you keep the peach stroke close to the natural nail tone. It's a great choice for summer photos where you want your nails to look crisp with minimal detail.
Apply a base coat and cure, then build the white milk gel in two thin layers so it levels out. Cure fully between coats and wipe the tacky layer only if your system requires it. With a liner brush, paint a peach brushstroke across the cuticle area, starting at one side and sweeping toward the other with a thicker center. Cure, then top coat and cap the free edge.
Editor's noteFor smooth white, stir your gel before using - separation makes streaks that are impossible to fix later.
Watch outAvoid thick white in one coat; it wrinkles and looks chalky.
15. Turquoise Marble Almond With Thin Gold Crack Lines
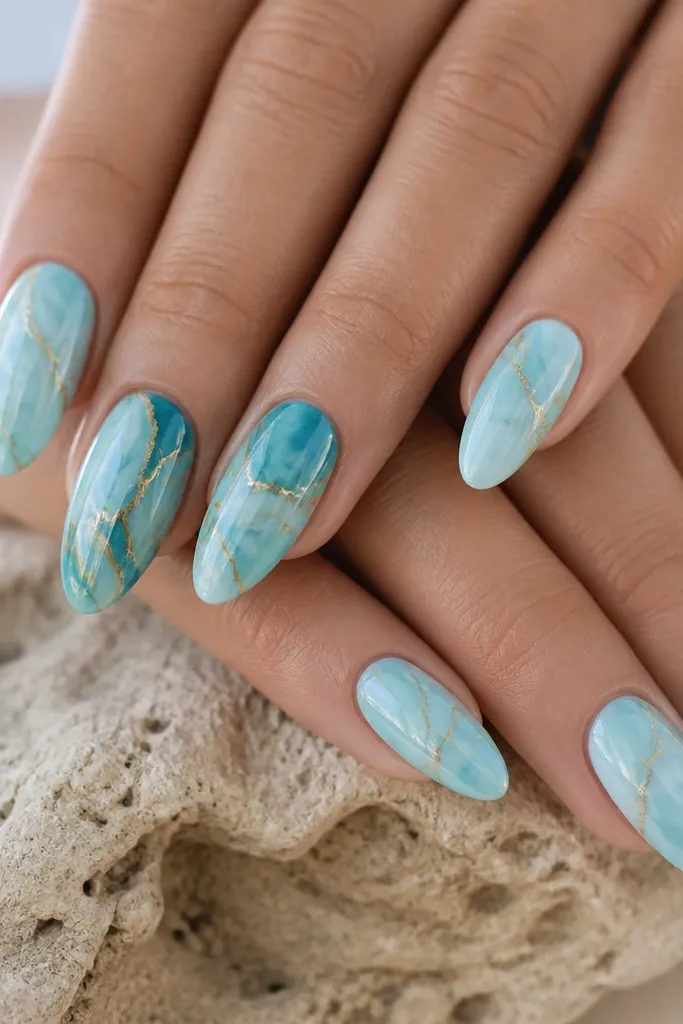
Marble nails can look cheap fast, but thin gold crack lines make this look like real stone. Turquoise marble flatters cool undertones and makes neutral skin look crisp. The almond shape is perfect because the marble flows naturally along the taper. This set is a solid pick for summer events where you want something eye-catching but still "luxury" instead of neon.
Start with a sheer nude base, cure. Add turquoise gel in a thin base layer, then create marble swirls with a mix of icy blue and white using a thin brush - drag lines and then soften with a second brush. Add gold crack lines with striping gel or gold liner gel, placing them only where the marble needs definition. Cure each accent, then top coat twice for a sealed, glass-like surface.
Editor's noteKeep marble swirls bigger on the center and smaller near the sides so the almond taper stays clean.
Watch outAvoid heavy gold foil chunks; they lift and make the marble look like stickers.
16. Sunkissed Nude Almond With Sunburst Edge
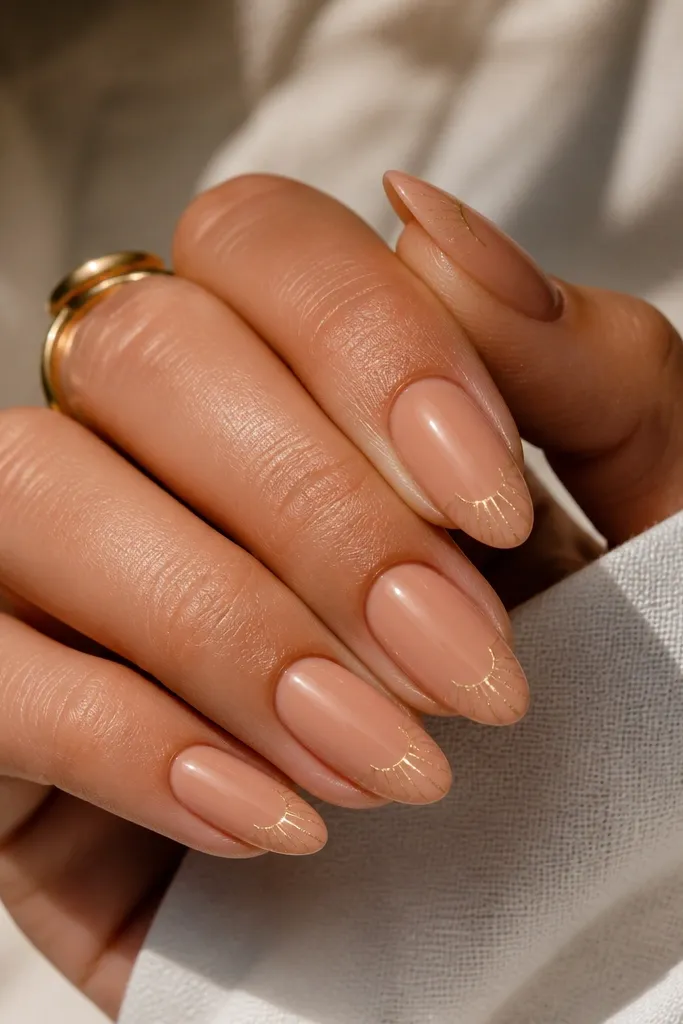
Warm sunkissed nude nails look like you just came back from vacation. The sunburst edge adds energy without covering the whole nail, so your almond shape stays elegant. This flatters golden and olive undertones, and it looks surprisingly good on fair skin because the warm nude isn't too pink. It's also perfect for summer outfits with gold jewelry - the lines match your accessories.
Apply a warm nude gel base, cure. Paint a sheer layer again to even the tone, then cure. Draw sunburst lines along the outer edge of the tip only - think 6-10 tiny rays, not a full fan. Use a fine gold liner gel and cure. Finish with two coats of top coat, focusing on smoothing the rays so they don't feel raised.
Editor's noteIf your sunburst looks shaky, mark 3 points where the rays start and end, then connect them with short lines.
Watch outDon't put sunburst across the entire nail; it turns into a busy pattern quickly.
17. Smoky Mauve Almond With Clear Jelly Center
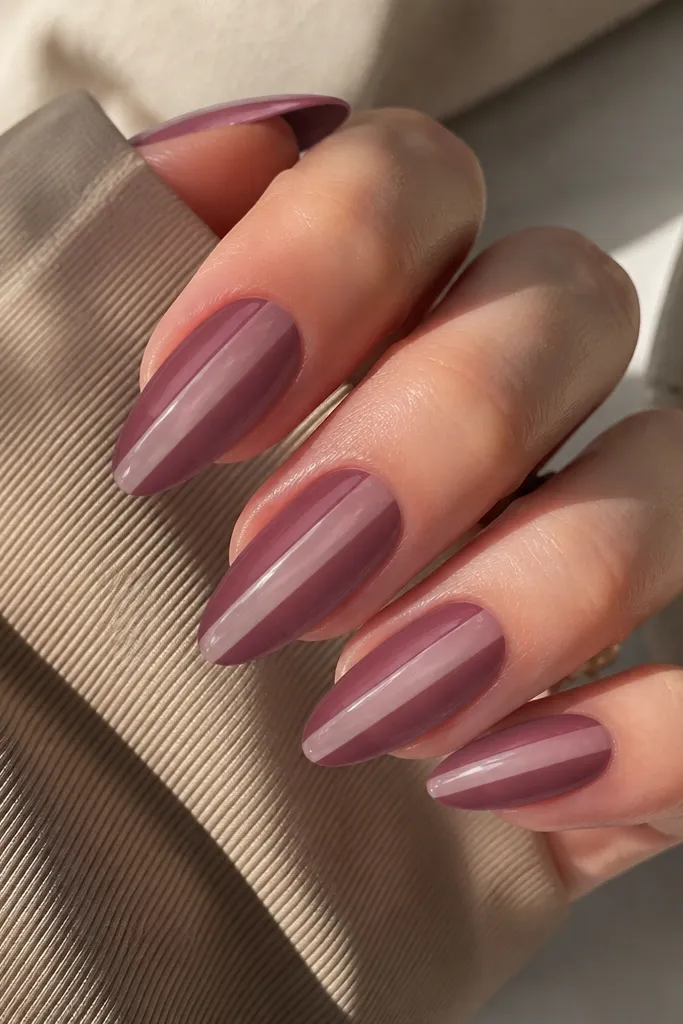
This set is a cheat code for making hands look long. The smoky mauve gives a soft, elevated tone, and the clear jelly center stripe adds dimension without darkness. It flatters neutral undertones and looks especially good on medium nails because the vertical stripe visually stretches the almond. It's a great option for summer workdays when you want something stylish but not loud.
Apply a sheer nude base and cure. Paint smoky mauve gel across the whole nail in a thin layer, cure, then leave the center strip as clear negative space. Use clear jelly gel to fill only the center stripe - keep it straight and narrow, around 1-1.5mm. Cure, then add a final thin mauve layer only on the sides to blend edges. Top coat with two glossy layers and cap the tip.
Editor's noteUse the center of your nail as your guide line - if the stripe isn't centered, the whole almond looks off.
Watch outAvoid thick clear gel; it can look like a ridge instead of a sleek highlight.
18. Grape Sorbet Almond With Lavender Aura Glow
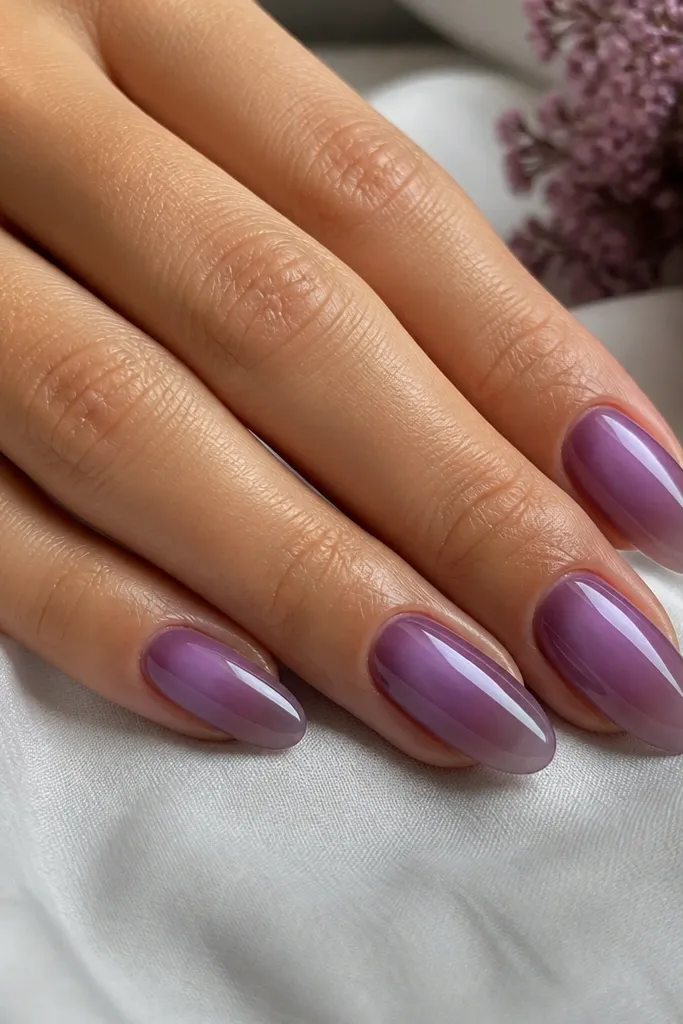
Aura nails look high end when the glow is soft and the base stays translucent. Grape sorbet flatters cool and neutral skin, and the lavender aura brightens the center so your nails look fuller. On almond, aura effects follow the nail's natural curve and look like a filter in real life. This is perfect for summer evenings when you want something moody but still pretty.
Apply a sheer nude base and cure. Add grape sorbet jelly in two thin coats for smooth coverage, curing between. For aura, sponge or airbrush lavender gel around the center near the cuticle, letting it fade into the grape - keep the glow radius small. Cure, then seal with a glossy top coat and cap the free edge so the aura stays crisp.
Editor's noteUse a makeup sponge for aura - tap lightly in a few passes instead of dragging the gel.
Watch outDon't make the aura too wide; it can cover the almond taper and shorten the look.
19. Clear Almond With Peach Foil Flakes Under Glass
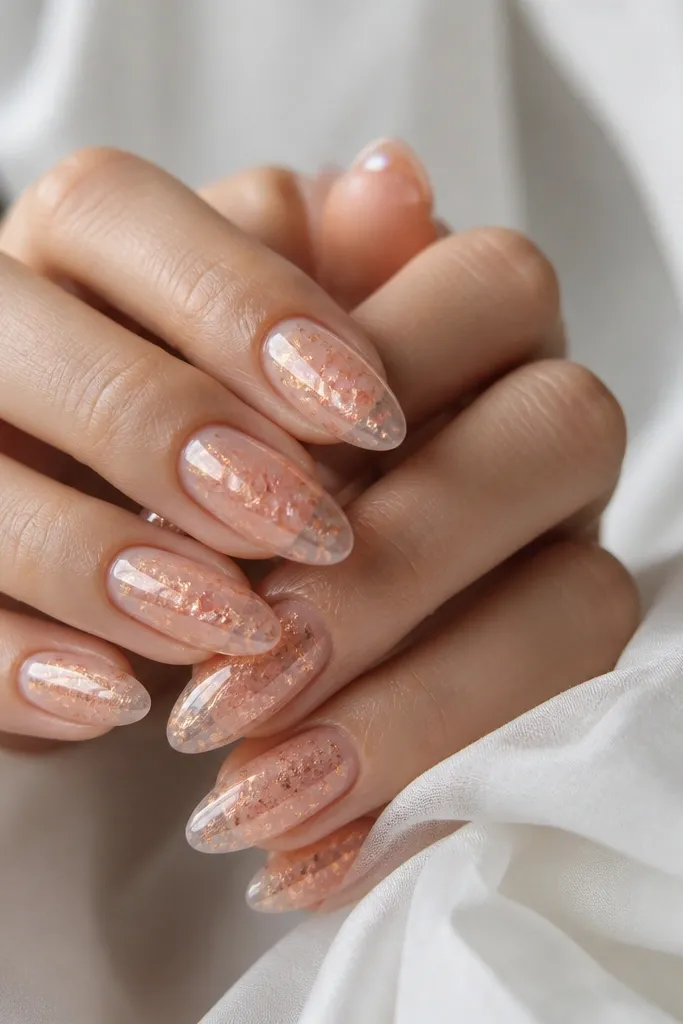
This is the "expensive glass" look I keep redoing because it photographs insanely well. The clear base makes the peach foil feel like it's floating, not stuck on top. It flatters all skin tones since the clear layer is neutral, and the foil reflects warmth that works with summer makeup. Wear it for beach dinners or events where you want your nails to look like a manicure accessory.
Start with a clear gel base and cure, then apply a thin sheer peach gel layer where you want the foil to glow through. Sprinkle peach foil flakes into the tacky layer - press lightly so they sit but don't spread everywhere. Add another thin clear gel layer to trap the flakes, cure, then top coat with two coats of thick glassy finish. Cap the free edge so the trapped foil doesn't snag.
Editor's noteIf foil is too sparse, add a tiny second pinch only near the center - it fills the nail without turning it chunky.
Watch outAvoid trapping foil directly under a thin top coat; it lifts and you feel edges when your hands move.
20. Mint Cream Almond With Tiny White Bow Tie Accent
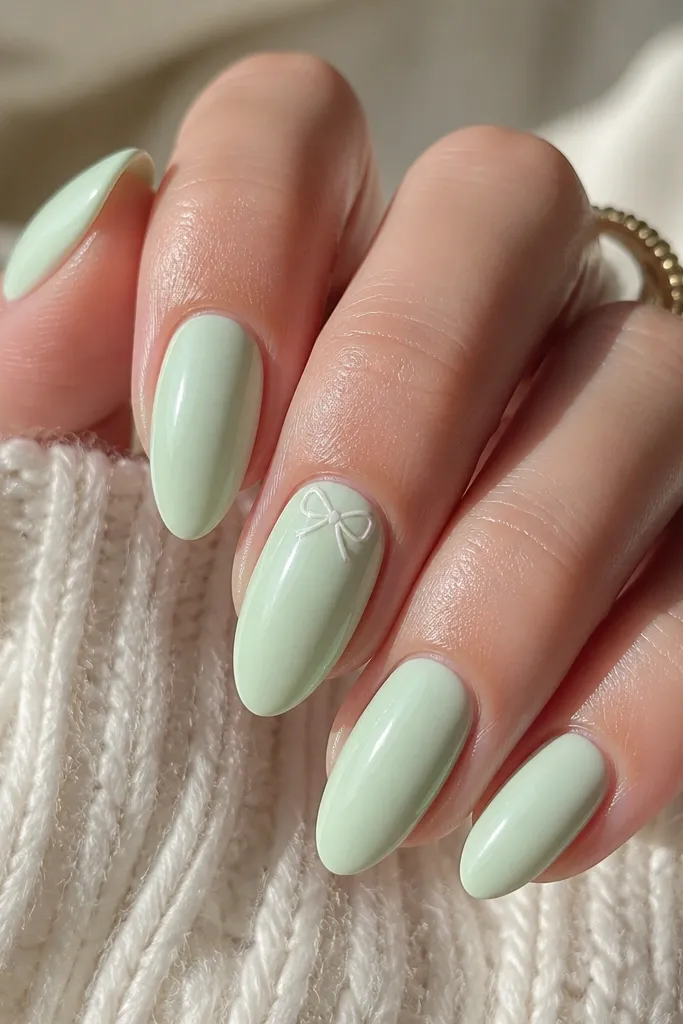
Mint cream reads fresh and sweet without looking like a candy nail when the finish is smooth and the accent is small. The bow tie near the cuticle makes it feel playful, but the placement keeps it looking grown-up. This flatters fair to medium skin tones by adding a cool pastel glow, and on deeper skin it still pops because mint cream has a high opacity level while staying soft. Great for summer birthdays and cute vacation outfits.
Apply a mint cream gel in two thin coats, curing between, so it stays even and not streaky. Choose one accent nail and use white gel to place a tiny bow shape at the cuticle area, keeping the center knot small. Outline the bow with a thin mint line if you want extra definition, then cure. Finish with top coat in two layers and cap the free edge. Make sure the bow is sealed so it doesn't catch on fabric.
Editor's noteSeal bow accents with a slightly thicker top coat over the center knot; it prevents lifting at the bow edges.
Watch outSkip oversized bows; large 3D art makes almond tips feel bulky and knocks the luxury look.
21. Nude Almond With Sapphire Blue Side Gradient
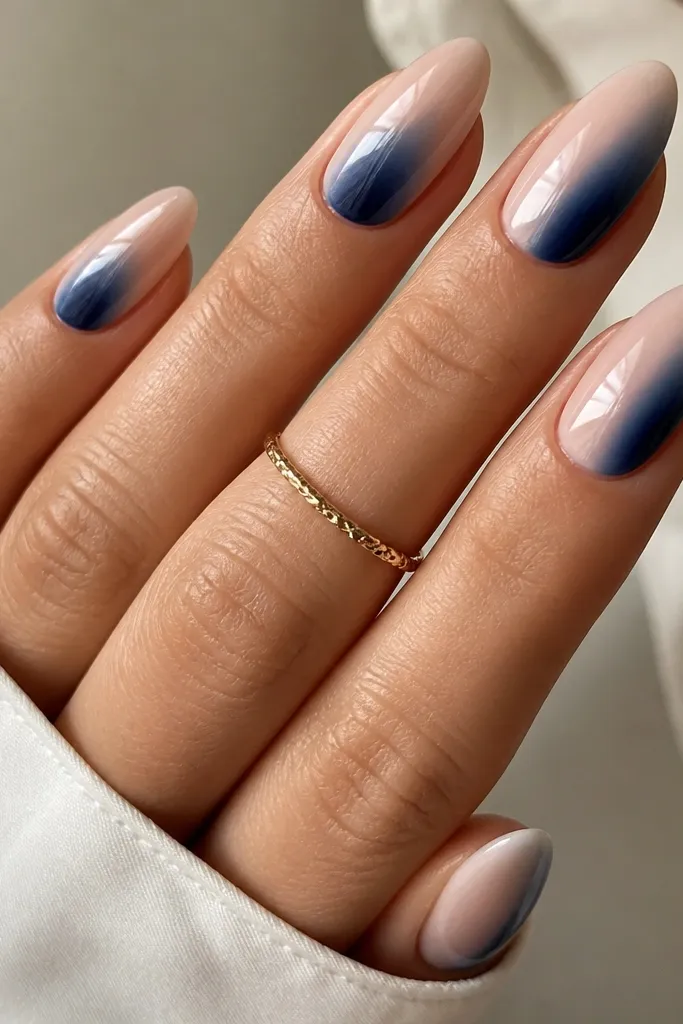
Side gradient nails look designer because they emphasize the almond shape rather than filling the whole nail. The nude base makes it wearable with everyday outfits, and the sapphire blue adds a cool pop that looks striking in sun. It flatters neutral and cool undertones, and on warm skin it looks extra luxe because sapphire contrasts nicely. This is one of my favorite summer "statement but still clean" sets.
Start with a nude sheer base, cure. Apply a thin layer of nude again so the surface is smooth. For the side gradient, place sapphire gel on one sidewall at the tip area and blend toward the center with a clean brush - keep the fade soft and narrow. Cure, then repeat once more if you want deeper color at the tip. Top coat twice with extra smoothing over the blended edge.
Editor's noteIf the gradient looks too stripey, blend with a brush wiped once on cleanser - not a wet brush.
Watch outDon't blend blue all the way to the cuticle; it shortens the nail visually.
22. Strawberry Milk Almond With Tiny Dots And Glossy Top
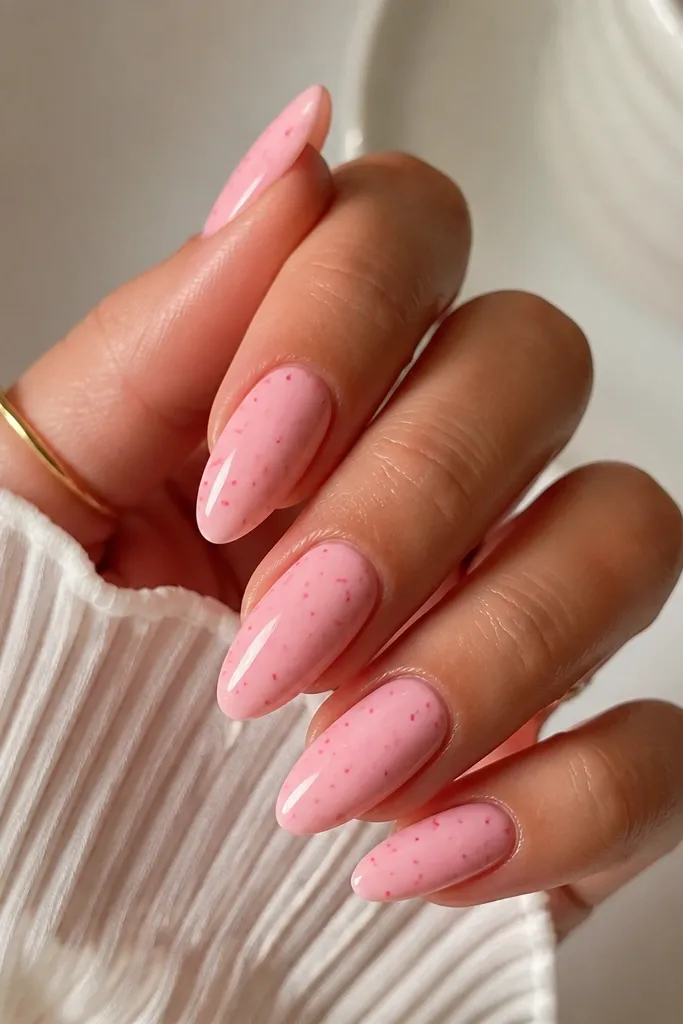
Strawberry milk nails are cute, but they look high end when the dots are tiny and evenly spaced. The base is creamy and translucent enough that it doesn't look like a thick candy coat. This flatters fair skin because the milk pink brightens, and it flatters medium skin because the dots add dimension without harsh lines. It's a fun summer pick for picnics, weekend errands, and casual dates.
Apply a strawberry milk gel in two thin coats and cure fully. Use a dotting tool to place tiny darker pink dots - keep them clustered around the mid-nail and avoid the cuticle line. Cure, then use a clear gel to lightly seal over the dots if they feel raised. Finish with two glossy top coats and cap the free edge.
Editor's noteFor dot consistency, wipe the dotting tool on a lint-free pad between nails.
Watch outAvoid big dots and uneven sizes; they turn into a random sticker pattern.
23. Champagne Gold Almond With Thin Crystal Line At Tip
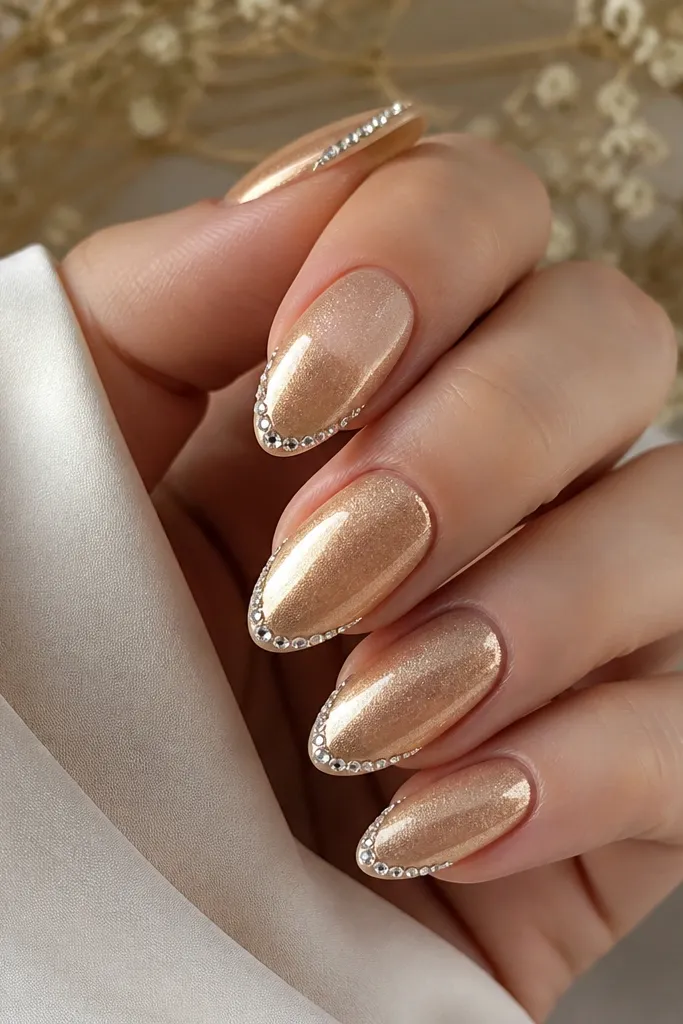
This is for nights when you want "luxury high end" without a full rhinestone mess. The champagne gold shimmer is flattering because it sits between nude and metallic, so it works for both day and evening. The crystal line at the tip makes the almond look sharper and more dressed up. It flatters warm and neutral undertones, and it also looks great on cool skin because gold adds warmth.
Apply a champagne gold shimmer gel in two thin coats, curing between. Keep the base smooth and level so the crystals sit flat. Place small clear crystals along the tip edge using crystal gel, starting at the center and working to the sides with even spacing. Cure, then add a thin top coat layer to lock them in, followed by a second full top coat. Cap the free edge carefully so crystals don't snag.
Editor's noteUse tweezers with a fine tip and press each crystal for 2-3 seconds before curing.
Watch outDon't build a thick crystal bed; thick rhinestones lift and catch on hair.
24. Pearl White Almond With Iridescent Holo Stripe
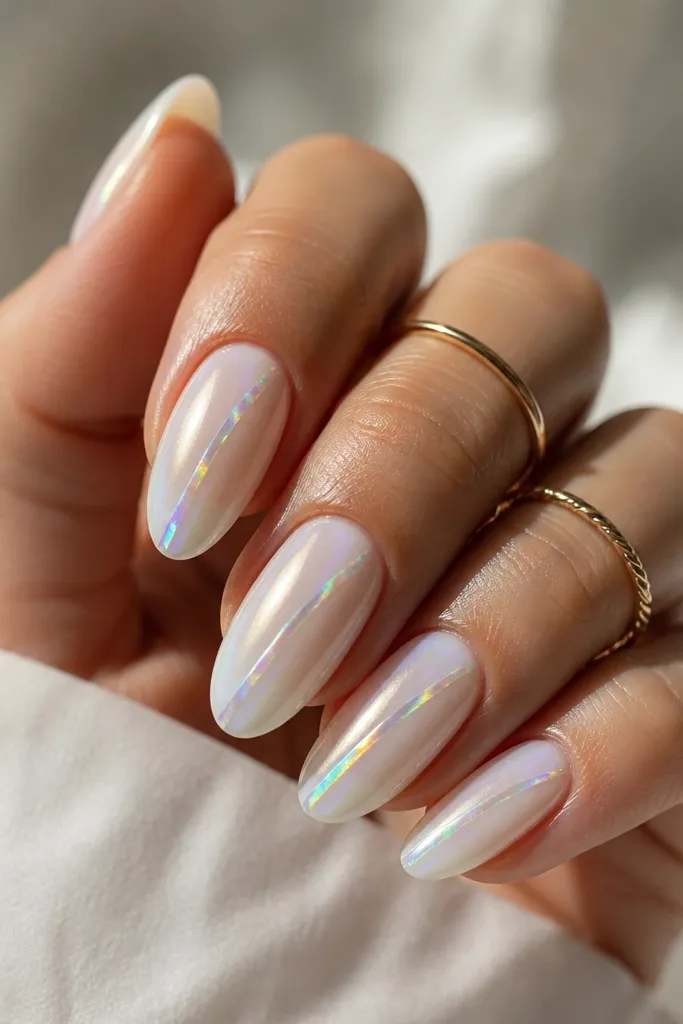
Pearl white is a summer staple because it stays crisp and makes your hands look clean. The iridescent holo stripe gives that luxury effect when it catches light from different angles. This set flatters fair skin by brightening, and it flatters medium-deep skin because the holo stripe creates a color accent that doesn't disappear. It's a great pick for photos and events where you want movement without lots of pieces.
Apply a pearl white base in two thin coats, curing between. On accent nails, draw a diagonal stripe with a thin striping gel line, then add iridescent holo powder or iridescent chrome mixed with top coat along the stripe. Cure and check under a lamp - if the stripe looks thin, add a second thin holo layer. Finish with two coats of glossy top coat and cap the free edge.
Editor's noteKeep the stripe width under 1mm for a high end look; wider stripes look like tape.
Watch outSkip full holo coverage; it looks flat and cheaper than a single controlled stripe.
25. Tropical Palm Green Almond With Nude Base And Leaf Outline
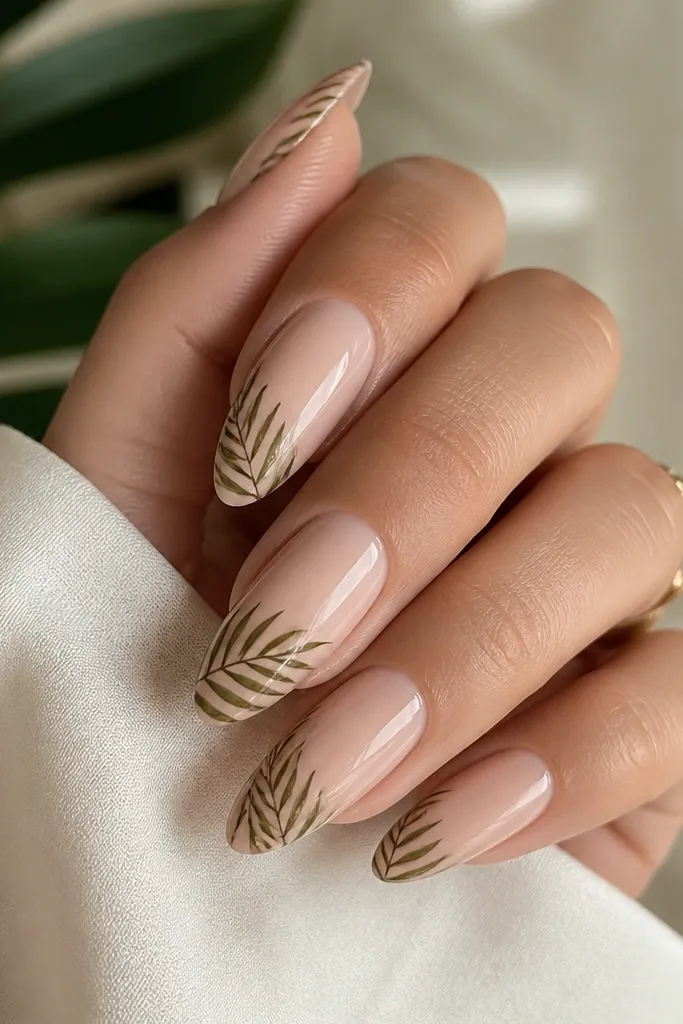
Tropical palm outlines look expensive when the lines are thin and the background stays nude. The nude base makes it wearable with summer dresses and also keeps it from looking like a beach costume. Palm green flatters warm and neutral undertones, and it works on cool skin because the green has enough yellow in it to feel sunny. This set is perfect for vacation and casual parties where you still want your nails to look neat.
Start with a nude sheer base and cure. Add a second thin nude coat for smoothness. Use a fine liner brush to paint a palm leaf outline starting near the mid-nail and curving toward the tip on one sidewall. Add tiny vein lines inside the leaf outline with a slightly darker green. Cure the line art and seal with two top coats, making sure the outline is fully covered and doesn't feel raised.
Editor's noteIf your lines spread, use gel paint with a slightly thicker consistency instead of watery polish.
Watch outDon't fill the leaf shape solid green; filled leaves look heavy and lose the luxury outline effect.