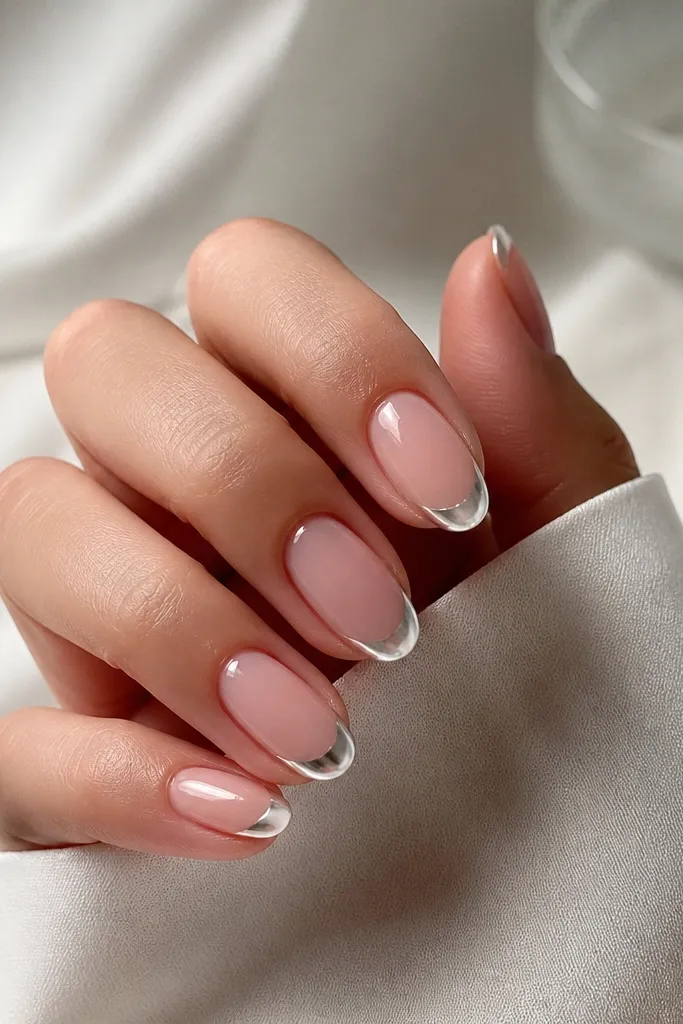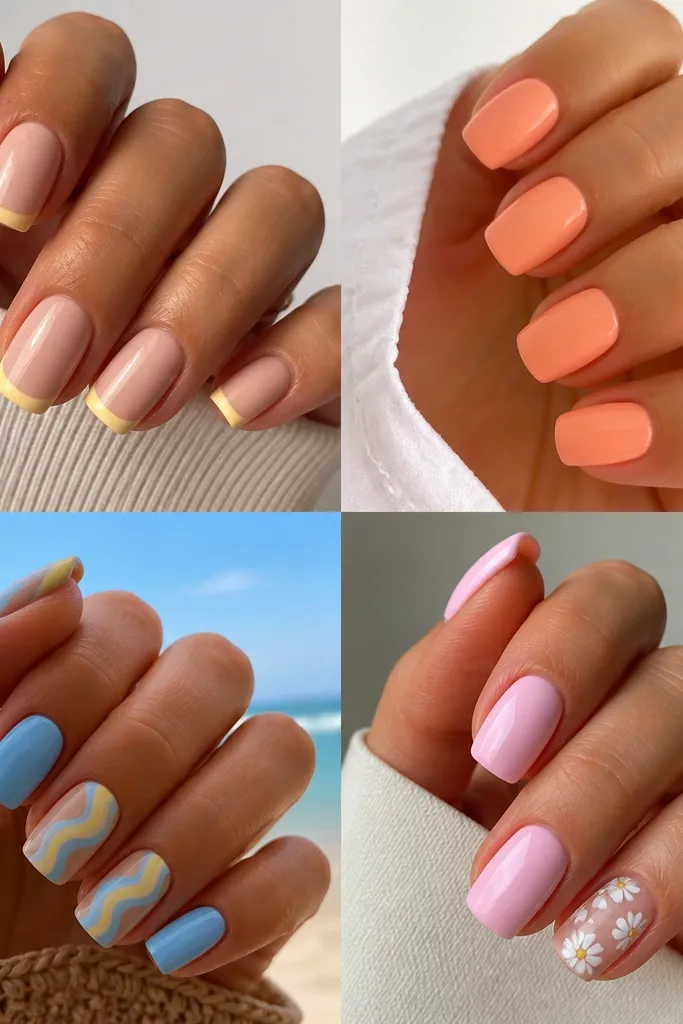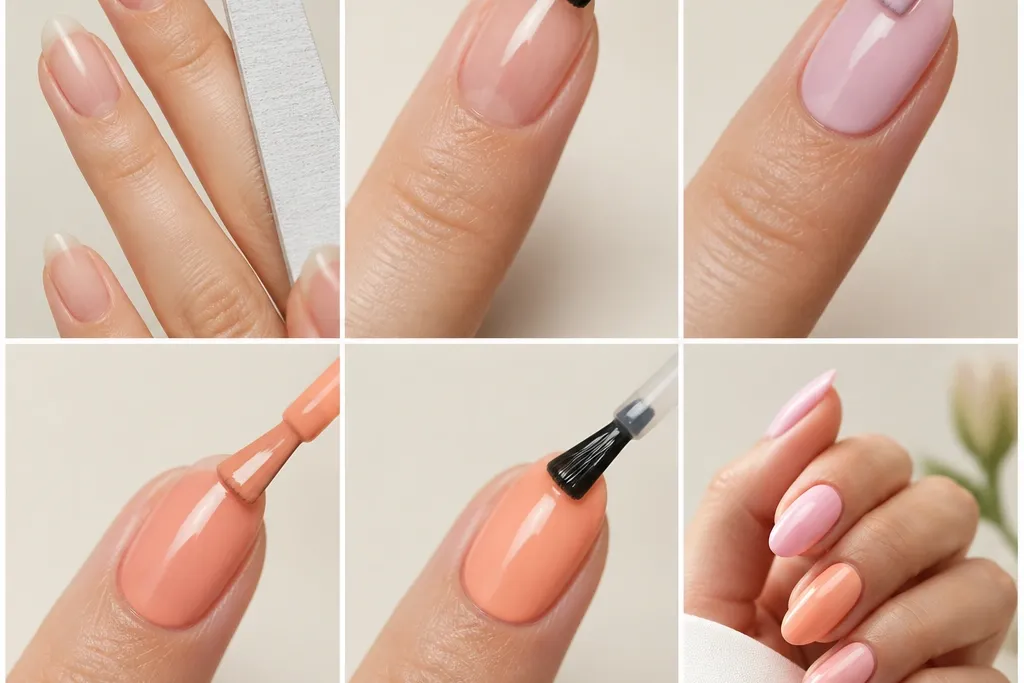
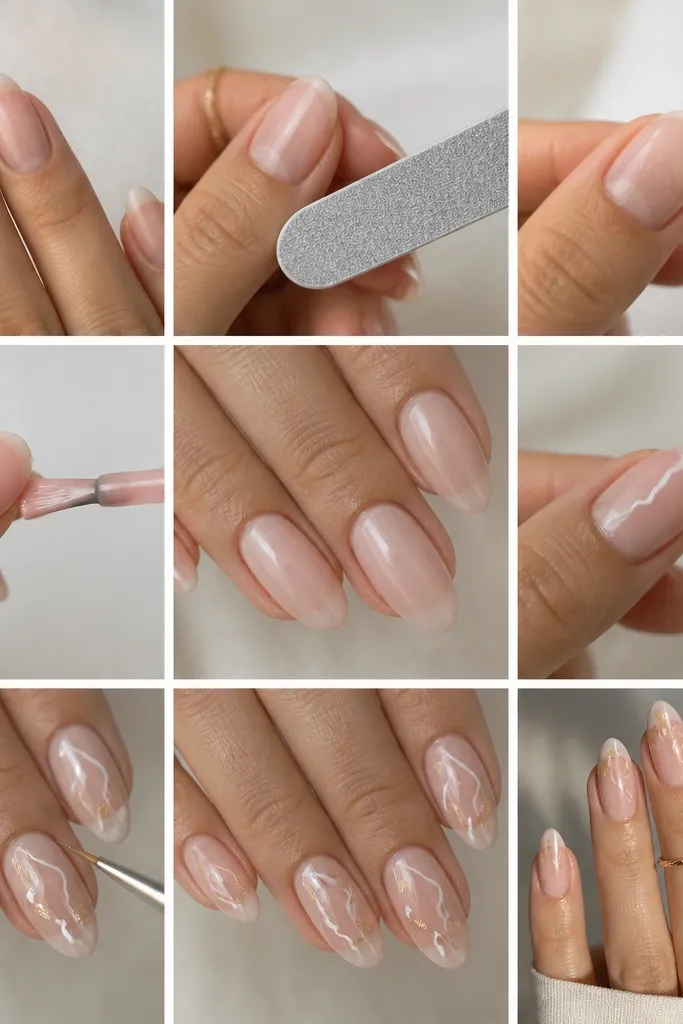
1. Milky Peach Almond With Micro French Edge
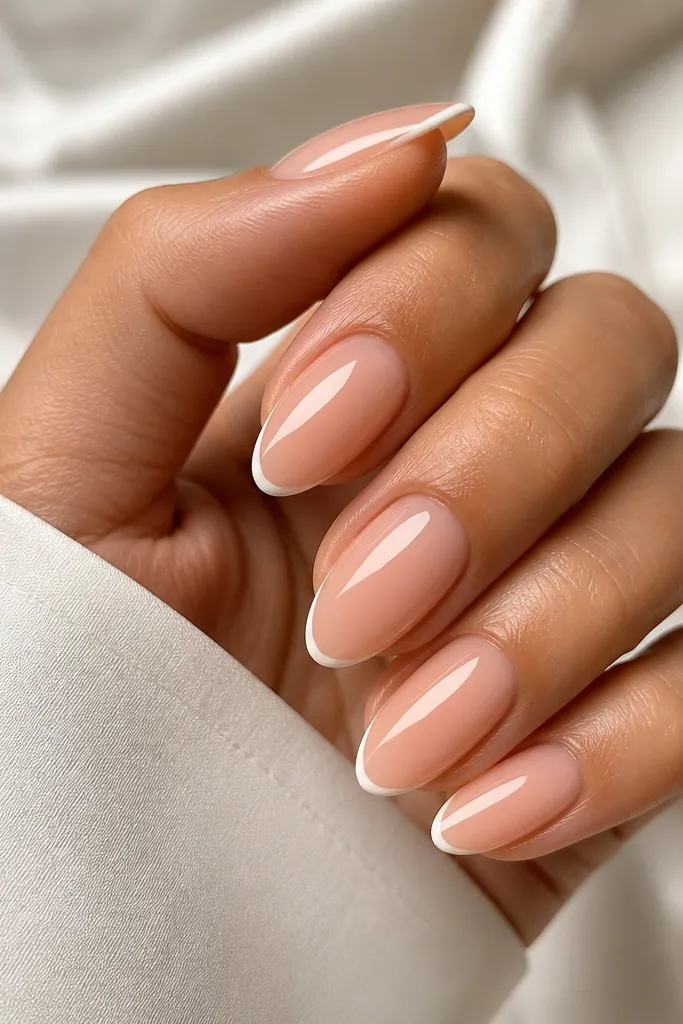
I love this set because it looks fresh even when your hands are bare of rings. Start with a milky peach acrylic that looks like skin, not like paint. The micro French is a thin arc at the tip, so it frames the almond without widening it. This is flattering on short nail beds because the base stays light and the tip line stays narrow. It also looks great on both warm and cool undertones because the peach is muted, not orange.
Start by building a sheer milky peach layer over the nail plate, leaving a tiny amount of natural translucency at the center. Then place a thin white acrylic or gel line right at the free edge, keeping it the same width from center to sides. Cap lightly with a clear layer if you're using acrylic for the French so the line feels smooth. Finally, file the tip to a crisp almond point and buff only the surface, not the edges, before top coat.
Editor's noteUse a striping brush and let the line dry in place - don't drag it across the tip. If your white looks chalky, switch to a gel white liner and cure it under your lamp.
Watch outDon't make the French line thick or it turns "classic" and loses the modern minimalist look.
2. Sheer Pink Nude With One Side Sky-Blue Line
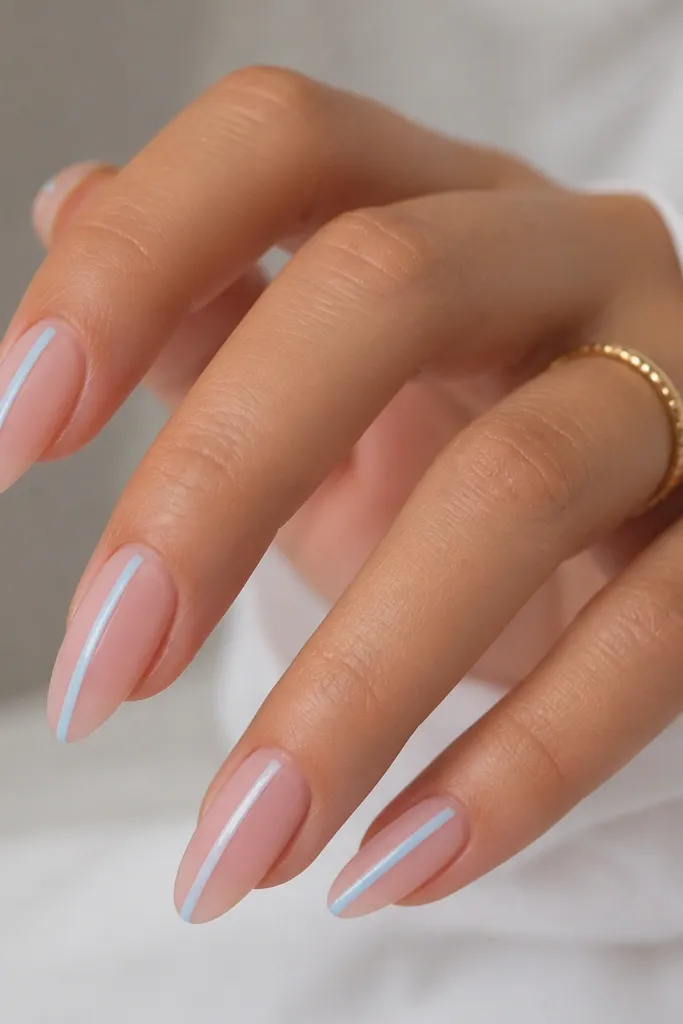
This design gives you that "clean editorial" look without needing tiny details. The sheer pink nude base makes your nails look healthy, and the sky-blue line adds a summer pop that still feels minimal. I place the line slightly off-center so your nail shape stays the star and your fingers look longer. This works especially well if you have shorter nail beds because vertical lines pull the eye upward. Cool undertones look amazing with sky blue, but warm undertones can wear it too when the nude base leans rosy instead of beige.
Start with a sheer pink nude acrylic that's thin enough to show faint nail translucency. Then use a gel liner brush to draw a straight sky-blue line from just under the middle of the nail down toward the tip, leaving a small gap near the cuticle. Cure, then add a second thin pass if the line looks patchy. Finish by top coating and lightly cleaning the edges so the line doesn't flood into the sidewalls.
Editor's noteMask your cuticle edge with a tiny smear of petroleum jelly before painting if you're prone to blue staining. It speeds clean-up and keeps the line sharp.
Watch outAvoid a thick line - wide stripes make the set look juvenile fast.
3. Clear Base With Floating Peach Dot Cluster
Floating dots look playful, but minimalist dots look grown-up. I use a clear or jelly nude base so the dots feel like they're floating above your nail. The peach dots are tiny and clustered near the upper third, which keeps the look balanced and stops it from spreading toward the tip. This is flattering because the open space makes your almond shape read sharper. If you wear gold jewelry, peach dots make your hands look warm and sun-kissed.
Start with a clear acrylic or jelly nude layer, keeping it evenly thin. Then place three micro dots using a dotting tool: one dot near the center, two slightly angled to form a small triangle. Keep the cluster small - about the size of a rice grain. Cure if gel, or seal with a clear acrylic cap if you're working with acrylic. File the surface smooth, then top coat for glass shine.
Editor's noteIf dots smear, dip the dotting tool in cleaner first and wipe it dry - less product means cleaner circles.
Watch outDon't place dots at the tip. It makes the nail look top-heavy.
4. Milky Nude With One Tiny Green Leaf Accent
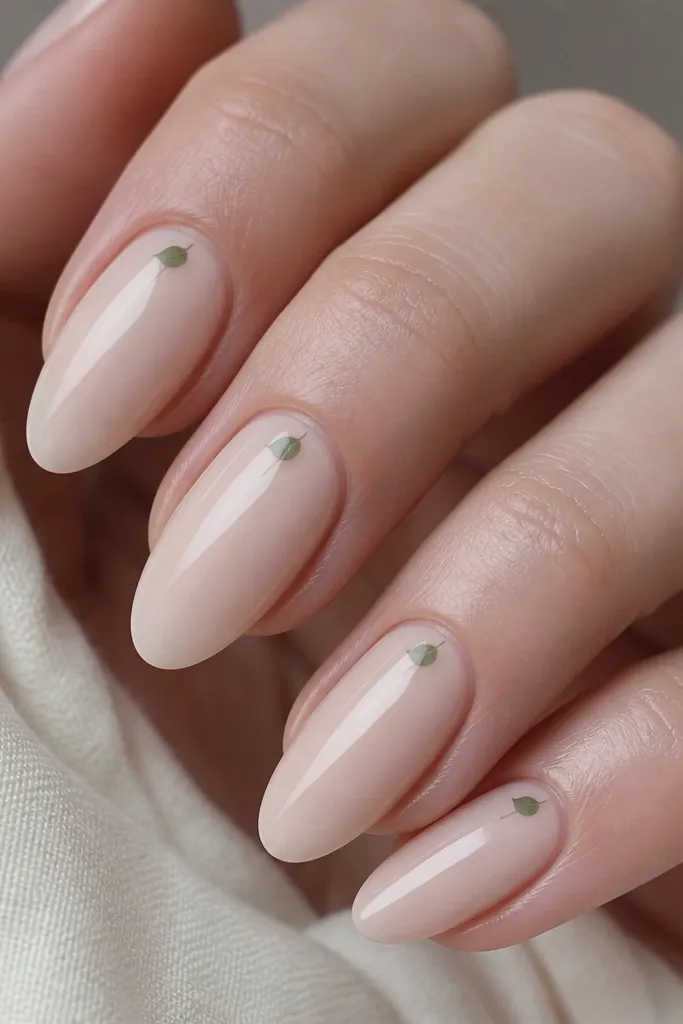
This is my go-to when I want "summer" without beach colors all over. The milky nude base keeps everything calm, and the leaf accent adds a fresh detail that feels intentional. I paint one leaf near the sidewall so it elongates the nail instead of sitting in the center like a sticker. It looks great on medium to deep skin tones because green pops against warm nudes, but it also works on fair skin if the base leans milky pink. This set fits brunch, casual office days, and photos where you want hands to look neat.
Start with a milky nude acrylic that's opaque enough to hide ridges but still soft and light. Then paint a tiny leaf using a fine liner brush: one curved stroke for the main leaf and a thinner line down the center for a vein. Place it on the upper third, slightly off-center toward the side. Let it dry or cure, then cap with clear acrylic or gel and top coat.
Editor's noteUse a darker green for the outline and a lighter green for the fill so it looks dimensional at a glance.
Watch outSkip full leaf clusters. Two details max keeps it minimalist.
5. Soft Coral Sheer With Negative Space Half-Moon
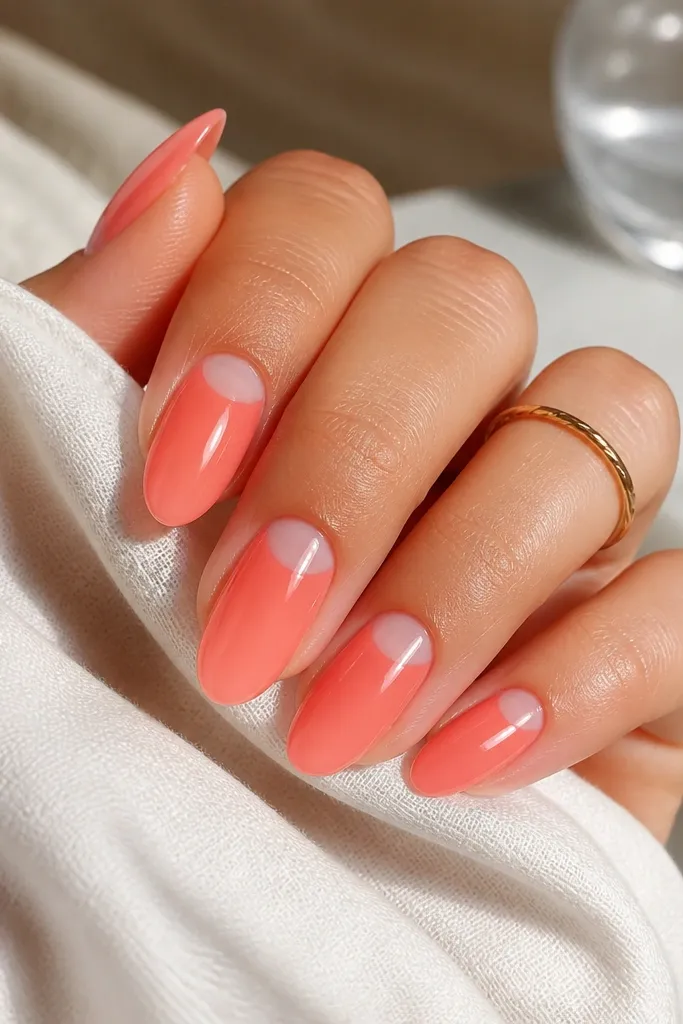
Half-moons look fancy, but they're easy when you keep the fill sheer. The negative space near the cuticle makes your nail bed look longer and cleaner. I use soft coral sheer so you don't get that thick, opaque "painted" look. This design is flattering on hands with visible cuticle lines because the half-moon gives a neat visual break. It also looks great with both silver and gold rings since coral stays neutral-soft.
Start with a sheer coral acrylic or gel that you apply from mid-nail down, leaving the cuticle area bare. Then use a small liner brush to build a clean edge where the coral stops, shaping a half-moon that follows your cuticle curve. Cap with clear to smooth the edge and prevent lifting at the boundary. File the surface flat, then top coat in two thin layers for full shine.
Editor's noteIf your half-moon edge wobbles, wait for it to cure, then file the boundary gently before top coat.
Watch outDon't cover the cuticle area with opaque coral. It kills the negative space effect.
6. White Jelly Base With Barely-There Nude Tips
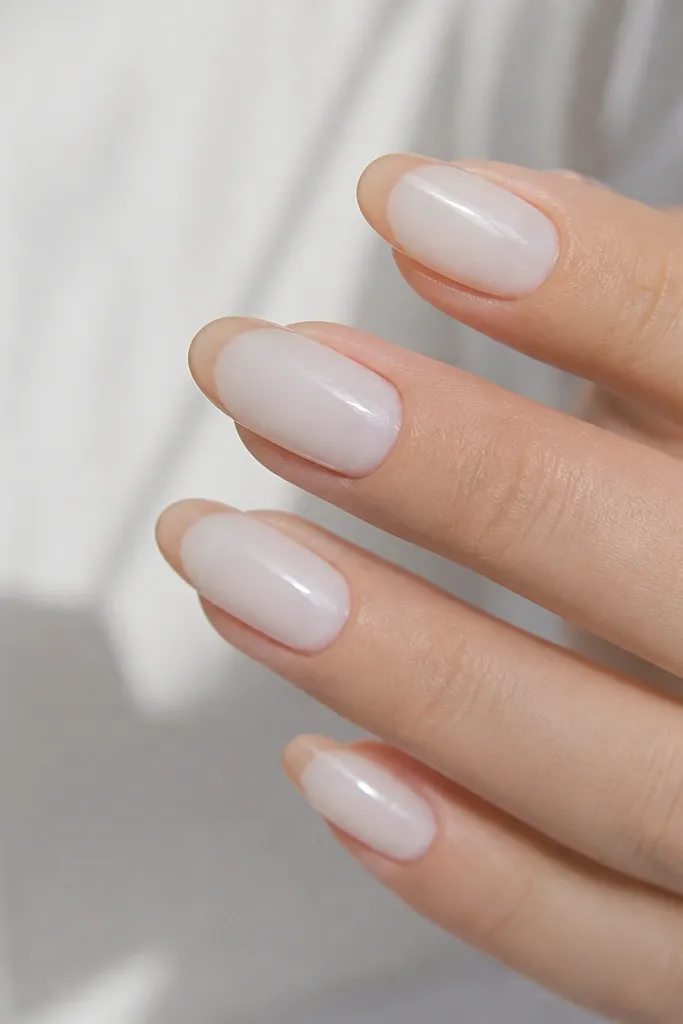
This one looks like a soft summer cloud. The white jelly base gives you that bright, clean feeling, and the nude-tinted tips add dimension without using bold lines. I keep the nude tips narrow so the almond stays slim. It's flattering on most skin tones because white jelly reads light and fresh instead of stark. If you want minimal nails that still photograph well in daylight, this is the set.
Start by building a white jelly acrylic layer that's translucent, not chalky opaque. Then mix a nude tone that matches your natural nail bed - peachy beige for warm, pink-beige for cool - and apply it only to the free edge. Blend the nude into the white with a light buff after curing, then cap with clear acrylic so the blend looks smooth. Finish with top coat and wipe any tacky residue if you used gel.
Editor's noteUse daylight when you blend. Indoor light makes the nude tip look darker than it is.
Watch outAvoid thick nude tips. They make the nail look shorter.
7. Matte Milky Pink With Glossy Single Stripe
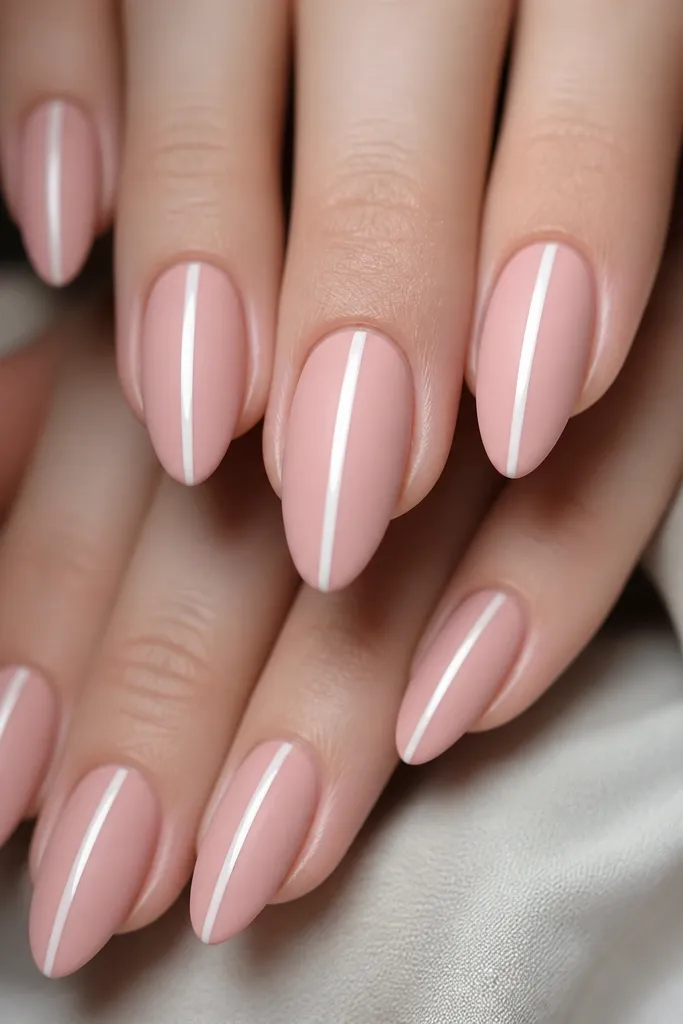
This set plays with texture in a way that still feels minimalist. Matte on the base makes the milky pink look soft and expensive, and the glossy stripe adds a clean highlight that catches the light. I prefer a single stripe down the center because it makes the nail look longer and keeps the design from turning into "pattern nails." This is flattering on hands that have dry skin, since matte hides tiny surface imperfections better than full gloss. Wear it with simple outfits and it still looks styled.
Start with milky pink acrylic or gel and cure fully. Then buff lightly to remove shine, apply matte top coat, and cure or air-dry based on your product. Next, paint a thin glossy stripe using white gel and cure it separately so it stays shiny. Finally, top coat only over the stripe area if your matte top coat covers everything too dull.
Editor's noteIf you mess up the stripe, wipe the gel with cleaner before curing. After curing, you'll have to file.
Watch outDon't apply glossy stripe over matte before it sets. It can smear and look cloudy.
8. Clear Jelly With Micro Gold Foil Speckle
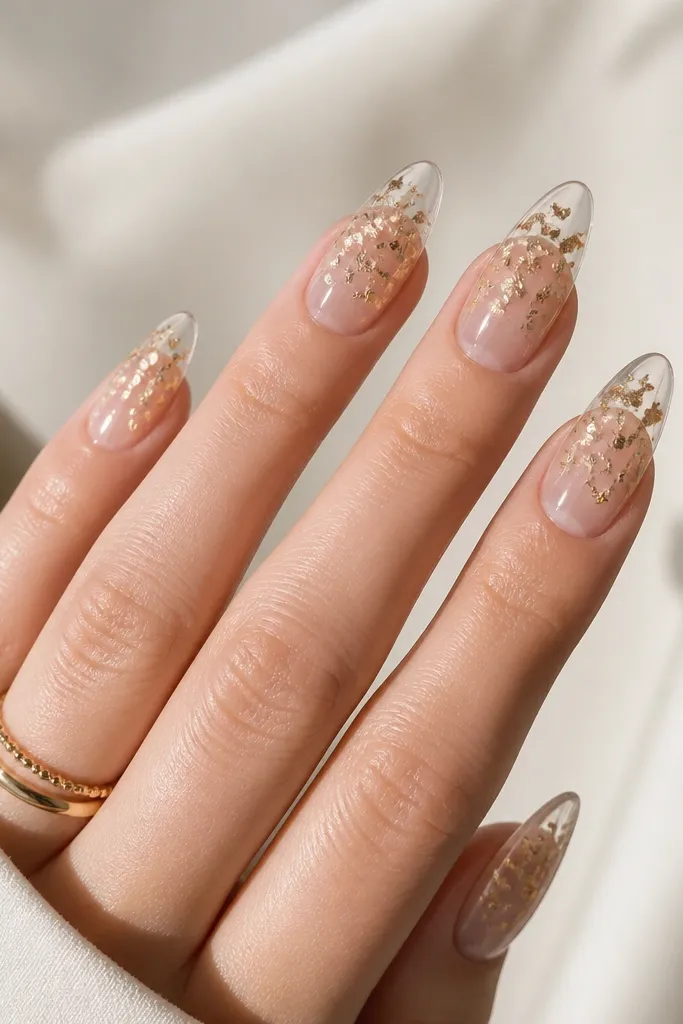
Gold speckles look like sun dust, and minimal ones look intentional. I keep the foil micro - think pinhead bits - and I place them near the upper third so your nails still look clean from a distance. The clear jelly base gives that wet-glass look without heavy color. This is flattering on both fair and deep skin tones because gold reflects warm light and doesn't compete with your skin. It also looks great for summer nights when your outfit has any metallic detail.
Start with a clear jelly acrylic layer, keeping it even and not too thick. Then dab tiny pieces of gold foil onto the upper third using clear gel tack or foil glue. Press lightly with a silicone tool so the foil grips without lifting edges. Cap with clear to lock it in, then file smooth and top coat for full gloss. Keep foil pieces small enough that you don't feel bumps.
Editor's noteUse tweezers with a fine tip. Big foil chunks ruin the minimalist effect.
Watch outAvoid foil near the cuticle line. It can snag and look messy as it grows.
9. Soft Lavender Sheer With One Tiny Dot At Tip
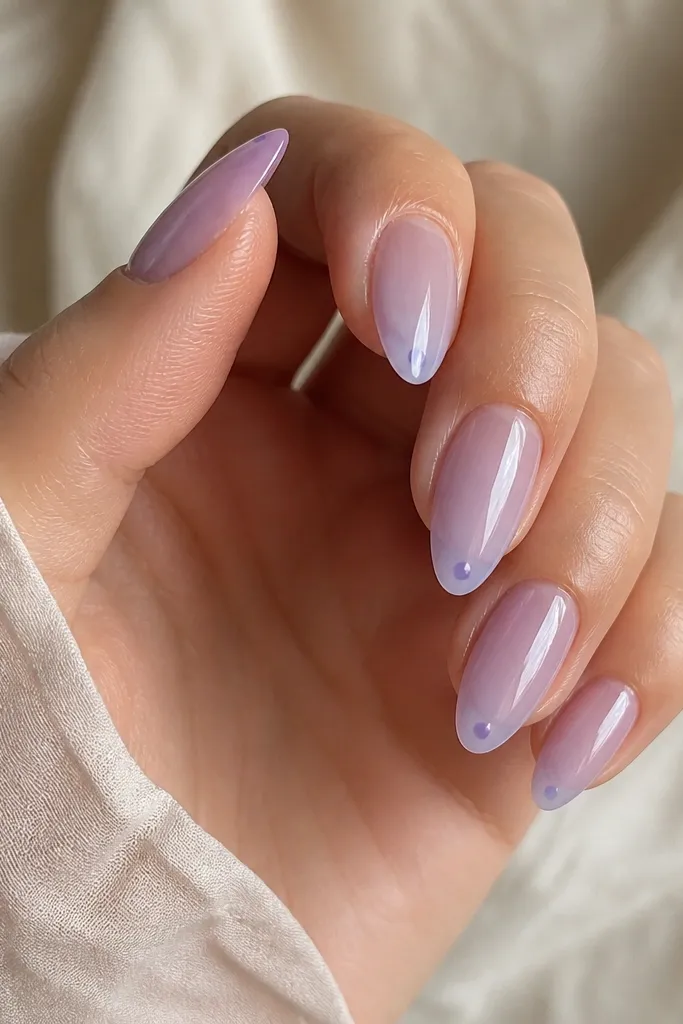
This design is quiet, but it reads summer because lavender feels airy in warm weather. The sheer base keeps it wearable, and the tiny dot at the tip makes the almond point look intentional. I use one dot per nail so the look stays modern minimalist instead of turning into a pattern. It flatters slender nail shapes and also works if your nails are broad because the dot is small and centered. It looks especially good on cool undertones and on anyone who likes purple polish but doesn't want full coverage.
Start with a soft lavender sheer acrylic layer, applying it thin and evenly. Then place a single dot using a slightly deeper lavender shade: keep it about 1/8 of the nail width and center it near the free edge. Cure if gel, then cap lightly so the dot doesn't create a ridge. File and top coat to seal the dot under a smooth surface.
Editor's noteIf your dots look too big, fix it by wiping off and re-adding smaller. Small dots look expensive.
Watch outDon't add extra dots for symmetry. One dot per nail keeps it clean.
10. Peach Nude Almond With Thin White Side Overlay
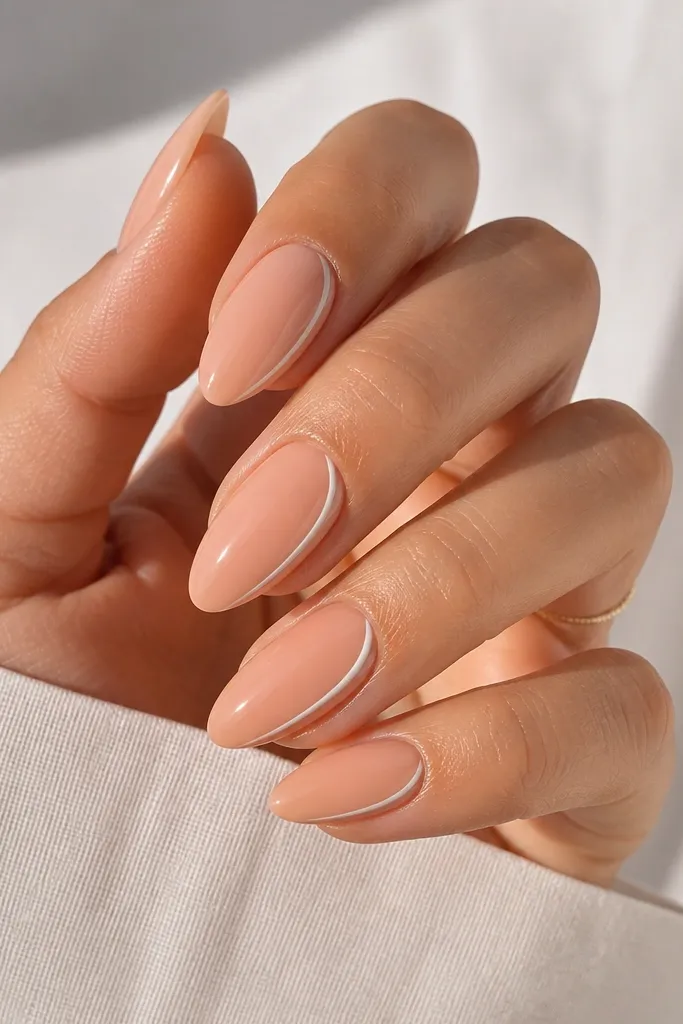
Side overlays are a cheat code for making nails look longer. The peach nude base is flattering and natural, and the thin white line on one side adds definition without heavy art. I keep the line narrow so it looks like a highlight, not a stripe. This works best when your almond shape is already tapered - the line follows the taper and makes it look sharper. It's also a great choice if you want something minimal that still hides small imperfections on the sidewall.
Start by building peach nude acrylic with a smooth apex and thin edges. Then use a striping brush to draw a thin white line along one sidewall, starting around the upper third and ending near the tip. Cure, then add a clear cap so the line stays protected and doesn't catch on fabric. File the top surface flat and top coat for a glass finish.
Editor's noteHold your brush like a pencil and rest your pinky on the table for steadier side lines.
Watch outAvoid lines that touch the cuticle. Leave a tiny gap for a cleaner edge.
11. Milky Nude With One Thin Black Diagonal
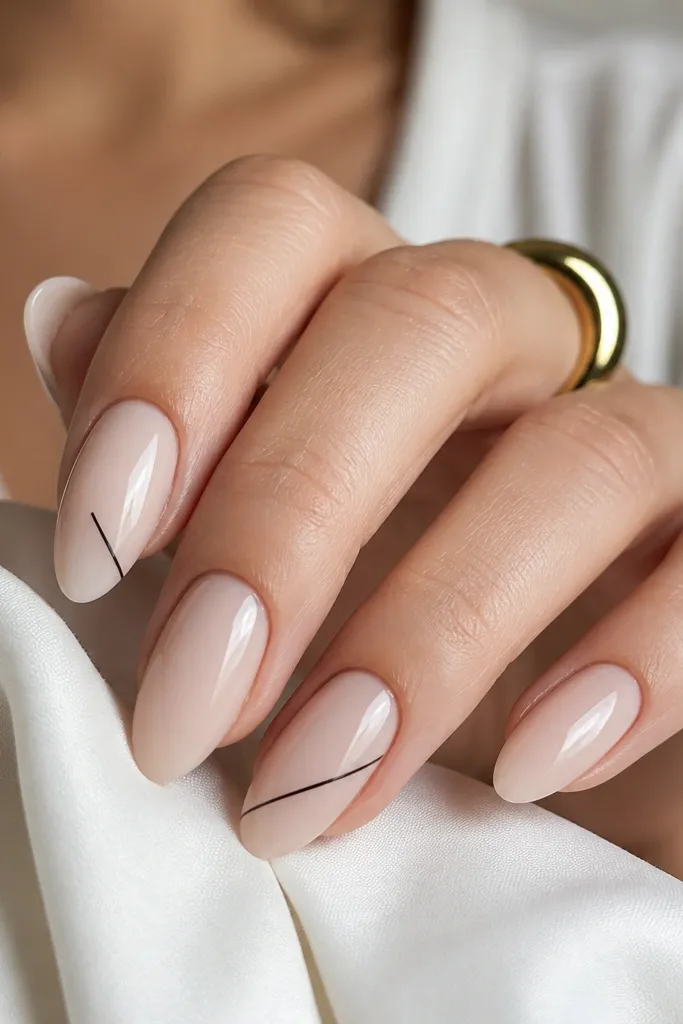
Black sounds intense, but thin diagonal lines on milky nude look very wearable. I like placing the diagonal on alternating nails - for example, index and ring - so your set stays modern minimalist instead of goth. The diagonal line draws the eye and makes the almond look more sculpted. This flatters hands that look better with contrast, like when you wear darker clothing or bold lipstick. It also looks great with both warm and cool skin tones because the base is milky neutral.
Start with a milky nude acrylic layer, smooth and even. Then paint a thin black diagonal line on every other nail using gel liner: start near the upper sidewall and angle down toward the free edge. Keep the line width consistent - thin is the whole point. Cure, cap with clear if needed, then top coat. After curing, lightly file the diagonal edge so it doesn't feel raised.
Editor's noteIf black looks too harsh, soften it with a charcoal gel instead. It still reads modern but less stark.
Watch outDon't put the diagonal on all ten nails. The set stops looking minimalist fast.
12. Sheer Coral With Tiny White Star At Side
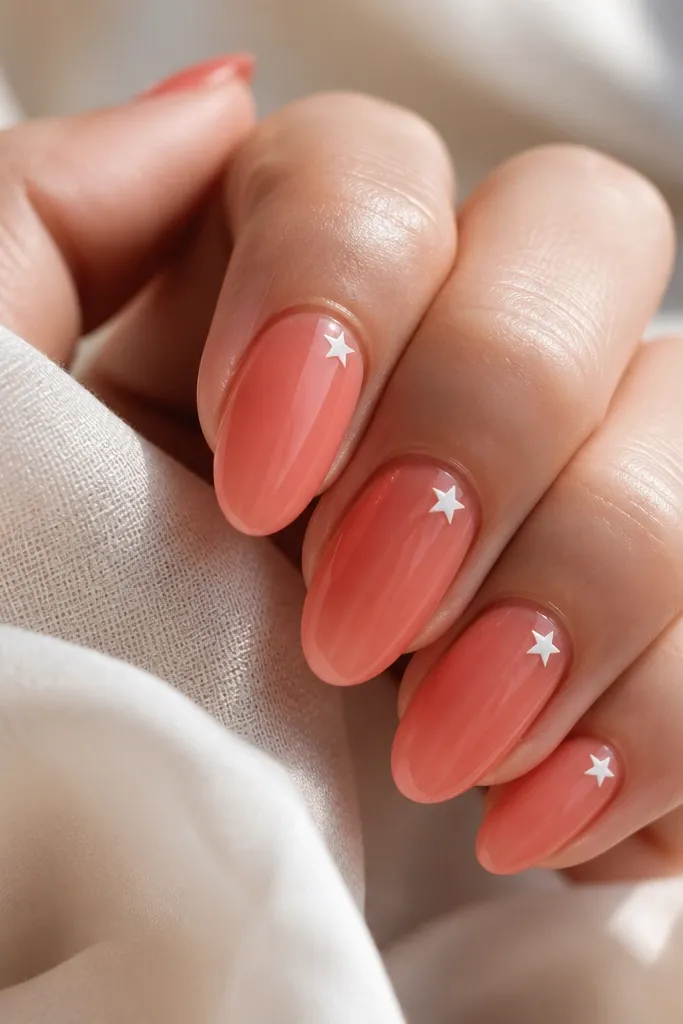
Stars can look childish, but a single tiny star on sheer coral looks like summer sparkle without noise. The sheer coral base keeps everything soft, and the star sits on the side so it elongates rather than centering. I make the star small enough that you notice it up close, not from across the room. This is flattering for hands that look best with warm tones, especially when you wear peachy blush or warm lip colors. It also works for vacation photos because white details pop in sunlight.
Start with a sheer coral acrylic or gel, applied thin and even across all nails. Then use a star dotting stencil or a fine liner brush to paint a tiny white star on the upper third near one sidewall. Cure, then cap with a clear layer so the star is sealed under the surface. File smooth, then top coat in two thin coats for full shine.
Editor's noteIf your star points get lumpy, draw it in two steps: outline first, then fill. It keeps edges crisp.
Watch outAvoid big stars or multiple stars. Minimal means one detail.
13. Jelly Blue With Clear Outline Cuticle Frame
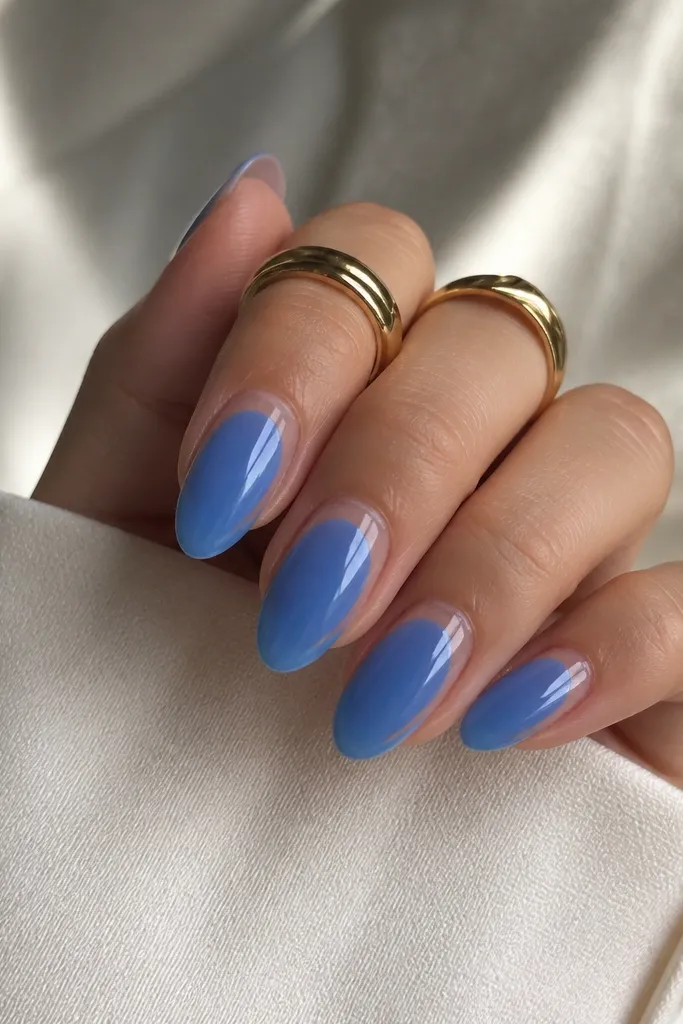
This one is weirdly flattering because it creates structure without looking busy. The jelly blue base is airy and summer-cool, and the clear outline around the cuticle acts like a frame. Your nails look more "finished" because the cuticle area has a crisp design cue. I place the frame only around the upper cuticle curve, not down the sides, so it stays minimalist. It looks great on fair skin with cool undertones, and it also looks good on deeper skin when the jelly blue is slightly teal-leaning.
Start with a jelly blue acrylic layer that's translucent and smooth. Then paint a thin clear gel outline around the cuticle curve using a fine liner brush - think of a soft half-rectangle, not a full border. Cure and keep it super thin so it doesn't create a ridge. Cap with clear acrylic or gel to blend, then top coat for a glass finish. If you feel a bump, lightly buff and re-top coat.
Editor's noteUse a gel with a tacky consistency for the outline so it holds its shape during painting.
Watch outDon't outline down the sidewalls. Full borders make it look like nail art stickers.
14. Nude Base With Two-Color Thin Gradient Tip
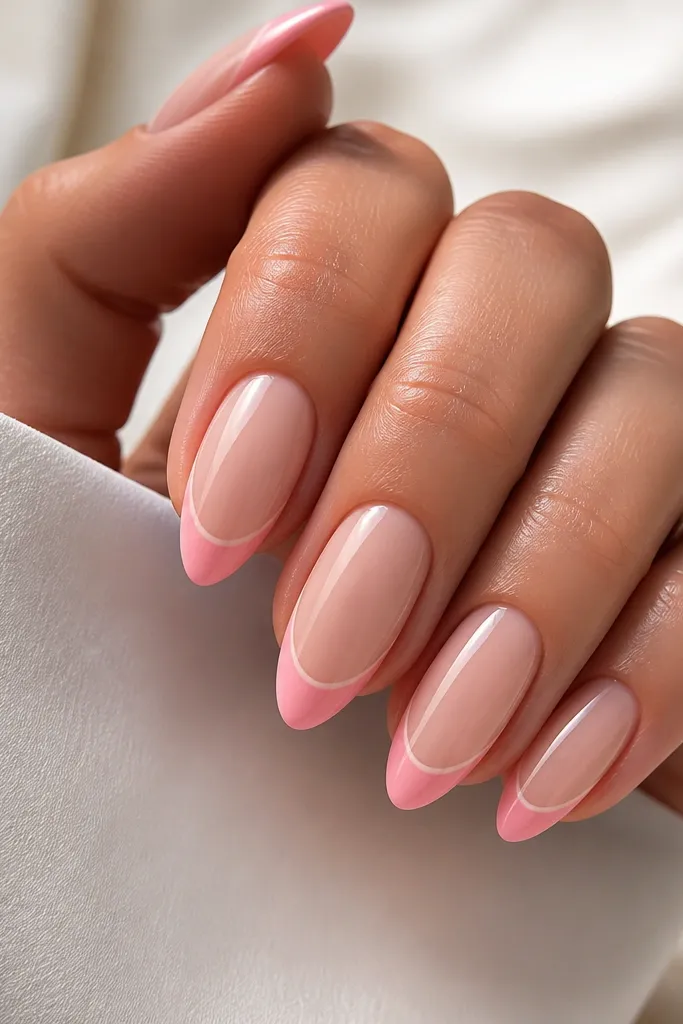
A gradient tip can still be minimalist if it's thin and controlled. I use a nude base that looks like your natural nail color, then I add only a narrow band at the tip where two summer colors blend. The band stays small, so it doesn't look like "ombre French" that covers the whole nail. This flatters any nail bed length because the nude does the elongating work, and the gradient band adds a soft summer glow. It looks especially good with warm skin tones and gold jewelry.
Start with a nude acrylic base, smooth and not too thick. Then mix two gel colors: pale pink and soft peach. Using a makeup sponge or a tiny blending brush, dab the colors onto the free edge only - keep the gradient band about 1 to 1.5 mm tall. Clean up the edges with a brush dipped in cleaner, cure, then cap with clear. File the tip to sharpen the almond point and top coat.
Editor's noteUse thin layers. Thick gradient bands trap bubbles and look bulky.
Watch outDon't blend too far up the nail. Minimalist tips stay close to the edge.
15. Creamy White Almond With One Tiny Rose Quartz Line
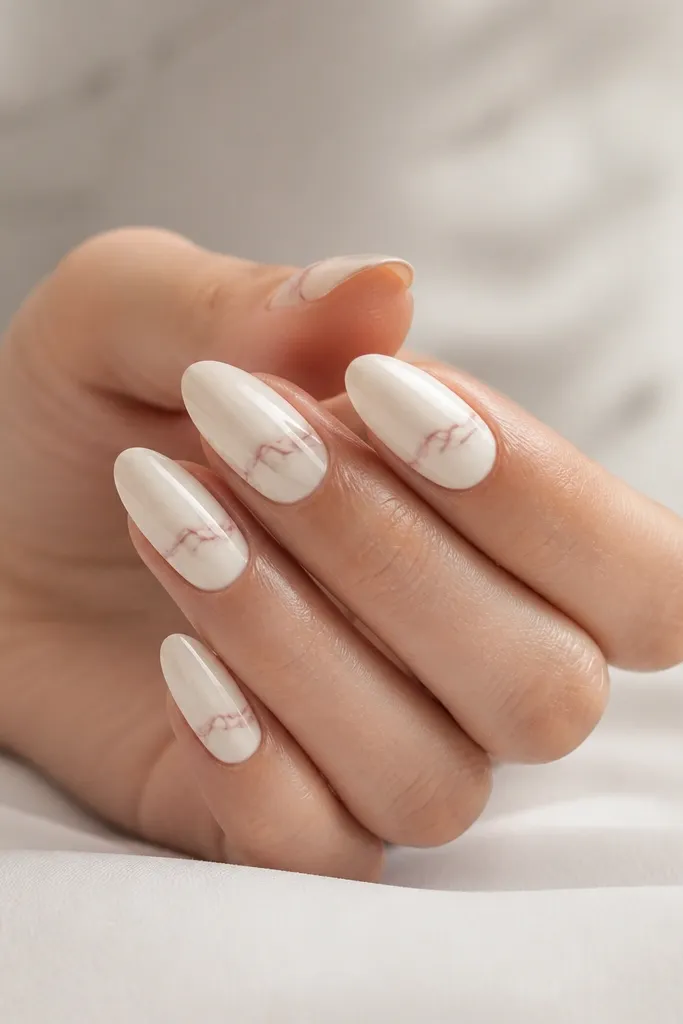
This is my "pretty but not loud" set for summer weddings. Creamy white makes your nails look clean and bright, and the rose quartz line gives a soft hint of color like jewelry. I keep the line thin and veiny so it looks like marble, not like random scribbles. It flatters hands that look good in soft neutrals and it pairs beautifully with silver or rose-gold rings. The key is placing the detail on the upper third so the nail tip stays simple and elegant.
Start with a creamy white acrylic layer, opaque enough to be smooth but not chalky. Then paint a thin rose-pink line with a fine brush - add two or three tiny offshoot strokes to mimic veining. Keep it only on one side or slightly off-center so the nail still looks airy. Cure, cap with clear, and file smooth so the line feels flat. Finish with a high-gloss top coat that doesn't yellow.
Editor's notePractice on a scrap nail tip first. Veining looks best when the line is slightly uneven in width.
Watch outAvoid full marble coverage. That turns it into nail art, not minimalist.