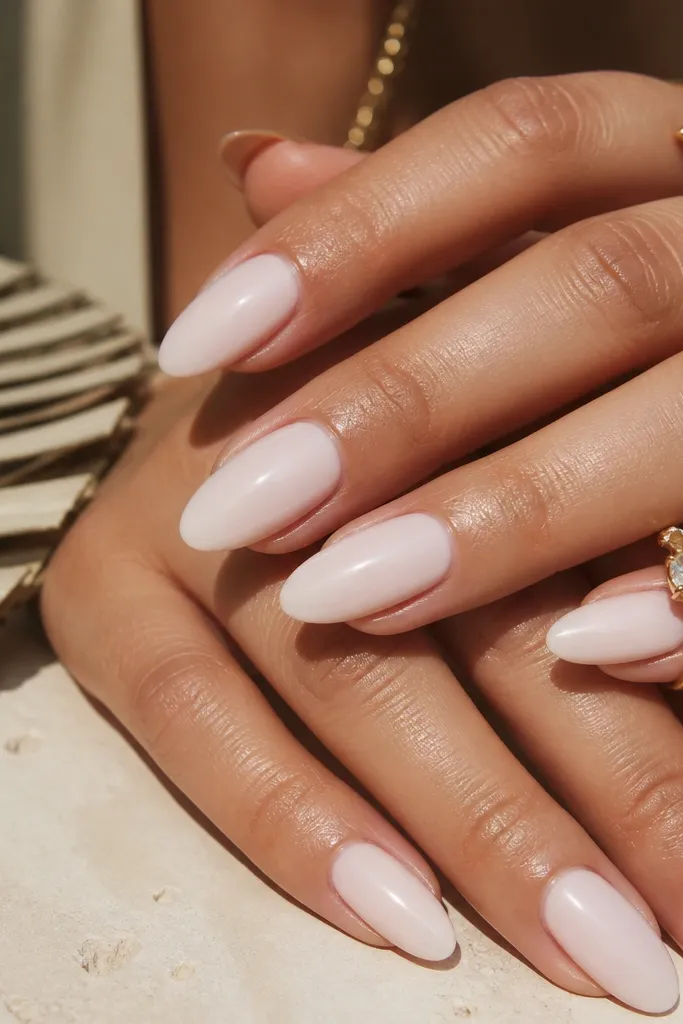
1. Milky Nude Almond with Micro-Glitter Cuticle Glow
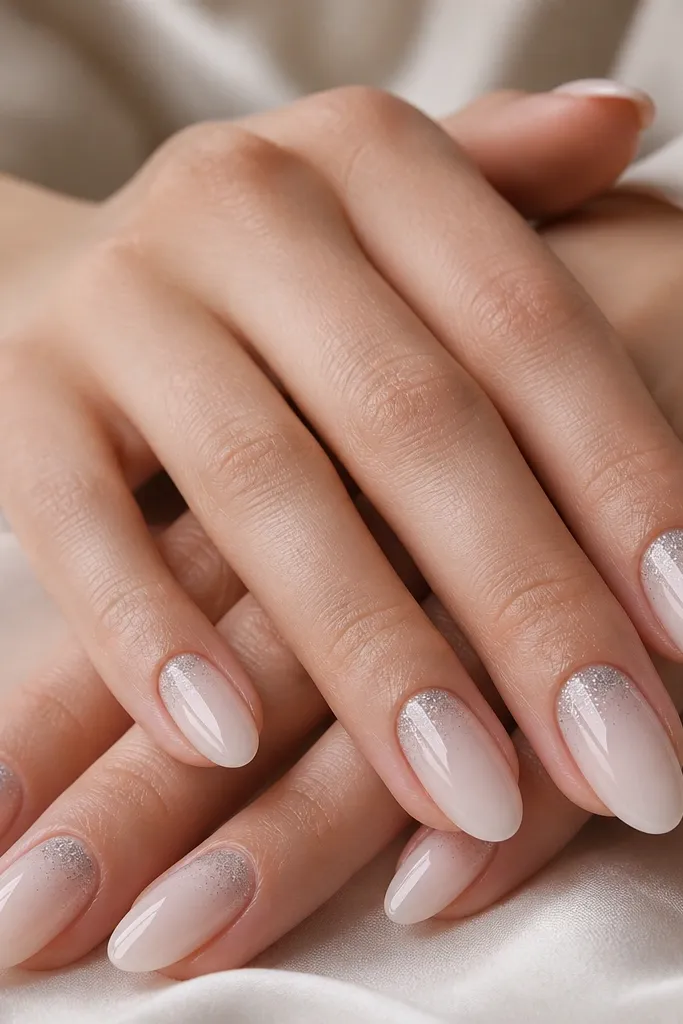
This set is the one I reach for when I want my hands to look expensive but I do not want loud color. The milky nude base is sheer enough to let your natural nail tone show through, which makes the finish look clean instead of heavy. The micro-glitter sits right at the cuticle - that placement makes your nails look longer because your eye tracks upward. It flatters most skin tones, but it especially pops on warm undertones since the nude base has a soft peachy cast.
Start by applying two thin coats of a milky nude gel or builder in a sheer opacity, curing fully between coats. Next, use a fine liner brush to paint a narrow half-moon band along the cuticle and sprinkle micro-glitter only in that zone, then seal lightly with a thin layer of top coat. Add a glossy top coat in two steps, first a medium coat, then a second thicker coat after wiping the inhibition layer if your system requires it. Keep the glitter band about 1 mm tall so it reads like a glow, not a full sparkle strip.
Editor's noteIf your glitter looks gritty, mix it with a clear gel drop before placing it - it spreads smoother and stays more "jewelry-like."
Watch outDo not flood glitter across the whole nail - it turns the look into party confetti instead of expensive shine.
2. French Almond with Peachy Nude Base and Ultra-Thin Rose Tips
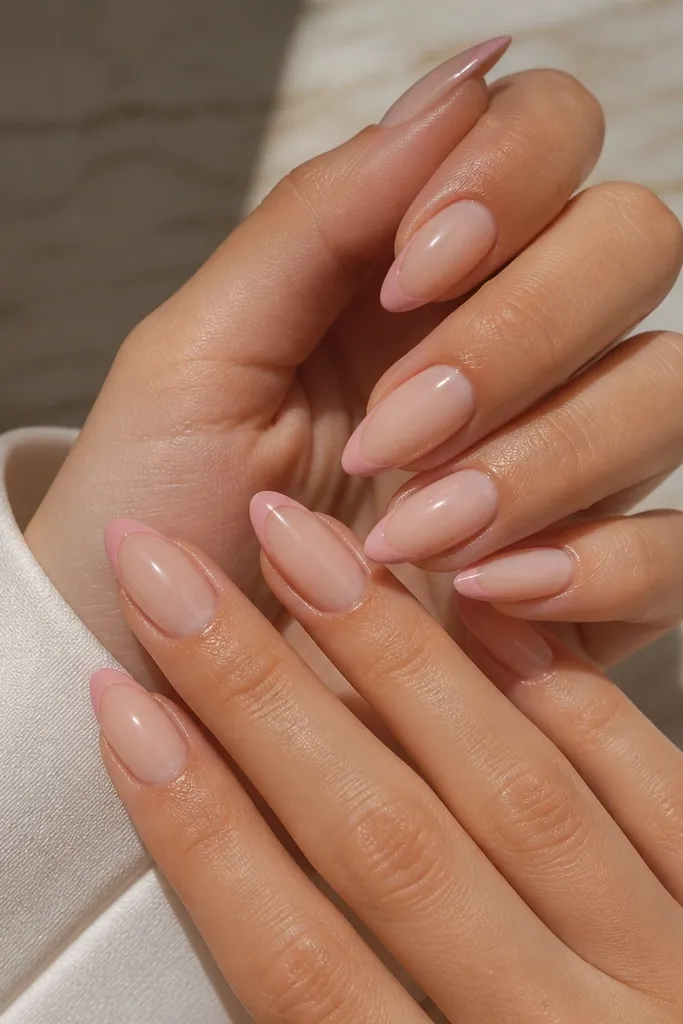
A French tip is expensive-looking when it is thin and clean. This version uses a peachy nude base so the tips look like they belong to your skin, not like a sticker. The rose tip color is warm and romantic, which reads perfect for summer weddings, baby showers, and date nights. It flatters shorter nail beds too, because the thin line keeps visual bulk down while still framing the almond shape.
Apply a sheer peach-nude base in two thin coats, keeping the center slightly thicker for a smooth apex. Place French guides or use a steady hand to paint the rose tips as a very narrow arc - stop the line about 0.5 mm short of the sidewalls. Cure and then clean any edge with a small brush dipped in gel cleanser. Finish with two glossy top coats, pressing the brush along the free edge so the tip looks sealed and crisp.
Editor's noteUse a striping gel or a gel polish with a thin consistency for the tip line; thick polish makes French look rounded and cheap.
Watch outDo not make the French line wide - thick tips make almond look chunky and older.
3. Iced Champagne Chrome Almond with Sheer Nude Undercurrent
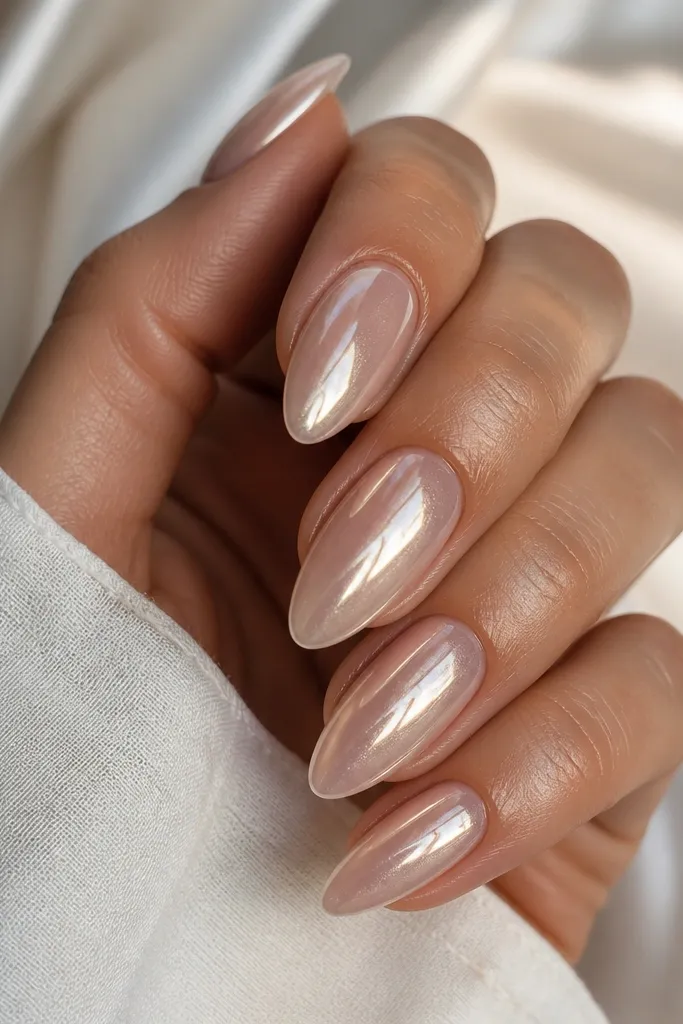
Chrome looks expensive when it is not too yellow and when it has a soft gradient. This iced champagne tone reads cooler, almost pearly, which keeps it from turning brassy. The sheer nude underlayer gives depth so it does not look flat like metallic paint. It looks great on fair to medium skin tones, especially when you wear gold or champagne jewelry because the undertones match.
Start with a sheer nude gel base and cure it hard. Apply a chrome gel or tacky base only where you want the shine, then rub iced champagne chrome powder in small circles, focusing more near the center. When you buff off extra powder, you should still see a gentle fade toward the cuticle. Seal with a chrome-safe top coat in a thin first layer, then a second layer for full gloss without dulling the reflection.
Editor's notePress the chrome powder in with a firm applicator sponge, not a fluffy brush; firmness gives you that mirror-like finish.
Watch outDo not use a regular thick top coat right away - it can mute chrome and make it look like cheap metallic dust.
4. Sun-Kissed Coral Almond with Glossy Jelly Depth
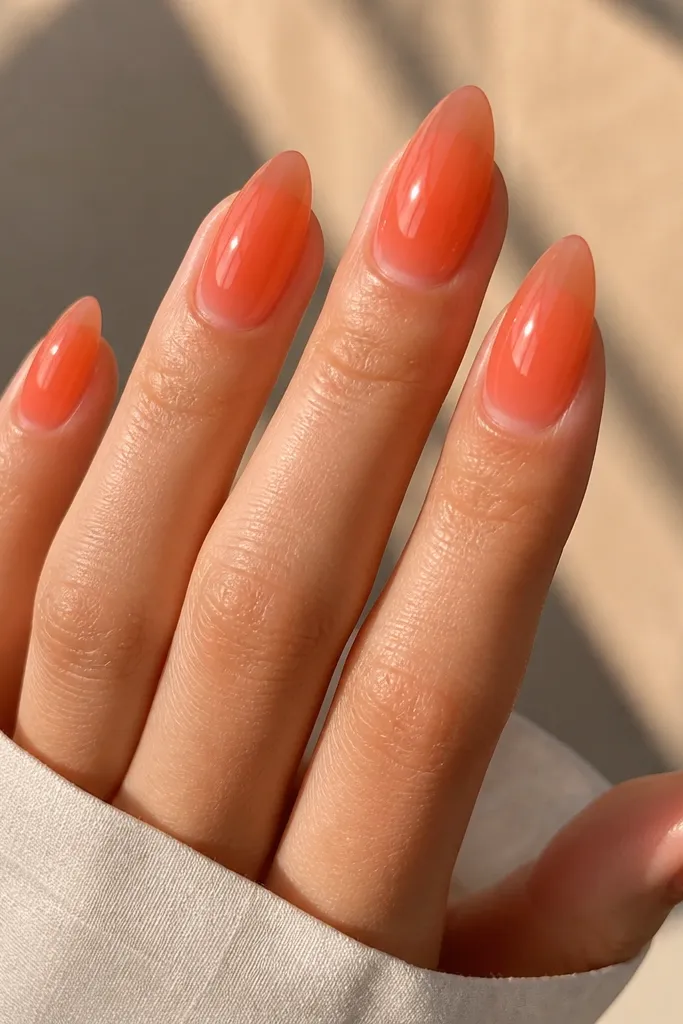
Jelly polish looks like a salon set because it has depth - you can see it like stained glass. Coral in this jelly style is summer without being neon, so it works for everyday and still looks "put together." The translucency makes the almond shape look longer because the sides stay light. It flatters both cool and warm undertones; on cooler skin it adds a healthy blush, and on warm skin it brightens your hands.
Use a coral jelly gel that is semi-sheer and apply one thin coat, cure, then add a second coat with slightly more saturation through the center. Keep the color away from the cuticle by about 0.5 mm to avoid flooding. For extra depth, add a third micro-layer only in the center and cure again. Finish with a high-gloss top coat that is slightly thicker on the apex so the surface looks smooth and domed.
Editor's noteIf your jelly is streaky, wipe the brush on the inside of the bottle neck before applying - it reduces thick ridges.
Watch outDo not go opaque in one coat - opaque coral loses the "expensive glass" look.
5. Sea Glass Almond with Blue-Green Shimmer and Clear Edge
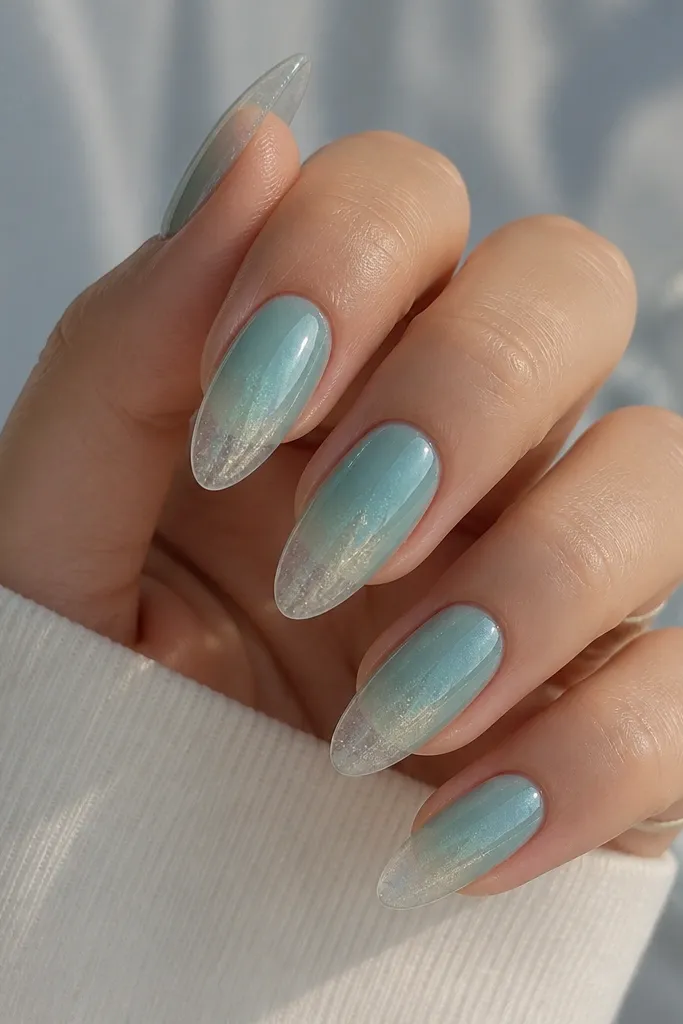
Sea glass nails look expensive because the color is soft, not flat. The key is the clear frosted edge - it mimics how real sea glass is lighter at the rim. Blue-green shimmer adds movement when you move your hands, which reads high-end in photos. This set looks amazing on all skin tones, and it is especially flattering if you wear silver jewelry because it echoes cooler metals.
Start with a pale blue-green base, applied in two thin coats. When you reach the tip, leave a small clear gap - about 1.5 mm from the free edge - and blend the shimmer so it is denser near the tip. Add shimmer gel only on the outer third and cure. Seal with a glossy top coat; for the clearest frosted effect, use a top coat that stays glassy rather than rubbery.
Editor's noteKeep the clear edge consistent across all nails - uneven gaps make it look accidental, not styled.
Watch outDo not add heavy glitter chunks - sea glass should be fine and frosted, not sparkly and chunky.
6. Buttercream Almond with White Milk Marble Swipe
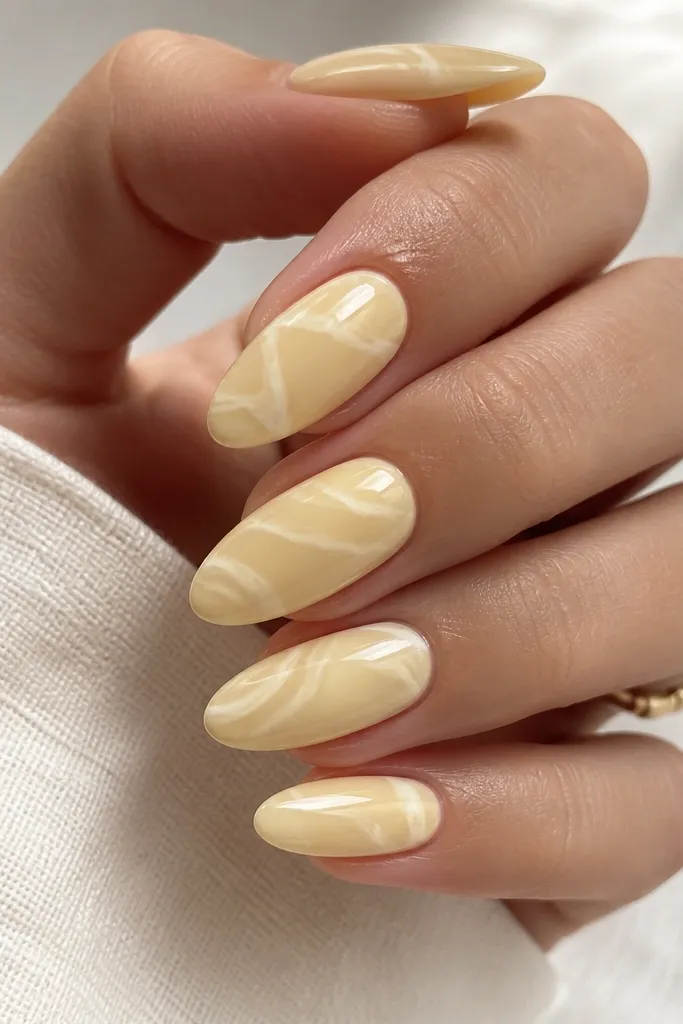
This is my summer "dessert nails" set that still reads expensive. The buttercream base looks warm and flattering, and the white marble swipe is minimal enough to feel designer instead of chaotic. Marble works because the white streaks create contrast while the base stays uniform. It looks especially good on medium skin tones because the yellow has enough warmth to brighten without washing you out.
Apply a buttercream nude base in two coats, keeping it sheer enough that the nail underneath does not look patchy. Use a thin striping brush with white gel polish to make one diagonal swipe across each nail - keep it to one main streak, not multiple. Lightly drag the brush to feather the edges so it looks like marble, then cure. Finish with glossy top coat and make sure the white lines are sealed so they do not catch on fabric.
Editor's notePractice the swipe on a paper towel first; marble looks natural when the motion is confident and fast.
Watch outDo not add black or gray veins - they make buttercream marble look like nail art from a decade ago.
7. Chocolate Truffle Almond with Tan Micro-Foil Specks
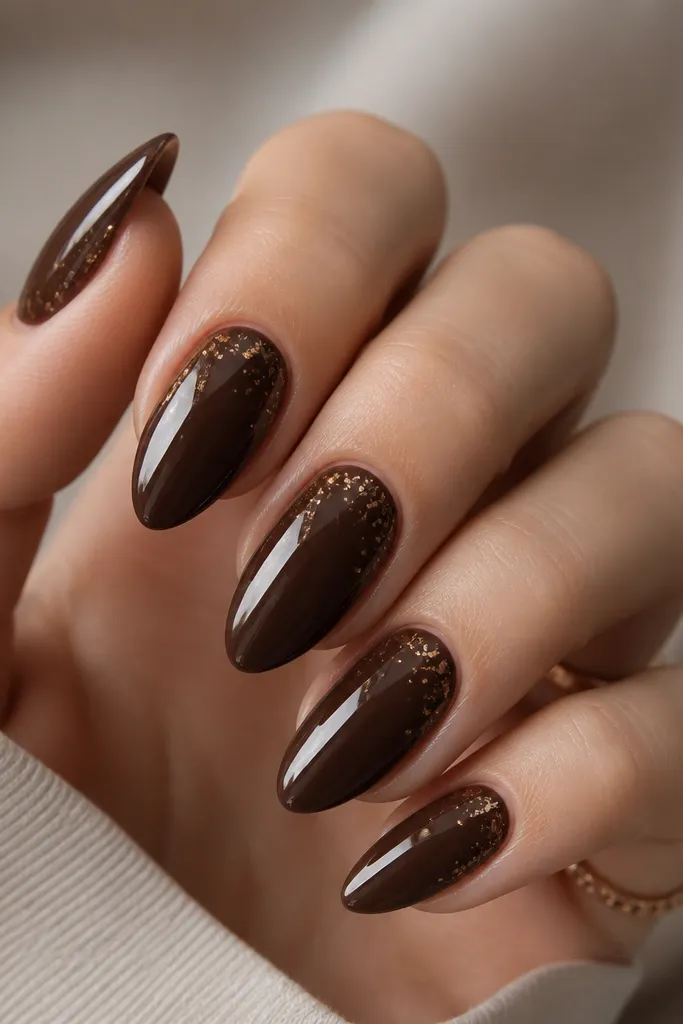
This is for the summer nights when you want something rich but still fresh. Chocolate truffle reads expensive because the brown is glossy and dimensional, and the micro-foil specks feel like sun catching dust on silk. The specks near the cuticle elongate the nail and draw the eye upward. It looks great on deep skin tones and also on fair skin if you keep the foil tan-gold rather than bright yellow.
Start with a chocolate brown gel in two thin coats, curing fully. Add a very light layer of clear gel only near the cuticle and sprinkle tan micro-foil - tap off extra so it stays sparse. Repeat foil placement on the mid-nail for balance, then cure. Seal with a glossy top coat, and when it cures, file lightly at the edges so the foil does not lift.
Editor's noteUse foil bits that are smaller than a grain of rice; large chunks look heavy and cheap on almond.
Watch outDo not cover the whole nail with foil - sparse specks are what make it look like jewelry.
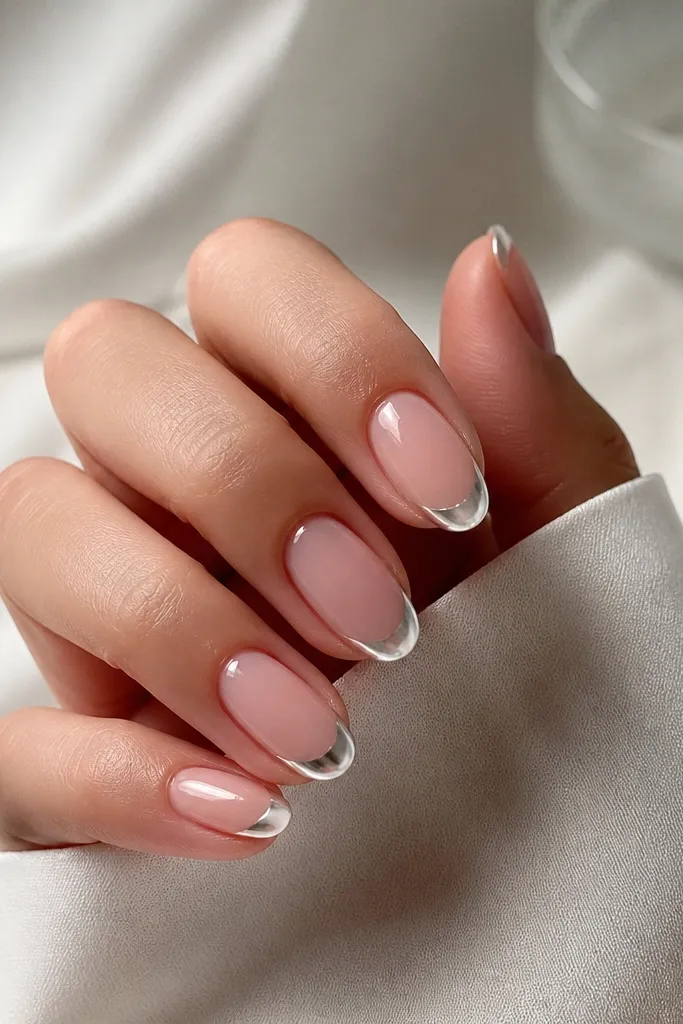
8. White Iced Almond with Silver Aurora Chrome Tips
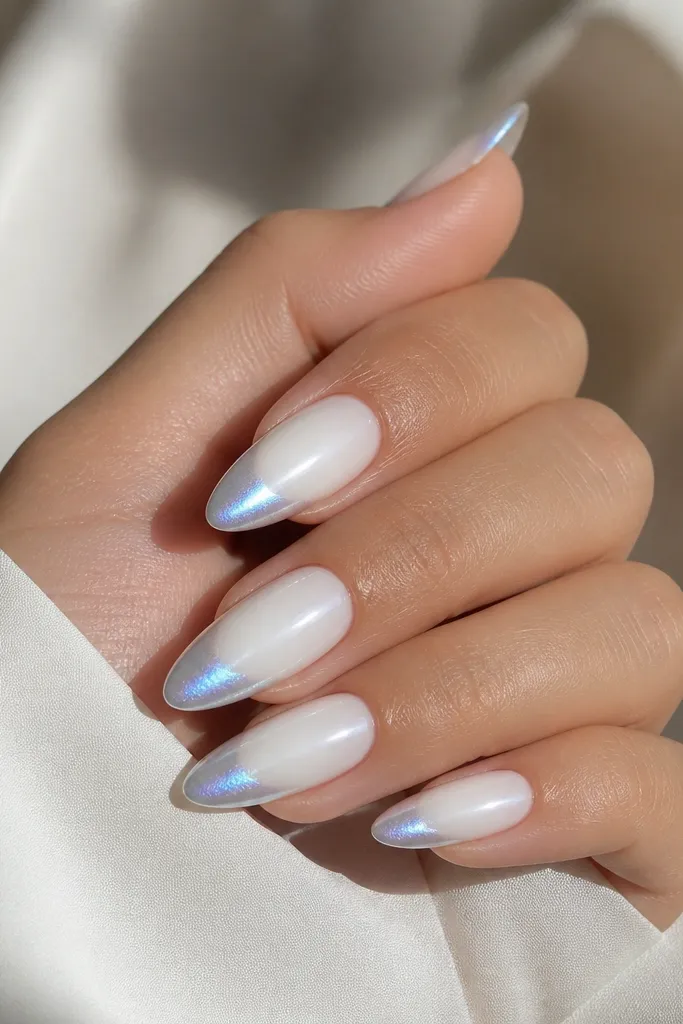
White nails look expensive when they are milky, not stark, and when the chrome is only on the tips. This design gives you a crisp summer vibe that still feels elevated because the aurora chrome shifts color as you move. It flatters cool undertones and makes hands look bright without needing a tan. For photos, it is insanely photogenic because the chrome catches flash and daylight.
Apply a milky white gel in two coats, keeping the first coat thin for even coverage. For the tips, use a chrome gel and blend it from the outer third inward, then apply silver aurora chrome powder. Buff gently so you get a smooth gradient, not a harsh line. Seal with a chrome-safe top coat and then a second glossy coat around the free edge for a fully sealed look.
Editor's noteIf your white looks streaky, cure between coats and do a third ultra-thin coat only where you see nail show-through.
Watch outDo not make the chrome coverage too high up the nail - it should feel like a tip detail, not a full metallic nail.
9. Lavender Milk Almond with Thin Purple Halo Line
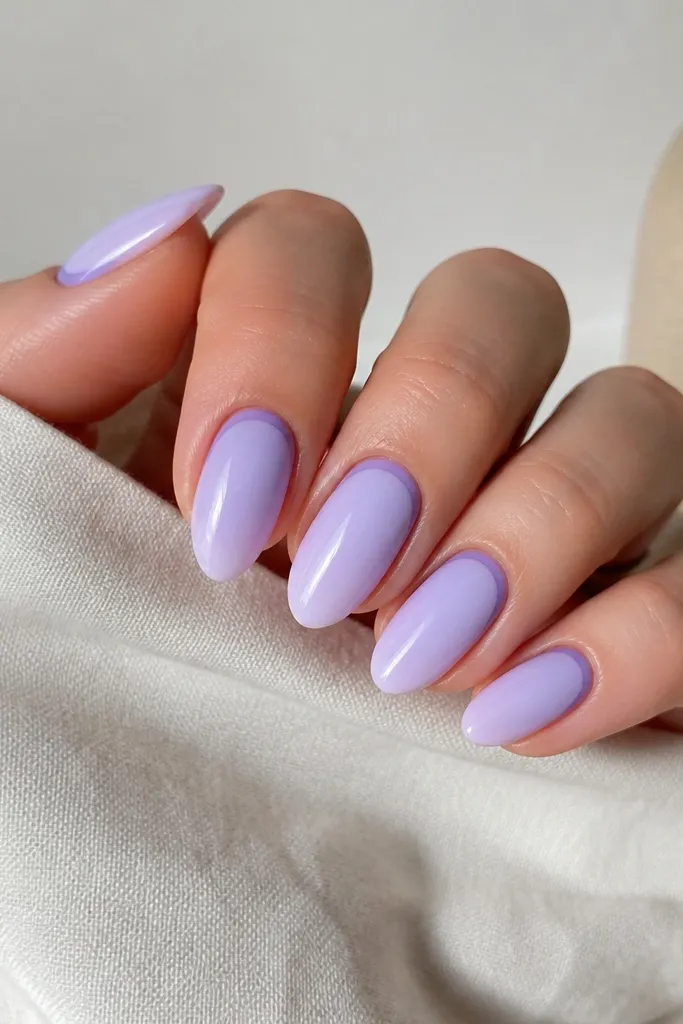
Lavender milk is one of those shades that looks soft and pricey because it has blur-like opacity. The thin halo line turns it into a design without adding clutter. I like placing the line around the cuticle because it makes the nail bed look longer and frames your nail like a cut gem. This works on fair to deep skin tones; on deeper tones, the lavender still shows clearly if you use a milky base instead of translucent polish.
Start with a lavender milky gel in two coats until it looks opaque but still soft. With a fine liner brush, paint a thin line following the cuticle curve using a deeper purple gel. Keep the line about 0.75 mm tall and leave a little space between the line and the side walls. Cure and finish with a thick glossy top coat, then clean the underside edge so the cuticle area looks crisp.
Editor's noteUse a liner brush that is actually narrow; wide brushes make halo lines look like messy cuticle stains.
Watch outDo not thicken the halo line - fat rings make it look like a nail sticker.
10. Tangerine Sorbet Almond with White "C" Micro Tips
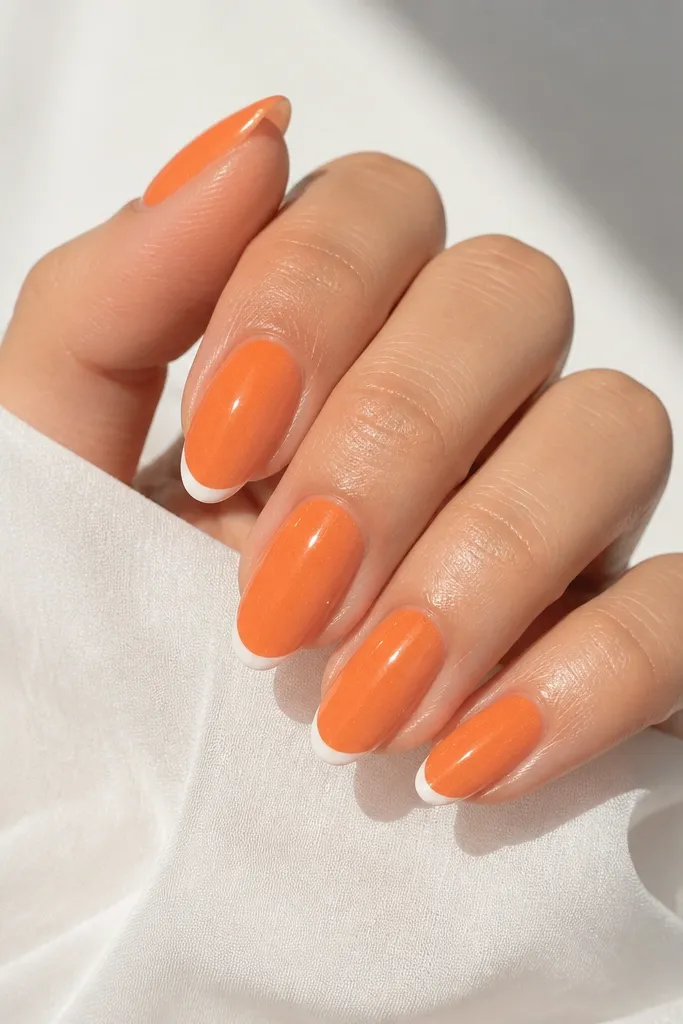
This is playful summer that still looks polished because the white detail is tiny. The micro "C" tips create the look of a French without the full line, which makes the nail feel light and modern. Tangerine sorbet is flattering because it warms the skin and makes your hands look like you spent time outside. It is also great if you want something different from pink and coral but still seasonal.
Paint tangerine sorbet gel in two sheer coats, building color evenly without flooding cuticles. Use a dotting tool or liner brush to place a small white "C" at the tip - the curve should sit on the free edge and leave the center clear. Cure each nail, then add a glossy top coat that covers the white shapes fully so they do not chip. For the most expensive look, keep the "C" shapes the same size across all nails.
Editor's noteIf the white looks uneven, dip the brush lightly in gel cleanser before picking up polish; it makes the edge cleaner.
Watch outDo not make the white moons too big - oversized tips look like beginner nail art.
11. Nude Almond with Espresso Half-Moon Negative Space
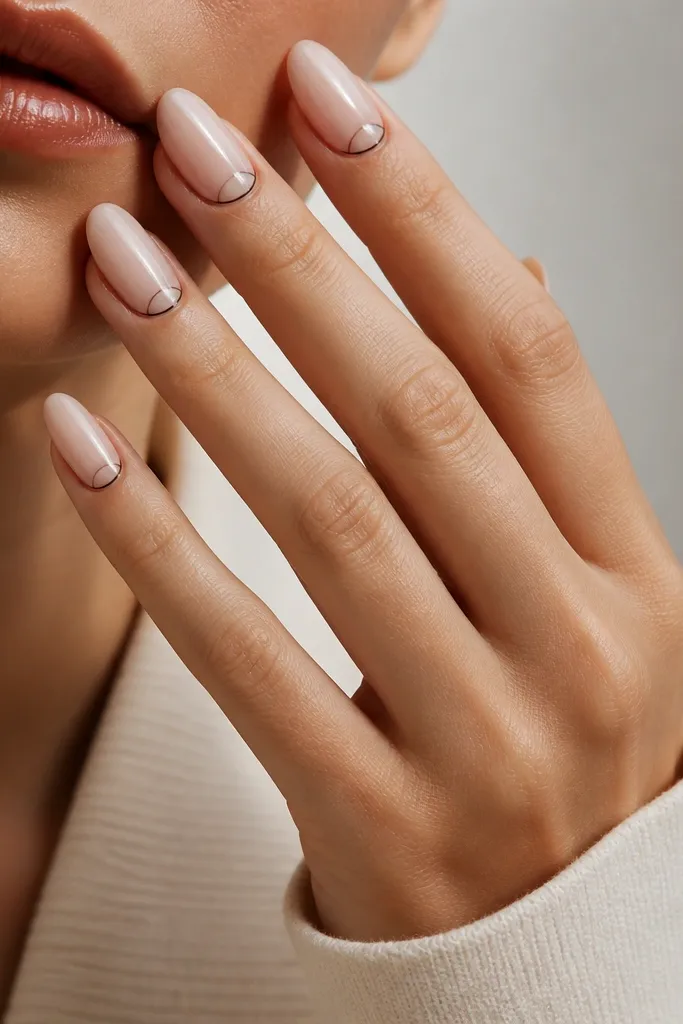
Negative space reads expensive when it is intentional and framed, not random. This set uses a sheer nude base so the nail looks clean and healthy, while the espresso half-moon gives depth at the cuticle. The negative space makes your nail bed look longer, which is a big part of that summer "done" feeling. It flatters everyone because nude adapts to your skin tone, and espresso adds contrast without going neon.
Apply a sheer nude gel in two thin coats and cure. Leave the cuticle bare by applying gel only from about 0.5 mm below the cuticle line, then use a fine liner brush to paint an espresso half-moon around the exposed area. Keep the brown outline thin and symmetrical on every nail. Cure and top coat with two glossy layers, paying extra attention to the outline edges so they do not snag.
Editor's noteIf your nude base pools at the cuticle, wipe the brush on a lint-free wipe before applying - the line stays crisp.
Watch outDo not cover the negative space with opaque nude - you lose the high-end contrast.
12. Sea Salt White Almond with Peach Micro-Foil Fade
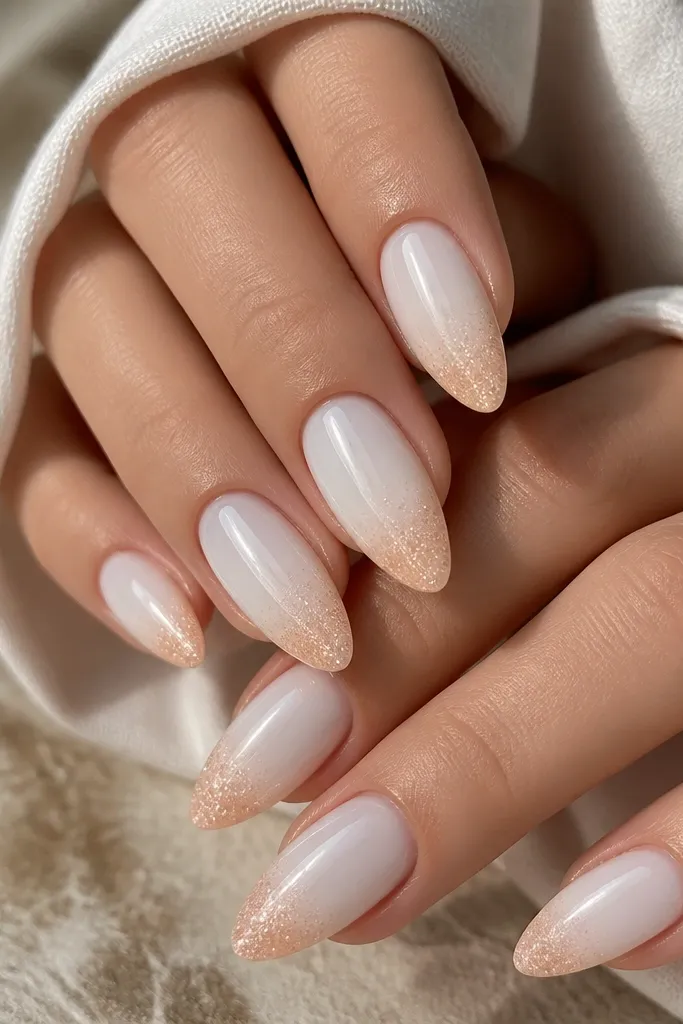
Sea-salt white is the summer white that looks expensive because it has a slight softness instead of looking harsh. The peach micro-foil fade gives a warm glow at the tips, like the sun hitting your swimsuit. It flatters fair and medium skin tones because the white brightens and the peach adds warmth. On deeper skin, it still works if the base is opaque enough to look milky, not see-through.
Apply a sea-salt white gel in two coats, curing between. For the tip fade, put a thin layer of clear gel on the outer third and tap in peach micro-foil, then blend it slightly with your finger-gloved applicator. Cure and brush off any loose foil. Seal with glossy top coat, and if you want extra smoothness, do one extra thin top coat after the first cures.
Editor's noteUse micro-foil that is flatter and finer; it lays smoother and avoids bumps that ruin almond shine.
Watch outDo not use chunky glitter - it makes the fade look textured and cheap.
13. Olive Leaf Almond with Gold Leaf Accent Stripe
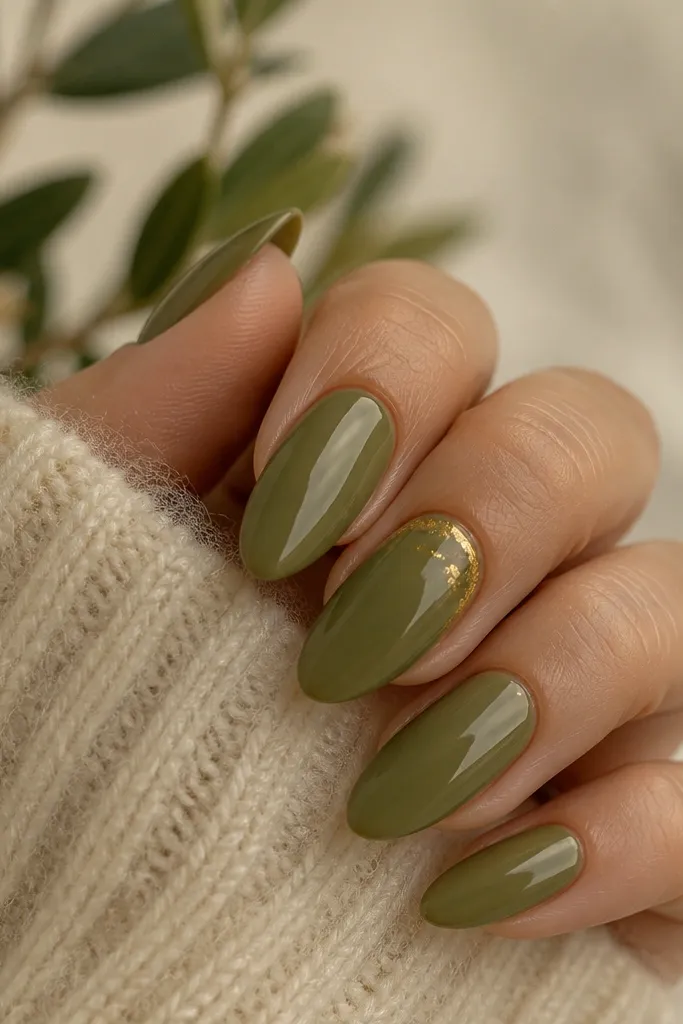
Olive nails look expensive in summer because they feel grown-up and different from the usual pinks. The gold leaf stripe near the cuticle adds warmth and makes the nail look like it has a designer detail. I like doing it on one or two nails because too much gold leaf makes it look costume-y. This set looks great with gold rings and tan skin, and it flatters medium to deep skin tones especially well.
Paint all nails olive green in two thin coats, making sure the color is even and not patchy. Choose one accent nail per hand and apply a small strip of clear gel about 2 to 3 mm tall along the cuticle curve. Press gold leaf onto the strip, then tap off loose pieces and cure. Finish every nail with glossy top coat, keeping the gold leaf sealed but not flooded to avoid lifting.
Editor's noteGold leaf sticks better when the clear gel tack is right - cure too early and it won't grab, cure too late and it smears.
Watch outDo not cover every nail in gold leaf - one stripe is what keeps it expensive-looking.
14. Rose Quartz Almond with Clear Pink Jelly Veins
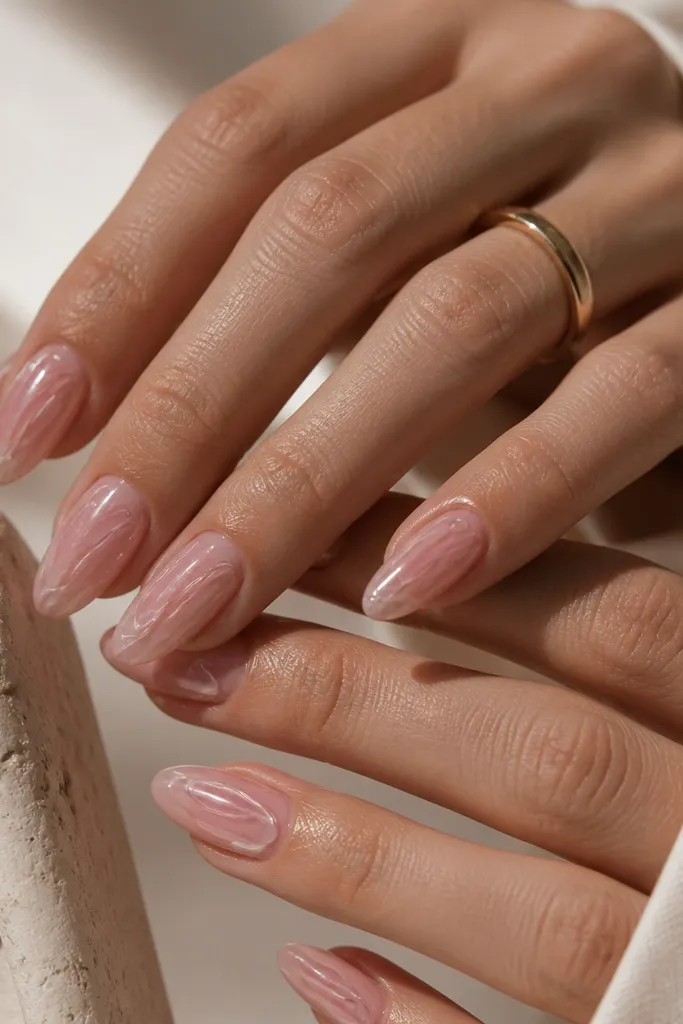
Rose quartz is a summer staple when you do it like stained glass, not like chunky crystals. The base stays translucent, and the veins are made from clear pink gel so they sit on top like light. That layered look reads expensive because it has dimension and movement as you tilt your hands. It flatters fair, neutral, and warm skin tones; the pink stays soft and does not overpower your undertone.
Start with a sheer rose quartz pink gel in two coats until it looks evenly translucent. Use a liner brush to draw thin vein lines with a clear pink gel - do not fill the entire nail, just map a few main veins. Cure, then add a second thin layer of clear pink only on the thickest vein segments for depth. Finish with a glossy top coat that fully seals the edges and makes the veins look like they are under glass.
Editor's noteKeep veins irregular but spaced - even spacing makes it look like a pattern instead of natural stone.
Watch outDo not use opaque pink for veins - it turns the stone effect flat and cartoony.
15. Hot Pink Gloss Almond with Negative Space Side Cut
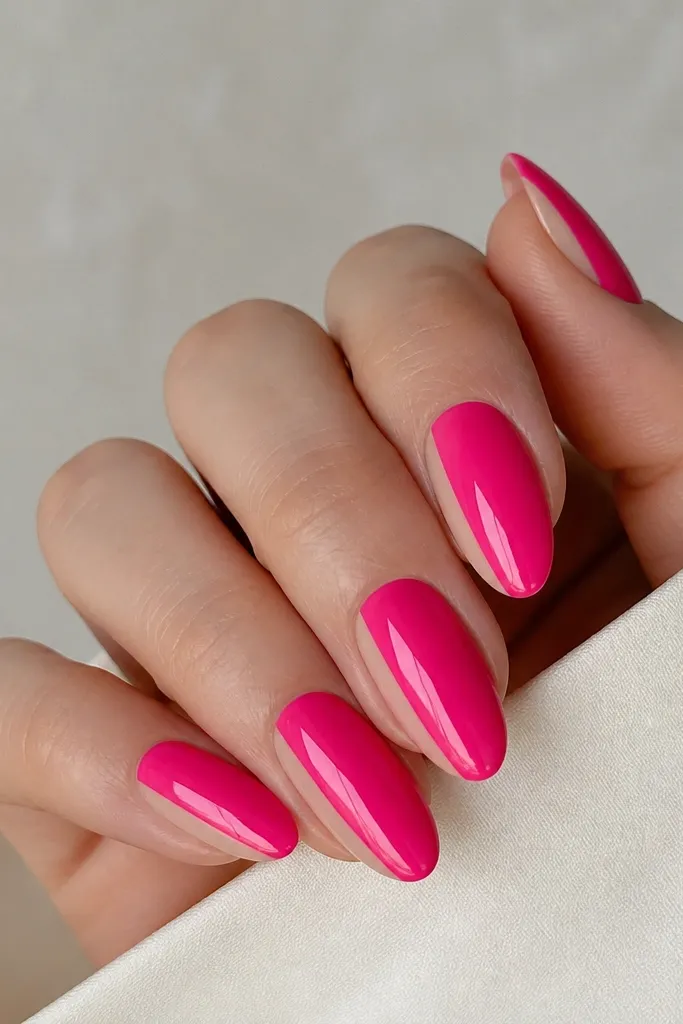
Hot pink can read cheap if it is fully opaque and covers every inch. This version looks expensive because the negative space side cut breaks up the color and makes the nail look longer and more architectural. The glossy finish keeps it looking fresh for summer, and the bare strip makes the shape look sharper. It suits people who like bold color but want their manicure to still look sleek in professional settings.
Apply hot pink gel in two thin coats, leaving one narrow side strip bare. Use a striping tape or a thin brush to define the negative strip - keep it about 1 mm wide. Cure each layer, then remove tape carefully if you used it. Finish with two glossy top coats, and cap the free edge so the negative strip edges stay smooth.
Editor's noteIf you get gel creep into the negative space, clean with a small brush dipped in cleanser before curing - once cured, it looks messy.
Watch outDo not make the negative strip too wide - it should sharpen, not shrink the pink.
16. Champagne Nude Almond with Pearl Dot Cluster
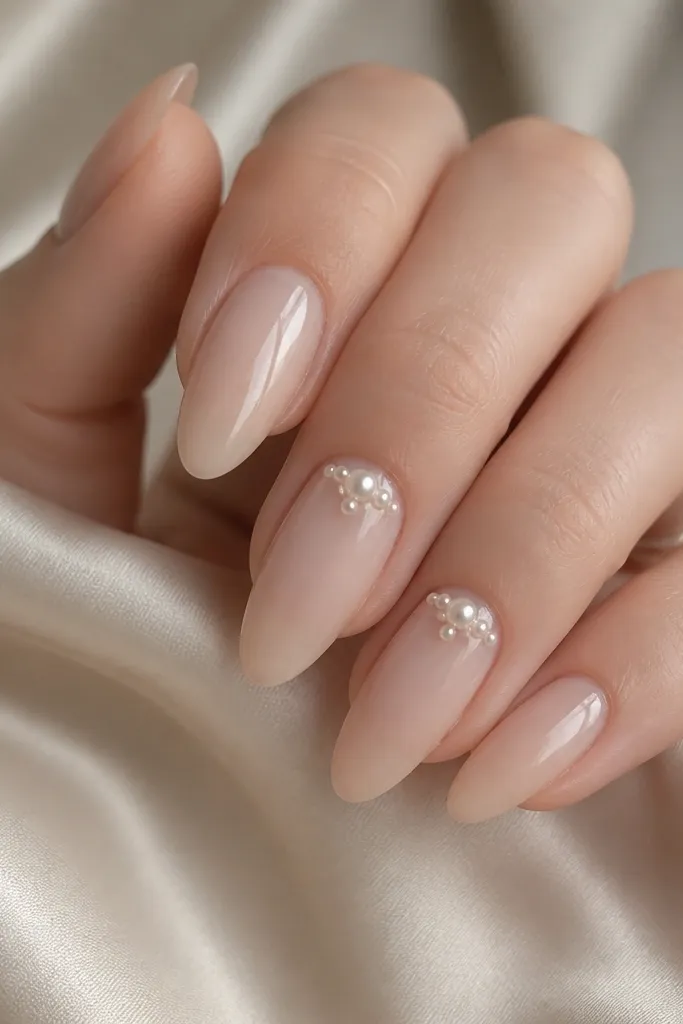
Pearls look expensive when they are small and placed like jewelry, not scattered like decoration. The champagne nude base keeps the pearls from looking costume and makes the whole set feel bridal-adjacent while still summer-friendly. A tiny cluster near the cuticle draws attention to your nail bed and makes the almond shape look delicate. It flatters fair and medium skin tones beautifully, especially if you wear cream or gold clothing tones.
Apply a champagne nude gel base in two coats. For accent nails, dot a small amount of clear gel around the cuticle area in a tight cluster - about 3 to 4 dots. Place micro pearl studs with tweezers, starting with the largest bead in the center, then smaller ones around it. Cure carefully and seal with a glossy top coat in thin layers so you do not flood the pearls and make them sink.
Editor's noteUse micro pearls that are flat on the bottom; round-bottom pearls lift and snag on fabric.
Watch outDo not add pearls to every nail - it turns elegant into overly busy fast.
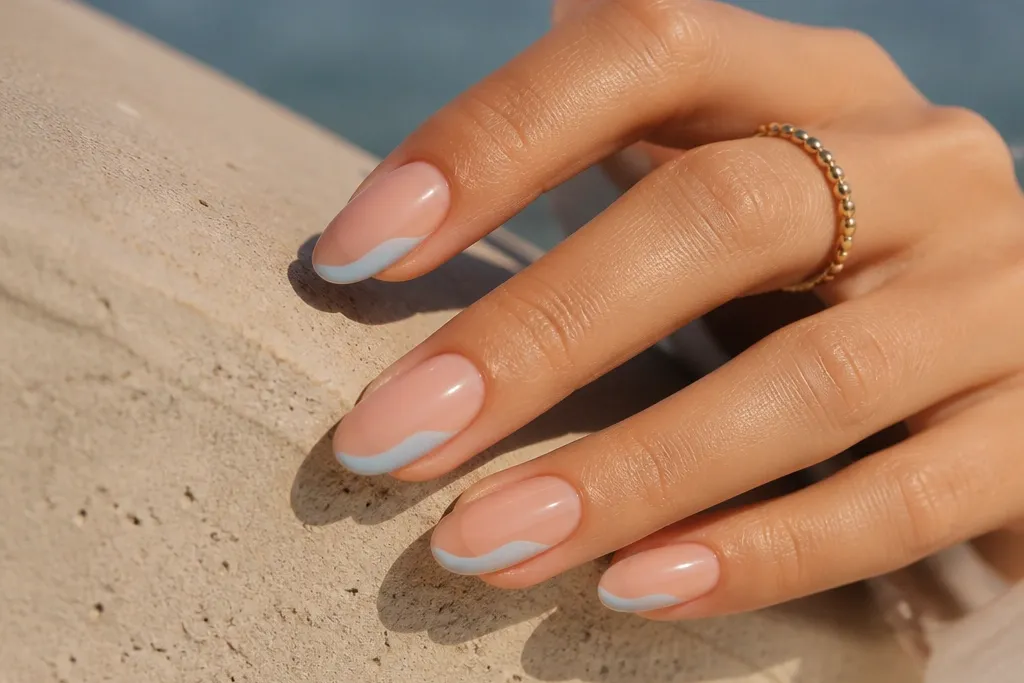
17. Turquoise Tide Almond with White Wave Line
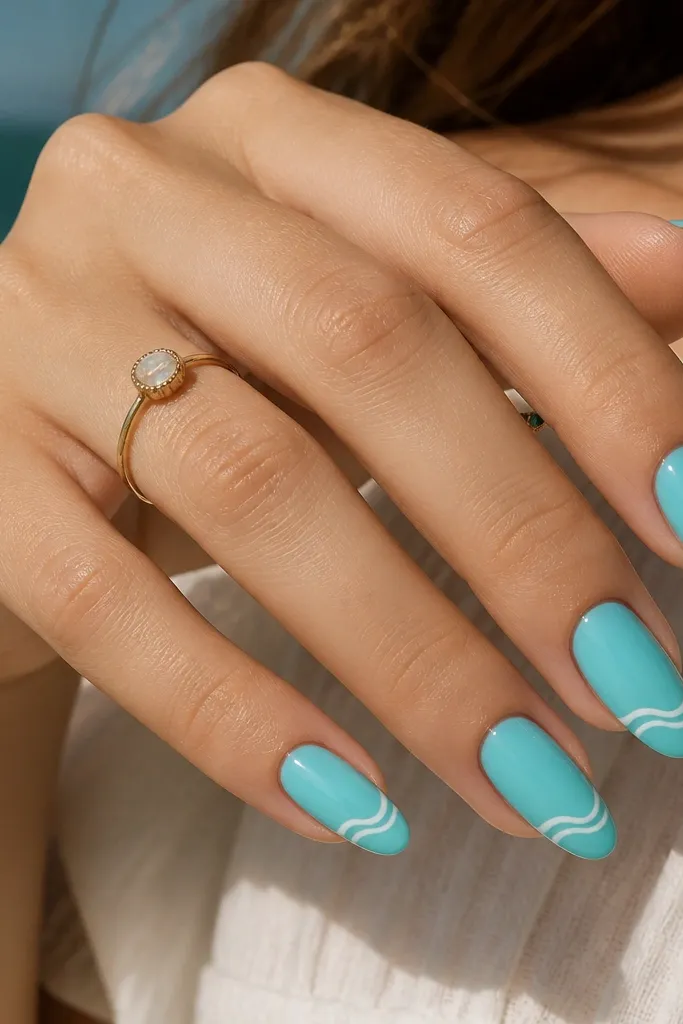
Turquoise is the summer color that makes hands look like vacation photos, but it needs restraint to look expensive. The white wave line is a clean, graphic detail that feels crisp instead of messy. Because the line is thin and placed near the tip, it makes the almond shape look longer. This set looks great with tan skin and gold jewelry, and it flatters many undertones because turquoise sits between blue and green.
Paint turquoise gel in two thin coats, curing fully. With a striping brush, draw a single thin wave line near the tip - keep it consistent about 2 mm up from the free edge. Leave slight gaps in the wave so it looks like foam rather than a solid sticker line. Cure and apply glossy top coat, cap the tip edges, and wipe any gel around the line before curing for a sharp look.
Editor's noteUse a gel polish that is slightly runny for lining; thick paint makes wavy lines look clumsy.
Watch outDo not stack multiple wave lines - two or three lines makes it look like kid art.
18. Tropical Pink Almond with Lime Micro-Outline
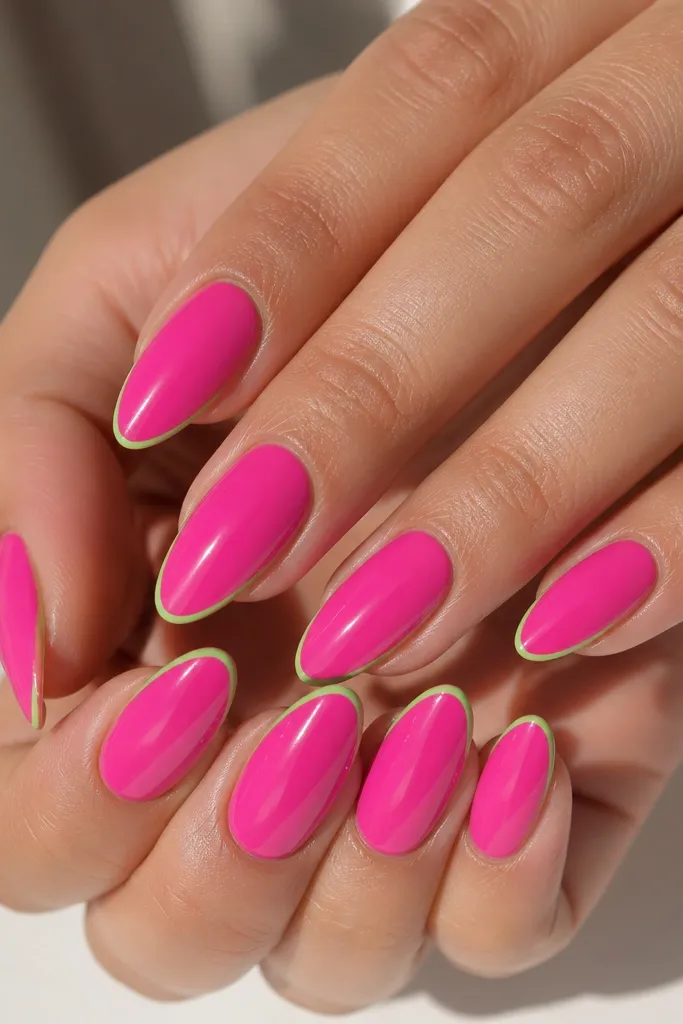
This design looks expensive because the lime is used like a frame, not like a stripe everywhere. The thin outline makes the nail look crisp and graphic, which reads modern and styled. Pink keeps it summery, and lime adds a fresh punch that still looks clean when the line is narrow. It flatters warm undertones and looks great in summer with white dresses and gold accessories.
Apply tropical pink gel in two coats for full coverage, curing between. Use a liner brush and lime gel polish to trace a thin border around the tip and sidewalls - keep the border about 0.5 mm wide. Avoid getting lime onto the skin by using a steady hand and cleaning the cuticle with a small brush. Seal with a glossy top coat in two layers so the outline stays smooth and does not catch.
Editor's noteIf the outline looks shaky, do one side first, cure, then do the other side. Less rushing gives a cleaner frame.
Watch outDo not thicken the lime border - thick lines make the set look like nail wrap art.
19. Soft Peach Almond with Gold Foil Half-Moon Accent
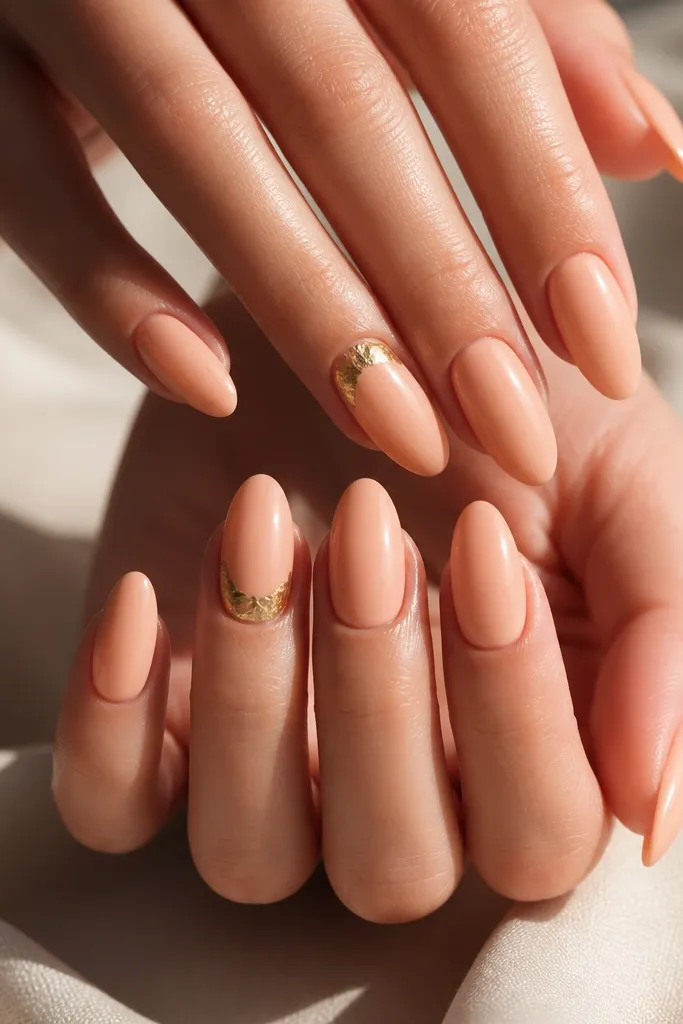
This set is elegant because the gold is concentrated in one small zone. The peach nude base looks like a natural summer glow, and the foil half-moon adds that expensive "light catching" effect. I love placing it on two nails per hand because it gives you a focal point without turning the manicure into a full-on festival look. It flatters most skin tones, and the gold looks extra good with warm jewelry and bronzy makeup.
Paint all nails with a soft peach nude in two coats, keeping it evenly opaque. Choose two accent nails and apply clear gel at the cuticle area in a half-moon shape. Press gold foil onto the gel, then tap off loose pieces so it stays concentrated. Cure and seal with glossy top coat, doing a slightly thicker top coat over the foil to smooth any uneven edges.
Editor's notePress foil with a silicone applicator or sponge - it grips better than brushes and keeps the shape clean.
Watch outDo not add foil across the whole nail - half-moon placement is what keeps it luxe.
20. Iced Lilac Almond with Clear Negative Cuticle V
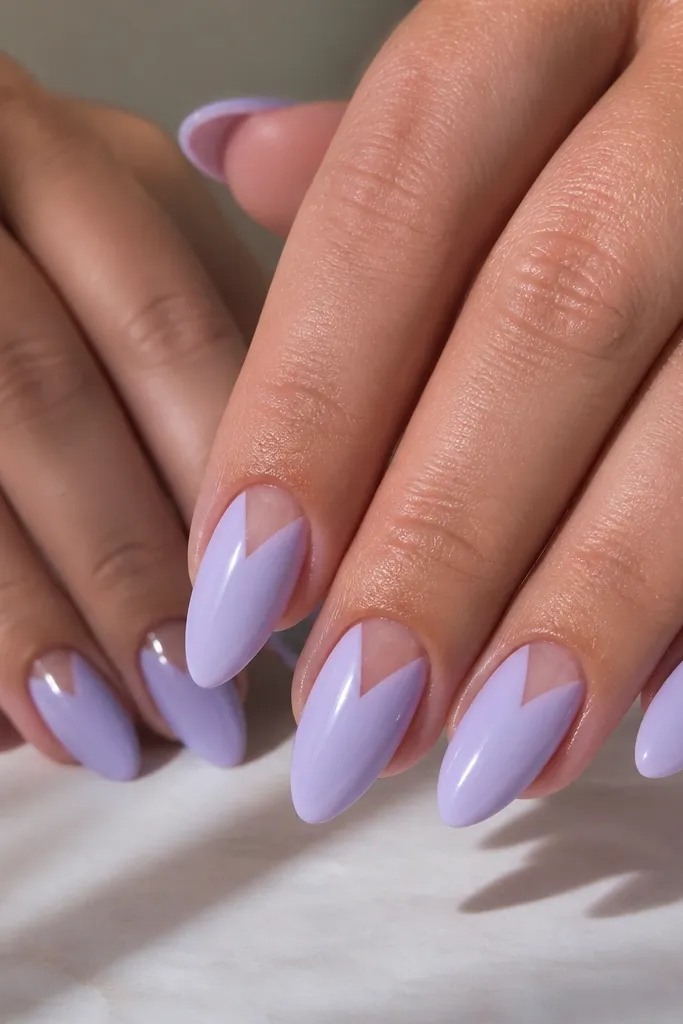
This is one of my favorite summer looks because it feels clean and high-end while still being soft. The iced lilac base is light and flattering, and the clear V shape gives a subtle graphic line that makes the nail look longer. Negative cuticles also make your hands look tidy because it mimics a neat manicure line. It works on fair through deep skin tones - the lilac stays airy and does not overpower.
Apply an iced lilac gel in two coats, curing fully. Use a thin brush to mark a V shape from the cuticle down the center, leaving that area clear or bare. Paint around the V, then cure and carefully clean the edges with a liner brush. Seal with glossy top coat in two layers, keeping the V crisp by not flooding gel into it.
Editor's noteIf your V looks crooked, anchor the first point at the center of the cuticle, then mirror the second side using the same brush angle.
Watch outDo not make the V too wide - wide negative shapes can look like damage instead of design.
21. Coral Rose Almond with Thin Gold Micro-Foil Tips
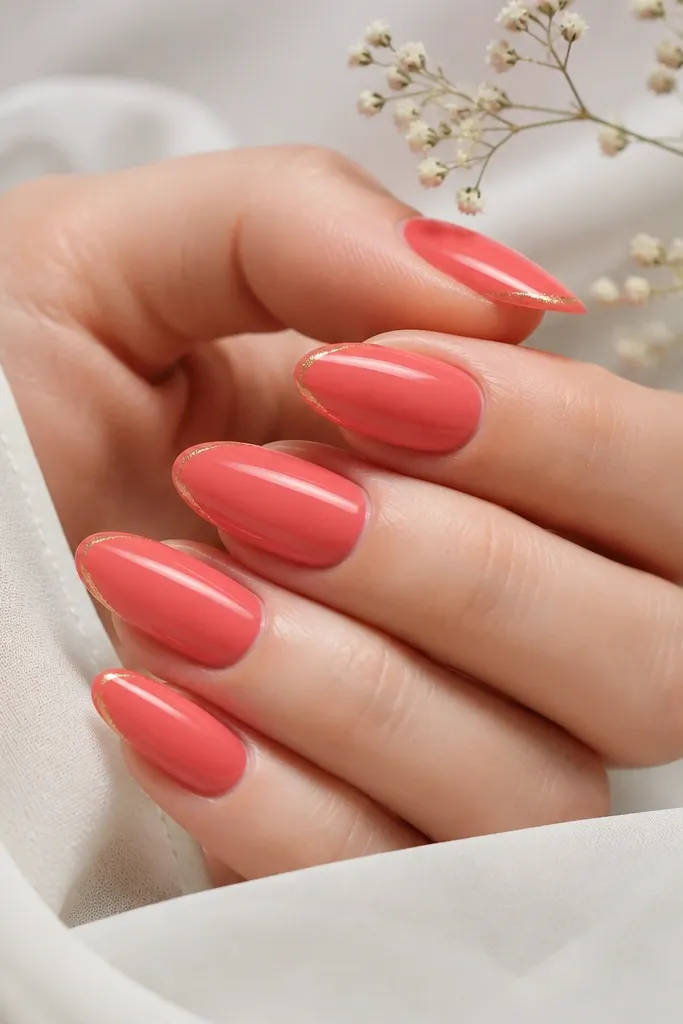
This is the "expensive manicure on a budget" look because it uses one small detail with big payoff. Coral-rose is flattering and summery, and the gold micro-foil at the tips reads like designer jewelry. The thin strip makes the almond shape look sharper and more defined. It is especially pretty if you wear warm makeup tones and gold earrings.
Apply coral-rose gel in two thin coats, keeping the color even and glossy. For the tips, apply a tiny amount of clear gel on the outer edge only - about 1 mm wide - then tap gold micro-foil onto that strip. Cure and brush off extra foil. Finish with glossy top coat, and cap the free edge so the foil does not catch on hair or fabric.
Editor's noteUse micro-foil that is flat and fine; it lays like a metallic line instead of glitter texture.
Watch outDo not paint gold foil as a thick blob - thick gold looks heavy and dull under gloss.
22. Black Cherry Almond with Opal Chrome Side Swipe
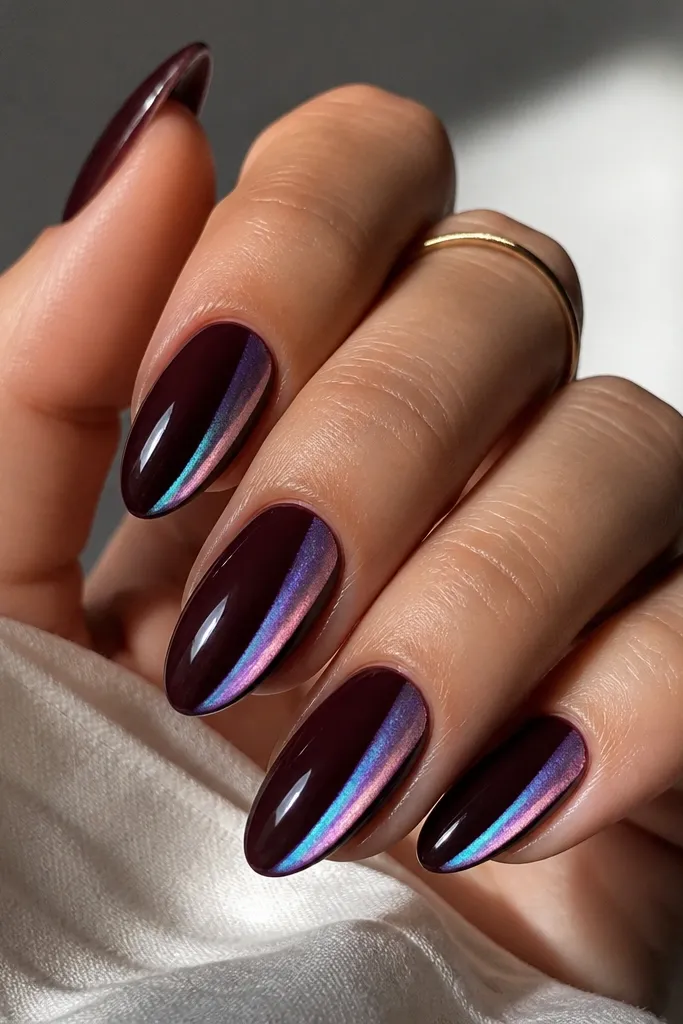
Dark cherry nails look pricey in summer when you keep the design minimal and reflective. The black cherry base is rich but not heavy, and the opal side swipe adds a soft iridescent glow without turning the nails into full chrome. Side placement makes your nails look slimmer and longer, which is exactly what I want on almond. This works beautifully on medium to deep skin tones, but it also looks dramatic on fair skin if the cherry is truly glossy.
Apply black cherry gel in two coats, curing fully so it looks like liquid polish. Use a striping brush to paint a narrow side swipe of opal chrome gel on one sidewall from near the mid-nail to the upper third. Rub opal chrome powder over it, then buff off excess carefully. Seal with chrome-safe top coat and a second glossy coat over the whole nail to lock in the shine.
Editor's noteKeep the chrome swipe narrow - about 1 mm - so it reads like a highlight, not a stripe.
Watch outDo not do a full chrome overlay on dark polish - it can mute the cherry and look flat.
23. Creamy Beige Almond with White Pearlized Dot on Tip
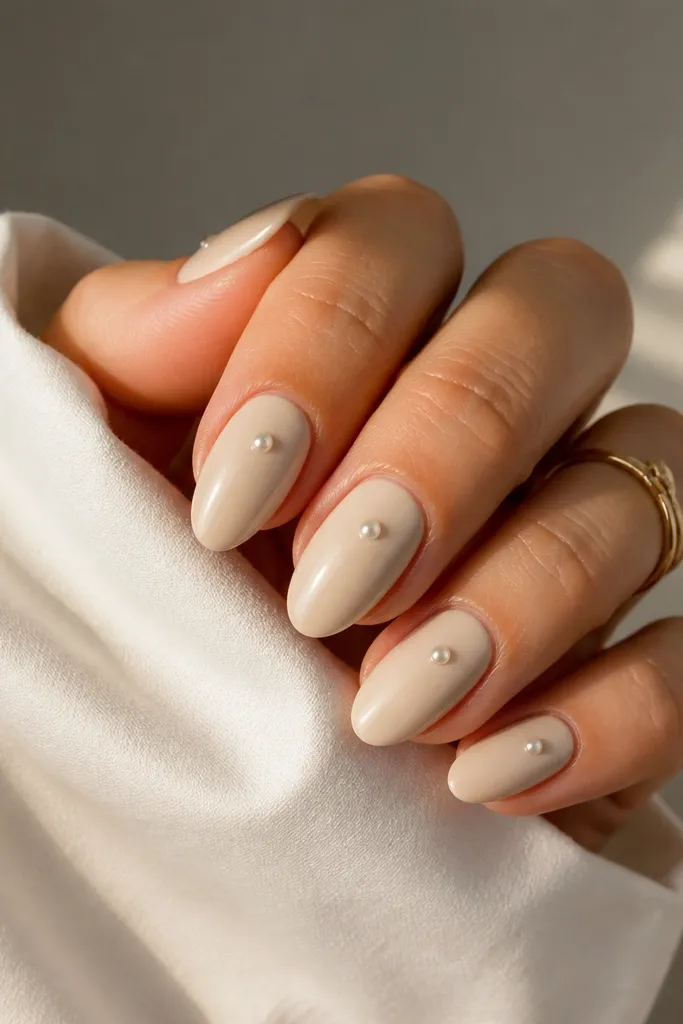
This is subtle luxury. A creamy beige base looks natural and expensive because it matches your skin tone energy, and the single pearlized dot adds a "jewel" moment without turning the nails into a pattern. Placing the dot near the tip makes the almond point look intentional and sharp. It flatters fair to medium skin tones and looks great with light summer outfits because it does not fight your wardrobe.
Apply creamy beige gel in two coats, making sure the finish is smooth and not streaky. Use a dotting tool with pearlized white gel polish to place one dot near the center of the tip - keep it small, about the size of a poppy seed. Cure and then top coat carefully in thin layers so the dot feels sealed, not bumpy. Finish with a final thicker glossy top coat and cap the free edge.
Editor's noteIf the dot spreads, wait for the gel to thicken slightly in the palette before picking up more - it gives a rounder bead.
Watch outDo not place the dot too close to the sidewalls - it should sit centered for the clean look.
24. Emerald Glass Almond with Clear Gloss Dome
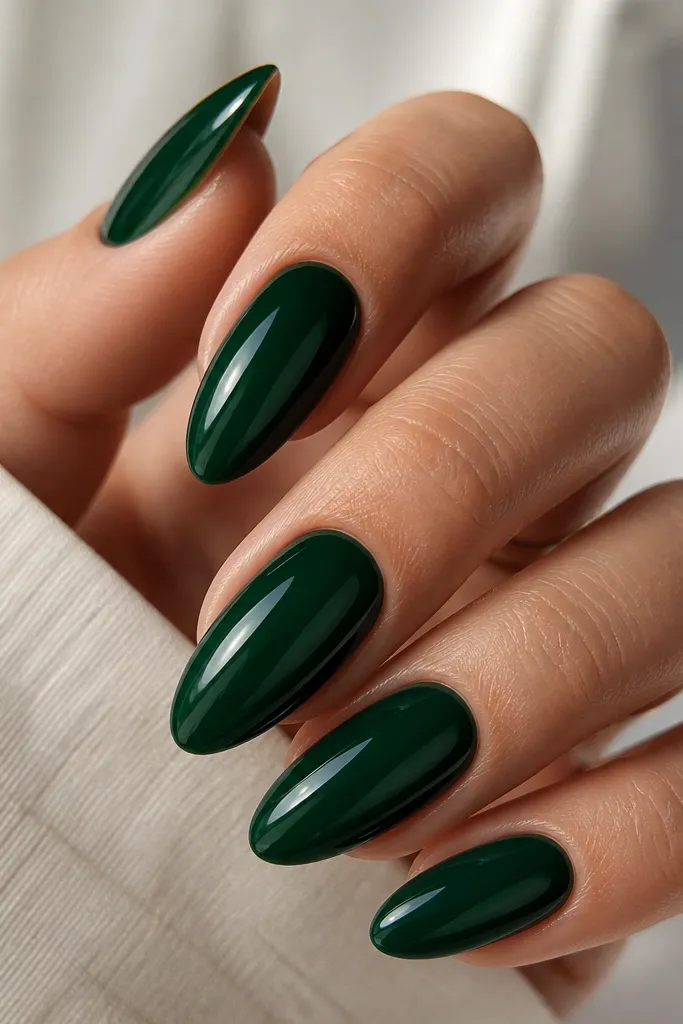
This one is pure color plus finish, and that is why it looks expensive. Emerald glass polish has a depth that looks like it has liquid inside, and the clear dome effect makes the surface feel custom. When the light hits, the nail looks smooth and expensive even without gems or lines. It flatters olive and deep skin tones, and it also looks striking on fair skin if you keep the emerald saturated.
Apply emerald gel in two coats, building full color while keeping the cuticle area clean. After curing, apply a clear builder or thick clear gel only in the center to create a subtle dome, then cure again. File very lightly after curing if needed to smooth the dome into the almond shape, then wipe dust. Finish with two glossy top coats to lock in the glass effect and seal the edges.
Editor's noteUse a thicker clear gel for the dome instead of regular top coat - it holds shape and reflection better.
Watch outDo not skip the cure and dome step - glossy color alone does not create that glassy custom look.
25. Watermelon Sorbet Almond with Black Seed Dot Gradient
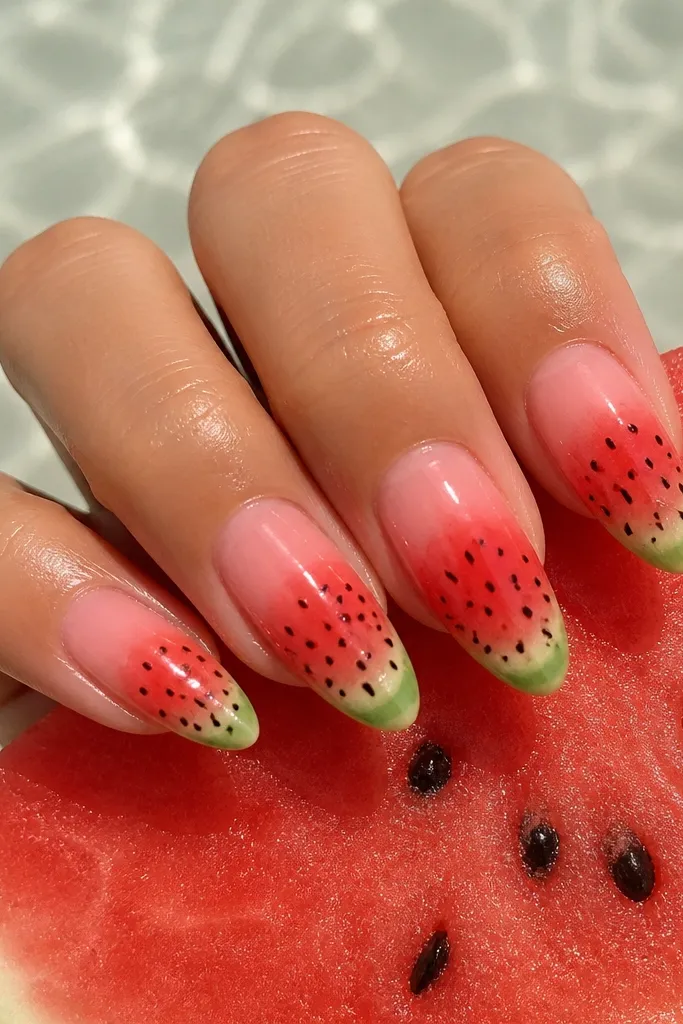
This design looks expensive because it has three zones that read clearly from a distance - pink, coral, and a green edge - then it adds tiny black "seeds" that make the whole thing feel intentional. I did this on a set for a July dinner and people kept staring at the center of the nails, not the tips, because the dot density pulls the eye inward. The seed dots also break up the color block so it does not look flat. Almond shape makes the fade look like it flows, especially when you keep the green edge thin and crisp.
Start with a sheer pink base gel, then paint a coral-red band across the middle third of each nail. Use a makeup sponge or a stipple brush to soften the top edge of the coral into the pink so you get a real fade, not a hard line. Add a very thin melon-green line along the outer edge of the tip - I place it about 1-2 mm wide - and blur it lightly with the sponge so it looks like color at the surface. Cure, then dot black seed shapes using a dotting tool: first place 6-8 dots per nail in the center, then add a few smaller dots toward the sides, leaving the cuticle area mostly clean.
Editor's noteUse a top coat with a thicker brush and run it in one slow pass over the seed dots so the dots stay crisp but get a smooth dome.
Watch outSkip using big seed dots - if they look like punctuation marks instead of tiny seeds, the design reads childish and messy.