1. Milky Sage Almond with One Tiny Fern Accent
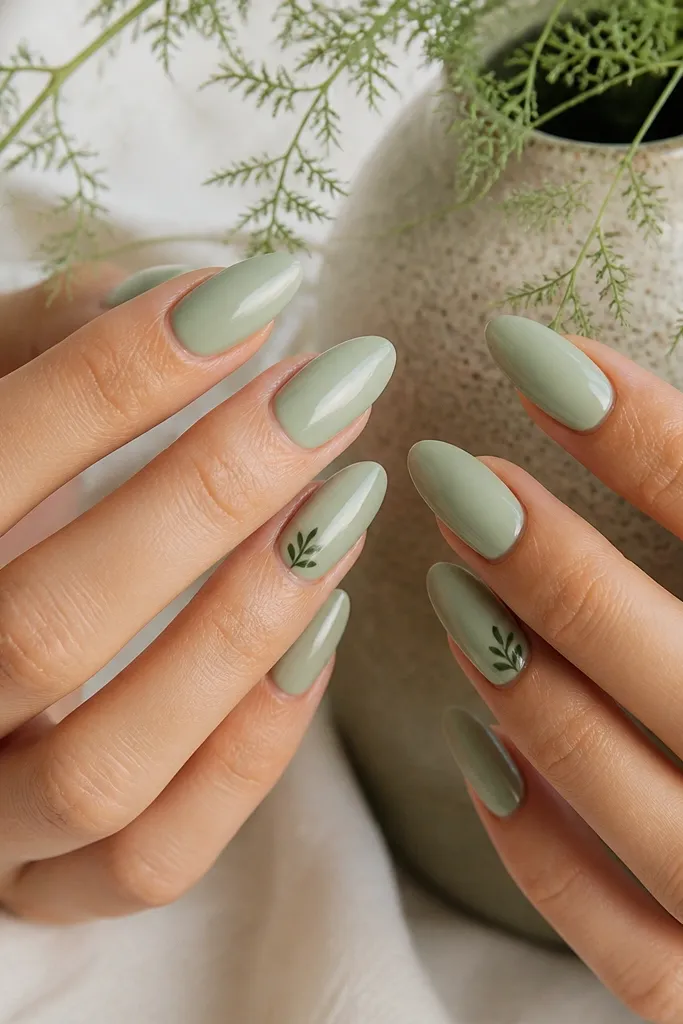
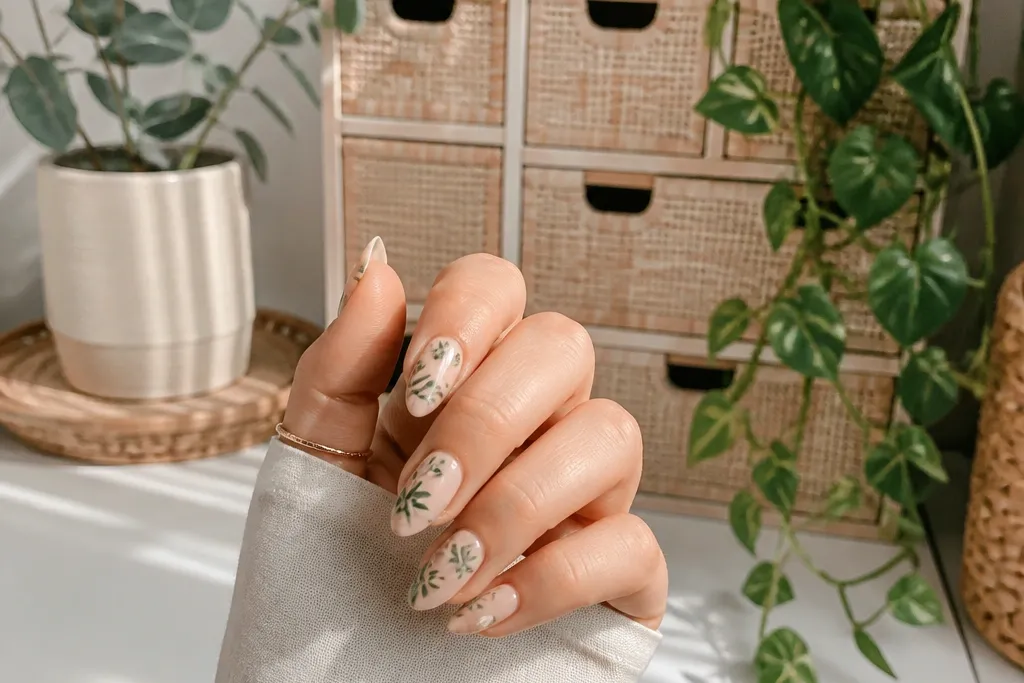
This is the "clean garden" version of summer nails. The milky sage base is soft enough for daytime, and it makes your skin look calmer - I've worn it on both fair-cool and medium-warm tones and it always reads fresh. Because the fern is small and placed near the cuticle, your eye goes there first, and the rest of the nail stays simple. The almond tip keeps the fern lines from looking cramped, since the nail narrows nicely toward the end. It works best for brunch, office days, and any outfit that leans neutral.
Start by prepping the nails and applying a thin base coat, then paint two coats of milky sage (leave the edges 1 mm clean so the color doesn't flood your cuticles). Cure fully between coats. On each ring finger, use a striping brush or gel liner to draw 5-7 short fern leaves starting just above the cuticle, angled upward like a little crown. Add a tiny dot for the stem, then cap the design with a glossy top coat and cure. Finish by running the top coat over the free edge so it doesn't peel up after day two.
Editor's noteUse a dark green gel for the fern and don't overfill the lines - thin strokes look more "grown" than bold strokes.
Watch outAvoid putting the fern in the center of the nail; it makes the design look like a sticker.
2. Peach Almond with Terracotta Pot and Micro Leaves
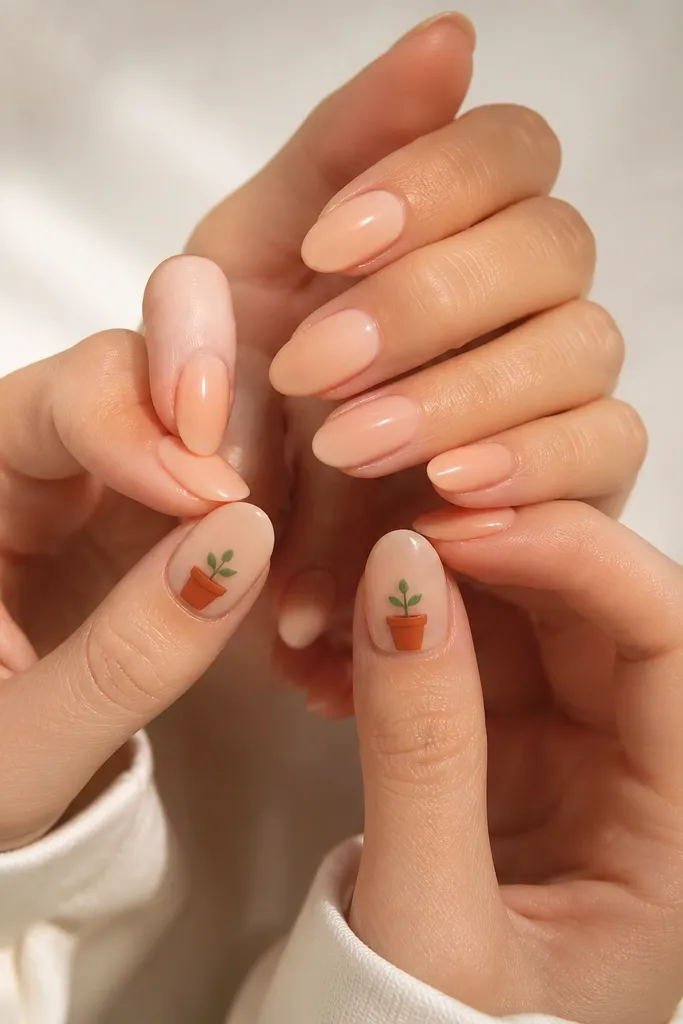
This one feels dreamy because it looks like a little summer planter on your nails. The peach base flatters warm skin tones and looks great with gold jewelry; I wear it with thin hoops and a simple chain and it always looks intentional. The terracotta pot adds warmth without turning orange, and the micro leaves keep it delicate. Almond shape helps the pot look tidy because the curved outline follows the nail's taper. Wear it for vacations, outdoor dinners, or any time you want your hands to look "cute but grown-up."
Paint two coats of a peachy nude jelly or creamy peach (thin coats look more glassy). Cure, then on the thumb only, place a small oval pot shape using terracotta gel - keep it about the size of a pencil eraser. Add a slightly darker terracotta line at the rim, then dot three tiny leaf tips in sage green. Finally, cap everything with a glossy top coat in two thin layers, dragging top coat from cuticle to tip and sealing the sides.
Editor's noteIf your pot looks wobbly, draw the rim first with a liner brush, then fill the pot center after the rim cures.
Watch outAvoid making the pot too tall; tall 3D shapes snag and chip faster.
3. Lavender Milk Almond with Side-Stripe Leaf Line
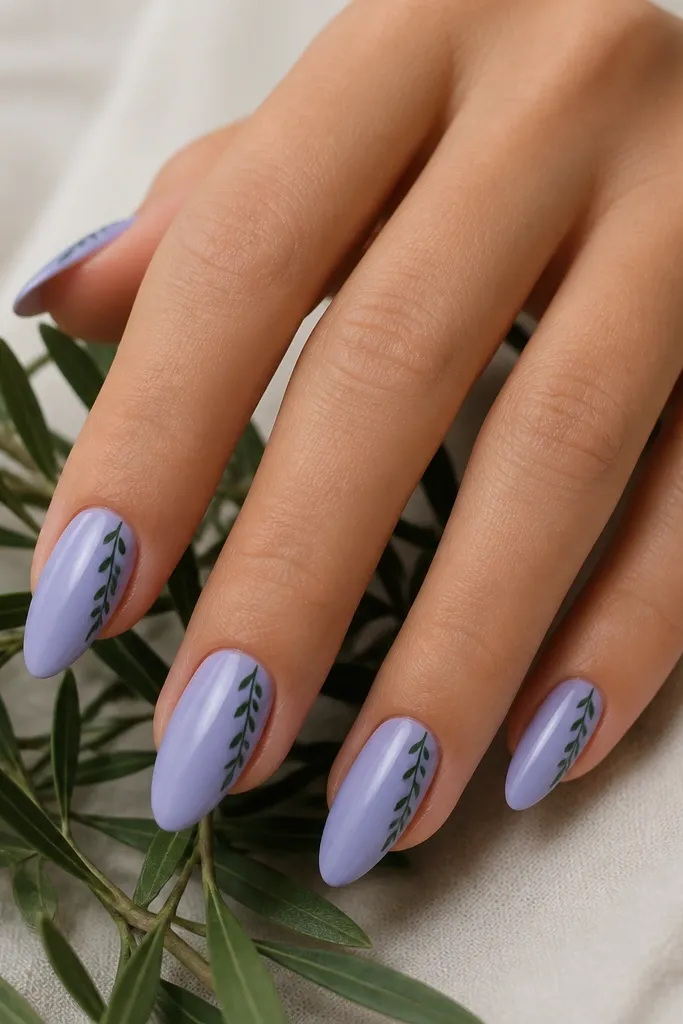
This design looks like summer stationery - clean, soft, and slightly artsy. Lavender milk is flattering on cool and neutral skin tones, and it makes your nails look bright without being neon. The side stripe keeps the plant theme from covering the whole nail, so it still looks sleek even when you're busy. The leaf marks along the diagonal line create movement toward the tip, which is why almond shape looks extra good here. I wear this when I want a "pretty but not loud" manicure.
Apply a milky lavender base in two coats, keeping the first coat thin so the color builds evenly. Cure well. With a gel liner brush, draw a thin diagonal line on one side of each nail, starting 1-2 mm above the cuticle and stopping about 2 mm before the tip. Add tiny leaf ticks along the line using a darker green gel, spacing them about a leaf-width apart. Top coat with a glossy layer, then wipe the tacky layer if your top coat needs it.
Editor's noteKeep the stripe consistently thin - if the line is thick, the leaves start to look like blobs.
Watch outAvoid drawing leaves on both sides; it makes the manicure look crowded.
4. Clear Nude Almond with Sage Marble Planter Accent
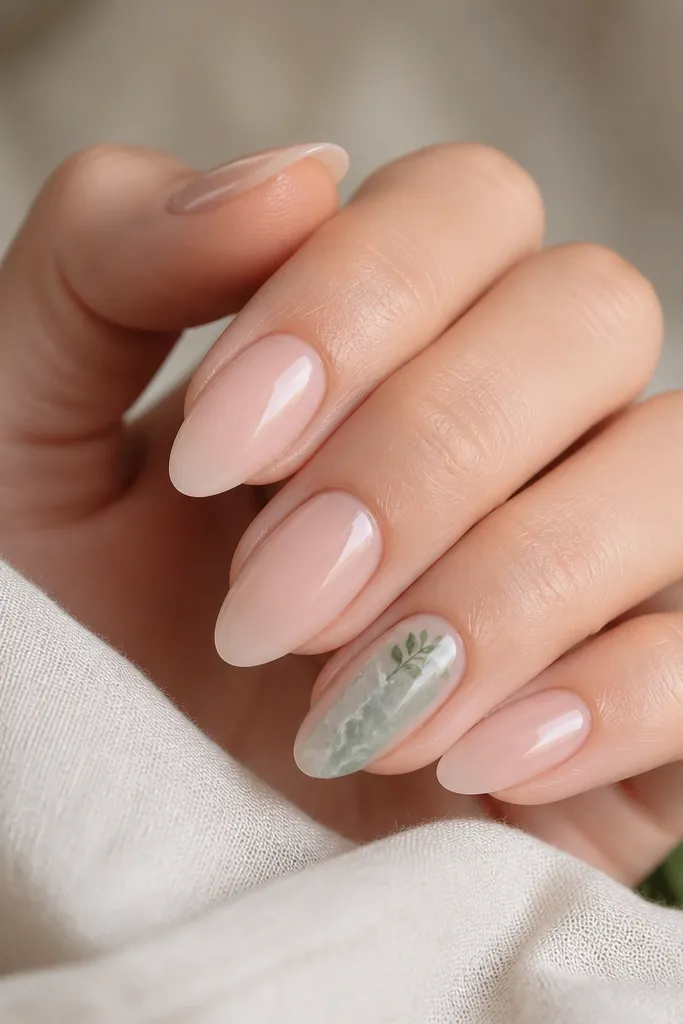
Clear nude is the fastest path to "dreamy" because it matches your natural nail bed and lets the accent do the talking. The sage marble planter accent looks like ceramic, which is why it feels more special than a flat color. I like this for medium and deep skin tones because the nude base creates a clean contrast and the sage veining looks crisp. Almond shape helps the marble look like it's wrapped on, not like a sticker. This is also a good pick if you hate bold color on your nails.
Start with a sheer clear nude base (I use a builder gel base tinted slightly nude), and paint two thin coats so it doesn't look streaky. Cure and top coat lightly. On the ring finger, sponge a vertical sage area using a makeup sponge, then drag a small amount of white gel through it for veining. Add a tiny leaf cluster at the top edge with a liner brush - 3 leaves max so it stays airy. Seal with glossy top coat and cap the sides.
Editor's noteUse a sponge, not a brush, for the marble block so it looks like soft ceramic texture.
Watch outAvoid putting the marble on every nail; one planter accent looks intentional, five looks busy.
5. Mint Jelly Almond with Floating Leaf Confetti
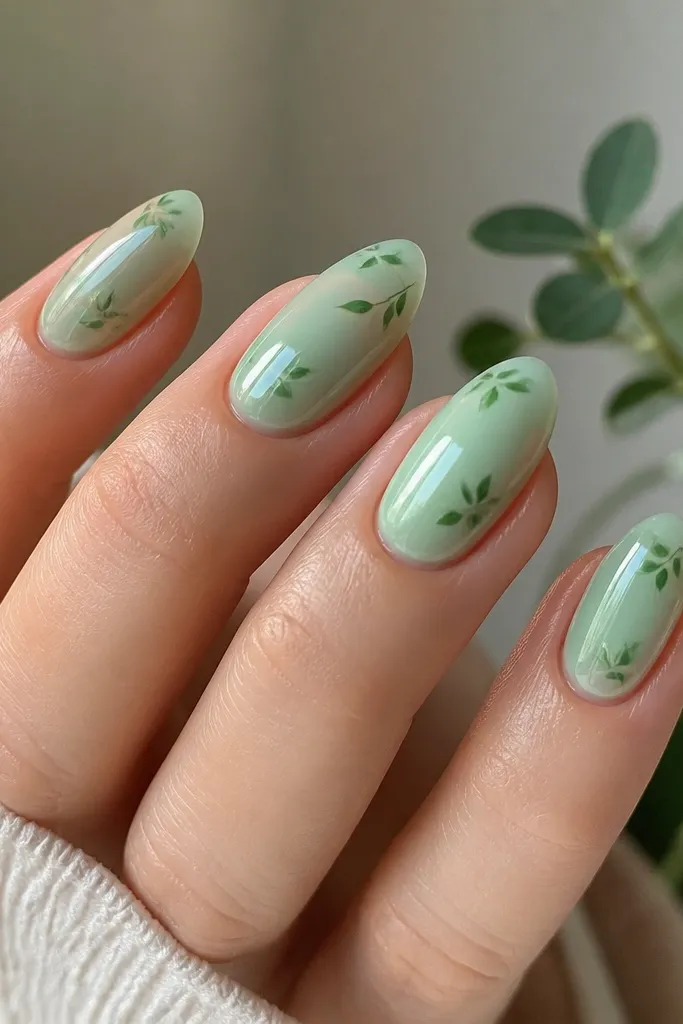
Mint jelly is the summer nail color that always looks like you just stepped out of sunshine. It flatters fair and medium skin because the translucence shows a hint of your natural warmth underneath. The floating leaf confetti gives a playful "storage plants" vibe without turning into a cartoon. Almond shape keeps the scattered details from feeling chaotic because the nail narrows and guides the eye. This manicure is perfect for festivals, beach weekends, and any day you want your hands to look light and fresh.
Paint two coats of mint jelly (thin coats, then build). Cure each coat and make sure the surface looks smooth. Apply tiny leaf decals near the cuticle area only, or paint 6-8 tiny leaf dots with a liner brush - keep them uneven so it looks natural. Add a clear gel layer to blend edges over decals. Finish with a glossy top coat, then cap the free edge so the decals don't lift.
Editor's noteIf you hand-paint leaves, use tiny curved strokes instead of full leaf outlines; it reads more airy.
Watch outAvoid placing confetti all the way to the tip; it makes the nail look cluttered.
6. Buttercream Nude Almond with 3D Mini Succulent Pots
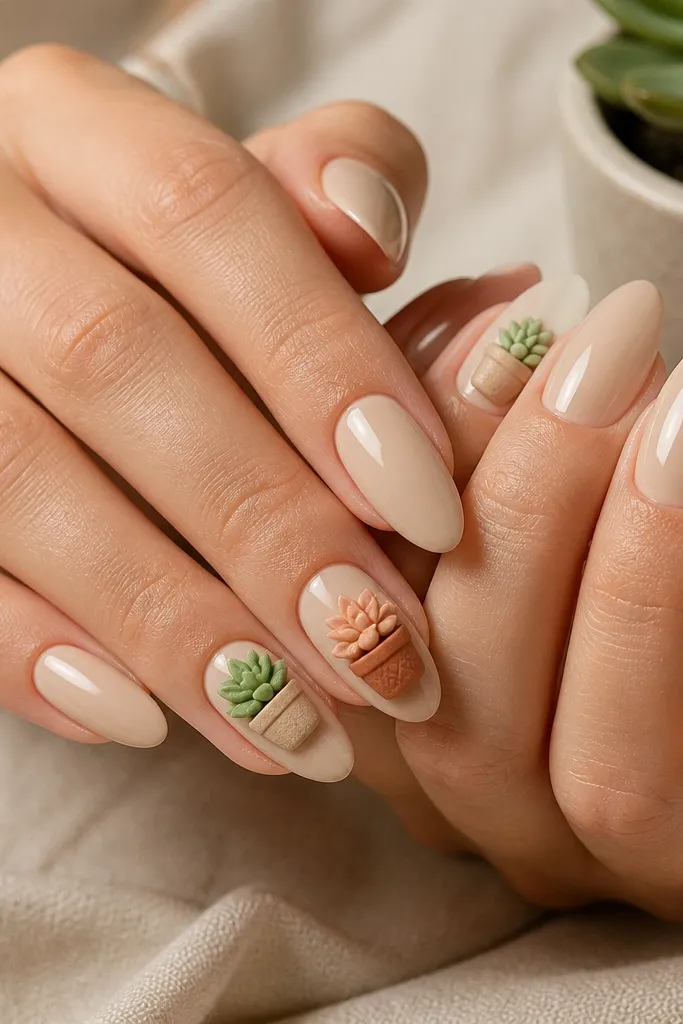
This is the most "dreamy garden shelf" look on the list. The buttercream nude base is creamy and forgiving, so even if your cuticles aren't perfectly polished, the manicure still looks soft. The 3D succulent pots look amazing in sunlight because the raised texture catches light. Almond shape gives you enough room for the pot without squishing the succulent rosette. This works best for special dinners, events, and photos where you want texture, not just color.
Apply a buttercream nude base in two thin coats and cure. For the 3D pots, use builder gel: place a tiny bead for the pot body, pull it into a flat dome, then cure. Add a thin darker line for the pot rim, cure again. For succulents, use a small amount of muted green gel and swipe it into a rosette pattern, keeping the center slightly raised. Cap the entire 3D area with a thin layer of top coat or builder gel to smooth it, then cure and polish the surface with a very light buff.
Editor's noteMake 3D details on two nails only; your hands look styled, not heavy.
Watch outAvoid skipping the cap layer - without it, edges catch and lift.
7. Ocean Blue Almond with White Leaf Vein Overlay
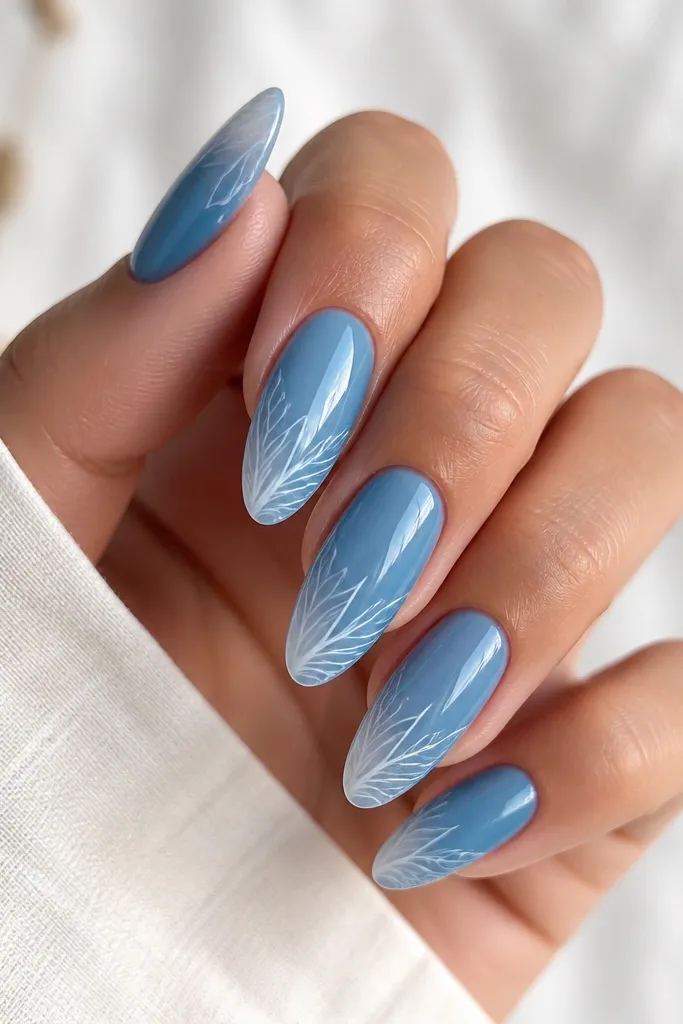
Ocean blue makes your nails look like summer water, and the white leaf veins make it feel botanical instead of generic. I like this on medium to deep skin because the blue pops while the white stays soft, not stark. The semi-transparent overlay near the tip makes the manicure look longer and more taper-forward, which is perfect for almond. The leaf vein pattern is also easy to control: you're drawing lines, not filling shapes. Wear it with white linen shirts, denim, and silver rings.
Start with two coats of ocean blue, letting the second coat slightly thicken at the center for a smooth dome. Cure fully. On each nail, sponge or brush a thin semi-sheer white gel near the tip, then use a liner brush to draw 3-4 vein lines starting from the tip edge and branching inward. Keep the veins thin and let the blue show through between lines. Finish with glossy top coat and seal the sidewalls.
Editor's noteIf the veins look too bright, mix white gel with a tiny drop of clear to keep it translucent.
Watch outAvoid drawing heavy black-like veins; it turns the look graphic instead of dreamy.
8. Sunkissed Nude Almond with Golden Leaf Cuticle Lines
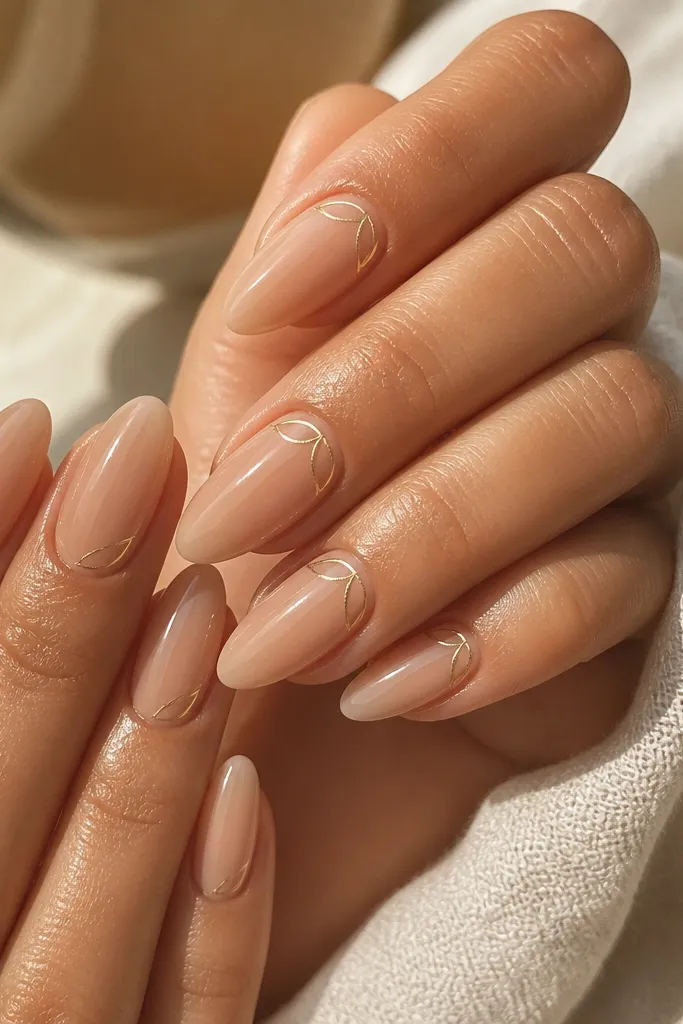
This is the manicure version of warm light on your hands. The sunkissed nude base gives you that healthy, "your nails but better" look, and the gold leaf cuticle lines add just enough shine without needing a full accent nail. I've worn this with both warm-toned and cool-toned foundations and it still works because the gold sits near the cuticle where it reads elegant. Almond shape helps the leaf arch look smooth because the curve matches the nail contour. It's great for weddings, work, and evenings.
Apply a sunkissed nude base in two coats and cure. Use a gold foil gel or gold liner gel with a striping brush to draw a leaf arch starting 1 mm from one side of the cuticle and curving to the other side, stopping before the sidewalls. Add a tiny vein line in the middle with the same gold gel. Cure, then top coat in two thin layers to prevent foil gel from snagging. Seal the free edge last.
Editor's noteGold looks best when it stays close to the cuticle; keep the rest of the nail plain.
Watch outAvoid extending the gold lines past the mid-nail; it makes it look like decoration stuck on.
9. Sage Chrome Almond with Tiny Pot Outline
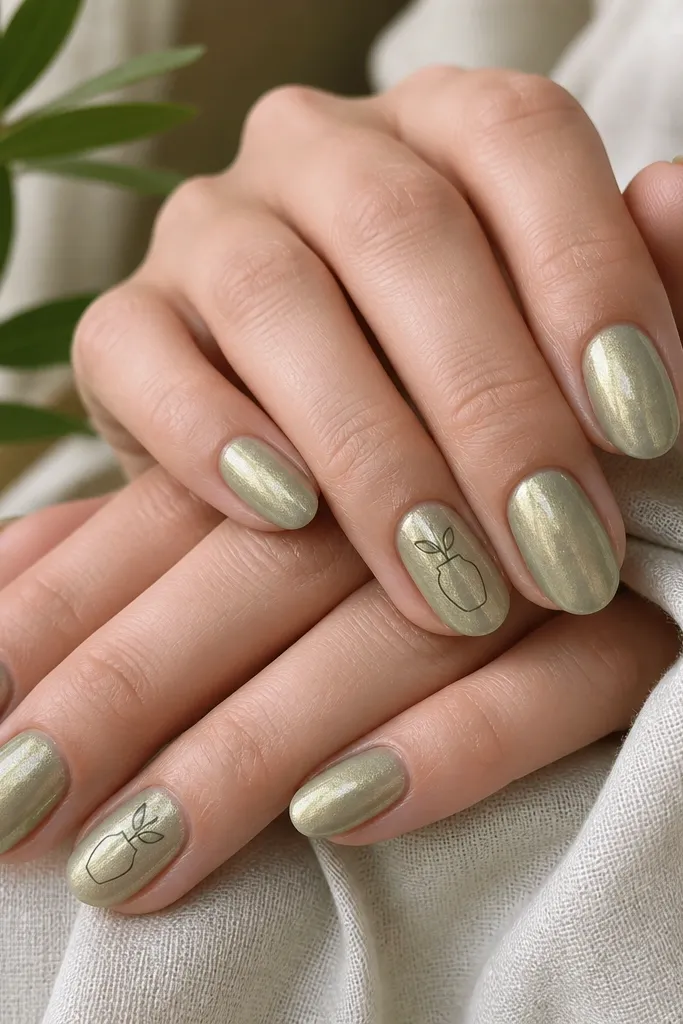
Chrome nails can look harsh, but sage chrome reads soft and expensive. The shimmer flatters almost every skin tone because it reflects warm and cool tones depending on the light. The tiny pot outline keeps the theme clear without covering the whole chrome surface. Almond shape makes chrome look smooth because the taper reduces harsh edges and keeps the shine uniform. This is my pick when you want "dreamy" but you also want it to look like jewelry.
Prep and apply a chrome base (black or green-tinted base works best for sage). Apply two coats of the base color and cure. Rub sage chrome powder evenly, then buff lightly and avoid overworking one spot. On each ring finger, use a thin liner brush with darker green gel to draw a pot outline and two leaf strokes on top. Cure, then apply a glossy top coat carefully so you don't smear the chrome - I use a thin layer and cap the edges.
Editor's noteIf your chrome dulls after top coat, use a chrome-safe top coat or apply top coat only over the pot outline area.
Watch outAvoid heavy top coat over full chrome; it can kill the shine.
10. Coral Blossom Almond with White Flower and Fern Pair
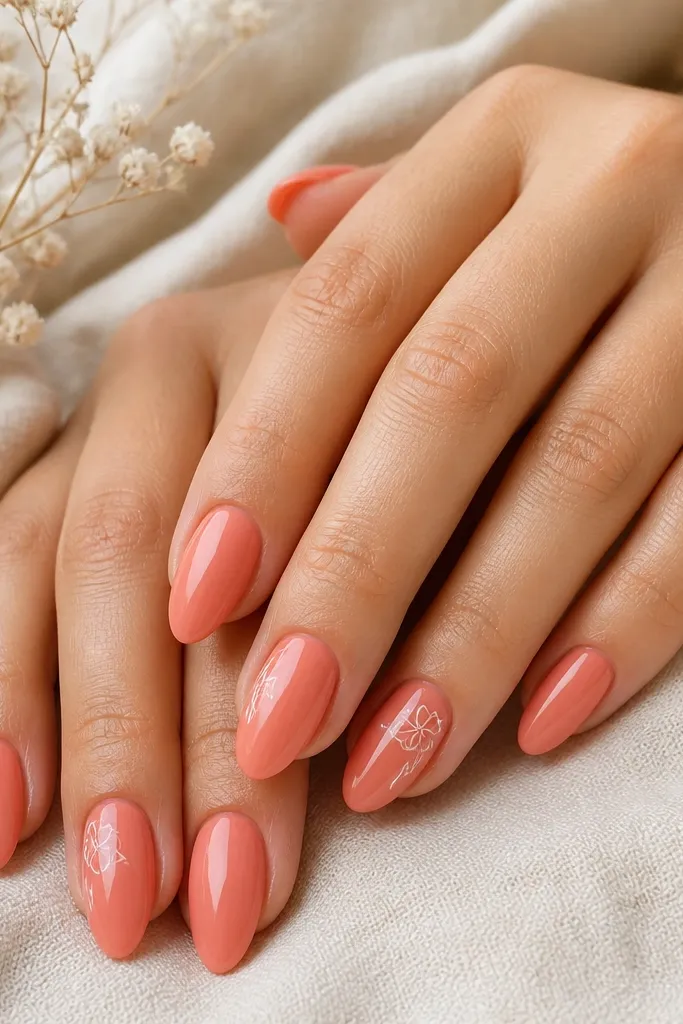
Coral blossom nails feel cheerful without turning neon, and the white flower keeps it airy. The fern beside the flower ties the whole botanical theme together while staying delicate enough for almond. I like this for summer weekends and when you want your nails to match coral lipstick or a coral dress. Almond shape makes the flower look like it's opening toward the light. This is a great option if you want plant vibes but you also like a feminine floral touch.
Paint two coats of coral (creamy coral or jelly coral both work). Cure and let the surface be smooth. On the ring finger and middle finger of each hand, draw a small white flower near the cuticle using a dotting tool for the petals and a tiny center dot. Add a small fern line next to the flower in forest green - 4-6 leaf strokes max. Seal with glossy top coat, then check the sidewalls for sharp edges and file lightly if needed.
Editor's noteKeep the flower small; on almond, tiny details look more expensive than big ones.
Watch outAvoid filling the flower with thick white gel; it can look chalky.
11. Milky White Almond with Sage Leaf Stamping
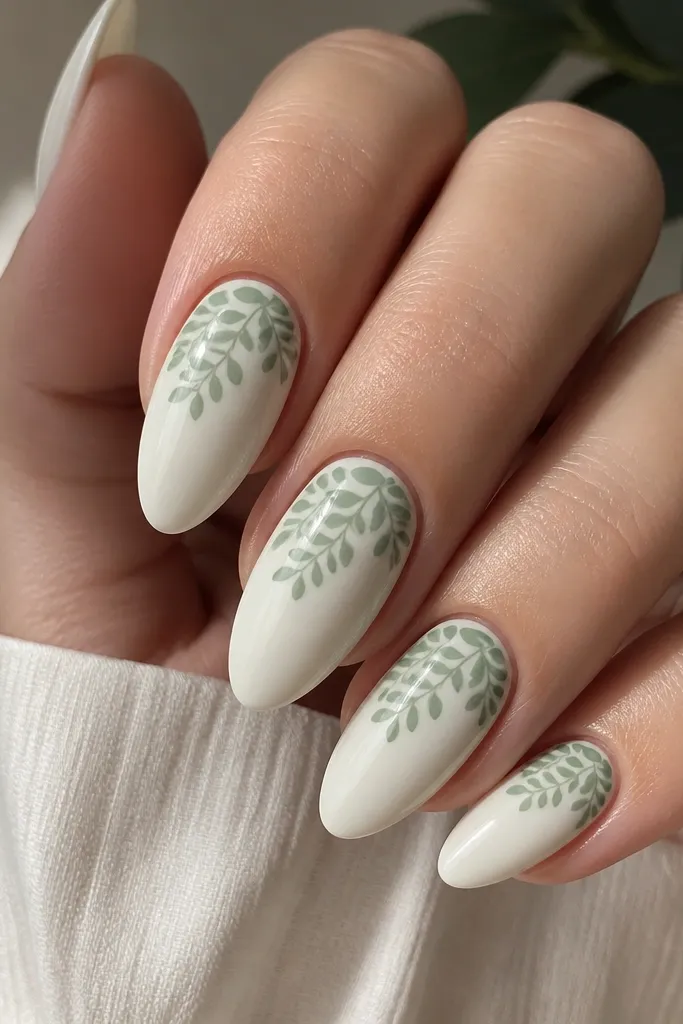
Milky white makes plant stamping look like a crisp fabric print. The sage ink is softer than dark green, so it reads dreamy instead of dramatic. I've worn this on vacation because it photographs well - the stamping stays sharp in bright sun and doesn't look muddy. Almond shape gives the stamp room to curve, so the pattern looks like it wraps the nail. This one is for people who love detail but don't want to hand-draw every leaf.
Apply two coats of milky white and cure. Choose a stamping plate with leaf clusters that fit almond; you want the pattern to cover about the top half of the nail. Apply stamping polish in sage, scrape, then press the stamper firmly onto each nail. Transfer the pattern and cure briefly if your gel stamping system needs it. Finish with glossy top coat, and cap the edges so the stamp doesn't catch on your nails during the first week.
Editor's noteWipe your stamping plate with acetone between nails so the leaf edges stay crisp.
Watch outAvoid using thick stamping polish; it blurs the leaf outlines.
12. Turquoise Jelly Almond with Leaf Tip Gradient
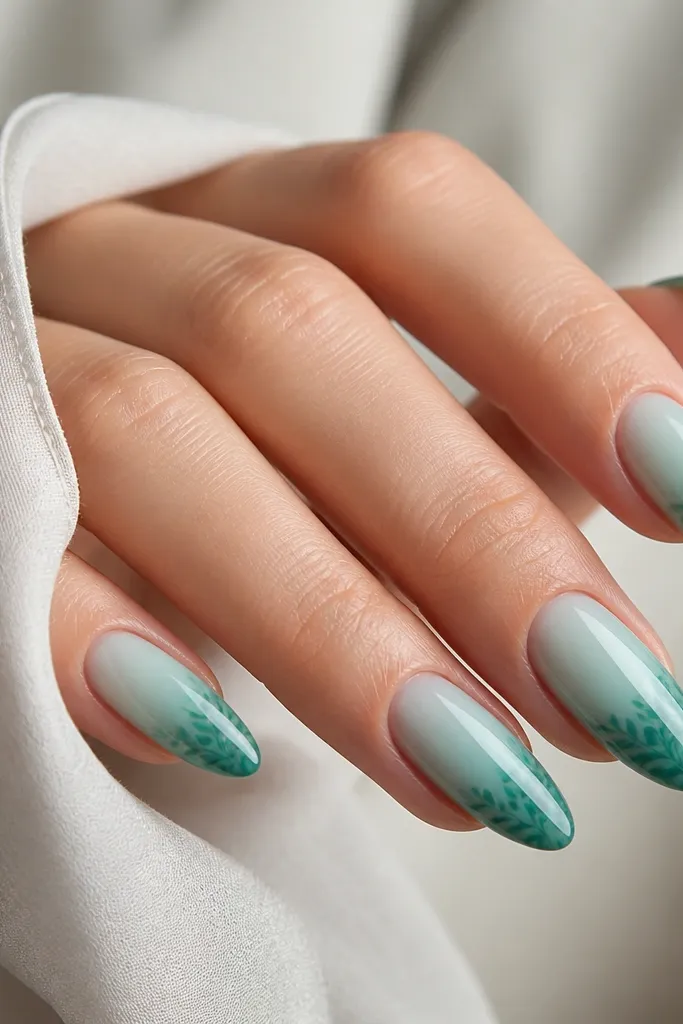
This one looks like tropical water and a garden shadow at the same time. The turquoise jelly base lets your natural nail show through, which makes the gradient look smoother and more expensive. The leaf silhouettes at the tip give the design a focal point without adding a lot of clutter. Almond shape is perfect because the gradient naturally follows the taper, and the leaf silhouettes sit in the narrowest area where they look intentional. It works for beach trips, pool days, and any outfit with blue accents.
Paint a turquoise jelly base in two coats. For the gradient, use a makeup sponge to dab a deeper teal only at the tip area, then blend upward about 1/3 of the nail. Cure, then use a liner brush or tiny stamp to add leaf silhouettes near the tip - keep them in one cluster per nail. Add a glossy top coat and cap the free edge. If your gradient looks patchy, add a thin layer of clear jelly gel to even it out and cure again.
Editor's noteBlend the gradient with a clean sponge; don't drag with a brush or you'll get streaks.
Watch outAvoid putting the leaf silhouettes too high; they should live on the tip.
13. Rose Nude Almond with Minimal Green Leaf Side Dots
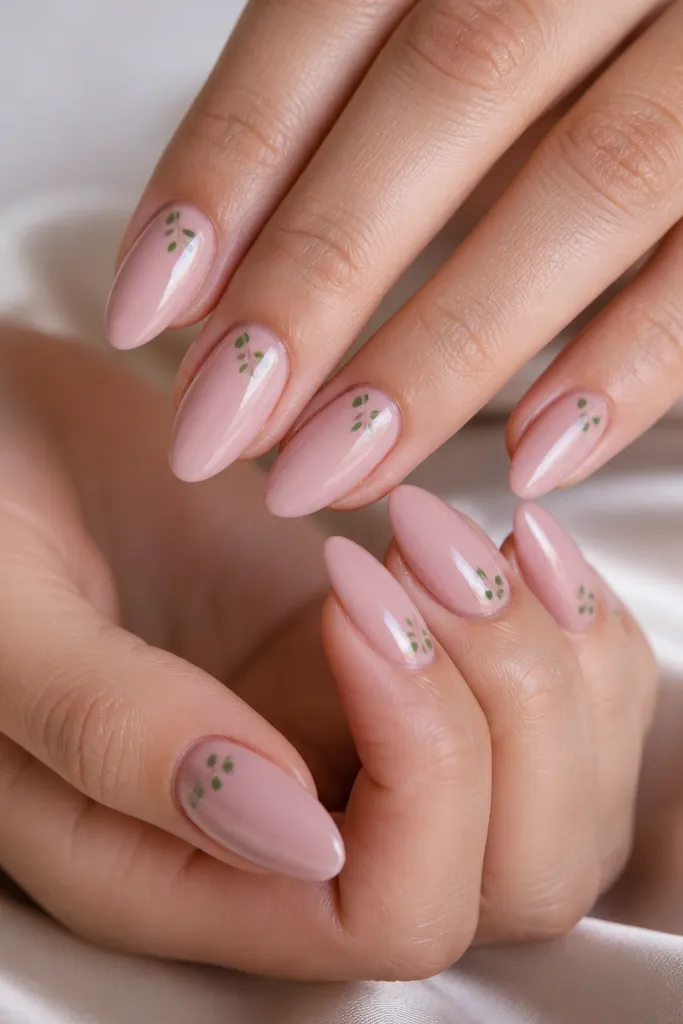
Minimal doesn't mean boring here. The rose nude base makes your hands look polished, and the three tiny leaf-tip dots give a botanical hint without full art. This is the manicure I reach for when I want something cute but I'm wearing bold earrings or a busy top. Almond shape makes the side placement look sleek because the nail narrows and the dots follow that curve. It flatters most skin tones since the base is close to your natural nail color with a pink glow.
Apply two coats of rose nude, cure, and wipe tacky residue if needed. Use a gel liner brush or dotting tool to place three tiny leaf-tip shapes along one side - each one should be about the size of a sesame seed and angled slightly outward. Keep the top dot about 2 mm from the cuticle and the last dot around mid-nail. Cure and finish with glossy top coat, making sure top coat covers the dots so they don't catch.
Editor's noteUse a darker sage for the dots so they read clearly against the nude base.
Watch outAvoid making the dots too big; oversized dots turn into random specks.
14. Sage and White Half-Moon Almond with Leaf Border
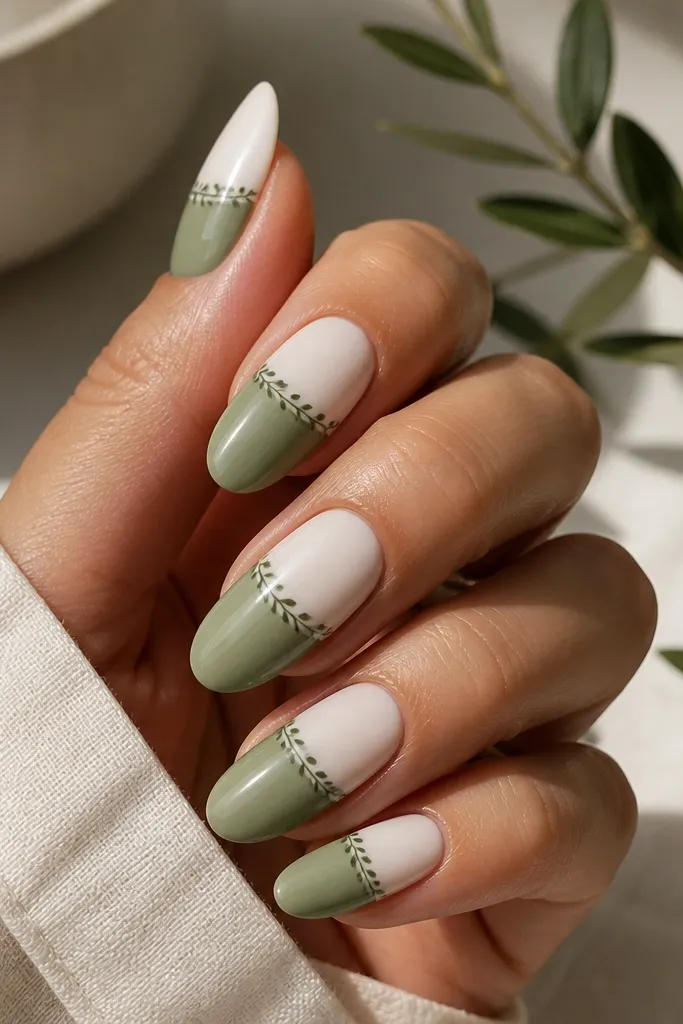
Half-moon designs look sharp on almond because the curve matches the nail's natural shape. The sage and white split feels fresh and summer-clean, and the leaf border makes it botanical without covering the whole nail. I like this for people who want a graphic look but still want it feminine. It also photographs well because the contrast is clear. If you wear neutrals or monochrome outfits, this will look like a deliberate accessory.
Paint the upper half with milky white and the lower half with sage using striping tape. Apply tape so it creates a clean half-moon line, then paint each side in thin coats and cure. Remove tape carefully while nails are still slightly tacky-free (not wet). Draw a thin dark green line along the split, then add tiny leaf tips along the line using a liner brush. Seal with glossy top coat and cap the edges where tape may have left a rough spot.
Editor's notePress tape firmly at the sidewalls to prevent seepage - that's what keeps the split line crisp.
Watch outAvoid freehanding the split line; that's where cheap-looking uneven edges happen.
15. Chocolate Brown Almond with Glossy Green Leaf Vines
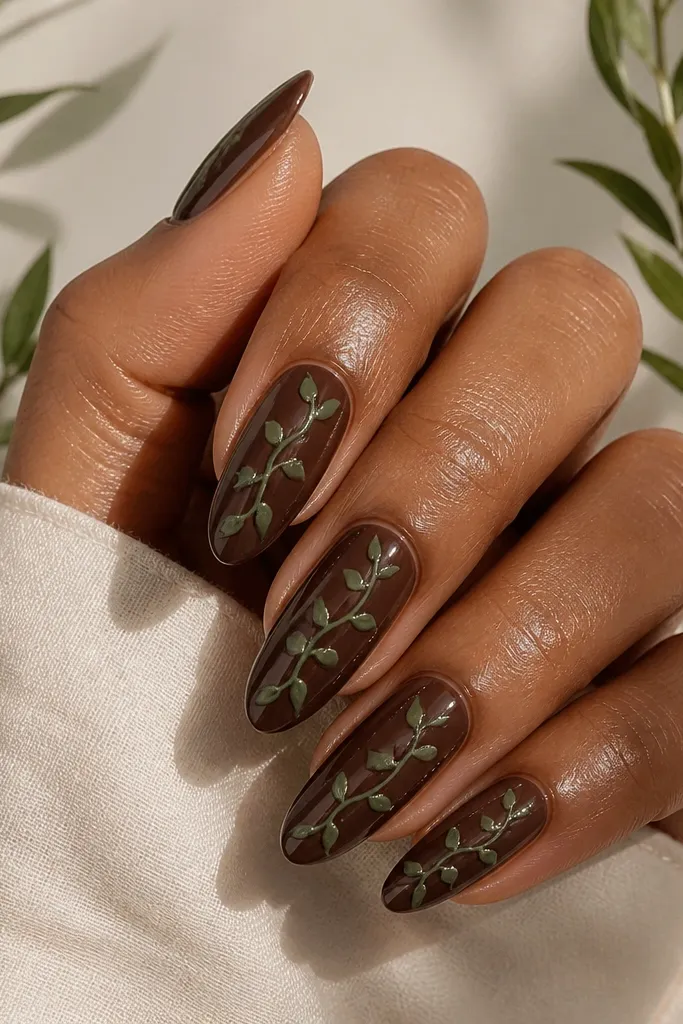
Dark nails in summer work when the accent is botanical and glossy. Chocolate brown makes your nails look grounded, and the green vine gives that plant energy. I've worn this with black dresses and it still feels summery because the vine looks like it's reaching for light. Almond shape makes the diagonal vine look elegant, not messy, because the nail narrows toward the tip. This is a good pick if you like moody colors but want them to feel alive.
Apply two coats of chocolate brown and cure, then top coat lightly if your system needs smoothing. With a liner brush, draw a diagonal vine line in glossy green gel - keep it thin. Add leaf pairs as small curved ovals on both sides of the vine, spaced every 3-4 mm. Cure each nail thoroughly so the vine stays raised but smooth. Finish with a glossy top coat overall and cap the free edge.
Editor's noteUse a gel that stays glossy after cure so the vine looks like it's wet and fresh.
Watch outAvoid thick vines; they make the manicure feel heavy and less "dreamy."
16. Creamy Nude Almond with Emerald Leaf Frame on One Nail
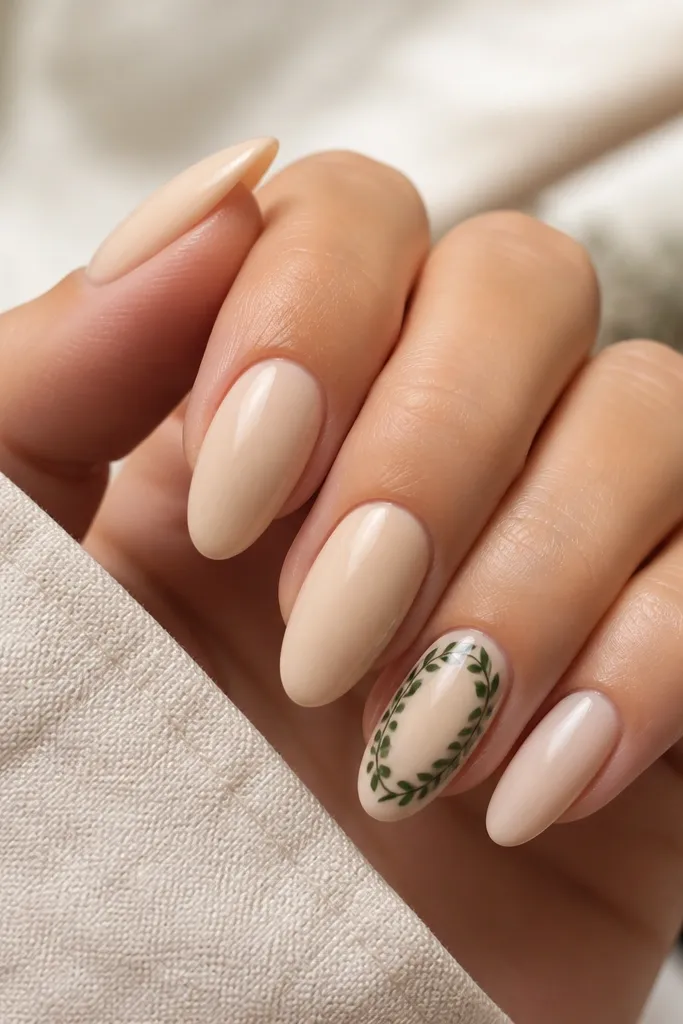
A leaf frame is one of those designs that looks way harder than it is. The creamy nude base keeps everything wearable, and the emerald frame creates a focal border that makes your nails look like they're wearing jewelry. I love this on fair and medium skin because emerald pops without looking neon. The almond shape helps the border follow the nail contour, so it doesn't look like a rectangle sticker. This is perfect for date night and any time you want your nails to look "done" without 3D texture.
Paint two coats of creamy nude and cure. On the ring finger only, draw the leaf frame: start by placing two larger leaves on the left and right sides, then add smaller leaves between them like a wreath. Use an emerald green gel and add tiny vein lines with a thinner brush. Keep the frame centered and leave about 1-2 mm of nude space between the frame and the nail edge. Top coat with glossy finish and cap the frame so it feels smooth to the touch.
Editor's noteIf your frame looks uneven, fix it by adjusting leaf size rather than redrawing the line - smaller leaves hide minor misalignment.
Watch outAvoid frames that touch the sides; leave a tiny breathing gap.
17. Sunscreen Yellow Almond with White Leaf Outline
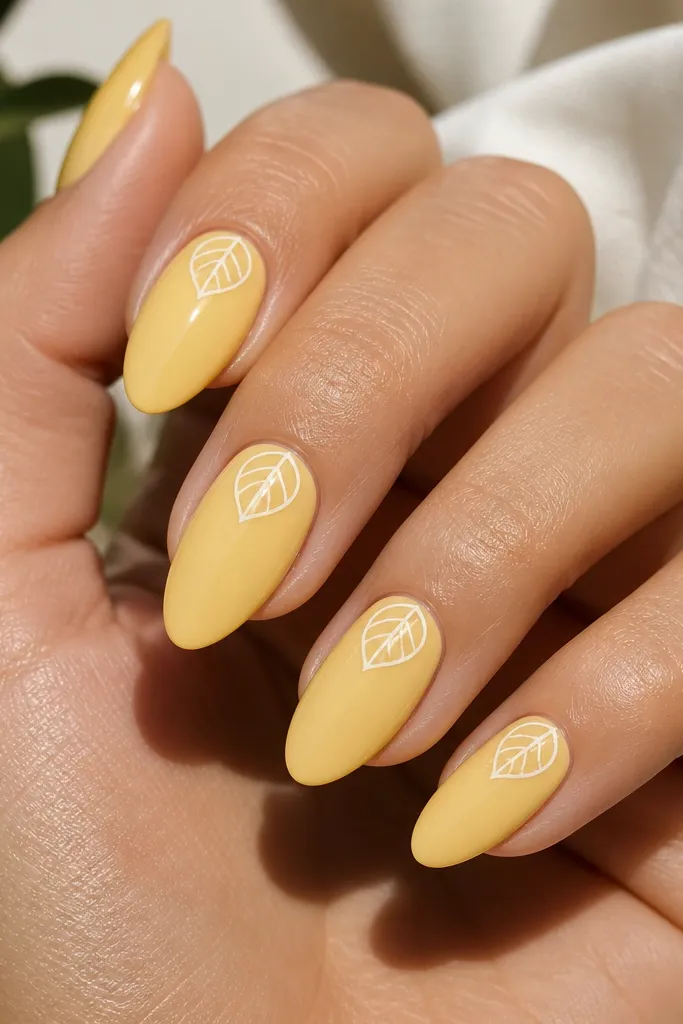
Sunscreen yellow is the kind of color that instantly makes your hands look awake. The trick is using white outlines instead of solid white leaves, because outlines keep it light and airy. This works especially well if you're wearing bright summer makeup or gold accessories; the yellow pairs with warm tones beautifully. Almond shape keeps the leaf outline from looking like a blob - it naturally tapers with your nail. I've done this for outdoor parties and it always feels cheerful without being childish.
Apply two coats of sunscreen yellow and cure. Use a liner brush to draw a single leaf outline near the cuticle on each nail - about 1/4 of the nail width. Add 2-3 thin white vein lines inside the leaf outline. Keep the outline lines consistent and don't thicken them at the base. Finish with a glossy top coat and seal the free edge carefully so the yellow doesn't lift first.
Editor's noteUse a gel with good opacity so the yellow doesn't turn patchy under the white lines.
Watch outAvoid making the leaf outline too big; big outlines overpower almond nails fast.
18. Seafoam Ombre Almond with Leaf Skins on Tips
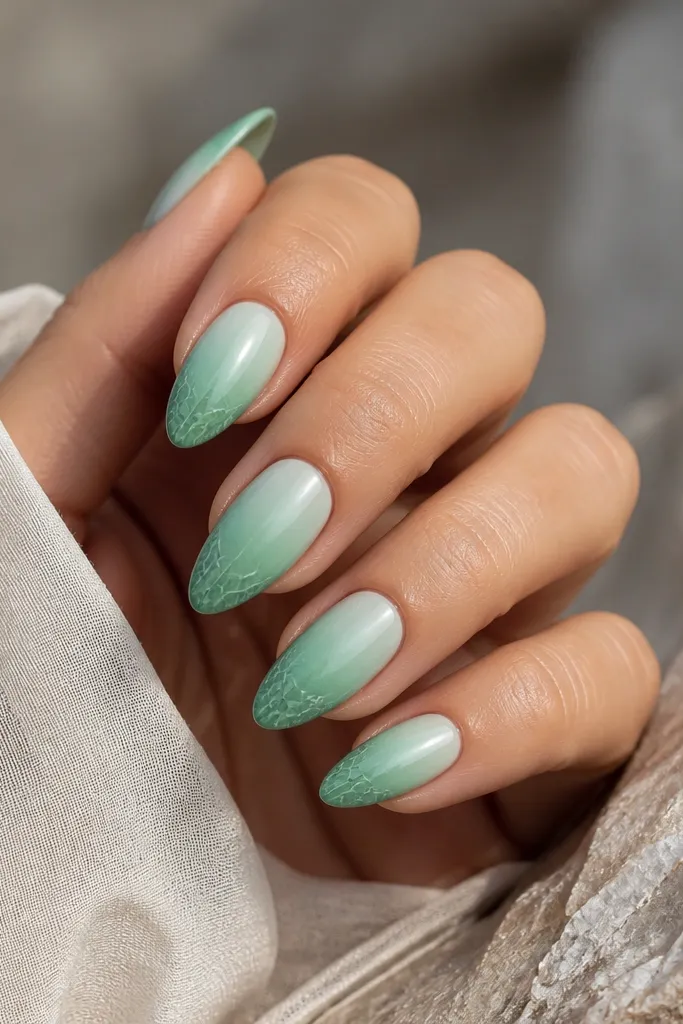
Seafoam ombre is the "I'm on a patio with iced drinks" manicure. It looks soft and dreamy because the gradient blends, not because it's a flat color. The leaf skin pattern at the tip gives extra detail exactly where almond nails look best - at the narrow end. This works for most skin tones because seafoam is light and mixes well with nude undertones. If you like your nails to look like they belong in summer photos, this is it.
Paint a sheer nude base or use a seafoam jelly base. Build the seafoam color with two coats, then create the ombre by sponging deeper green only at the top third toward the tip and blending upward. Cure. On the tip area, draw a simple repeating leaf skin pattern using a liner brush - a few curved lines that follow the nail taper. Keep the pattern to the last 3-4 mm of the nail so it stays airy. Top coat glossy and cap the tip edge.
Editor's noteBlend the ombre with a clean sponge in small dabs - one long swipe creates streaks.
Watch outAvoid covering the entire nail with leaf skins; keep it to the tip.
19. Creamy White Almond with Sage Storage Shelf Accent
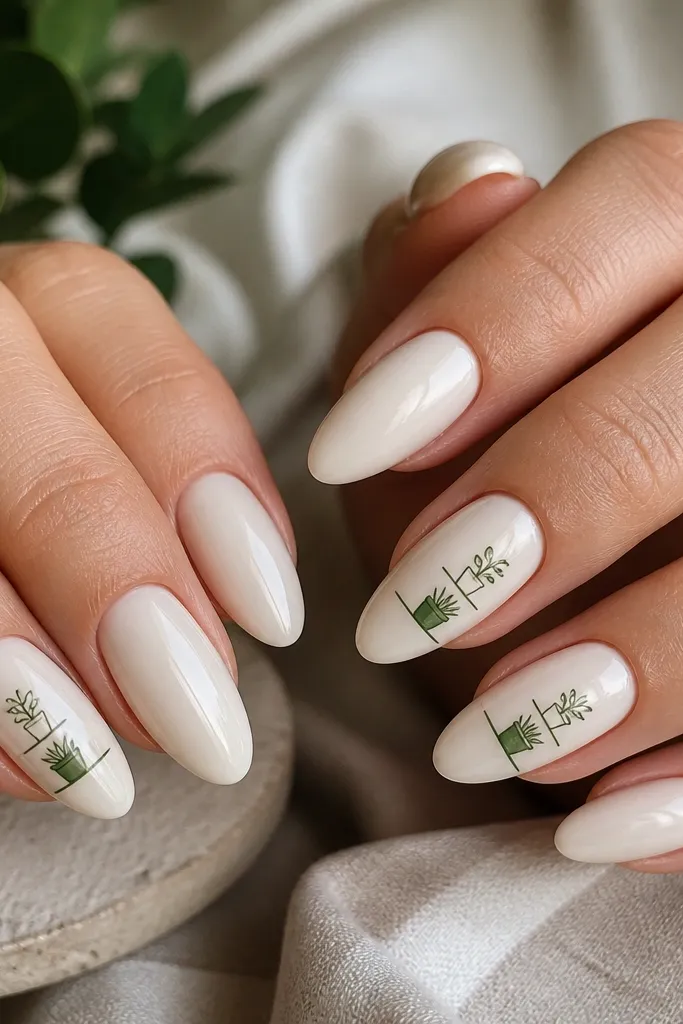
This is the closest nail art to the "storage plants" idea because it looks like your plants have a tiny home. Creamy white makes the shelf and pots look clean, like ceramic on a countertop. It's a great option if you're doing a vacation packing trip or you just want your manicure to match the calm, organized feeling of having supplies sorted. Almond shape gives the shelf room to curve nicely, so it doesn't look like a flat sticker. Wear it when you want something slightly whimsical without being messy.
Apply two coats of creamy white and cure. On the accent nails (I do ring fingers), draw a thin horizontal shelf line in sage near the middle of the nail, then add two small rectangles or ovals as pots stacked above the shelf line. Outline the pots with darker green gel and add tiny leaf stems coming out of each pot. Keep the art small - about the width of a dime across the nail. Seal with glossy top coat and make sure you cap around the shelf line so it doesn't catch.
Editor's noteUse a fine liner brush and draw the shelf line first; it anchors the whole scene.
Watch outAvoid overcrowding the pots with too many leaves; two pots is enough.
20. Clear Pink Almond with Rose-Gold Leaf Micro Lines
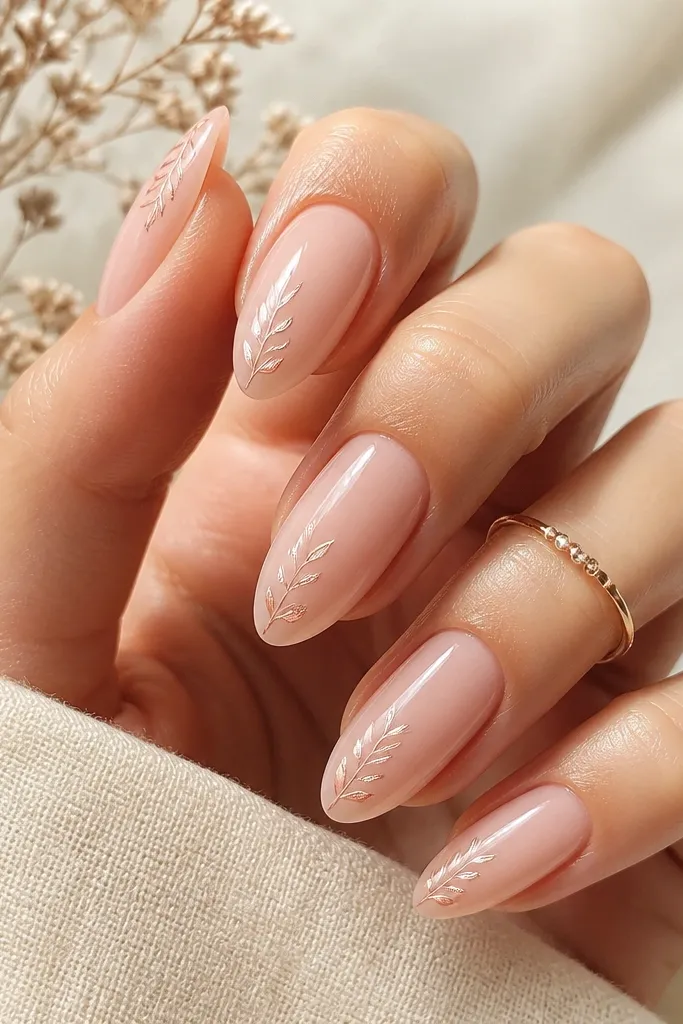
Clear pink is perfect for people who hate heavy nail polish. It looks fresh, and the glassy finish makes your nails look moisturized even if your cuticles are dry. Rose-gold leaf micro lines feel dreamy because they shimmer without needing glitter. I like this on all skin tones, especially if you wear rose gold jewelry; the match makes it look intentional. Almond shape helps the micro lines stay elegant because the taper gives the leaves room to "point" without getting cramped. This is my go-to for everyday summer when I still want nail art.
Apply a clear pink builder gel or sheer pink base in two thin coats, cure, and wipe if needed. With a rose-gold liner gel, draw 2-3 leaf micro pairs along one side of each nail, starting near the cuticle and spacing them about 4 mm apart. Each leaf pair should be small and angled slightly outward. Cure, then apply a glossy top coat in one smooth layer, followed by a second thin layer only if the surface isn't fully glassy. Cap the free edge and check for any raised spots.
Editor's noteKeep your leaf lines super thin - rose-gold looks best when it's delicate.
Watch outAvoid thick rose-gold lines; they look like paint, not jewelry.