1. Espresso Almond with Micro French Half-Moons
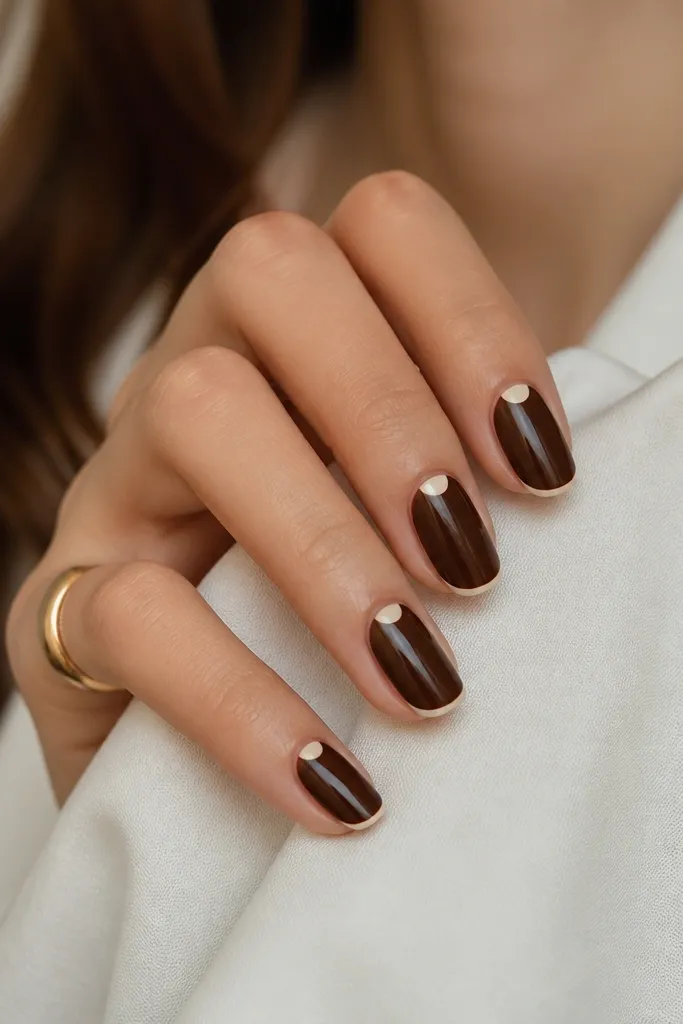
This one is my go-to when I want fall nails that still look neat at work. The espresso base reads warm and grounded, and the micro French keeps the look crisp even on shorter almond tips. The cream half-moons near the cuticle make your nail bed look wider and cleaner, which is flattering on hands that show a lot of nail bed. I’ve worn this with olive coats and camel sweaters and it always looks intentional because nothing is chunky.
Start by painting a smooth espresso brown base in two thin coats, letting the first coat dry fully. Use a striping brush to draw a micro French line that hugs the tip — keep it about 1 mm thick so it doesn’t overpower the almond. Then place a tiny half-moon at the cuticle using the same cream color, leaving a small gap from the sidewalls. Finally, seal with a glossy top coat and cap the free edge with a thin brush stroke.
If your half-moons get messy, use a small piece of tape to mask one sidewall, then remove right away while the polish is still tacky.
Avoid thick French tips — on almond they make the nail look shorter.
2. Burnt Orange Gradient with Caramel Gloss
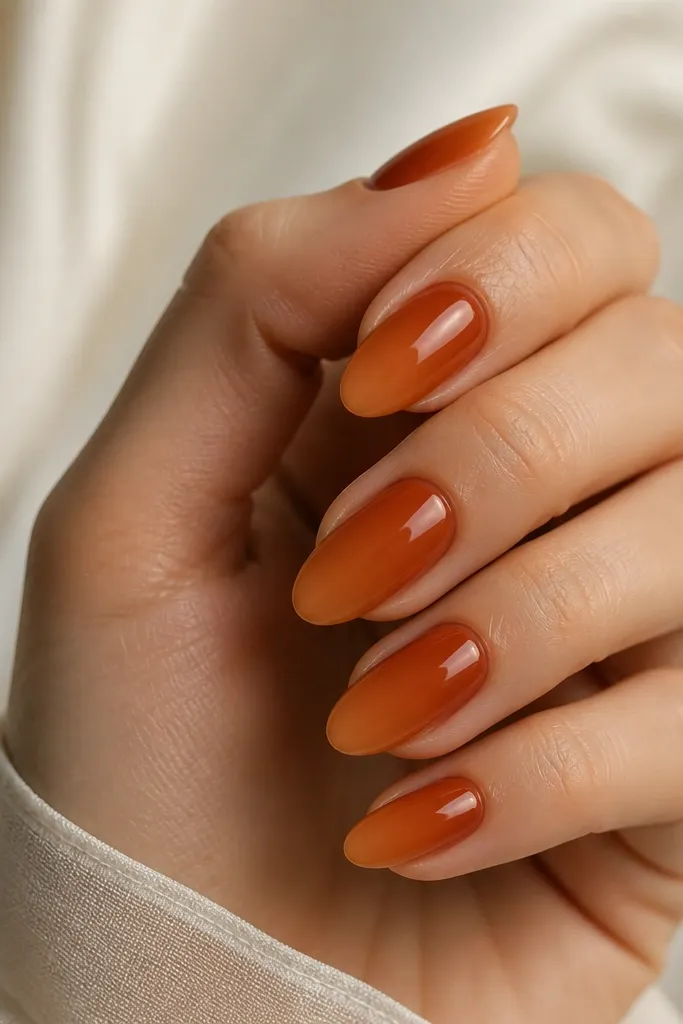
Gradient is the fastest way to make fall color look expensive, and almond makes it look smooth instead of stripy. The burnt orange at the cuticle flatters most skin tones because it lifts warmth right where the nail bed is, while the caramel tip adds depth. On fair skin, it looks like a cozy sweater; on deeper skin, it reads like amber jewelry. This set works for both casual weekends and date nights because the finish stays glossy and clean.
Editor's noteBlend with one gentle press, not rubbing — rubbing creates grainy edges on ombré.
Start with a sheer nude base to even out the nail bed, then apply a burnt orange gel polish at the cuticle area only. Use a makeup sponge to dab caramel on the outer edge and blend downward, keeping the fade soft and not muddy. Cure between steps if you’re using gel, and wipe the tacky layer if needed. Finish with one glossy top coat, and pay attention to the sidewall edges so the gradient doesn’t look raised.
Watch outSkip a white base under orange; it can make the color look chalky.
3. Velvet Matte Oxblood with Tiny Gold Studs
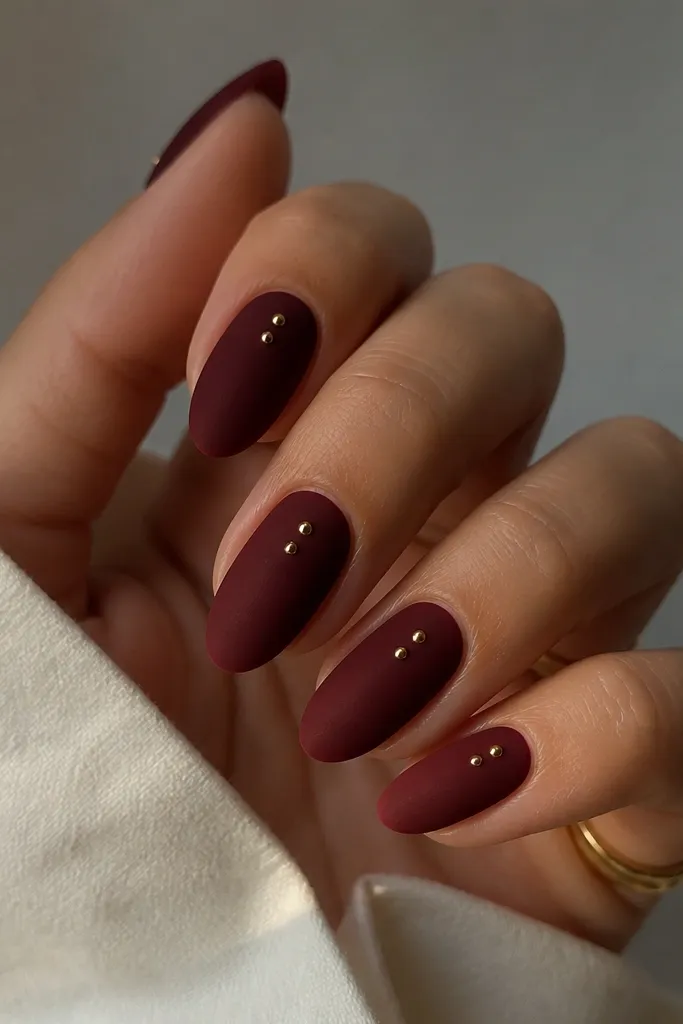
Matte oxblood is the fall equivalent of a dark coat — it looks sharp without needing patterns. The velvet effect hides minor ridges and makes the color look richer, especially in indoor lighting. Gold studs add a small point of sparkle without turning the set into full holiday glam. This flatters hands that look better with strong color — if you like bold nails, you’ll love it.
Paint oxblood in two thin coats, then cure fully. Apply a matte top coat over everything, but leave the spot where studs will go slightly tacky by using a glossy layer only on that dot area. Place one micro gold stud at the center third of each nail, then cure or set according to your product. Finish by sealing around the studs with a tiny brush line of matte top so the edges don’t catch.
Use tweezers with a rubber tip pad — it stops the stud from pinging across your table.
Don’t put studs at the cuticle — they snag and lift first.
4. Terracotta Half-Swirl Lines on Nude Almond
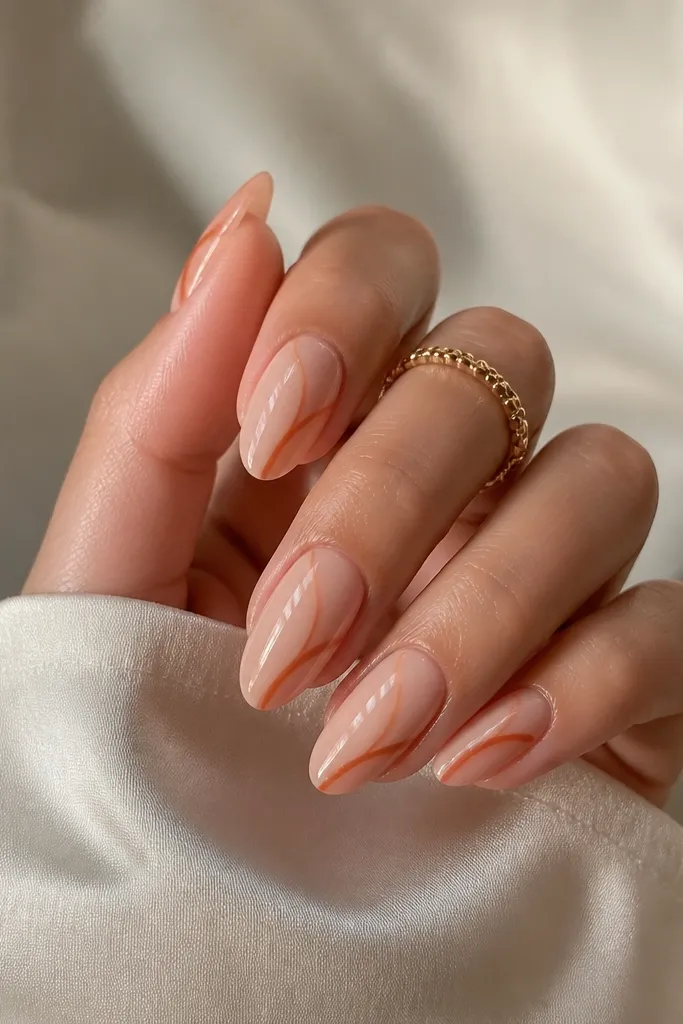
Negative space is what makes this look modern instead of “fall sticker art.” The nude base keeps your nail bed looking clean, and the terracotta half-swirl lines add movement without crowding the almond shape. Terracotta flatters warm undertones and looks great on medium to deep skin tones because the orange-brown pops. If you’re starting nail art and want something that still looks polished with minimal effort, this is it.
Editor's noteIf you’re nervous, practice the arc on a paper strip first — your hand learns the curve fast.
Start with a sheer nude builder gel or polish, then cure. With a fine liner brush, draw a thin terracotta arc starting around the center third and curving toward one sidewall, not the middle. Add a second thinner swirl line that follows the first arc but stays shorter so the design looks layered. Top coat glossy and keep the brush strokes straight to preserve the crisp line edges.
Watch outAvoid thick liner lines; they look heavy on almond and blur when you file.
5. Forest Green Chrome Fade with Clear Edge
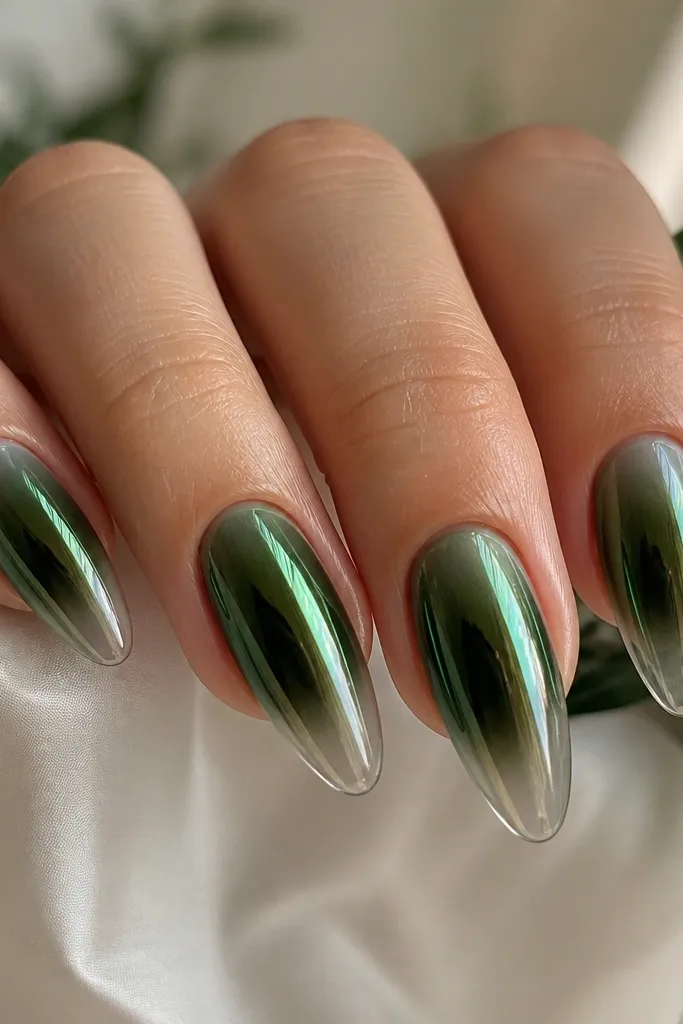
Chrome fade in forest green reads like autumn leaves after rain. The middle concentration makes almond look sleek, and the clear tip area keeps it from looking too dark and heavy. It flatters cooler undertones and makes brown eyes pop, which I noticed when I wore this with silver jewelry. This set also photographs better because the chrome catches light on the center third.
Editor's noteUse a small makeup sponge to keep chrome from spreading into the clear tip zone.
Apply a sheer nude base and cure, then paint a thin layer of forest green gel in the center third only. Use a chrome powder or foil transfer method over the green — press it lightly so the edges stay soft. Leave the tip mostly clear; you can tap a tiny amount of pigment near the tip but don’t cover it fully. Seal with a high-shine top coat that’s compatible with chrome, then cap the free edge with a thin clear layer.
Watch outDon’t buff the chrome too aggressively — it dulls the reflective finish.
6. Cocoa Brown Skittle Tips with Micro Dot Spacing
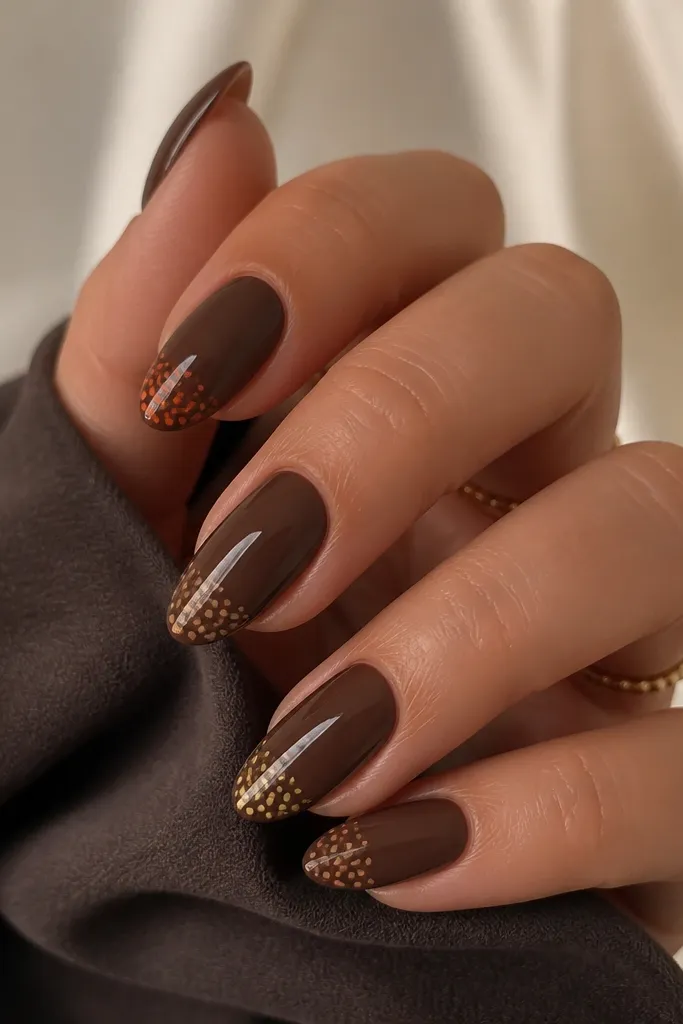
Skittle tips look fun in fall because the colors stay warm but the dots keep it clean. The cocoa brown anchors the set and makes every dot color pop without needing full decals. I like this for short almond because the tip area is where you want visual interest, not the cuticle. This also works if you’re matching a sweater with small color accents like rust earrings or a camel bag.
Editor's noteIf your dots merge, let the base fully cure and wipe residue before placing dots.
Start with a cocoa brown base in two coats, then cure. Decide your dot colors (I use burnt orange, caramel, and muted gold) and place a single row of tiny dots about 1 mm below the tip line on each nail. Use a dotting tool and keep the spacing consistent — one dot, then a 1 mm gap, then the second dot. Finish with glossy top coat, and cap the tip so the dots don’t lift.
Watch outAvoid big dots — micro dots keep almond looking delicate.
7. Matte Clay Nude with Cinnamon Line Art
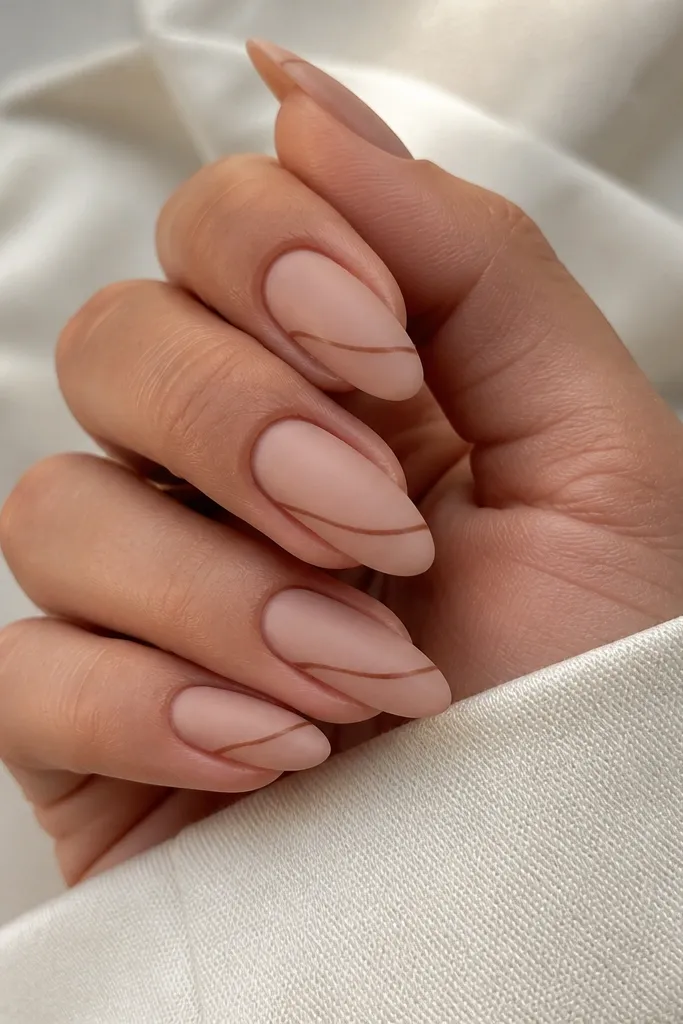
This is the “quiet fall” set that still gets compliments. The matte clay nude looks like soft suede, and the cinnamon line art adds just enough contrast to sharpen the almond silhouette. I’ve worn it to autumn weddings and casual dinners because it looks tidy in photos and doesn’t scream holiday. It flatters hands with shorter nail beds because the matte base visually smooths the surface.
Paint clay nude and cure, then apply matte top coat. With a liner brush, draw a thin diagonal swoop starting around the center third and ending just before the tip. Repeat on each nail, but keep direction consistent so the set feels designed. Let the line art dry fully, then re-seal with matte top, staying careful around the lines so they don’t smear.
Use a slightly dry liner brush for line art; wet paint spreads and thickens the line.
Skip glossy accents on matte clay — it can look like a patch if you’re not careful.
8. Burgundy Gloss with Black V-Notch Tips
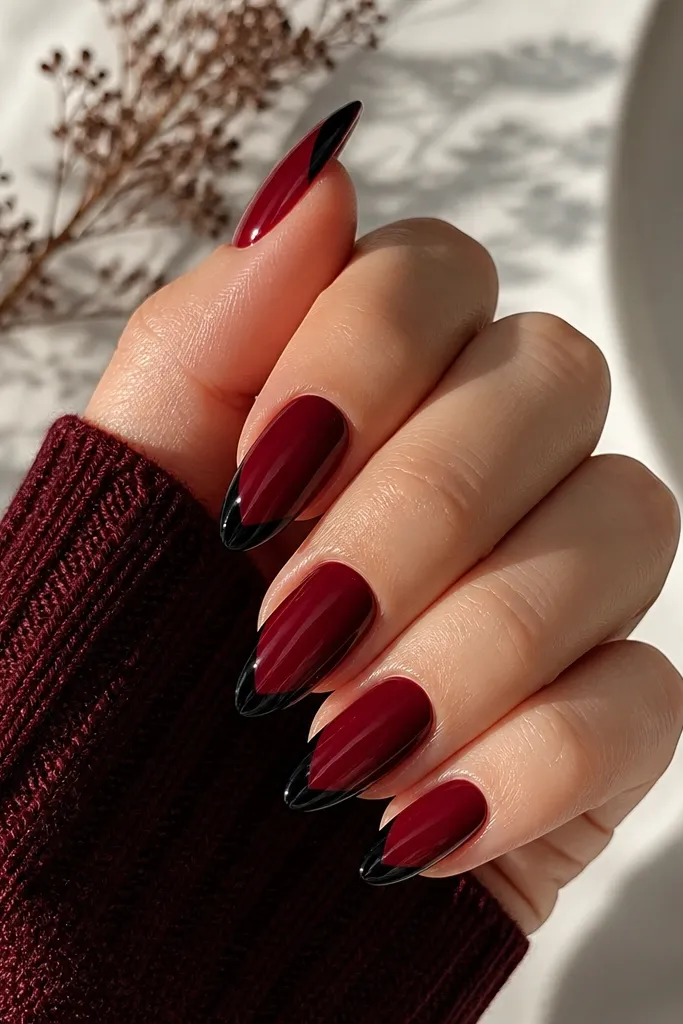
The V-notch tip gives you that sharp, editorial fall look without needing complex art. Burgundy is flattering because it sits between red and brown, which makes it wearable for everyday. The black V adds contrast and makes the almond taper look intentional. This set is perfect if you like darker nails but hate heavy glitter that grabs at sweaters.
Start with two coats of glossy burgundy, cure fully, then top coat lightly. Use a striping brush to draw a V at the tip: start both lines about 2 mm from the sidewalls and meet at the center point. Fill the V with black gel polish and cure, then clean the edges with a small brush dipped in cleaner. Finish with a full glossy top coat and cap the tip and sidewalls.
If you can’t get the V symmetrical, do one side first, cure, then mirror it on the other side.
Avoid rounded V tips — they look sloppy on almond.
9. Camel Nude with Espresso Micro Checkers
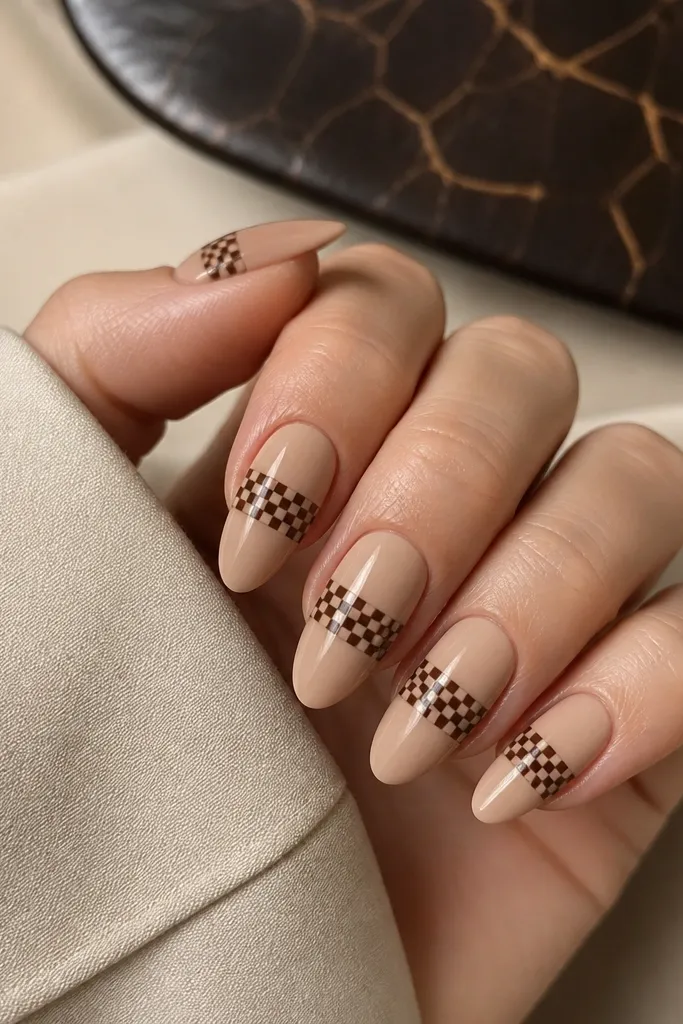
Micro checkers look playful but still fall-appropriate when you keep the colors tight. Camel nude is flattering because it matches warm undertones and makes your nails look healthy and clean. Espresso checkers add structure and visual interest without heavy contrast that can feel too loud. I like this for people who want something different from plain solid fall polish but still easy to wear.
Apply camel nude base in two thin coats and cure. Use a dotting tool or a small square stencil to place tiny espresso dots in a grid on the center third only. Connect the dots into mini squares by filling alternating squares, keeping the pattern about 1/4 of the nail width. Cure, then seal with glossy top coat and cap the free edge.
Use a thin espresso gel — thick gel makes the checkers look like blobs.
Don’t run the checkers all the way to the cuticle; it makes almond look busy.
10. Rust Red Marble with Clear Topcoat Veins
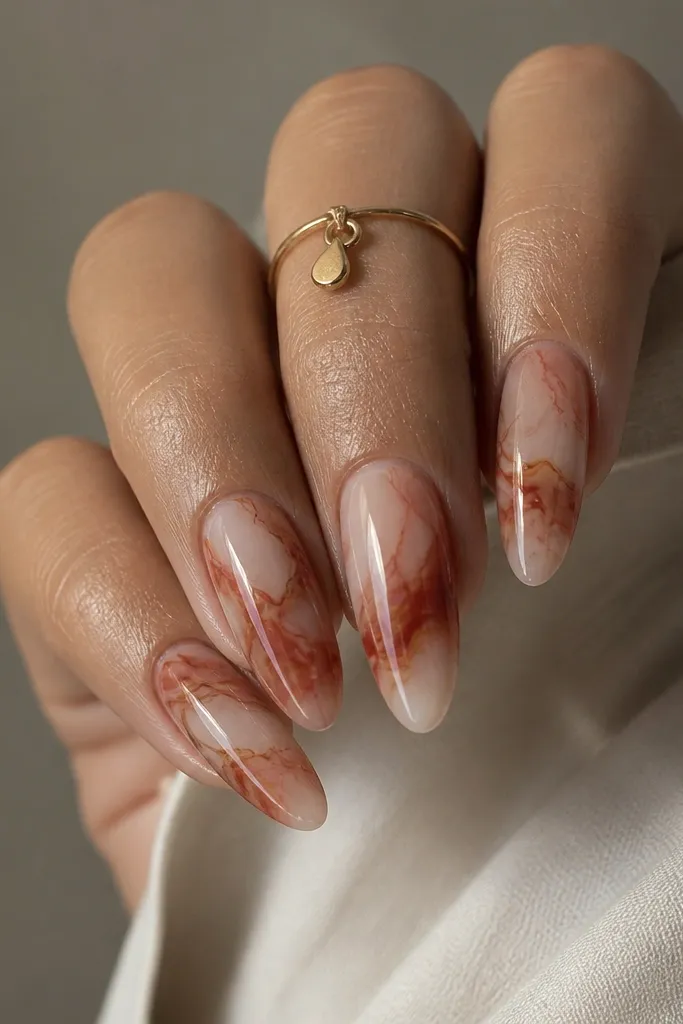
Marble looks best on almond when you treat it like a map, not a full paint job. The sheer base keeps your nail bed visible, which makes your fingers look longer. Rust red marble reads autumn instantly, and the clear veining gives a dimensional, glassy look that I’ve had people ask about in real life. This is also forgiving — small imperfections blend into the marble.
Start with a sheer nude base and cure. Drop small pieces of rust red gel on the nail, then swirl with a thin toothpick or marbling tool to create veins. Use a clear gel to pull some lines through so you get that glass-vein effect. Cure fully, then top coat glossy in two thin layers so the surface stays smooth over the marbling texture.
Work one nail at a time so the gel doesn’t set before you swirl.
Avoid using only opaque red — it can cover your nail bed and shorten the look.
11. Soft Gold Foil on Chocolate Brown Matte
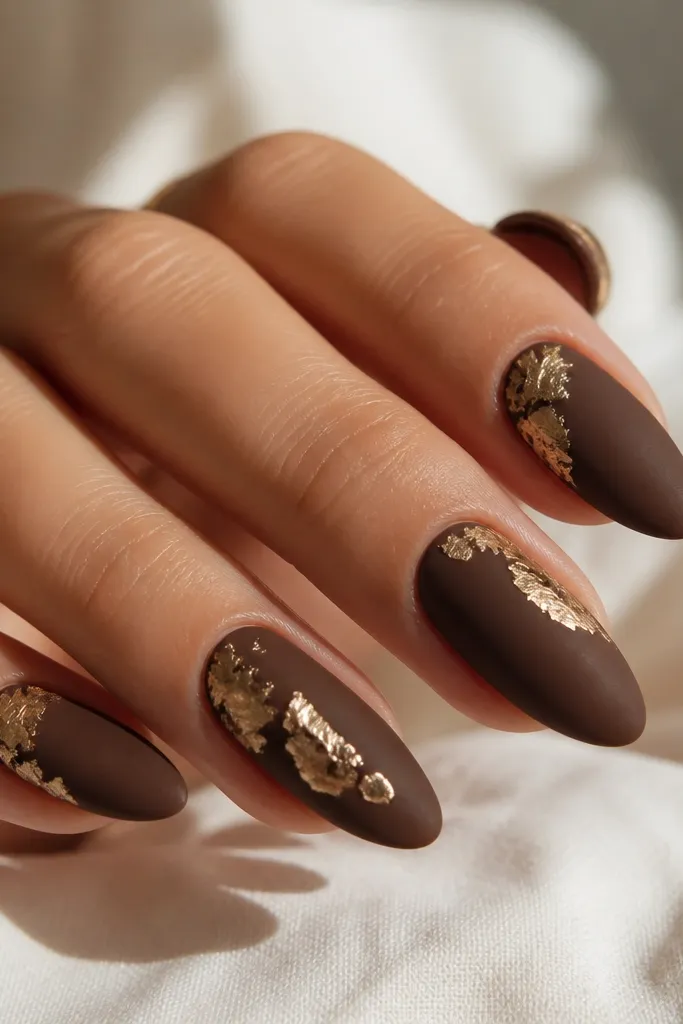
Gold foil over matte chocolate brown looks like warm candlelight. The matte base keeps it cozy, and the foil pieces catch light without needing glitter. I like the foil angled toward the center because it lifts the whole nail visually, which flatters hands that look better with upward detail. This set works for fall evenings and also looks good with sweaters because it doesn’t feel sparkly like winter sets.
Paint chocolate brown and cure, then apply matte top coat. Use foil glue or a thin tack layer where you want foil, then tear soft gold foil into small irregular strips. Press the foil at a diagonal near the cuticle and repeat on each nail, varying placement so it doesn’t look stamped. Seal with a matte top around the foil edges, then do a light glossy top over the foil pieces only so they stay reflective.
Press foil with a foam applicator, not your fingertip — you get cleaner edges.
Don’t cover foil completely with matte top — it dulls the gold.
12. Sage Green with Nude Outline Leaves
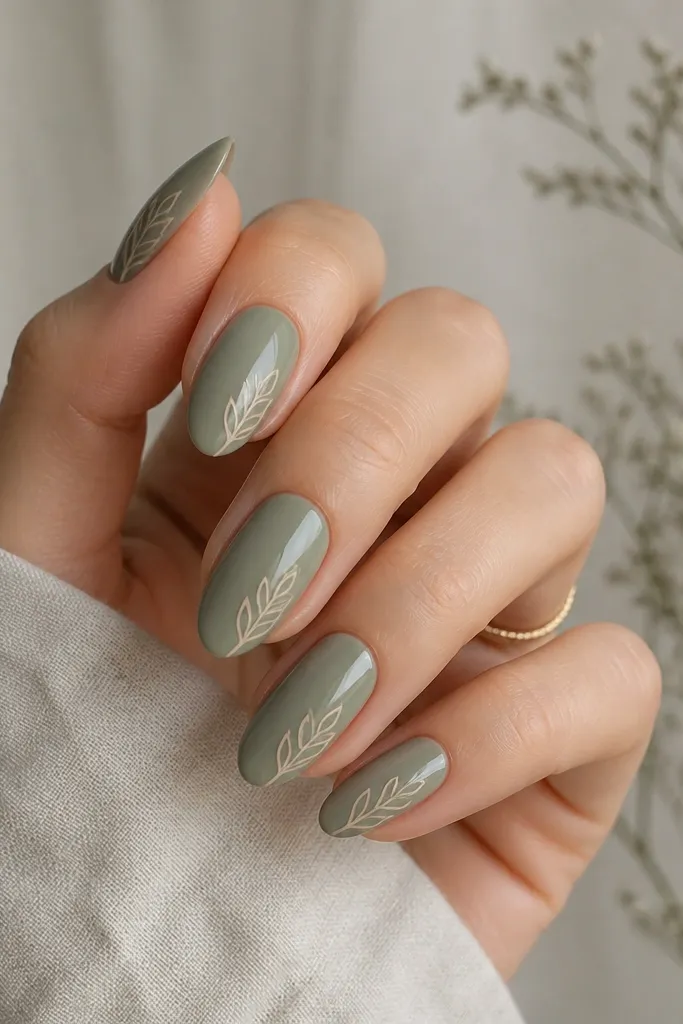
Sage green is fall without screaming “Halloween.” The nude outline leaves keep the design delicate, and the glossy finish makes the green look fresh and dimensional. This flatters fair to medium skin tones because the nude outline blends with your natural nail color, making your hands look clean. If you love nature-inspired art but hate bulky decals, this is light and wearable.
Editor's noteThin your nude gel slightly so the leaf outline stays hairline, not marker-thick.
Apply sage green in two coats and cure. Use a fine liner brush and nude gel polish to draw a single leaf outline starting near the center third and pointing toward the tip. Add a simple vein line inside the leaf outline for definition, then keep the rest of the nail plain. Top coat glossy and wipe any stray liner on the sidewalls before curing.
Watch outAvoid filling the leaves solid — outlines look cleaner on almond.
13. Caramel Swirl Tips on Nude Almond
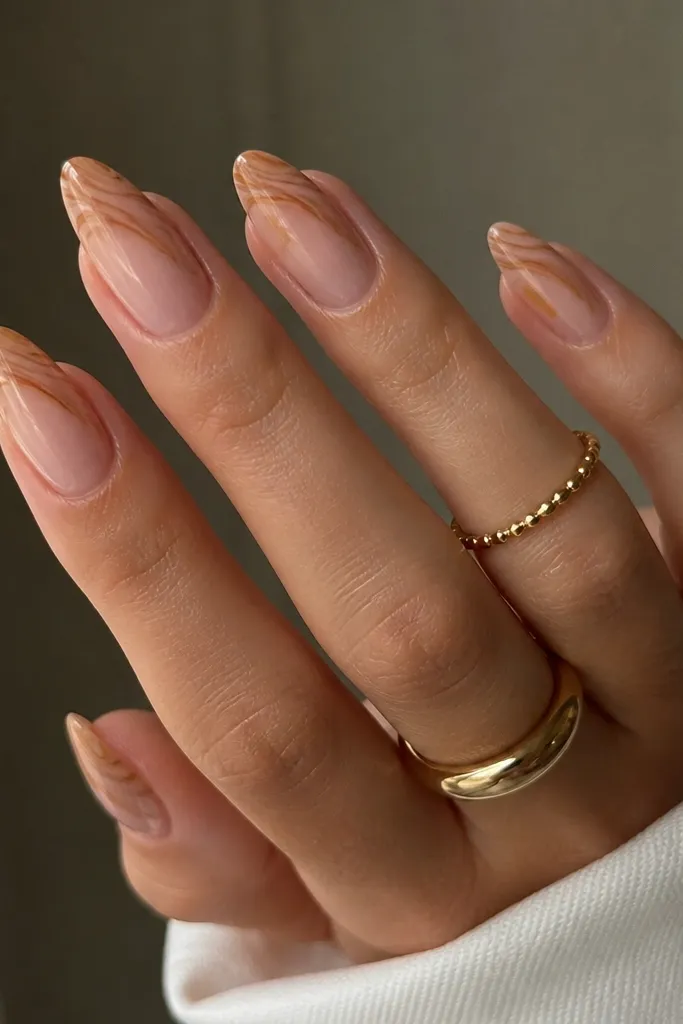
This set looks like caramel sauce drizzled carefully over a latte. The nude base makes it wearable for everyday, and the swirl tips pull the eye toward the almond point. Caramel swirls flatter most skin tones because caramel sits warm and neutral rather than icy. It’s also a great choice if you want fall nails that still look “pretty” instead of dark and moody.
Editor's noteKeep the swirl lines thin — thick swirls look like candy wrappers.
Start with a sheer nude base and cure. Use a striping brush to paint two caramel swirl lines that start near the sidewalls and curve toward the center of the tip, leaving a clear margin around the edges. Add one tiny dot at the tip center to anchor the swirl. Cure, then apply glossy top coat and cap the tip so the swirl stays sealed.
Watch outAvoid painting swirls too close to the cuticle — it shortens the nail visually.
14. Chocolate Brown Gradient with Rose Undertone
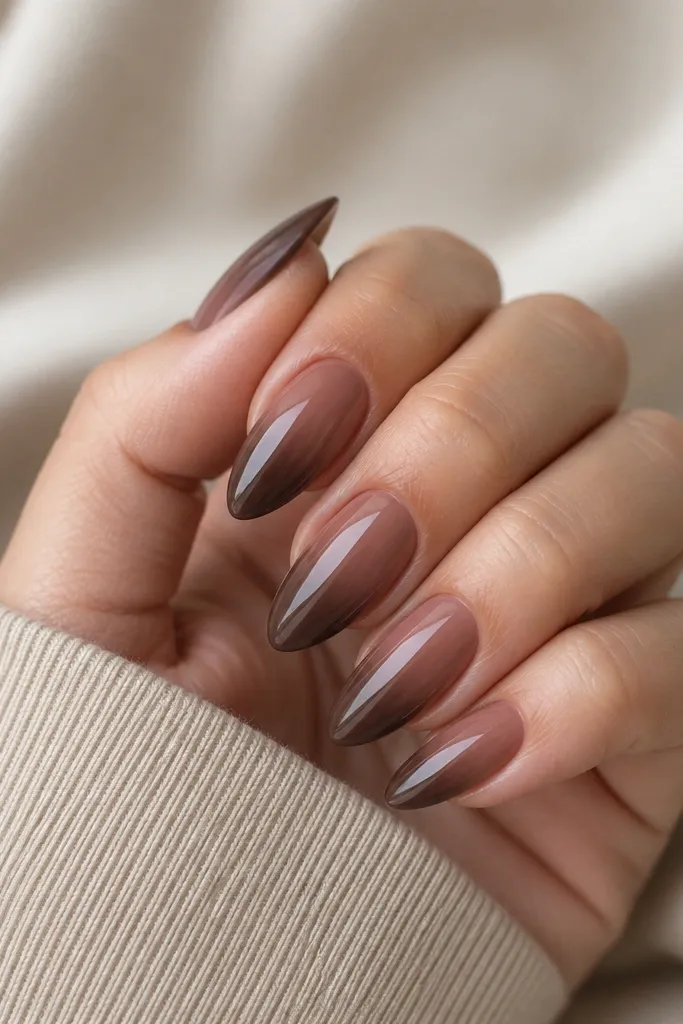
This is a fall gradient that doesn’t go straight into red or orange. The rose undertone near the cuticle makes the nail look fresh and flattering, while the chocolate tip grounds it. I’ve worn this with burgundy lipstick and it matched without making my nails look like they were trying too hard. It’s a good option if you want fall nails that also work in winter.
Editor's noteBlend with a sponge using light dabs, then stop as soon as the fade looks even.
Apply a sheer nude base first so the gradient blends smoothly. Sponge or brush rose-brown at the cuticle area, then blend into chocolate brown toward the tip, keeping the transition soft. Add a second thin layer of chocolate at the tip if you want more depth, then cure between coats. Finish with a glossy top coat and make sure the tip is fully sealed with a thin edge cap.
Watch outDon’t over-layer the gradient — too many layers make it look thick on almond.
15. Terracotta Matte with One Glossy Stripe
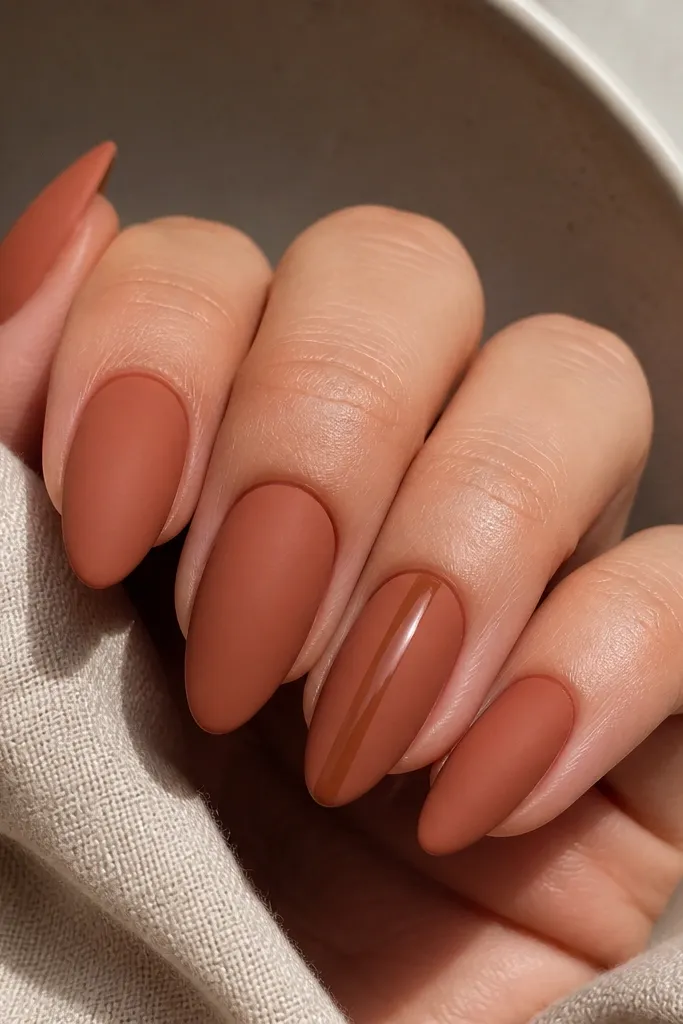
This set is simple, but the contrast is the trick. Matte terracotta looks cozy and soft, and one glossy stripe on the ring finger makes the whole set feel styled. I like it for fall events because the stripe adds light reflection without needing glitter. It flatters hands by giving a vertical line that makes nails look longer.
Paint terracotta in two coats and cure. Apply matte top coat to all nails. On the ring finger only, paint a thin caramel vertical stripe from just above the center third down toward the tip, then top coat it with glossy top, not matte. Keep the stripe narrow so it looks like a highlight, then cure and edge-seal.
Use a striping brush and measure the stripe width against your cuticle line — keep it consistent.
Avoid glossy stripes on every nail; it turns into a busy look fast.
16. Muted Plum with Silver Foil Cuticle Crescent
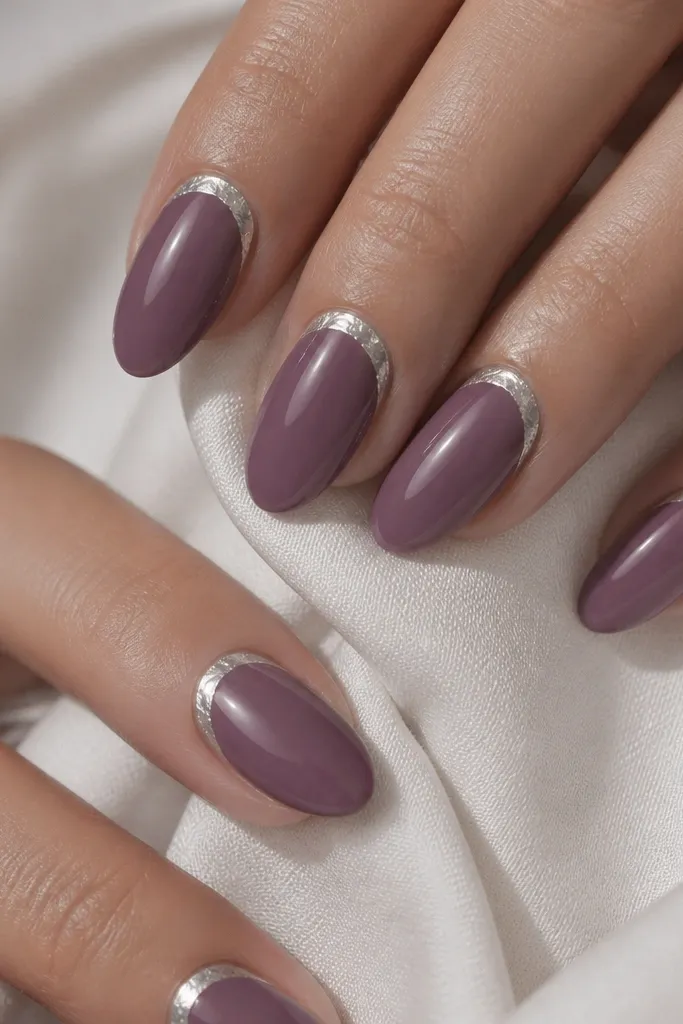
This one looks like jewelry because the foil crescent frames the cuticle. Muted plum is fall-friendly and flattering, and silver foil makes the whole set feel crisp instead of heavy. I’ve worn it with gray hoodies and it still looks dressed up. The crescent placement is key — it widens the nail bed and makes almond look sharp.
Paint muted plum in two coats and cure, then apply glossy top coat lightly. Apply foil glue or a tack layer right at the cuticle area, leaving a small gap from the sidewalls. Press thin silver foil into the glue to form a crescent shape, then remove excess. Seal with glossy top coat without dragging over the foil too hard.
If your foil won’t stick, let the glue get tacky first — not wet.
Don’t put the crescent too low — it can look like a dirty ring.
17. Mocha Nude with 3D Beaded Accent at the Tip
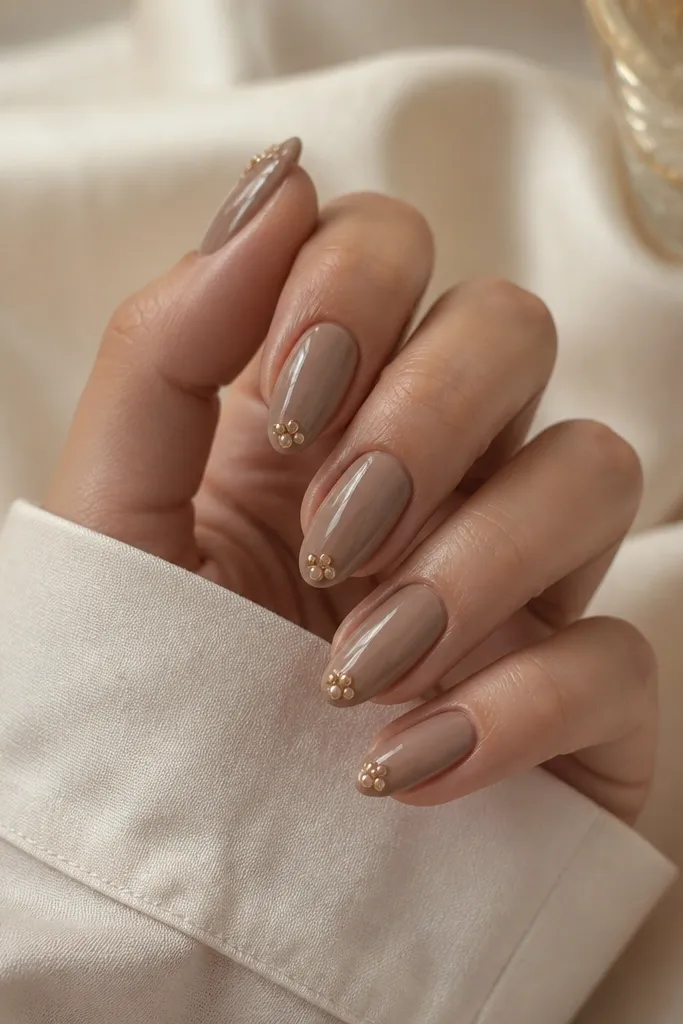
3D accents can look tacky if they’re too big, but a tiny beaded cluster at the tip makes it feel intentional. Mocha nude is a neutral base that lets the beads stand out without overwhelming your nail bed. This is flattering on medium to deep skin tones because the warm nude matches the undertone, and the gold beads glow. It’s a great choice for dinners, birthdays, and any time you want your nails to look “done” in one glance.
Editor's noteUse smaller beads than you think — almond already looks delicate, so tiny scale wins.
Start with mocha nude in two thin coats and cure. Place a small dot of clear builder gel at the tip center — about 1 mm wide. Press micro beads or tiny 3D nail pearls into the gel cluster, then cure. Top coat carefully around the beads and cap the edges so the surface doesn’t snag on sweaters.
Watch outAvoid putting 3D beads near the cuticle — they lift and catch first.
18. Black Tea Brown with Copper Leaf Nail Sticker Cutouts
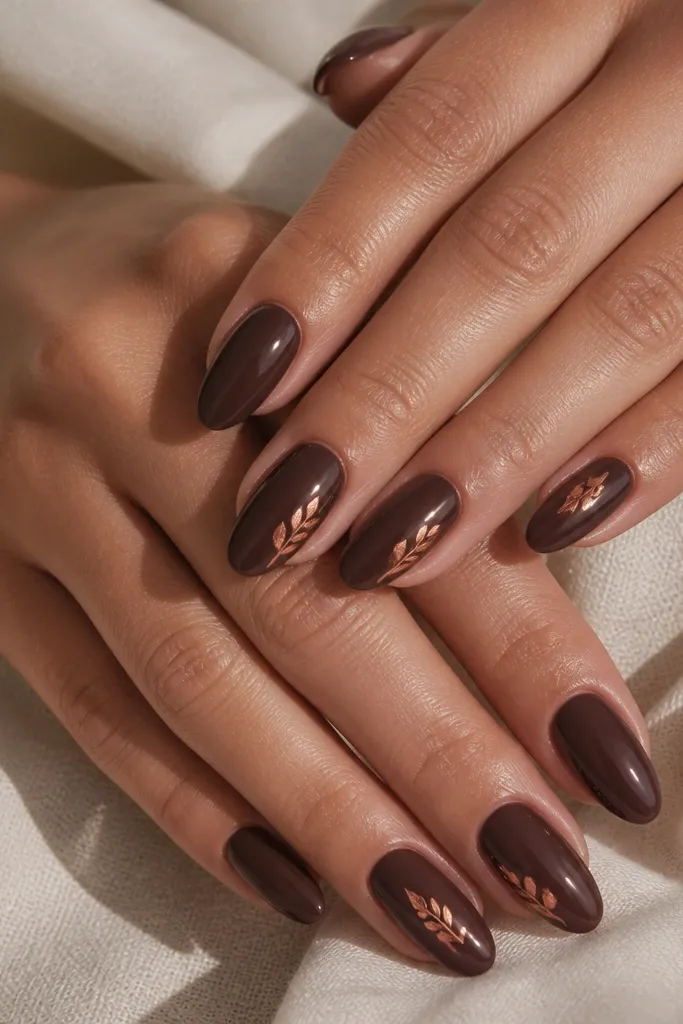
I like leaf stickers in fall because they have instant texture without freehand work. Black tea brown is a deep neutral that makes copper leaf look warm instead of flashy. The cutout style (thin leaf outlines) keeps it classy and makes almond look airy. This set flatters hands that look better with dark neutrals and looks great with gold rings and cognac boots.
Paint black tea brown and cure, then apply glossy top. Place copper leaf nail sticker cutouts on the sidewall area of one or two nails per hand, keeping the leaves angled toward the center to elongate the almond. Press firmly and trim any excess at the tip. Seal with two thin layers of glossy top coat, focusing on the edges where stickers lift.
Seal the sticker edges like you’re glazing — slow brush strokes prevent bubbles.
Avoid covering stickers with thick top coat — it can pool and look uneven.
19. Olive Drab with Nude Negative Space Chevron
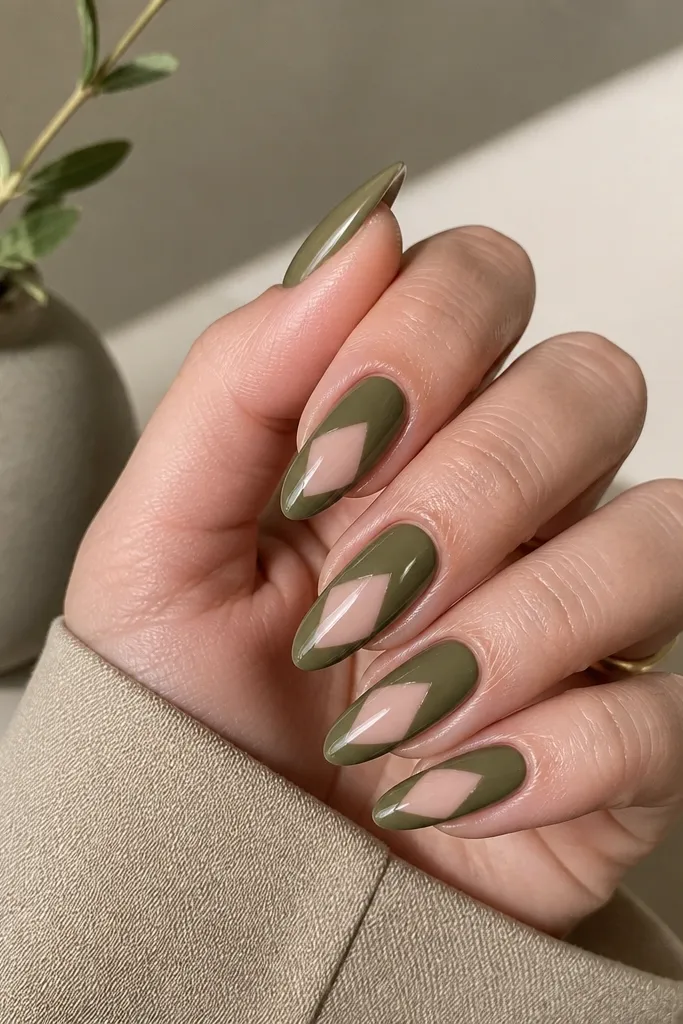
Negative space chevrons look sharp on almond because they create a clean V line that guides the eye. Olive drab is fall-perfect and works on warm and cool undertones, especially if you pair it with gold or bronze jewelry. The nude chevron keeps it from looking too dark, and it makes the nail bed look longer. This is a great option when you want something graphic but not heavy.
Paint olive drab in two coats and cure. Use tape or a chevron stencil to mask a V-shaped area in the center third, then remove the mask to reveal nude negative space. If you’re working with gel, paint a sheer nude or just leave the base area uncovered depending on your system. Top coat glossy and cap the tip, making sure the chevron edges are smooth after curing.
Press tape firmly along the line so the chevron stays crisp — any lift causes fuzzy edges.
Avoid a chevron that reaches the cuticle — it makes almond look shorter.
20. Smoked Plum Almond with Smoky Smoke-Gray Ombré and Pearl Corners
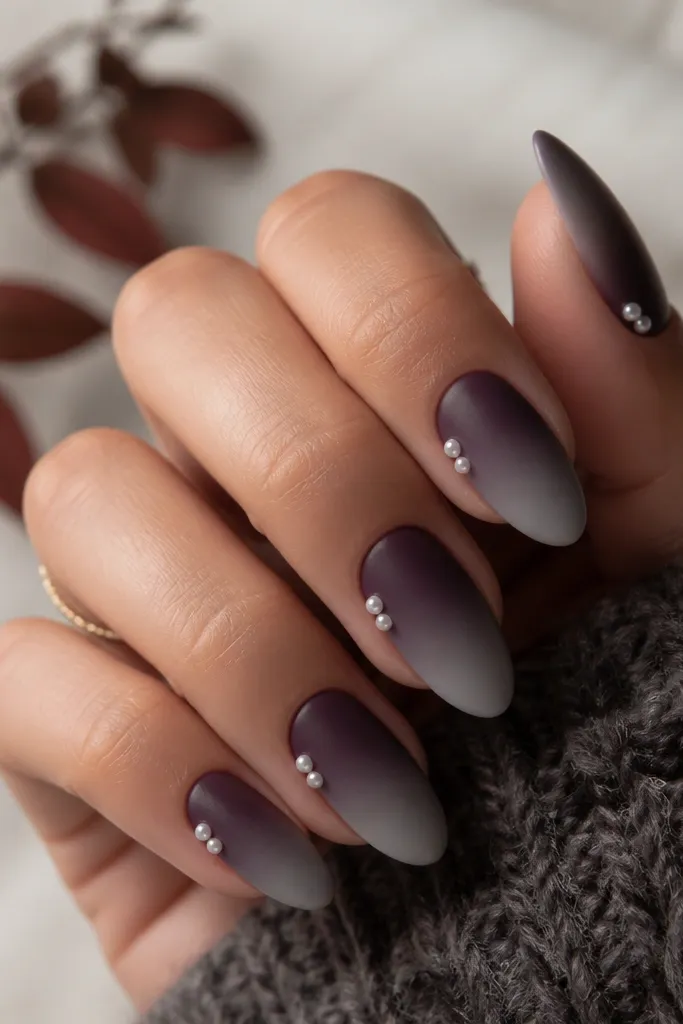
This look has that fall mood without going full dark and heavy. The smoked plum base reads warm in indoor light, then turns cooler as the gray ombré takes over at the free edge. I like the pearl corners because they feel autumn fancy — not wedding-glam, more like a sweater-and-boots kind of pretty. A satin or matte topcoat keeps the gray from looking flat and makes the plum look velvety instead of shiny-thick.
Editor's noteIf your ombré turns streaky, thin the gray gel slightly and do two lighter sponge layers instead of one heavy layer.
Start by prepping the nails and applying a plum gel polish as your base, then cure fully. For the ombré, sponge on smoke-gray gel at the tips using a torn makeup sponge — dab, don’t swipe — and blend upward about 2-3 mm. Clean the edges with a small brush dipped in gel cleanser, then cure. Place two small pearls at the outer corners of each nail — I set them about 0.5 mm in from the sidewall and 0.5 mm down from the tip line — then cap over with a thin clear gel. Finish with a satin matte topcoat so the pearls stay crisp but the polish looks soft.
Watch outSkip using a thick gray layer at the tip — it makes the fade look like a hard cap instead of smoke.