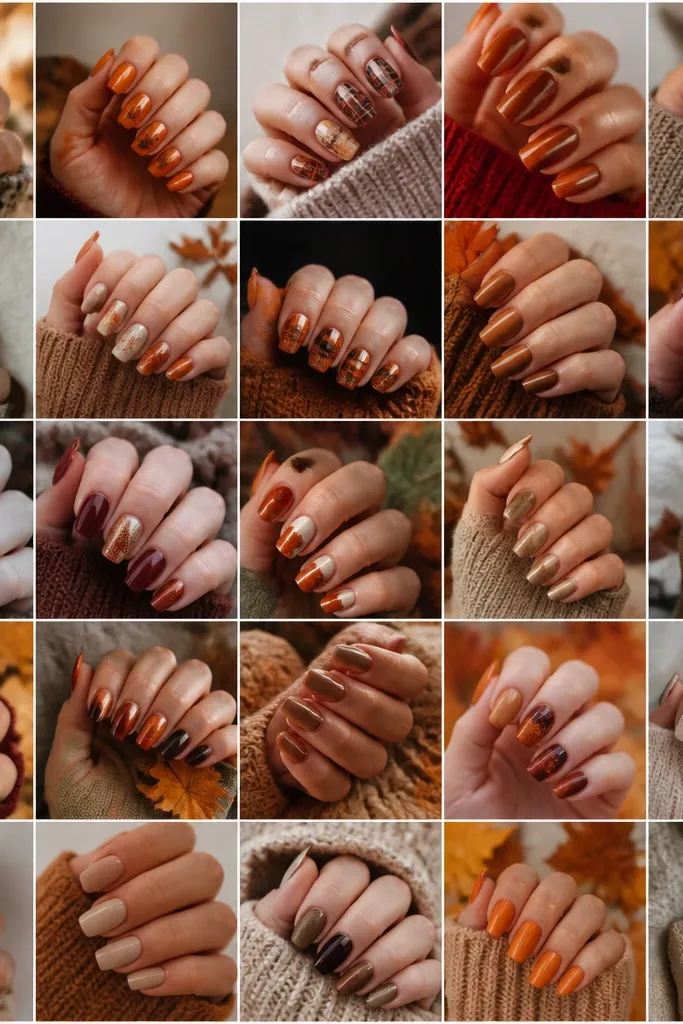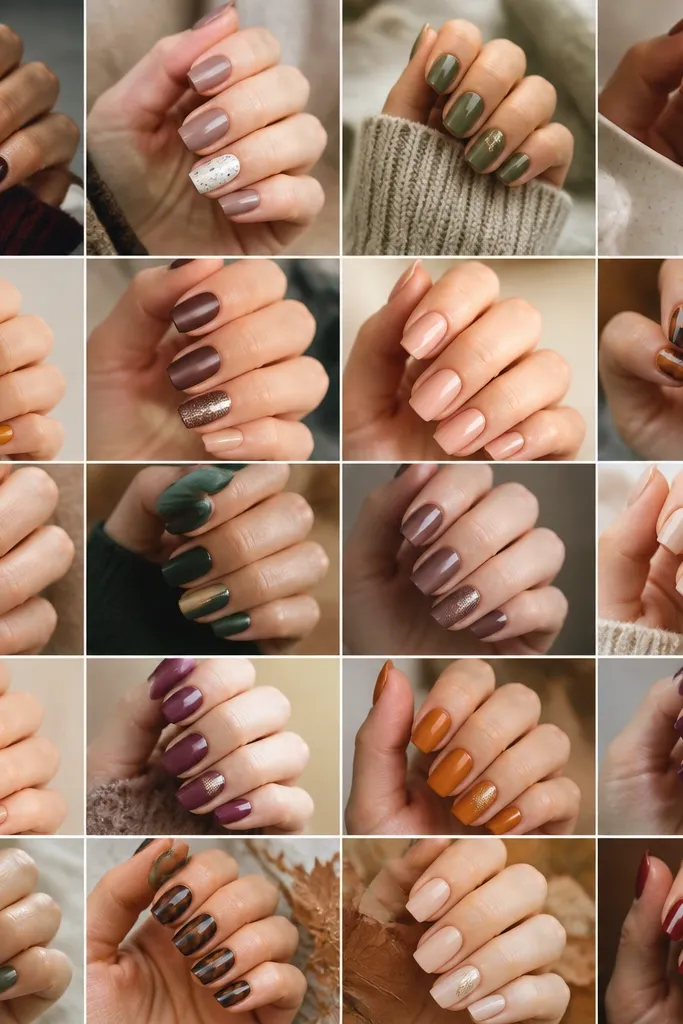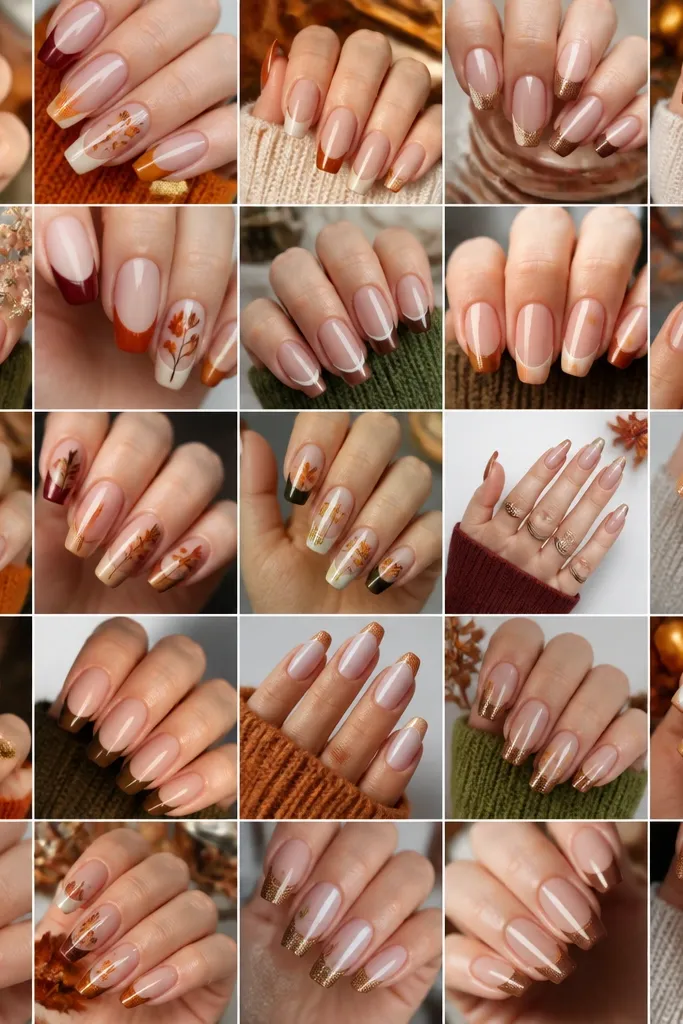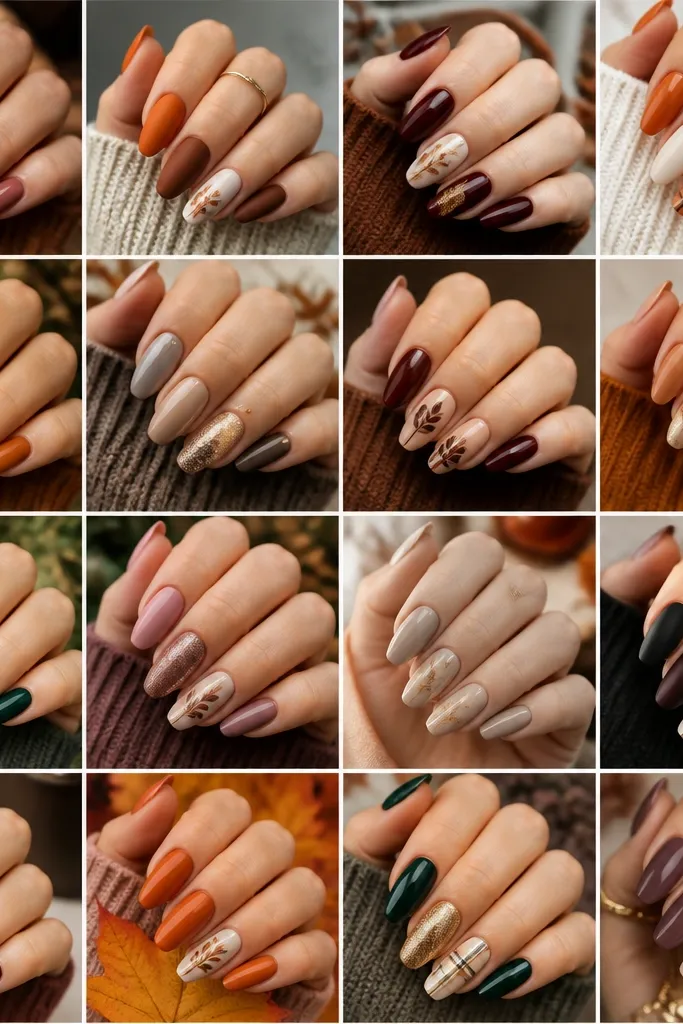
1. Cocoa Cream Square with Micro Gold Cuticle Line
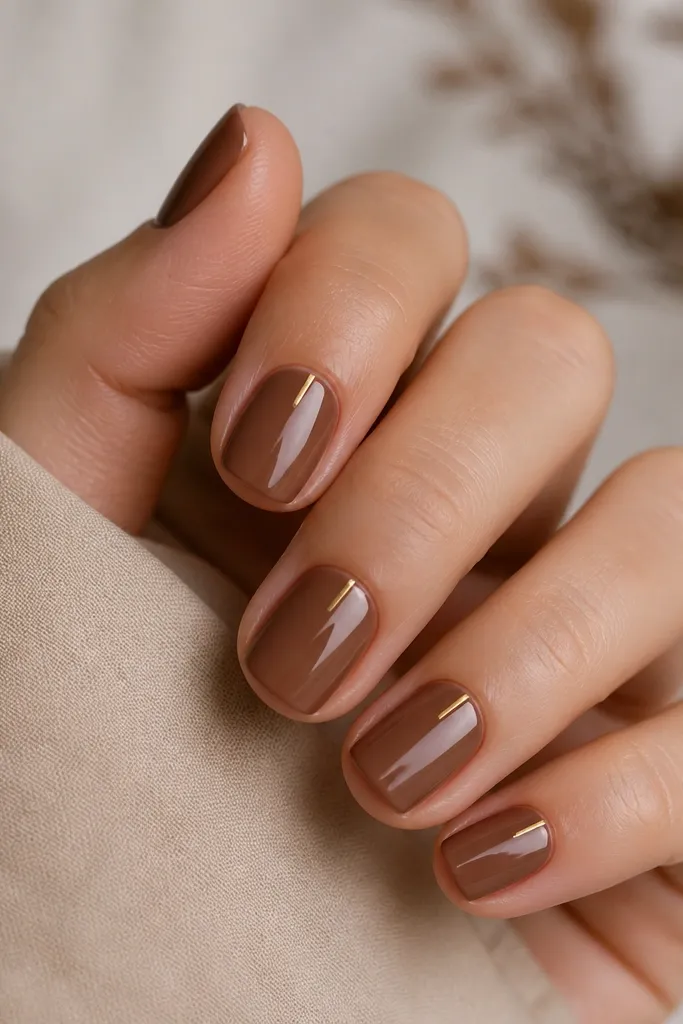
This one is my go-to for fall because cocoa cream makes skin look warmer without turning the nails into “Halloween brown.” The finish is creamy and opaque so short squares look smooth and even. The micro gold line stays classy because it’s thin and placed right at the cuticle, not stretched across the nail. It flatters most skin tones, especially fair to medium — it gives contrast without looking harsh. If you have wider nail beds, the centered line visually narrows the nail and makes the square edge look intentional.
Start by prepping your nails and pushing back cuticles lightly, then buff the surface just enough for polish to grip. Paint two coats of the cocoa cream, letting each coat level out before curing or drying fully. Use a fine striping brush or a dotting tool to place a straight gold line 1-2 mm above the cuticle on each nail. Finish with a glossy top coat, then cap the free edge so the gold line doesn’t chip at the corners.
Editor's noteIf your cuticles get dry, apply a tiny amount of cuticle oil after top coat dries, not before — oil can cause top coat to peel.
Watch outAvoid gold lines that are thicker than a hair — chunky foil on short nails reads messy.
2. Burgundy Jelly with Clear Half-Moon at the Cuticle
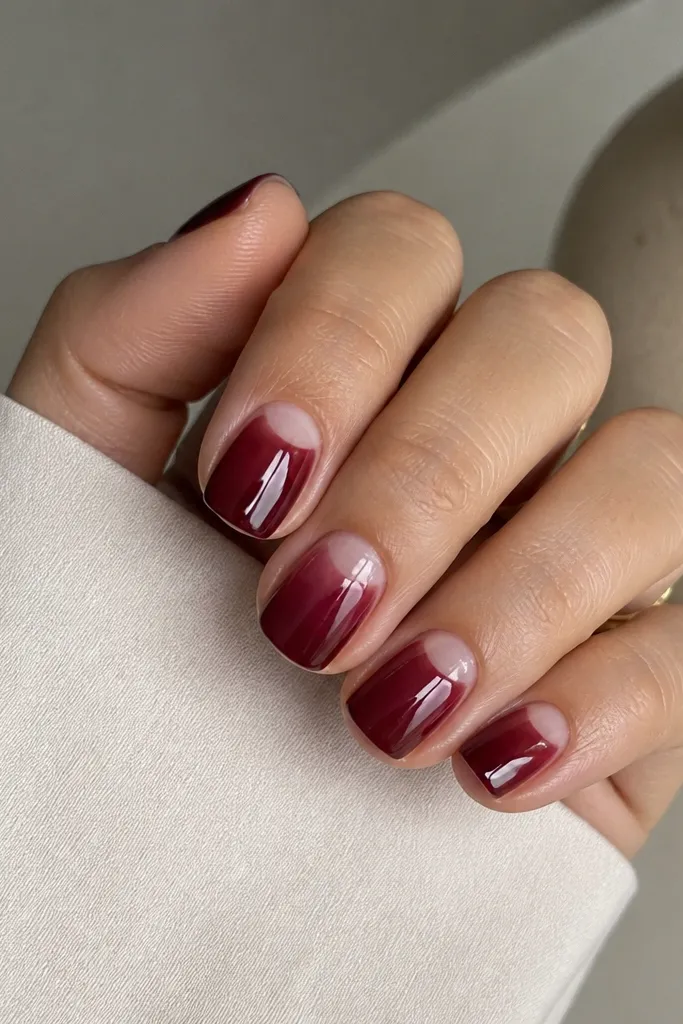
Burgundy jelly gives you that deep fall tone while still looking light on short nails. The clear half-moon keeps the nail from looking heavy, and it makes your cuticle line look neat. I love this when my hands look a little dry because the clear area draws attention upward without clinging to flakes. This design flatters medium and deeper skin tones the most, but fair skin looks great too when the burgundy is not too dark. It also pairs with gold jewelry beautifully because the clear space mimics light.
Start with a thin base coat, then place a small half-moon guide using half-moon nail stickers if you want a perfect curve. Paint two thin coats of burgundy jelly, keeping the color slightly away from the cuticle so the half-moon stays crisp. Carefully remove the stickers while the last coat is still slightly tacky so edges don’t pull. Seal with glossy top coat and cap the sides to protect the half-moon border.
Editor's noteUse thin coats instead of one thick coat — jelly polish thickens fast and can flood the half-moon.
Watch outDon’t paint right up to the cuticle if you want a clean half-moon — messy edges make it look like a regrowth mistake.
3. Smoked Olive with One Matte French Tip
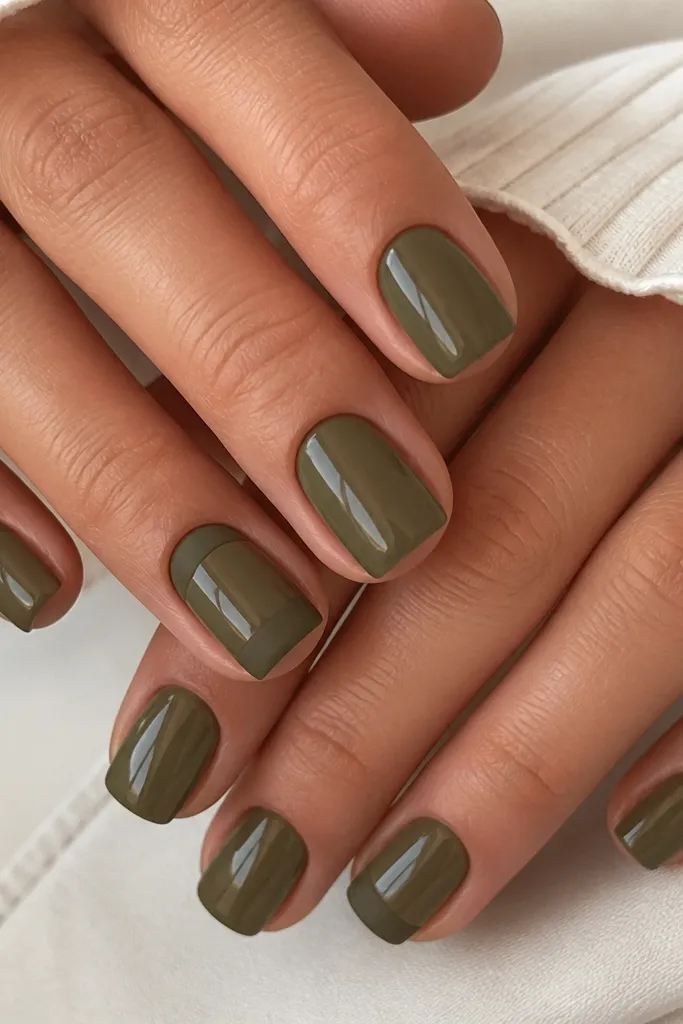
Smoked olive is autumn in one bottle — it looks grounded, not loud. Keeping most nails glossy and only one matte French tip gives contrast that reads intentional. Matte can look cheap when it’s everywhere, but one matte element keeps it classy and modern. This design looks especially good on warm undertones because olive has a green-gold warmth. If your nails stain easily, olive can hide it better than bright reds.
Paint all nails with smoked olive in two coats, then let them cure/dry fully. On your accent nail, add a French tip using a striping tape guide — keep the tip width about 1.5-2 mm for short squares. Use matte top coat only over the French tip area, not the whole nail. Finish with glossy top coat on the other nails so the olive stays dimensional.
Editor's noteIf the matte top coat smudges, wipe the brush on a lint-free pad and work slowly with short strokes.
4. Rust Terracotta Base with Tiny White Dots
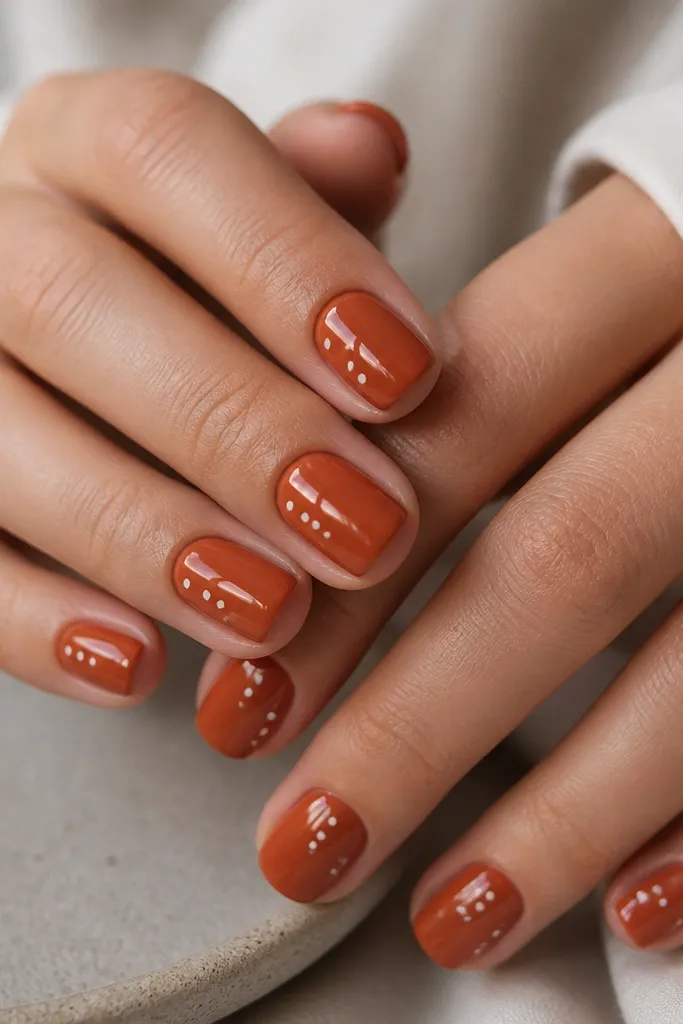
Terracotta rust is one of those fall shades that looks expensive because it sits between orange and brown. The tiny white dots add a playful detail without turning it into cartoon art. Dots work well on short square nails because they don’t require long lines to look balanced. This flatters a wide range of skin tones because the rust color brings warmth and the white adds a clean highlight. It’s also forgiving if your nail surface isn’t perfectly smooth, since dots distract the eye.
Start with two coats of terracotta rust, fully leveling each coat. Then use a dotting tool with white polish and place dots near the lateral sides — aim for 2-3 dots per nail, not a full cluster. Space them so the largest dot sits about halfway between the cuticle and the tip. Seal everything with glossy top coat, and lightly nudge any dot edges with the brush so they look round, not dragged.
For crisp dots, let the base coat dry hard before dotting — soft polish smears.
Avoid uneven dot size — if three dots are huge and the rest are tiny, it looks accidental.
5. Chocolate Brown Gradient Fade to Nude
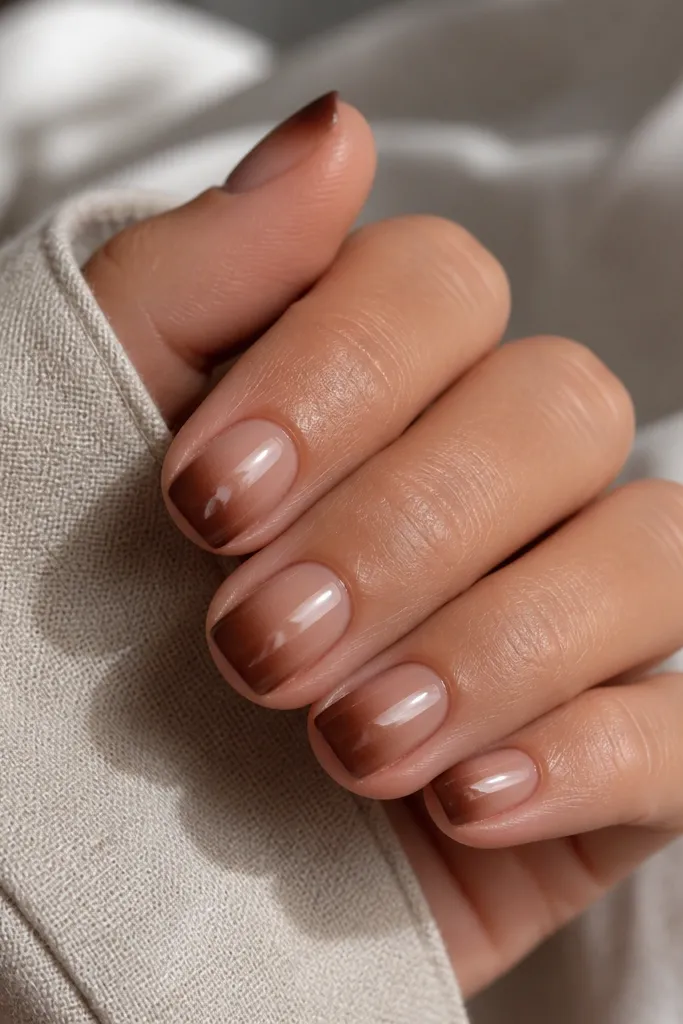
This gradient is classy because it looks like a manicure artist blended it, but it’s actually easy. The chocolate-to-nude fade makes short nails look longer without changing the shape. I like this when I want fall warmth but still want my nails to match everyday outfits and workwear. The nude shade needs to be close to your skin tone so the transition looks natural. It flatters hands with smaller nail beds because the fade creates a vertical line effect.
Paint a nude base close to your skin tone in two thin coats. Using a makeup sponge, tap chocolate brown at the very tip area and blend upward in light dabs, keeping most color concentrated at the free edge. Clean up the edges with a small brush dipped in remover before it fully sets. Finish with a glossy top coat, and apply an extra layer over the center so the gradient looks smooth instead of speckled.
Use a sponge that’s slightly worn-in — fresh sponges leave hard edges on short nails.
Don’t blend too high — if brown reaches the cuticle, the manicure looks heavy.
6. Forest Green with Thin Gold Side Lines
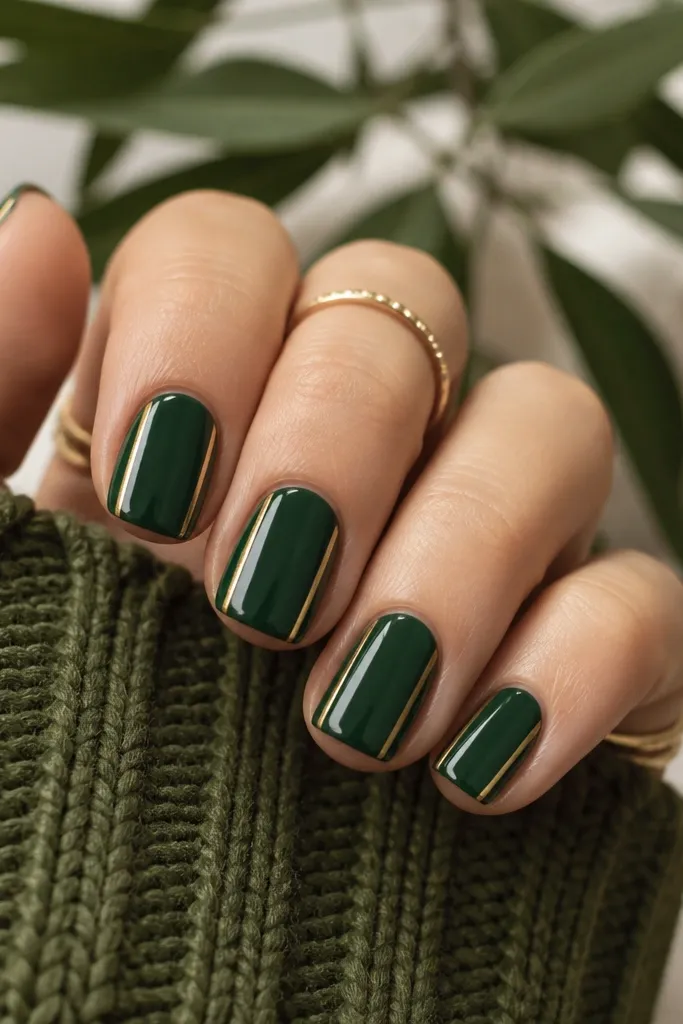
Forest green looks rich in fall, and the thin gold lines make it feel tailored. I’m picky about the line width — it should be barely visible up close, like a design detail on a watch strap. This keeps the manicure classy even though the color is bold. It flatters cool undertones and also looks stunning on warm skin because the gold warms everything up. If you have slight ridges, the glossy top coat helps smooth the look and the side lines pull attention to the shape.
Apply two coats of forest green and let it fully dry/cure. Place gold striping tape on each side edge of the nail — keep it centered and don’t let it touch the free edge too much. Paint over the tape lightly with gold polish or press gold foil carefully, then remove tape while the gold is still tacky. Seal with glossy top coat, and cap the corners so the gold line doesn’t peel.
If tape leaves a ridge, run a fine buffer lightly over the cured surface before top coat.
7. Mocha Nude with One Burgundy Chevron Accent
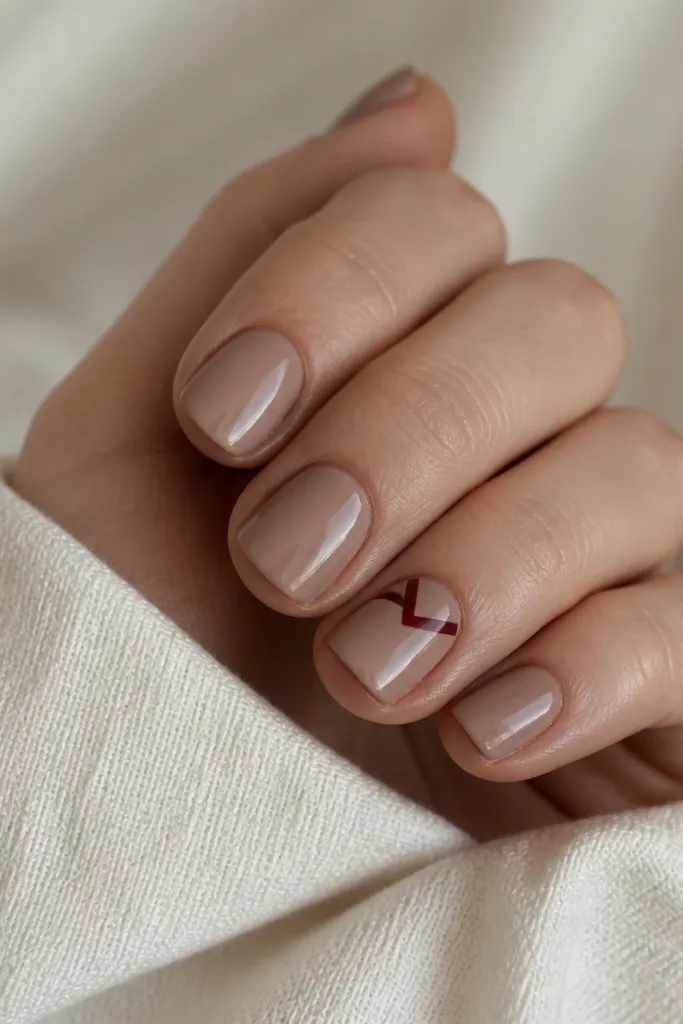
Mocha nude is the easiest way to look put-together in fall when you don’t want your nails to steal attention. The burgundy chevron adds movement and makes the manicure feel designed. Chevron works on short squares because the lines are angled, creating a slimming effect. This looks great with sweaters, long sleeves, and neutral outfits, and it flatters both fair and deep skin tones since the nude sits in the middle. Keep the accent on one nail per hand so it stays elegant.
Paint all nails with mocha nude in two coats. On each ring finger, use a thin nail art brush with burgundy polish to draw a small V shape centered near the middle — about 2-3 mm tall. Add a second line to sharpen the chevron edges by tracing over the first V. Clean up sides with a remover pen, then finish with glossy top coat over the whole hand.
Editor's noteIf your chevron looks crooked, correct it with a tiny dot of nude at the inner corner — it tightens the shape fast.
8. Blackened Plum with Clear Glossy Top and Crystal Speckle
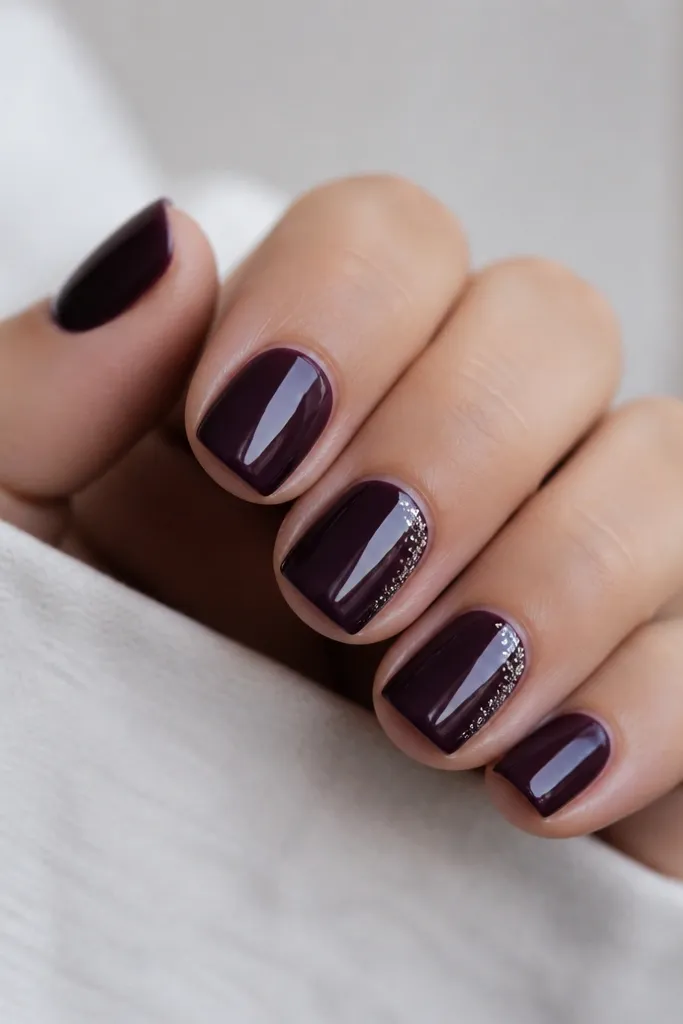
A blackened plum shade reads classy because it sits between wine and espresso. The crystals are small and clear, so they catch light without looking like heavy glitter. I like to place specks near the cuticle because it draws the eye upward and makes short nails look more polished. This works for evening events and also looks great with dark denim and gold rings. It’s especially flattering on medium to deep skin tones, where plum shows depth.
Paint all nails with blackened plum in two coats. For the accent nails, dot a thin layer of clear gel or top coat near the cuticle on one side, then press tiny clear crystals using tweezers. Keep the cluster small — 6-10 crystals total per accent nail — and leave the rest of the nail plain. Cure/dry fully, then apply glossy top coat over everything carefully so crystals stay secure but don’t get flooded.
Editor's noteUse a crystal placement tool or tweezers with a flat tip so the stones don’t roll on short nails.
9. Sienna Brown with White Micro-Lined Tips
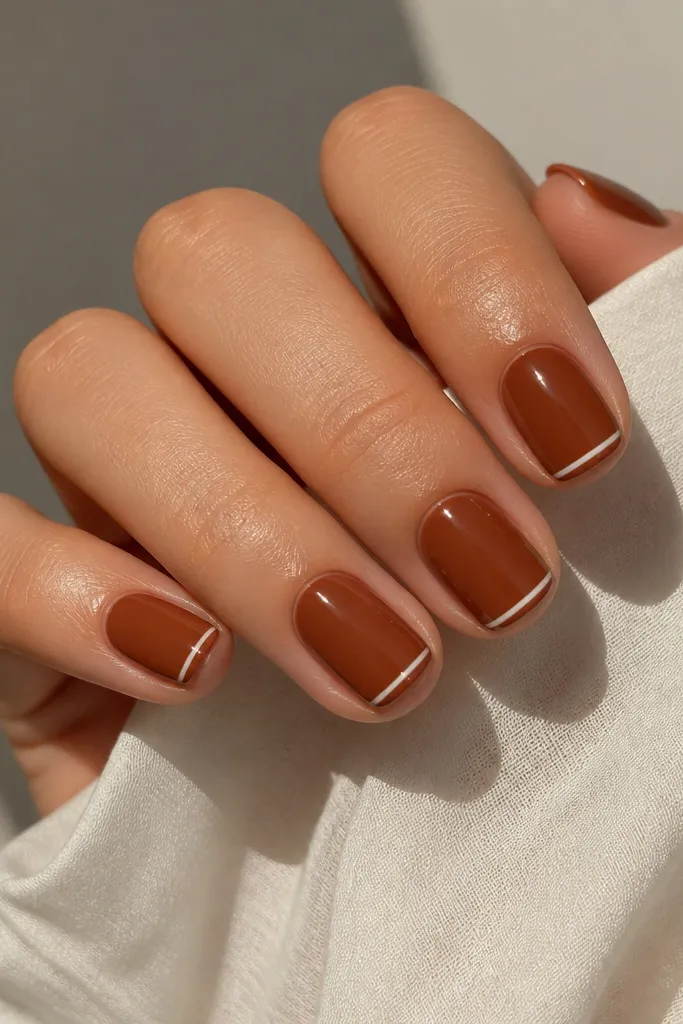
This is a clean fall twist on French tips. Sienna brown brings warmth, and the micro white line makes your short squares look crisp instead of blunt. It’s classy because the design is minimal but precise. This works for all skin tones because brown is neutral-warm and white adds a clean highlight. If your nail shape is slightly uneven, the thin line acts like a visual border and makes the shape look intentional.
Start with two coats of sienna brown, fully smooth and glossy. Use striping tape or a nail guide to create a straight line 1 mm from the square edge, then paint a thin white stripe along that line. Remove tape while polish is still tacky so the stripe stays sharp. Finish with glossy top coat, and cap the free edge lightly so the white line doesn’t chip at the corner.
Editor's noteIf your line wobbles, remove the tape and reapply after the base coat fully dries — rushing makes it jagged.
10. Warm Taupe with Copper Foil Half-Stripe
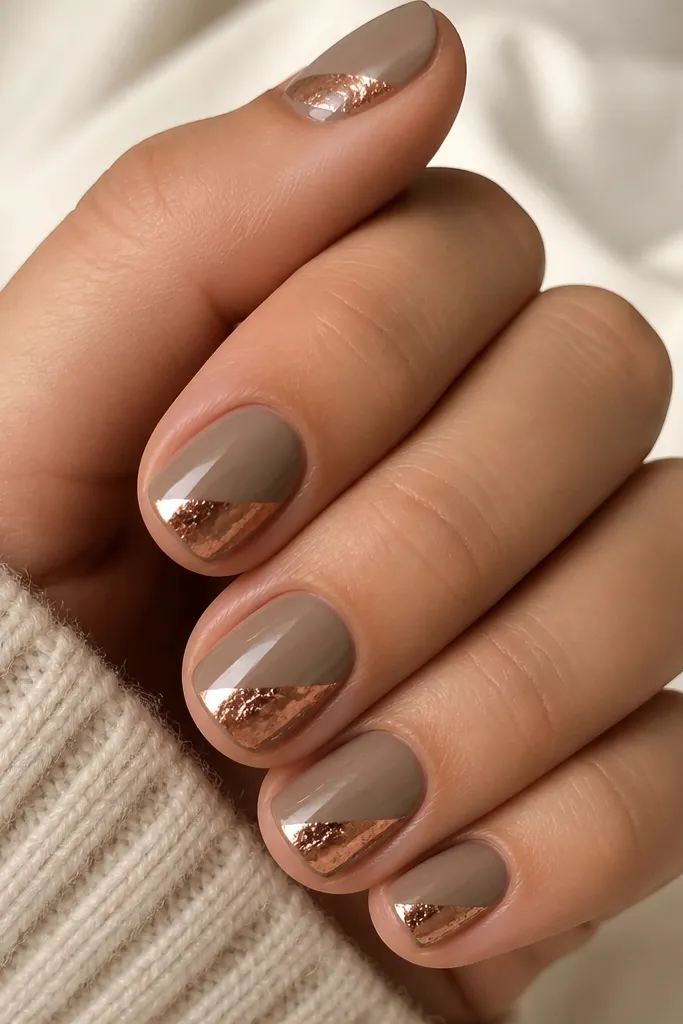
Warm taupe keeps fall nails office-friendly, and copper foil adds that autumn metallic warmth. A half-stripe looks classy on short square nails because it doesn’t cover the whole surface — it creates a diagonal accent that elongates. I like this for people who want metallics but don’t want full chrome. It flatters fair and medium skin tones especially well because taupe doesn’t fight your undertone. The diagonal placement also helps if you have slightly short nail beds.
Apply warm taupe in two coats, making sure the corners are fully covered. Cut small pieces of copper foil backing (or use copper foil sheets) and place them along one diagonal line starting about 2-3 mm above the cuticle on the lower side and ending near the middle. Press gently and trim excess with a cleanup brush once the foil grips. Seal with a thick glossy top coat to lock in foil texture and prevent lifting.
Editor's noteCopper foil looks cleaner when you use thicker top coat — thin top coat can show foil edges.
11. Terracotta Marble Swipe on One Accent Nail
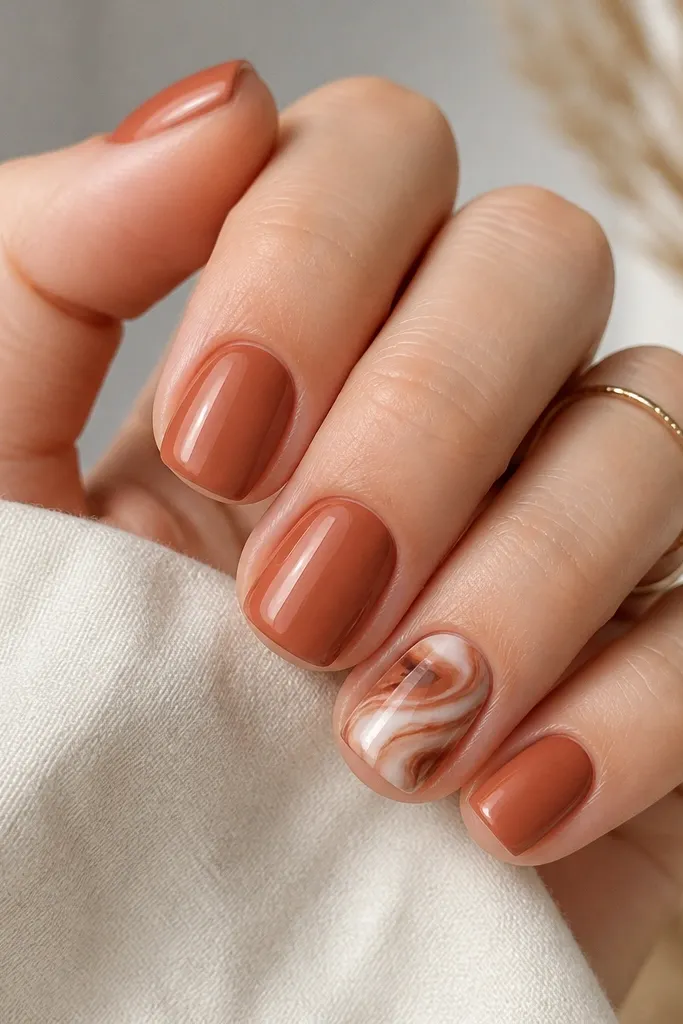
Marble looks fancy, but on short square nails it can get messy fast if you marble every nail. This version keeps it classy by doing marble swipe only on the ring finger and leaving the other nails solid. Terracotta marble reads autumn without being too dark, and the white streaks make the short nail look light and clean. This flatters warm undertones and also looks good on neutral skin because the colors sit close to your natural palette. It’s also a good choice if you want something “different” without doing full nail art on all ten fingers.
Paint all nails with terracotta in two coats. On the ring finger, apply a thin layer of the same terracotta but leave it slightly sheer, then swipe in creamy white polish in 2-3 curved strokes using a detail brush or sponge edge. Add a darker brown streak on top of one white stroke so it looks layered. Use a glossy top coat over everything, and apply one extra coat on the marble nail to smooth ridges.
Use a light hand with the marble strokes — you want thin streaks, not thick paint lines.
12. Charcoal Grey with Peach Cuticle Glow
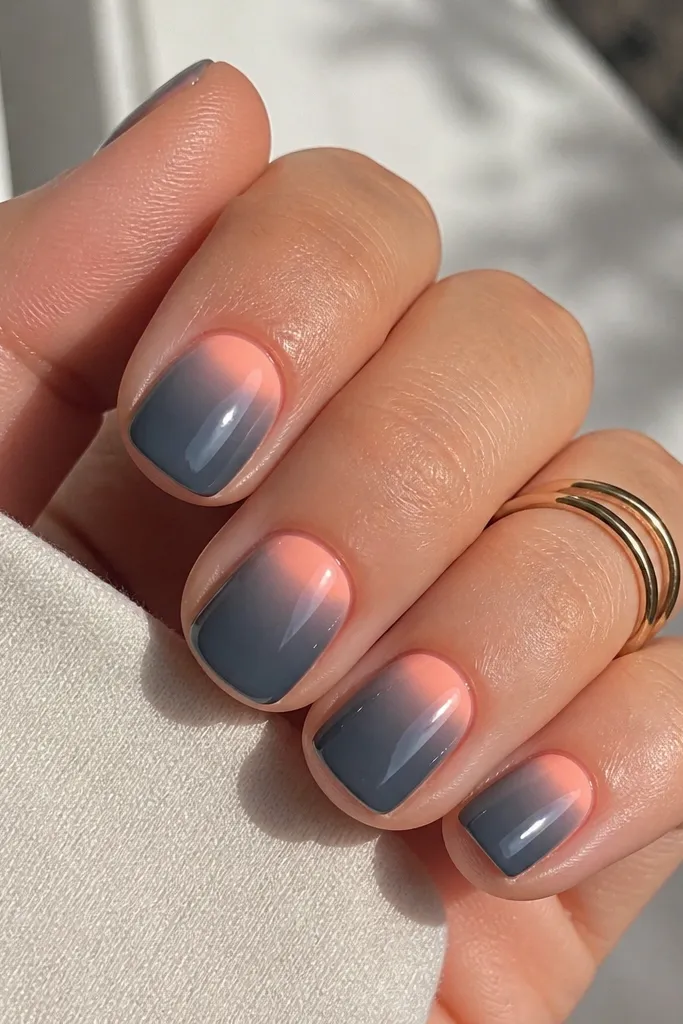
Charcoal grey is the cool-weather neutral that makes fall outfits look sharper. The peach cuticle glow is the trick that keeps it warm and classy instead of goth. The fade near the cuticle makes your nails look more “finished” and draws attention to the base of the nail. This flatters cool and neutral undertones because grey balances them, and it flatters warm undertones because the peach adds warmth. If you hate super-dark nails, this gives you the edgy vibe without going black-black.
Start with two coats of charcoal grey and let it dry fully. With a small sponge or a makeup sponge corner, dab peach-pink polish lightly around the cuticle area, blending upward just a bit so it fades into grey. Use a cleanup brush dipped in remover to sharpen the cuticle edge and keep the glow from spreading sideways. Finish with glossy top coat, and apply a slightly thicker coat in the center so the gradient looks smooth.
Editor's noteKeep the peach glow under 20% of the nail — if it’s too big, the manicure looks like a stain.
13. Spiced Red with Nude "Negative Space" Window
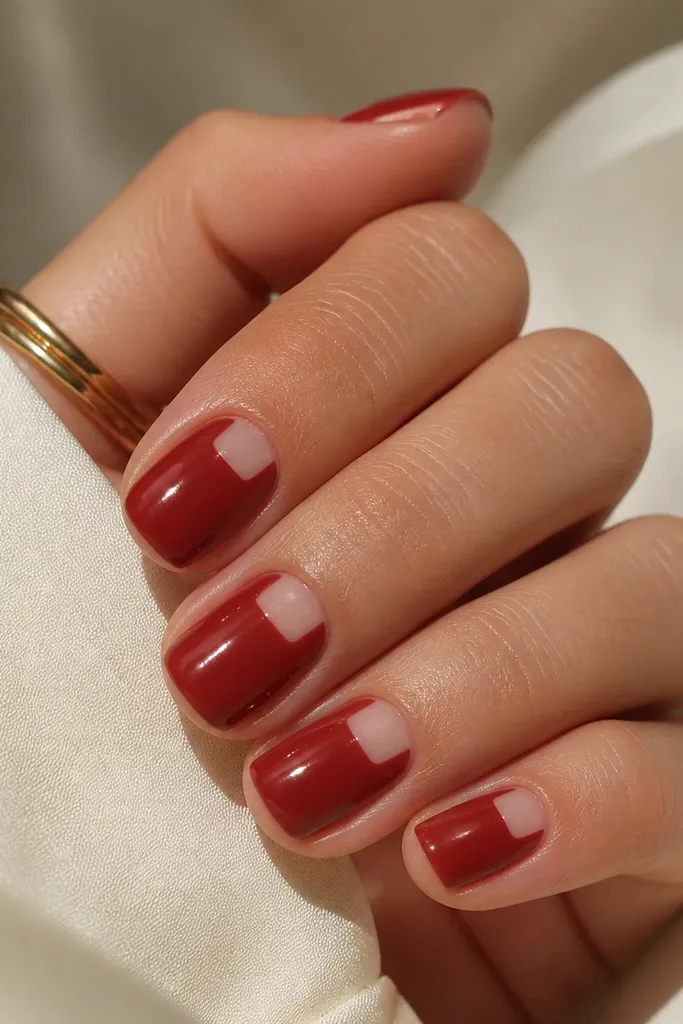
Spiced red is fall’s version of classic red, and it looks classy when it has breathing room. The nude negative space window keeps the design modern and prevents the nails from looking too bold on short squares. This is a great choice when you want red but you don’t want full coverage — the window makes your nail bed look longer. It flatters fair to deep skin tones because nude blends with your natural color and the red stays the star. If your cuticles are a little uneven, the negative space pulls attention away from that area.
Paint a nude base first, then apply two coats of spiced red while leaving the center near the cuticle uncovered using small nail art tape or a pre-cut guide. Keep the window about 2-3 mm wide and centered. After the red cures/drys, remove the tape carefully to reveal clean edges. Add glossy top coat only over the red area and window edges, then cap the free edge lightly so the design lasts through daily wear.
Press tape down firmly along the edges — weak adhesion gives fuzzy negative space.
14. Moody Teal with Gold Dipped Tips
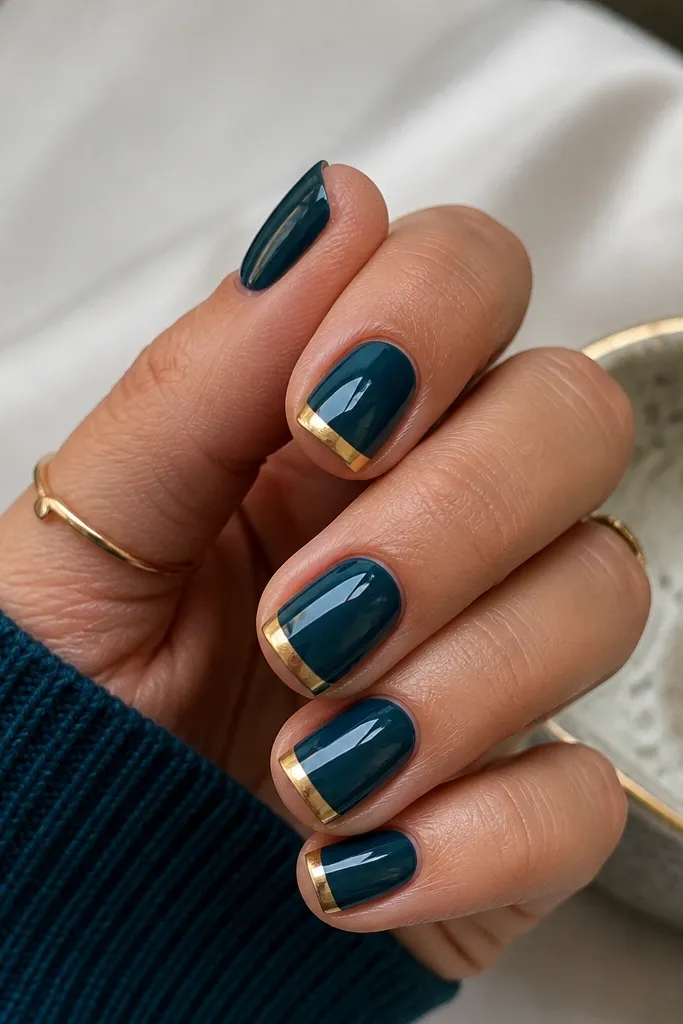
Moody teal looks unusual in fall and still reads classy when you pair it with gold at the tip. The gold dipped band makes short square nails look like they have a “jewelry” edge. I like this for nights out because it catches light when you move your hands, but it still works for daytime because the teal is grounded. This flatters most skin tones, especially when you wear warm metals like gold rings. It’s also a good option if you want something bold but controlled.
Apply two coats of moody teal and fully dry/cure. Use a small striping brush to paint a gold band on the free edge — keep it about 1-2 mm tall so it doesn’t cover too much of the short nail. For a sharper edge, dab the gold on first, then clean the border with a flat brush and remover. Finish with glossy top coat over both teal and gold, and cap the sides to prevent peeling.
If your gold looks streaky, apply it with a sponge tip instead of dragging a brush across the surface.
15. Camel Nude with Chocolate Speckle Fade
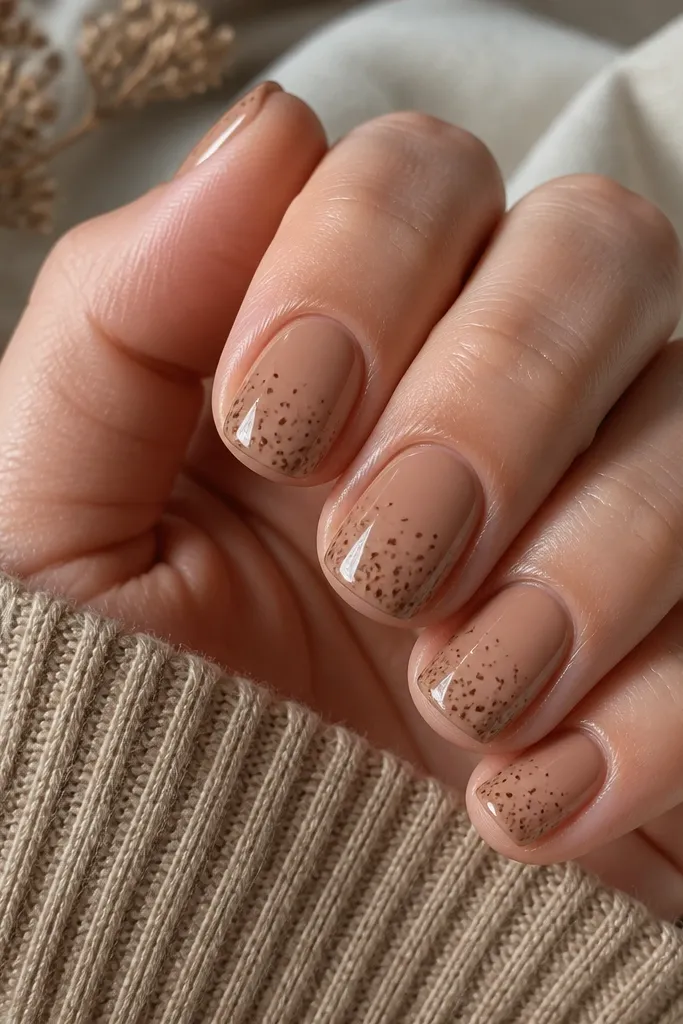
Camel nude is one of those fall neutrals that never looks dated, and the speckle gives it texture without heavy lines. The chocolate speckle fade looks classy because the density is highest toward the tip and lightens as it goes up — it creates a natural gradient effect. This manicure is forgiving because tiny specks hide micro imperfections in the nail surface. It flatters fair to deep skin tones because camel nude sits close to warm undertones, and speckles add depth. It’s also perfect if you want fall nails that don’t scream “holiday.”
Paint camel nude in two coats and let it dry fully. Load a small brush with chocolate polish, then tap the brush lightly over the nail so speckles land mostly from mid-nail to the tip. Avoid the cuticle area so you don’t make the nail look dirty. Once the speckles dry, seal with glossy top coat in one careful layer, then a second thin layer if you can still feel texture.
Practice on a scrap nail or paper first — speckle size changes a lot depending on brush load.