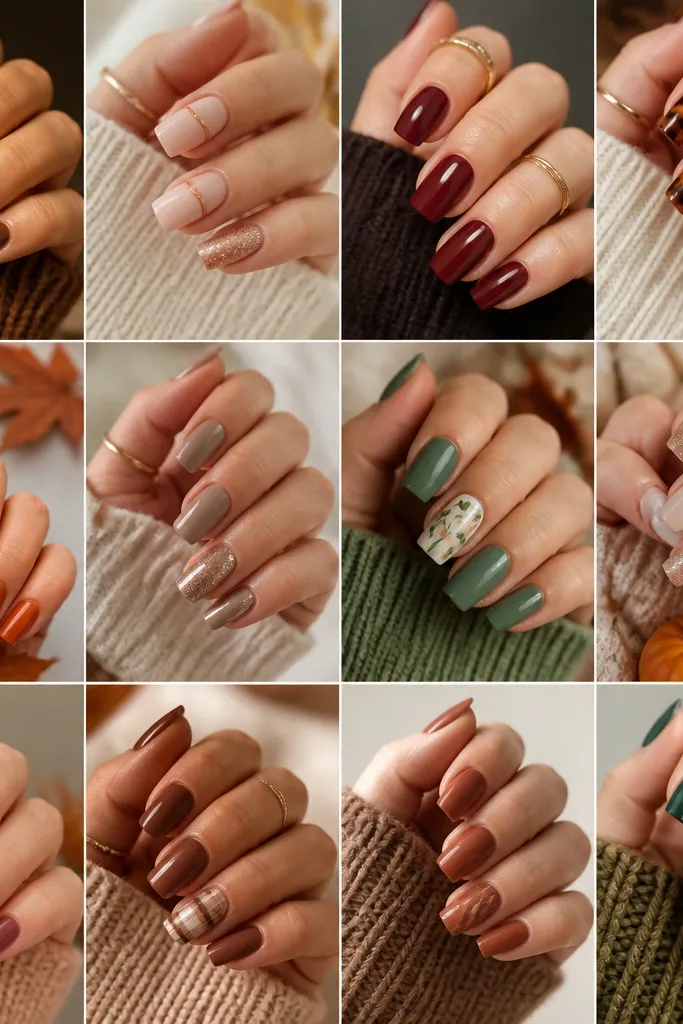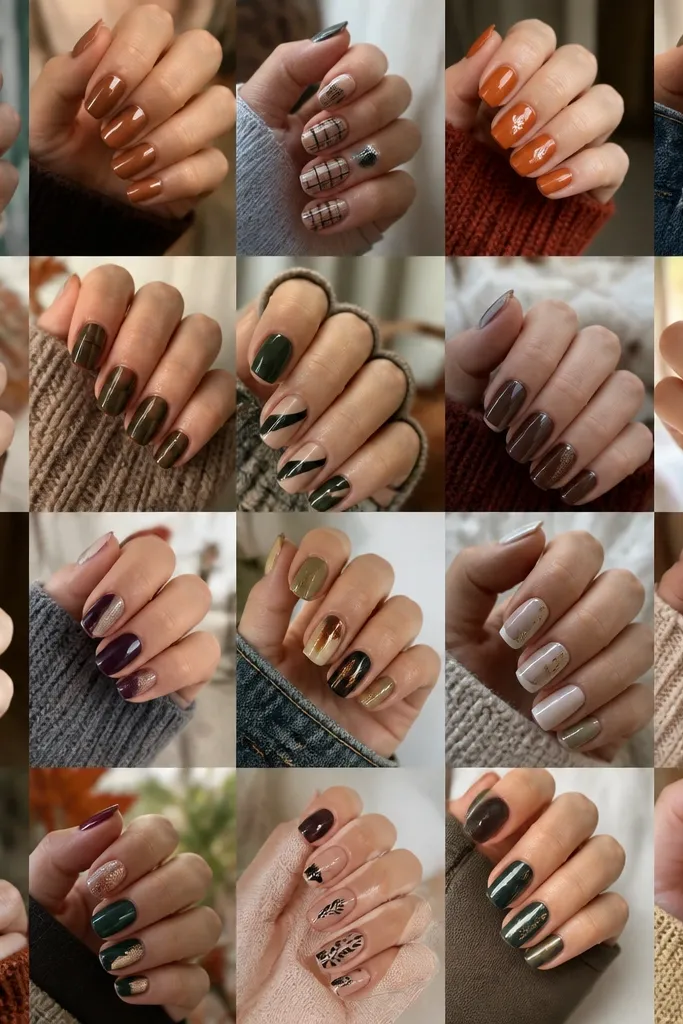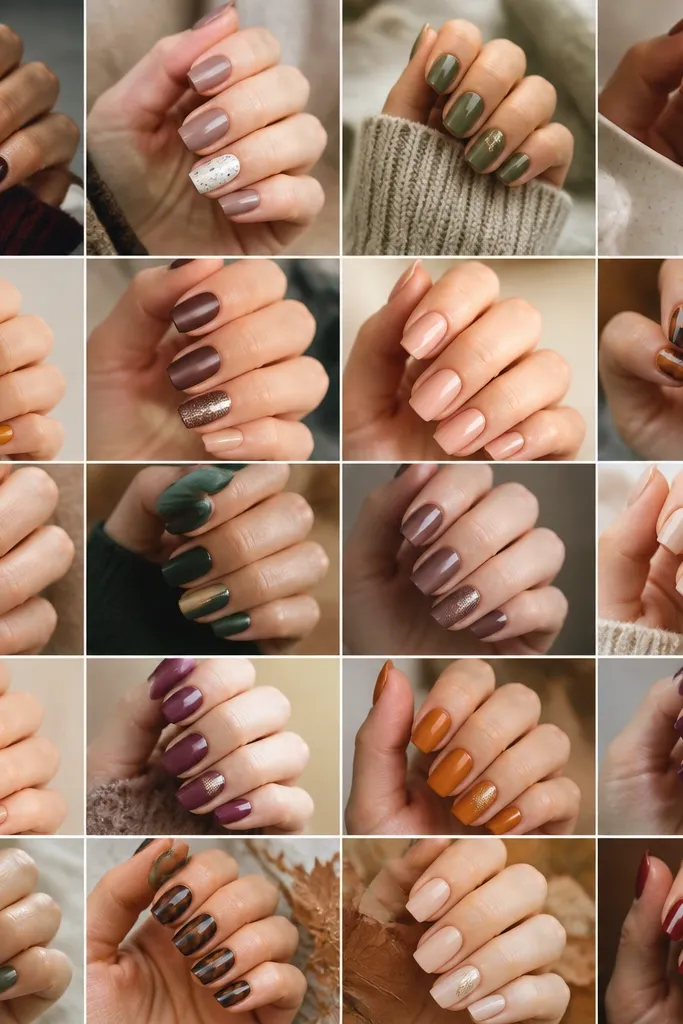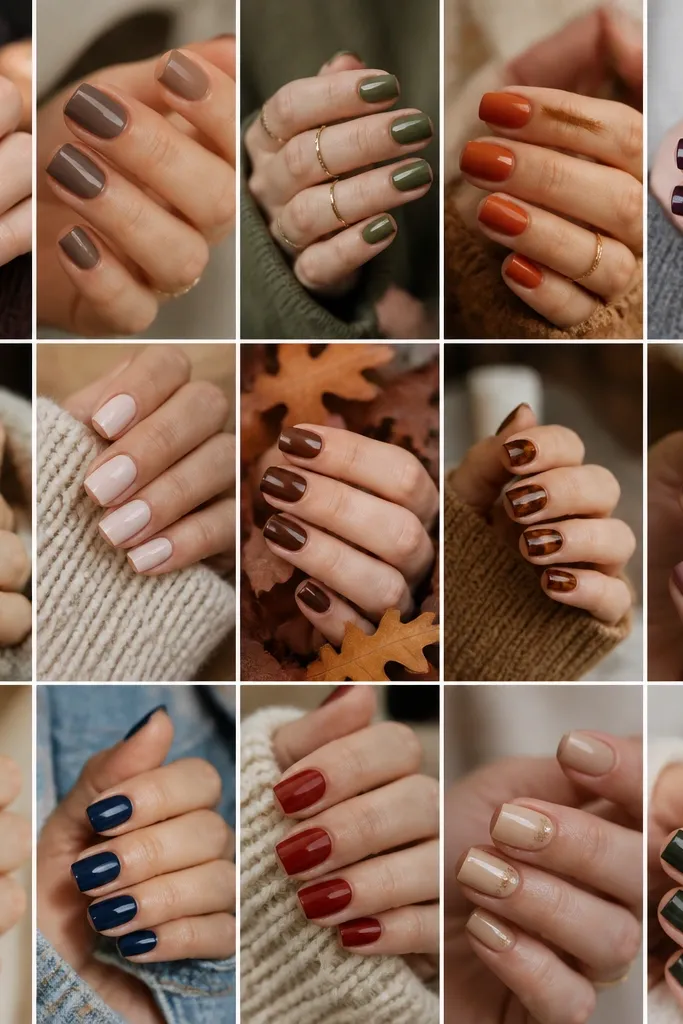
1. Rose-Mauve Velvet Tips with Peach Glow
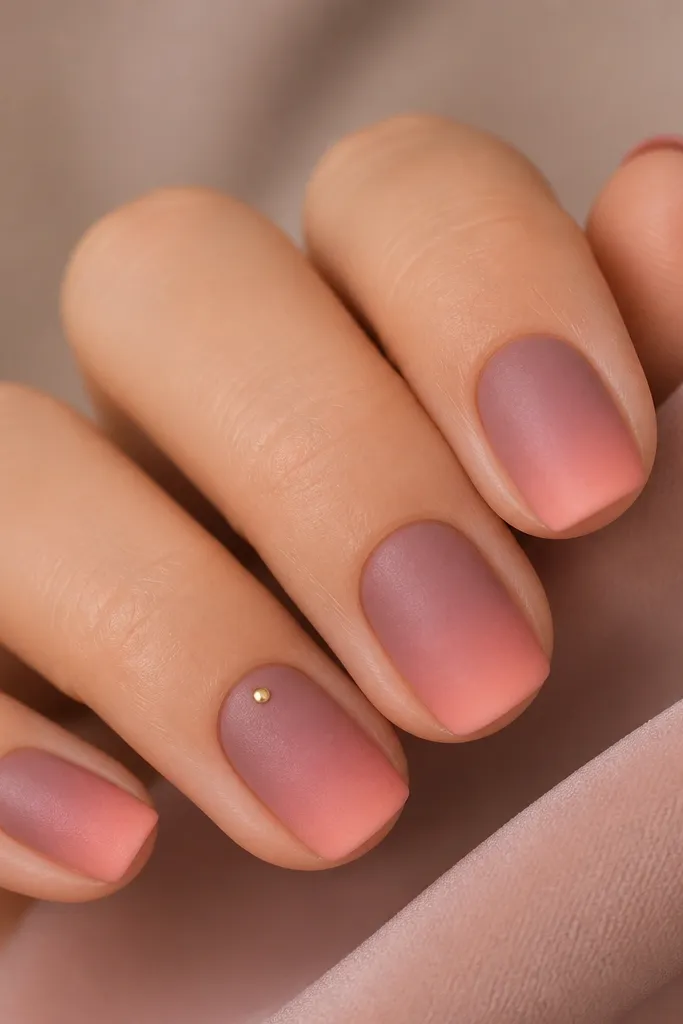
This set works because the velvet matte texture makes rose-mauve feel cozy instead of flat. I start with a warm peachy-pink base, then pull rose-mauve toward the tips so your nails look lit from within. The velvet effect catches dry, autumn light and hides tiny imperfections better than full gloss. It looks especially good on medium to deeper skin tones because the warm mauve warms the whole hand. For fair skin, keep the peach underlayer thinner so the mauve stays the main tone.
Start by prepping and pushing back cuticles, then buff the shine off your natural nail so velvet top coat grabs. Apply a sheer peachy base coat, then cure. Paint the tips in rose-mauve and blend about 1-2 mm down the nail using a sponge — light taps, no dragging. Seal with a velvet-matte top coat on every nail except the ring finger, where you use a satin top coat to keep the gold dot crisp.
Editor's noteIf your velvet top coat looks patchy, do two thin coats instead of one heavy one — it levels as it cures.
Watch outAvoid going fully opaque velvet on top of chunky glitter — it turns into a dull blob fast.
2. Pink Chrome Half-Moons with Cocoa Micro-Glitter
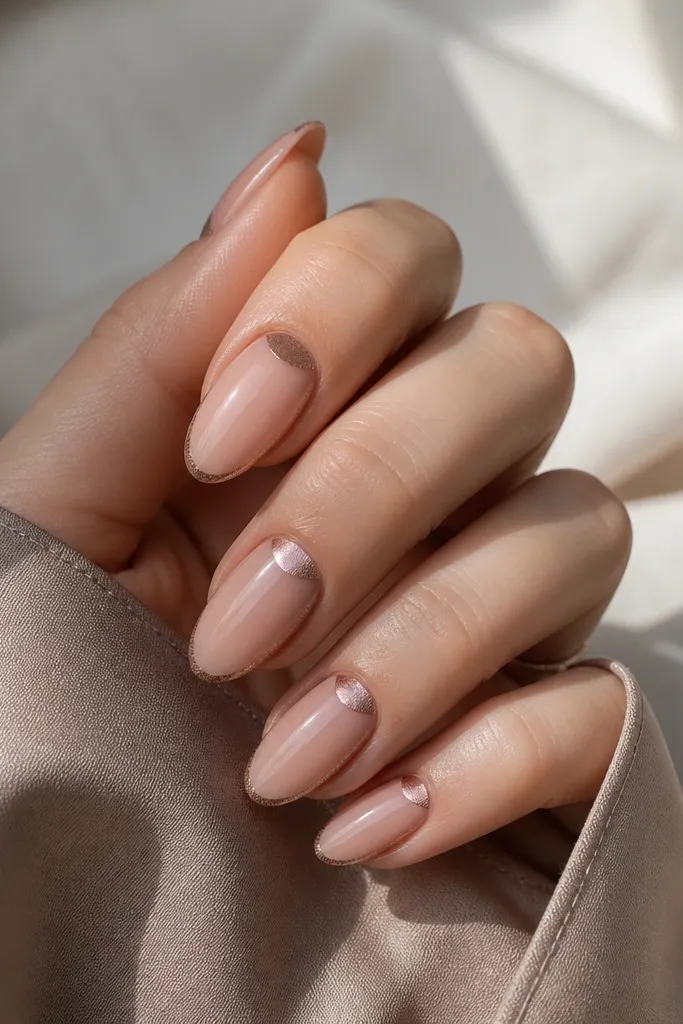
Half-moons are the quickest way to make pink look intentional and “designer,” and chrome makes the shape pop without needing heavy art. The chrome here is a soft pink, not neon, so it stays fall-friendly. The cocoa micro-glitter gives a warm, coffee-toned contrast that looks great with camel coats and brown boots. This flatters hands with longer nail beds because the half-moon frames the cuticle area cleanly. If your nails are short, keep the half-moon smaller so it doesn’t shorten the look.
Apply a sheer blush base, cure, then wipe the tacky layer if your system requires it. Use a small striping brush to paint crisp half-moon arcs right at the cuticle, leaving a hairline of skin space — then cure. For the cocoa glitter, tap micro-glitter polish along the outer third of each nail and blend inward with a clean sponge. Finish with a glossy top coat so the chrome stays reflective and the glitter doesn’t look dusty.
Editor's noteUse a metal-backed cuticle pusher to test the half-moon spacing — you want a consistent gap on every nail.
Watch outDon’t drag glitter polish across the whole nail or it turns patchy and cheap-looking.
3. Dusty Rose Marble with Clear Negative Space Veins
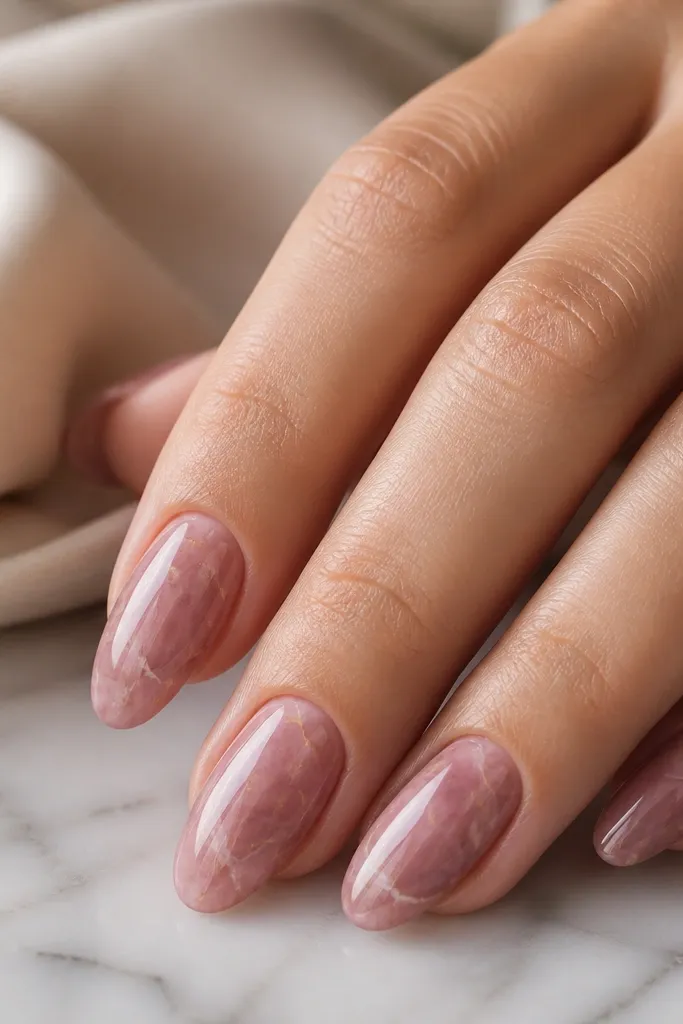
Marble nails feel fall because the tones are grounded, but the clear negative space keeps it light and dreamy. I use dusty rose as the base so it reads soft against fall sweaters, not like a heavy wine set. The clear veins make your nails look longer, which is a win if you’re growing them out. This style flatters most skin tones because it’s mostly neutral pink with airy white-gray movement. I also love it for office days because it looks artistic without screaming for attention.
Start with a sheer pink or clear base, cure, then place thin striping gel lines where you want the “veins.” Add dusty rose polish around those lines and swirl with a thin brush using minimal pressure. Add tiny white-gray streaks only on the outer half of each nail so the center stays airy. Seal with a thick glossy top coat in two layers, curing fully so the marble looks smooth, not raised.
Editor's noteWhen you swirl, keep the brush barely touching — press and you’ll muddy the veins.
Watch outAvoid covering the negative space completely — that’s what makes marble look like a sticker instead of art.
4. Blush-to-Rose Ombre with Copper Edge Line
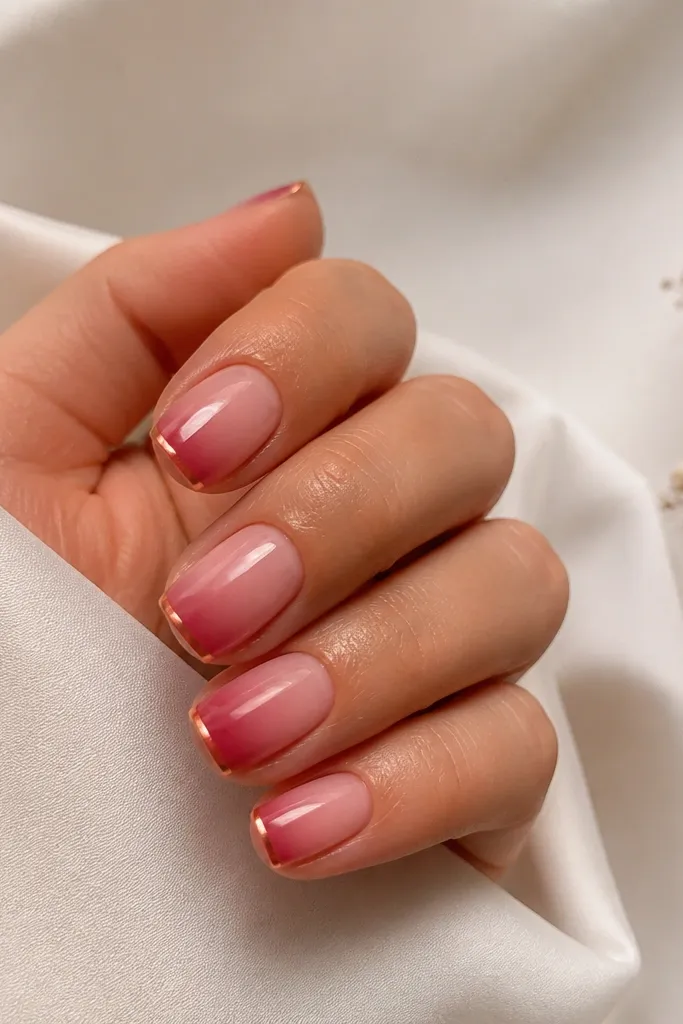
This is the set I recommend when you want pink fall nails that still look neat at a desk. The blush-to-rose ombre makes your nails look naturally dimensional, and the copper edge line adds that autumn metal warmth. Copper works because it harmonizes with rust, leather, and knit textures. It’s flattering on short nails because the ombre lifts the base upward instead of leaving a harsh line. If you’re fair-skinned, choose a rose that’s slightly peachy so it doesn’t look too pink-purple.
Paint a sheer blush base, cure, then sponge on rose starting from the mid-nail down to the tip. Blend until the ombre looks like it fades, not like two blocks. Use striping tape or a steady hand to draw a single copper line at the tip edge, staying 0.5 mm away from the sidewalls. Top coat twice for a glass finish, especially over the copper line so it won’t catch on fabric.
If your copper line looks wobbly, do it in two passes — first place the line, then thicken it lightly.
Don’t use a chunky metallic for the edge or it will snag and chip faster.
5. Peachy Pink Dried Flower Accent on Matte Blush
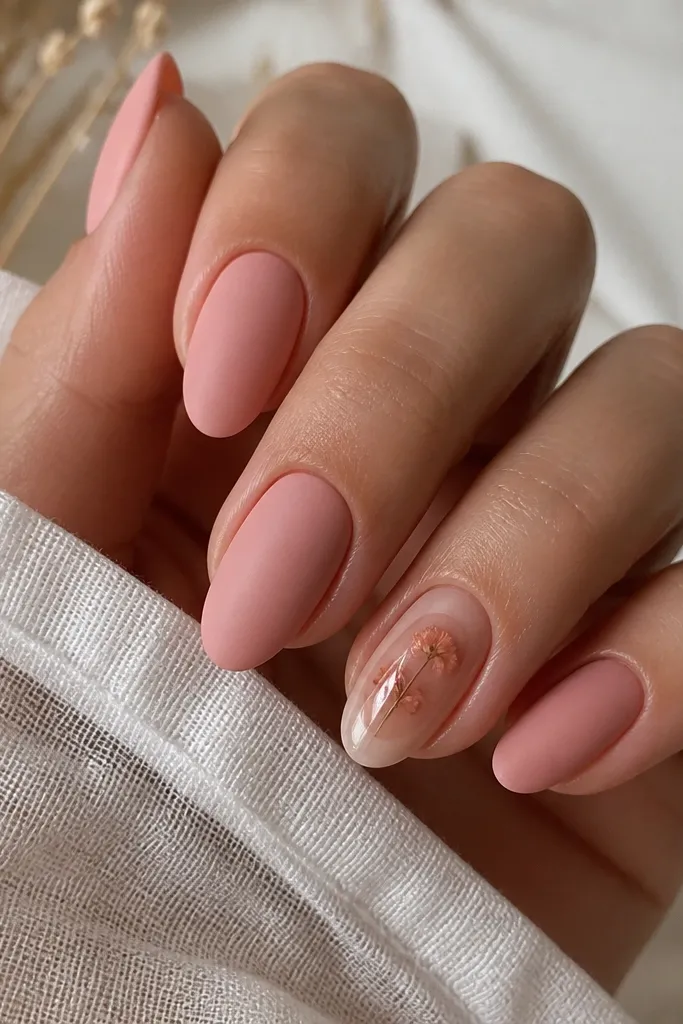
Dried flowers read autumn instantly, but the trick is keeping the rest of the set matte and simple. Peachy pink is the perfect background because it looks warm next to browns, oranges, and olive. The matte finish makes the flower look like it’s sealed in a pressed-leaf book, and the glossy dome over the flower adds depth. This looks best on almond or squoval because the dome sits neatly and doesn’t look bulky. It’s also a great option if you want something unique that still stays wearable.
Start with a matte blush gel polish base and cure. Place a tiny dried flower fragment on the accent nail using clear builder gel, keeping it centered and slightly angled toward the cuticle. Cure, then apply a clear glossy top coat or gel dome over the flower until it feels smooth to the touch. Finish by applying matte top coat to the non-accent nails, leaving the dome glossy. Keep the flower size small — like 1-2 mm pieces — so it doesn’t look crowded.
Editor's noteSeal dried flowers with a gel dome, not regular top coat, so it won’t lift at the edges.
Watch outAvoid putting dried flowers on every nail — it turns into a textured mess.
6. Pink Gilded Bow on Nude Rose Base
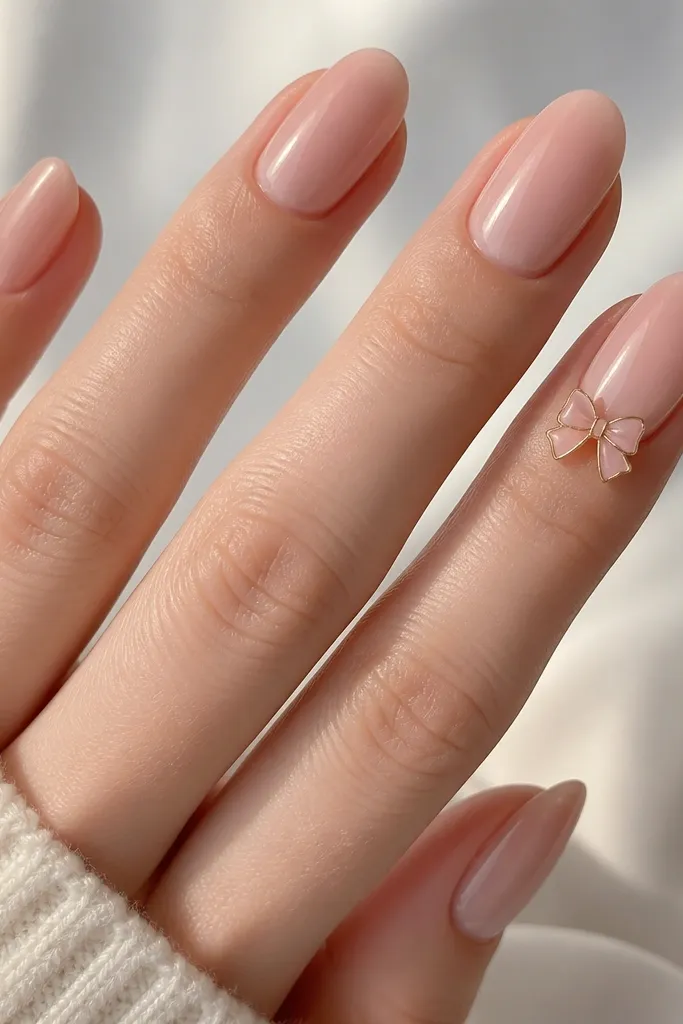
If you love dreamy glam but you don’t want full-on rhinestones everywhere, a tiny bow is the answer. The nude rose base stays wearable, and the gold outline makes the bow feel like jewelry instead of a sticker. I’ve worn this to fall dinners and it always looks put together in photos because the bow sits right where light hits near your cuticles. This flatters hands with shorter nails because the bow draws the eye upward. For deeper skin tones, pick a nude rose that’s slightly lighter than your natural nail — it brightens the hand.
Apply a nude rose base, cure, then add one thin layer of pearly pink sheer polish over the top for glow. On the ring finger, place a small 3D bow charm or sculpt a bow using gel and a fine liner brush. If sculpting, outline the bow edges with gold gel first, cure, then fill the bow with blush gel. Seal around the charm with a careful top coat so the edges don’t snag. Finish the rest of the nails with glossy top coat for a uniform shine.
Editor's noteUse a dotting tool to press the bow down — you want full contact with the nail so it won’t lift.
Watch outAvoid thick top coat over the bow without capping the sides — it can look rounded and bulky.
7. Rose Quartz Glaze with Silver Crackle
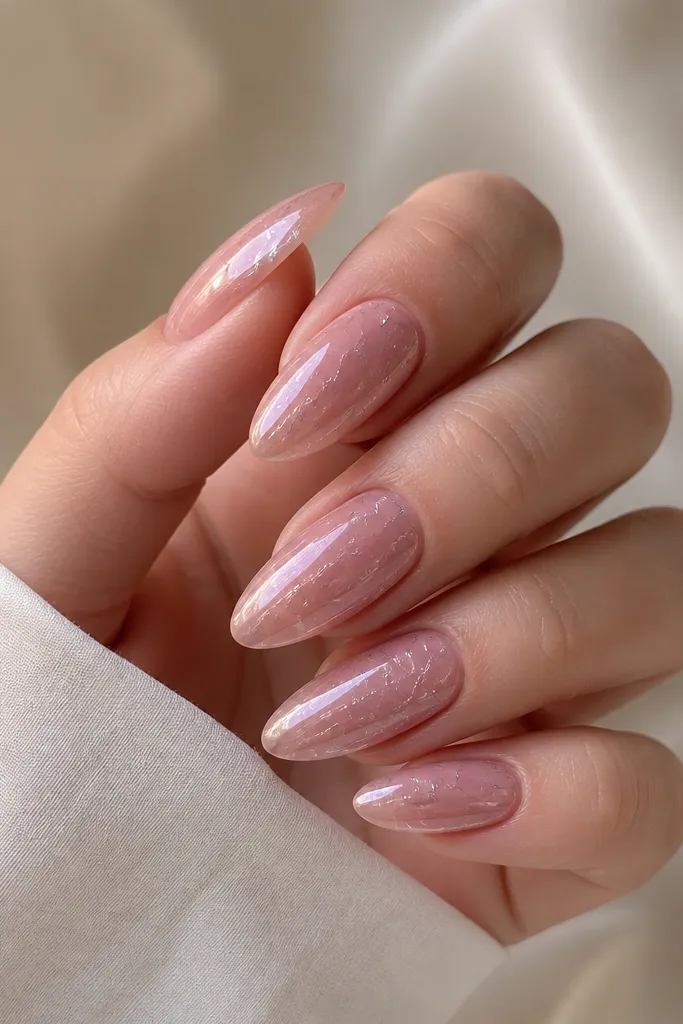
Rose quartz nails are dreamy, and the crackle lines make it feel like fall winter air even though the base is pink. The milky rose glaze is flattering because it softens the hand without turning your nails into a solid block of color. Silver crackle adds a cool contrast that looks amazing with gray coats and silver rings. This style is gorgeous on longer almond or stiletto because the glaze has room to breathe. If your nails are short, reduce the crackle coverage to just two thin lines per nail.
Start with a milky rose gel that’s translucent enough to see your nail line faintly, then cure. Add rose quartz glaze by layering a slightly more opaque pink gel in the center and feathering outward with a brush. Apply silver crackle gel in thin lines — don’t cover the whole nail. Cure each step and finish with a high-gloss top coat that smooths the crackle texture into a glassy surface.
When applying crackle, use the brush like a pen — short strokes look more natural than long sweeps.
Don’t flood the crackle — too much makes it look like glitter glue.
8. Pink Plaid Accent with Clear Grid Lines
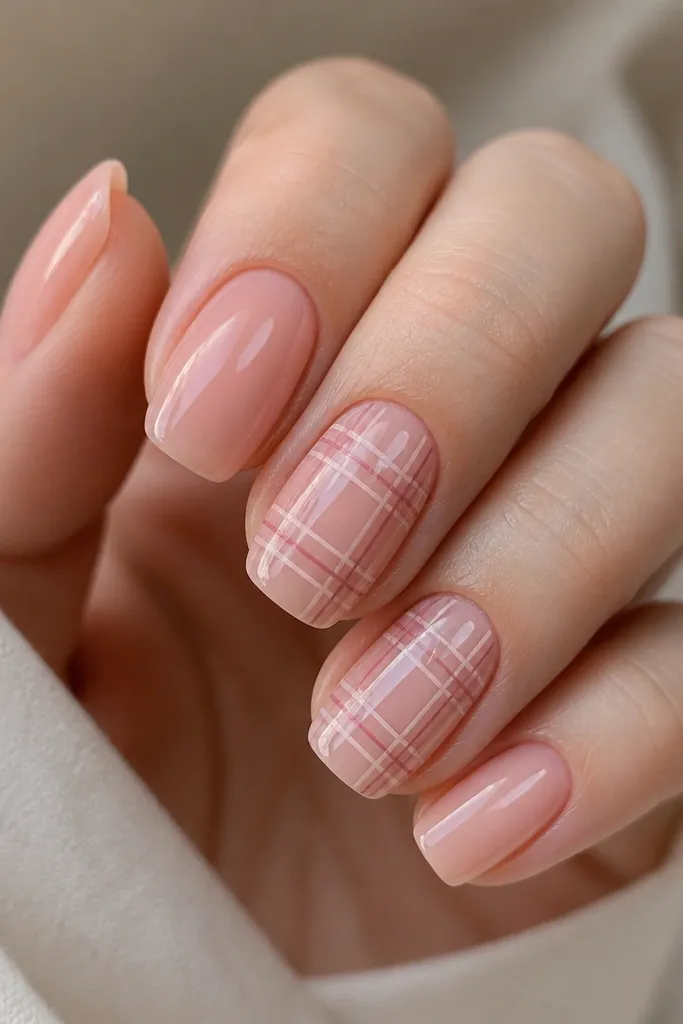
Plaid nails read fall because they mimic flannel without needing big chunky colors. The secret here is using clear grid spaces so it stays airy and dreamy instead of heavy. I use a sheer pink base so the plaid lines look like they’re drawn on glass. This flatters most skin tones, especially if you like soft looks rather than dark reds. It also works well for short nails because the pattern stays thin and controlled.
Apply a sheer pink base to all nails and cure. Choose one or two accent nails and draw vertical lines with darker rose gel, spaced about 2-3 mm apart. Add horizontal lines to form the grid, leaving a thin clear gap between lines where your base shows through. Add a second lighter pink line crossing the plaid to create depth, then cure. Top coat all nails with glossy gel, paying attention to the edges so the lines don’t catch on sweater fabric.
Use striping tape for the first grid — it’s faster than freehand and keeps the spacing consistent.
Avoid thick plaid lines; they make short nails look cramped.
9. Cherry Blossom Fade with Umber Outline
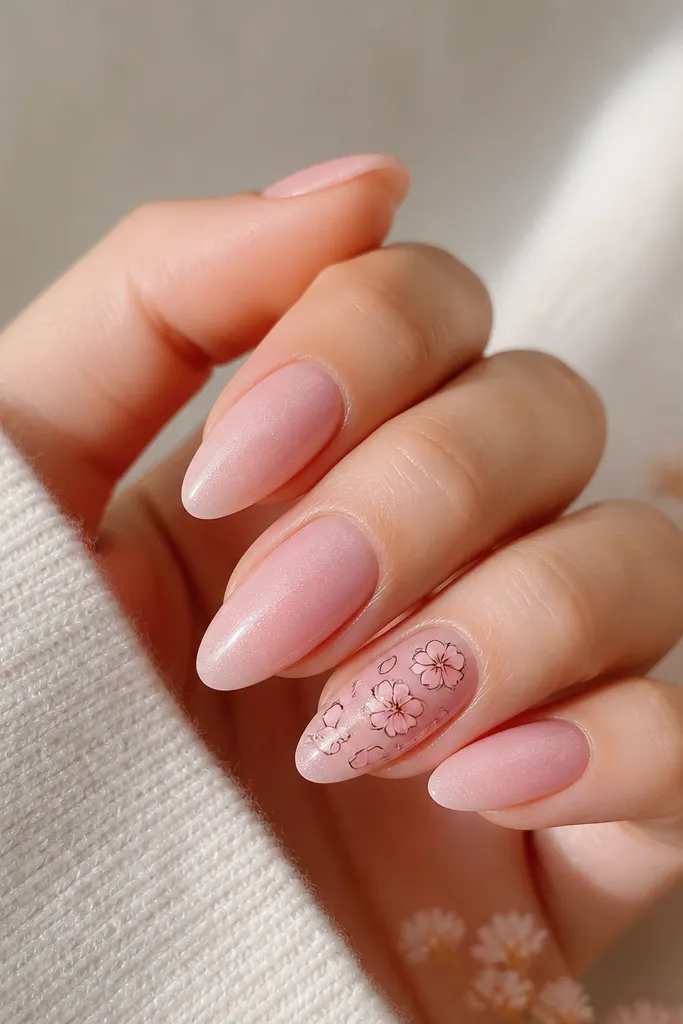
This set is fall because of the umber outline. The blossoms stay soft and pink, but the warm brown edging makes the whole design feel like autumn branches instead of spring petals. I like it for people who want art but don’t want dark polish on their hands. The fade makes the nails look longer and smoother, and the umber outline gives crisp definition. It looks best on almond or longer squoval, and it flatters medium to deep skin tones because the umber pops against warm pink.
Start with a blush shimmer base, cure, then sponge a slightly deeper pink from mid-nail to tip for a smooth fade. On the accent nail, paint a small cluster of five petals using a thin liner brush. Outline each petal lightly with umber gel, then cure. Add a tiny dot of darker rose in the center of the cluster so it reads like a blossom. Finish with glossy top coat on all nails; do two thin coats over the art so it stays smooth.
If your petals look messy, paint only three petals first, cure, then add the other two on top.
Avoid using black outline — it turns the blossoms harsh and not dreamy.
10. Blush Glitter Gradient with Rose-Gold Stipple
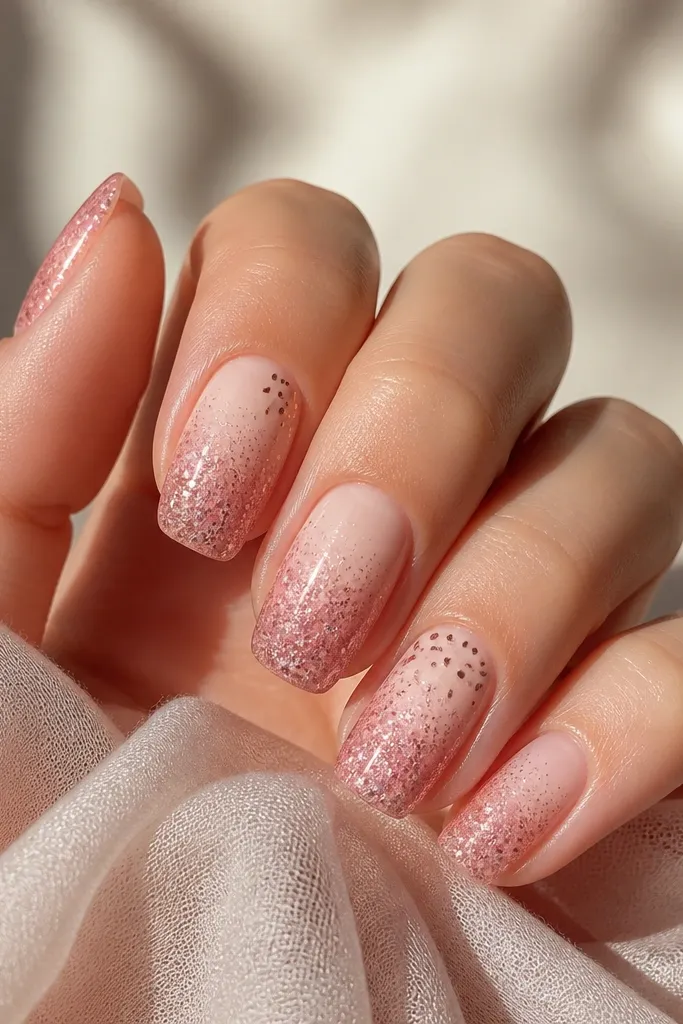
A glitter gradient feels glamorous without looking heavy, and it’s perfect for fall nights because it catches indoor lighting. The blush-pink base keeps it dreamy, while the rose-gold stipple adds a jewelry effect that doesn’t require rhinestones. I’ve worn this to holiday parties and it looks great even when you’re not wearing a bold outfit — the nails do the work. It flatters shorter nails because the gradient pulls the sparkle upward. For longer nails, keep the densest glitter in the outer half so the center looks airy.
Apply a sheer blush base and cure. For the gradient, load a makeup sponge with blush glitter gel and press from mid-nail to tip, building density as you move outward. Clean up the edges with a brush dipped in cleaner. Add rose-gold stipple near the cuticle on two nails using a dotting tool and cure. Seal everything with glossy top coat, then add a second thin coat to smooth the glitter texture.
Editor's noteUse finer glitter than you think — chunky glitter makes the gradient look lumpy by week two.
Watch outDon’t put glitter right up to the cuticle line — it lifts faster there.
11. Matte Blush with Micro Rhinestone Crescent
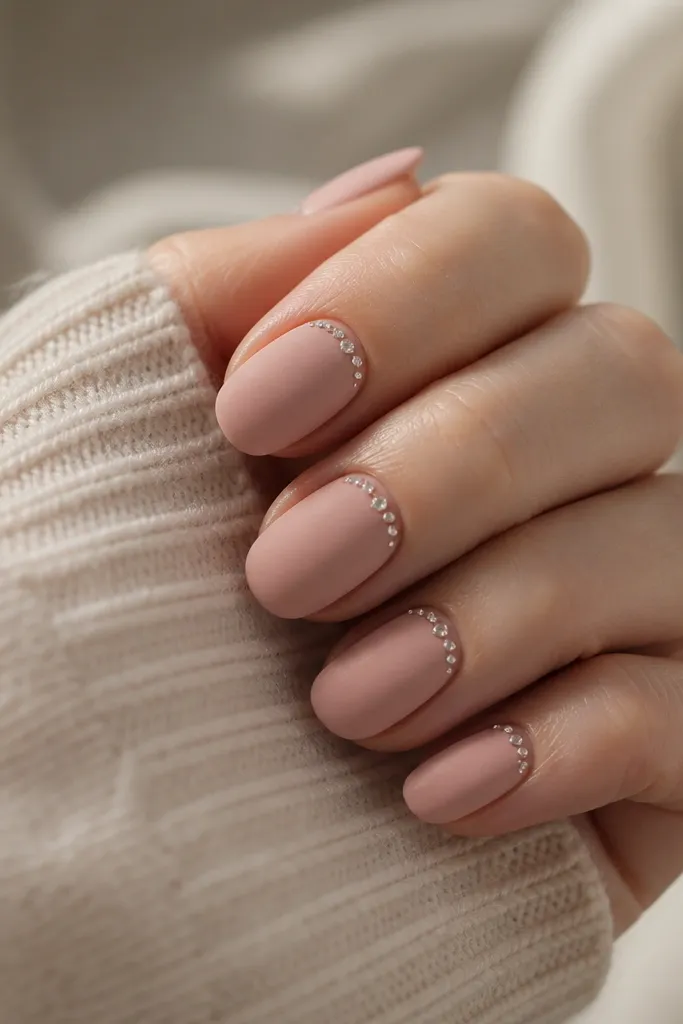
This is the “quiet glam” set. Matte blush gives you that cozy fall feel, and the micro rhinestone crescent adds sparkle exactly where light hits your hands. I like micro stones because they look like tiny highlights instead of a full bling wall. It flatters hands with short to medium nails because the crescent frames the cuticle and makes the nail look wider and cleaner. If you dislike bling, you’ll still like this because it’s controlled and minimal.
Start with a matte blush gel polish, cure, then wipe tacky if needed. Use a small liner brush to apply a thin strip of clear gel where the crescent will sit — about 1-2 mm below the cuticle. Place micro rhinestones along the strip using tweezers, keeping the curve consistent across nails. Cure, then top coat carefully: use matte top coat on the stones' edges and glossy top coat over the center strip so stones stay bright. Cap the free edge with top coat so it doesn’t snag.
Count stones as you place them — I use 6 per nail for a consistent look.
Avoid big rhinestones on matte polish; they sink and look uneven.
12. Peony Pink French with Taupe Shadow Line
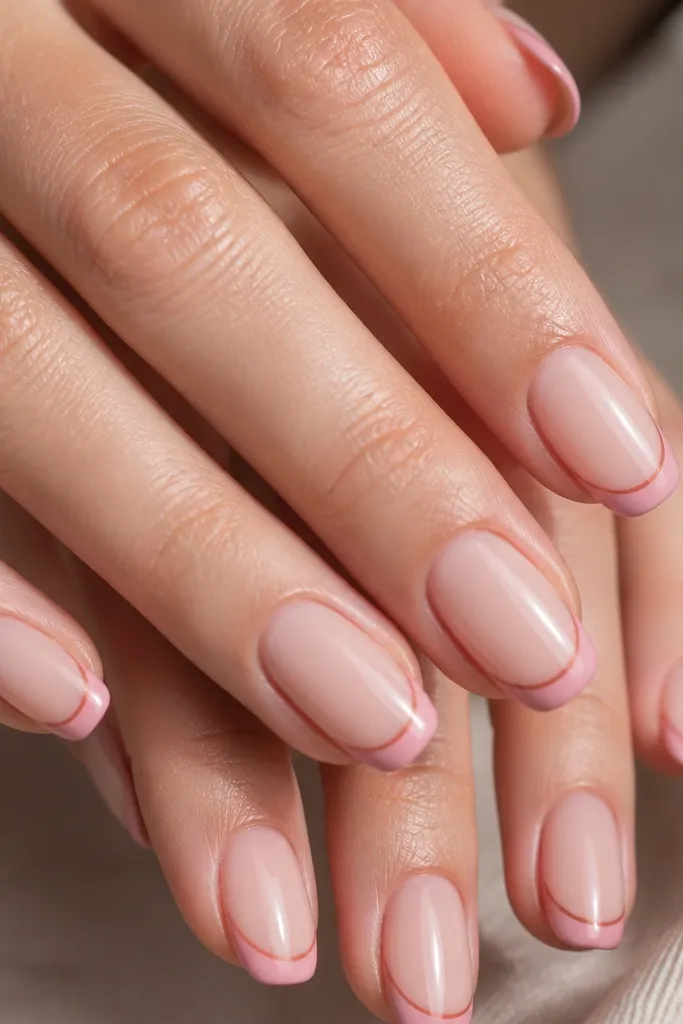
French tips in fall need a little grounding, and the taupe shadow line does that. The peony pink tips stay dreamy, while taupe adds a smoky, sweater-weather feel. This set is flattering on both short squoval and almond because the French shape defines the nail without making it look shorter. It also looks great with gold jewelry since taupe and blush create a warm neutral. If you have warm undertones, this is especially flattering because the pink leans peachy rather than purple.
Apply a sheer nude base and cure. Paint French tips in peony pink, keeping the tip width about 2-3 mm on short nails. Then, with a fine brush, add a taupe shadow line directly under the pink — it should be thinner than the French itself. Clean any smudges with a small brush and cleaner before curing. Seal with glossy top coat in two thin layers so the lines stay crisp.
Make your French tips slightly higher on the sides — it lifts the whole hand in photos.
Don’t skip the shadow line if you want fall — plain pink French looks too springy.
13. Blush Jelly Base with Copper Foil Flecks
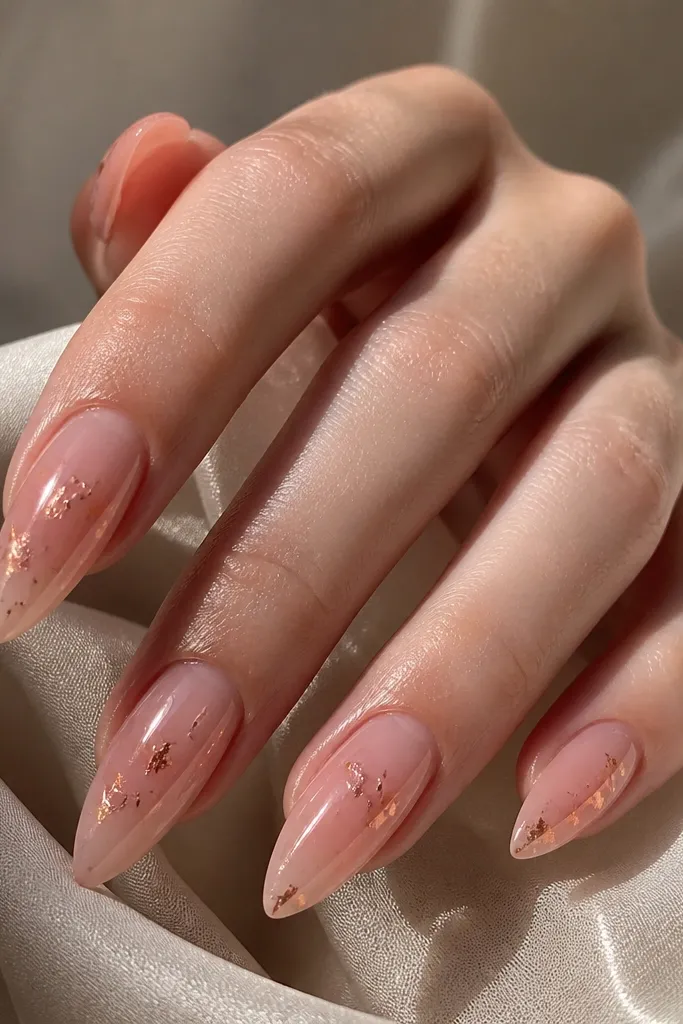
Jelly bases look dreamy because they show a soft translucence, and foil flecks add that autumn metal sparkle without the weight of full chrome. The blush color here is warm and see-through, which makes the foil look intentional instead of random. Copper foil is perfect for fall because it matches rust, terracotta, and leather. This flatters long almond nails the most because the jelly glow fills the nail bed. If you prefer shorter nails, keep the foil to one or two nails and keep the rest solid jelly.
Start with a blush jelly gel and cure, leaving it translucent. Apply a thin layer of clear gel where you want foil, then press small copper foil pieces with tweezers — don’t overpack. Cure and remove any lifted foil edges with a gentle file. Add a second jelly layer over the top of the foil so it looks sealed under glass. Finish with a glossy top coat, then cap the free edge to lock everything down.
Use smaller foil bits than you think — tiny flecks read more premium on jelly.
Avoid covering foil with matte top coat; it kills the shine that makes this design work.
14. Rose-Pink Smoky Ombré with Blackened Plum Outline
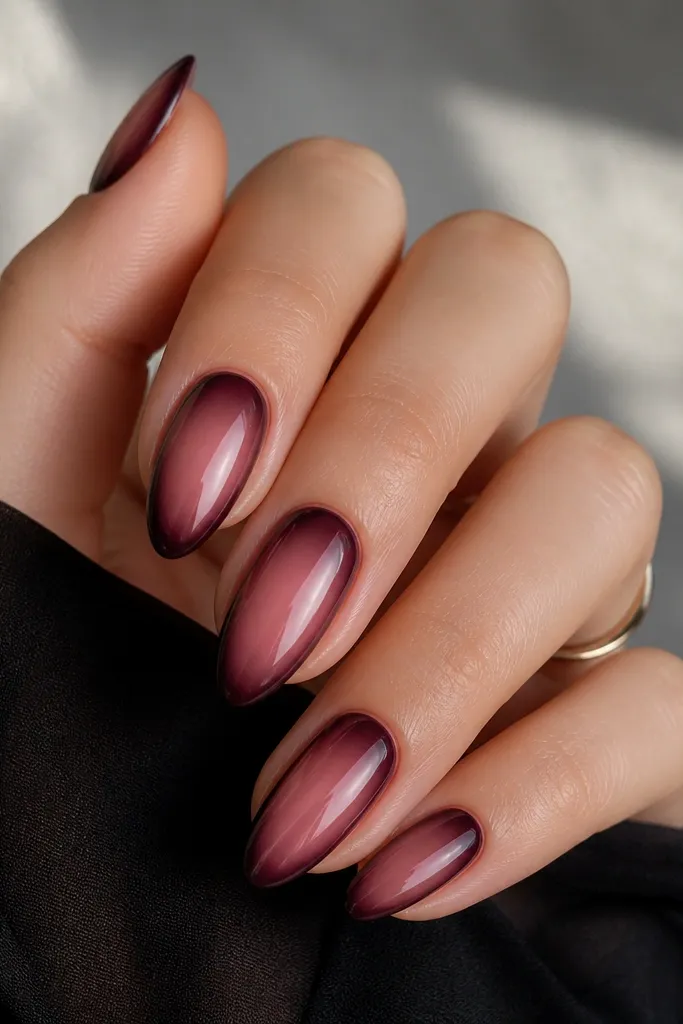
This set is for when you want pink fall nails that still feel dramatic. The smoky ombré keeps the pink dreamy, but the blackened plum outline makes it grounded and autumn-ready. I’ve worn this with black coats and it looks like you tried harder than you did. It flatters hands with longer fingers because the outline defines the shape and makes the nail look sharper. If you’re fair-skinned, keep the smoky fade soft so the plum doesn’t overpower your hand.
Apply a sheer rose-pink base and cure. Sponge a darker rose-pink into the outer third and tip area, blending inward until it looks smoky instead of striped. With a thin brush, draw a blackened plum outline along the sidewalls and around the tip edge — like a frame. Cure, then add glossy top coat in two layers, focusing on the outline so it stays smooth. Clean the sides with a brush to avoid thick edges.
Editor's noteOutline after ombré, not before — it’s easier to match the softness level.
Watch outAvoid using harsh black gel; blackened plum looks softer and more fall.
15. Cotton-Candy Pink Skittle Tips with Warm Taupe Lining
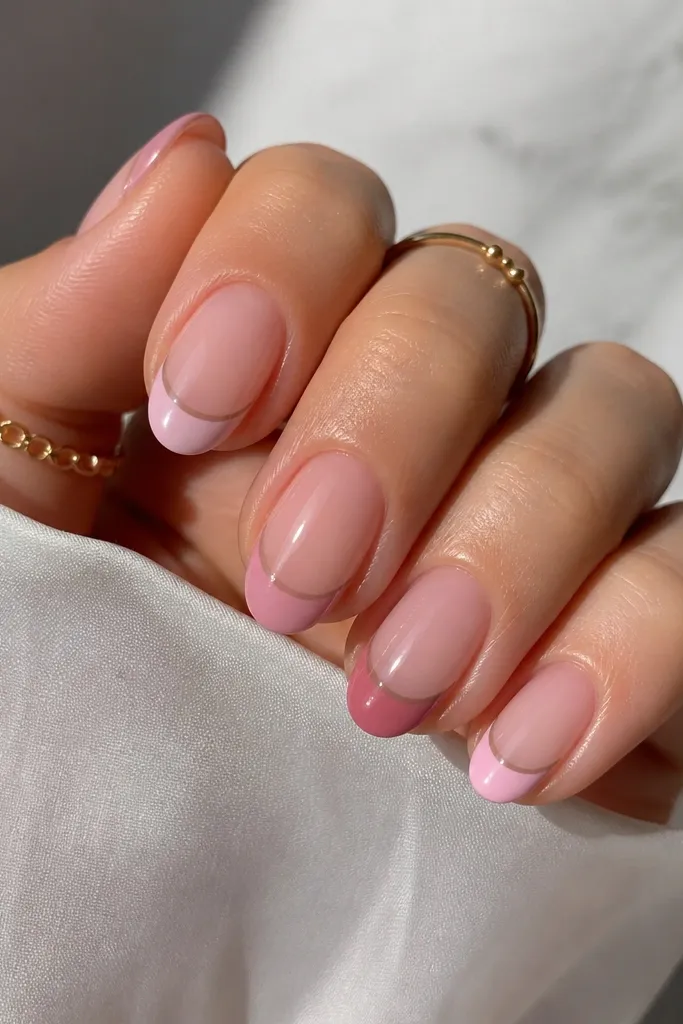
This look is playful without turning juvenile, because the shades stay in the same pink family and the taupe lining keeps it grounded. I wore a version of this for a fall dinner and got compliments on how “intentional” my nails looked even though I only changed the tip color. The skittle layout makes each finger feel like its own mini design, but the warm taupe line ties the whole set together. It also photographs really well because the glossy clear base catches light while the tip shades stay soft and creamy.
Start with a sheer pink base gel (I use a milky pink that still shows a hint of nail tone). Cure, then paint each nail tip with a different pink shade using a small liner brush so the edges look rounded, not blocky. Before you cure the final tips, drag a thin warm taupe stripe right along the underside of each tip curve — like a shadow line — and keep it about 0.5 mm thick. Cure again, then seal with a high-gloss top coat, focusing extra on the tip edge so the skittle borders feel smooth. If you want it extra fall, use one dusty rose and one rose quartz shade instead of two similar baby pinks.
To keep the taupe line straight, rest your hand on a folded towel and drag the liner in one slow pull per nail. After top coat, run a lint-free wipe over the line — it makes the taupe look sharper and cleaner.
Skipping the taupe lining makes the skittle tips look like random polish colors instead of a finished set.