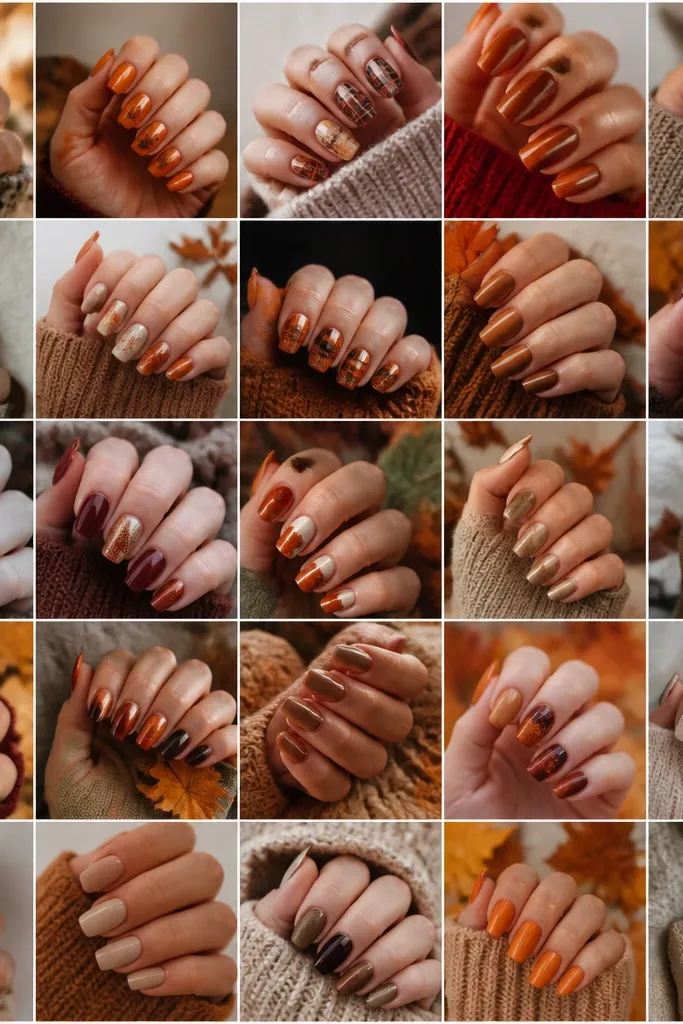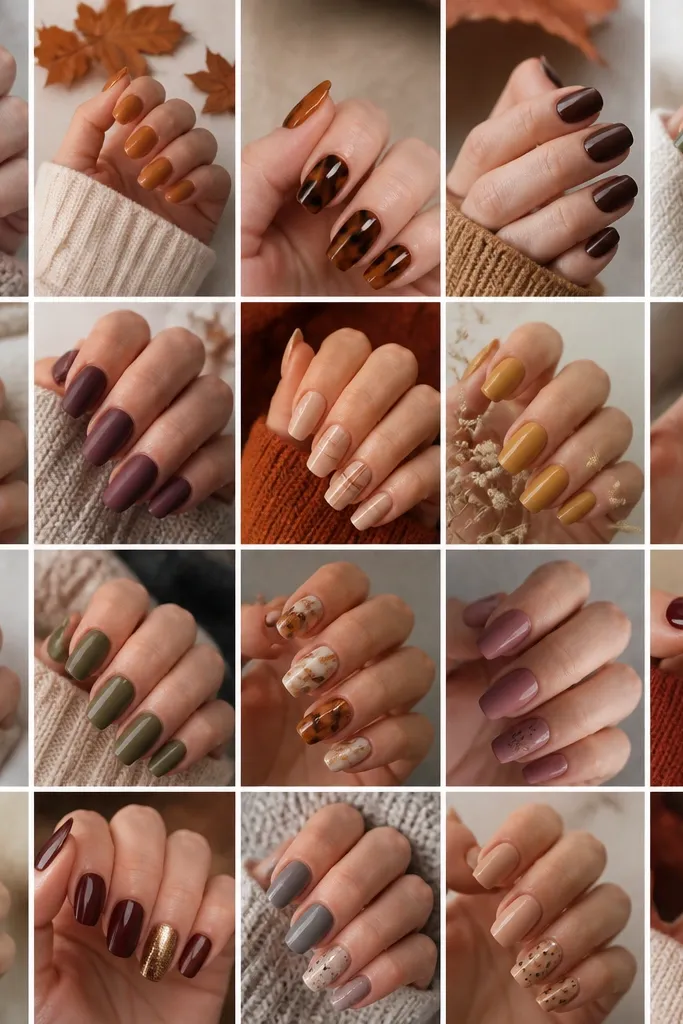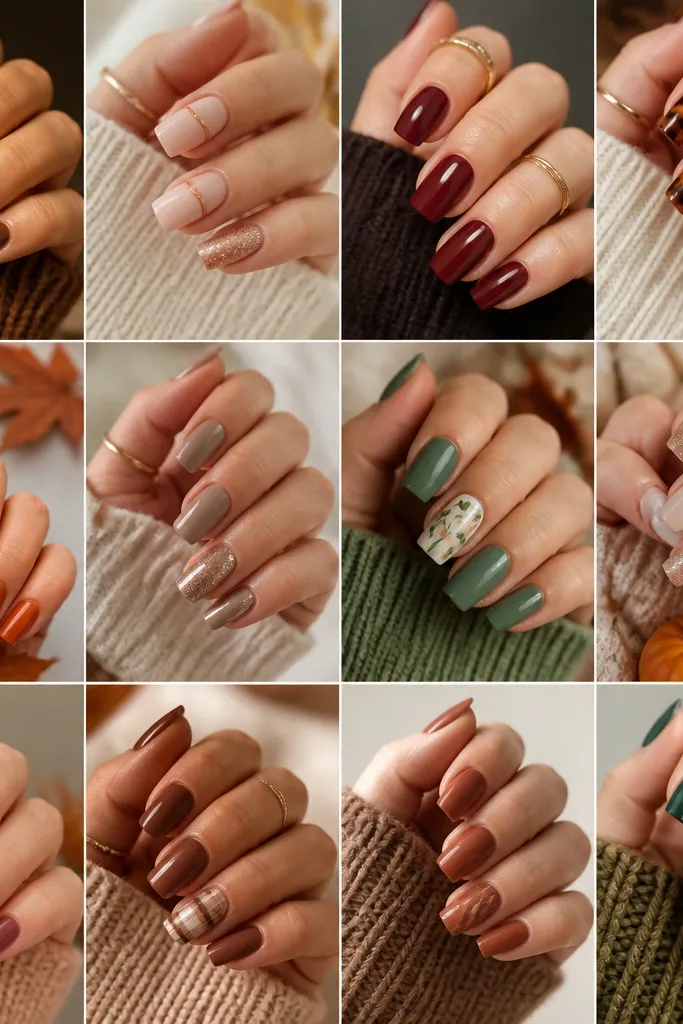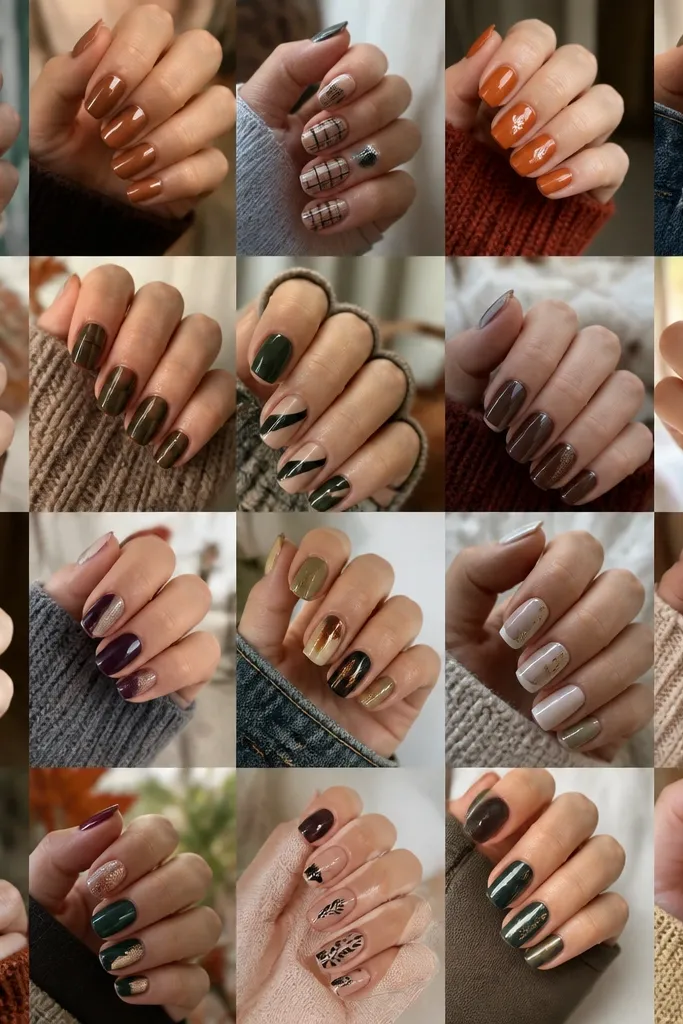
1. Smoky Navy Half-Moon with Caramel Chrome
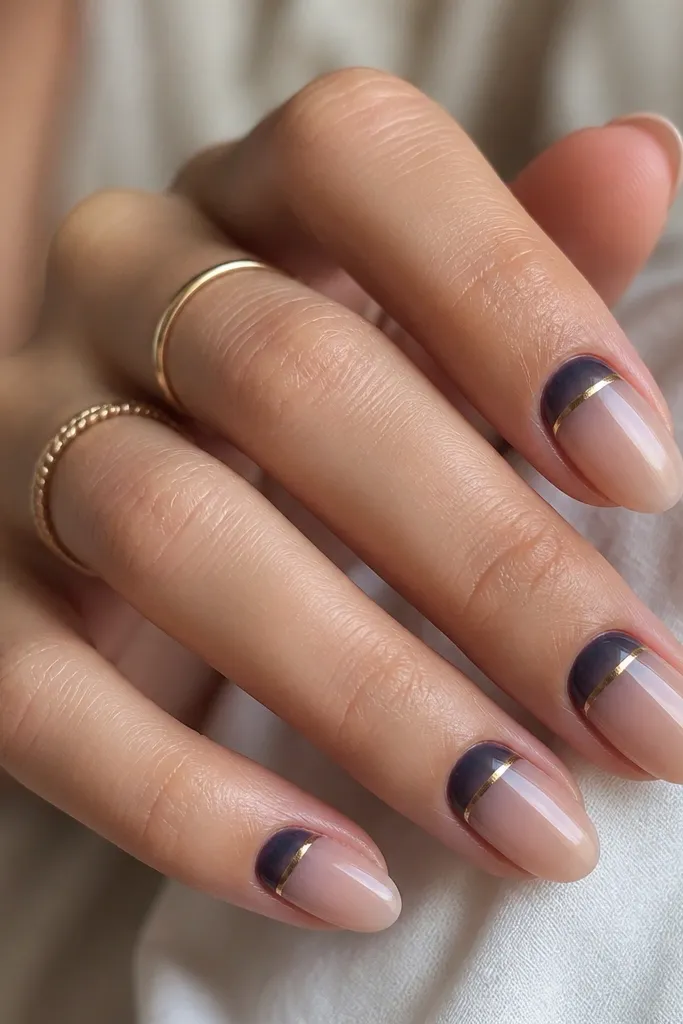
I love this one because it reads fall without feeling heavy. Use a smoky navy gel that looks almost charcoal at the edges, then keep the rest of the nail in a nude base so your hands look clean. The caramel chrome line is the warm counterweight — it makes blue feel autumn instead of icy. This flatters fair to deep skin tones because the nude base gives you a natural “bridge” color, and the chrome adds warmth near the cuticle where light hits first. It also suits short nails since the design lives in the top third of the nail.
Start by prepping and pushing back the cuticle, then apply a sheer nude base and cure. Sponge or brush on smoky navy only in a half-moon shape, keeping the fade soft — I overlap about 1 mm past where you want the curve to end. Cure, then use a fine striping brush or a thin chrome tape to place a narrow caramel-gold chrome line right along the half-moon border. Seal with two thin coats of top coat, curing fully each time to keep the chrome from dulling.
If your half-moon line looks uneven, place a small dot of chrome paste on a nail tool first, then drag it into a straight edge.
Avoid painting the navy too opaque — if it covers the whole nail, the set loses that airy fall contrast.
2. Dusty Periwinkle Matte Dots Over Espresso Nude
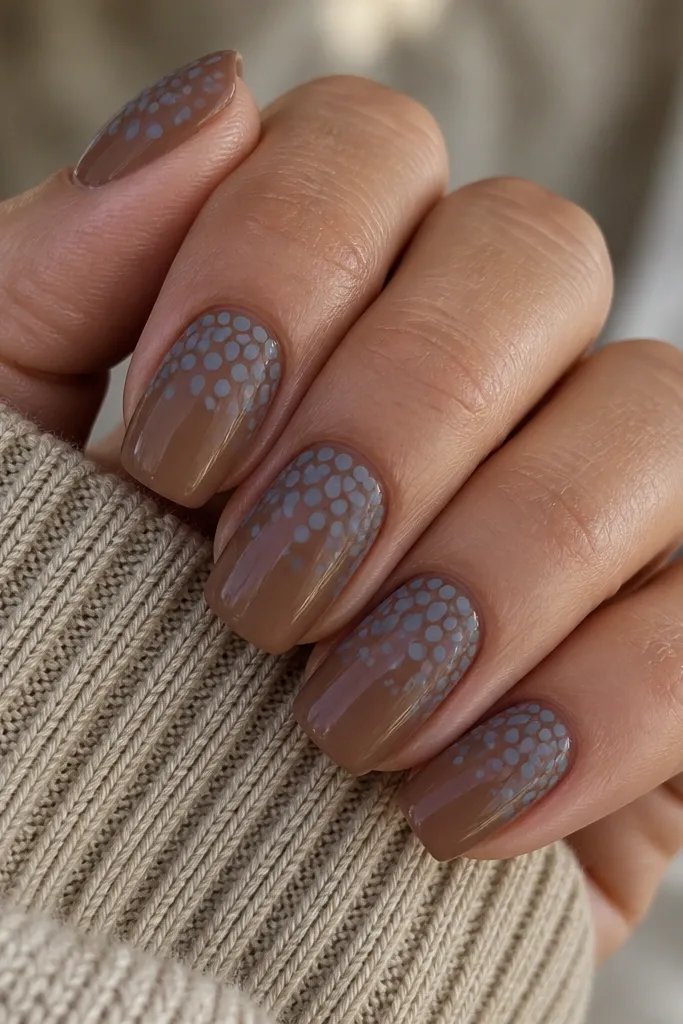
This is for when you want blue that feels cozy, not cold. I use a dusty periwinkle that looks greyed out, then switch the finish to matte so it resembles early fall denim or soft knit. The espresso nude base anchors everything and makes the dots look intentional instead of random confetti. It works on most skin tones because espresso nude is deep enough to show off blue, but not so dark it swallows your hands. I wear this to work a lot because it looks cute even when my nails are short.
Apply an espresso nude gel base and cure. Dot dusty periwinkle matte gel in small groups — I place one cluster of three near the sidewall and one cluster near the center, leaving breathing room. Cure, then wipe tacky residue if your brand requires it. Finish with one glossy top coat on the base only if you want contrast; if you prefer everything matte, use a matte top coat overall after curing the dots.
Use a dotting tool with a slightly smaller ball than you think — the dots look cleaner and more nail-art sharp.
Avoid making the dots too big — oversized dots on a nude base look like marker freckles.
3. Navy Micro-French with Burnt Orange Outline
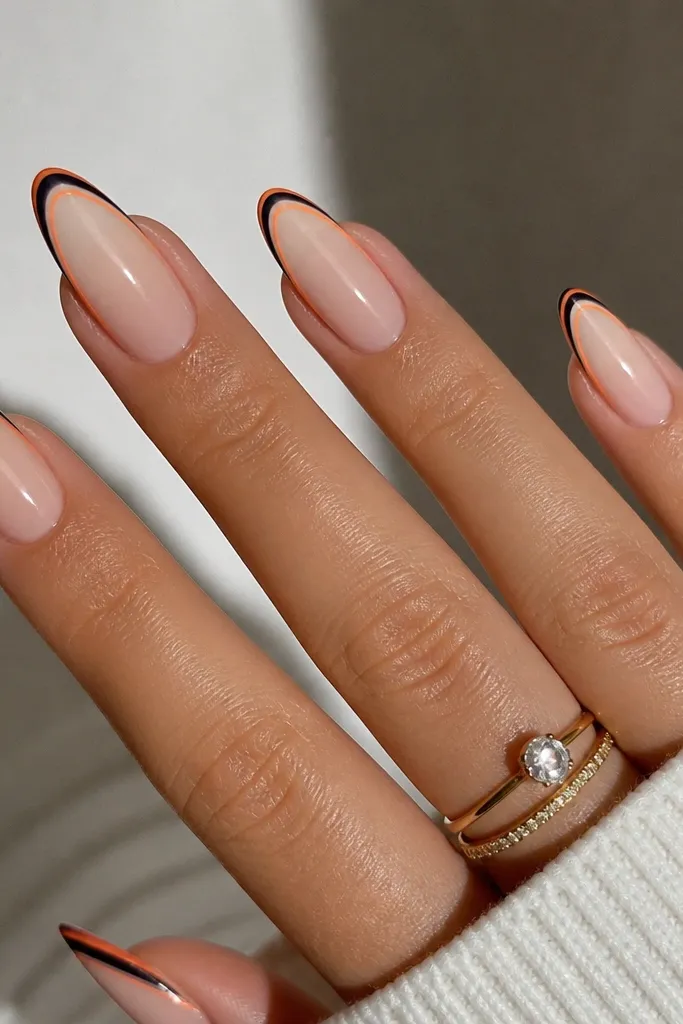
Micro-French keeps fall nails looking polished when you don’t want full coverage art. The navy line gives you that classic fall “tailored” look, and the burnt orange outline adds warmth along the tip where your hands naturally show contrast in daylight. I like sheer nude here because it makes the outline crisp and prevents the design from looking like a solid block of color. This flatters fingers because the line stays thin, which visually lengthens the nail. It’s great for medium-long nails and for anyone who hates chunky decorations.
Start with a sheer nude base and cure. Paint a straight navy micro-French line at the tip using a striping brush, keeping it about 1-2 mm wide from the free edge. Cure, then add a second burnt orange line just outside the navy — keep it thinner than the navy so it looks like a frame. Finish with a glossy top coat, and cap the tip edge lightly so the lines don’t catch or chip.
If your orange bleeds, wipe your brush on a lint-free wipe until it’s nearly dry, then drag the line slowly.
Avoid a thick orange outline — it turns the look into a candy stripe instead of a refined border.
4. Blue-Grey Marble with Gold Fleck Veins
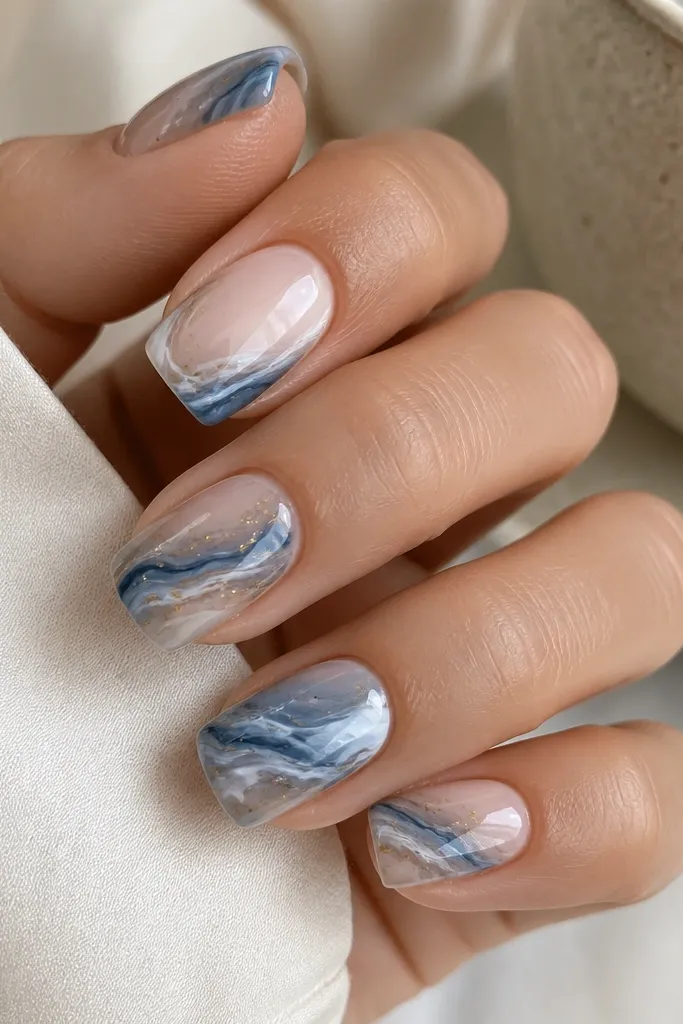
Marble nails look expensive when the veining is thin and the color story stays tight. I use a blue-grey marble so it feels like stormy October skies, then add micro gold flecks instead of big gold foil pieces. The gold flecks catch light without overpowering the cool tones. This works for fair and medium skin especially well because the cool nude base keeps the marble from washing out. It’s also photo-friendly because the gold flecks sparkle even when the rest of the nail looks calm.
Apply a cool nude base and cure. Create marble with a thin gel brush: drag blue-grey and white streaks in irregular paths, then soften edges by tapping with a clean brush tip. Add tiny gold flecks using gold leaf bits or a fine gold glitter gel, placing most flecks near the thicker veining. Cure and seal with two glossy top coats, doing extra care at the sidewalls so the marble doesn’t snag.
Use a toothpick to place gold flecks — it gives you control and keeps flecks from clumping.
Avoid thick marble swirls — heavy white patches make the set look like nail stickers.
5. Cobalt Velvet Look with Black Leaf Edges
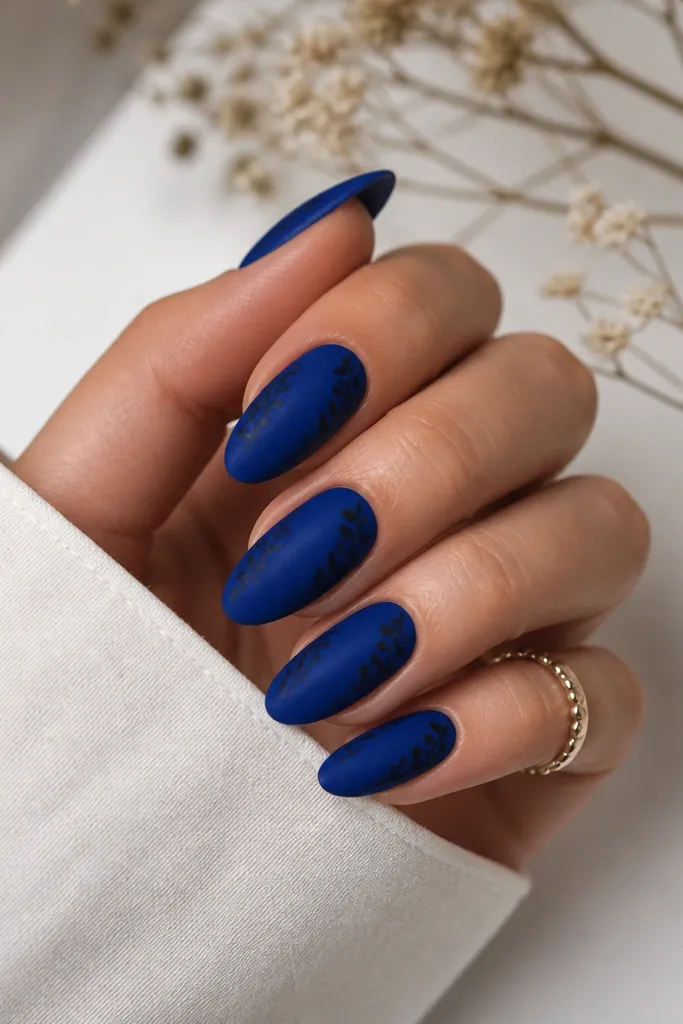
Velvet-look blue screams fall because it mimics the look of crushed velvet scarves and dark coats. I keep the base a true cobalt but use a velvety matte top coat or velvet powder so it loses the wet shine. Then I add black leaf edges — thin, irregular shapes that sit only on the sides. It gives you that “nature meets night” vibe without turning the nail into a full botanical mural. This flatters shorter nails because the art hugs the edge instead of taking over the whole surface.
Editor's noteKeep the black leaf shapes away from the cuticle — 1 mm clearance makes the set look intentional instead of messy.
Start with a cobalt gel base and cure. Apply velvet powder (or a velvet matte top coat) with a light hand so the center stays smooth while the sides get slightly textured. Use a striping brush to paint thin black leaf silhouettes along both sidewalls, leaving the middle nail clear. Cure again, then seal with a second thin layer of velvet top coat if your system needs it.
Watch outAvoid painting leaves across the center — it makes the velvet base look patchy.
6. Icy Blue Gel with Brown Sugar Crystal Tips
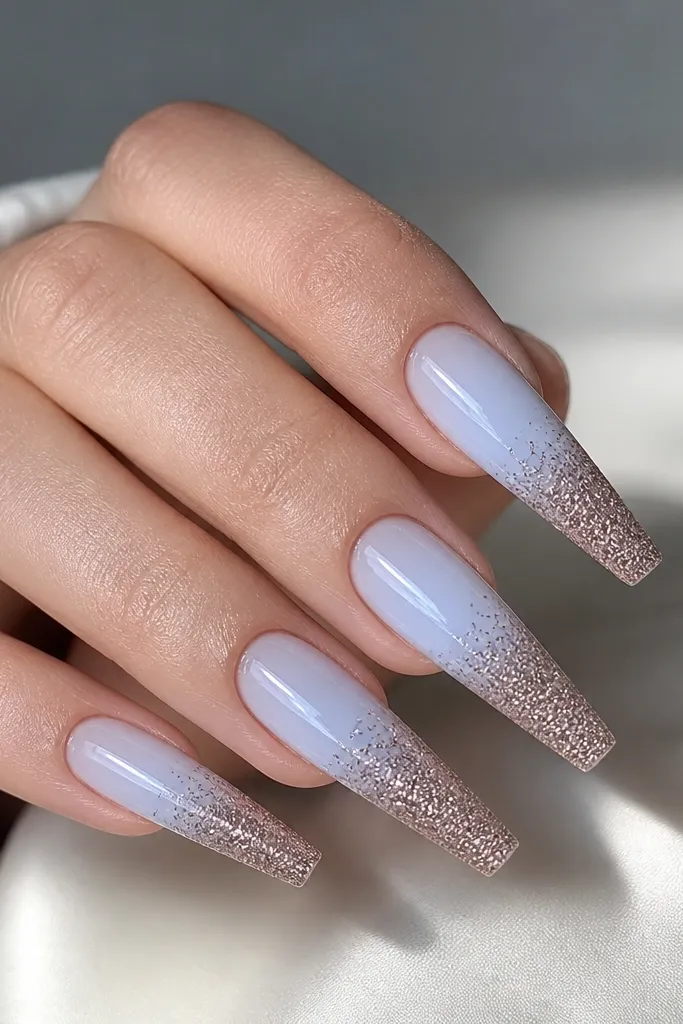
This one is fun because it looks like cold air meeting warm dessert. I use an icy blue that’s almost translucent with a soft glow, then build the fall texture at the tips with brown sugar crystals or chunky fine glitter. The gradient matters: dense at the tip, then fade back so your nail still looks clean near the cuticle. It flatters hands with longer nail beds because the gradient lengthens. It’s also great for parties because the crystals catch light differently than regular glitter.
Editor's noteSeal the underside of the tip with a micro layer of top coat if you wear your nails long — it prevents tip lift.
Apply a sheer nude base or builder gel that matches your natural nail tone, then cure. Add a thin layer of icy blue gel starting mid-nail and blend it toward the tips. For the crystals, press brown sugar glitter onto the tip area while the gel is tacky, using a silicone tool to pack it closer to the edge. Cure, then brush off loose glitter and cap with glossy top coat to lock everything in.
Watch outAvoid full-coverage crystals — it turns the look from fall dessert to rough texture.
7. Indigo Skies with Tiny White Snowflakes on One Accent Nail
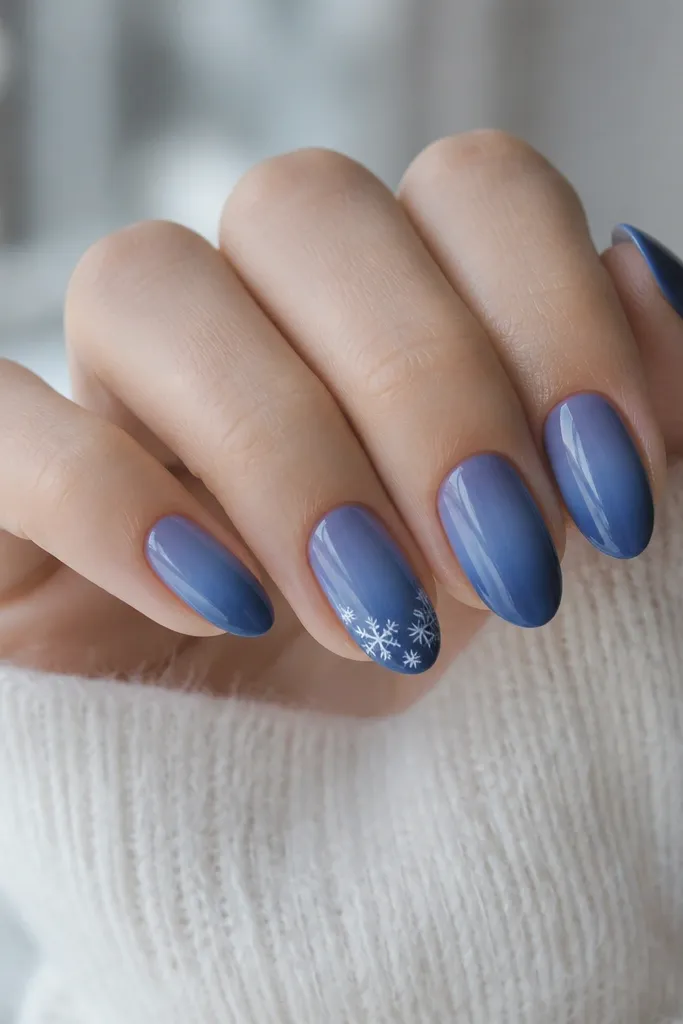
Snowflakes in fall sound weird until you do them tiny and only on one nail. I build an indigo gradient that looks like dusk, then place micro white snowflakes as if they’re floating — not like a winter print. The single accent nail keeps it from looking like you forgot to change your theme. This looks great on short nails because the snowflakes sit high and don’t overtake the nail width. It also works for medium skin tones because the indigo gives strong contrast without needing extra color.
Start with an indigo gel gradient: paint deep indigo at the tip, then blend upward with a sponge or flat brush, curing after the first layer. Add a second thin gradient layer if you want more depth, cure again. On one accent nail only, use a striping brush or dotting tool to place 3-5 tiny white snowflake shapes near the cuticle line. Seal with glossy top coat and cure thoroughly so the snowflakes don’t smear.
Make the snowflakes different sizes — it looks like real flakes instead of a pattern stamp.
Avoid snowflakes on every nail — it reads as winter, not fall dusk.
8. Blue Denim Stripes with Matte Corners
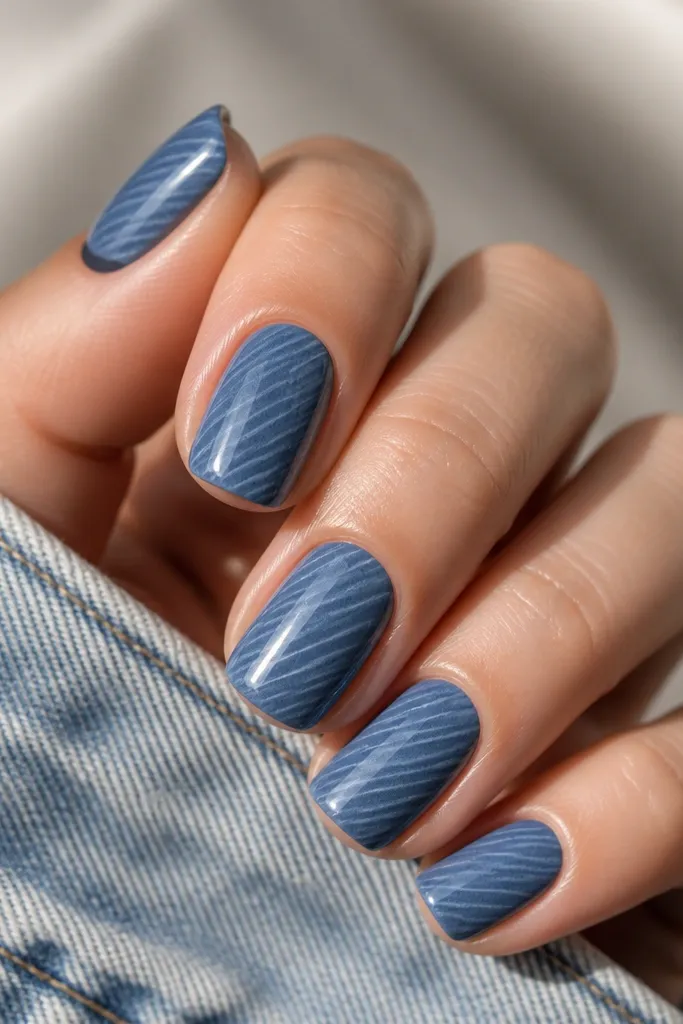
Denim nails feel like fall because denim is the season’s uniform. I use a faded denim blue base, then add diagonal stripes in a slightly darker blue for that stitched look. The matte corners are the trick — I keep matte only at the lower edges so the nail looks dimensional without looking unfinished. This flatters hands with wider nail beds because the diagonal stripes slim the eye. It also works for most skin tones because the blue is muted, not neon.
Editor's noteUse painter’s tape as a guide for the matte corners — it gives you a clean edge in two minutes.
Apply a faded denim blue base and cure. Add diagonal stripe lines with a thin striping brush — keep them spaced about 1-2 mm apart. Cure, then brush matte top coat only on the lower corner areas (near the sidewalls and free edge), leaving the center glossy. Cure again and finish with one glossy top coat only on the glossy sections so you don’t blur the matte boundaries.
Watch outAvoid matte on the whole nail — denim should look worn, not dull and flat.
9. Periwinkle Aura Around the Cuticle with Bronze Lines
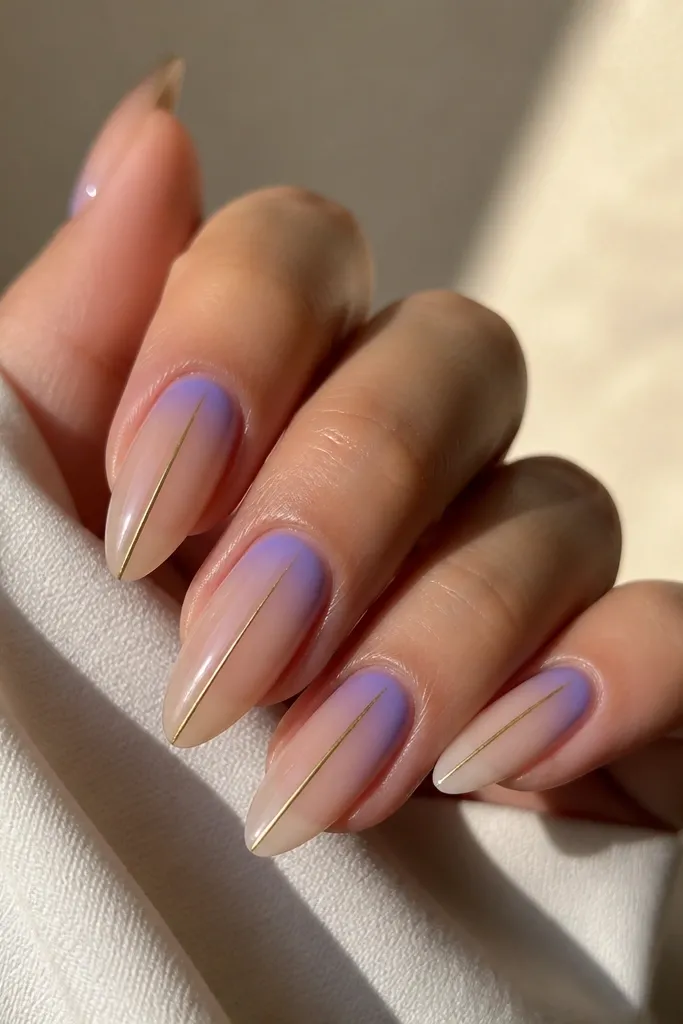
Aura nails are my go-to when I want blue that feels soft and flattering. The periwinkle halo around the cuticle makes fingers look longer because it brightens the top area without adding bulk. I pair it with bronze lines because bronze is warm and fall-friendly, and the vertical placement creates a straight, elongating effect. This works on fair through deep skin tones because the sheer nude base keeps it balanced. If you’re between nail shapes, this also looks great on almond and squoval.
Editor's noteFor a cleaner aura, wipe your sponge after every two nails so the halo stays soft, not muddy.
Start with a sheer nude base and cure. Sponge periwinkle gel lightly around the cuticle in a halo, blending outward and leaving the center clear enough to show your natural nail tone. Cure. Use a striping brush to paint one thin bronze vertical line from near the aura edge down to about 2-3 mm above the tip. Cure and seal with glossy top coat, focusing on the line edges so they don’t lift.
Watch outAvoid placing bronze lines too close to the sidewalls — it can shorten the nail visually.
10. Navy and Rust Checkerboard on Two Accent Nails
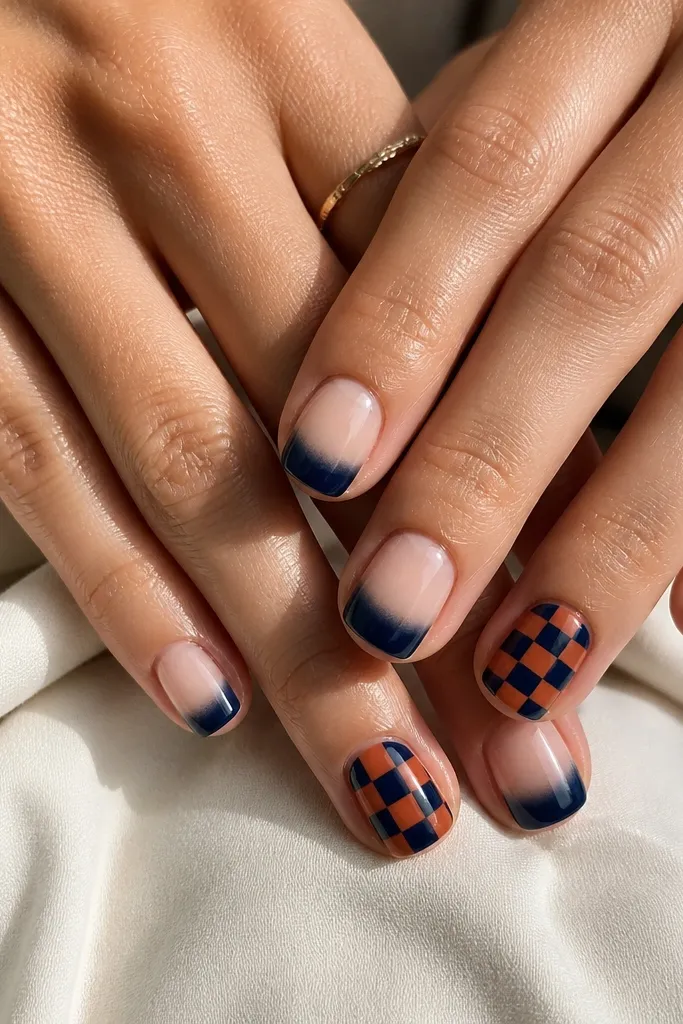
Checkerboard works when it stays controlled. I keep the pattern only on two accent nails and use a rust orange that looks like baked clay, not neon. The rest of the nails get a simple navy tip gradient so the set feels cohesive. This is perfect if you want something graphic for fall without committing to full nail art on every finger. It flatters short nails because the squares are small and stacked neatly, and the simple nails keep your hands from looking crowded.
Editor's noteUse thin tape and burnish it down — checkerboard edges stay sharp when tape sticks fully.
Paint a sheer nude base on all nails and cure. Add a soft navy tip gradient on the non-accent nails using a sponge, blending about 1/3 of the way up. For the accent nails, use striping tape to block out a grid, then paint alternating navy and rust squares. Cure each color, remove tape carefully, and clean edges with a brush dipped in acetone or gel cleanser. Seal with glossy top coat and cap the free edge.
Watch outAvoid big squares — large checker pieces make short nails look wider than they are.
11. Midnight Blue Gloss with Copper Leaf Streak
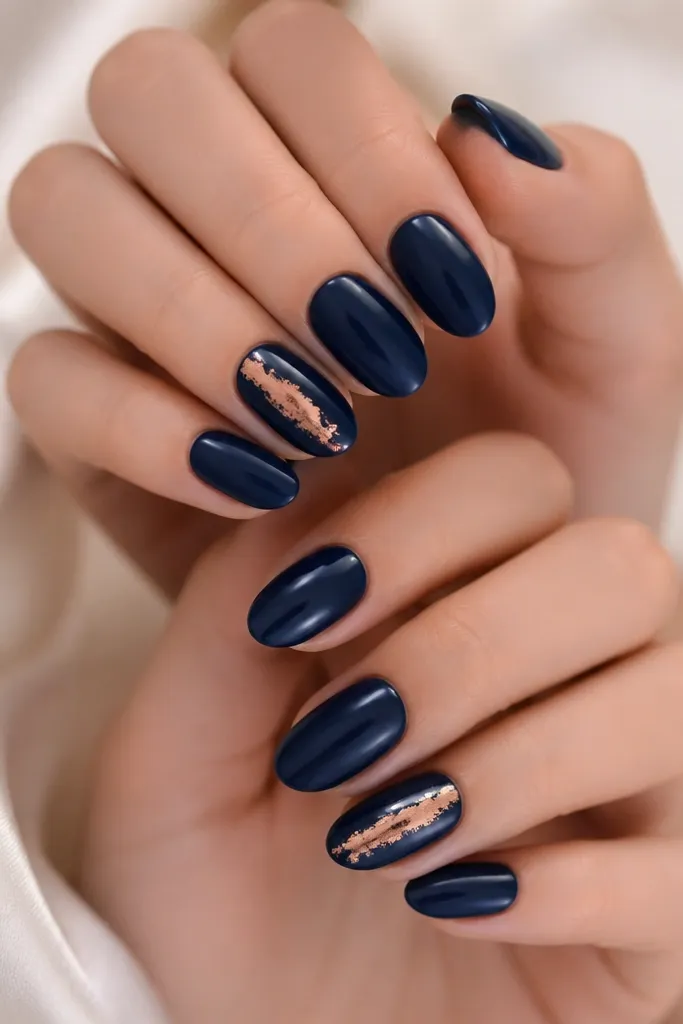
This is the “one statement nail” trick I use when I want the set to look expensive in photos. Midnight blue stays sleek and fall-appropriate, and copper leaf adds that warm autumn sparkle. I place the leaf as a diagonal streak because diagonals add motion and make the nail look longer. The uneven leaf edges look natural against glossy blue, so it doesn’t feel like sticker art. This flatters all nail lengths, but it looks especially good on medium almond where the diagonal has room to breathe.
Start by painting midnight blue on all nails and cure. On your chosen accent nail, add a thin line of tacky base gel where the streak will go, then tear copper leaf into small pieces and press them along the diagonal. Overlap slightly for coverage, then gently tap off extra bits. Cure, then seal with a thick top coat layer just over the leaf so it feels smooth when you run your finger across it.
If leaf sticks in weird spots, use a cleanup brush with a tiny amount of gel cleanser to push it into the streak.
Avoid covering the whole nail in leaf — copper should be a streak, not a full blanket.
12. Blueberry Jam Swirls with Creamy Nude Base
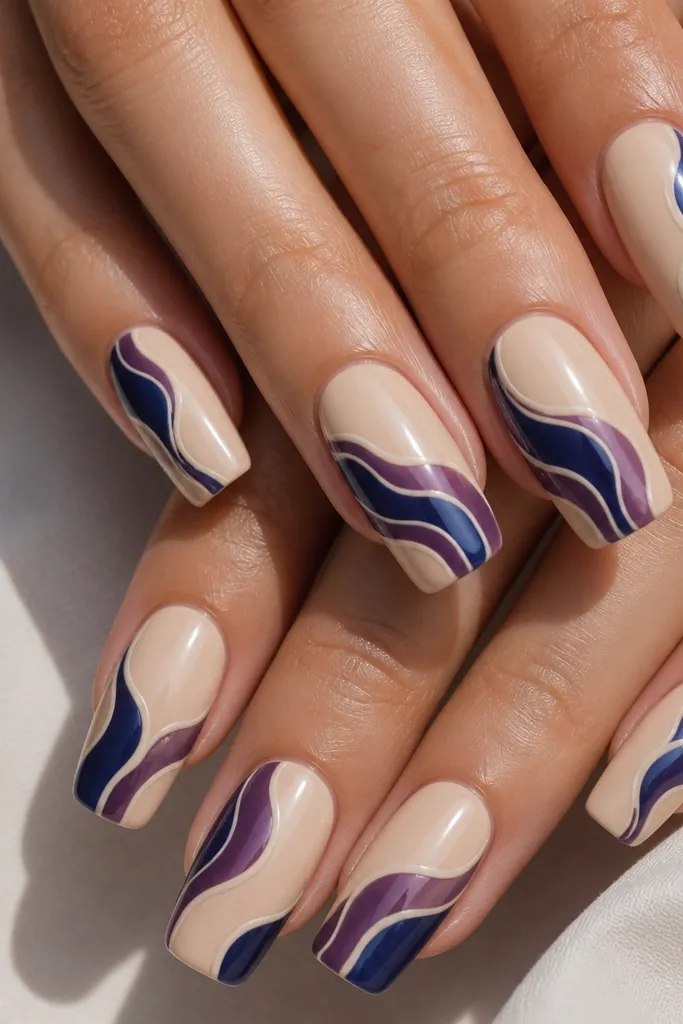
Jam swirls are one of those fall patterns that look playful but still grown-up. The creamy nude base keeps the blue from turning too dark and makes your nail bed look healthy. I mix deep blueberry blue with a hint of plum and add thin separating cream lines so the swirls read clearly. This style flatters people with shorter nail beds too because the base is light and the swirls follow the nail length. It also works for both everyday wear and date nights.
Apply creamy nude gel and cure. Use a thin brush to draw long C-shaped swirls running from near the cuticle toward the tip, then fill with deep blueberry blue gel. Add a small amount of plum gel on one side of the swirl and drag it slightly into the blue while it’s still workable. Finally, paint thin cream separator lines between swirl layers, cure, and seal with a glossy top coat to smooth the surface.
Do one nail at a time and cure often — swirls look cleaner when the gel doesn’t spread.
Avoid thick swirl lines — they make the art look like smudged paint.
13. Cobalt Outline French with Matte Taupe Half-Moons
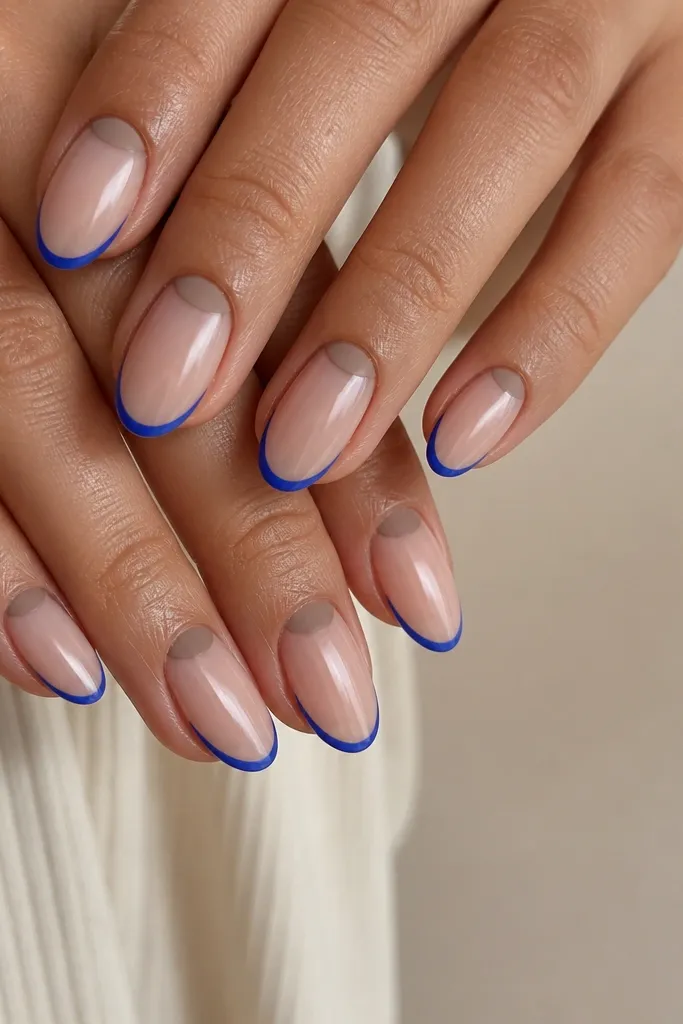
This design is my “meeting day” pick because it looks sharp and not loud. The cobalt outline French keeps the tips structured without turning your nails into solid color blocks. Matte taupe half-moons at the cuticle add a soft fall neutral that pairs perfectly with blue. The contrast between matte taupe and glossy nude makes your hands look styled even with minimal art. It flatters almost everyone because taupe is forgiving and the outline keeps the nail shape crisp.
Editor's noteUse a liner brush and rest your hand on a table — steadiness makes the outline look salon-done.
Start with sheer nude on all nails and cure. Paint an outline French: draw a thin cobalt line along the tip edge, leaving the center of the tip transparent, then cure. For the half-moons, use matte taupe gel and apply it only at the cuticle curve, leaving a narrow nude gap between the matte and the cobalt outline. Cure and top coat only the nude areas with glossy top coat, leaving taupe matte or sealing it with a matte top coat if you want it all uniform.
Watch outAvoid filling the entire tip with cobalt — outline French looks best when the nude shows.
14. Blue Marble Tips with Copper Foil Corners
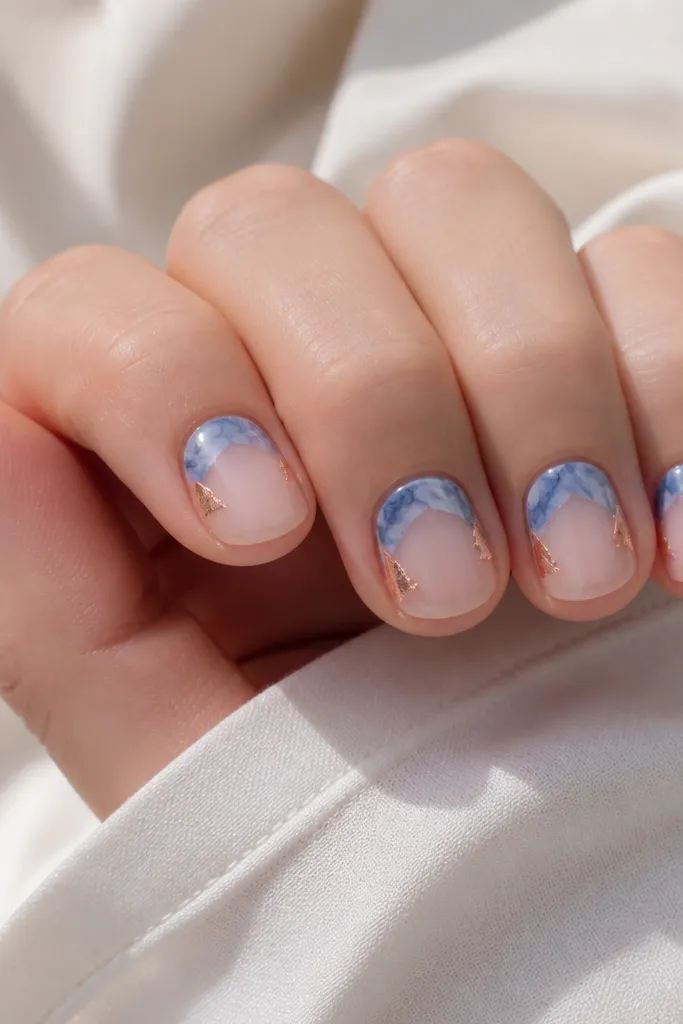
This one is a neat way to do marble without committing to full nail art. Marble tips look like dyed glass and feel very fall when you keep the base sheer and let the pattern sit only at the free edge. Copper foil corners are small but high-impact — they catch light at the sides and make the marble look more intentional. This flatters short nails because it keeps the design concentrated and prevents the nail from looking too busy. It also looks great on hands with slightly wider nail beds since the corner accents pull focus outward.
Apply a sheer nude base and cure. Create blue marble only at the tips: add blue-grey and a touch of white in thin streaks, then blend so the marble fades down about 2-3 mm from the tip. Tear small copper foil pieces into tiny triangles and press them into the corner areas near the sidewalls on each nail. Cure and seal with glossy top coat, paying extra attention to the foil edges so they don’t lift.
Cut the foil into smaller bits than you think — big foil corners look bulky on short nails.
Avoid marble reaching past the upper third — it makes short nails look top-heavy.
15. Navy Galaxy with Starry Micro Glitter and Matte Base
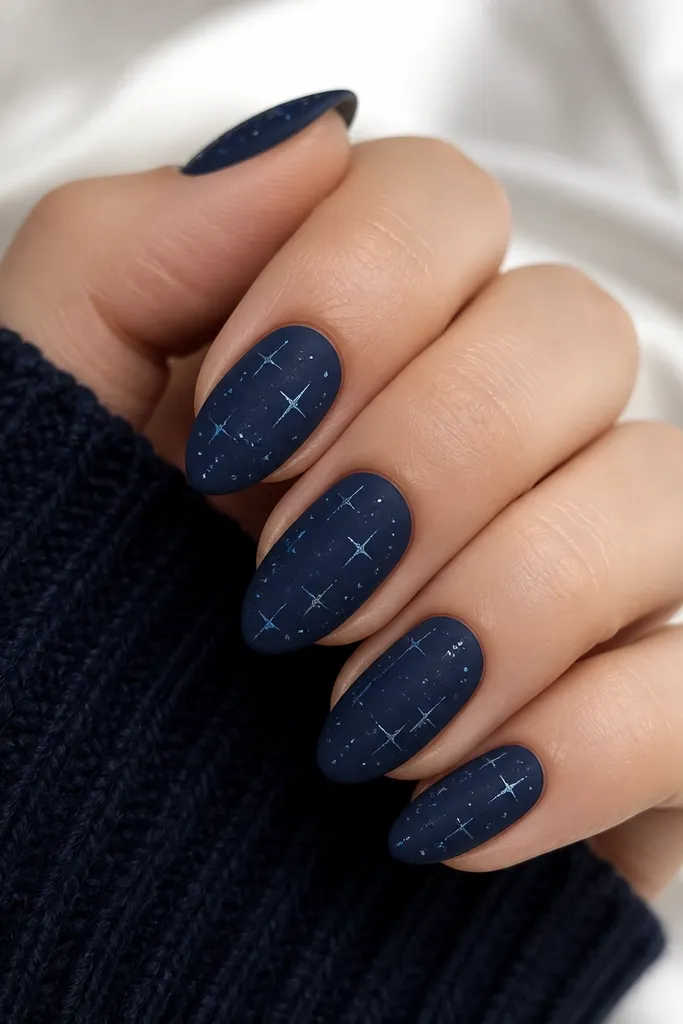
Galaxy nails can get messy fast, so I keep this version controlled and fall-friendly. The base is matte navy, which makes the glitter look like night sky dust instead of party sparkle. I use micro glitter and tiny star bursts so the stars look hand-placed, not scattered confetti. This looks flattering on medium almond because the nail shape gives the sky room. It also hides minor nail texture under matte, which is why it’s a great choice when your nails aren’t perfectly smooth.
Start with a matte navy base and cure. Use a fine detail brush to place tiny dots of silver micro glitter and a few light blue micro accents, focusing around the center and upper half. Add 2-3 star bursts per nail using a dot and two short lines, then cure. Seal with a matte top coat over everything so the stars stay integrated, not glossy and raised.
If glitter sinks into gel, wait until it’s tacky and press gently with a dry brush tip.
Avoid big chunky glitter — it ruins the night-sky effect and makes the set look uneven.
16. Periwinkle Skittle Gradient with Rust Skins on the Ring Finger
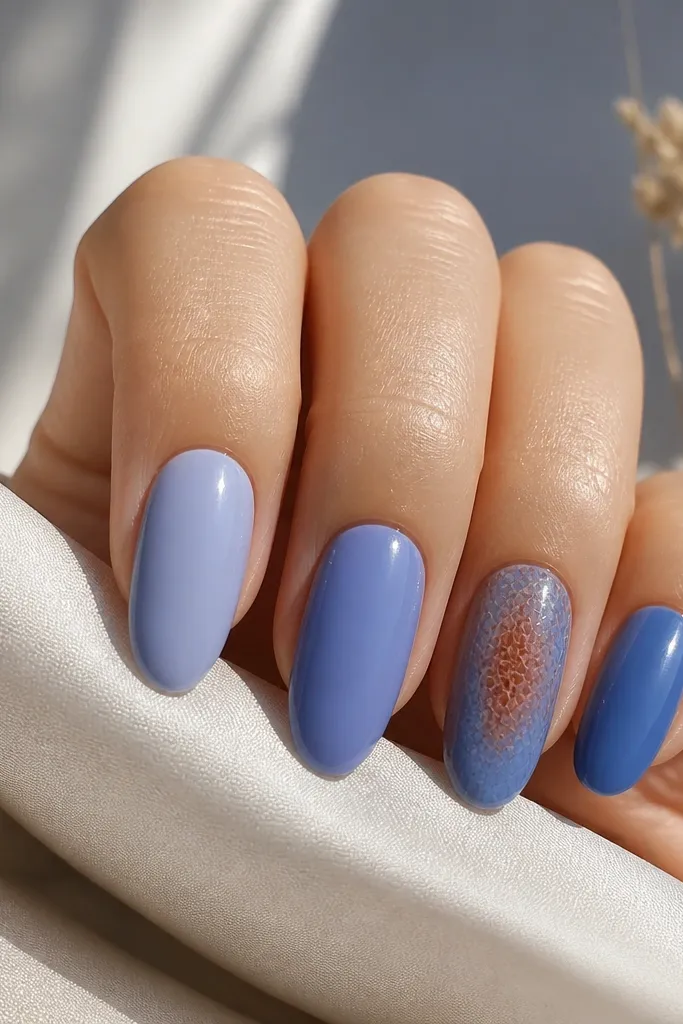
Skittle gradients are one of the easiest ways to make fall look intentional without heavy art. I use periwinkle shades that step down in depth across the fingers, so your hands look coordinated. On the ring finger, I add rust-brown skin texture (like crushed metallic flakes or a thin scale gel effect) to bring in fall warmth. That one textured nail keeps the whole set from looking like a simple color change. It flatters hands because the gradient draws the eye across the fingers, and the textured accent adds interest without covering every nail.
Editor's noteMatch your gradient to your ring size — if you wear a chunky ring, keep the texture nail glossy and the rest smooth.
Choose five close periwinkle-to-blue shades and apply them from thumb to pinky, keeping each nail glossy. Blend the color toward the tip or keep it full coverage — I do a slight fade on the thumb and a deeper fade on the pinky. On the ring finger only, apply the rust texture gel in the center area and build it to a thin raised finish. Cure, then seal all nails with glossy top coat, using a thicker coat on the textured nail so it feels smooth.
Watch outAvoid jumping between wildly different blues — a skittle looks best when shades stay in the same family.
17. Blue Tortoiseshell with Black Lines and Warm Nude Base
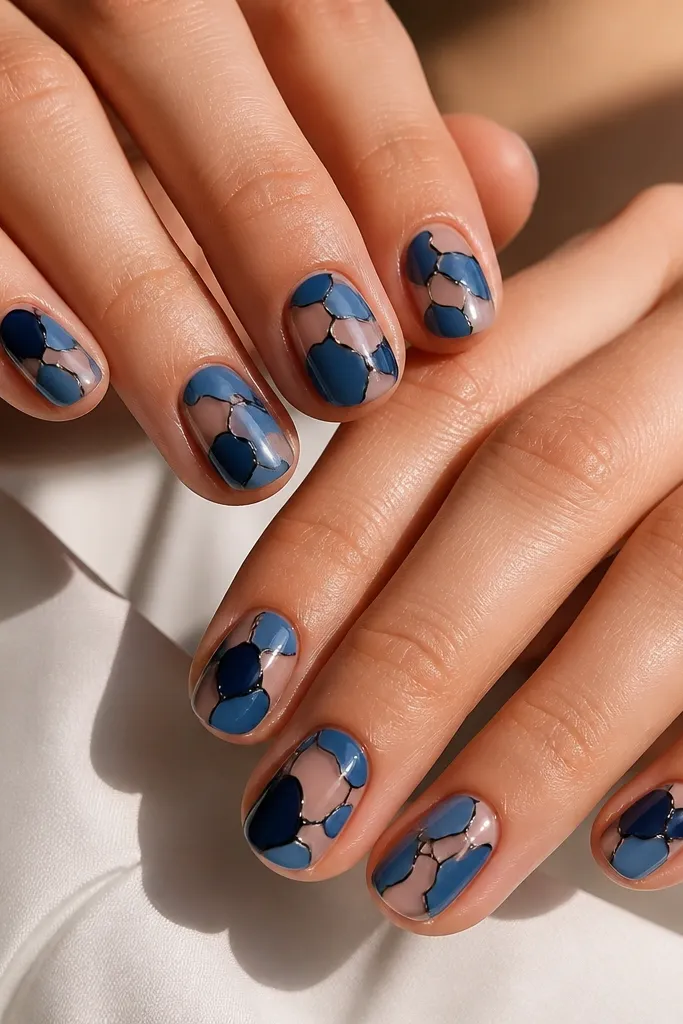
Tortoiseshell looks like fall because it mimics the look of acetate frames and caramel-toned accessories. I use a warm nude base so the blue tortoiseshell doesn’t look like it’s floating on a cold background. The black lines are what make it look sharp — they create separation between blue patches and keep it from turning into smudgy marbling. This flatters short nails because the irregular patches fill the surface without needing length. It also works for deeper skin tones because the warm nude balances the contrast.
Editor's noteMake the black lines slightly thicker where two patches meet — that’s where tortoiseshell looks most realistic.
Apply warm nude gel and cure. Layer blue tortoiseshell patches by painting irregular shapes in navy, then medium blue, leaving tiny nude gaps. Use a thin brush to draw black lines around the edges of each blue patch, then cure. Add a second thin coat of glossy top coat if your tortoiseshell looks slightly dull, then cap the tip edge for durability.
Watch outAvoid using only one blue shade — tortoiseshell needs variation to look like material, not paint.
18. Cobalt Stained Glass with Clear Negative Panels
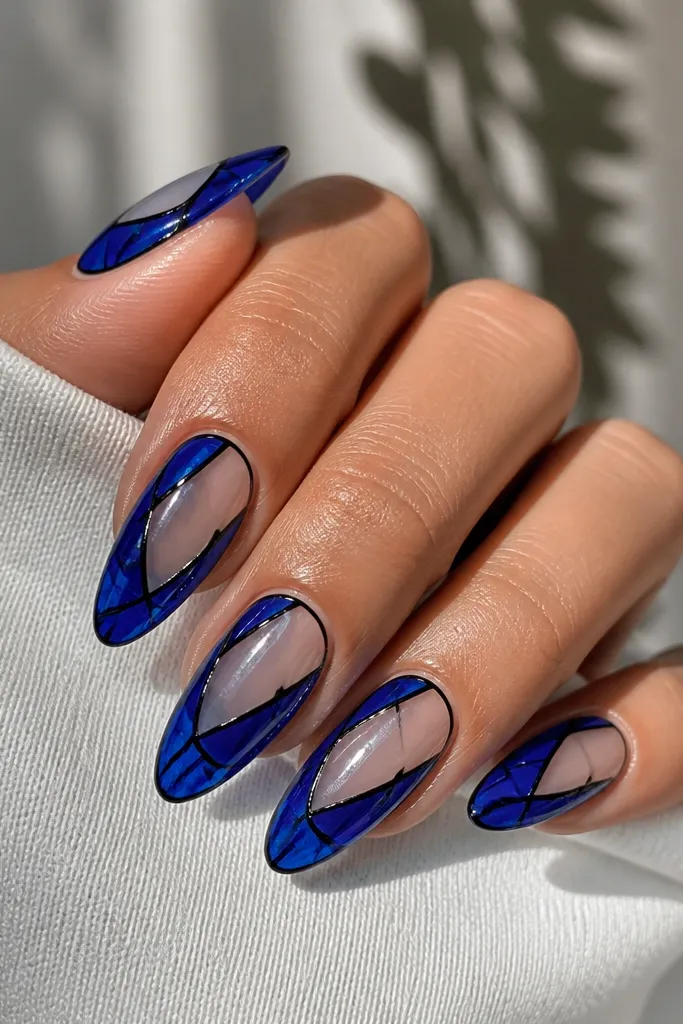
Stained glass nails feel modern and still very fall when you use deep cobalt and keep it structured. The trick is the negative panels: leaving clear or sheer nude spaces in the center makes the design look crisp instead of heavy. Thin black lines act like the “lead” between glass pieces, which is why it reads like stained glass instead of random blobs. This flatters long almond nails because the shapes can follow the nail length. It also looks great on hands with strong nail beds since the panels give you clean visual breaks.
Apply a sheer nude base and cure. Outline stained-glass shapes with a thin black liner gel — I draw two side panels and leave the center clear. Fill the side panels with cobalt gel, keeping the edges thin and curing after each fill if your gel runs. Add a second cobalt layer for opacity, cure, then seal with a glossy top coat that smooths the line edges without flooding the negative panels.
If you’re worried about black liner bleeding, use a gel that self-levels less and cure in short bursts.
Avoid filling the negative panels — stained glass needs those clear breaks to look like glass.
19. Indigo Gradient with Micro Gold Stars and Matte Cuticle
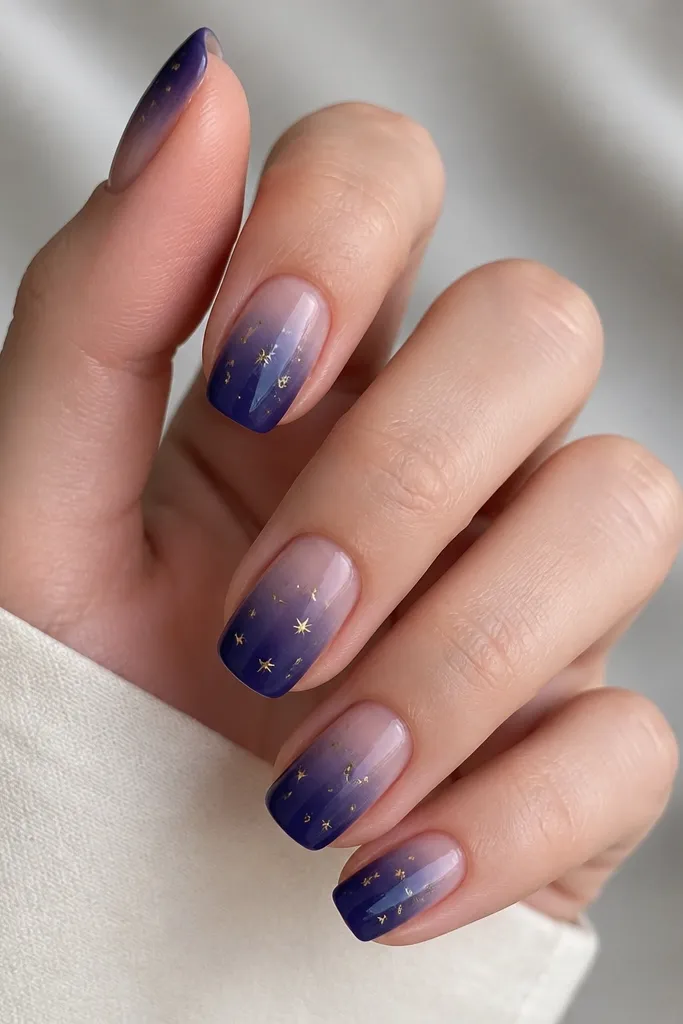
This set mixes calm and sparkle in a way that feels like fall nights. The indigo gradient is smooth and flattering, especially on squoval where the fade follows the shape. The matte cuticle frame makes the nails look neat and gives your hands that “styled” finish even before the stars catch light. Micro gold stars are subtle enough for everyday, but they still show up in photos. This works across skin tones because indigo is deep and the gold is warm, and the nude matte cuticle keeps it balanced.
Paint a full indigo gradient: deep at the tip, blended up toward the base, then cure. Add matte nude gel or matte top coat only around the cuticle area, keeping a clean line where matte meets gloss. While the nail is tacky (or right after placing stars), add tiny micro gold stars near the center and upper half using a star stencil or dotting tool. Cure and seal with glossy top coat everywhere except the matte cuticle zone.
Use a star confetti mix that is truly micro — big stars look cartoonish on gradients.
Avoid placing stars too close to the edges — they can catch on hair and feel rough.
20. Blueberry Chrome with Dark Brown Outline and Clear Tips
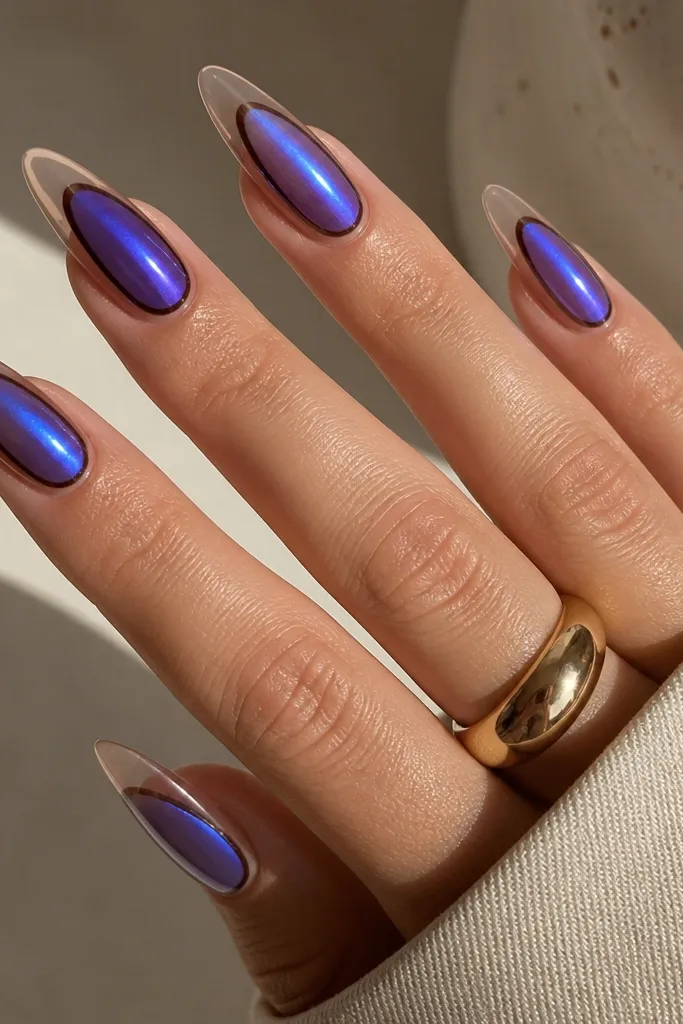
Chrome can look wild, but this version stays wearable because the outline is dark brown and the tip is negative space. The blueberry chrome shifts cool-to-purple tones, which feels like late-summer fruit turning into fall jam. The dark brown outline anchors the chrome so it doesn’t look like a random shimmer sticker. Clear tips keep the design light and make your nail shape look longer. This is best on medium-long almond or coffin because the negative-space tip needs room to breathe.
Editor's noteWipe your liner brush on a lint-free wipe first so the brown line stays thin and not watery.
Start with a sheer nude base and cure. Apply blueberry chrome gel in the center area only, leaving a small gap around the edges for the outline and leaving the tip clear. Cure, then paint a thin dark brown outline around the chrome region using a liner brush. Finally, cap with top coat — go thinner at the outline edges so the design stays crisp and doesn’t flood into the clear tip.
Watch outAvoid coating the entire nail in chrome — negative space is what makes this look clean, not loud.