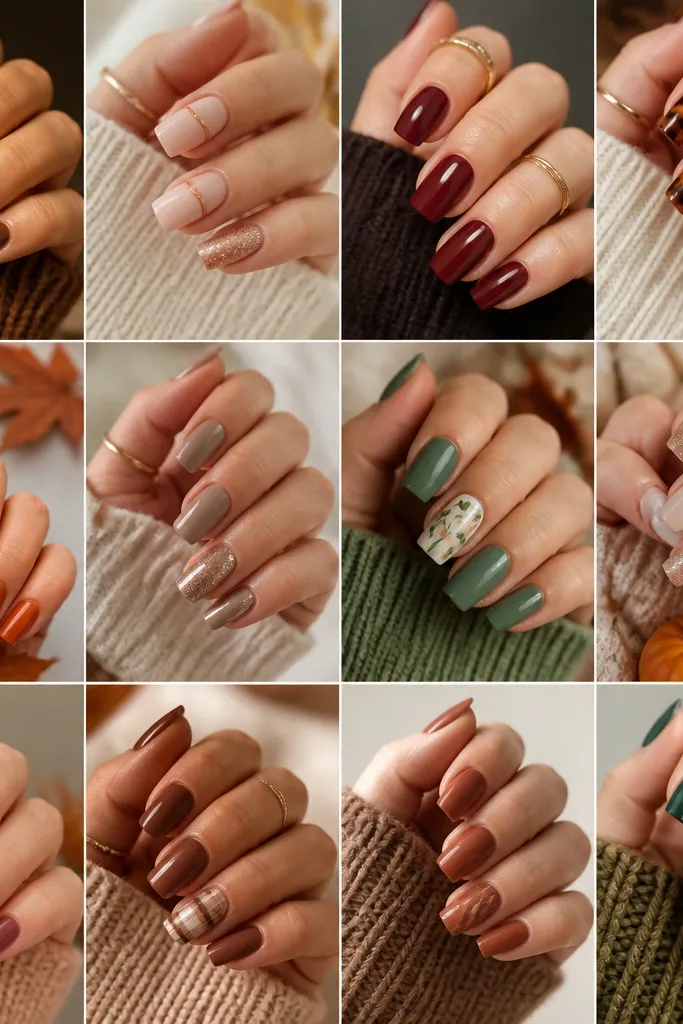
1. Caramel French with Burnt Orange Tips
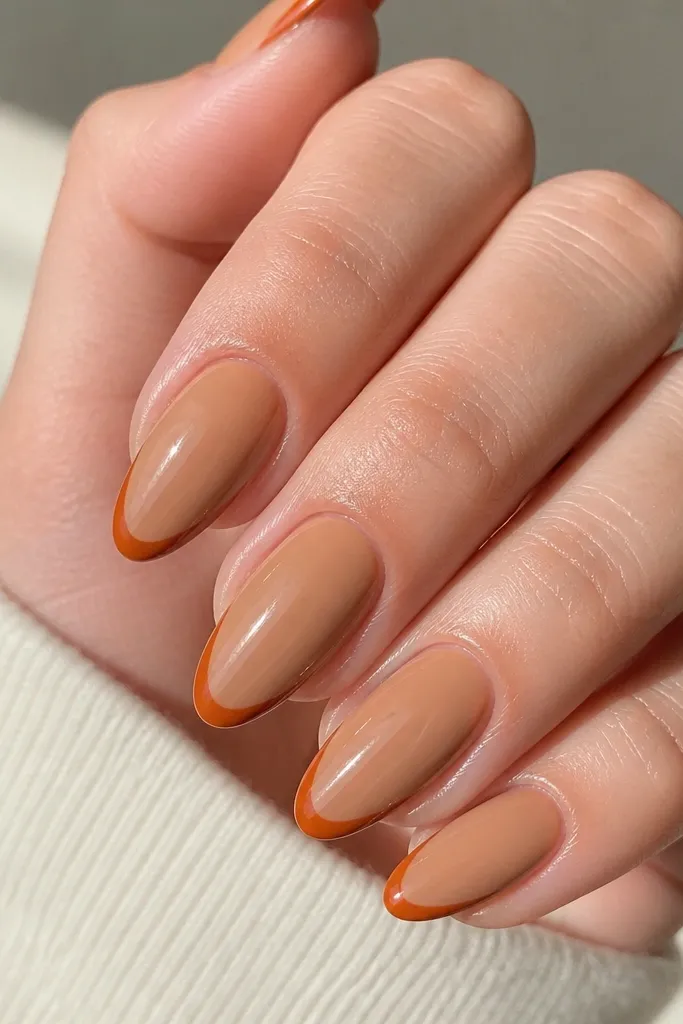
This set makes fall hands look polished fast. The base is a caramel-beige nude that matches warm undertones, and the burnt orange tips add that cozy autumn color without turning your nails into a block of pigment. I like almond or soft square here because the French curve has room to look sharp. It flatters short nail beds too because the tip line is thin and placed slightly higher than a classic French, which visually lengthens. For everyday wear or work, it reads warm and intentional.
Start by applying your acrylic to your natural nail length, then keep the apex centered so the nail doesn’t flex. On the cured acrylic, paint a caramel nude base in two thin coats, letting each cure fully. Then create the French: use a guide strip or a thin brush to place the burnt orange smile line about 1-2 mm from the tip edge, keeping it narrow. Seal with a glossy top coat, and wipe the tacky layer carefully so the French stays crisp.
Place the French line slightly higher than you think for a longer look, especially on short nails.
Avoid thick French tips — they lift and chip faster at the corners.
2. Chocolate Swirl Marble Over Nude Rose
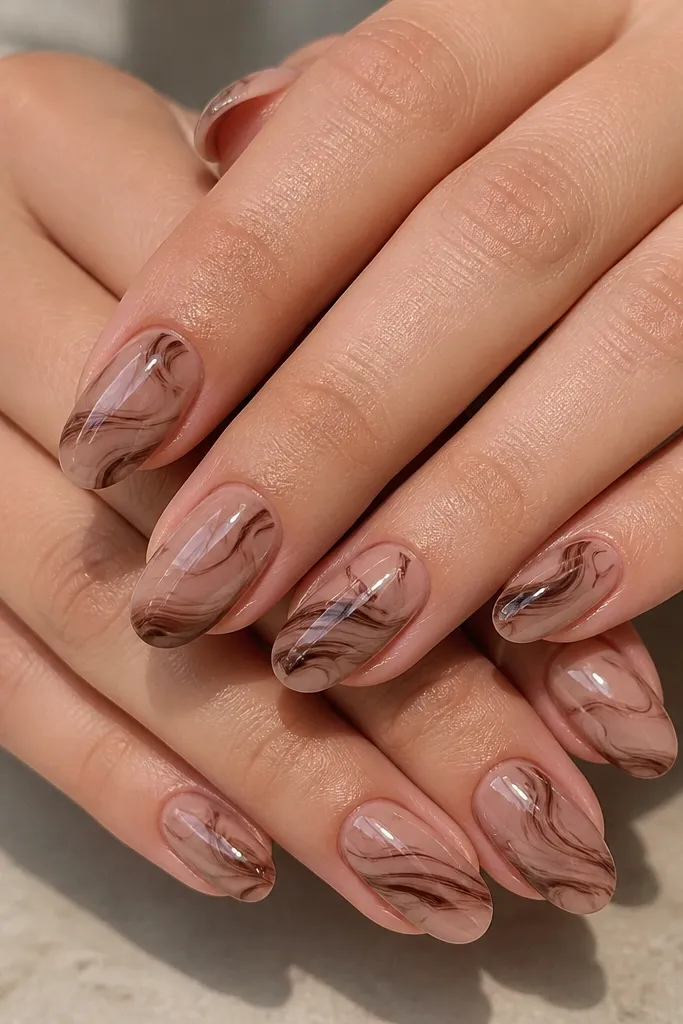
Marble nails feel seasonal because the browns look like coffee and the swirls mimic natural stone. The nude-rose base keeps it flattering, especially if you have warm or neutral skin tones, because it doesn’t wash you out. I prefer these on medium oval nails because the diagonal movement has space to flow. It also looks great for hands that show tendons — the soft swirls draw the eye across the nail instead of focusing on the cuticle area. It’s a dress-up look that still works for casual days.
Start with a nude-rose acrylic or gel base and keep your surface smooth with light buffing. Mix or choose a thin chocolate brown gel, then drag a few lines diagonally from near the sidewall toward the center without filling the whole nail. Use a clear-tinted gel or a marbling tool to break up lines so they look like stone veins. Cure, then add a thin second layer only where the lines look too faint, and finish with a glossy top coat.
Use thin lines and let the base show through — thick marble looks heavy and cheap.
Don’t over-layer the swirls until the nail looks opaque; you lose the marble effect.
3. Moss Green Velvet Matte with Micro Specks
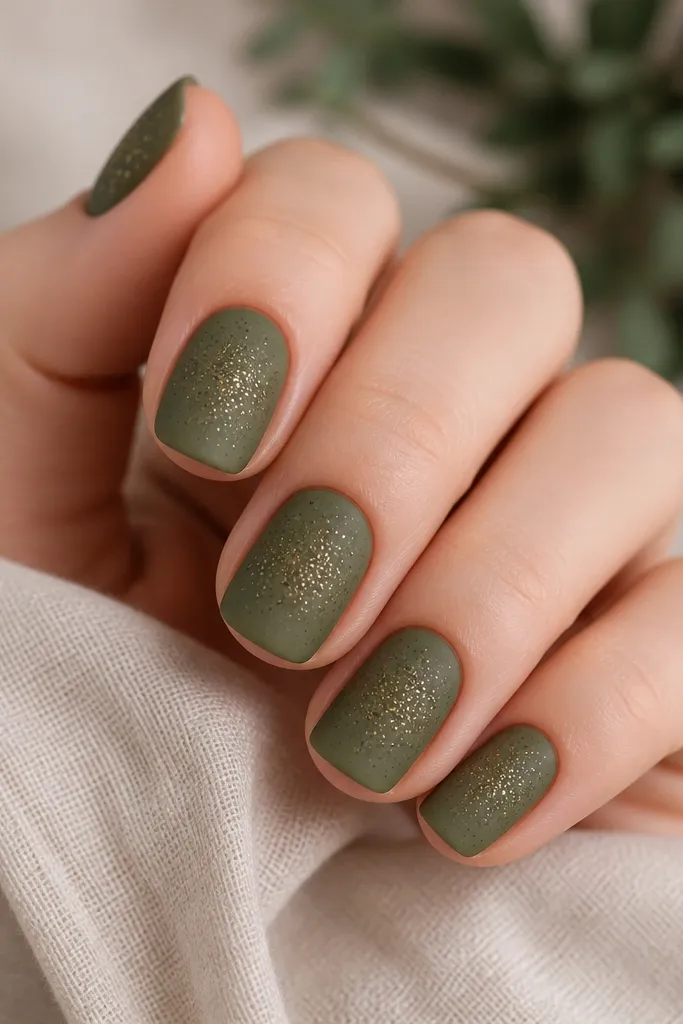
This is my go-to when I want fall nails that don’t look like every other orange set. Moss green reads earthy, and the matte velvet finish makes it feel soft and “fabric-like.” The micro specks add dimension without big art, so it flatters short nails and small nail beds. If your skin has olive or neutral undertones, the green looks especially harmonious. For day-to-night, it stays classy because the glitter is subtle and controlled.
Build your acrylic as usual, then buff just enough to remove shine. Paint a moss green base in two thin coats and cure fully. Apply matte velvet top coat across the whole nail, but keep it even so you don’t get patchiness. After curing, use a fine dotting tool to place micro specks of darker green gel and a tiny pinch of gold micro glitter in the center third. Seal lightly with another matte top coat only over the base, not on top of the glitter clumps.
Editor's noteWork with a small amount of glitter — you want dust, not chunks.
Watch outAvoid glossy top coat on velvet sets; it kills the soft look.
4. Burnt Orange Half-Moon Cuticle with Nude Skin Base
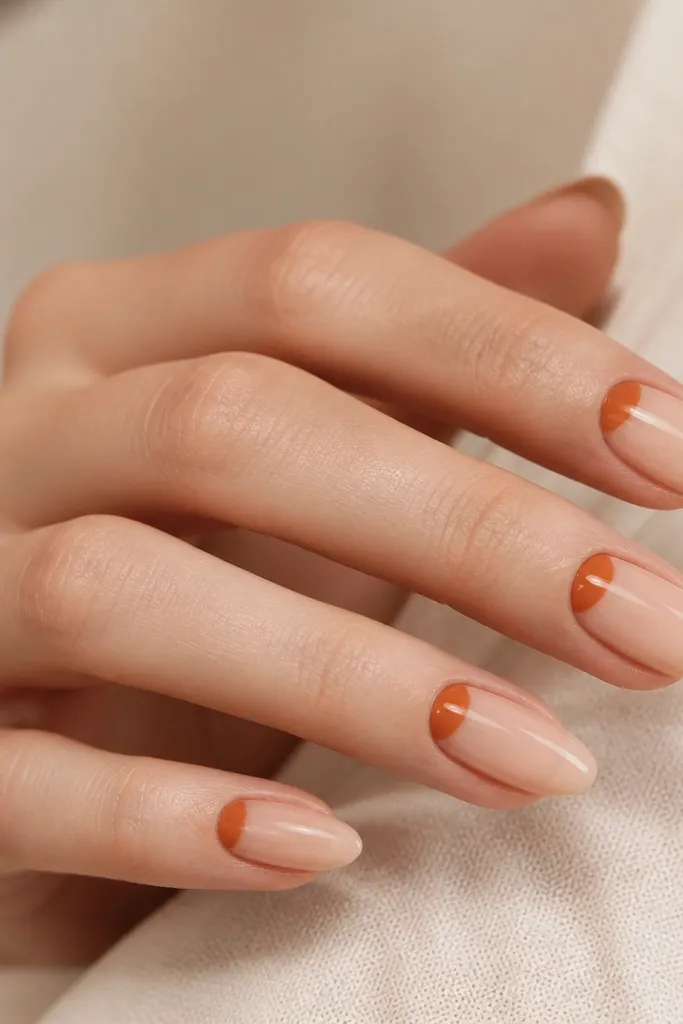
Half-moons at the cuticle are the fastest way to make acrylic look custom. The nude skin base keeps everything flattering and makes the burnt orange pop like a warm accent. I like this when I want my nails to look neat but not busy, especially if my hands need a cleaner look for events. It also flatters fingers with shorter nail beds because the accent is at the top and draws the eye upward. The glossy finish keeps it fresh instead of dusty.
Start with a nude skin-toned base gel or acrylic overlay, then smooth it so the cuticle line looks crisp. Use a thin strip brush to paint the burnt orange half-moon: start at one sidewall, curve toward the center, then repeat on the other side. Keep the half-moon height about 1-2 mm and leave a tiny gap from the actual cuticle so it doesn’t flood. Cure, then add one glossy top coat layer over the entire nail for a glassy finish.
Editor's noteIf your half-moon looks too wide, shrink it by 1 mm and it instantly looks more expensive.
Watch outDon’t paint over the cuticle — leave a small breathing gap to prevent lifting.
5. Terracotta Outline Nails with Clear Negative Space
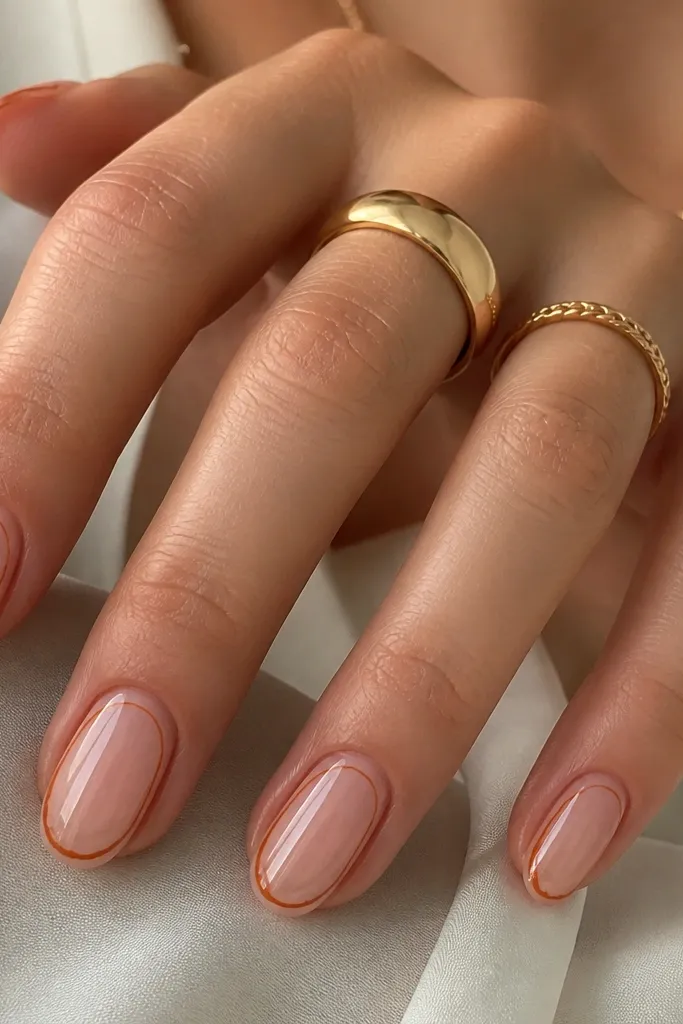
Negative space makes fall feel modern. The terracotta outline looks like a sketch and keeps the set light, so it’s perfect for short nails and anyone who hates thick-looking acrylic. This also flatters deeper skin tones because terracotta shows up without needing a dark base. I’ve worn this to fall weddings and casual dinners — it reads intentional and not overly seasonal. The glossy finish adds contrast against the clear panel.
Use a clear or sheer nude acrylic base so the nail still looks like skin. Cure and buff lightly, then apply a thin glossy layer if your base looks too matte. With a fine liner brush, draw an outline around the nail perimeter, leaving the center clear. Add a second line only at the tip area to create a subtle frame effect. Cure, then top coat carefully, keeping it thin so it doesn’t blur the outline edges.
Outline from the sidewall inward for clean corners — don’t try to connect lines in one stroke.
Skip thick gel outlines; they spread and look like sticker edges.
6. Gingerbread Brown Ombré Fade
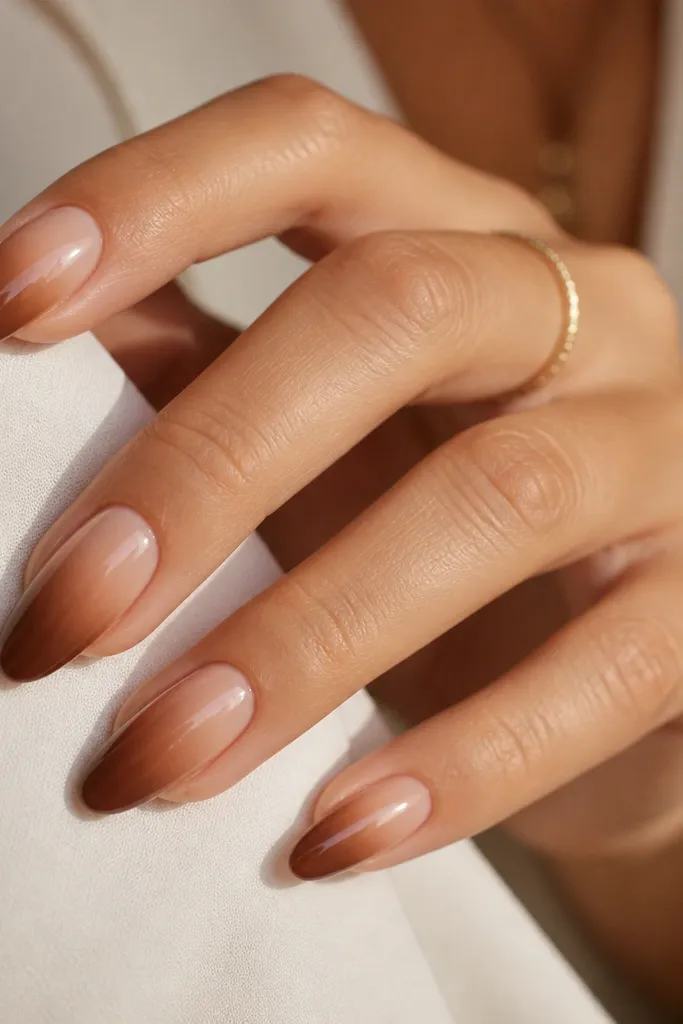
Ombré is the easiest way to get a fall gradient that looks expensive without adding art. Gingerbread brown gives that spiced warmth, and the nude-to-cocoa fade keeps it flattering on all skin tones. On almond or long squoval, the gradient makes fingers look longer because the darkest shade sits at the tip. If you have wide nail beds, ombré hides edges better than solid blocks of color. It’s also forgiving if your base application isn’t perfect.
Start with a nude base, then sponge a gingerbread brown shade starting at the center third. Blend it upward slightly toward the cuticle so the fade looks smooth, not striped. Add a deeper cocoa at the very tip and blend it into the gingerbread with a clean brush, using light pressure. Cure between layers if needed, then seal with glossy top coat. Keep the surface smooth — ombré shows texture more than solid color.
Editor's noteUse a makeup sponge cut small enough to match your nail width so you don’t smear over the sidewalls.
Watch outDon’t rush blending; streaky ombré looks like you didn’t cure evenly.
7. Maple Leaf Accent on Caramel Nude
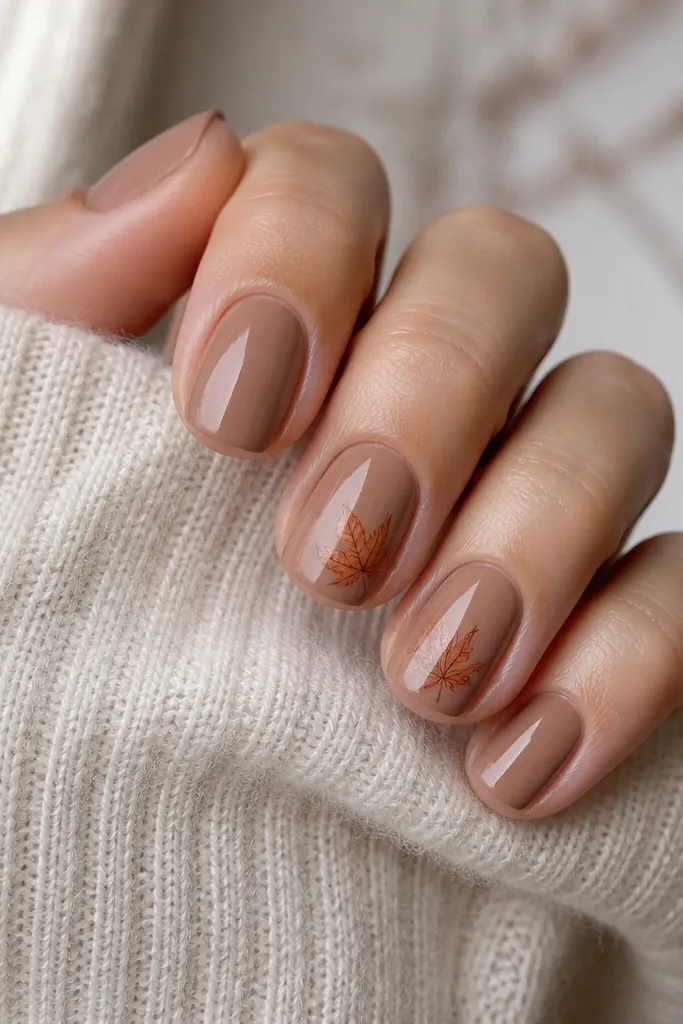
A single maple leaf accent reads autumn without turning your nails into a themed costume. Caramel nude is flattering because it’s close to skin tone, so the leaf looks like a detail, not a cover-up. I like placing the leaf on the ring finger and thumb because the set looks intentional in photos. Short nails benefit because the accent is small and positioned near the sidewall, which helps the nail look longer. It’s a great option if you want fall nails but you hate glitter.
Apply a caramel nude base in two thin coats and cure fully. On the accent nails, place a maple leaf sticker or paint a small leaf using a liner brush and two browns for veins. Position it about 2-3 mm away from the cuticle line and center it slightly toward the sidewall. Add a tiny highlight dot in warm gold gel to mimic leaf shine. Seal with a glossy top coat and cap the edges so the leaf doesn’t catch.
Editor's noteCap the leaf with gel only at the edges — too much gel on top makes it look thick.
Watch outAvoid putting the leaf too close to the tip; it makes short nails look even shorter.
8. Deep Burgundy Chrome with Smudged Edge
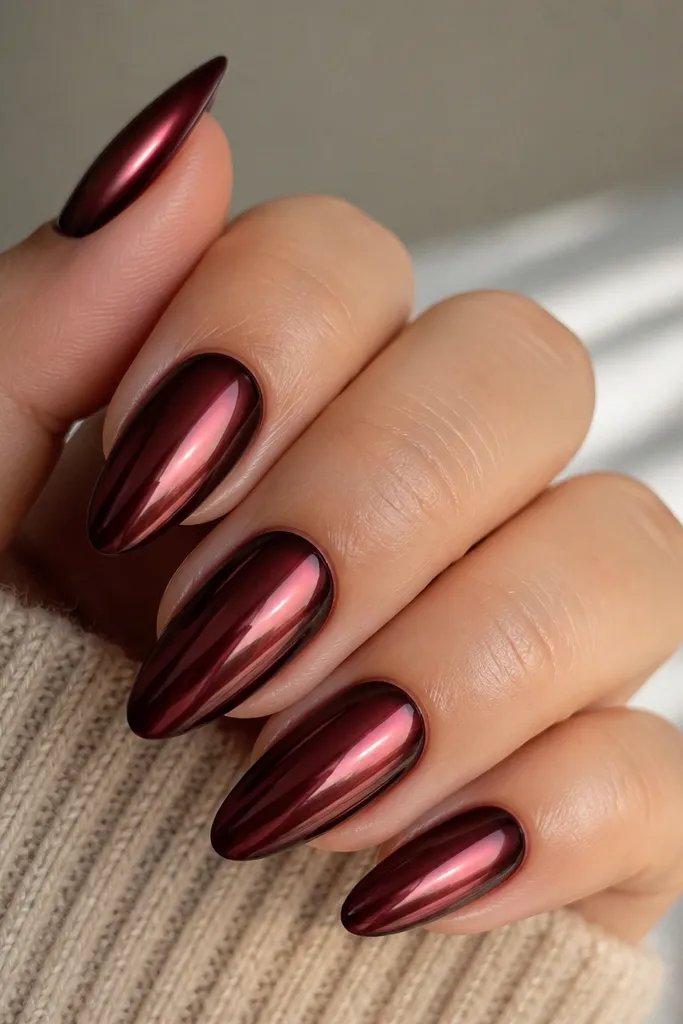
Burgundy chrome looks like fall fashion — heavy, glossy, and flattering. The key is the “smudged edge” effect: it adds depth at the sidewalls so the nail looks sculpted. This works on medium and long shapes because chrome reflects light, which emphasizes length. On fair skin, burgundy looks rich and not too harsh; on deeper skin tones, it reads like jewelry. I like it for date nights and parties because it catches light every time you move your hands.
Paint a deep burgundy base and cure. Apply a thin chrome gel or tacky layer only where you want the mirror effect, then rub burgundy-toned chrome powder in small circles with a silicone applicator. For the smudged edge, stop the chrome near the sidewall and use a darker gel to create a soft border, then blend with a clean brush. Seal with a glossy top coat that won’t dull the chrome too much. Cure fully and wipe tack carefully.
Do chrome in sections so it doesn’t dry before you rub the powder in.
Avoid heavy buffing before chrome; it removes grip and causes patchiness.
9. Espresso Latte Nails with Tiny Heart Foam
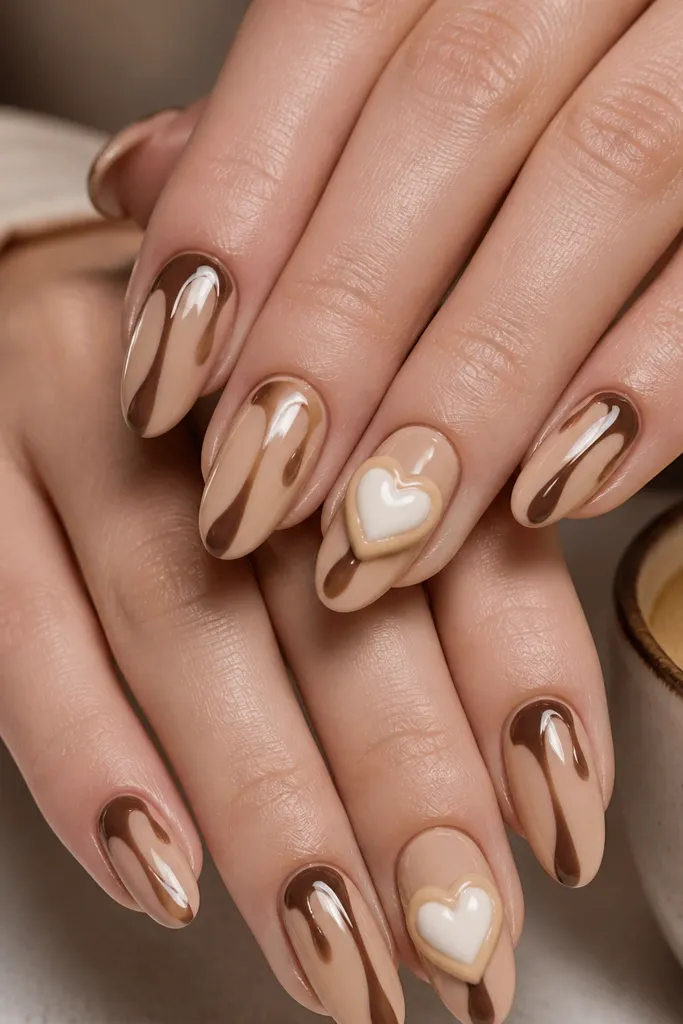
This set is cute without being childish. The milky latte nude base looks clean, while espresso brown lines give that coffee-drip vibe. The tiny heart foam is a small detail that makes it feel playful for fall without going full Halloween. It flatters all skin tones because the base is creamy and the brown accents stay controlled. I like it for fall weekends, brunch, and anything where you want your nails to look “done” but not loud.
Start with a milky latte nude base and build it to a smooth finish. Use a thin brush to paint espresso brown drip lines that start near the center and taper toward the tip, leaving negative space between drips. For the foam hearts, use a light beige gel and a small heart dotting tool, then slightly raise the gel so it looks like foam. Cure, then seal with glossy top coat. If the hearts feel too raised, gently smooth the top with a thin layer of gel and cure again.
Keep the coffee drips thin — thick lines make it look like nail art you did in a hurry.
Don’t place the drips across the entire nail — the empty space is what makes it look airy.
10. Olive Branch Geometric Lines
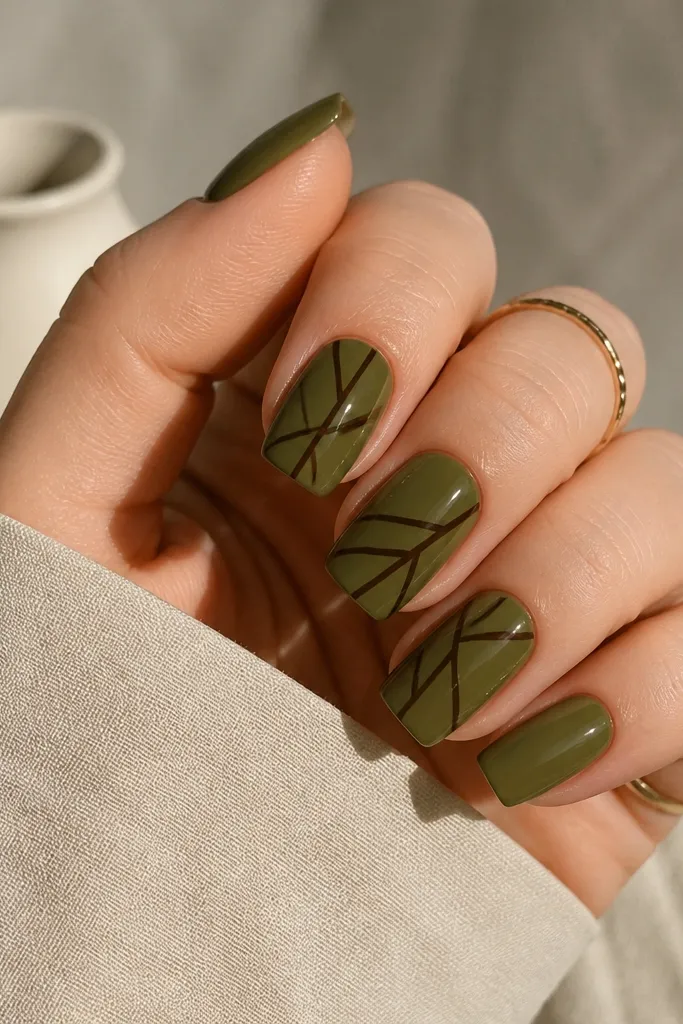
Geometric fall nails look sharp and clean, not messy. Olive green is earthy, and the dark brown lines add structure like a branch pattern. This flatters long nail shapes because the lines guide the eye from cuticle to tip. If you have a wider nail bed, the angled lines make the nail look narrower. It’s also a good choice if you want fall nails that work with lots of outfits, from jeans to sweaters.
Apply an olive green base in two thin coats and cure. With a fine liner brush, draw angled lines that start near the cuticle and taper toward the tip, keeping spacing consistent. Leave one or two small sections solid olive so it doesn’t look like full coverage. Add a second pass with dark brown only where lines need definition, then cure. Finish with a glossy top coat and cap the free edge so the lines don’t catch.
Editor's noteUse painter’s tape as a temporary guide for straight diagonals, then remove it before curing.
Watch outAvoid freehand lines that curve — wobbly geometry reads cheap fast.
11. Autumn Galaxy Glitter Dip on Nude
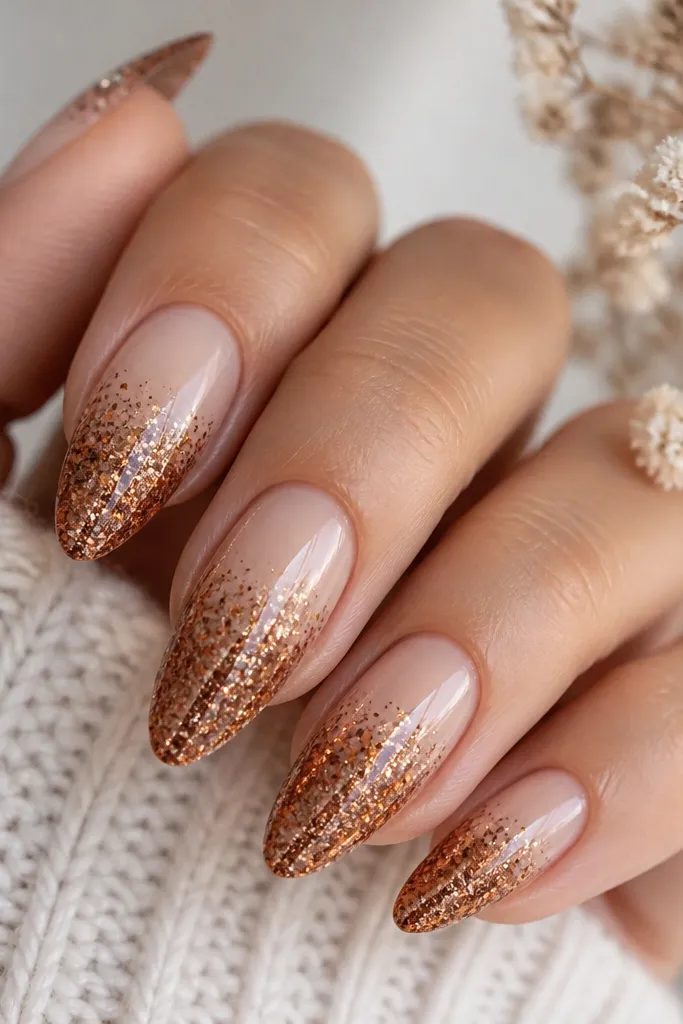
This is the fall version of galaxy nails, but wearable. The nude base keeps it clean, and the copper-gold glitter makes it look warm under streetlights. I like the glitter dip on the lower half because it visually elongates the nail and hides any minor thickness at the apex. It flatters hands with short nail beds because the nude top half gives breathing room. For parties and evenings, it looks like you tried harder than you did.
Start with a nude base and cure until smooth. Apply a thin layer of clear gel at the lower half of the nail and press in copper-gold fine glitter, then add darker brown glitter only near the tip for contrast. Blend the fade by brushing a small amount of clear gel upward into the glitter edge and curing again. Seal with a glossy top coat in two thin layers so the glitter doesn’t feel gritty. If it feels bumpy, lightly buff after the first top coat and add the final coat.
Editor's noteGold glitter looks best when it’s not the only color — mix in a darker shade for depth.
Watch outAvoid one thick glitter layer; it lifts at the edge and feels rough.
12. Rust Red Aura Glow Around the Cuticle
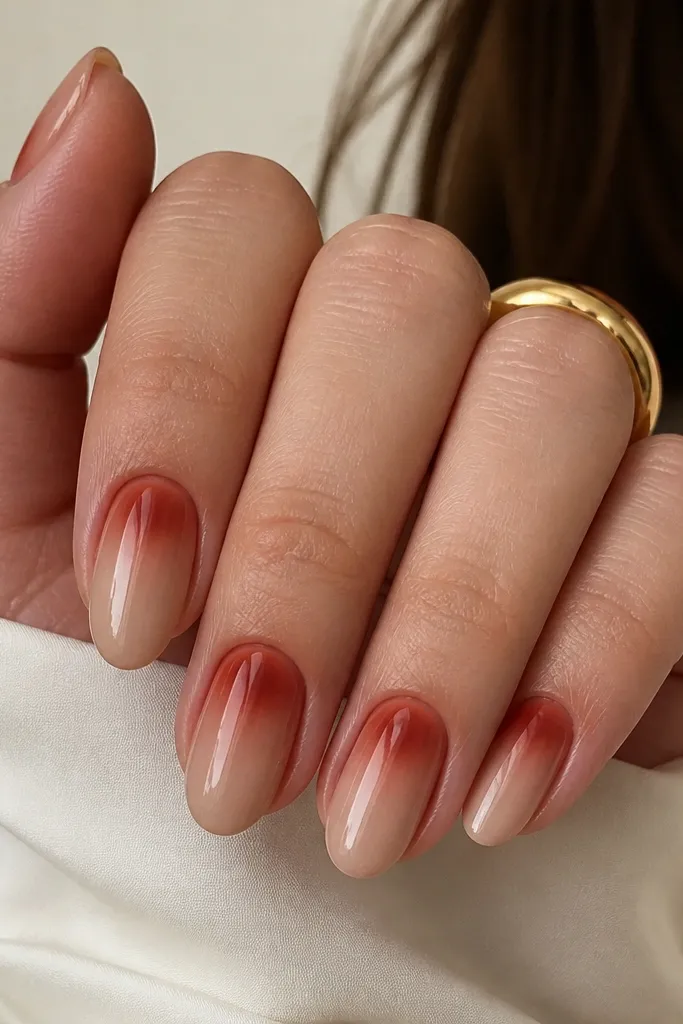
Aura nails are flattering because the color sits where your natural nail is already lighter. The rust red halo makes your hands look warm and glowing, like fall sunlight on skin. I like it on medium oval because the aura spreads naturally in the curve. It flatters most skin tones since the base stays nude and the halo is semi-transparent. This set works for work too because it’s not loud — it’s just warm.
Apply a nude base and cure. Use a small makeup sponge to tap rust red gel at the cuticle, then blend outward in tiny dabs until you get a soft halo. Keep the center brightest and fade toward the sides so it doesn’t look like a dirty cuticle. Cure, then clean up the edges with a thin brush dipped in cleanser. Seal with a glossy top coat and make sure the glow doesn’t smear by wiping tack carefully.
Editor's noteIf your aura looks too solid, add a clear gel layer and blend again before curing.
Watch outAvoid painting a hard rust ring — the halo must fade.
13. Sienna Brown Checkerboard Accent
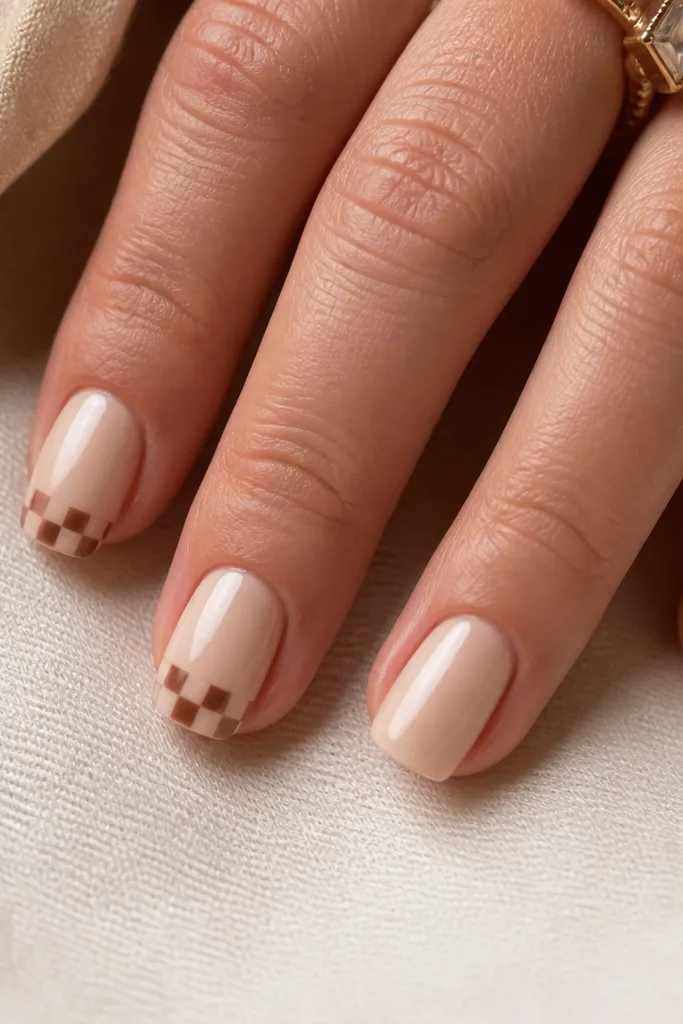
Checkerboard looks fun but still fall when you use warm browns instead of black and white. The creamy nude base keeps it soft and flattering, especially on short nails where big patterns can feel crowded. I place the checkerboard near the tip because it frames the nail and makes it look longer. On deeper skin tones, the lighter beige squares add contrast without needing bright colors. This is a good option when you want something graphic but not Halloween.
Start with a creamy nude base and cure. On accent nails, draw a simple grid near the tip using a thin liner brush — about 3-4 squares across the width. Fill alternating squares with sienna brown gel and a lighter beige gel, curing between fills if needed. Keep the squares small so the pattern stays neat. Top coat over everything, then cap the edges so the gel lines don’t lift.
Editor's noteUse a dotting tool to place square corners first, then connect with the liner brush.
Watch outAvoid large squares on short nails; they overpower the nail bed.
14. Burnt Orange and Black Striped Tips
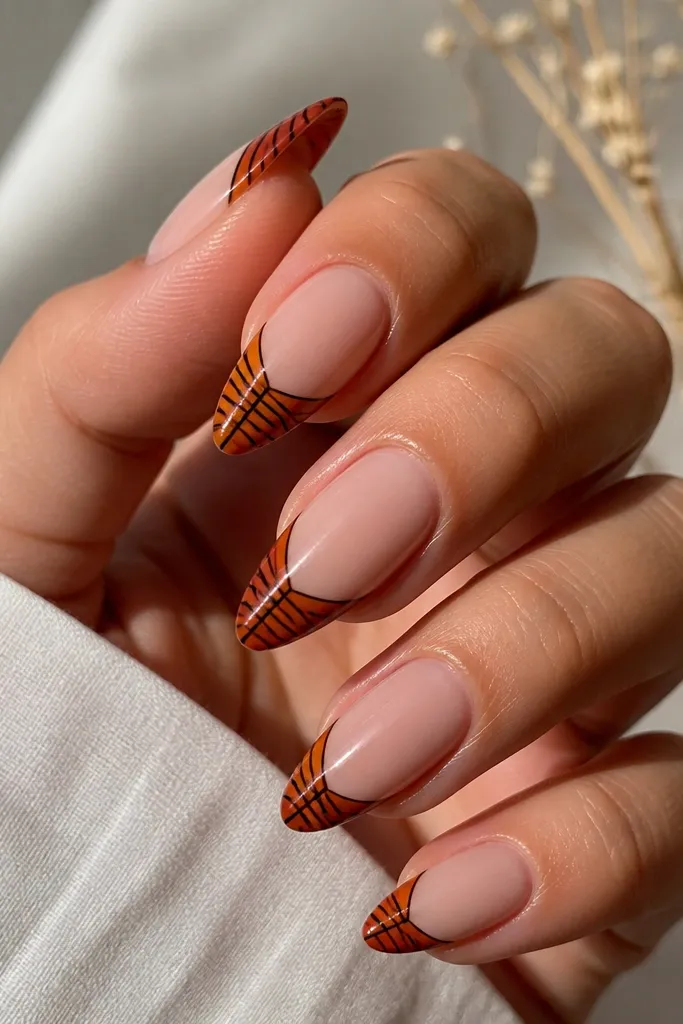
This is the fall set that looks like you got it done at a salon because the stripes make it look intentional. The burnt orange band gives the season warmth, and the black lines add edge without making it goth. I like it on almond because the tip band looks clean and the stripes follow the nail curve. It flatters all skin tones because the base stays nude, and the contrast does the work. Wear it with sweaters, boots, and anything neutral.
Apply a nude base and cure. Paint a burnt orange band across the tip, keeping it about 2-3 mm tall and parallel to the free edge. With a fine striping brush, add thin black lines — one vertical and one diagonal — within that band. Cure after each stripe set if you need extra control. Finish with glossy top coat and check the edges under light so the stripes don’t catch.
Editor's noteLet the burnt orange band cure fully before you stripe, or the black will bleed.
Watch outDon’t use thick striping gel — it spreads and makes lines look fuzzy.
15. Pecan Nude with Micro Glitter Fade
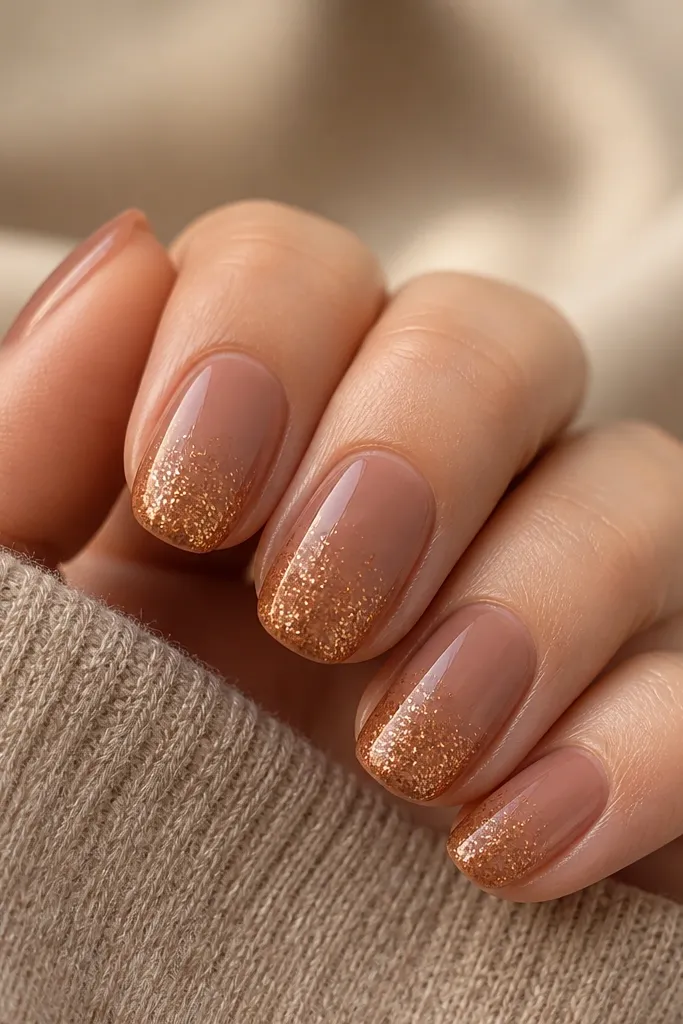
Micro glitter fade is the fall version of a subtle highlight. The pecan nude base looks like your nails but warmer, and the glitter at the tip makes your hands look polished without feeling sparkly. This flatters short nails best because the glitter is controlled and doesn’t crowd the cuticle. It also works for office days because it reads as texture, not full-on party nails. If you hate loud designs, this one is the compromise.
Start with a pecan nude base and cure smooth. Apply a clear gel layer only at the tip area and press in micro copper-gold glitter. Blend the glitter fade by brushing clear gel upward into the edge, then curing. Add one thin layer of clear gel across the whole nail to smooth any glitter texture before top coat. Seal with glossy top coat in two thin coats for an even surface.
Editor's noteIf glitter feels rough, add a thin clear gel smoothing layer before final top coat.
Watch outAvoid big chunky glitter — it catches on fabric and chips faster.
16. Plum Wine Jelly Accent Nails
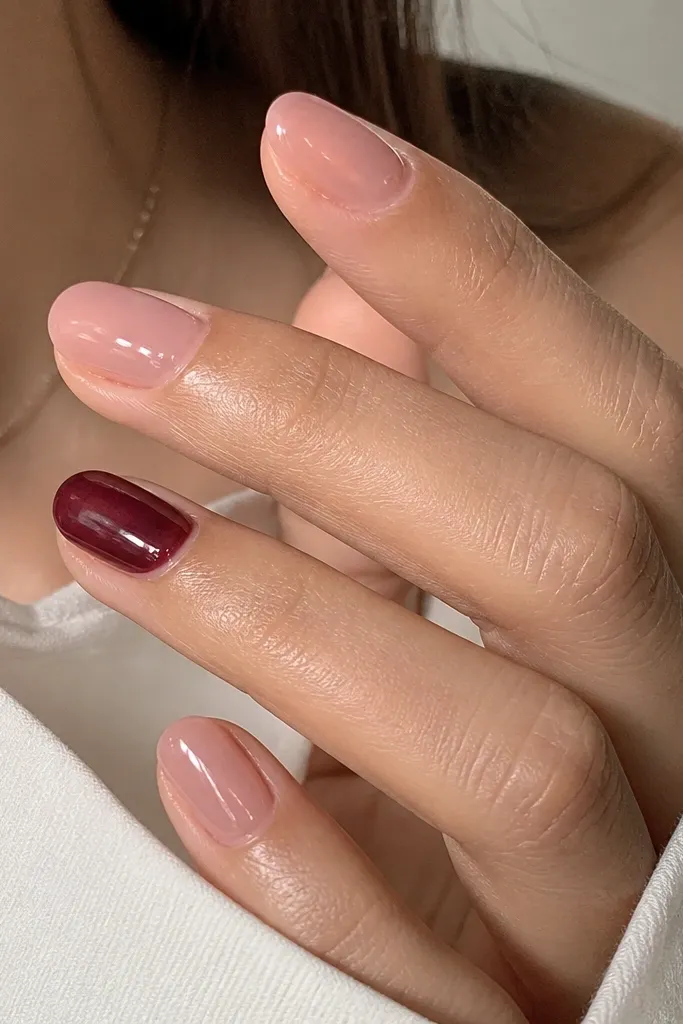
Jelly nails look juicy and modern, and plum wine makes them fall-ready. The translucency keeps it from looking heavy, which is why it flatters smaller nail beds. I like a mixed set where most nails are nude jelly and two are plum wine jelly — the contrast looks intentional and not random. On fair to medium skin, plum wine pops; on deeper skin, it looks like dark berry gloss. This is also a great choice for anyone who wants shine and color but hates matte.
Build your acrylic and buff smooth, then paint a sheer nude jelly pink on most nails. For the accent nails, apply plum wine jelly gel in one to two thin layers so it stays translucent — don’t bury it under opaque color. Cure each layer fully, then shape the top for a rounded jelly dome. Finish with glossy top coat over all nails, but keep it thin so the jelly look remains slightly see-through. Wipe tack carefully to keep the surface glassy.
Editor's noteUse thin layers for jelly — thick jelly turns cloudy and loses that glossy depth.
Watch outAvoid opaque plum over a nude base if you want jelly; it reads flat.
17. Taupe and Gold Leaf Negative Space
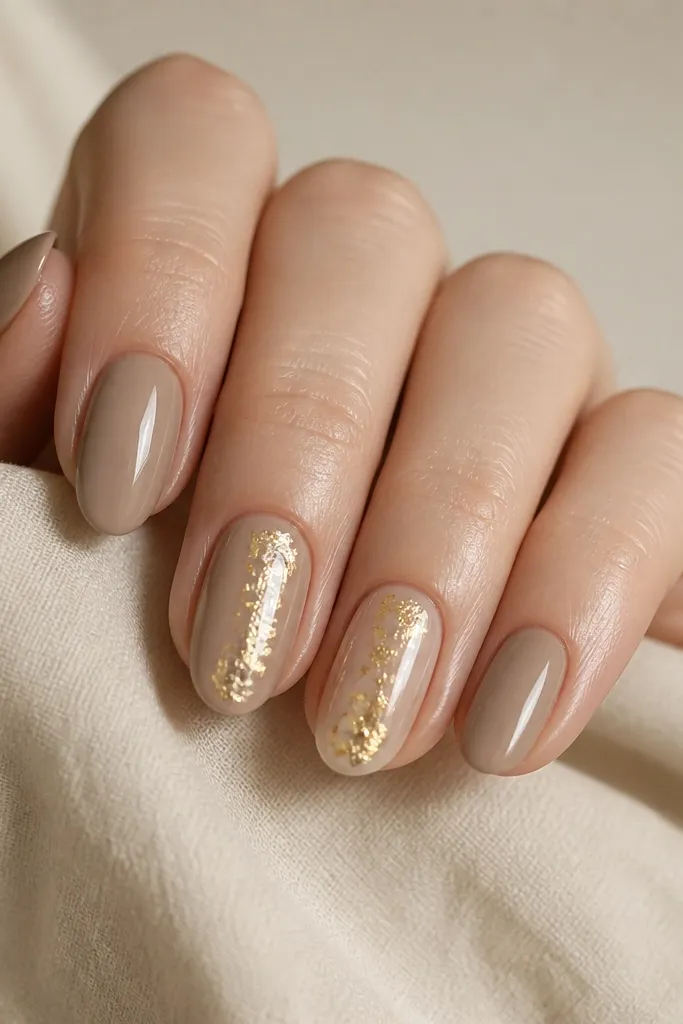
Gold leaf over taupe looks like fall jewelry instead of nail art. Taupe is neutral, so it matches everything from camel coats to black denim. I place the leaf in the center third because it looks balanced and doesn’t overwhelm short nails. The irregular leaf edges catch light and give texture, but the negative space keeps it clean. If you have cool undertones, taupe will look more natural than warm browns, and the gold still warms it up.
Start with a taupe nude acrylic or gel base and cure. Add a thin layer of clear gel where you want gold leaf, then press gold leaf pieces lightly so they stick without covering everything. Leave negative space around the leaf so it looks airy. Cure, then seal: apply a layer of clear builder gel over the leaf to smooth it, cure again, and finish with glossy top coat. Clean up the edges with a brush so the leaf doesn’t creep to the sidewalls.
Editor's notePress gold leaf with your applicator, then stop — over-pressing smears it.
Watch outAvoid piling leaf everywhere; it turns into a dull patch instead of a highlight.
18. Smoked Black Coffee Tips with Nude Base
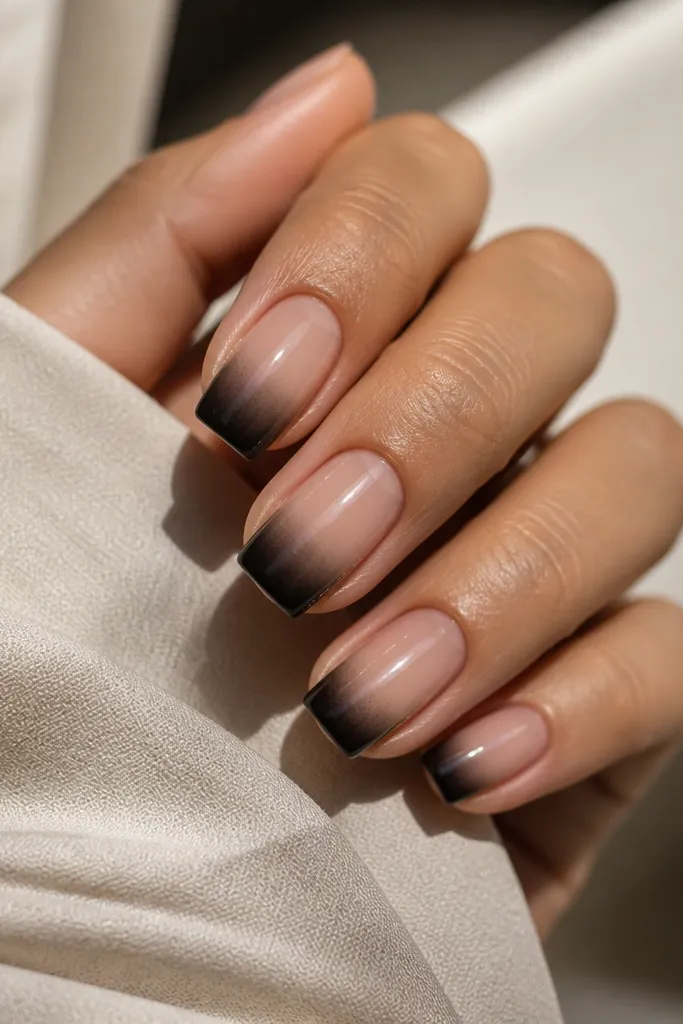
This is a fall set for people who want dark nails without going full goth. The smoky black-brown tips look like coffee steam, and the nude base keeps it flattering and wearable. I like soft square here because the corners frame the gradient and keep it sharp. It flatters short nail beds because the fade starts at the tip and doesn’t crowd the cuticle. If you wear lots of neutrals, this gives you contrast without needing bright reds.
Apply a nude base and cure smooth. Paint the smoky tip by tapping a black-brown gel at the free edge, then blending upward with a clean brush or sponge so it looks misty rather than solid. Keep the darkest part at the very tip line and fade it 2-3 mm toward the center. Cure, then add one thin layer of nude gel over any uneven fade spots to clean the transition. Seal with glossy top coat and cap the edge lightly.
Blend with a damp brush edge, not soaked — wet gel smears fast.
Avoid solid black tips; they look harsh and show chips immediately.
19. Rust Orange Foil Flakes on Clear Nude
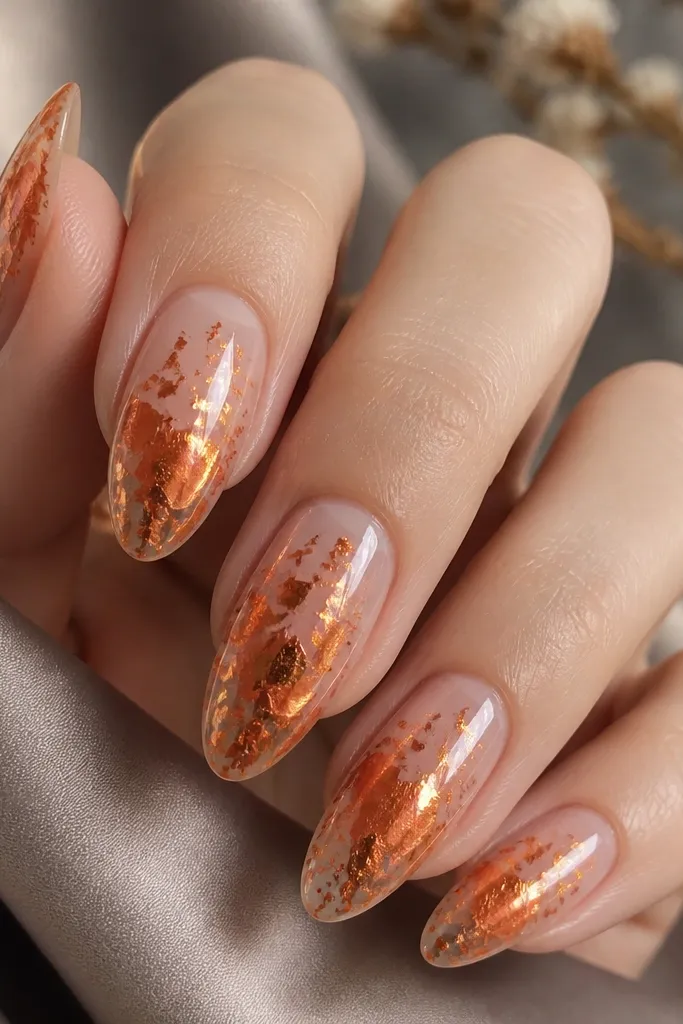
Foil flakes give you that autumn metallic warmth without the full chrome commitment. A clear nude base keeps it airy and flattering, especially if your nails are short or your cuticles run dry. The rust orange foil looks like fallen leaves catching light, and the uneven placement makes each nail look unique. I like it for fall dinners and photos because it reflects in small bursts instead of one big mirror shine. It also pairs well with gold jewelry.
Use a clear or sheer nude base acrylic and cure. Apply a tacky clear gel layer in the center third and slightly toward the tip. Press rust orange foil flakes onto the tack, then press lightly again to seat them without crushing the foil texture. Cure, then seal with a thin layer of clear builder gel to smooth sharp edges. Finish with glossy top coat, and pay attention to sidewalls so flakes don’t lift.
Editor's noteMix foil flakes with two sizes — tiny shards look more expensive than one size.
Watch outDon’t skip the smoothing gel — rough foil edges snag and chip.
20. Autumn Plaid on Cream Base with Matte Top
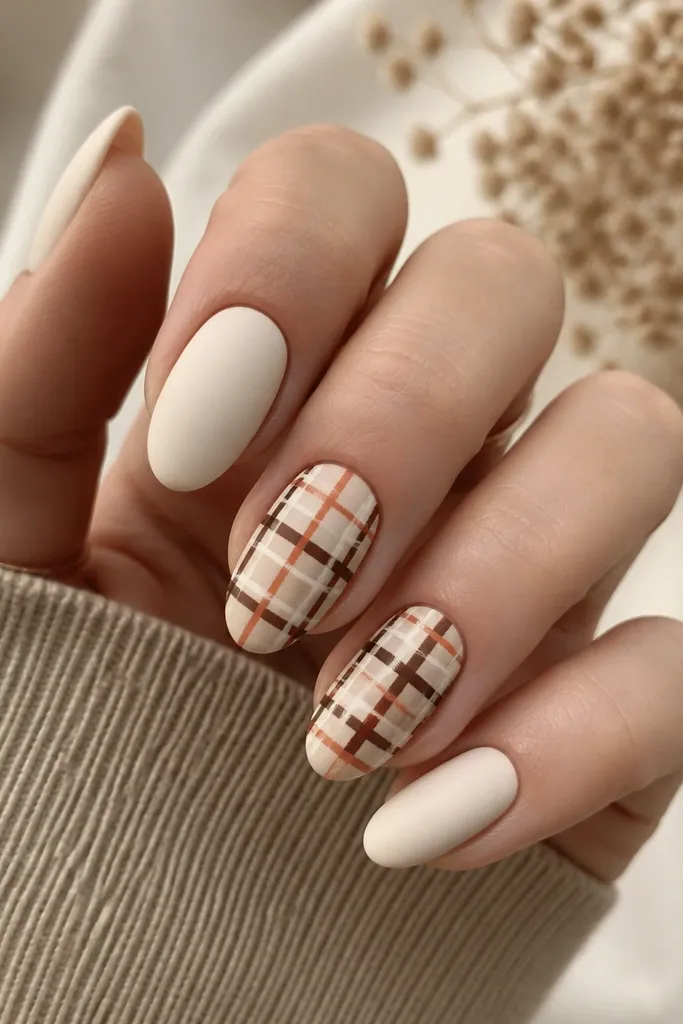
Plaid nails feel like a sweater in nail form. The cream matte base makes the colors look soft and cozy, and the rust orange plus deep brown combo reads true autumn. I keep the plaid to two accent nails because full plaid across every nail gets busy fast. Matte top makes the plaid look like fabric, which is the whole point. This flatters hands because matte hides minor surface bumps better than glossy, especially if you’re still learning acrylic shaping.
Start with a cream base and cure. Apply matte top coat after the cream is fully cured and smooth. For plaid nails, use a thin liner brush to draw vertical lines in deep brown, then add horizontal lines in black. Add rust orange lines as a second layer to build the grid, and keep the spacing consistent within each nail. Cure, then add a final matte top coat layer over the plaid and cap the edges carefully.
Editor's noteUse a liner brush with a sharp tip — plaid only looks clean when your lines are thin.
Watch outAvoid wide plaid lines; they look like coloring book strokes.