1. Pumpkin Cream French With Cocoa Sidewalls
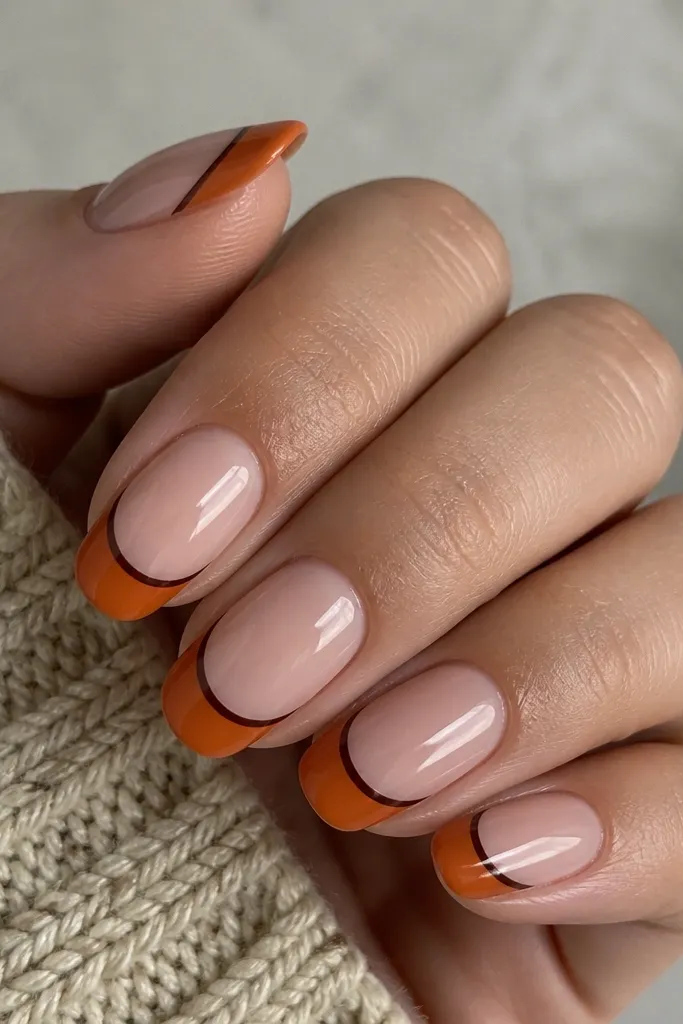
This one is my go-to when orange needs to look crisp, not streaky. The pumpkin cream French gives you that bright fall punch, while the cocoa sidewalls add definition so the nails look longer. I like it on medium ovals and almond shapes because the side lines visually sharpen the nail bed. On fair skin, the nude base keeps it soft; on deeper skin tones, the cocoa lines make the orange read warmer instead of neon.
Editor's noteIf your orange looks translucent, add a third thin coat only on the tip area before you do the cocoa lines. Use a striping brush with a slightly flattened tip for cleaner sidewalls.
Start by prepping and pushing back cuticles, then apply a thin nude base gel and cure. Paint the French tips in two coats of opaque pumpkin orange, keeping the tip width about one-third of the nail. Using a striping brush, add thin cocoa-brown lines along each side of the tip and cure again. Finish with a glossy top coat, and cap the free edge with top so the orange stays sealed.
Watch outAvoid painting the French too close to the cuticle — it makes the mani look crowded and can peel at the first wear spot.
2. Tangerine Jelly Half-Moons With Clear Gloss
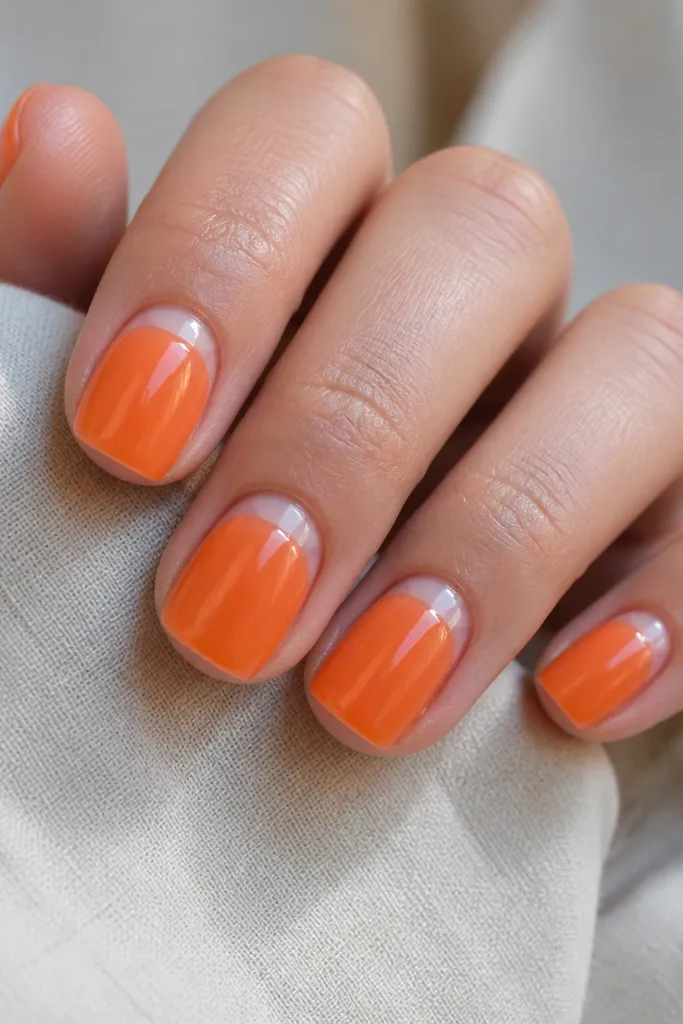
This design makes orange look fresh and “expensive” because the jelly finish catches light like a drink. The clear half-moons keep the nail from feeling heavy, which is great if you have short nails or wide nail beds. I’ve worn this on both cool and warm undertones; the tangerine tint reads bright on cool skin and warms up deeper tones without going muddy. It also works for everyday because the art is minimal and the pattern hides small growth.
Editor's noteFor a cleaner half-moon edge, press the tape down with your fingertip after curing the first jelly coat. Then add the second jelly coat only after the mask is set.
Start with a builder gel or jelly-friendly base to prevent staining, then apply two thin coats of tangerine jelly, curing each layer. Place small half-moon cuticle guides or use tape to mask the cuticle area, and leave it clear. After curing, remove the guides and add one more thin jelly coat over the rest of the nail for even opacity. Seal with a thick, high-shine top coat and cap the edges.
Watch outDon’t overbuild the jelly — thick layers can look cloudy and peel at the cuticle.
3. Burnt Orange Marble Swirls On Nude
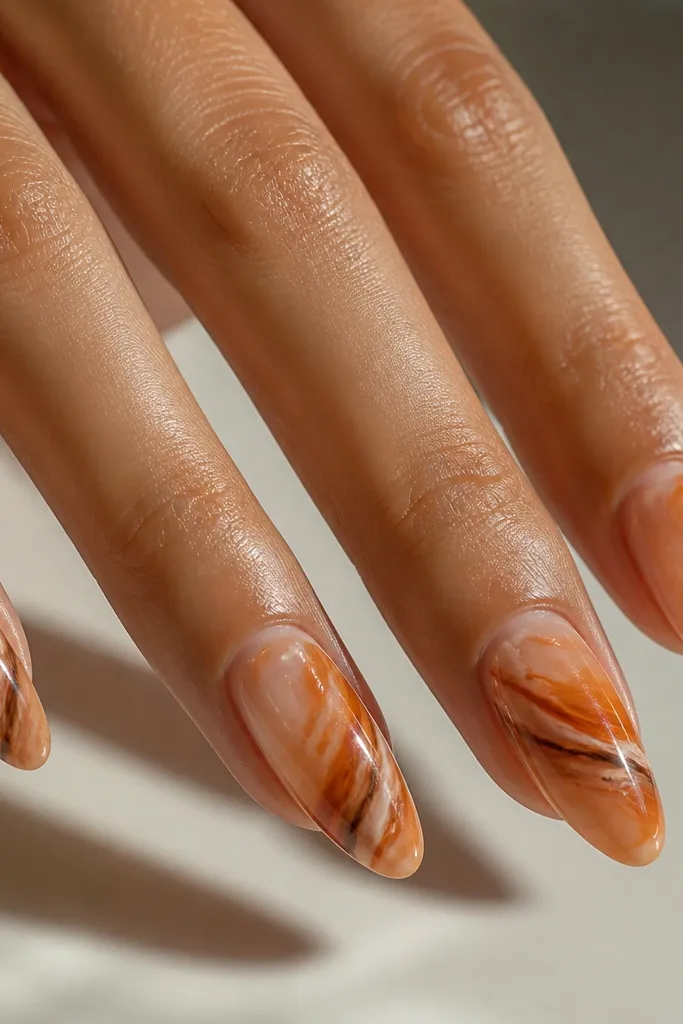
Marble makes orange feel artistic instead of plain, and burnt orange is the best choice for fall because it reads like spice, not candy. The nude base keeps it wearable, and the chocolate-brown veins ground it so it doesn’t look orange-only. I love this on almond shapes because the swirl direction naturally follows the nail curve. It flatters a wide range of skin tones because the nude base creates a consistent “bridge” between your hand and the pigment.
Paint a sheer nude base and cure. Drop a few small dots of burnt orange gel on a palette, then mix in a tiny amount of brown to create two shades. Use a thin dotting tool to place orange blobs on the nail, then drag them with a fine nail art brush using diagonal strokes. Add white gel accents sparingly for highlight, cure, then top coat with a glossy layer to smooth the look.
Practice the swirl on one nail tip first — marble looks best when some areas are thin and airy. Too much gel makes it look like paint blobs.
Avoid thick lines — marble should look like flowing stone, not cartoon stripes.
4. Orange And Espresso Speckle Fade
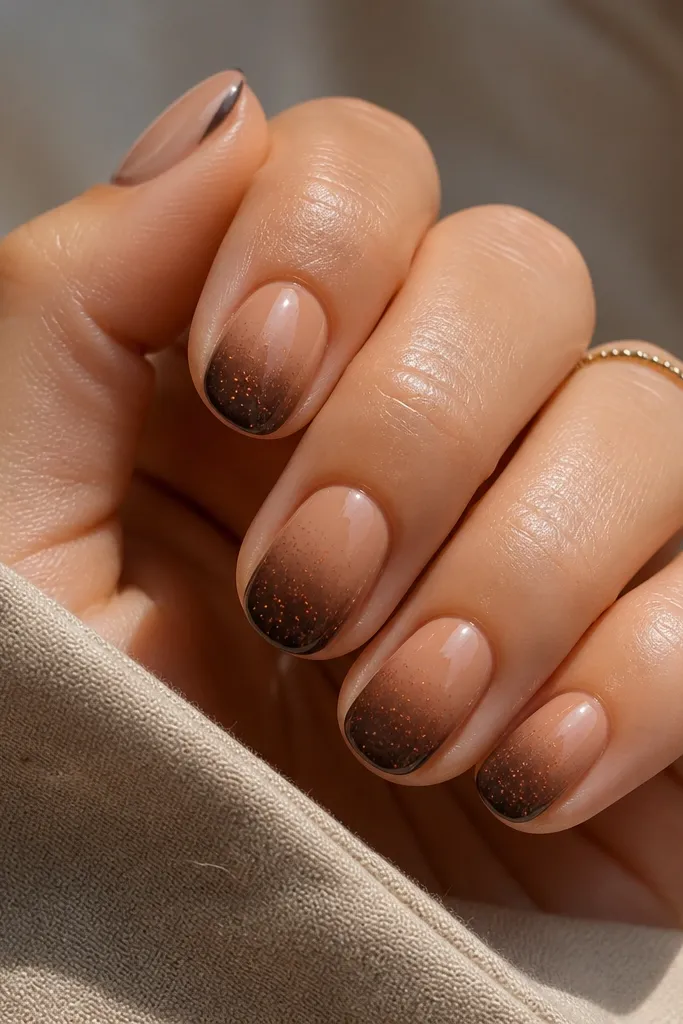
This is the mani I reach for when I want fall texture without detailed art. Speckles make orange feel playful, but the espresso fade keeps it grounded and gives you that autumn depth. Rounded short nails benefit because the fade visually lengthens and the speckles hide tiny chips. I’ve worn this on hands with short nail beds and it still looks full, because the pattern distributes attention across the whole nail.
Start with a nude base and cure. Sponge on a light espresso-brown fade near the tips using a makeup sponge, keeping it soft and not harsh. While the espresso is still slightly tacky or after a thin base coat, use a dotting tool to flick orange speckles from a palette. Add one more thin layer of top coat to lock the speckles, then cure fully.
Use an old toothbrush for speckles once you get the hang of it — it makes the dot size more natural than a single dotting tool.
Don’t place all the speckles at the tip — it looks like a stain instead of a design.
5. Sliced Tangerine With Black Outline Accent
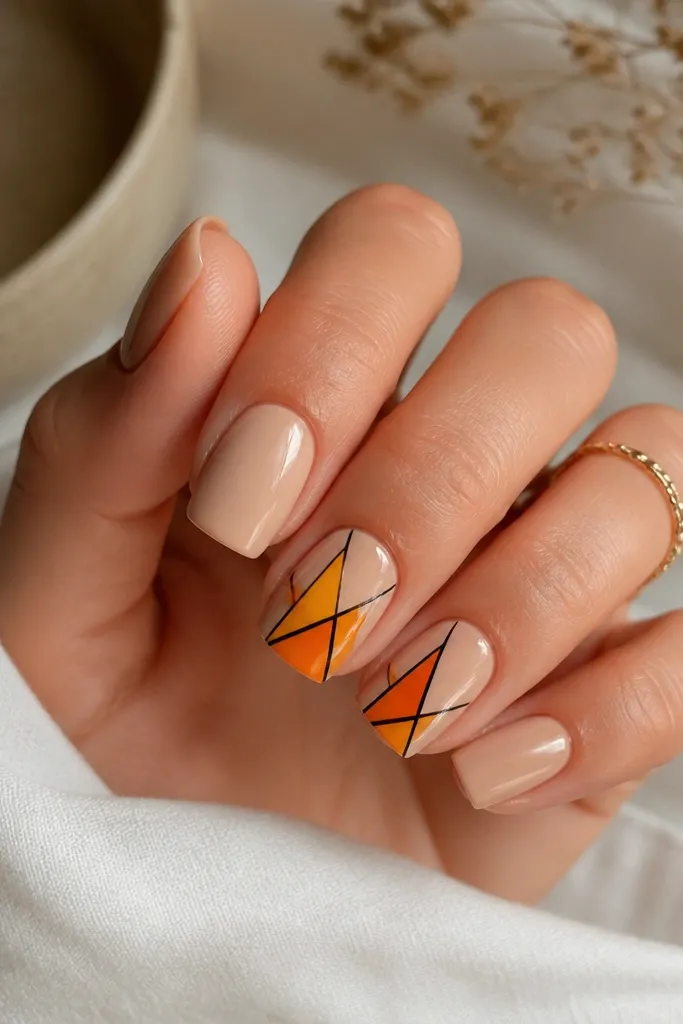
This gives you that “before and after” look because the black outline makes orange shapes look intentional and crisp. The sliced pattern looks modern and sharp, and the nude background keeps it from feeling costume-y. I like it on medium square because the angles match the geometry. On fair skin, the tangerine reads bright; on deeper skin, the black lines create contrast so the design doesn’t blur.
Editor's noteDraw a quick pencil guide on the nail tip shape before you paint triangles. It keeps your angles even nail to nail.
Paint all nails a warm nude base and cure. On accent nails, add a light yellow-orange triangle as the base, cure, then layer the tangerine triangle shapes on top. Use a striping brush with black gel to outline each slice — keep the lines thin, not thick. Cure and finish with glossy top coat, making sure the outline edges are sealed.
Watch outAvoid thick black lines — they make the mani look heavy and less “sharp” in daylight.
6. Burnt Orange Velvet Matte With Cocoa Gloss Tips
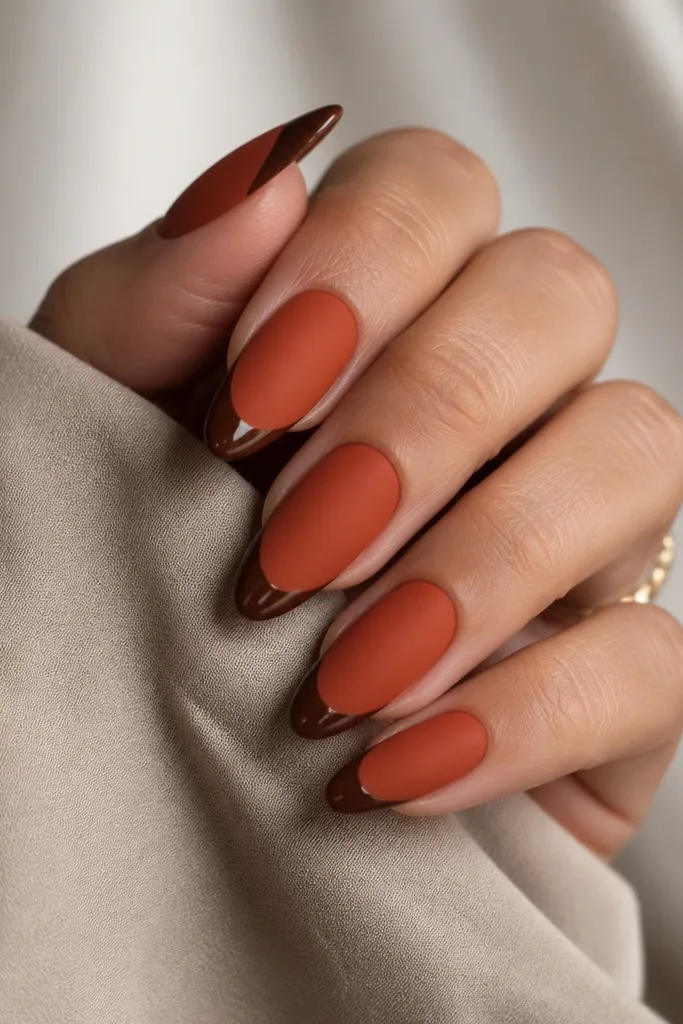
Matte turns burnt orange into a cozy fall color that looks like knitwear. The glossy cocoa tip border gives you contrast so the nails don’t look flat, and the combo looks expensive even with simple lines. Almond nails make the matte area look smooth, and the gloss at the tip draws the eye upward. This works across skin tones because the burnt orange stays warm while the cocoa adds depth.
Start with a base coat and cure, then apply two coats of burnt orange gel. Cure each coat fully. Apply matte top coat over the full nail and cure again. Finally, use a thin brush to paint a narrow cocoa-brown French line at the tip with glossy gel top (or gloss gel over matte), cure, then cap the line edges carefully.
Keep the matte coat away from the cuticle by 1 mm so it doesn’t smear when you move your hands.
Don’t try to matte over uneven gel — if the base is lumpy, matte will show it.
7. Orange Leaf Silhouette Over Nude With One Rhinestone
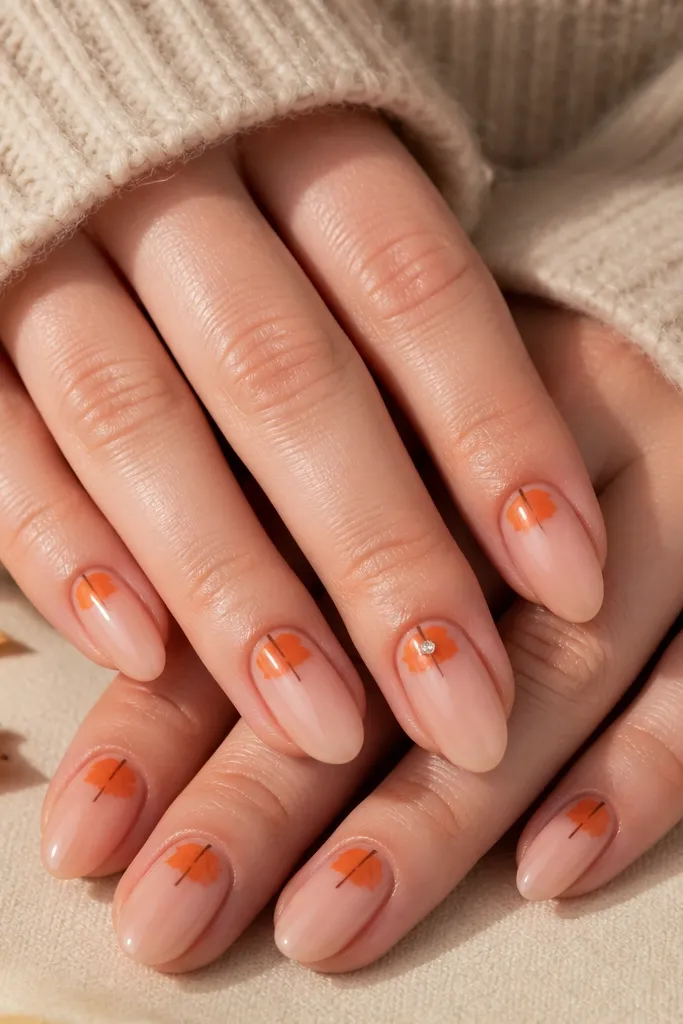
Leaf silhouettes make orange feel seasonal without covering the whole nail. Placing the leaf near the cuticle makes your nail bed look longer and keeps the art from feeling crowded. I like this for medium ovals because the leaf curves match the nail shape. On hands with shorter fingers, the rhinestone adds a focal point so the mani still looks special in photos.
Paint a sheer nude base and cure. With a dotting tool or fine brush, paint a leaf silhouette using tangerine-orange gel, then add a thin brown stem line. For variation, keep the leaf size about the width of your cuticle — not bigger. On one nail, place a single small rhinestone (ss3 or ss4) on top of a tacky spot and cure. Finish with glossy top coat, sealing around the rhinestone.
If your leaf edges look shaky, stamp the leaf shape onto a clear stamper first, then apply with gentle pressure to the nail.
Avoid multiple rhinestones — two or more starts looking messy instead of intentional.
8. Pumpkin Ombre Tips Into Warm Nude
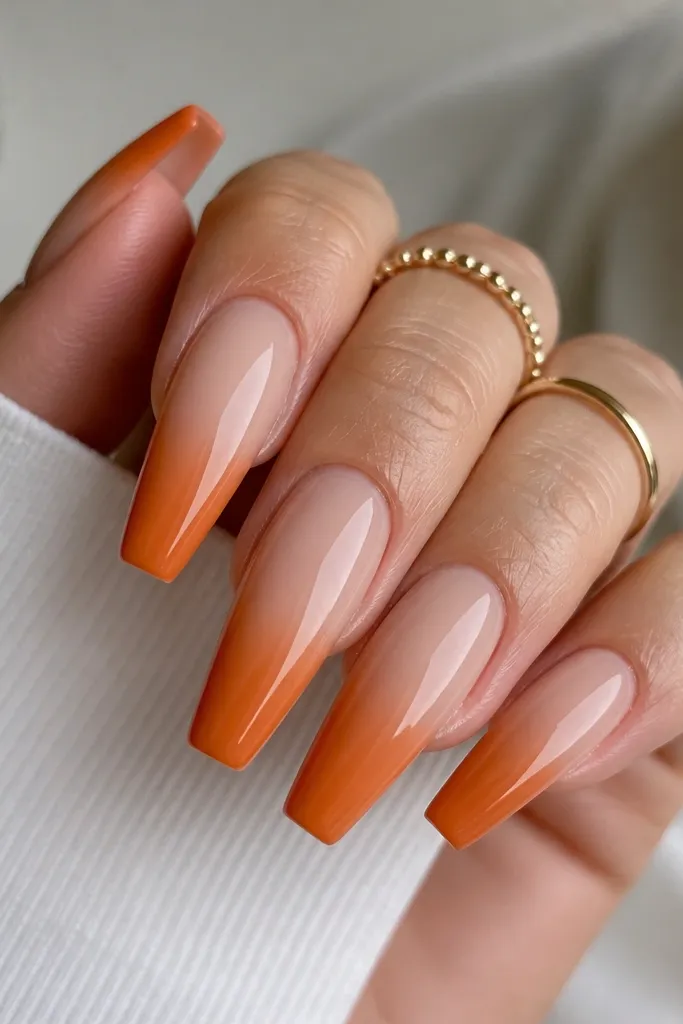
Ombre is the fastest way to get that “after” polish because it looks blended even when your lines aren’t perfect. Pumpkin orange is strong enough to show fall color, but the warm nude base keeps it flattering. I use this on coffin and almond nails because the gradient follows the nail length and makes fingers look longer. It works on both light and deeper skin tones because warm nude is the bridge color that doesn’t fight your undertone.
Start with a warm nude base and cure. Sponge pumpkin orange onto the tips, blending upward with a clean makeup sponge so the transition stays soft. Build opacity with a second sponge pass after curing the first. Clean up the sidewalls with a small brush dipped in cleanser. Finish with glossy top coat and cap the tip edges.
Use two sponge pieces — one for orange and one for blending. It prevents muddy transitions.
Don’t stop at one sponge pass if your nude shows through — patchy ombre looks unfinished.
9. Orange Linework French With Taupe Micro-Stripe
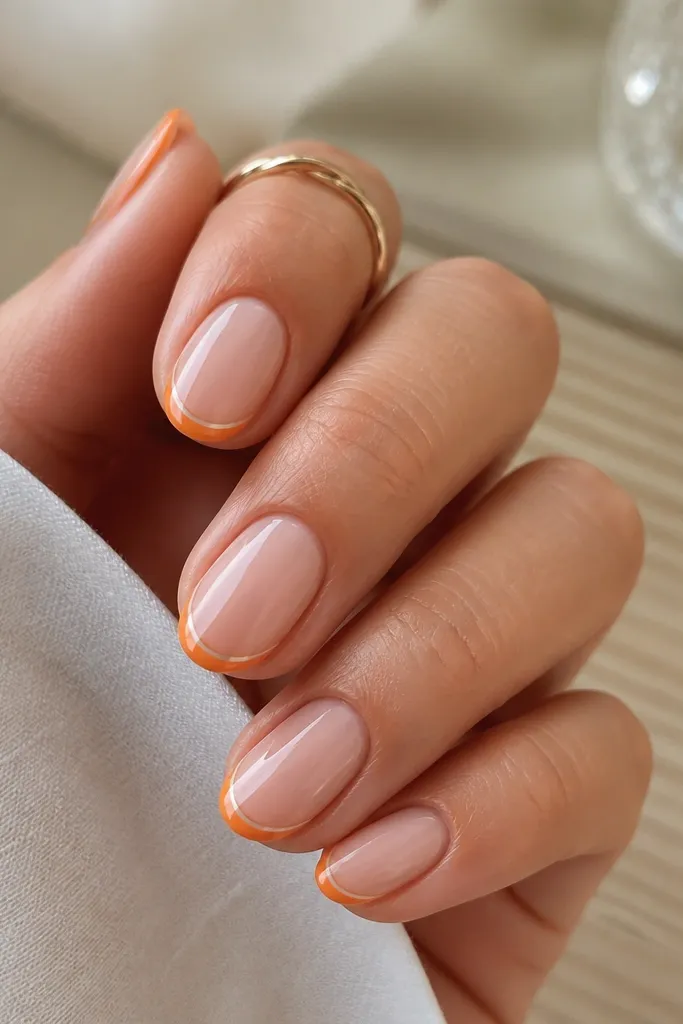
This is for when you want orange but you hate big blocks of color. The linework French gives a clean, graphic look that still reads fall because the orange is at the tip. The taupe micro-stripe adds a muted middle tone so the design doesn’t look like a single flat line. It flatters short nails because the thin lines look precise rather than bulky.
Apply nude base and cure. Paint a thin orange French line across the tip edge, then cure. Add a taupe micro-stripe about 1 mm inside the orange line using a nail art pen or striping brush — keep it straight. Cure and top coat with a glossy layer that doesn’t pool over the linework.
If your line wobbles, fix it with a second pass rather than trying to erase — gel cleanup is harder than repainting.
Avoid thick French lines — they make short nails look shorter.
10. Burnt Orange Gradient With Charcoal Dot Constellation
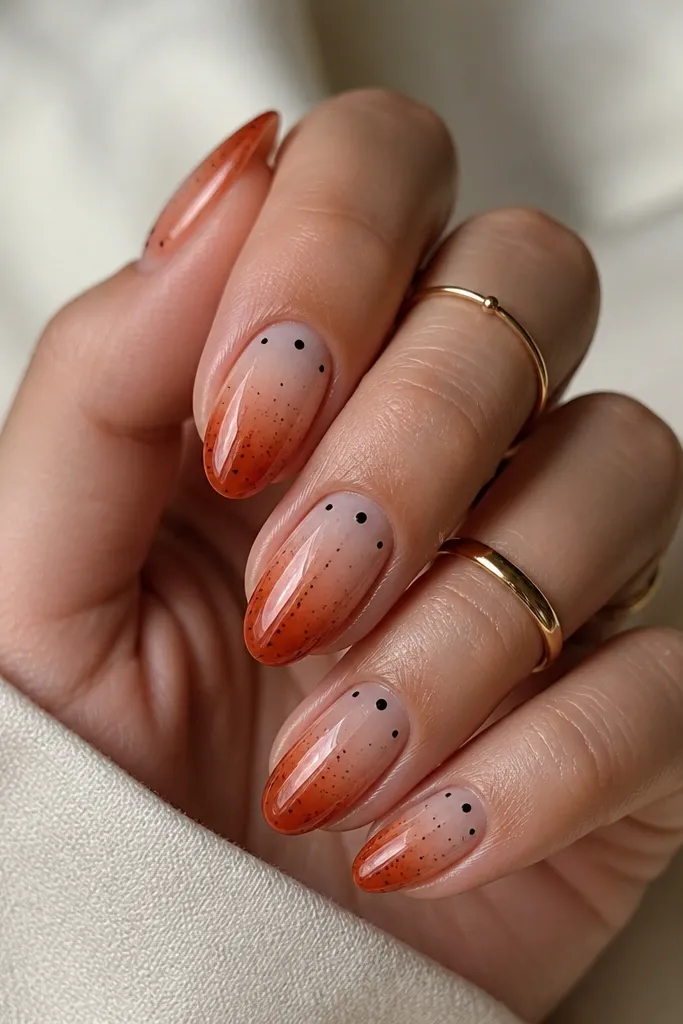
Constellation dots make orange look like nightfall, which is my favorite fall vibe when the weather turns dark early. Charcoal dots add contrast without taking over the whole nail like black paint would. This is especially flattering on medium ovals because the gradient gives shape and the dots add texture without heavy art. It also hides small wear because dots look intentional even if they fade slightly.
Editor's noteMake your dot sizes vary — perfect uniform dots look like a stamp and less like real constellation spacing.
Paint a nude base and cure. Sponge burnt orange onto the tips, then blend up slightly toward the center to create a soft gradient. Cure and add a second gradient pass if you want deeper pigment. Use a dotting tool to place small charcoal dots — start with sparse dots, then add a few larger ones to anchor the pattern. Finish with glossy top coat, keeping the dots sealed.
Watch outAvoid placing dots too evenly across every nail — it starts looking like nail stickers.
11. Orange Chrome Dust Over Nude With Brown Foil Flakes
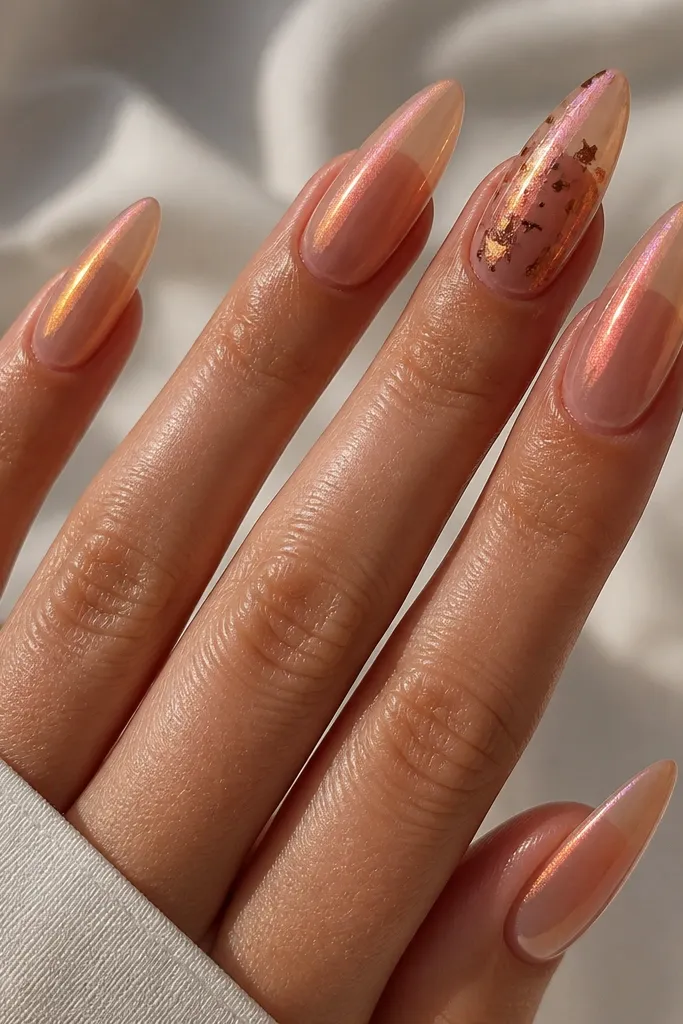
Chrome dust is the shortcut to “wow” with orange because it reflects light in a way regular polish can’t. The nude base keeps it wearable, and the brown foil flakes make it feel like fall leaves instead of Halloween glitter. I love this on long almond because the chrome glow looks smooth and elongated. It suits many skin tones — the warm nude base prevents chrome from looking too harsh.
Editor's noteIf your chrome looks gritty, wipe the surface lightly with cleanser before top coat. It makes the shine smoother.
Apply nude gel base and cure, then rub orange chrome powder over the tacky surface using a soft applicator. Buff lightly so it stays even but not patchy, then cure. Add brown foil flakes on two accent nails by pressing flakes into tacky gel and curing. Seal everything with a thick glossy top coat that won’t dull the chrome.
Watch outAvoid matte top coat over chrome — it kills the effect fast.
12. Pumpkin Swirl Accent On Half-Sheer Nude
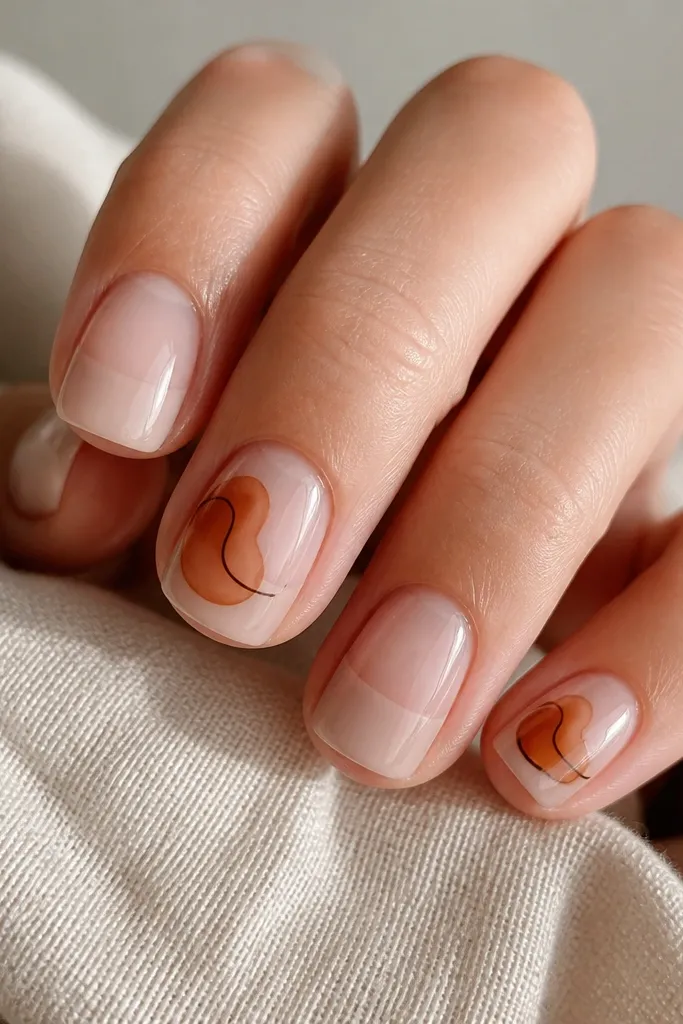
This design is subtle until it catches the light. The half-sheer nude gives you a modern, clean look, and the pumpkin swirl adds the fall color without covering the whole nail. I like it on short square because it looks neat and avoids the “too much art” feeling. It flatters hands with darker nail beds too, because the sheer base still looks intentional and the swirl gives focus.
Editor's noteKeep the swirl centered and about 60% of nail width — big swirls shorten the nail visually.
Apply a sheer nude base and cure. For the half-sheer effect, paint a second nude layer only on the top half of the nail, leaving the bottom more translucent, then cure. On accent nails, draw a pumpkin orange swirl using a gel liner brush, then add a thin brown outline along one side of the curve. Cure and finish with glossy top coat.
Watch outAvoid heavy opacity over the entire nail — it defeats the half-sheer look.
13. Orange And Olive Diagonal Checker On One Nail
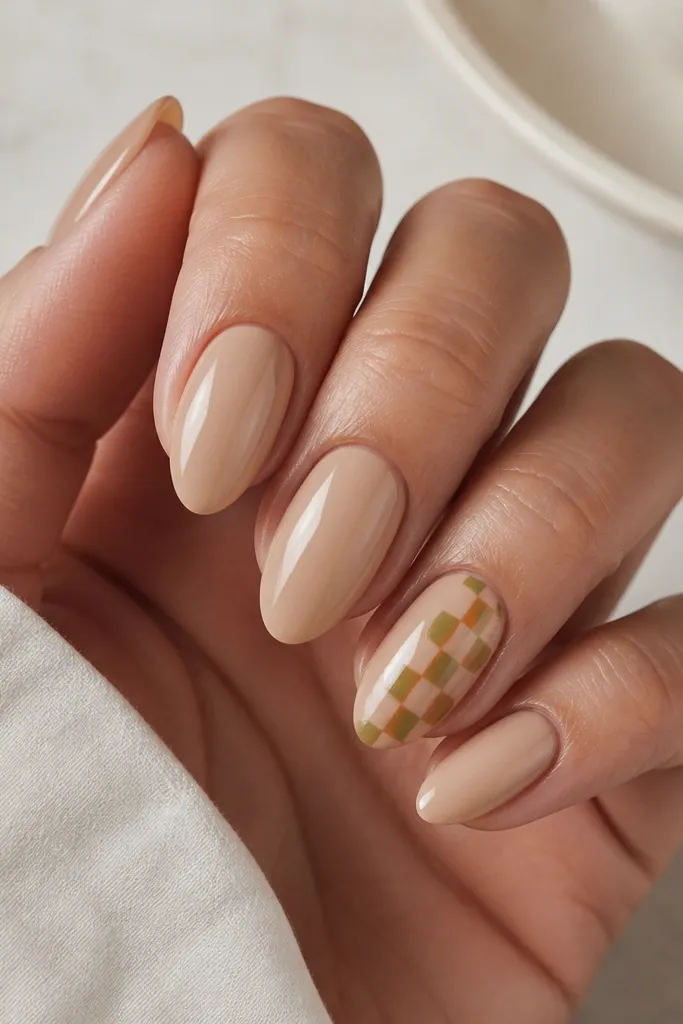
Diagonal checker gives orange a more grown-up fall feel because olive adds that earthy contrast. I keep it to one nail so it looks like a planned accent, not a full set of patterns. Almond nails look great with diagonal geometry because the angle lines up with the nail curve. This is also a good choice if you want something different from leaf or marble but still clearly autumn.
Editor's notePress tape firmly, then pull it off slowly after curing. It keeps the checker edges sharp.
Paint all nails warm nude and cure. On one accent nail, place striping tape diagonally to create a grid, then fill alternating sections with orange gel and olive gel. Cure each color layer so the edges don’t bleed. Remove tape carefully, then add a glossy top coat over the whole nail and cap the free edge.
Watch outAvoid smudging colors during removal — if tape pulls pigment, you’ll get fuzzy squares.
14. Cinnamon Ombre With Micro Glitter At The Tips
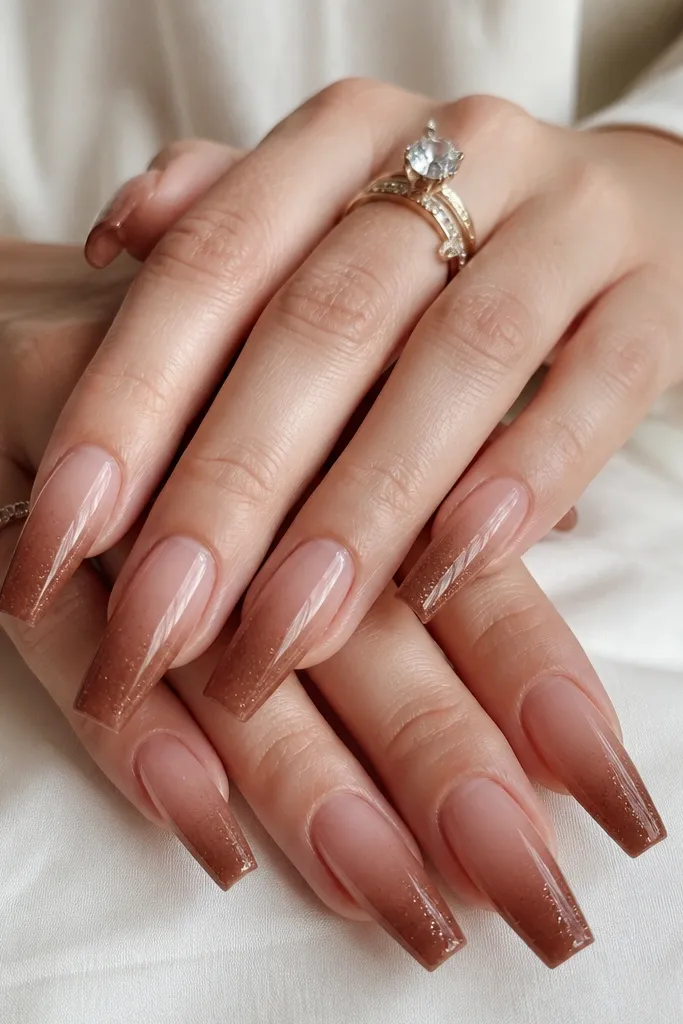
Micro glitter at the tips is the easiest way to make orange-adjacent fall shades look special without big chunks. Cinnamon-brown works like a neutral that makes orange accents look warmer, and the glitter edge gives that “just left the salon” sparkle. I like this on long coffin because the tip glow looks like a soft sunset. It flatters most skin tones since cinnamon sits between nude and brown.
Editor's noteUse less glitter than you think — micro glitter looks best when it’s like a light dusting, not a layer.
Start with a nude base and cure. Sponge cinnamon-brown onto the tips, blending upward to create a smooth ombre. Use orange micro glitter or a fine copper-orange glitter mix and apply it only at the very tip edge, then cure. Add a thin layer of cinnamon on the glitter boundary if you need to hide any harsh line. Finish with glossy top coat and cap the tips.
Watch outAvoid chunky glitter — it catches on fabric and makes the mani feel rough fast.
15. Orange Pop Under Clear Jelly With Brown Outline
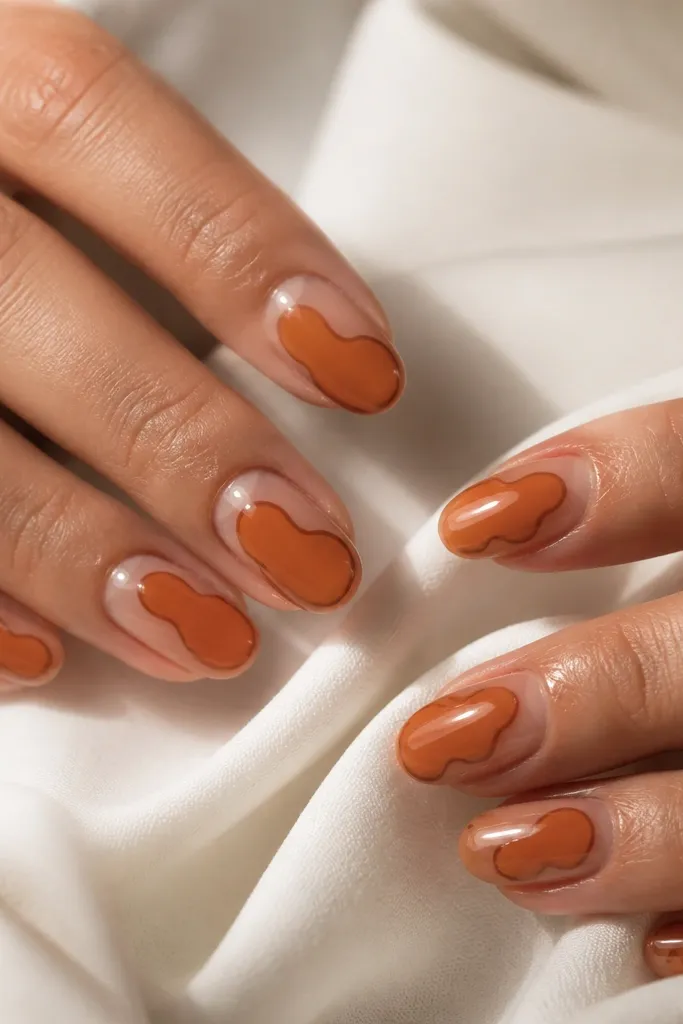
This is a dimensional look that reads expensive because the orange sits under clear jelly. The brown outline keeps the shapes crisp so the design doesn’t look like smeared paint. I’ve worn this on shorter nails too, but it shines on medium ovals because the jelly layer gives a smooth dome effect. The clear jelly works across skin tones — it doesn’t fight your undertone, and the orange still pops.
Editor's noteIf your jelly looks uneven, apply a thinner layer and cure longer instead of building thick at once.
Apply a clear or sheer base gel and cure. Paint orange shapes (small blobs, curved crescents, or a simple leaf outline fill) on the nail surface, then cure. Add a thin brown outline gel around the orange shapes and cure. Cover everything with clear jelly gel in one or two thin layers, cure, then finish with glossy top coat and cap the edges.
Watch outAvoid painting orange too close to the sidewalls — jelly magnifies any thickness near the edges.
16. Pumpkin Orange Marble Tips With Nude Base
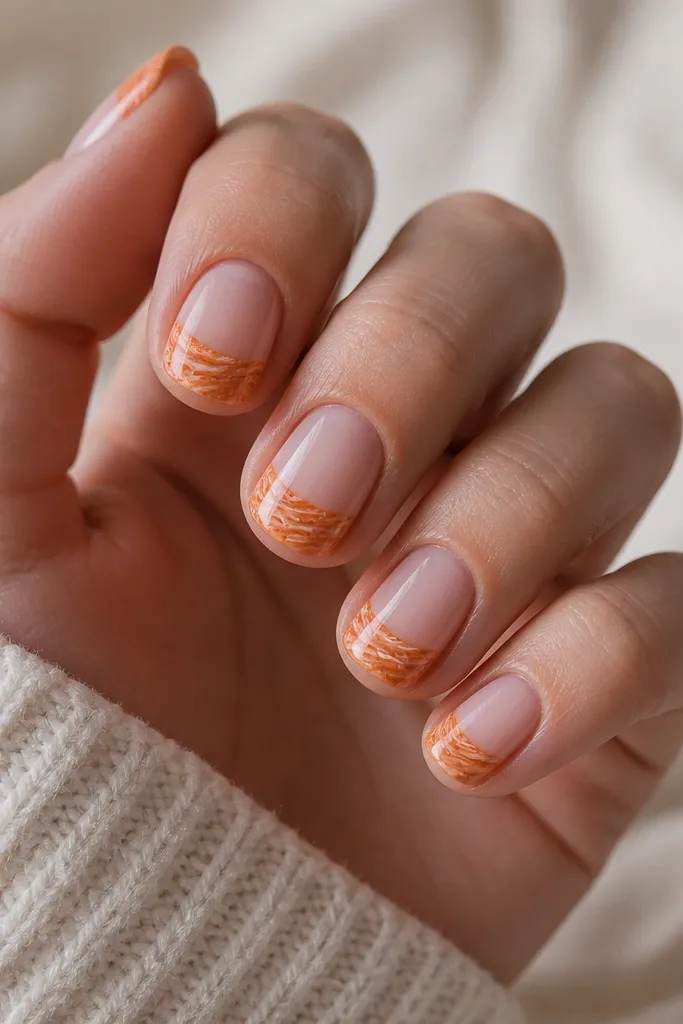
Marble tips keep orange seasonal but still wearable because the nude base gives your eye a break. The white streaks make the pumpkin shade look more dimensional and prevent it from turning flat. I like it on short rounded nails because the tip-only placement keeps the nail looking neat and hides small growth. It also looks good on hands with shorter fingers since the nude base keeps the overall nail shape clean.
Editor's noteUse a toothpick to drag tiny white flecks — it creates more natural breaks than a big brush.
Apply nude base gel and cure. On the top third of each nail, sponge or brush on a thin base of pumpkin orange, then add marble streaks using a fine brush with a mix of brown and white gel. Keep the marble concentrated at the tip and taper toward the center so it looks intentional. Cure and seal with a glossy top coat, making sure the marble edges are smooth.
Watch outAvoid full-nail marble if you want a clean look — the tip-only version reads more polished.
17. Orange And Brown Half-Matte Split With Gloss Border
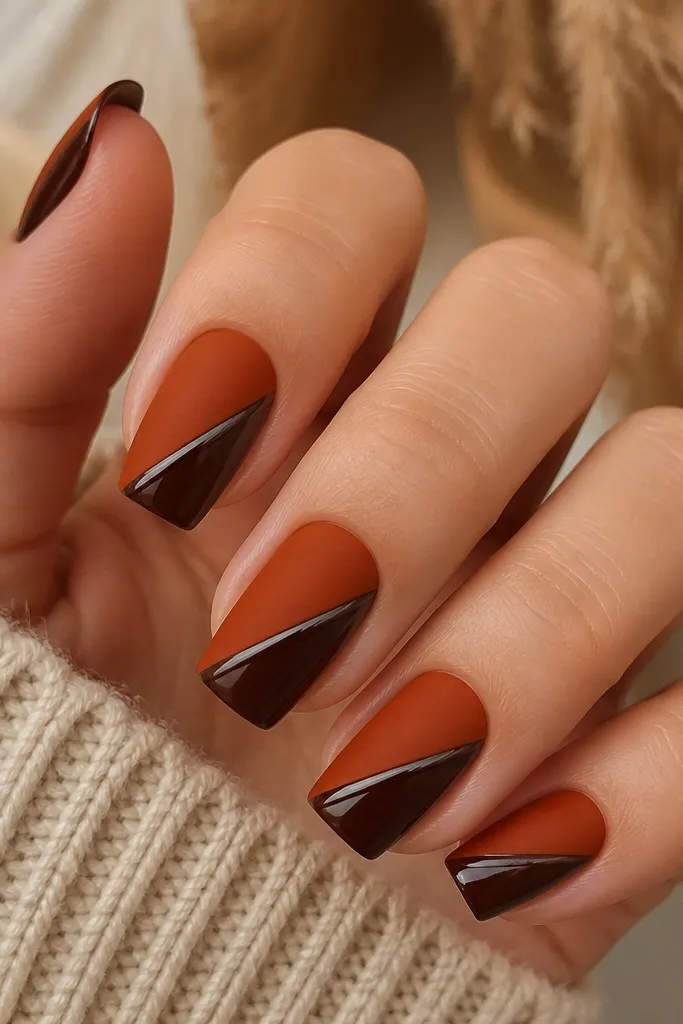
A diagonal split looks graphic and modern, and the matte/gloss contrast makes it feel like real fall styling instead of random color blocking. The burnt orange half gives warmth, while the deep brown half adds weight so the mani looks balanced. Medium square nails are perfect because the diagonal line stays crisp. This design flatters both fair and deeper skin tones because the border line creates a clear frame around the color.
Editor's noteUse striping tape to get the diagonal edge perfect, then remove after curing so you don’t smear the gel.
Paint the base with a sheer nude and cure. Add burnt orange gel on one side of the diagonal, cure, then clean edges with a small brush. Paint deep brown gel on the other side, cure again. Apply matte top coat only on the burnt orange side, then use glossy top coat to outline the diagonal border and cap everything.
Watch outAvoid mixing matte and gloss on the same brush — it drags and makes the finish look patchy.
18. Tangerine Aura Glow Around Cuticles
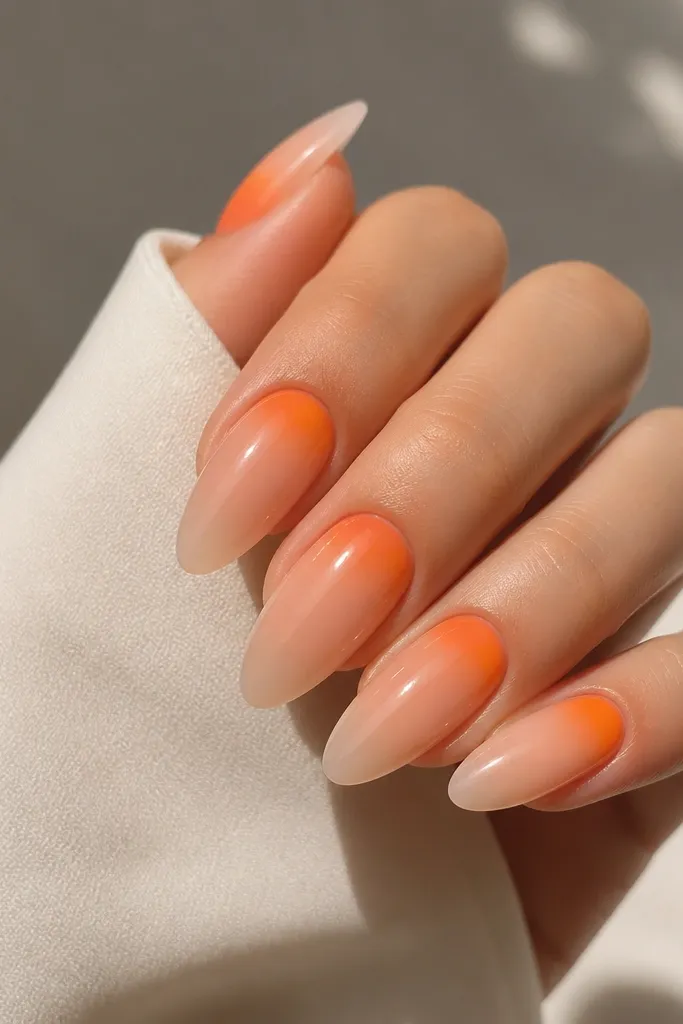
Aura nails are the “grown-up glow” version of glitter, and tangerine works because it’s bright without being too dark. The glow around the cuticle makes your nail bed look fuller and longer, which is why I like it on long almond. It also works when your hands get dry — the aura pattern hides tiny texture. On lighter skin, it looks like a warm candle; on deeper skin, it reads like a bright sunset near the nail.
Editor's noteKeep the aura centered and stop about 1-2 mm from the sidewalls so it doesn’t look like a stain.
Start with a nude base and cure. Sponge tangerine orange gel around the cuticle area in a soft oval, then blend outward using a clean sponge so the edges stay airy. Add a second aura pass only where you want the glow stronger, then cure. Finish with glossy top coat to keep the aura looking luminous.
Watch outAvoid harsh sponge edges — a crunchy edge makes it look like makeup transfer.
19. Pumpkin Orange Foil Leaf On One Accent
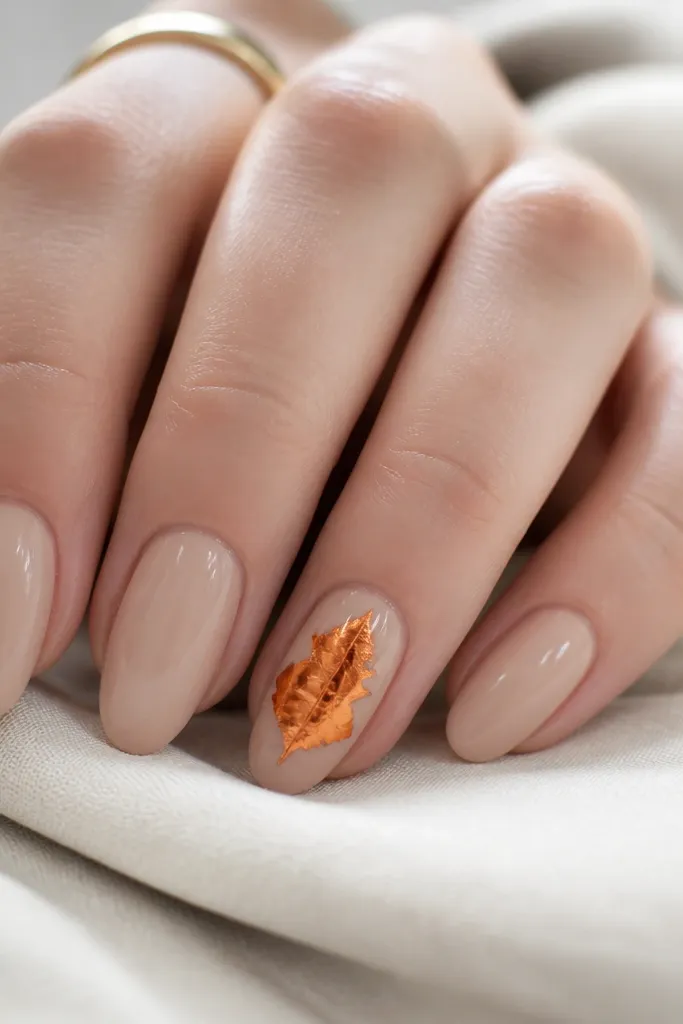
Foil leaf is the fastest way to make orange feel like actual fall weather. The metallic pumpkin tone catches light in a way paint doesn’t, and pressing the foil gives natural texture that looks real. I keep it to one accent nail because foil can look busy if you repeat it on every finger. This looks great on medium ovals because the leaf sits naturally along the nail curve.
Paint all nails nude and cure. On the accent nail, apply a thin layer of tacky gel where you want the leaf shape, then press pumpkin orange foil into the gel. Rub gently to adhere, then cure. If you need more coverage, add a second tack layer only on missing spots and press again. Seal with a glossy top coat to smooth the edges and keep foil from lifting.
Choose foil that has both orange and copper undertones — the mix looks more like fall leaves than a flat orange sheet.
Avoid skipping top coat — foil edges lift without a proper seal.
20. Orange And Cream Polka Dot Skittle Set
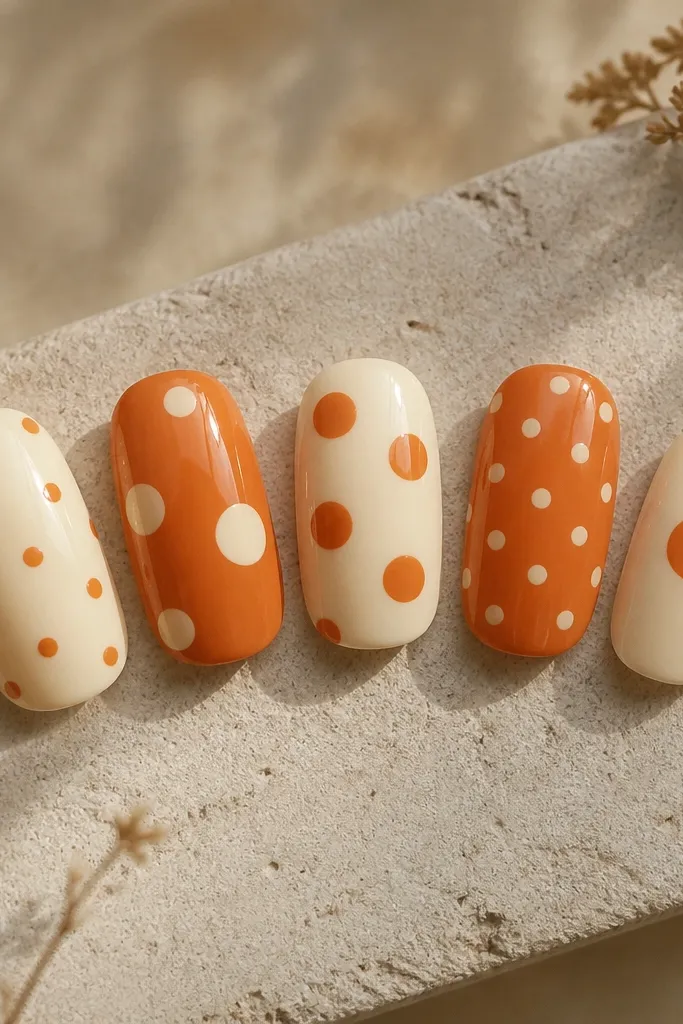
A polka dot skittle set is fun, and orange plus cream keeps it from looking like spring. I like varying dot sizes because it makes the set feel handmade instead of printed. This works on short and medium nails equally, but I especially love it on short rounded because the dots visually widen and brighten. It flatters most skin tones because cream neutralizes the orange and makes the colors look intentional together.
Editor's noteStagger dots slightly — perfect rows look too tidy and less like a real mani.
Pick one cream polish and one pumpkin orange polish, then paint each nail a different base: cream on two nails, orange on two nails, and a nude base on one nail. Cure each base fully. Use a dotting tool to place dots — larger dots near the center on one nail, smaller scattered dots on another. Keep dot spacing consistent within each nail. Finish with glossy top coat and cap the edges.
Watch outAvoid tiny dots that you have to force into place — they smear and look messy.
21. Burnt Orange Cuticle Cuff With Clear Negative Space
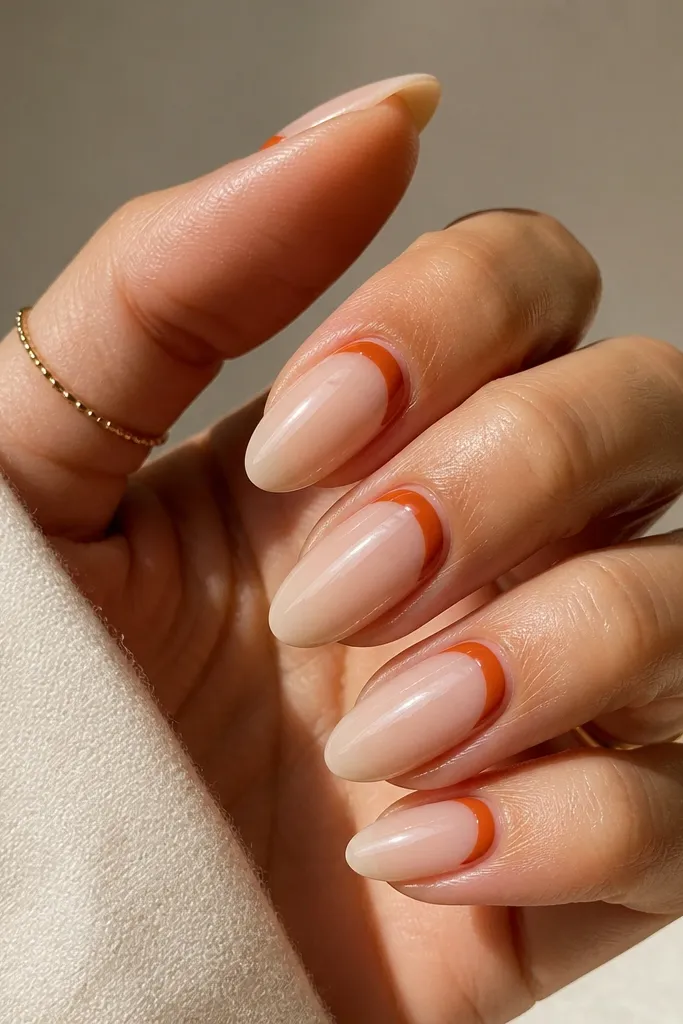
Cuticle cuffs make orange look neat and styled, and negative space keeps it from getting too heavy. The burnt orange cuff reads autumn and flatters hands because it emphasizes the nail shape without covering the whole nail. I like it on almond nails because the cuff curve follows the cuticle line naturally. It also works if you have uneven cuticles — the sheer nude hides minor differences while the cuff draws attention to a clean arc.
Editor's noteUse the side of a flat brush to sweep the cuff curve in one smooth stroke.
Apply a sheer nude base and cure. Leave a clear gap at the cuticle by placing a tiny strip of tape along the cuticle line, then paint burnt orange as a thin crescent just under the gap. Cure and remove tape carefully. Add a second nude layer if you need to even the sheer area, then top coat glossy to seal.
Watch outDon’t make the cuff too thick — thick cuffs look like a stain and can lift.
22. Orange And Espresso Checkerboard Tips
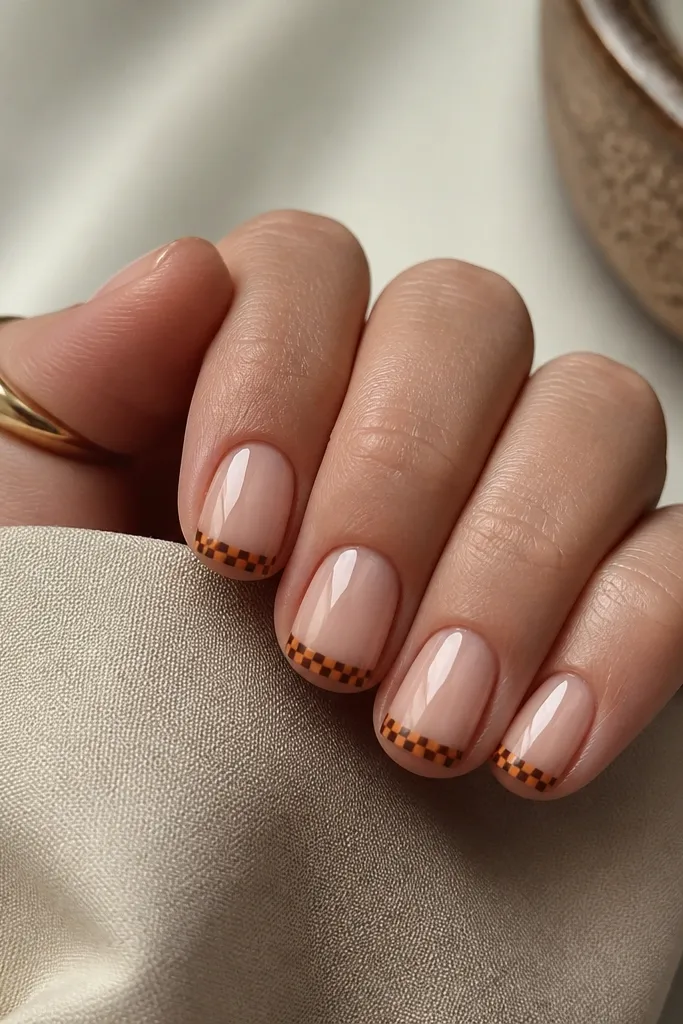
Checkerboard tips are playful but still fall-appropriate because the pattern is small and the espresso grounds it. This design flatters short nails because it focuses color at the tip, which makes the nail look defined. I like it on short square because the straight tip edge gives you a natural border for the squares. It also works on medium nails if you scale the squares down so it stays neat.
Editor's noteKeep squares tiny — about 1 mm — so the checker looks crisp instead of chunky.
Paint a nude base and cure. Use striping tape to create a grid at the tip area, leaving a border of nude around the edges. Fill alternating squares with pumpkin orange and espresso brown, curing each color after filling or using one-color dry-and-fill method. Remove tape slowly, then add glossy top coat to flatten and seal the pattern.
Watch outAvoid large checker squares on short nails — they take over the whole nail.
23. Tangerine Glow Gradient With Gold Micro Lines
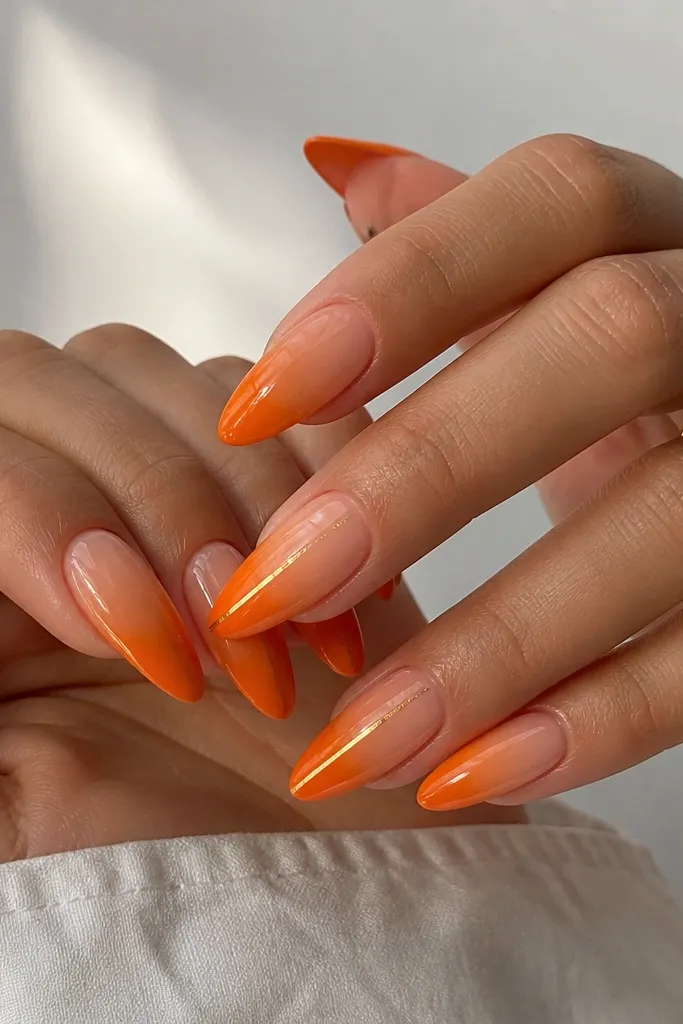
Micro gold lines make orange look like jewelry, not just color. The tangerine glow gradient gives brightness, and the thin gold lines add movement without covering the nail. I like it on long almond because the vertical lines elongate. On fair skin, the gold reads warm and flattering; on deeper skin, the gold adds contrast that keeps the orange looking clean in strong light.
Editor's noteIf gold gel is too thick, thin it slightly with a gel medium so it lays smoother.
Apply nude base and cure. Sponge tangerine orange onto the tips and blend upward to create a smooth glow gradient. Cure and add a second gradient pass for full coverage at the tip. On accent nails, draw two vertical micro lines with gold gel or gold nail art paint, keeping them about 1 mm apart. Cure and seal with glossy top coat, making sure the lines don’t catch.
Watch outAvoid wide gold stripes — they overpower the orange and look heavy.
24. Orange Bloom Watercolor Blotches With Brown Veins
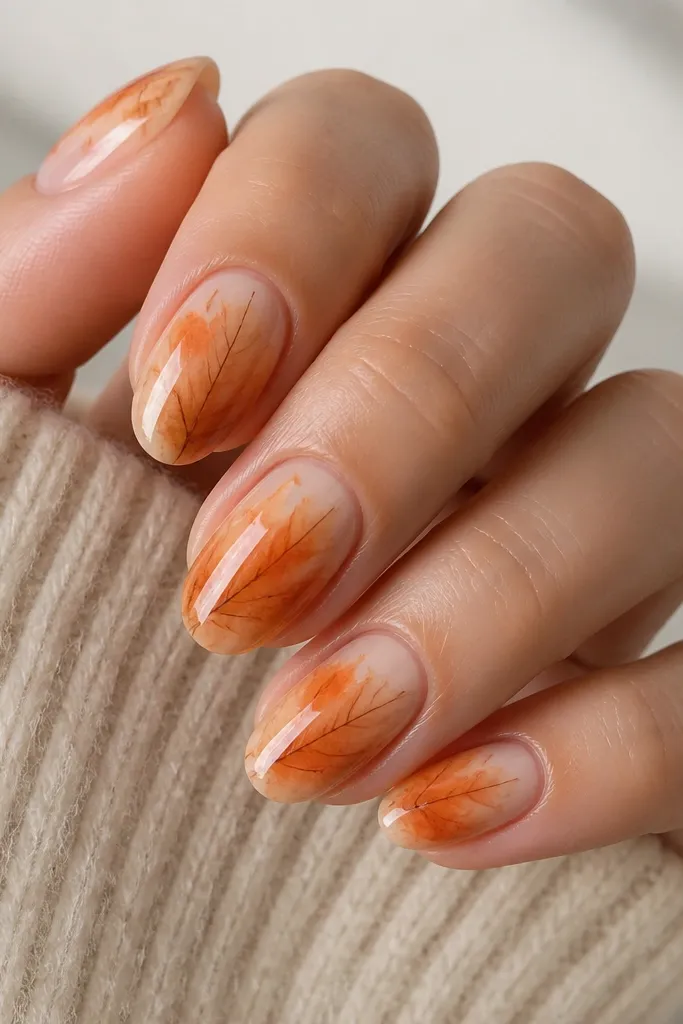
Watercolor blotches let orange look airy, like a stained leaf, which is why it feels perfect for early fall. The brown veins bring structure so the blotches don’t look random. I like this on medium ovals because the nail curve makes the blotches spread naturally. It also flatters a range of skin tones since the nude base keeps everything light and the orange sits on top like pigment, not paint.
Editor's noteWork with thin layers. Two light passes look better than one heavy blotch that dries streaky.
Start with a nude base and cure. Use a slightly translucent orange (jelly or watercolor gel) and dab blotches with a small sponge or brush, then feather edges with a clean damp brush. Add brown gel veins using a fine brush, dragging thin lines through the blotches. Cure and repeat on any nails that look too light. Finish with glossy top coat to unify the texture and seal the watercolor effect.
Watch outAvoid fully opaque orange on a watercolor design — it kills the soft feathered edges.
25. Pumpkin Orange Half-Glazed Donut French
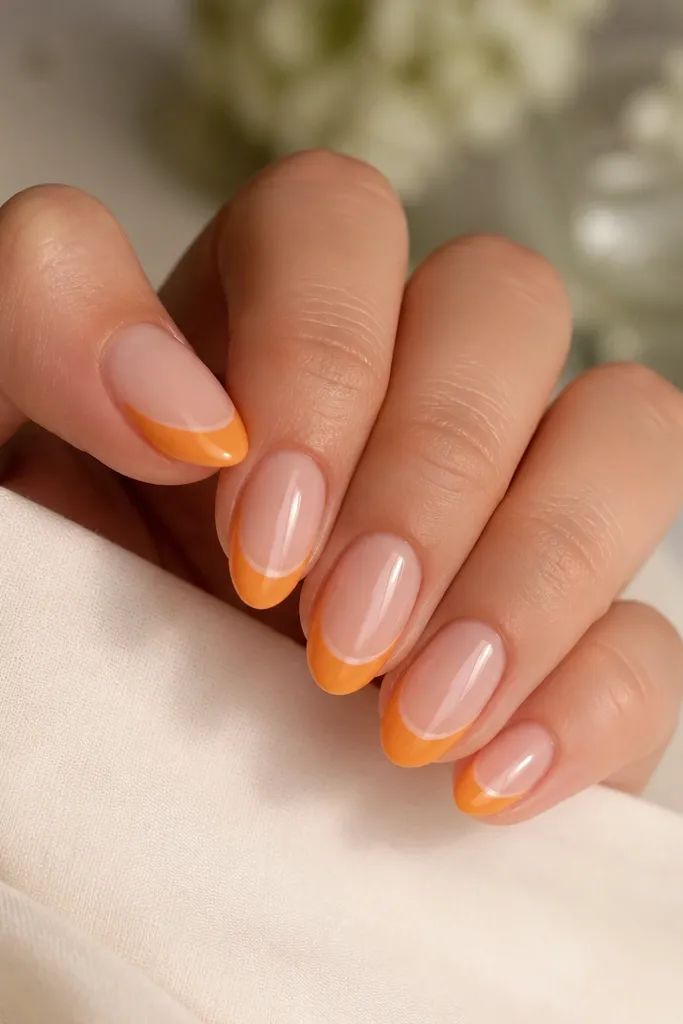
This is a fun twist on French that looks like a glaze ring, so orange feels trendy without being loud. The clear gap in the arc keeps it airy and makes short nails look more lifted. I like it on short almond because the curve matches the nail tip. On any skin tone, the nude base keeps the orange looking clean, and the glazed finish makes it look like gel food-coloring (in the best way).
Paint sheer nude base and cure. Use a stencil or freehand with thin striping tape to create an arc at the tip, leaving a small clear gap in the center. Fill the arc with opaque pumpkin orange in two thin coats for smooth coverage. Remove the stencil carefully and cure. Seal with a glossy top coat, and cap the free edge so the arc stays crisp.
Keep the arc height around 2-3 mm for short nails — taller arcs look bulky.
Avoid thick orange walls around the arc — it can look like it’s sitting on top instead of part of the nail.