
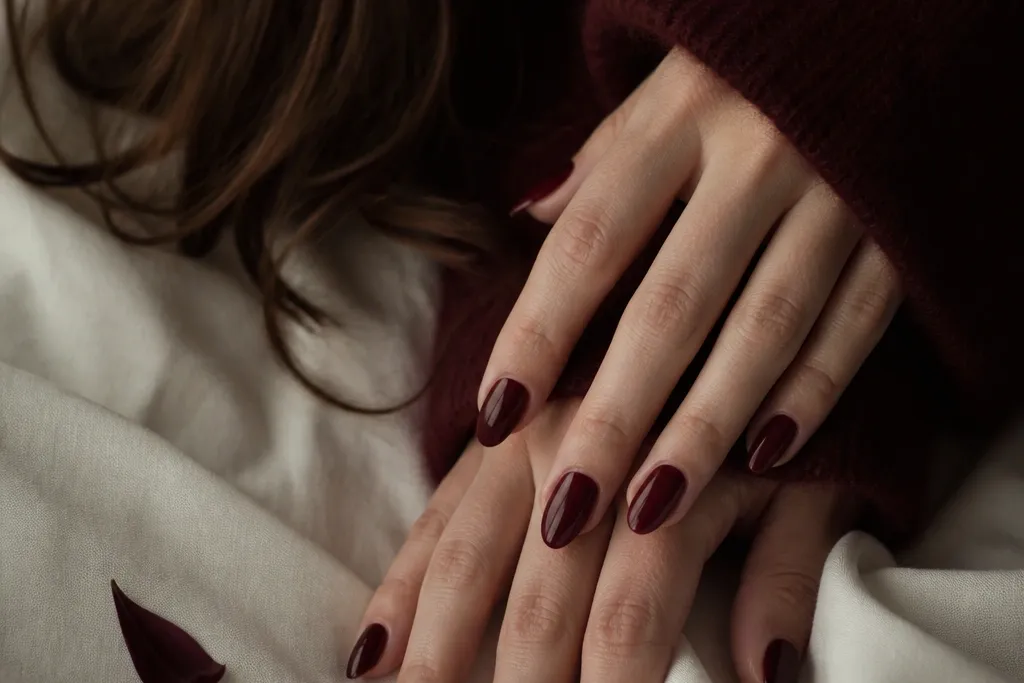
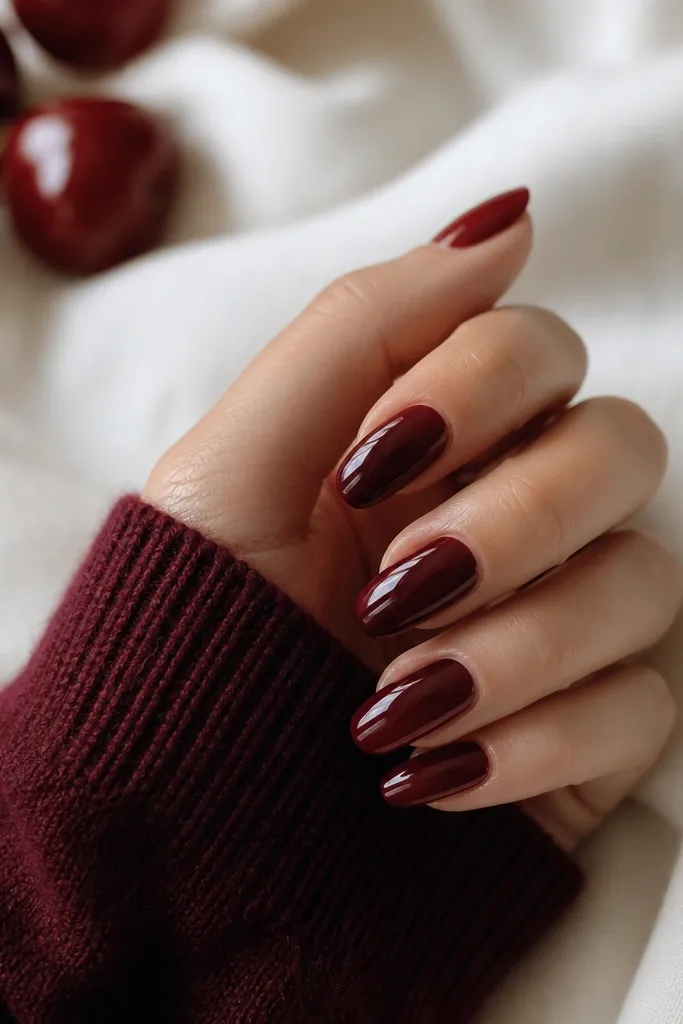
1. Juicy Gloss Cherry Base with Tiny Cuticle Dot
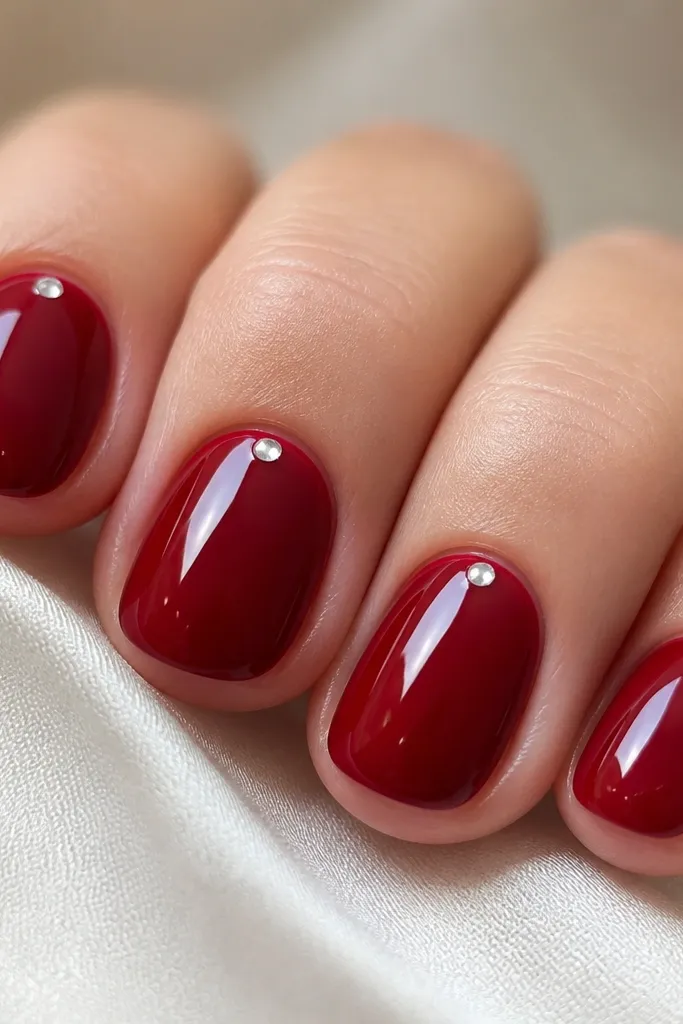
This look is my go-to when I want dark cherry red nails that still feel soft. The base is a true dark cherry red in a gel formula with strong pigment, then a high-gloss top coat that makes the surface look wet. The tiny dot at the cuticle adds a “glow” effect — your eye goes to the center of the nail first, which makes the whole set look more polished. It flatters every skin tone because the contrast is minimal: you’re not adding a heavy second color. It also works on short nails because the dot pulls focus upward without making the nail look busy.
Start by filing your nails into short rounded or very gentle almond, then buff lightly just to remove shine. Apply a thin base coat, cure, then paint two thin coats of dark cherry red, curing fully between coats. With a dotting tool, place one micro dot right at the cuticle center on each nail, leaving a hairline gap from the skin. Finish with a glossy top coat and cap the free edge on every nail. If the dot looks too big, wipe the tool and repeat — smaller reads dreamy, not cartoonish.
Put the dot on the cuticle center only, not spread — that keeps the look refined in real life and in close-up photos.
Avoid thick gel near the cuticle. It lifts faster and makes the red look lumpy.
2. Velvet Matte Dark Cherry with One Glossy Stripe
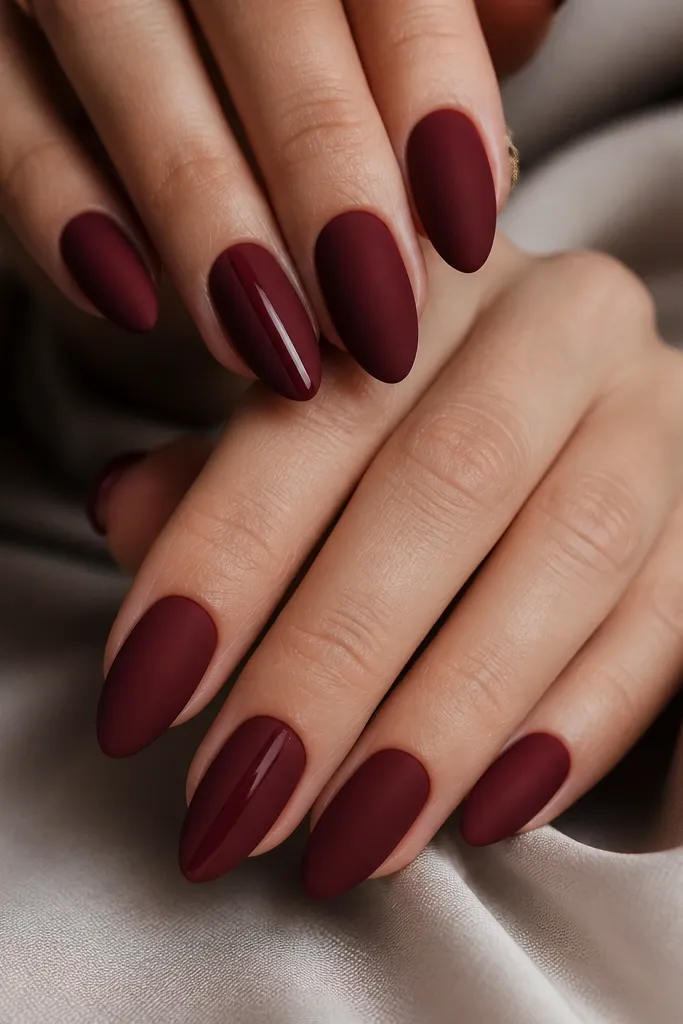
This is the “night cherry” aesthetic I wear when I want drama without heavy nail art. The matte top coat turns the cherry red into a smooth, velvety surface that looks expensive in low light. The one glossy stripe keeps it dreamy because it creates a reflective focal point — your eyes track the light along the nail. I like it on medium almond because the center stripe makes the nail look longer and cleaner. It also flatters hands with shorter nail beds since the stripe visually stretches the shape.
Paint two thin coats of dark cherry red gel and cure completely. Apply matte top coat to all nails, curing, and check that the surface is evenly non-glossy. On your chosen accent nails, tape a super-thin strip down the center after the matte top coat — press the tape firmly so no red seeps under. Paint a narrow strip of glossy top coat over the tape, cure, then remove the tape carefully. Finish by sealing the edges with a light pass of matte top coat around the stripe so it doesn’t peel.
Use nail vinyl striping tape. Regular tape leaves edges that look jagged under matte.
Don’t put matte top coat over a glossy stripe. It kills the contrast and turns it flat.
3. Dark Cherry Chrome Half-Moon
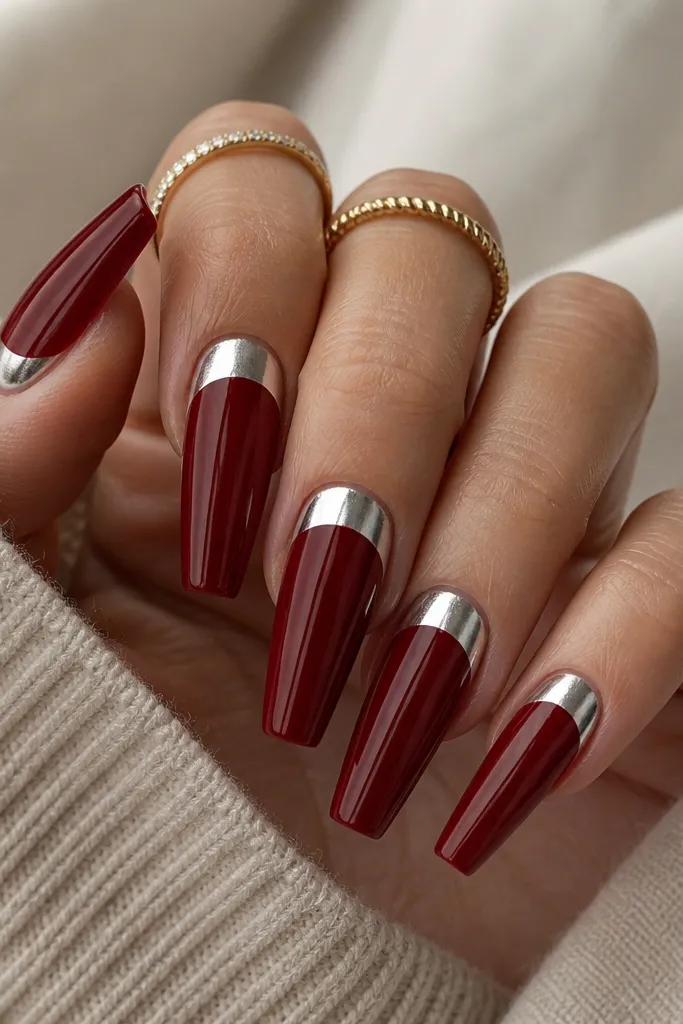
The half-moon chrome makes dark cherry red look fancy fast. I use a silver chrome because it matches almost any jewelry metal — gold rings still look intentional, but silver looks extra crisp. The chrome sits at the cuticle area, so it frames your nail and makes your hands look tidy. This is best on longer shapes because the crescent has room to look clean and symmetrical. If your cuticles are prone to dryness, keep the chrome slightly away from skin so you don’t get lifting around the edges.
Start with your dark cherry red base in two thin coats. Once it’s cured and fully dry, clean the cuticle area with a lint-free wipe so chrome doesn’t stick to skin oils. Apply a small amount of half-moon chrome adhesive or gel tack at the cuticle crescent area, then press silver chrome foil so it follows the curve. Use a soft brush to sweep away extra foil particles, then seal with a glossy top coat over the whole nail. If the foil looks uneven, add one more thin top coat pass to smooth the shine.
Editor's noteUse a small silicone tool to press the chrome. It gives sharper edges than finger pressure.
Watch outAvoid placing chrome all over the nail. Half-moon only looks dreamy; full coverage looks heavy.
4. Cherry Red Aura with Blended Center Glow
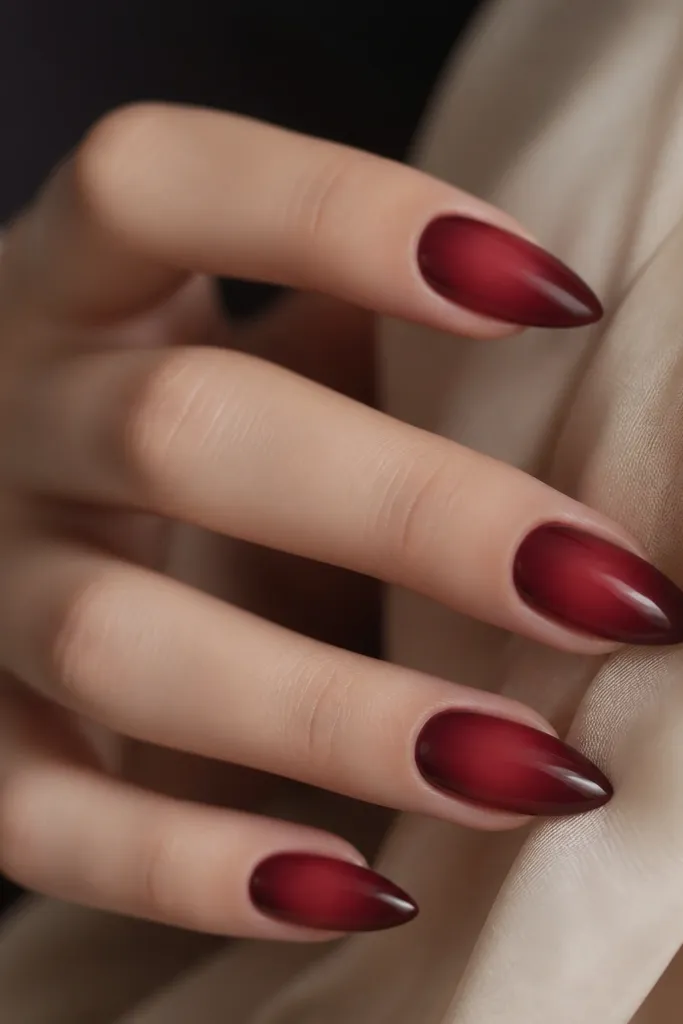
Aura nails make dark cherry red look like it’s lit from inside. The technique keeps the shade dreamy because you’re not adding a second color that clashes — you’re blending the same family. I use a slightly lighter cherry or berry-red gel for the aura center, then blend edges until it looks like mist. This flatters medium to long almond nails because the halo shape guides the eye down the nail. It also looks good on warm and cool undertones because the aura reads as a soft light effect rather than a harsh stripe.
Paint two thin coats of dark cherry red gel, cure, and top with a matte or slightly tacky layer if your brand needs it for blending. Apply a small amount of lighter cherry gel at the center of the nail, then use a sponge or airbrush-style blending brush to fade it outward. Work in tiny passes — you want a soft halo, not a hard circle. Cure after you get the glow shape you like, then finish with glossy top coat. Clean up around the cuticle with a gel brush dipped in cleanser for crisp edges.
Keep the glow centered and narrow on short nails. Wide aura looks like a stain on small nail beds.
Avoid over-blending until it turns flat. You need a visible center glow to get the dreamy effect.
5. Black Micro-French on Dark Cherry (Cat Eye Friendly)
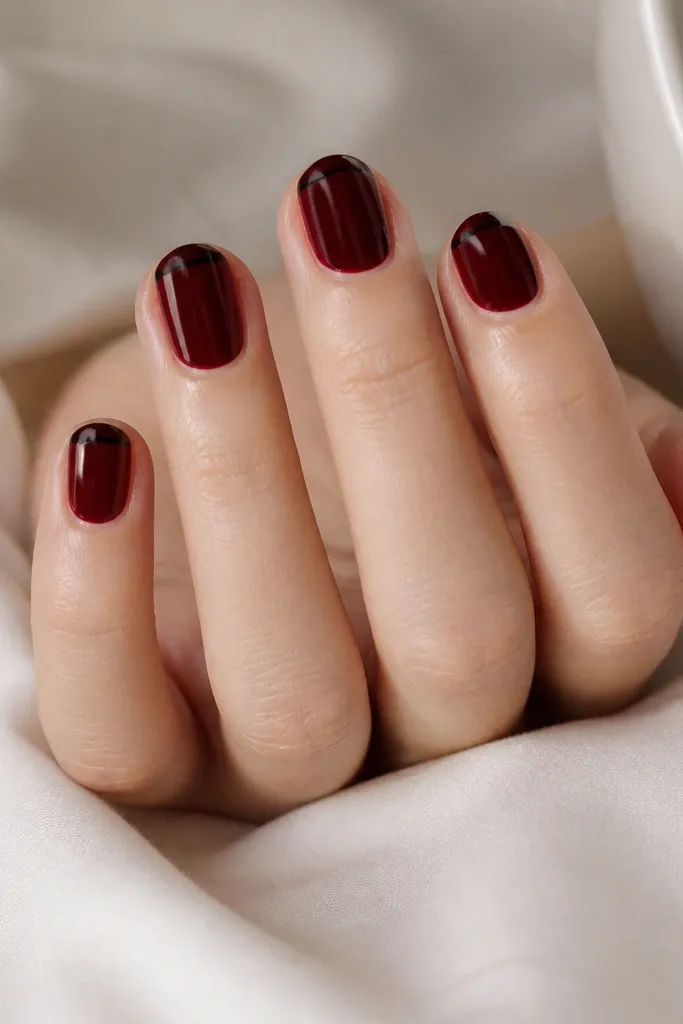
This is the cleanest way I’ve found to make dark cherry red feel edgy without looking goth-heavy. The black micro-French adds sharpness at the tip, and because it’s thin, the cherry still looks dreamy. I use this when I want a set that matches bold eyeliner or dark lipstick — it’s the same vibe on your nails. It flatters hands because the thin line elongates the nail slightly, especially on short rounded. If your nail beds are short, micro-French gives structure without making the tip look too wide.
Start with two thin coats of dark cherry red gel, cured fully. Use striping tape or a fine liner brush to paint a hairline black line along the tip — keep it narrow, about 1mm. Cure the black, then remove any tape while the gel is still tacky if your method requires it. Apply glossy top coat to seal everything, and cap the free edge. Check the sidewalls by angling your nail under a light; the micro line should look even from both sides.
If you’re using a brush, drag it once, don’t wiggle. Wiggling makes the line look shaky.
Avoid thick French tips. They eat up the nail surface and make cherry look muddy.
6. Cherry Red with Silver Foil Flake Accent
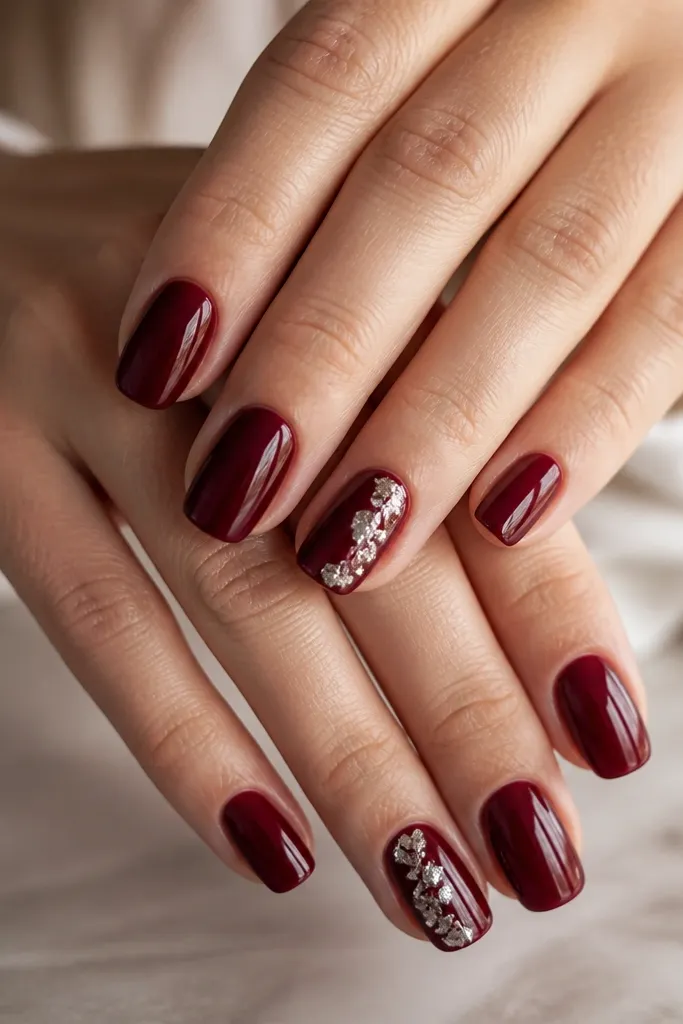
Foil flakes make cherry red look like it’s catching streetlight. I like silver foil because it reads cool and dreamy, and it pairs with both silver and mixed metals jewelry. The placement matters: I keep the flakes on one side or corner so the nail still looks clean. This is flattering for almost any nail length because foil adds texture without needing lots of line work. It also hides tiny surface imperfections since flakes break up the shine.
Paint all nails with two thin coats of dark cherry red gel and cure. On the accent nails, apply a small amount of tacky gel or foil adhesive where you want the flakes — I usually place it near the outer third of the nail. Press silver foil flakes in small pieces and tap off excess with a soft brush. Seal with a top coat in two layers so the foil doesn’t snag on hair or clothing. Wipe the nail edges with cleanser before the final cure so it looks crisp.
Use a matte top coat on the non-accent nails if you want the foil to pop harder.
Avoid putting flakes right at the tip edge. They lift and catch sooner.
7. Cherry Red Jelly Gradient Tips
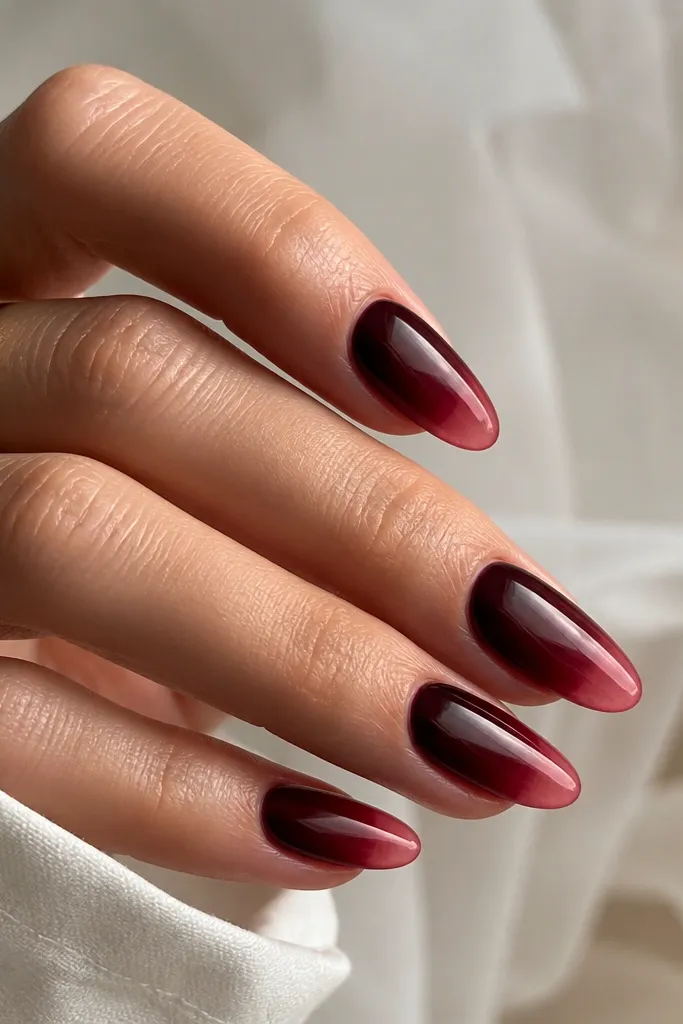
A jelly gradient tip keeps dark cherry red from looking heavy. The trick is using a translucent lighter cherry or cherry jelly that lets the nail base show through. It looks airy and dreamy because light passes through the tip area, not just reflects off the surface. I wear this when I want my nails to look more delicate but still bold. It flatters shorter nail beds because the translucent tip makes the nail look longer and less blocky.
Apply base coat and two thin coats of dark cherry red, curing fully. For the gradient, sponge or brush a lighter translucent cherry jelly onto the top third of the nail, blending downward. Leave a clean boundary — don’t blend all the way to the cuticle or it turns into a muddy ombré. Cure, then cap with glossy top coat to even out the texture and seal the gradient. If you see uneven spots, add a thin extra layer of jelly and top coat on just that area.
Use a makeup sponge for the soft blend. Nail brushes drag the jelly and create streaks.
Avoid a fully opaque ombré. Jelly looks dreamy; opaque looks flat.
8. Dark Cherry and Blush Nude Reverse French
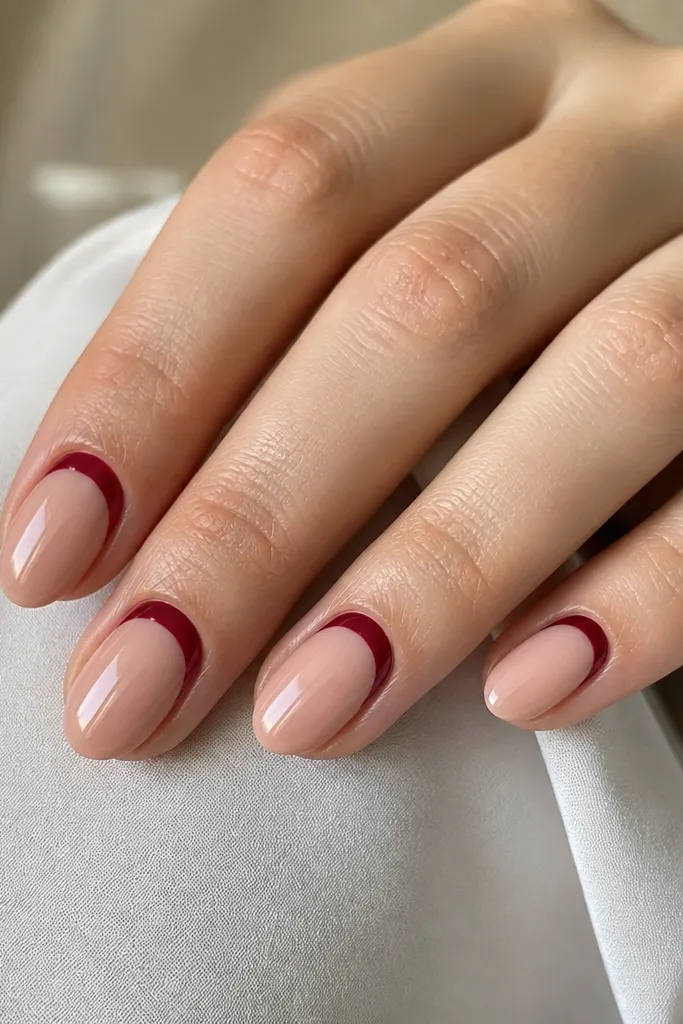
Reverse French makes the cherry red look like a frame, not a block of color. I love pairing dark cherry with a blush nude because it keeps the set soft and “dreamy” instead of too harsh. The cherry arc sits at the cuticle area, which visually lifts the nail and makes the center look clean. This is flattering on fair, medium, and deep skin tones because the nude base can be matched to your undertone. If you choose the right blush (pink-beige for cool, peach-beige for warm), it won’t clash.
File to a short almond or soft rounded shape. Paint nude blush base in two thin coats and cure. Use a fine brush to paint the reverse French arc with dark cherry red — start at one sidewall curve, then mirror it on the other side. Keep the arc thin so the nail still looks airy. Cure, then apply glossy top coat and seal the free edge.
Pick blush nude that matches the inside of your wrist — it’s the fastest way to avoid a weird undertone clash.
Avoid thick arcs. Thick reverse French makes the nail look shorter.
9. Cherry Red with Pearl Teardrop at Sidewall
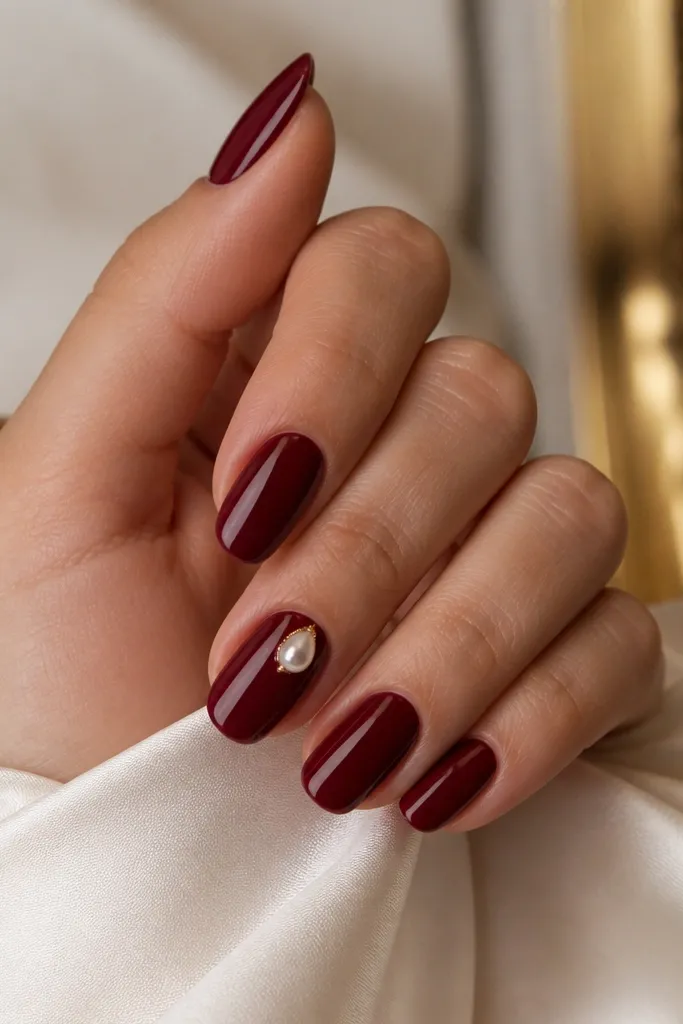
Pearls make dark cherry red feel romantic without turning it into a wedding-only set. I place a single teardrop pearl near the sidewall because it looks like jewelry on your nail, not like random rhinestones. The glossy cherry gives contrast, while the pearl adds that dreamy highlight. This looks best on medium almond or short almond because there’s enough surface to place the gem cleanly. It flatters hands with slender nail beds since the pearl sits like a focal point.
Paint two thin coats of dark cherry red gel, cure, and top with a slightly tacky layer if your pearl glue needs it. Dot a tiny amount of gel adhesive where you want the pearl — I aim for the outer third near the cuticle, not dead center. Press the pearl teardrop in place and cure according to your gel’s instructions. Add one more thin gel layer over the gem to anchor it, cure again, then seal everything with glossy top coat. Avoid getting top coat all over the pearl — it should stay shiny.
Use a dotting tool to place the pearl, not tweezers. Tweezers slip and scratch the gel surface.
Avoid stacking multiple stones. One pearl looks intentional; clusters look crowded.
10. Dark Cherry Red with Opal Flake Overlay
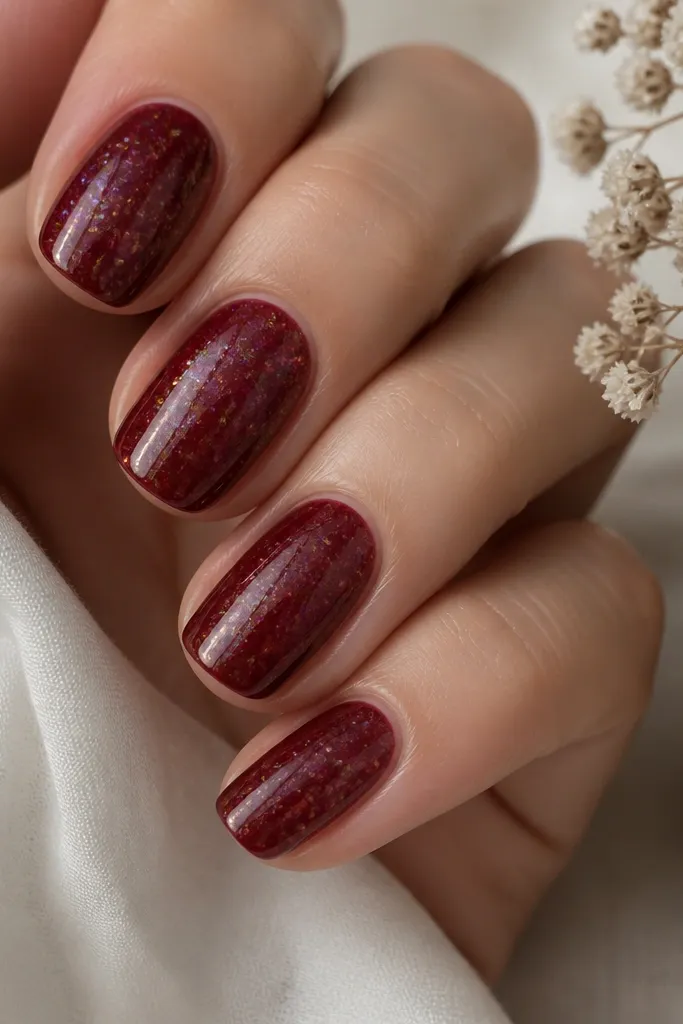
Opal flakes on dark cherry red look dreamy because they shift color with movement. Instead of bright glitter, the flakes are fine and scattered, so the base color stays the star. I use this when I want the nails to look magical in indoor lighting and still classy outside. The opal effect flatters all skin tones because it adds subtle iridescence without changing the cherry’s depth. On shorter nails, keep the flakes light so they don’t make the nail look textured and thick.
Apply two thin coats of dark cherry red gel and cure. Lightly dab opal flake gel or sprinkle fine opal flakes over the nail — focus on the center and let it thin out toward the sides. Press gently to set, then cure. Seal with a glossy top coat in two layers so flakes don’t snag. If the top coat makes the surface look uneven, add a thin final layer and cure again for a smooth finish.
Use a makeup brush to sweep away loose flakes before top coat. That prevents gritty texture.
Avoid heavy glitter coverage. Chunky sparkle turns cherry red into party nails, not dreamy nails.
11. Cherry Red Half-Glazed Look (Clear Gel Sheen)
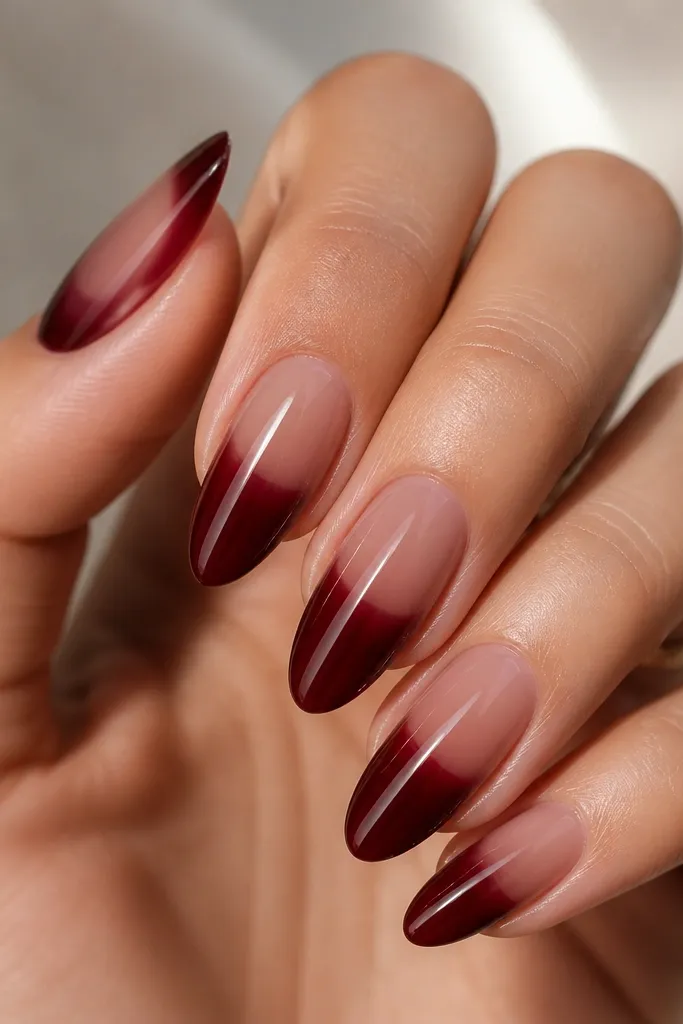
This glazed look makes dark cherry red feel like dessert — glossy, layered, and slightly translucent. I do it by keeping part of the nail in clear gel so the cherry reads as depth, not full opacity. The boundary curve creates a natural visual flow, which looks dreamy in motion. This flatters medium almond nails because the curve follows the nail’s natural shape. It’s also a good choice if your nails have slight ridges; the clear glaze can make the surface look smoother.
Paint a base coat and cure. Apply two thin coats of dark cherry red to the lower half of the nail, leaving the top half clear. Use a small brush to create a soft curve boundary — you want it blended, not straight. Cure, then add a translucent clear gel layer over the upper half and lightly feather the edge into the cherry. Finally, top coat everything with high gloss so both layers look uniform and sealed.
Editor's noteFeather the boundary with a clean brush dipped in slip solution or cleanser so it blends without streaks.
Watch outAvoid a hard straight line. Straight divides can look like a mistake instead of a design.
12. Dark Cherry Red with Starry Micro-Glitter Accent
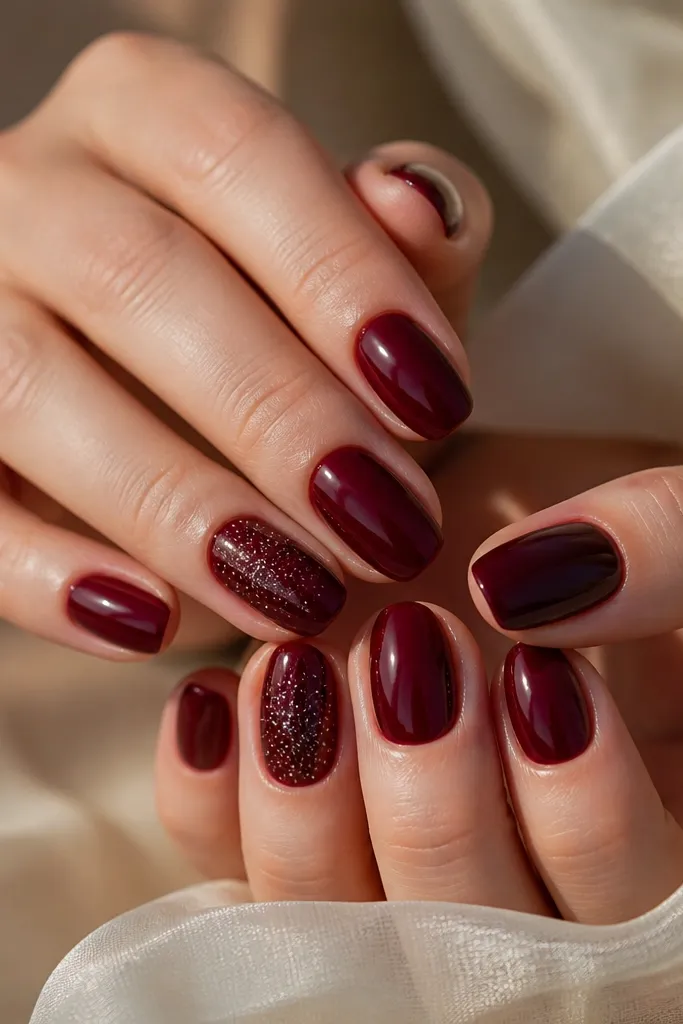
Micro-glitter specks on dark cherry red give a starry, dreamy effect without looking like full-on glitter bomb. I concentrate the glitter near the center so it looks like it’s “glowing” from within. This is flattering for short and medium nails because the specks don’t take up too much space. It also pairs well with winter outfits and holiday makeup, but it still looks wearable because the glitter is tiny and spaced out. The key is letting the cherry base show through — the glitter should be an accent, not a cover.
Paint all nails with two thin coats of dark cherry red gel and cure. Choose one accent nail and apply a thin layer of clear or slightly tacky gel where you want the sparkle. Use a micro-glitter mix (fine silver or iridescent) and sprinkle lightly with a small brush, then tap off excess. Cure, then seal with glossy top coat in two layers to lock the glitter down. Check under a bright lamp — you should see individual specks, not a solid glitter sheet.
Editor's noteUse a wax paper sheet under your hand so glitter falls off cleanly when you tap.
Watch outAvoid chunky glitter. It makes the nails feel scratchy and less dreamy.
13. Cherry Red Marble with Blush Veins
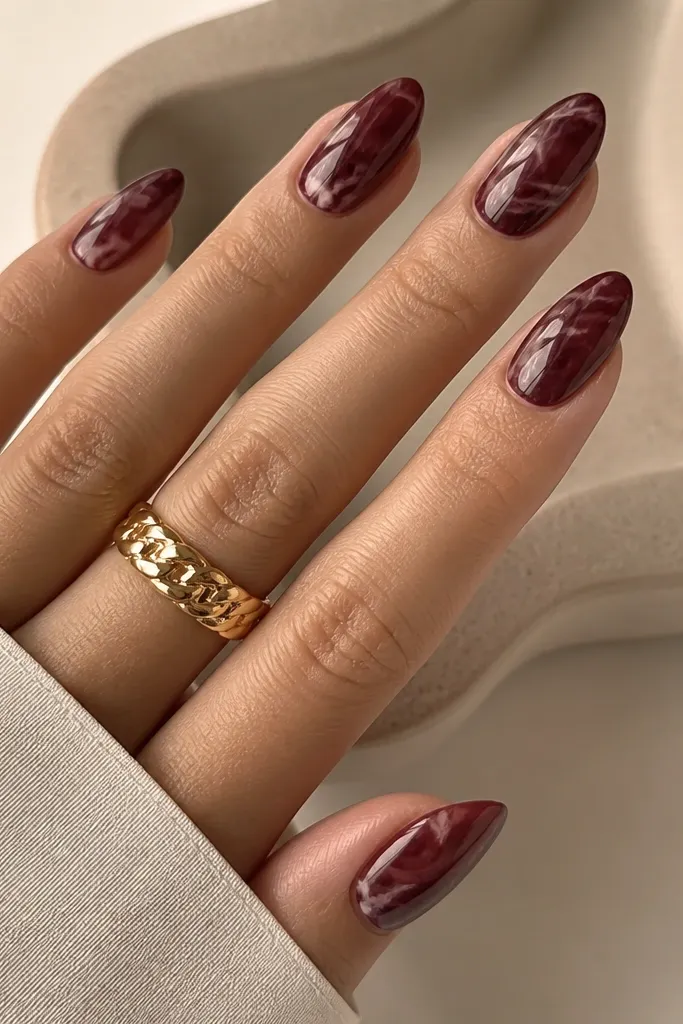
Marble nails look dreamy when the contrast is soft, not high-contrast. I use blush nude veins through dark cherry red because it creates a “stone candy” effect — pretty, not harsh. The glossy top coat matters here because marble looks best when it has depth and smooth movement across the nail surface. This flatters medium to longer almond nails because the pattern has room to flow. It also works on deeper skin tones because the blush veins stay light but not neon, so the set looks cohesive.
Start with two thin coats of dark cherry red gel and cure. On each nail, add a few thin strokes of blush nude gel — keep them irregular like veins, not straight lines. Drag a small dotting tool or thin brush through the blush strokes lightly to blur the edges for marble effect. Cure, then apply glossy top coat to smooth everything out. If the marble looks too bold, add a second thin cherry glaze layer over the veins and cure again, then top coat.
Editor's notePractice the vein pattern on one nail first. Marble looks best when you vary thickness nail to nail.
Watch outAvoid perfect symmetry. Marble that looks too planned reads artificial.
14. Dark Cherry Red with Smoky Gray Shadow Tips
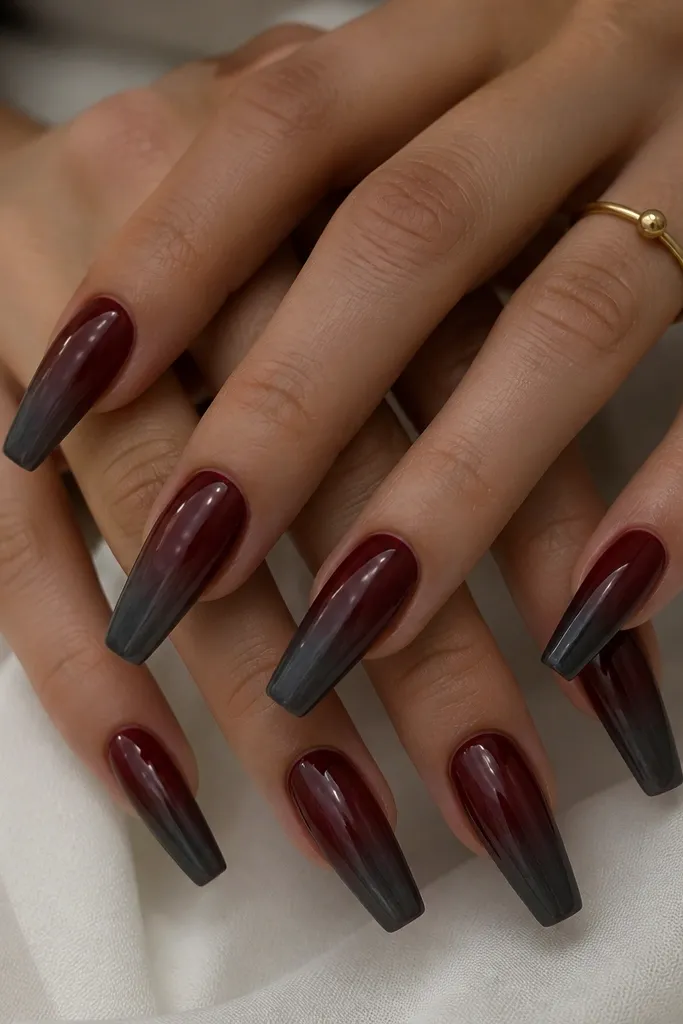
Smoky gray tips make dark cherry red look like it’s been tinted by night air. I like this when I want a dreamy, moody manicure that still looks sleek and intentional. The gray shadow is soft and blurred, so it doesn’t look like a harsh stripe. This flatters long coffin and stiletto shapes because the tip area is where the eye goes first, and the fade makes the nail look taller. It also looks great on cool undertones and pairs well with silver jewelry.
Paint two thin coats of dark cherry red gel and cure. For the smoky tips, dab smoky gray gel or airbrush pigment at the very tip, then blend upward using a sponge or blending brush. Keep the gray concentrated at the extreme tip and fade it about halfway to the nail’s midline. Cure, then apply glossy top coat to unify the surface. If the gray looks patchy, add one more ultra-thin gray layer and blend again before final top coat.
Editor's noteUse a sponge that is slightly damp with slip solution. It blends gray without tearing the gel surface.
Watch outAvoid a solid gray tip. Blurry shadow is the whole point.
15. Dark Cherry Red Jelly Top Coat Over Nude Base
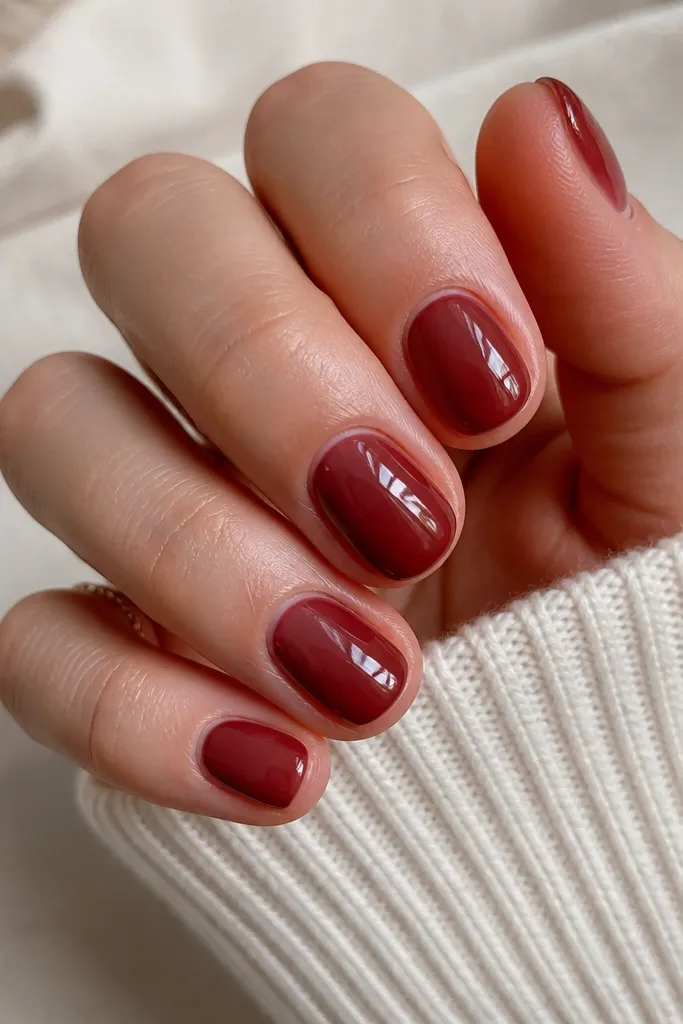
This is the most forgiving way to get the dreamy cherry look when you want it lighter and more wearable. The nude base gives you a clean skin-like foundation, and the translucent dark cherry jelly layer adds depth without turning heavy. The result looks like cherry candy — glossy, smooth, and dimensional. It flatters hands with short nails because it keeps the nail looking airy rather than capped in dark color. If you’re fair-skinned, it also helps the cherry stay flattering instead of too intense.
Apply a nude base gel in two thin coats and cure. Then apply a translucent dark cherry jelly gel as a top layer — start thin, cure, then add a second jelly coat for the depth you want. Keep the jelly layer even across the nail and avoid flooding the cuticle. Finish with a high-gloss top coat and cap the free edge. If you want extra shine, add a second top coat after curing the first one.
Choose a nude base that matches your natural nail bed color. It makes the jelly look seamless.
Avoid opaque red on top of nude for this look. Jelly effect comes from translucency.



