
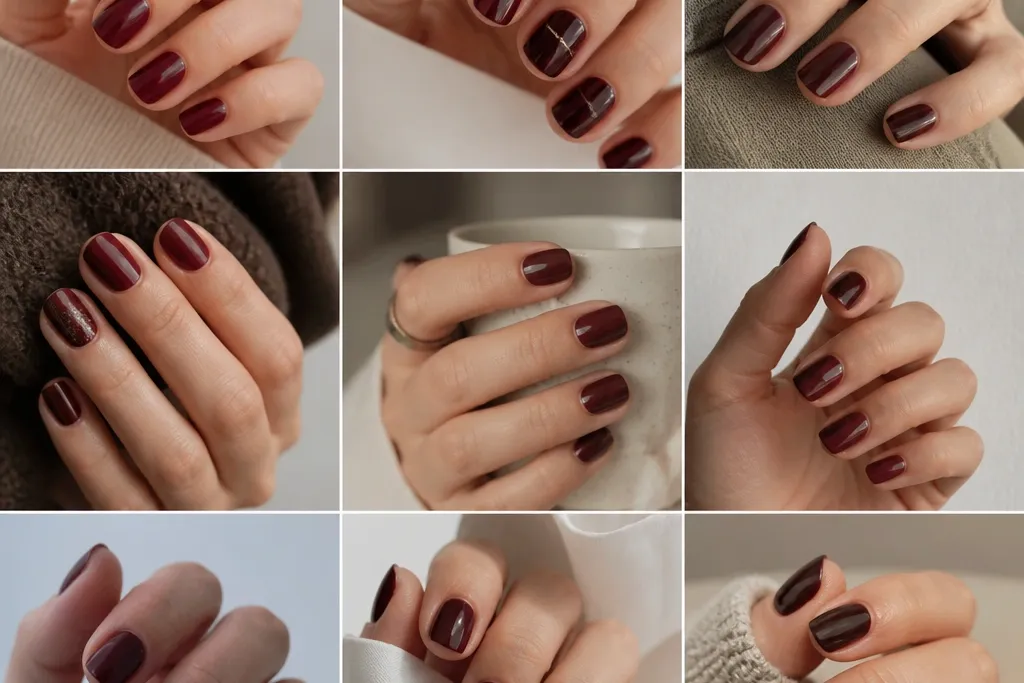
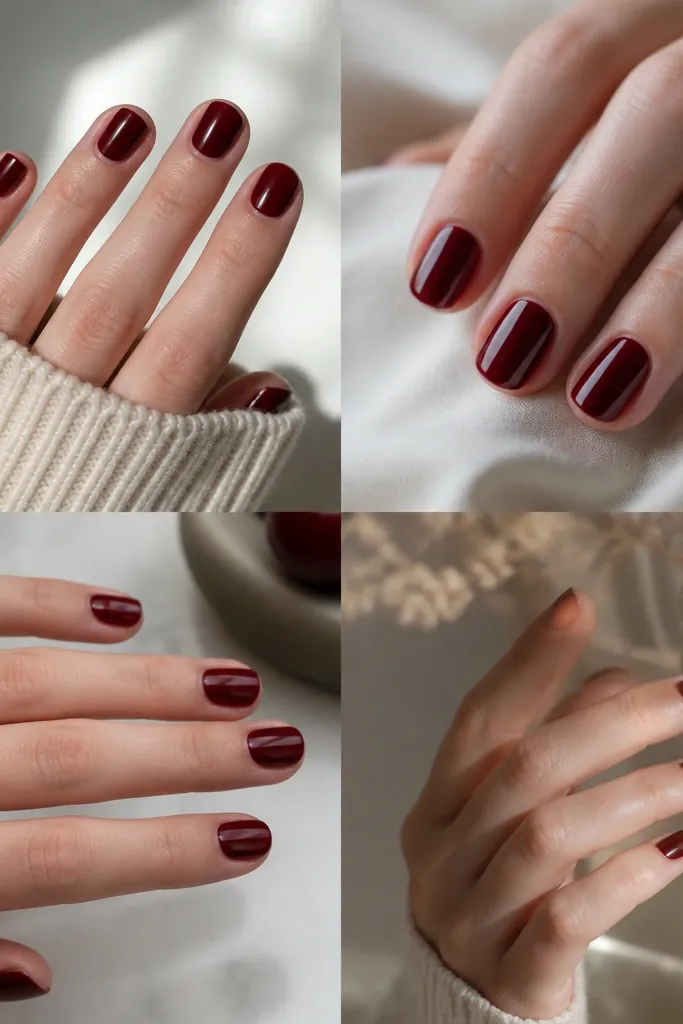
1. Classic Soft Square Cherry Gloss
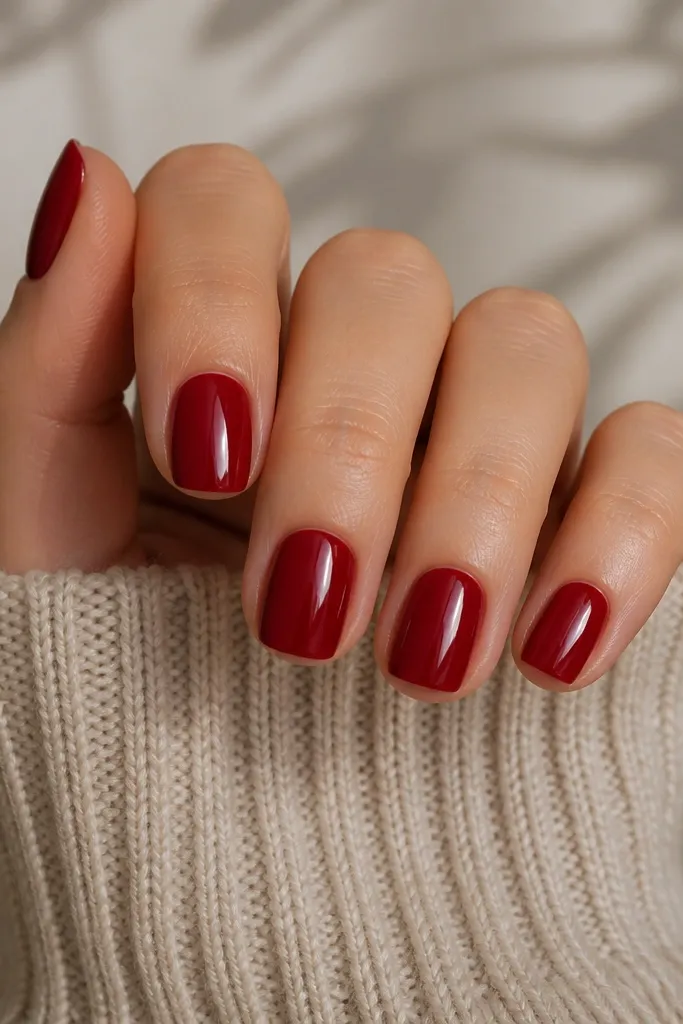
This is the one I reach for when I want dark cherry red nails that still look effortless. The key is coverage: the polish should be opaque in two coats, with no streaks near the sidewalls. I love it on fair to medium skin because the cherry reads bright instead of flat, and it also looks great on warm undertones since the red has a slight berry pull. Keep the shape soft square or rounded square so the color looks smooth and the light reflection doesn’t break up at sharp corners.
Start by pushing back cuticles gently and buffing the shine off the nail plate lightly. Apply a thin base coat, then two coats of dark cherry red, letting each coat dry fully so you don’t get tiny ridges. Clean up the edges with a brush dipped in acetone before the final coat sets. Finish with a glossy top coat, making sure you cap the free edge lightly so it stays chip-resistant.
Editor's noteIf your cherry looks uneven, apply the second coat a little closer to the cuticle and leave a hairline gap rather than flooding the cuticle.
Watch outAvoid thick coats — they stay tacky longer and make short nails look bumpy.
2. Micro French at the Cuticle Line
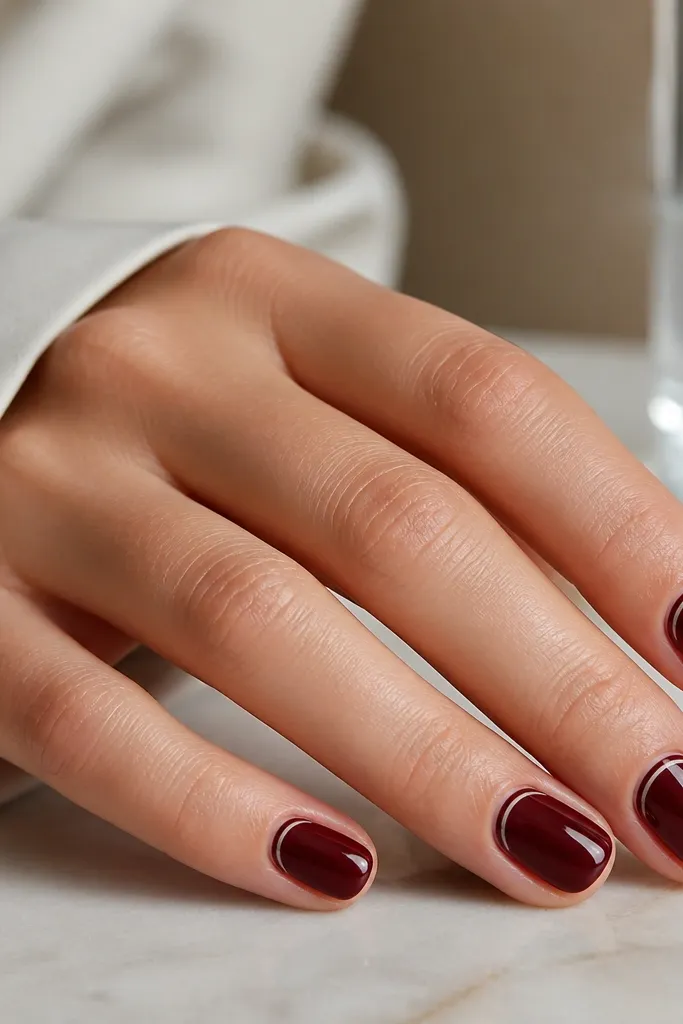
Micro French flips the usual French idea so it works beautifully on short nails. Instead of a big white tip, you place a thin highlight right under the cuticle, which makes the nail bed look longer and cleaner. The pale rose line also softens dark cherry so it doesn’t look too intense on day-old hands. I’ve worn this to work and it looks polished even when the rest of my makeup is minimal.
Paint the nails dark cherry red and let them dry completely. Use a striping brush to draw a thin pale rose arc along the cuticle line, staying about 0.5-1 mm away from the sidewalls. Add a second pass only if the line looks patchy. Seal with a glossy top coat, dragging the brush from cuticle to tip in one direction to avoid smearing the line.
Use gel polish for the line if you can — it stays razor-straight at the cuticle.
Don’t make the line thick; a wide cuticle French on short nails looks like a band.
3. Two-Tone Cherry Half-Moon
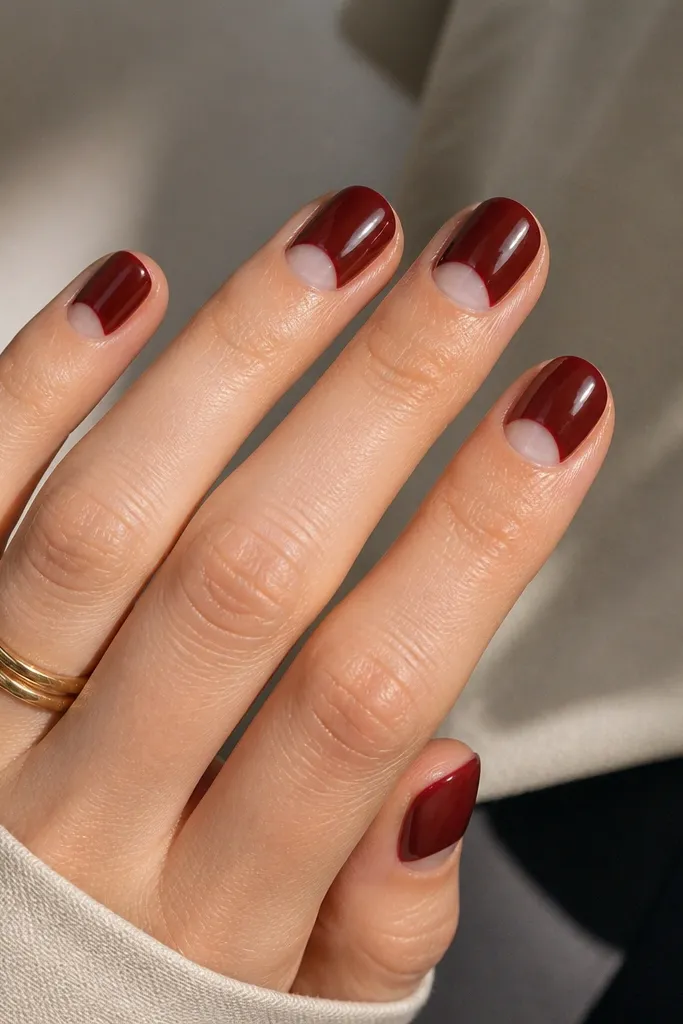
Half-moons are one of the fastest ways to make dark cherry red feel “designed” without adding length. The translucent nude half-moon gives contrast and makes the cherry look brighter, especially on medium and deep skin tones where dark reds can sometimes look flat. I like the half-moon shape slightly wider than a typical crescent so it shows up on short nails. It also hides small imperfections at the cuticle because the nude area frames the nail plate.
Start with a nude translucent polish on a thin layer where you want the half-moon. Once it’s tack-free, paint the rest of the nail with dark cherry red using a steady brush, keeping the edge crisp. If you’re using regular polish, place a small piece of tape or a half-moon stencil right at the cuticle and remove it while the cherry is still slightly wet. Finish with a high-gloss top coat to smooth the boundary.
Editor's noteChoose a nude that matches your lip tone or a pale pink, not a fully beige nude — it reads fresher next to cherry.
Watch outAvoid messy borders; smudged half-moons make short nails look unplanned.
4. Cherry + Gold Micro Stripe Down the Center
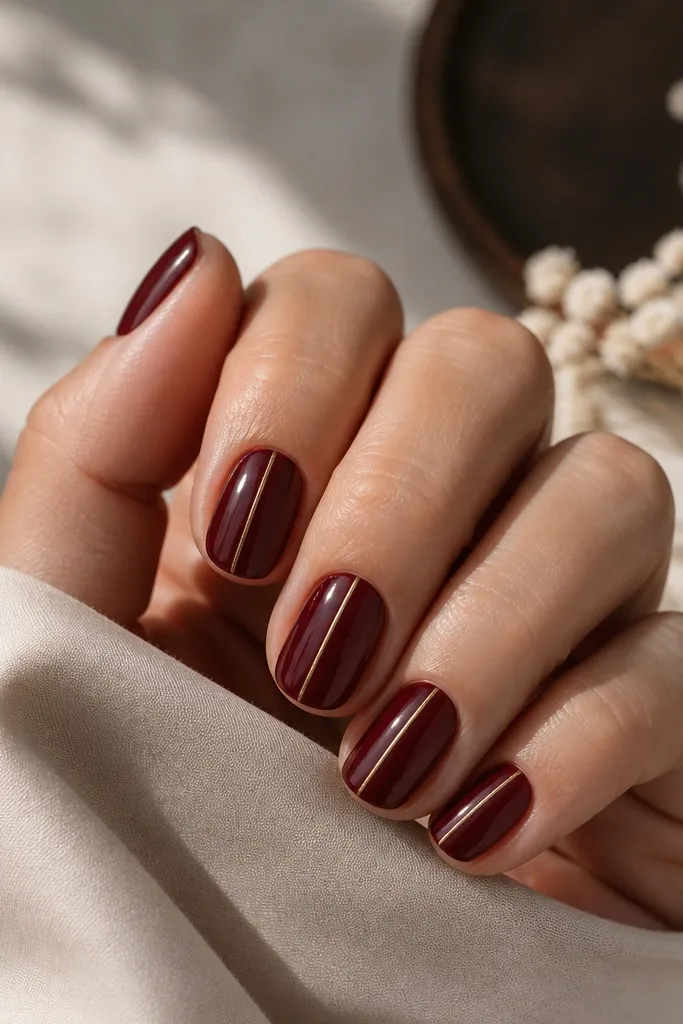
A vertical micro stripe is my go-to for making short nails look longer. Gold makes dark cherry feel warm and expensive, and the stripe draws the eye straight down the nail bed. This works on all skin tones, but I notice it looks especially flattering on cooler undertones because the gold adds warmth. Keep the stripe narrow — it should look like a highlight, not a ribbon.
Paint nails dark cherry red in two coats and let them dry. Use striping tape or a liner brush with gold polish to place a thin line in the exact center of each nail. For a clean stop, start 1 mm below the cuticle and end 1 mm before the tip. Seal with a glossy top coat and apply an extra thin layer over the stripe so it doesn’t snag.
Editor's noteIf your liner brush drags, thin the gold polish with one drop of nail polish thinner so the line lays down smoothly.
Watch outDon’t put the stripe off-center; asymmetry screams “DIY” on short nails.
5. Ombre Cherry Fade With a Nude Base
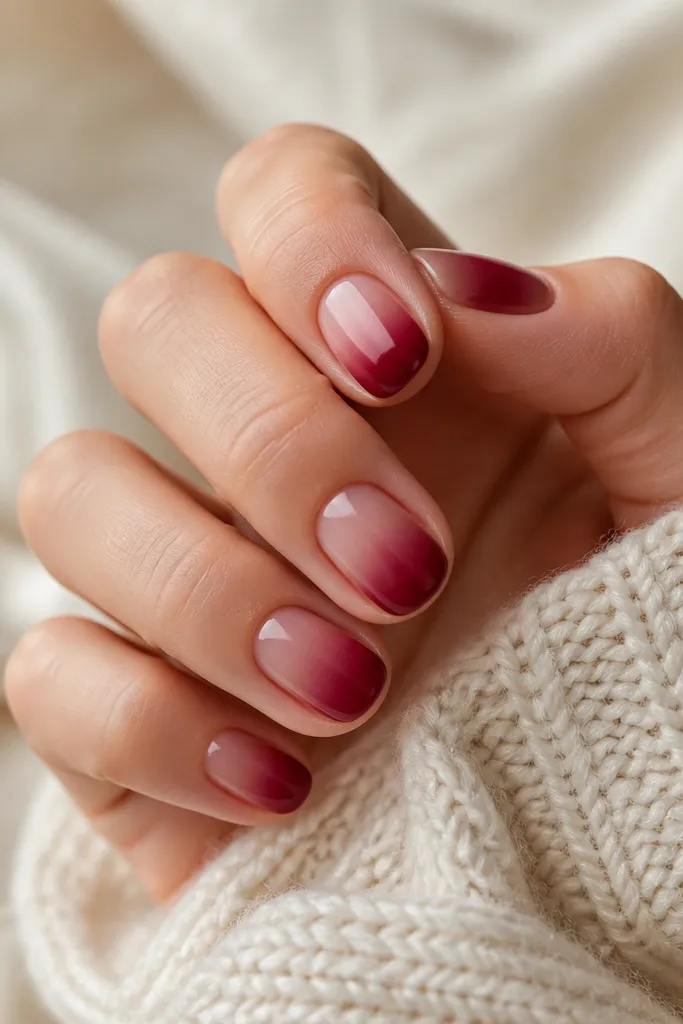
Ombre looks harder than it is, and dark cherry makes the fade look rich instead of messy. Start with a nude-pink base so the fade has a light anchor. The tip stays the darkest part, which visually lengthens the nail bed on short nails. I recommend this for anyone who wants something softer than full red, especially if your hands get dry and you want the manicure to still look neat.
Apply a nude base polish, then sponge a sheer cherry layer from mid-nail to the tip. Use a makeup sponge and dab lightly, building the cherry darker as you move toward the tip. Clean up the edges with a brush dipped in acetone. Add a glossy top coat to blend the transition and make it look like one smooth gradient.
Practice on a paper towel first — the sponge needs less polish than you think.
Avoid harsh lines at mid-nail; the sponge should melt the color, not end it.
6. Cherry Checker Accent on One Nail
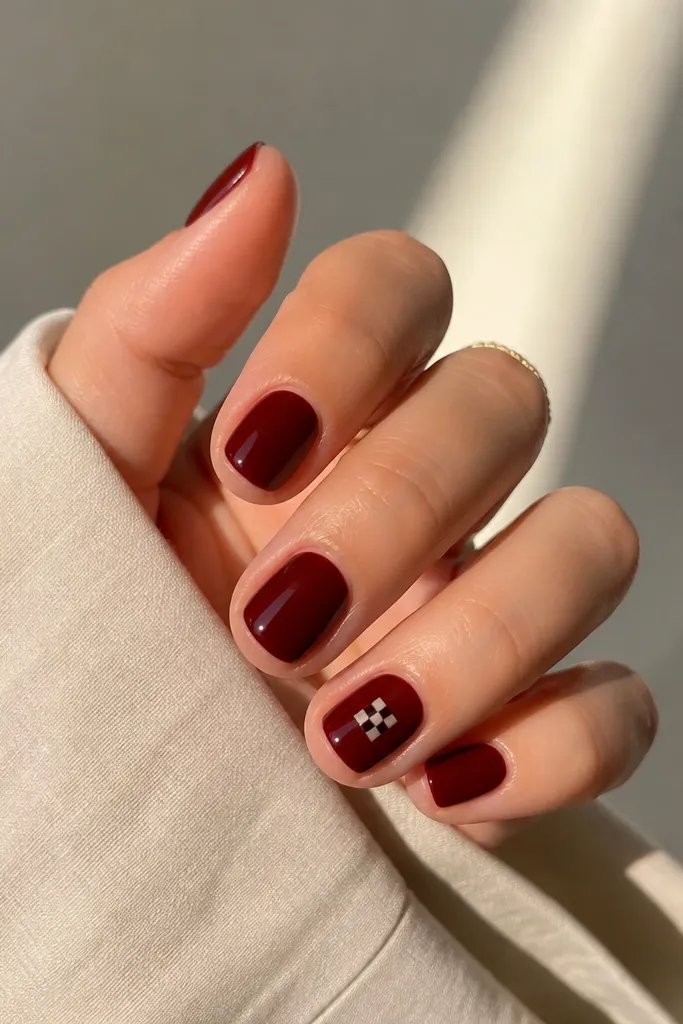
If you want a fun nail art moment without doing it on every nail, place a tiny checker on one accent nail. The contrast colors — black and a nude — make the cherry background look deeper and the pattern readable even on short length. I like this for casual weekends because it looks playful, not try-hard. It also flatters hands that have longer-looking nail beds, since the pattern sits in the center and doesn’t crowd the cuticle.
Base coat and paint all nails dark cherry red. On one accent nail, use a dotting tool to place small nude squares in a grid, then add tiny black squares between them. Keep each square about the width of a pencil eraser on short nails, and keep the pattern centered. Finish with a top coat, and press gently once it’s applied so the pattern doesn’t create bumps.
Editor's noteUse a nail art striping pen for the tiny lines if your dotting tool makes uneven dots.
Watch outAvoid making the checker too big; it overwhelms short nails fast.
7. Velvet Cherry Matte With Glossy Cuticle
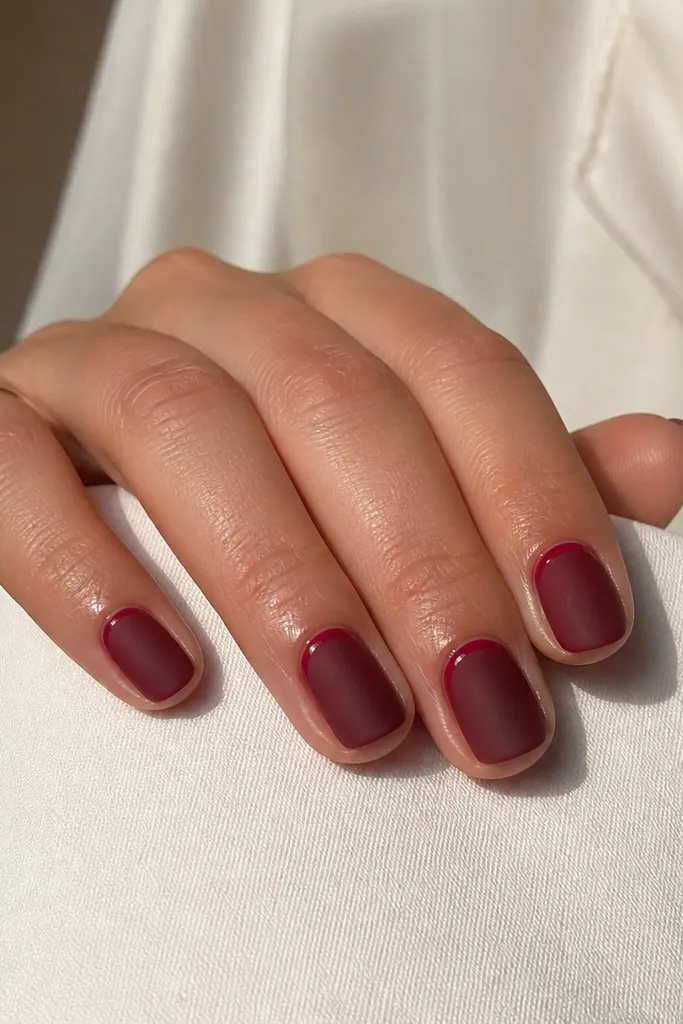
This one looks like you paid more than you did. Matte velvet makes dark cherry look deeper and hides minor ridges, while the glossy cuticle ring adds that “jewel” effect. I’ve worn this on hands with dry cuticles because the shine draws attention upward and keeps the manicure looking intentional. It suits medium to deep skin tones especially well since the matte finish reads plush rather than flat.
Paint nails dark cherry red and let them fully dry. Apply a velvet/matte top coat to the entire nail, avoiding the cuticle area. Then go back with a glossy top coat and paint a thin ring around the cuticle, leaving the rest matte. Seal the glossy ring carefully with a second thin glossy pass if needed.
Editor's noteDo the matte top coat in two thin layers instead of one thick one to avoid streaks.
Watch outDon’t skip the glossy ring; matte-only dark cherry can look heavy on short nails.
8. Cherry Marble Swirl Tips
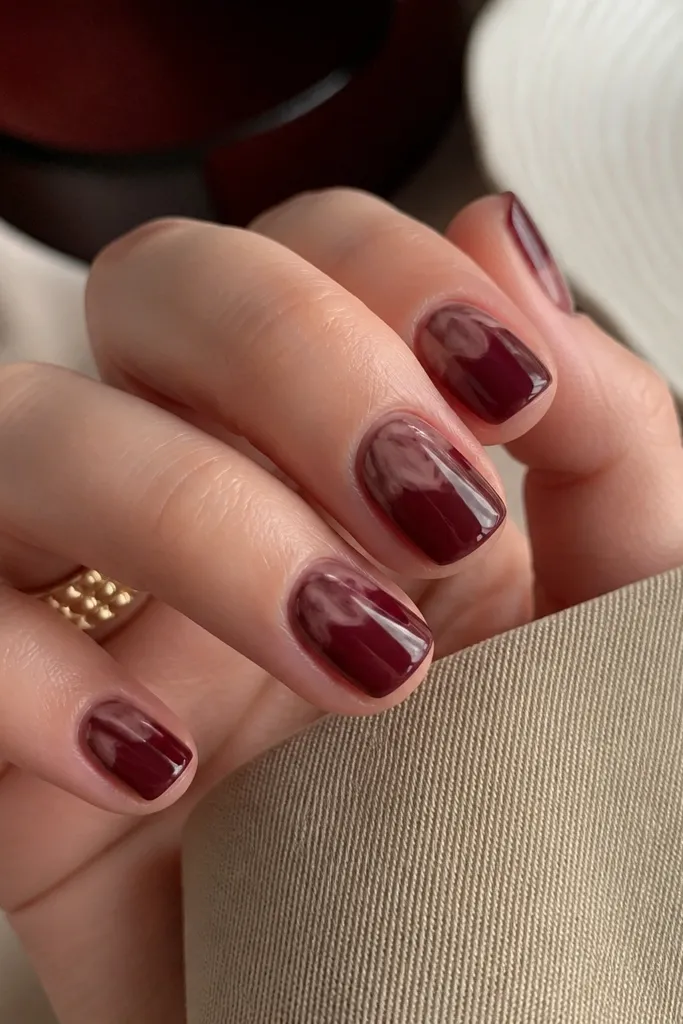
Marble can look messy, but keeping it to the top third makes it wearable on short nails. The technique gives depth without stealing space from the nail bed. I like using lighter cherry and a taupe-beige to create a marble that still feels classy. This style looks great on fair and light-medium skin because the lighter swirls catch light and keep the manicure from looking too dark in photos.
Base coat and paint nails in dark cherry red. On the top third of each nail, add small blobs of lighter cherry and taupe-beige polish with a dotting tool. Use a thin nail art brush or toothpick to swirl the blobs into wispy curves, then lightly drag the brush so the pattern fades as it moves down. Finish with a glossy top coat to make the swirls look glassy.
Editor's noteKeep the marble pieces smaller than you think — short nails need restraint.
Watch outDon’t marble the entire nail; it blurs the nail shape.
9. Cherry Dot Cluster at the Cuticle
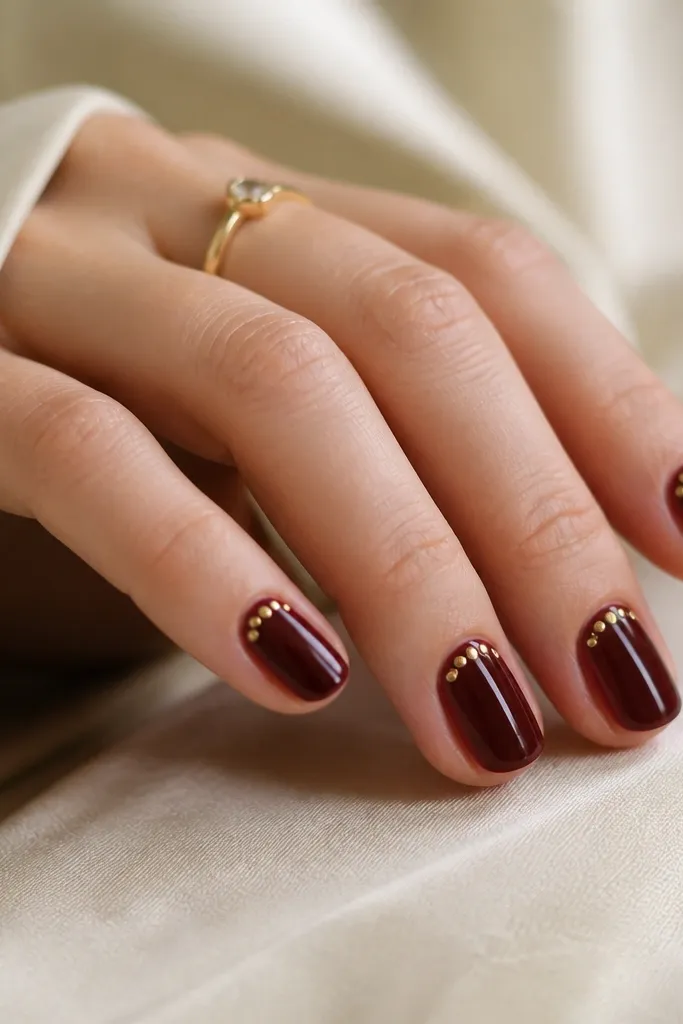
A dot cluster gives you that “studied” look without tracing lines. Placing it at the cuticle area keeps the design compact and makes the nail bed look longer. Gold dots read warm against dark cherry, and the tiny scale stays readable on short nails. I like this for evenings because it catches light when you move your hands, even if the rest of the manicure is simple.
Paint nails dark cherry red and let them dry. Use a dotting tool to add 6-10 tiny gold dots in a curved line about 1 mm above the cuticle, centered. Leave equal spacing between dots so it looks intentional. Seal with a glossy top coat, and cap the dots by painting over them gently so they don’t snag.
If your gold dots smear, wait until the cherry is fully dry and use a slightly thicker gold polish.
Avoid random dot placement across every nail — it looks cluttered on short length.
10. Cherry Negative Space Side Bow
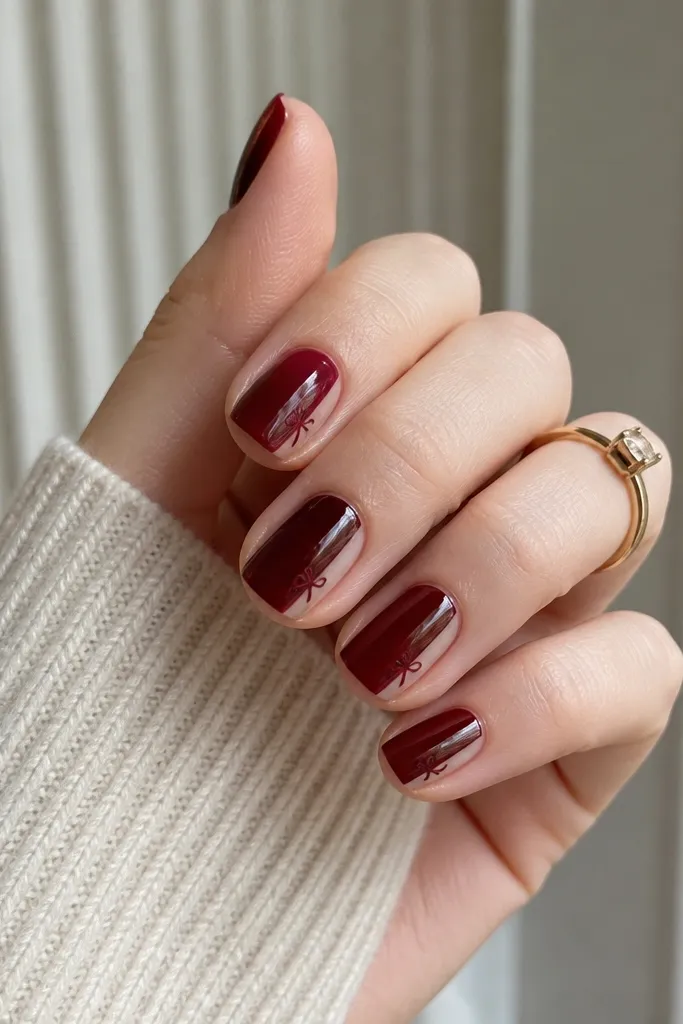
Negative space makes dark cherry feel lighter and gives your nails a graphic look that still reads easy. The trick is to keep the negative panel narrow and place the design on one side so it elongates visually. I’ve done this on short nails when I want something different but still office-friendly. On medium and deep skin tones, the bare nail looks clean and bright next to cherry.
Start with a clear base coat for the negative space areas. Paint dark cherry red on the nail, leaving a narrow vertical strip bare on one side. Add a small V shape using dark cherry over the bare strip near the center to create a bow-like accent. Clean the edges with a thin brush and finish with a glossy top coat on both the painted and bare areas.
Editor's noteUse nail tape to define the negative strip; freehand edges look uneven fast on short nails.
Watch outDon’t leave the negative space too wide — your nail bed will look shorter.
11. Cherry Ribbon Diagonal French
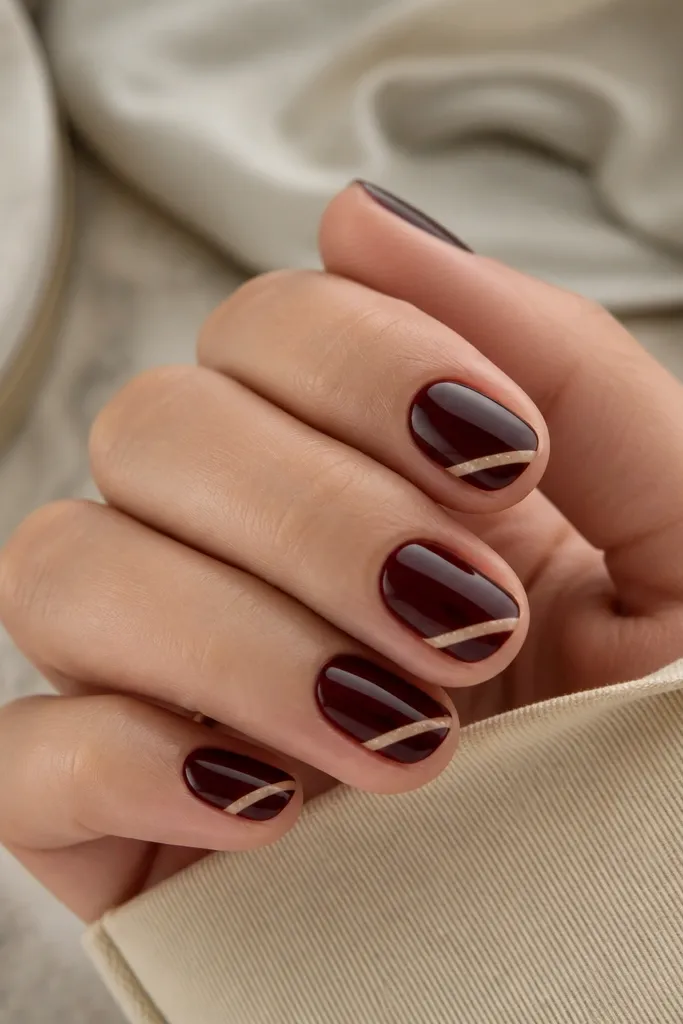
A diagonal French looks like a design, but it’s actually just tape and patience. The nude ribbon breaks up the dark cherry and makes the nail look slimmer, which is great if your nails sit wide or you want a longer hand look. The diagonal angle also flatters short nails because it pulls the eye toward the corner. I’ve worn this on days when I want something “cute” without doing full nail art.
Paint nails dark cherry red and let dry. Place a strip of nail tape diagonally from one side of the nail near the tip toward the center, then paint the exposed area with nude polish. Remove the tape while the nude is still slightly wet so the edge stays crisp. Add a final glossy top coat and cap the diagonal edge lightly with clear so it doesn’t peel.
Choose a nude that matches your natural nail or a pink nude — taupe can look dull against cherry.
Avoid a ribbon that starts too low; it should live in the top third.
12. Cherry Galaxy Pinpoint Stars
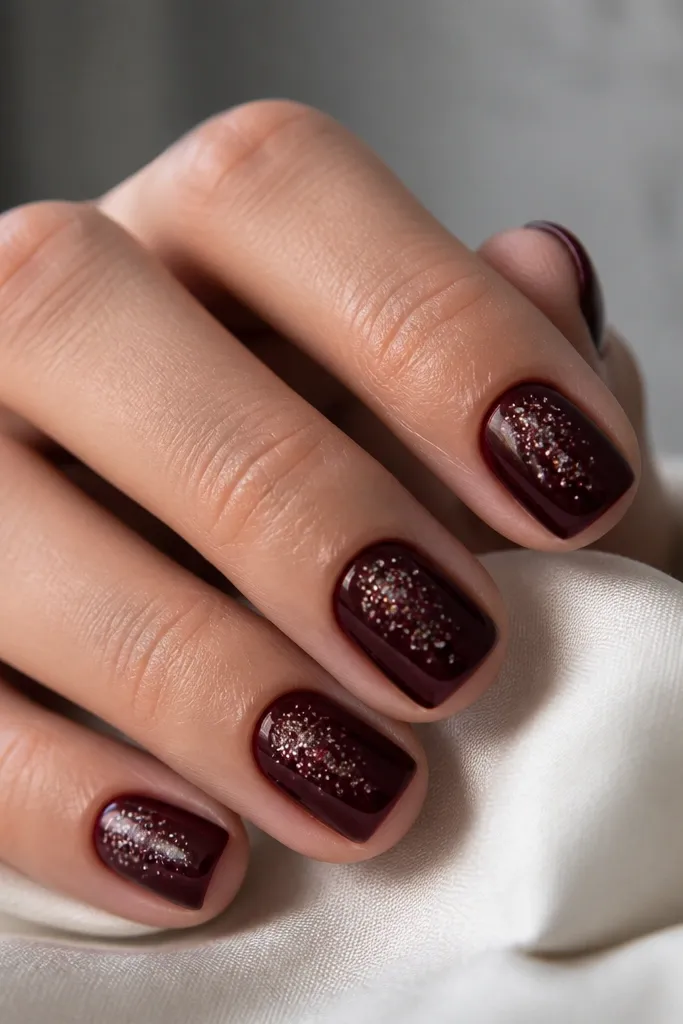
Galaxy nails on short length should be subtle, or they turn into a muddy speckle. Concentrating pinpoint stars near the center keeps it readable and elegant. Dark cherry is perfect for this because it acts like a deep “space” base, and the tiny silver specks look like light points. This style works for parties, winter events, and anytime you want sparkle without glitter chunks.
Paint nails dark cherry red in two coats. With a fine brush or toothpick, flick tiny dots of silver and a few white points onto the middle area of each nail. Keep the distribution uneven but controlled — more dots near the center, fewer toward the sides. Let it dry, then seal with a glossy top coat so the specks don’t catch fabric.
Editor's noteIf the specks look too dense, wipe your brush on a paper towel so you get smaller dots.
Watch outAvoid chunky glitter; it makes short nails feel rough and catches sleeves.
13. Cherry Outline Nail With Clear Inner Border
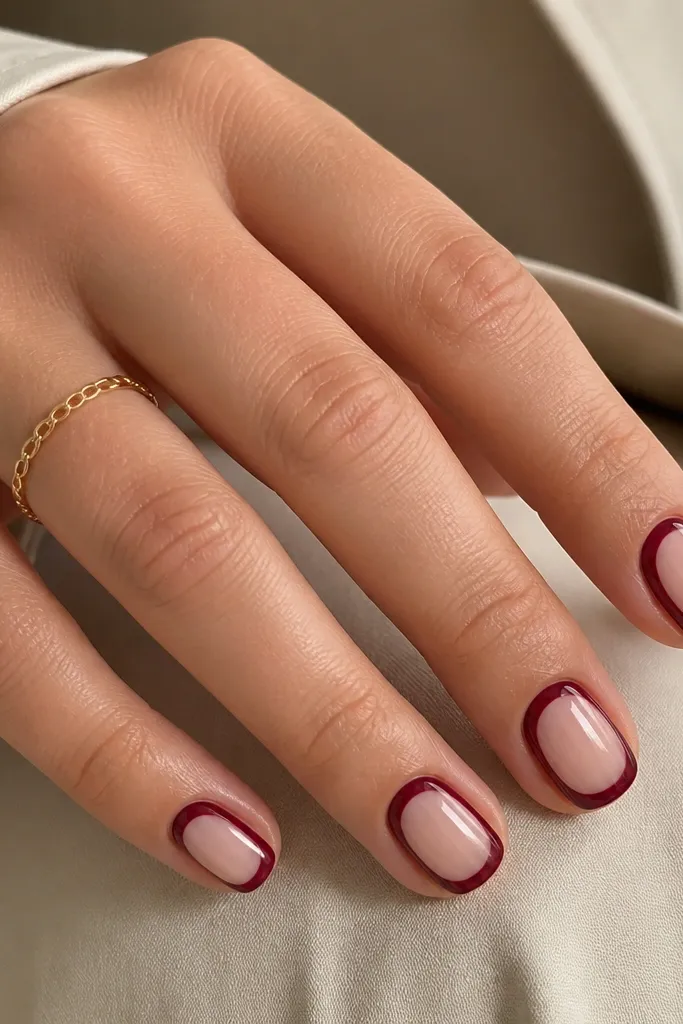
This is a graphic trick that makes short nails look custom-made. The dark cherry outline frames the nail bed and keeps the center lighter, so the nail looks longer and more structured. I like it on hands with short nail beds because the negative space gives you that “clean cut” look. It also looks sharp on all skin tones since the center can match your natural nail color.
Apply a nude or clear base coat to the whole nail. With a thin liner brush, draw a border along the nail edges and tip, forming a rounded rectangle shape. Fill only the outline with dark cherry, leaving the center clear. Clean up any thick areas with a cotton swab dipped in acetone, then seal with a glossy top coat to lock the border down.
Editor's noteUse a steady hand by bracing your wrist on a table; outlining is where DIY mistakes happen.
Watch outDon’t fill the whole nail with cherry; the outline needs empty space to look intentional.
14. Cherry and Nude Vertical Half-Strip
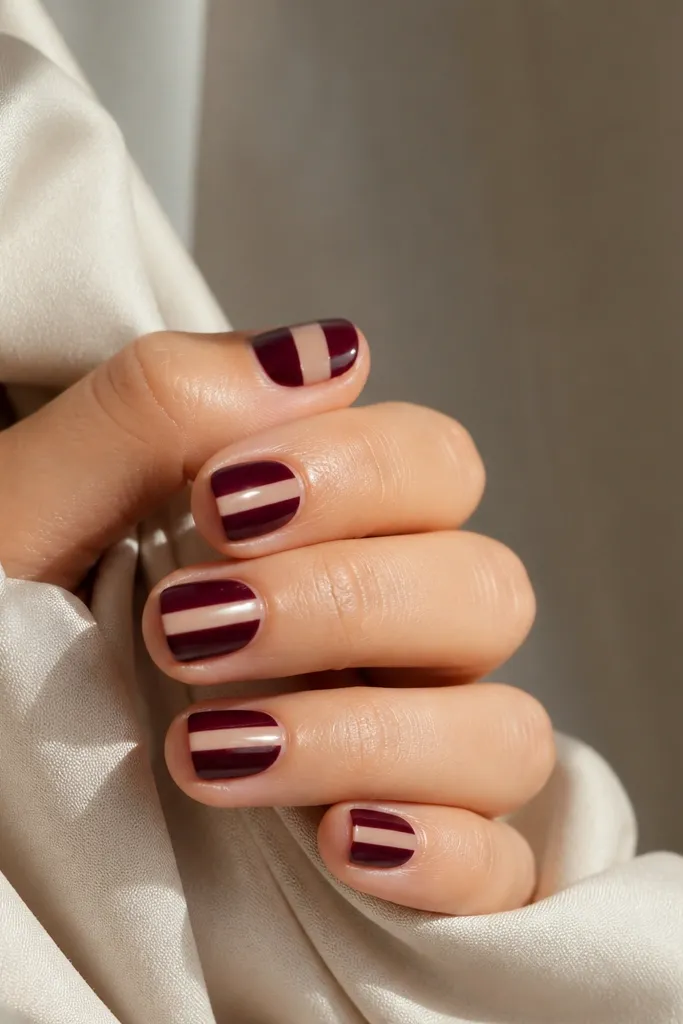
A single vertical strip turns dark cherry into a lengthening manicure with almost no work. The nude strip acts like a highlight line, and because it’s centered it makes the whole nail look balanced. This is a great choice if you’re tired of full color but don’t want complex art. I’ve worn it on short nails with slight ridges — the darker polish camouflages them while the nude strip keeps the design from looking heavy.
Paint nails dark cherry red and let it dry. Use tape down the center to create a narrow nude stripe, then paint the exposed stripe with a sheer nude or milky pink. Remove tape carefully once the nude is set enough to hold its shape. Finish with a glossy top coat and cap the stripe edges so they don’t lift.
Editor's noteMake the stripe about one-third of the nail width on short nails. Any wider and it starts to look like a stripey band.
Watch outAvoid uneven stripe width across nails; it makes the set look sloppy.
15. Cherry Skittle With One Matte Accent
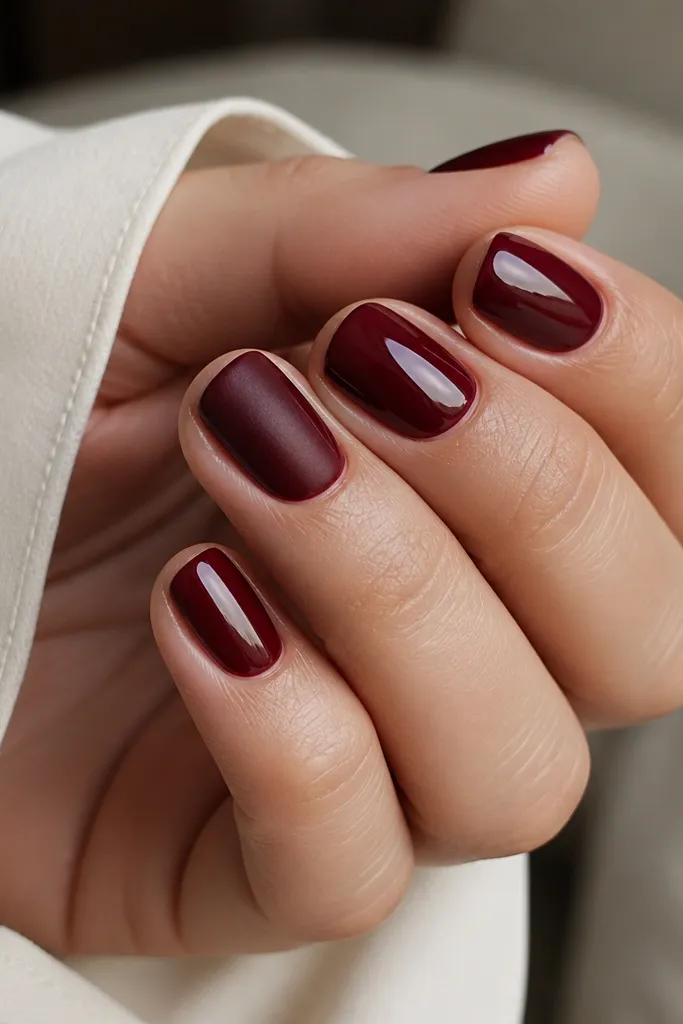
Skittle sets aren’t complicated here — you just change the finish. Matte on one nail makes the cherry look richer and gives your manicure variety without changing the color. I like this when I’m doing my nails at home because it’s forgiving: if one nail art detail is slightly off, the finish difference covers it. It flatters every skin tone because the contrast is all about texture and light.
Paint all nails dark cherry red and let them dry. Apply glossy top coat to four nails. On the fifth nail, apply a velvet/matte top coat instead, and then add a tiny glossy ring right at the cuticle. Seal the matte nail lightly so it doesn’t get patchy, but keep the rest matte for contrast.
Editor's notePick one accent nail consistently, like ring finger, so the look stays intentional every time.
Watch outAvoid matte on more than one nail; two matte shades can make the set look unfinished.
16. Cherry Foil Flake Corner
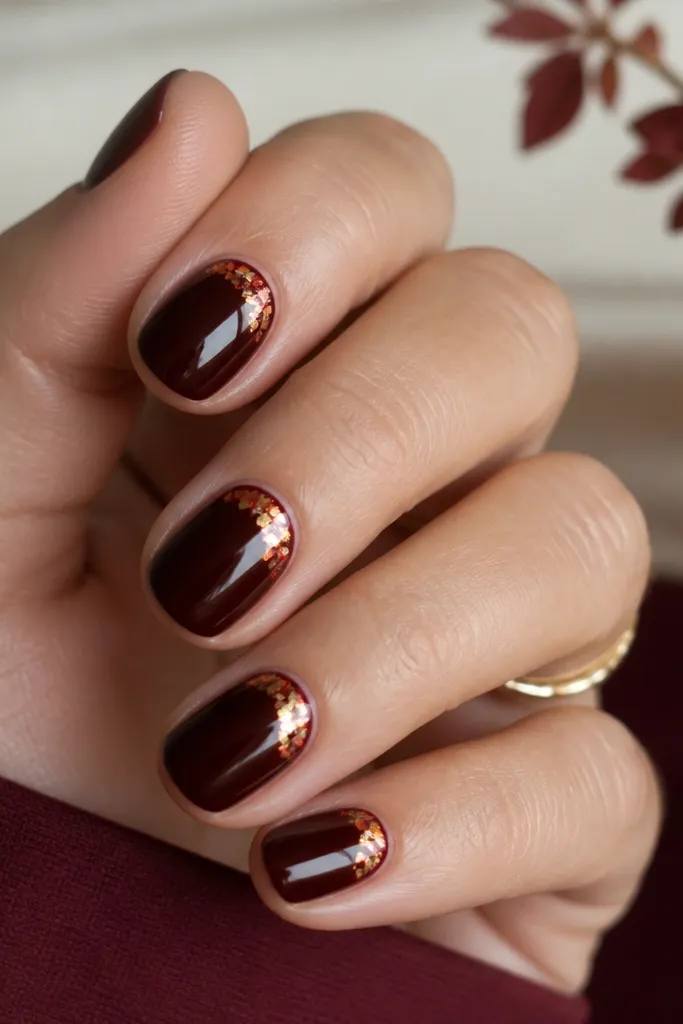
Foil flakes look best when they’re tiny and placed like a highlight. On short nails, a corner placement keeps the art from crowding the nail bed and keeps the design readable. I like red-gold foil with dark cherry because it mirrors the undertone and adds warmth. This looks great for dates and holiday parties because it catches light even without glitter.
Paint nails dark cherry red and let them fully dry. Dab a small amount of foil glue or tacky gel adhesive in the upper outer corner of each nail (or just two nails if you want it lighter). Press foil flakes gently so they stick, then trim excess with a soft file. Seal with glossy top coat, making sure you don’t drag hard over the foil.
Editor's noteUse tiny pieces of foil, not big shards — big foil on short nails lifts and looks chunky.
Watch outAvoid placing foil at the cuticle; it can peel faster there.
17. Cherry Floral Micro Stamp
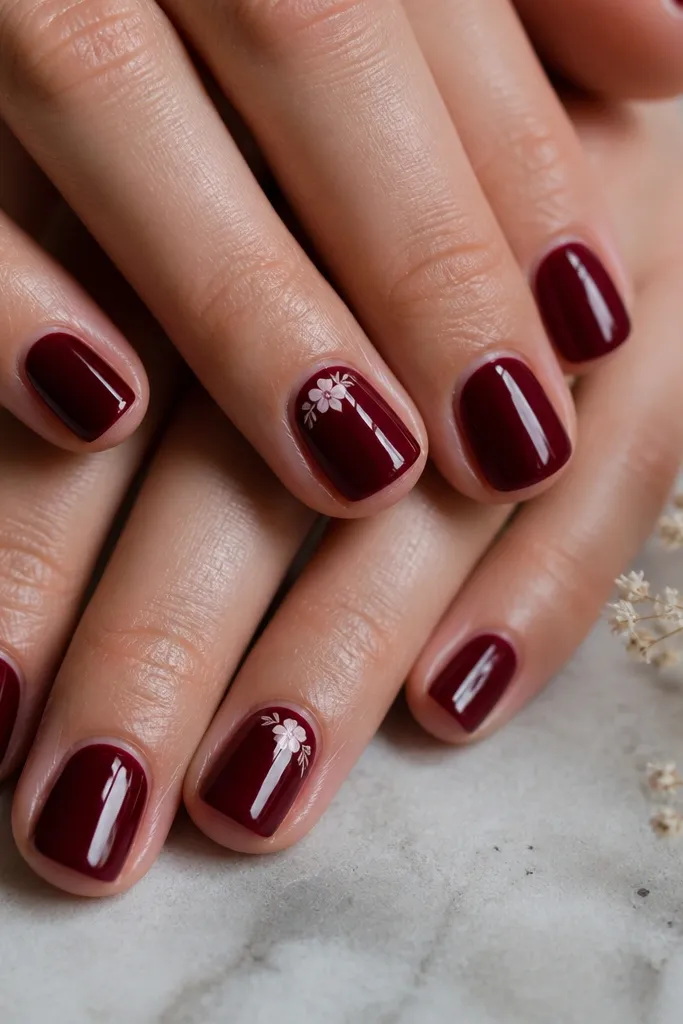
Micro stamping turns dark cherry into something sweet without adding length. Choose a white or soft ivory stamp so it stays crisp against the deep red. I like this on short nails because the floral sits small and doesn’t smear into a blob. It looks especially cute on fair and light-medium skin, but it also works on deeper tones when the stamp is clean and opaque.
Paint nails dark cherry red and let them dry. Apply a stamping plate image using a white polish, then scrape the excess off firmly. Press the stamper onto the nail near the cuticle, staying in the top third. Clean around the edges with a small brush and finish with a glossy top coat to lock the design in place.
Editor's noteIf your stamp looks gray, switch to a thicker opaque stamping polish.
Watch outAvoid stamping too low toward the tip; it makes the nail look shorter.
18. Cherry Crosshatch Accent Lines
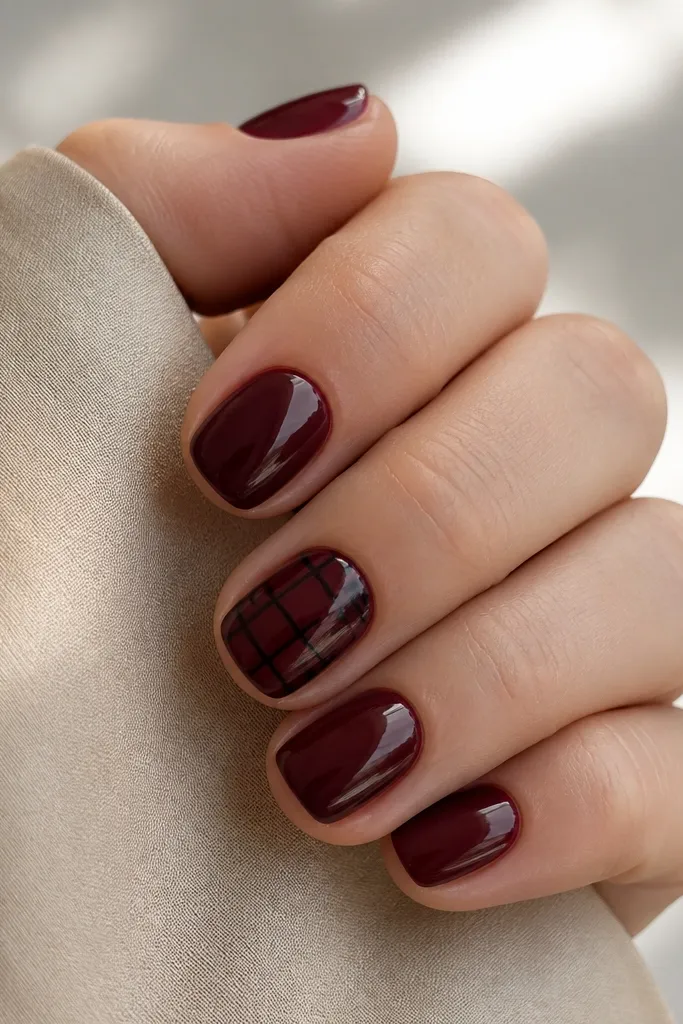
Crosshatch looks like fabric texture, and on short nails it reads as design, not clutter, when the lines stay thin. Black against dark cherry gives contrast without turning the manicure into a cartoon. I like this on the middle or ring finger because the pattern sits in the center where you see it most. It’s flattering on hands with shorter nail beds because the crosshatch stays compact and doesn’t widen the nail.
Paint all nails dark cherry red. On one accent nail, use a fine liner brush with black polish to draw vertical lines spaced about 1-2 mm apart, then add horizontal lines to form tiny squares. Keep the crosshatch within the center area, not the full nail. Let it dry, then apply glossy top coat in two thin layers so the lines don’t smear.
Use a liner brush, not a dotting tool, for crosshatch — it keeps the grid sharp.
Don’t overfill the pattern; too many lines make it look like a stain.
19. Cherry Crystal Dot Border
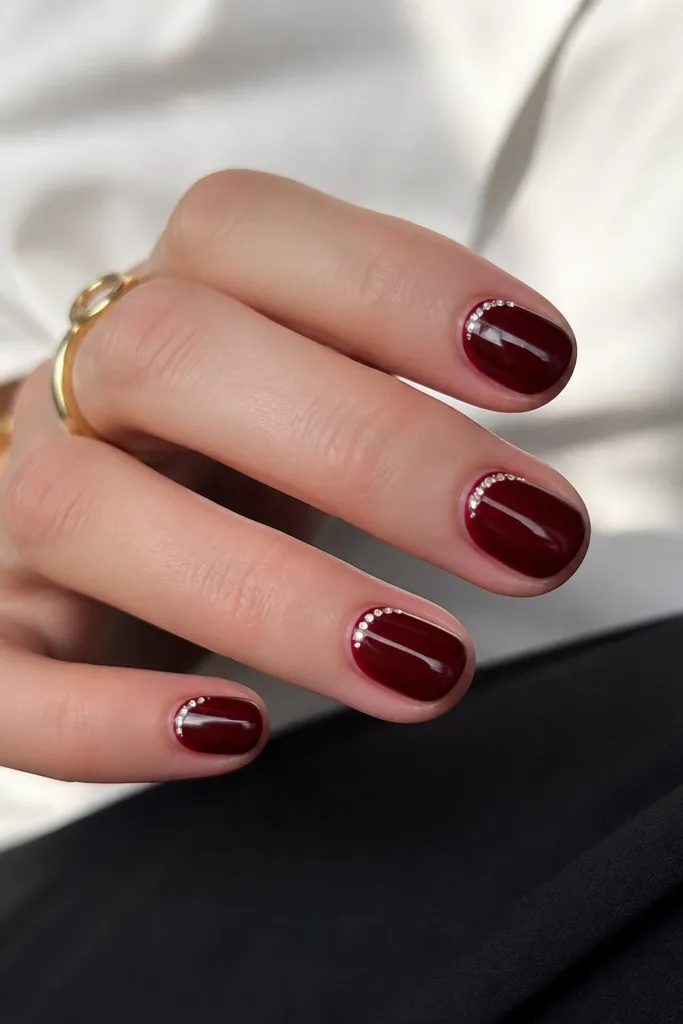
A tiny crystal border makes dark cherry red look like jewelry. On short nails, you want the crystals close to the tip or one side so they lift the light without taking up the whole nail. Clear rhinestones work with every skin tone because they reflect whatever light is around you. I’ve worn this for events where my hands move a lot, and it still looks neat because the border stays controlled.
Paint nails dark cherry red and let them dry. Add a small amount of gel glue or tacky adhesive along one side near the tip, then place 3-5 tiny clear rhinestones in a line. Press gently with a dotting tool so they sit flat. Cure if using gel, then seal with glossy top coat and pay extra attention to the edges of each stone.
Editor's notePlace stones only on two nails if you want it subtle; all five can look heavy on short length.
Watch outAvoid oversized stones; they snag and make the manicure feel rough.
20. Cherry Stained Glass Half Tip
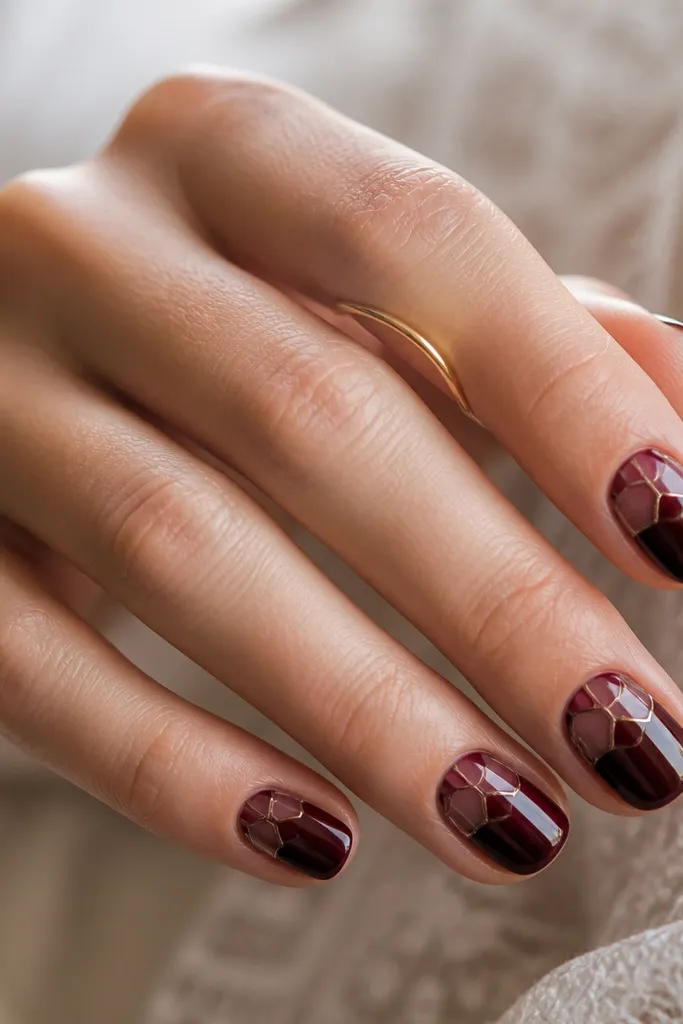
Stained glass is a neat way to make dark cherry look dimensional without adding length. The secret is using translucent shades and separating lines so it reads like glass panels instead of blobs. On short nails, half-tip placement keeps it tidy and makes the nail look like it has a built-in highlight. This looks amazing on medium to deep skin tones because the translucent burgundy glows when light hits it.
Start with a dark cherry base coat, then paint a clear gel layer over the top half of the nail to act as the “glass.” Add thin lines using a dark brown or black gel liner to create panel edges. Fill each panel with translucent burgundy or a darker cherry shade, leaving some clear space for shine. Cure, then finish with a glossy top coat for a smooth, glassy surface.
Keep panel sizes small — big panels on short nails look like a smear.
Avoid thick liner lines; they make short stained glass look chunky.



