
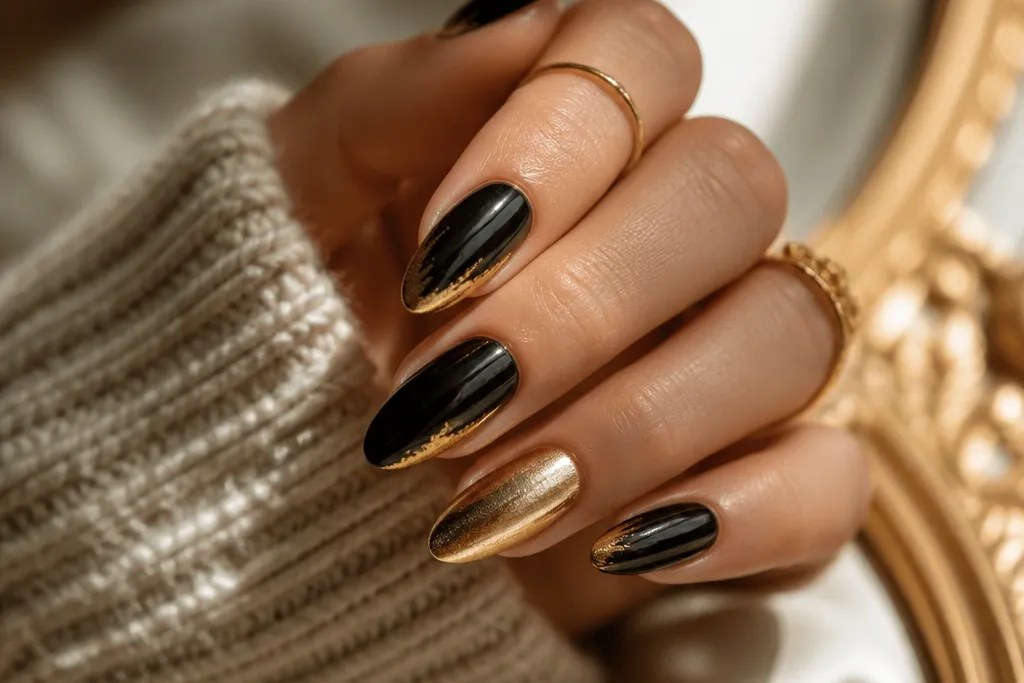
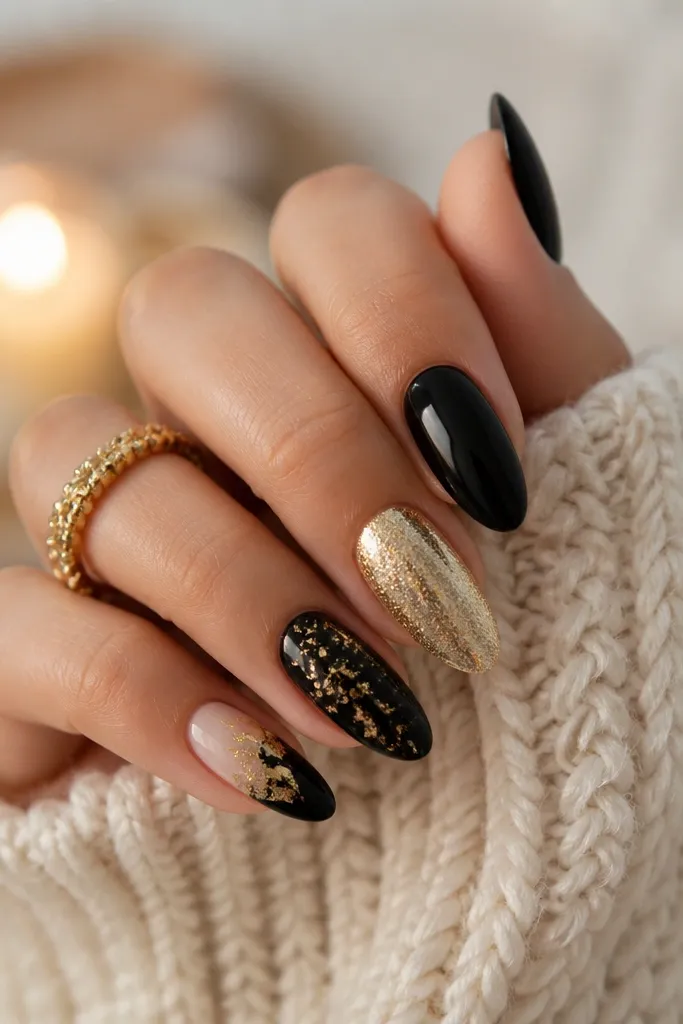
1. Matte Black Base With Cuticle Foil Half-Moons
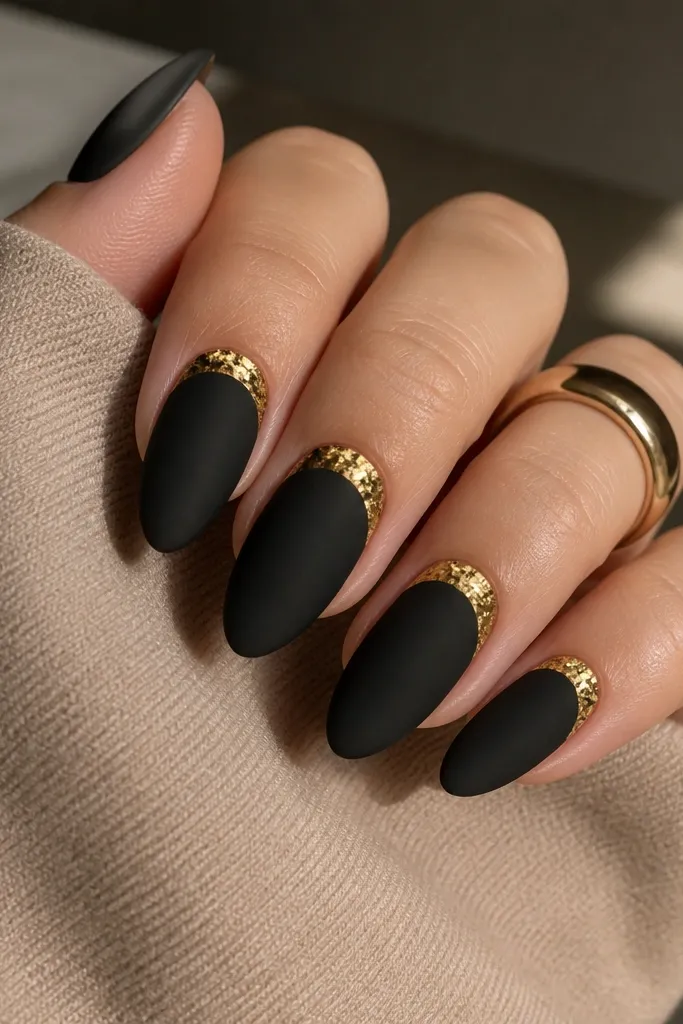
This is the cozy glam set I reach for when I want black-and-gold without the design feeling busy. The matte black kills glare and makes the gold feel warmer, like candlelight. The foil half-moon at the cuticle also makes your nails look longer because it frames the nail base. I’ve done this on short-to-medium almond extensions and it still looks neat at week two because the gold is anchored near the cuticle. It flatters most skin tones, especially warm undertones, because yellow-gold reads soft against matte black.
Start by prepping and filing your almond shape — keep the sides smooth and the tip evenly tapered. Apply a matte black gel base in two thin coats, curing fully each time. Then use a small curved brush or sponge to place warm yellow-gold foil gel in a half-moon shape around the cuticle, stopping about 1 mm before the sidewalls. Press the foil lightly so it grabs, cure, and finish with a matte or satin top coat that keeps the gold slightly dimensional. If you want extra glow, add a micro-glitter top coat only over the foil area.
Editor's noteIf the foil looks too patchy, use a second layer of foil gel just on the center of the half-moon, not the edges.
Watch outDon’t drag gold gel down the sidewalls — it makes the manicure look sloppy and makes the foil lift faster.
2. Glossy Black With Thin Gold French at the Tip
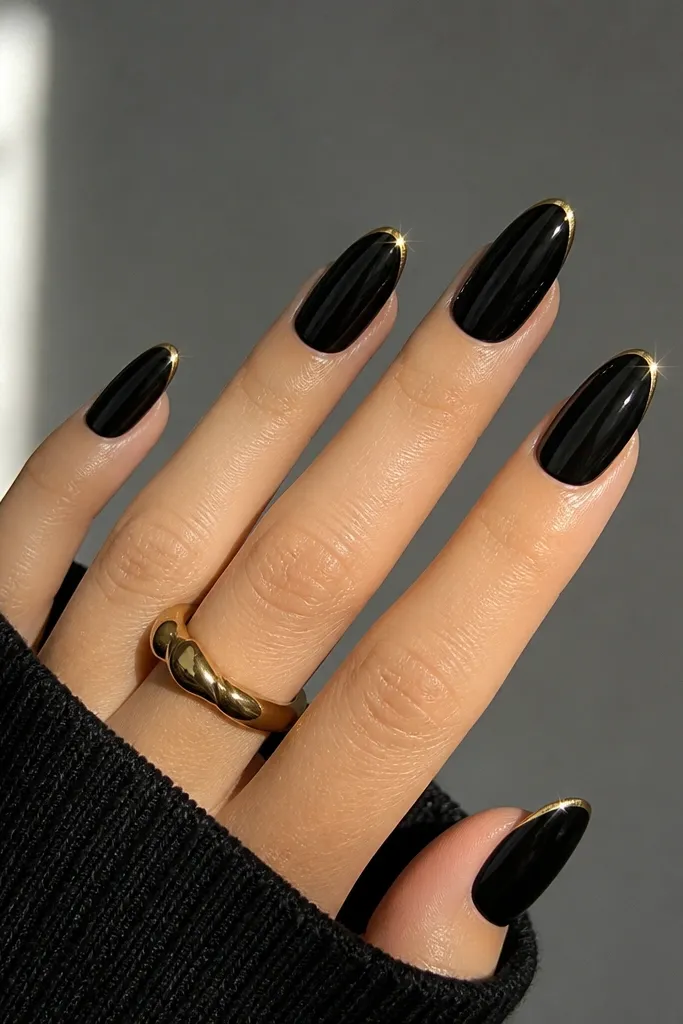
This design looks expensive because it keeps the gold line narrow and precise. Glossy black reflects light, so the thin gold reads like jewelry rather than decoration. The thin French at the tip elongates almond nails and keeps the set wearable for office days. I like it on hands that already have longer fingers because it adds a clean highlight instead of adding width. On cooler skin tones, the yellow-gold line still works, but keep the gold warm, not pale.
Paint glossy black gel in two coats and cure until it’s fully even, no streaks. Use striping tape or a French guide to mark a very slim arc at the tip — aim for about 1.5 mm of gold line from the edge inward. Apply metallic gold liner gel in that arc, cure, and remove any tape carefully. For the sparkle accent, dab a tiny amount of fine gold glitter gel at the extreme tip only, then top coat over it. Clean the edges with a lint-free wipe and alcohol before final cure so the gold stays crisp.
Use striping tape for the first attempt; once you nail the line width, you can freehand it quickly.
Don’t make the French too thick — chunky gold on a glossy black base looks heavy and cheap.
3. Cozy Knit Lines Over Matte Black
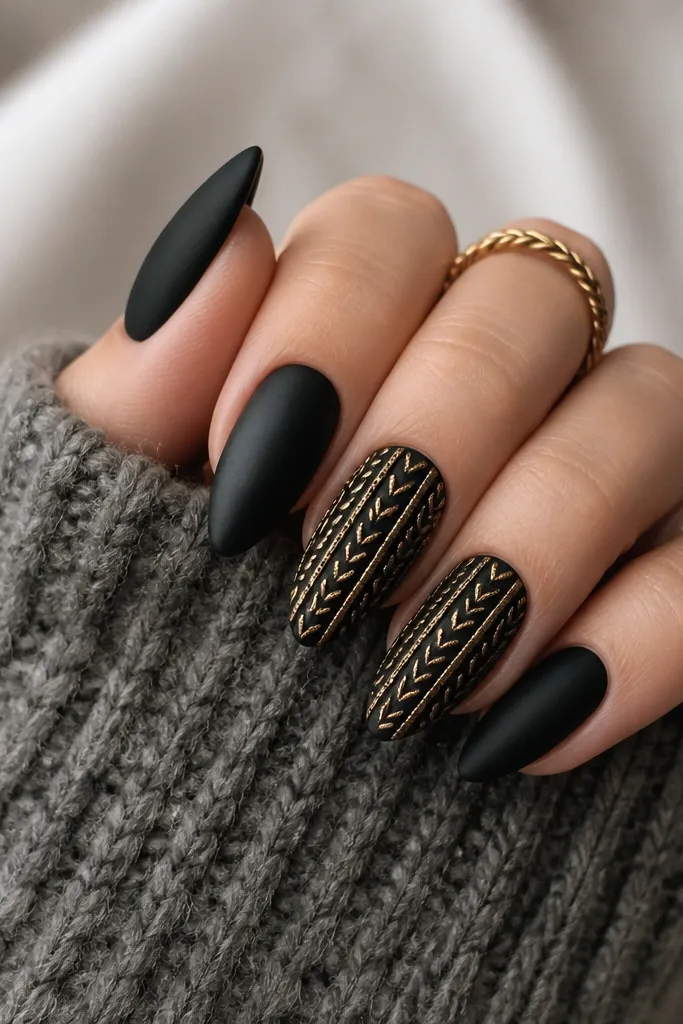
Knit texture is the fastest way I know to make black-and-gold feel cozy instead of icy. The matte black gives a soft fabric look, and the gold “cable” lines create a warm, winter sweater vibe. This flatters hands that look best with texture because it adds detail without covering the whole nail. It also looks great on shorter almond tips because the texture draws the eye along the center line. If you wear cozy neutrals like cream, camel, or charcoal, this set pairs perfectly.
Start with matte black gel base in two coats and cure fully. On the accent nails, outline a center cable line with a thin warm gold liner gel — keep it straight from cuticle to tip. Add diagonal “stitches” on either side using a dotting tool or liner brush, spacing them about one dot width apart. For the knit effect, build the lines slightly thicker at the crossing points, cure, then seal with a thick gel top coat. Finish all nails with matte top coat except the knit lines, which look best with a satin top coat so they catch light.
Editor's noteIf the lines feel too flat, add a second thin coat only over the cable crossings before top coat.
Watch outDon’t cover the entire nail in knit — too much texture makes it look bulky and uneven.
4. Black Marble Veins With Gold Leaf Flecks
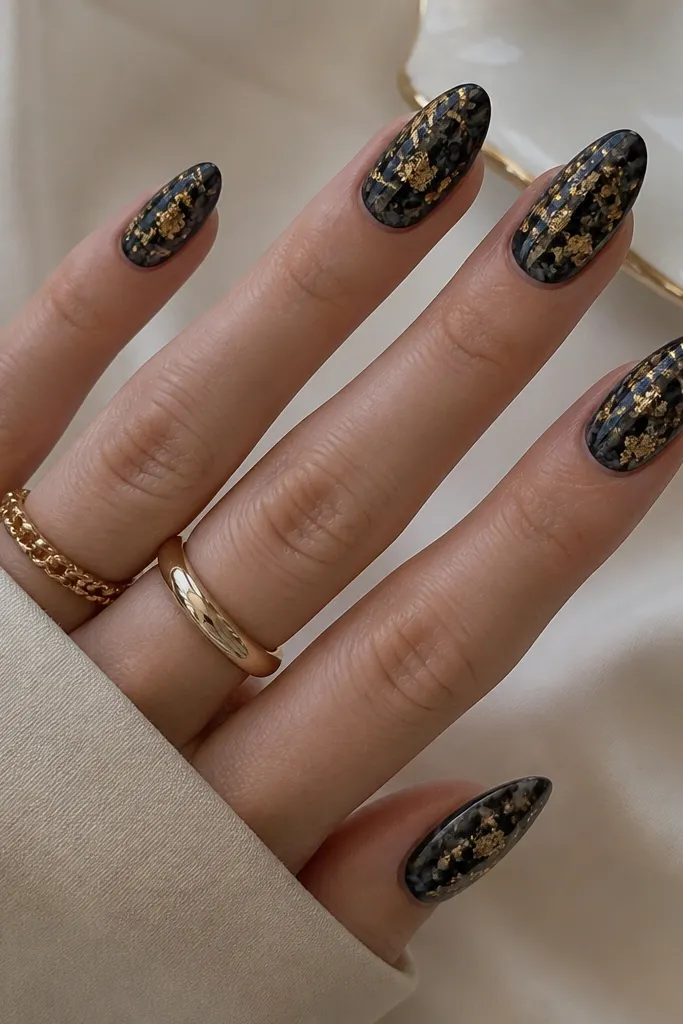
Marble nails are cozy glam when the veins are subtle and the gold leaf is scattered, not pasted in big chunks. The smoky black background keeps it grounded, and the gold leaf flecks add that warm “natural stone” feeling. This looks flattering on most nails because marble hides minor unevenness better than solid color. I’ve used this set for fall weddings and it still looks good in photos because the veins move with the light. It also looks great on medium skin tones because the gold leaf warms the whole look.
Apply a deep black base gel and cure. Create veins with a thin liner brush using a mix of black gel and a tiny bit of gray gel (or use a pre-made marble gel) — pull lines lightly, then feather the edges with a dry brush. While the base is still tacky or with a clear gel overlay, place small gold leaf pieces with tweezers and press gently. Cure, then seal with a glossy top coat for glassy stone depth. On one accent nail, put the densest gold leaf near the tip and keep the cuticle area lighter.
Editor's noteUse a dry brush to soften vein edges — sharp lines read like doodles, not marble.
Watch outDon’t use glittery gold flakes — they look like craft supplies against marble.
5. Matte Black With Glossy Gold Swirl Accent
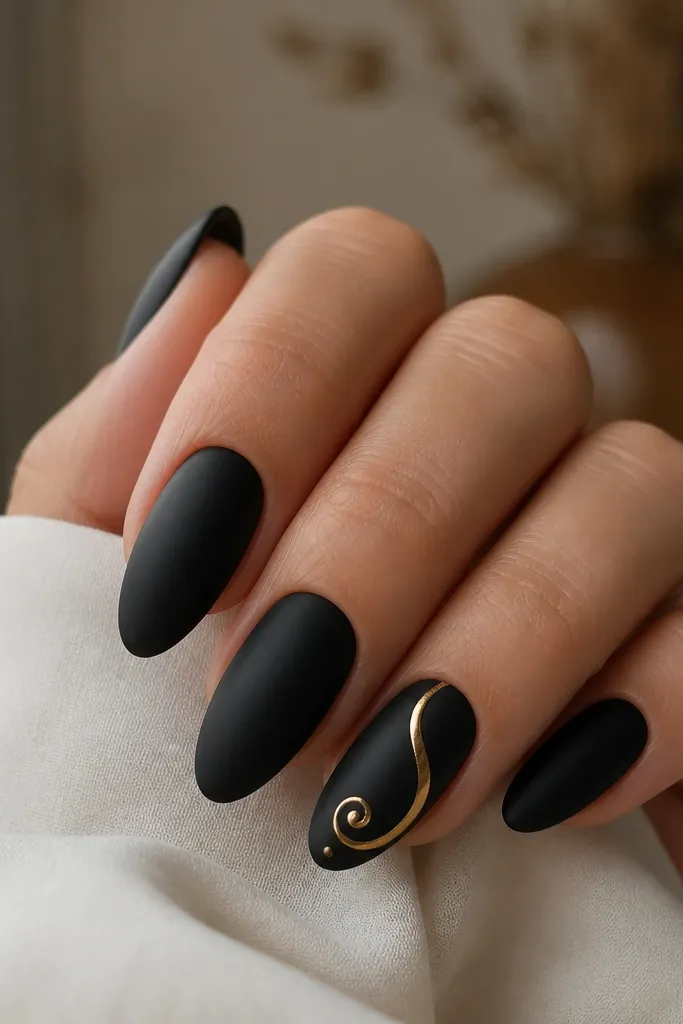
This is minimal cozy glam with personality. Matte black keeps it soft, and the glossy gold swirl looks like a highlight drawn with a pen. The swirl gives movement, which makes your hands look more graceful, especially if your fingers are on the shorter side. I like doing this with one accent nail per hand so it feels intentional. The glossy gold also makes the set look clean even when your nails grow out.
Paint all nails matte black in two coats and cure. Choose one or two accent nails and apply a thin layer of clear gel where the swirl will sit to help it glide. With a detail liner brush, draw a gold swirl — start close to the cuticle but stop short by about 1 mm, then loop toward the tip and end with a tiny dot. Cure and wipe tacky residue if your system requires it. Finish with matte top coat on the plain nails and a glossy top coat over the swirl so it stays reflective.
Editor's notePractice the swirl on a nail form first — the curve needs one steady pull, not lots of retracing.
Watch outDon’t outline the swirl twice; thick gold edges look like a sticker.
6. Black Velvet Effect With Gold Studded Crescent
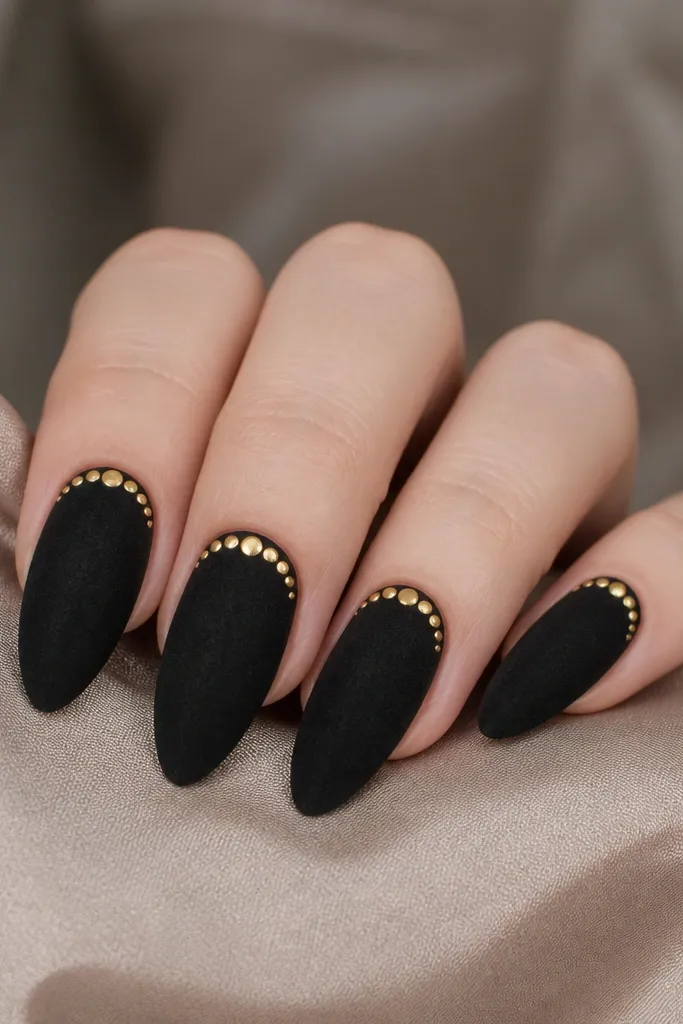
Velvet-black is the coziest base you can put under gold. It absorbs light, so the gold studs feel warmer and more tactile, like jewelry set into fabric. The cuticle crescent is also flattering because it visually lifts the nail base and makes the almond shape look sharper. I’ve seen this look incredible on hands with dry cuticles because the velvet finish hides tiny texture. It works well for parties, holiday dinners, and date nights.
Start with a black velvet gel layer and cure according to your product instructions. Lightly dust velvet powder over the tacky surface, then tap off excess and cure. Apply a thin clear gel line where the crescent will sit, about 1 mm from the sidewalls, then place small flat gold studs along the curve using tweezers. Add a tiny extra stud at the center of the crescent for balance. Seal with a velvet-safe top coat that doesn’t flatten the texture — or use a thin gel around the studs only if your top coat is too smoothing.
Use smaller studs on the side edges so the crescent stays smooth when your nails curve.
Don’t cap velvet nails with thick glossy top coat — it ruins the fuzzy look.
7. Gold Chrome Tips Over Black Smoke Ombre
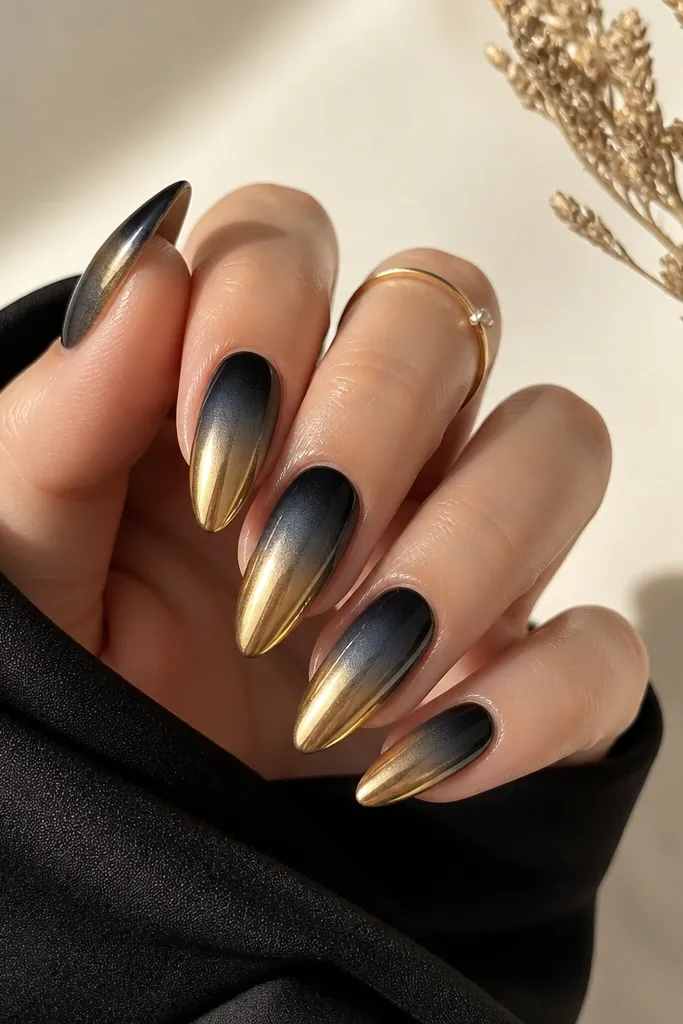
This set looks like you wrapped your nails in smoke and then finished them with gold. The black smoke ombre is softer than a hard black block, so it reads cozy instead of aggressive. Gold chrome at the tips makes the almond shape pop and gives that “just got a manicure” shine even as the nails grow. I love this on people who want black-and-gold but hate heavy designs on every nail. It flatters most skin tones because the smoke base creates a neutral cushion.
Apply a sheer base or nude-to-sheer layer near the cuticle, then blend black gel into it using a makeup sponge, curing between layers if needed. Build the smoke effect so it’s darkest near the tip and lighter near the cuticle. Add gold chrome powder only on the last third — use a sponge applicator and keep the boundary slightly angled so it looks natural. Seal with a chrome-friendly top coat that keeps the mirror finish. Clean the sides with a brush dipped in alcohol so chrome doesn’t smear.
Keep the chrome boundary soft by wiping the sponge off on a paper towel before you apply the final edge.
Don’t put chrome too close to the cuticle — it makes regrowth look messy fast.
8. Black Base With Gold Lattice Accent
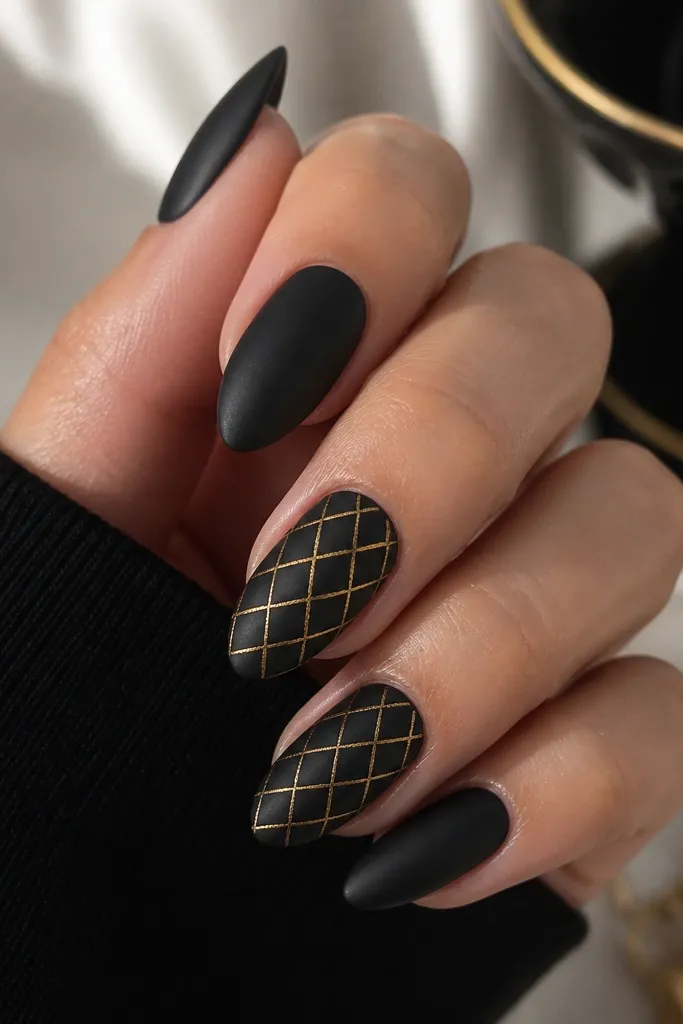
Lattice lines make black-and-gold feel structured and cozy at the same time. The matte black background keeps it warm, while the gold grid adds a tailored look that feels like a knit pattern without the bulk. This is especially flattering for hands with wider nail beds because the lattice creates vertical lines that slim the nail visually. I’ve worn this with chunky sweaters and it looks like a deliberate outfit detail. It also photographs well because the lines catch light along their edges.
Paint all nails matte black and cure. On accent nails, mark a central rectangle area that’s about 70% of the nail length and 60% of the width. Use a thin gold striping gel to draw one set of diagonal lines, cure, then add the second set crossing them to form diamonds. Keep the line thickness consistent — aim for a hairline width. Finish with matte top coat over the black and a satin top coat over the lattice so the gold stays slightly reflective.
Use nail tape guides for the first two lines so your grid stays symmetrical.
Don’t let the lattice touch the sidewalls; it makes the design look crowded and messy.
9. Gold Foil Drip Over Matte Black
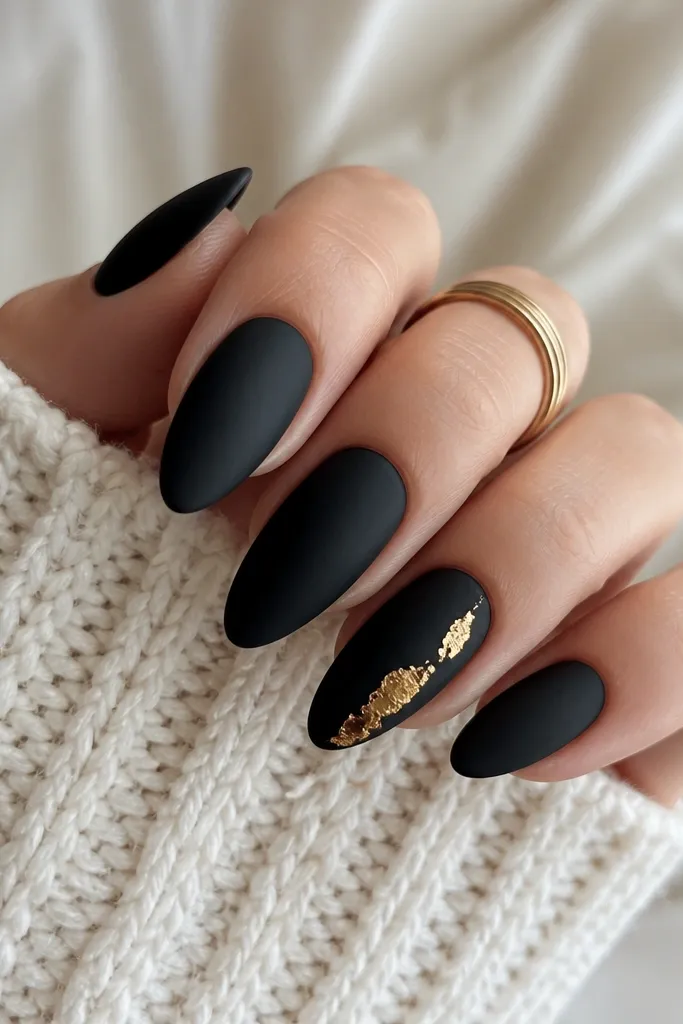
Drip foil looks cozy glam when the base is matte and the drip is controlled. The matte black gives you that soft, muted background, while the foil drip adds warmth and drama. This design is great if you want black-and-gold that still feels artsy without covering every nail. It flatters almond shapes because the drip follows the natural center line and makes the nail look longer. If your wardrobe is mostly black, this set adds warmth without changing your style.
Apply matte black to all nails and cure fully. Pick one accent nail and add a small clear gel spot at the center, about halfway between cuticle and tip. Tear or cut warm yellow-gold foil into small irregular strips, then press them onto the clear gel so they form a vertical drip. Build the drip by adding a second smaller strip below the first, curing as needed. Seal with a matte top coat overall, but use a satin top coat only over the foil so it keeps that molten shine.
Keep the biggest foil piece near the middle — that’s what makes the drip look intentional instead of accidental.
Don’t use thick glitter gel for drip; it looks like party confetti on matte black.
10. Black And Gold Half-Glitter Cuticle Fade
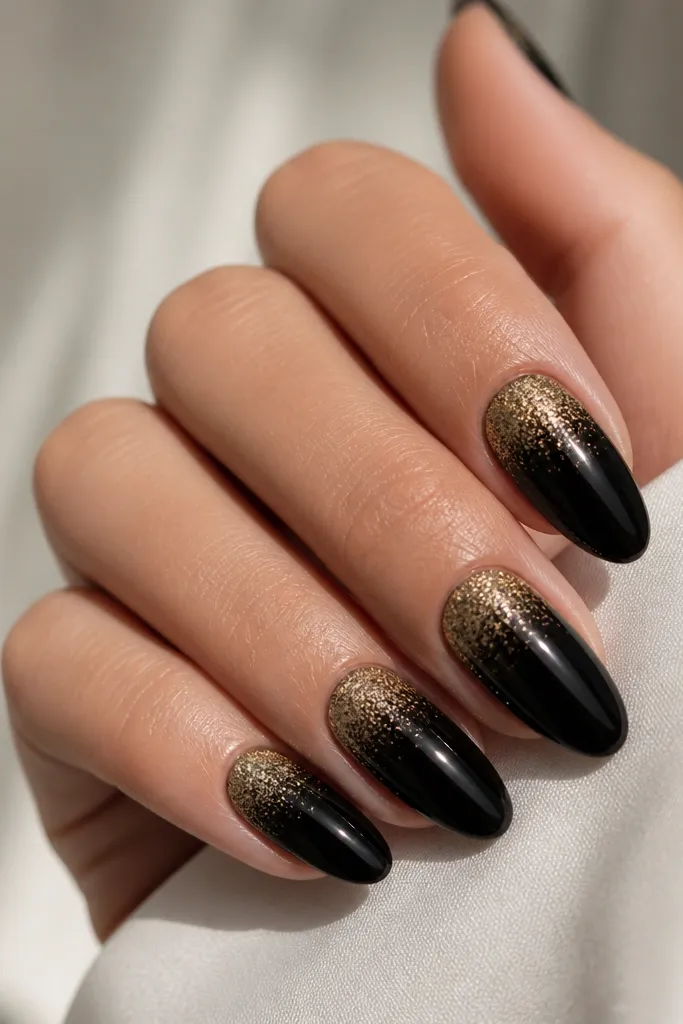
This is the cozy glam version of an ombre that stays clean. The micro-glitter near the cuticle looks like a warm shimmer, and the fade prevents the design from getting too loud. Because the glitter sits in the upper half, it visually balances the almond tip and makes nails look elegant even on shorter lengths. I like this for work and holiday parties because it feels festive without needing big art. It also flatters hands with uneven nail texture since the glitter draws attention upward.
Start with glossy black gel in two coats and cure. Apply a thin layer of clear gel right at the cuticle area on each nail, leaving a 1 mm gap from the sidewalls. Sprinkle or paint gold micro-glitter gel from the cuticle downward about halfway, then feather the edge with a clean brush while it’s still tacky. Cure and seal with a glossy top coat that locks the glitter down. If you want extra cozy, use warm yellow micro-glitter instead of silver.
Editor's noteUse a fan brush to dust off loose glitter before curing so you don’t get sparkle bumps.
Watch outDon’t let the glitter reach the sidewalls — it creates a messy halo when you wash your hands.
11. Black Starry Night With Gold Constellation Dots
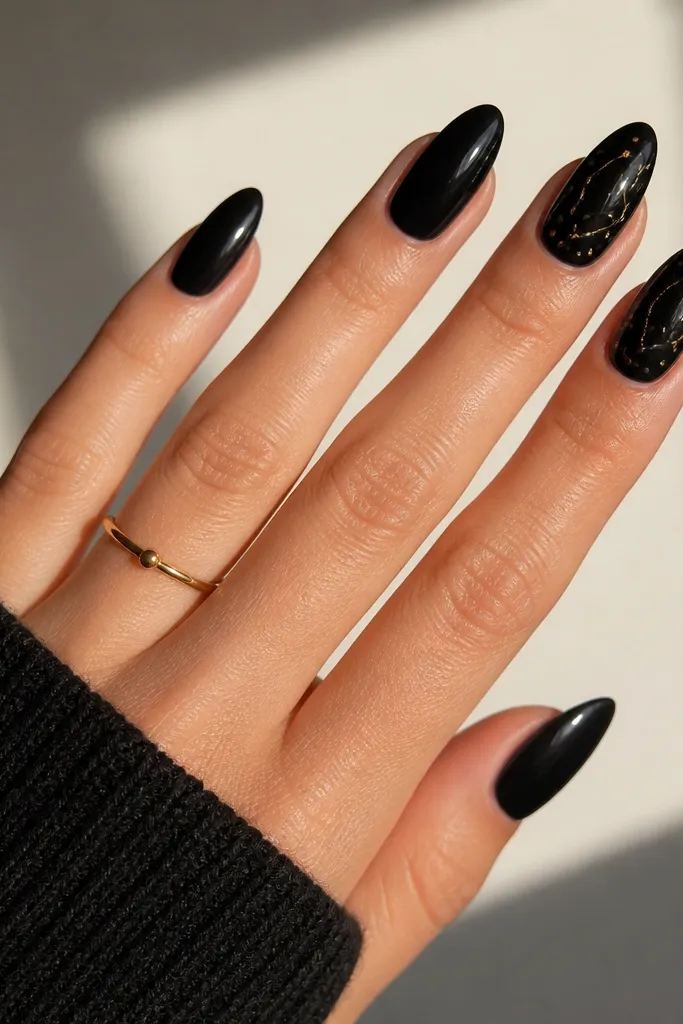
Starry night nails are cozy glam when the stars are gold and the black is clean. The deep black base makes the gold dots pop, and the constellation layout feels playful without looking childish. I like doing this when I’m wearing gold jewelry, because the dots match the warm metal tone. This design flatters almond nails because the dots can be placed along the natural center curve, making the nail look longer. It also looks good on fair and medium skin tones because the contrast is crisp.
Paint all nails deep black glossy and cure. On accent nails, map out a loose constellation with a dotting tool: place 1 larger gold dot near the middle and 4 to 6 smaller dots around it. Add a couple thin gold lines with striping gel to connect dots, keeping lines short so they don’t smear. Cure, then apply a glossy top coat to the constellation nails so the gold looks dimensional. Clean the edges with a small brush to keep the dot placement sharp.
Editor's noteUse a toothpick for the smallest dots; it gives you more control than a big dotting tool.
Watch outDon’t cover the whole nail with dots; it turns into glitter overload fast.
12. Gold Outline Frame Over Matte Black Negative Space
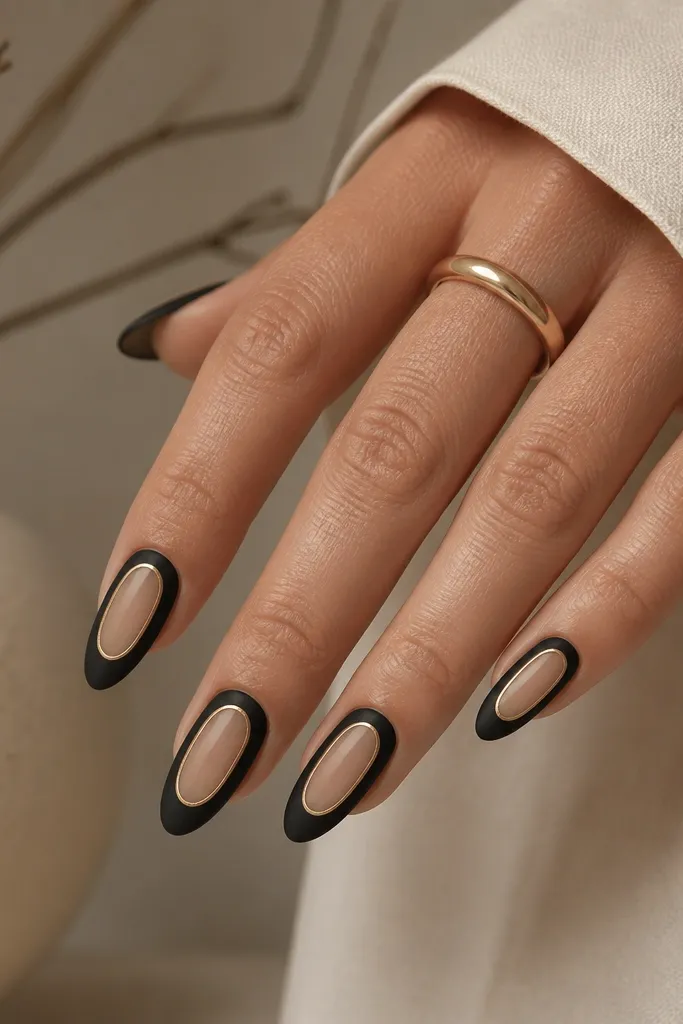
Negative space makes this set feel modern and cozy at the same time. Matte black around the edges looks soft, and the gold outline pulls everything together like a picture frame. This flatters shorter almond nails because the clear center makes the nail look longer and slimmer. I’ve worn this for events where I wanted something different but still classy. It also looks good on hands with warm undertones because yellow-gold warms the skin.
Start with matte black gel on the whole nail, then place a small strip of nail tape or a clear gel stencil in the center to keep the negative space. Cure, remove the stencil carefully, and wipe the exposed center. Apply a thin warm gold striping gel along the edges of the negative space, forming a rounded rectangle outline. Cure and clean any gold on the skin with a cotton swab. Finish with a matte top coat on the black areas and a clear glossy top coat over the negative window so it stays crisp.
If your negative space looks crooked, adjust the gold outline, not the matte — the outline is easier to correct.
Don’t leave gaps between black and outline; it looks like the design is unfinished.
13. Black Gloss With Gold Foil Confetti Specks
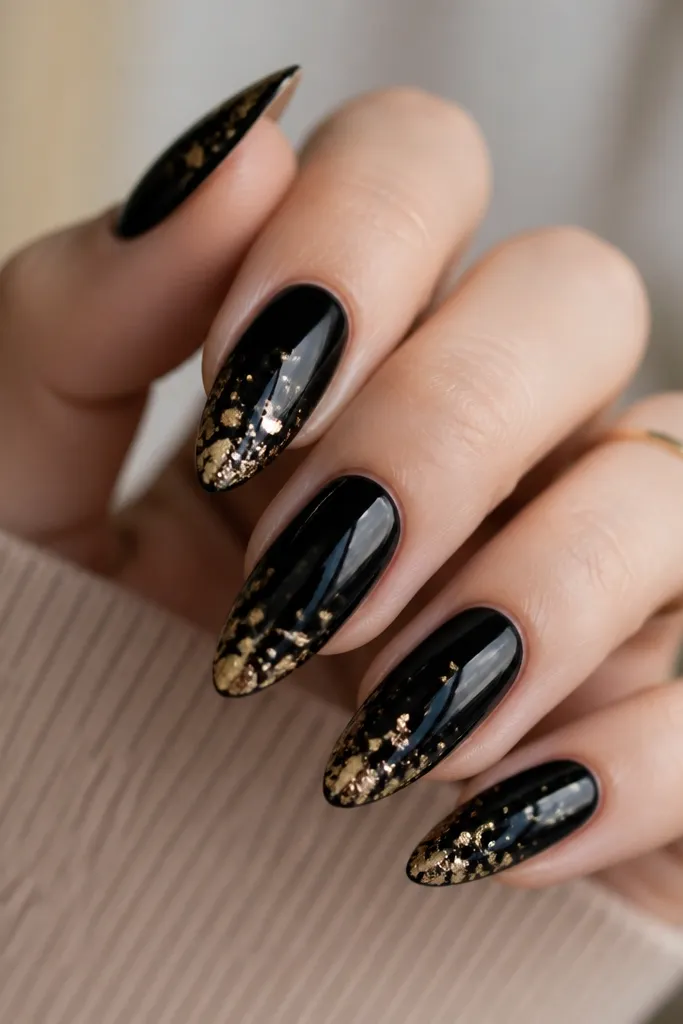
Confetti specks look cozy glam when they’re foil flakes, not glitter dust. Glossy black makes the foil sparkle in a controlled way, and the tip-heavy placement keeps the nail balanced. This design is forgiving if you’re not perfect at nail art because the specks hide minor brush strokes. It’s also great for people who want gold on every nail without doing full foil coverage. On deeper skin tones, the contrast looks extra striking in photos.
Apply glossy black gel in two coats and cure. On each nail, add a thin clear gel layer where you want the foil flakes — start heavier near the tip. Press tiny pieces of warm yellow-gold foil into the clear gel using tweezers, then cure. Seal with a glossy top coat that fully encapsulates the flakes so they don’t catch on fabric. For a more cozy look, keep the flakes slightly larger near the tip and smaller near the middle.
Editor's noteUse a matte top coat over everything except the foil if you want the specks to look like warm metallic dust.
Watch outDon’t skip sealing — loose foil flakes snag on sweaters and hair.
14. Gold Accent Nail With Matte Black Rose Swirl
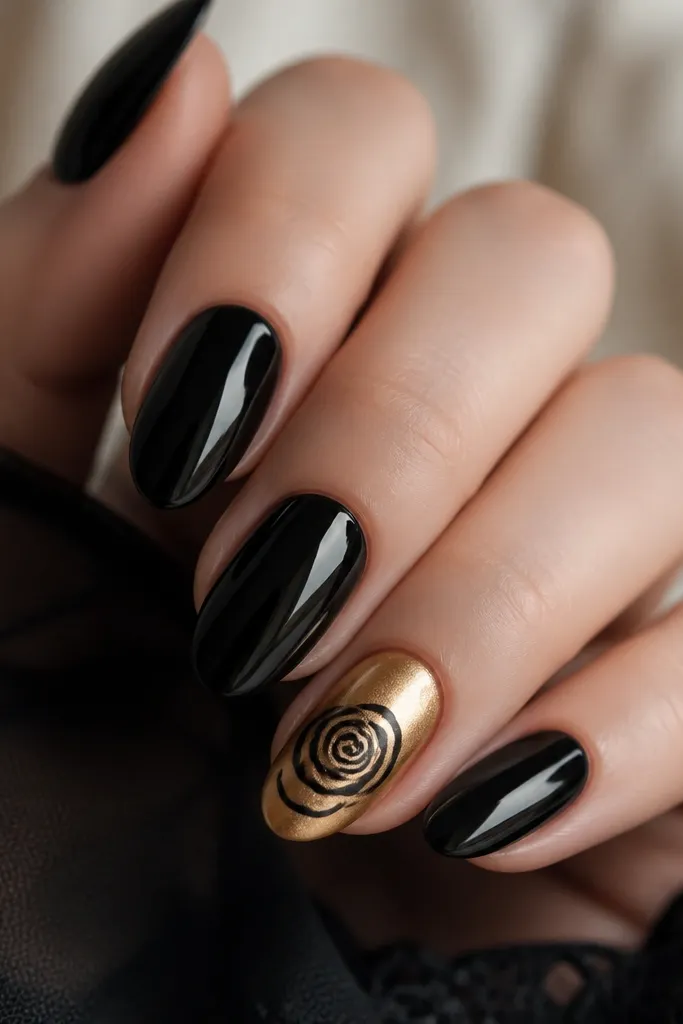
This is the set I wear when I want a romantic vibe but still want it to feel winter-cozy. The gold metallic base creates warmth, and the matte black rose swirl looks like dark velvet petals. This flatters hands because the rose sits centered, drawing the eye to the nail’s natural shape. It also looks amazing on almond nails because the center art doesn’t get stretched like it can on squoval. If you wear gold rings, the contrast between the metals looks intentional.
Do a glossy black base on most nails and cure. For the accent nail, apply warm yellow-gold metallic gel in two thin coats and cure until smooth. On the gold nail, add matte black gel to draw a rose swirl: start with a tight spiral in the center, then pull curved petal lines outward. Use a fine brush for clean edges and cure between layers if your design needs building. Top coat with matte over the rose only, then use glossy top coat over the rest of the gold nail so it stays reflective.
Editor's noteKeep the rose lines thin — thick petals on gold can look like messy frosting.
Watch outDon’t put matte black under glossy top coat across the whole nail; it kills the velvet rose look.
15. Black Gradient To Sheer Nude With Gold Tip Caps
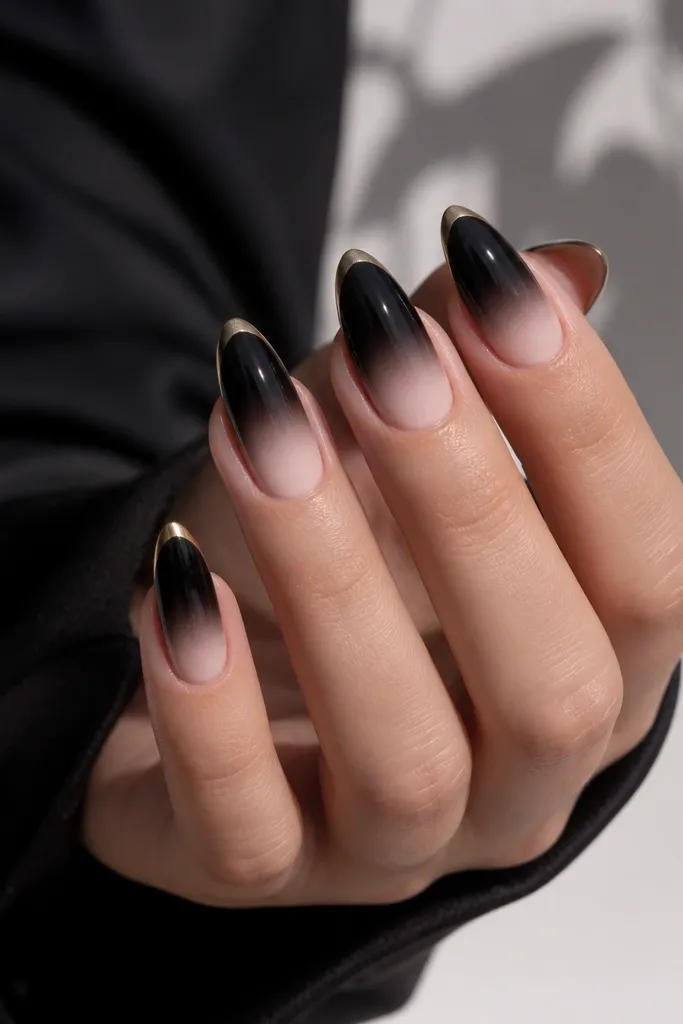
This design is cozy glam because it feels airy at the cuticle and richer toward the tip. The nude-to-black gradient keeps regrowth less obvious than a full opaque black, and the gold tip cap adds a crisp finishing touch. It flatters hands with shorter nail beds since the nude area makes the nail look longer. I like it for fall because it looks like a warm smoke fade rather than a harsh block color. On medium and deep skin tones, the nude gradient gives a smooth transition that looks polished.
Start with a sheer nude gel near the cuticle, then blend black gel over it using a sponge so the fade is smooth and diagonal-free. Cure each layer until the gradient looks even. Paint a warm yellow-gold cap on the very tip, about 1.5 mm wide, keeping the edge straight and centered. Cure and wipe any tacky residue. Finish with a glossy top coat for a glassy look, or use a satin top coat if you want it softer.
For a cleaner gradient, use a second sponge that’s slightly drier for the final feathering pass.
Don’t make the gradient too dark at the cuticle — it removes the regrowth-friendly effect.
16. Gold Bar Inlay Lines On Black Velvet Base
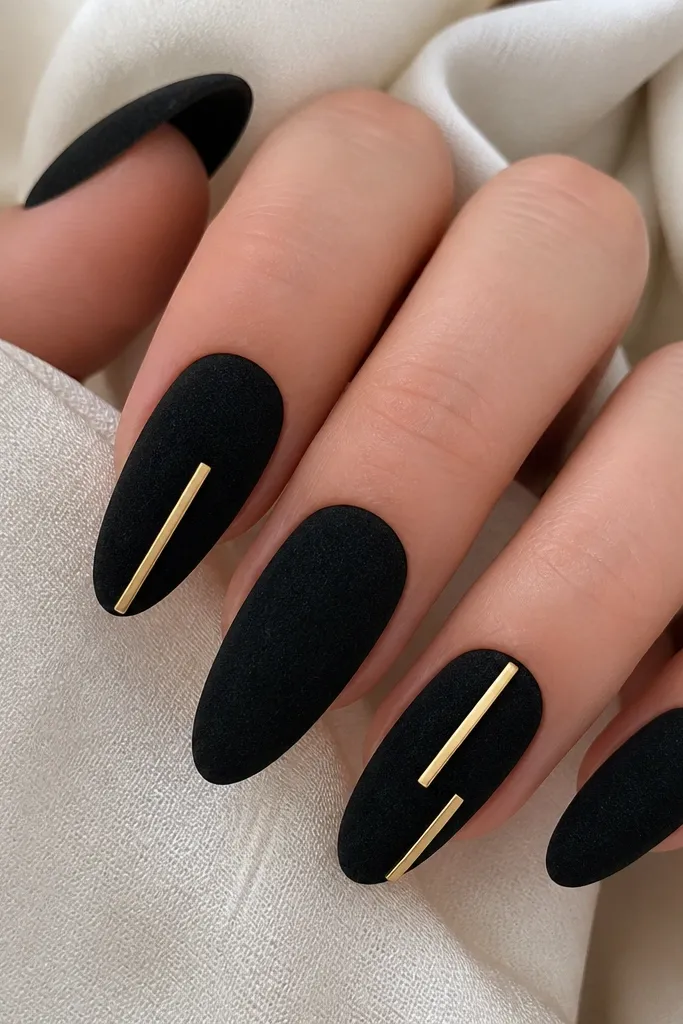
Metal bar inlays look like jewelry on nails, and the velvet base makes them cozy instead of cold. The straight gold bar line lengthens the nail because it pulls the eye vertically. I especially like this on hands with thinner nail beds because the center line gives structure without widening the nail. The satin shine of the gold bar is more flattering than mirror chrome when paired with velvet black. It’s also a great set if you wear lots of black outfits and want one detail that feels intentional.
Apply a black velvet base gel and cure, then add velvet powder for the fuzzy finish. On the accent nails, place thin gold striping tape or pre-cut gold foil bars in the exact position you want — keep one bar centered and another slightly to the side for variation. Press firmly into the velvet base, then seal with a thin gel top coat that won’t flatten the velvet too much. If you’re using foil bars, cure after placing them and then cap gently around the edges. Finish with a top coat that keeps the gold satin rather than fully mirror.
Measure bar placement with a nail guide: center bar should sit exactly between sidewalls for the most flattering look.
Don’t use glossy top coat over velvet; it turns the velvet into a shiny mess.
17. Black Lace Effect With Gold Thread Dots
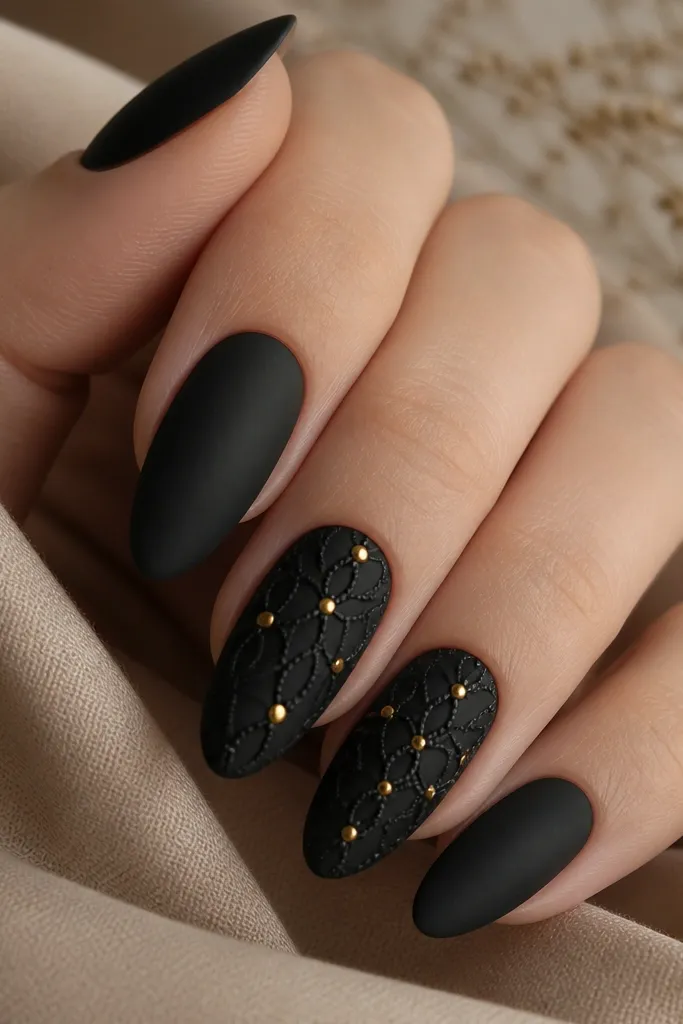
Lace effect nails read cozy glam because they add delicate structure without needing heavy foil. The matte black base makes the lace look like embroidered fabric, while the gold dots act like tiny thread knots. This design flatters hands with shorter almond tips because the lace pattern draws attention to the center and keeps the edges clean. I’ve done this for holiday parties where I wanted something feminine but still dark. It looks best on warm undertones because yellow-gold dots feel soft next to black.
Paint all nails matte black and cure. On accent nails, use a fine liner brush to sketch lace loops — start with a vertical zigzag in the middle, then add small curved loops branching outward. Add warm gold dots at intersections and along the lace border, keeping dots about the size of a pinhead. Cure, then top coat with matte top coat over lace lines but use a satin top coat over the gold dots to keep them slightly raised. Clean the edges so the lace stays crisp.
Editor's noteDo the lace in one nail at a time so the gel stays workable and you don’t rush the loops.
Watch outDon’t turn lace into a full grid; lace needs negative space to look like lace.
18. Gold Marble Tips With Soft Black Base
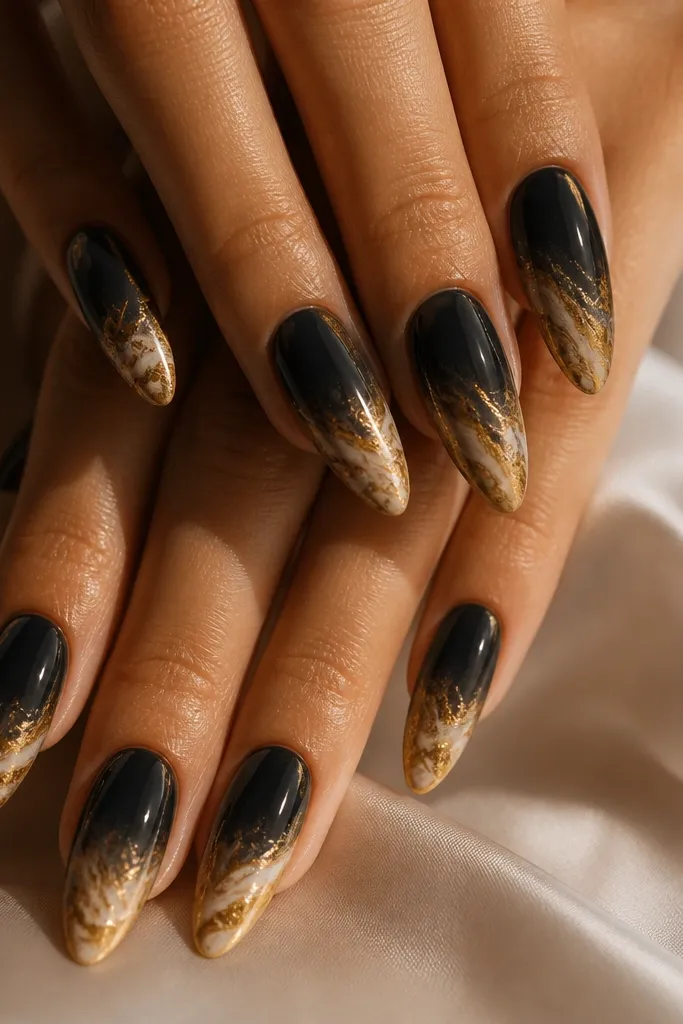
Gold marble tips feel extra cozy because they look like warm stone, not just metal. The soft black base keeps the overall color grounded, and the gold marble gives you that luxurious, natural pattern. This is flattering on almond nails because the marble sits in the tip area where the curve already helps the design look smooth. I’ve had this set last through busy weeks because the marble hides small chips better than solid gold. It also looks gorgeous with sweaters and gold jewelry because the colors are warm and muted.
Start with a soft black smoky base using a sponge to blend black gel with a tiny amount of gray at the edges, then cure. For the tips, create a gold marble blend by swirling gold metallic gel with a touch of sheer beige or light nude gel on a palette, then applying with a thin brush at the tip area. Blend the edge where black meets gold by lightly feathering with a clean sponge. Cure and seal with a glossy top coat for stone depth. Keep the densest marble swirls near the extreme tip so the look reads clearly from a distance.
Use a thin brush and less gel than you think — marble looks better when it’s airy, not flooded.
Don’t make the gold marble too uniform; stone needs variation in thickness and direction.
19. Black And Gold Geometric Triangle Tips
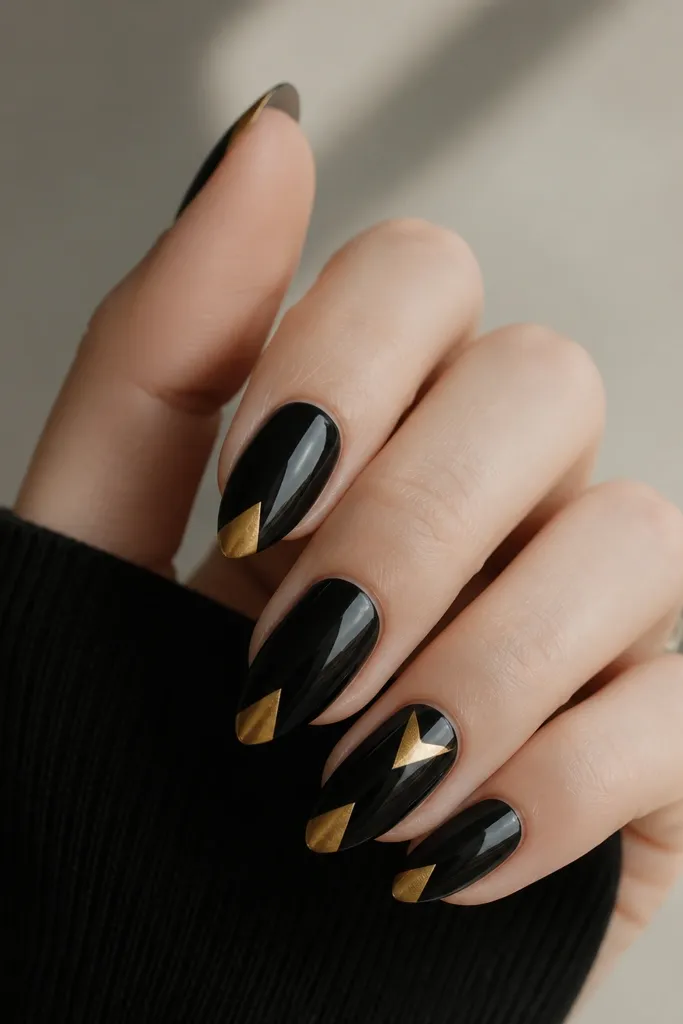
Geometric triangles make black-and-gold look modern and cozy at the same time when the design stays small. The glossy black base keeps it sleek, and the gold triangle at the tip reads like a warm accent panel. I like this on almond nails because the triangle follows the nail’s taper, so it doesn’t look bulky. It’s flattering for hands that prefer clean lines over busy art, and it pairs with both casual outfits and holiday looks. Warm yellow-gold works best here because it looks like a soft metal plate, not a cold highlight.
Apply glossy black gel in two thin coats and cure. Use striping tape to create a triangle guide at the tip — the triangle should start about 2 mm from the free edge and aim toward the center. Fill the triangle with warm gold metallic gel, cure, and remove tape slowly. For an extra accent, place a smaller triangle on one side of the tip area using the same angle so it looks intentional. Seal with a glossy top coat to keep the gold crisp and smooth.
Editor's notePress the tape down hard at the edges — cleaner tape edges mean sharper triangle lines.
Watch outDon’t freehand the triangle with a thick brush; rounded edges make it look like painted nail polish art.
20. Smoky Black Almond Nails With Gold Barbed Wire Detail
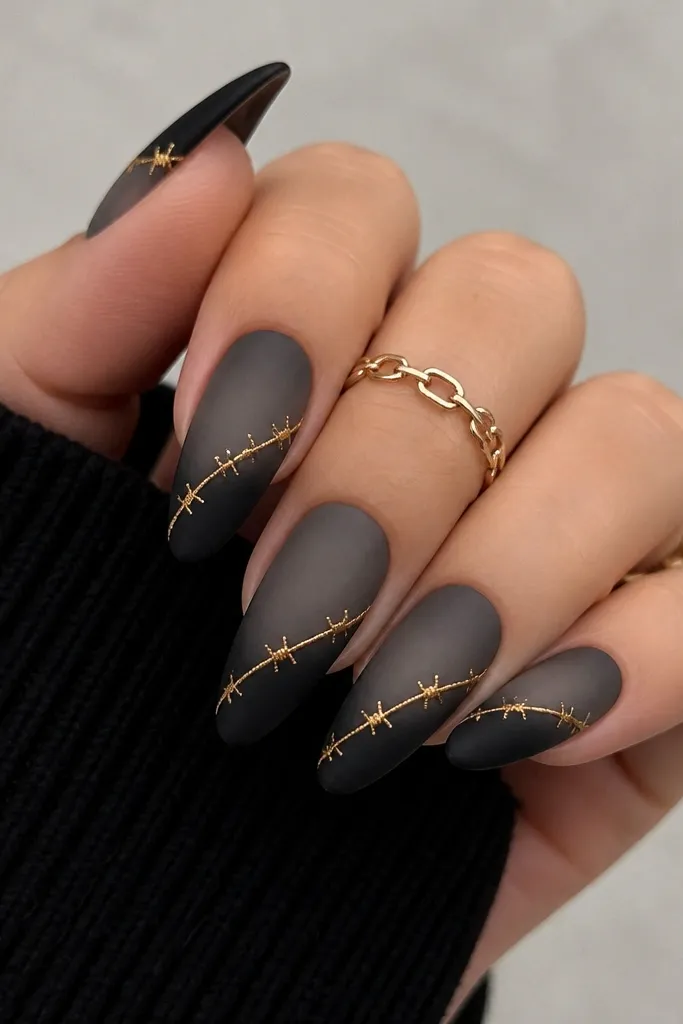
This look mixes a soft smoky base with a strong gold line that feels a little edgy but still cozy. I’ve worn it to winter dinners and it always looks like you planned it, even though the wire detail is straightforward once you have a guide. The trick is keeping the smoke blurred — not streaky — so the gold line becomes the only crisp element. Gold barbs give texture without needing gems, and the almond shape makes the diagonal line look extra lengthening.
Start with a smoky gradient: paint the base in charcoal, then sponge on black from the center outward using a makeup sponge cut flat. Blend until the edges fade, then seal with a matte top coat so the gold has something that grips. For the gold wire, use a striping gel and a liner brush to draw one diagonal path per nail, starting near the lower sidewall and ending just before the tip. Add the barbs by placing tiny dots of gold gel along the line with a dotting tool, then drag each dot slightly to form short spikes. Cure, then finish with a thin glossy top coat only over the gold detail so it stays shiny while the smoke stays velvety.
Use a striping guide made from painter’s tape — place it diagonally first, draw the wire within the taped boundary, then remove the tape before curing.
Don’t use full-coverage gel for the gold wire or it will look thick and clunky on almond nails.



