
1. Candlelight Foil Tips
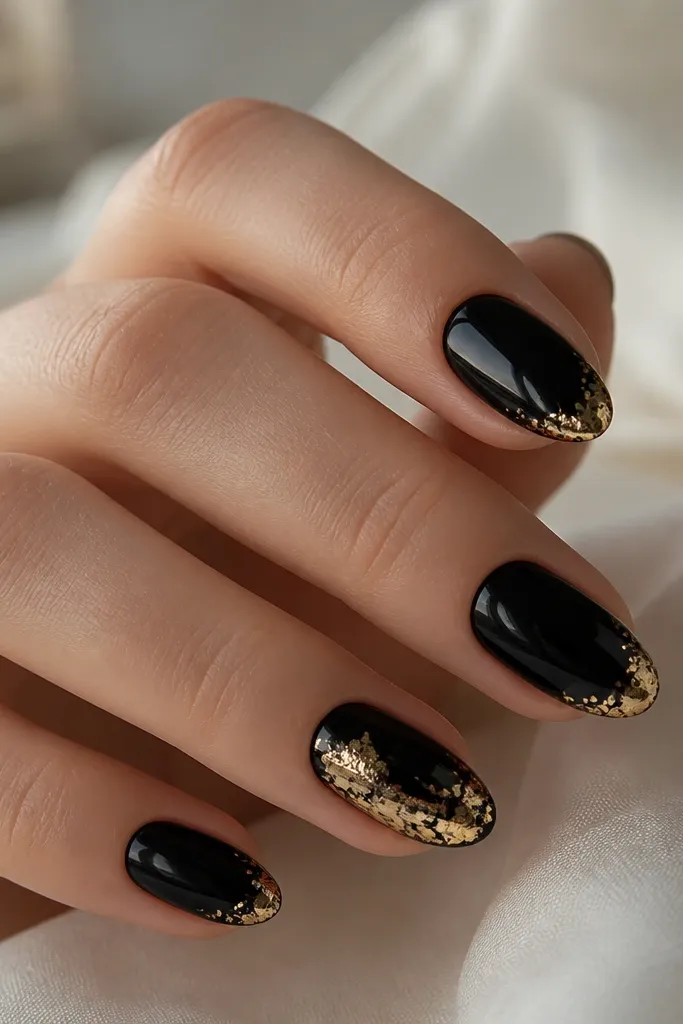
This one is the easiest way to get the Black And Gold Nails aesthetic to look dreamy in real life. The black base is glossy (so it reflects light), and the gold is foil, not thick glitter, so it looks warm instead of sparkly-cold. The foil sits on the tips and outer corners, which makes your hands look like they’re glowing when you move them. It flatters most skin tones because the foil reads yellow-gold, not brassy. On shorter nails, it elongates without needing long length.
Start by painting a smooth glossy black on all nails, then let it dry until it’s not tacky. Next, press small pieces of gold foil onto the tip area — I aim for about 1-2 mm from the free edge inward, with the heaviest pieces on the outer corners. Seal with a high-shine top coat in two thin layers, dragging the brush from cuticle to tip so edges don’t lift. Finish by adding one slightly heavier foil nail if you want that birthday “wow” without going overboard.
If your foil looks gray, switch from chunky gold flakes to fine foil leaf and press it lightly so it stays warm-toned.
Don’t put foil across the whole nail — it kills the contrast and makes the set look flat.
2. Thin Gold French With Micro Dots
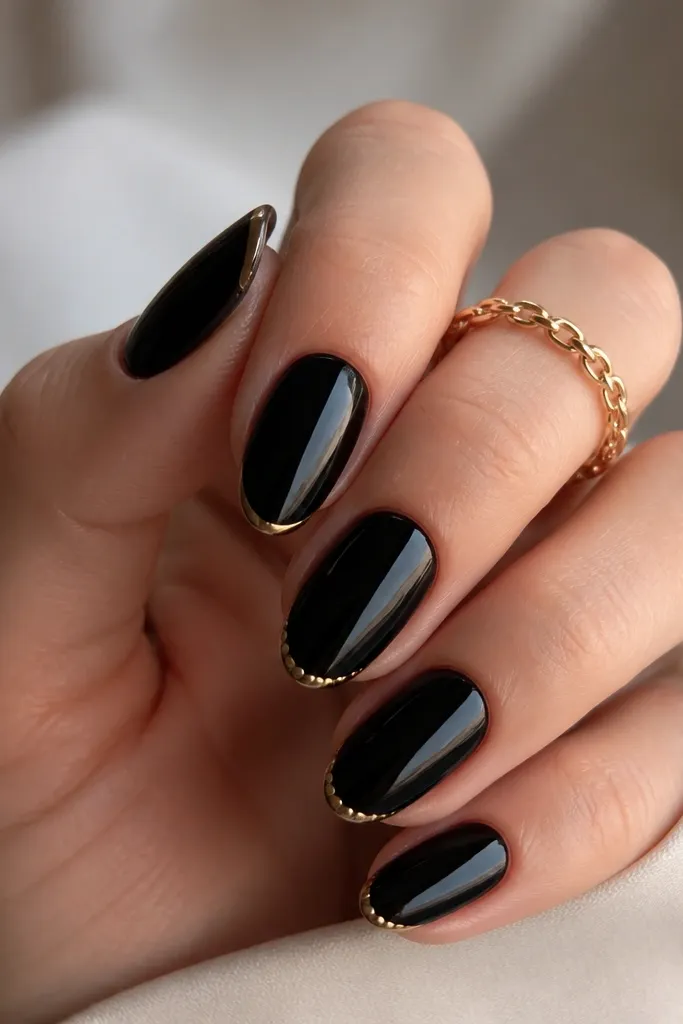
A thin French line makes black-and-gold look clean and photo-ready. The key is keeping the gold line narrow — about the width of a fine striping tape — so it doesn’t overpower the black. Micro dots add a celebratory sparkle without turning into chunky glitter. This design flatters hands because the negative space stays crisp and the gold sits exactly where your nail curves catch light. It also works on deeper skin tones because the gold reads bright and warm against the black.
Paint all nails glossy black and cure/dry fully. Apply gold striping tape for the French line, placing it parallel to the smile line; aim for a 1 mm band. Peel the tape carefully, then use a dotting tool to place micro gold dots just under the French on two nails only. Seal everything with a glossy top coat, then run the brush along the free edge to lock the tape down.
Use tape for the French line — freehand gold lines look wobbly under flash.
Don’t add dots on every nail; it turns into clutter instead of a birthday accent.
3. Black Velvet Base With Gold Chrome Crescent
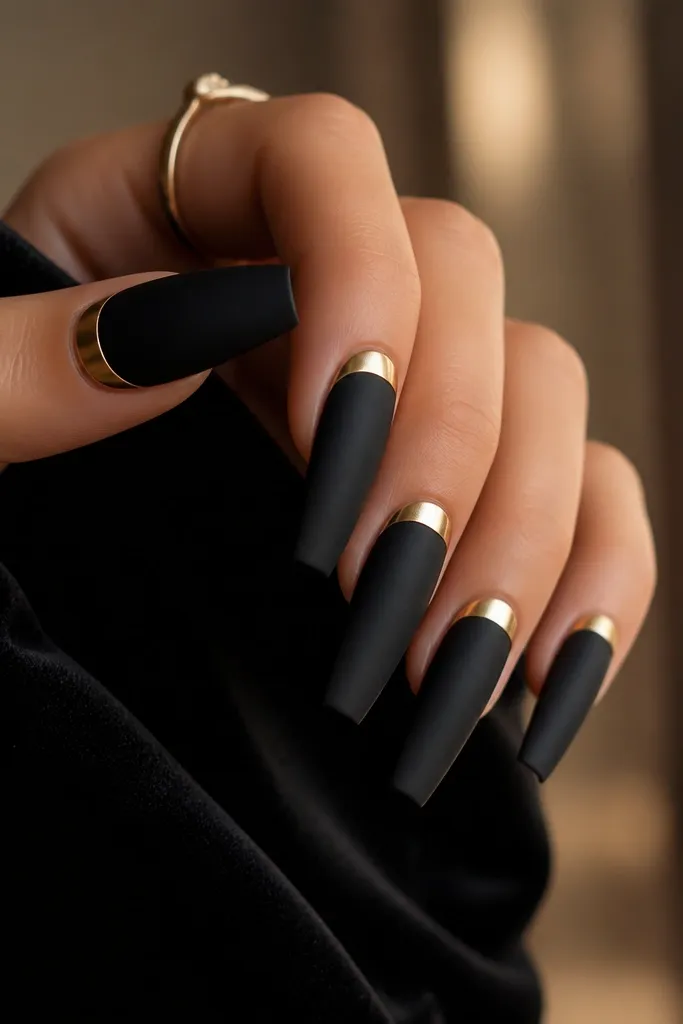
Apply your black velvet finish first and cure it so it stays non-sticky. Then use a small crescent stencil or freehand with a fine brush to map the gold half-moon — I keep it about 2-3 mm tall. Apply gold chrome powder carefully inside the shape, then buff gently so the edges are crisp. Top coat lightly over chrome if your brand allows it; if not, use a chrome-friendly top coat so the mirror finish stays reflective.
This is the set I reach for when I want Black And Gold Nails aesthetic to look luxe and intentional. The base is a “velvet” matte or satin-black that looks soft, not dusty, and the gold chrome half-moon gives that mirror flash. Crescents are flattering because they frame the cuticle area and make nails look neater. It’s great on medium to long nails because the negative space around the crescent has room to breathe. If you have shorter nail beds, keep the crescent smaller so it doesn’t crowd your cuticle line.
Watch outDon’t make the crescent too tall; a big cuticle band can shorten the nail visually.
Editor's noteIf chrome dulls after top coat, use a thin layer only over the edges and keep the center mirror.
4. Gold Leaf Aura Over Glossy Black
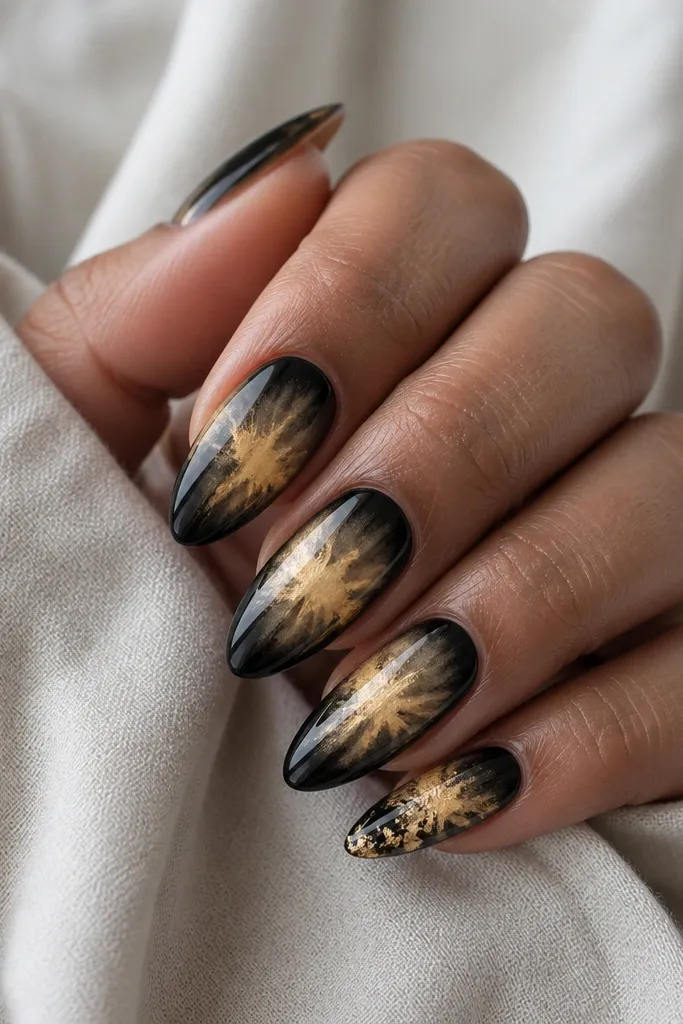
Paint a smooth glossy black and let it fully set. Tear tiny pieces of gold leaf and press them into the center area, then use your finger or a clean brush to nudge the leaf so it fades outward. Keep the edges irregular — that’s the whole aura look — and avoid filling the entire nail. Seal with two glossy top coats, pressing the first coat around the leaf edges so it doesn’t lift.
Aura designs make black-and-gold feel dreamy instead of harsh. The glossy black base gives a reflective depth, while gold leaf applied in the center creates a glow effect that looks like candle smoke. This works because the gold is concentrated where your nail is widest, so it reads flattering and balanced. On fair to medium skin tones, the gold looks bright; on deeper skin tones, it still pops because the base is truly black, not charcoal. It’s especially pretty for birthday photos because the aura shifts with hand movement.
Watch outDon’t use chunky glitter over the leaf — it makes the aura look like a craft project.
Editor's noteUse a makeup sponge to tap the leaf lightly; it helps the gold fade instead of sticking in one clump.
5. Black Marble With Gold Vein
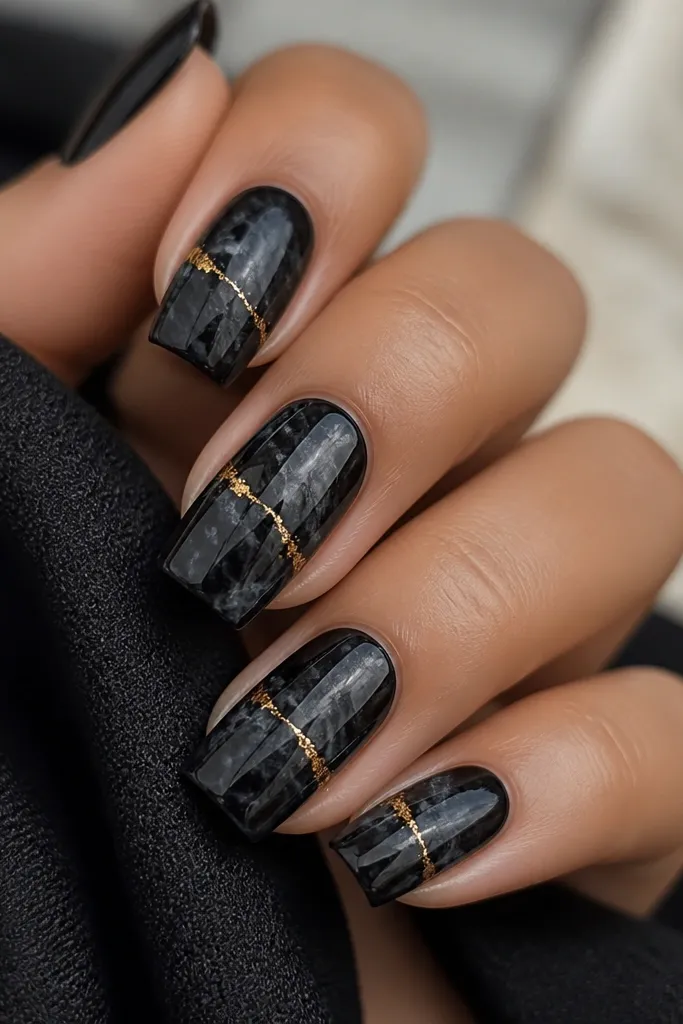
Marble gives you that “designer manicure” feel without needing a ton of gems. The black marble is all about contrast — glossy black plus darker charcoal swirls — and the gold vein adds the birthday sparkle. I like diagonal veins because they elongate the nail and look great on both short and medium lengths. This set flatters hands with any nail bed shape because the movement of the marble breaks up the surface. For a Black And Gold Nails aesthetic, the gold has to be thin and linear, not chunky.
Start with glossy black as your base, then add marble swirls using a thin nail art brush and darker charcoal polish. While the marble is still set, drag a fine gold striping gel or metallic paint along a diagonal line from lower left to upper right on each nail. Add tiny gold dots only at vein intersections so it looks intentional. Finish with a high-gloss top coat to make the marble look wet and dimensional.
Use striping gel for the vein — it stays smooth and doesn’t streak like loose metallic paint.
Don’t go heavy on gold — thick veins turn the marble into a messy stripe.
6. Gold Chain Link Accent
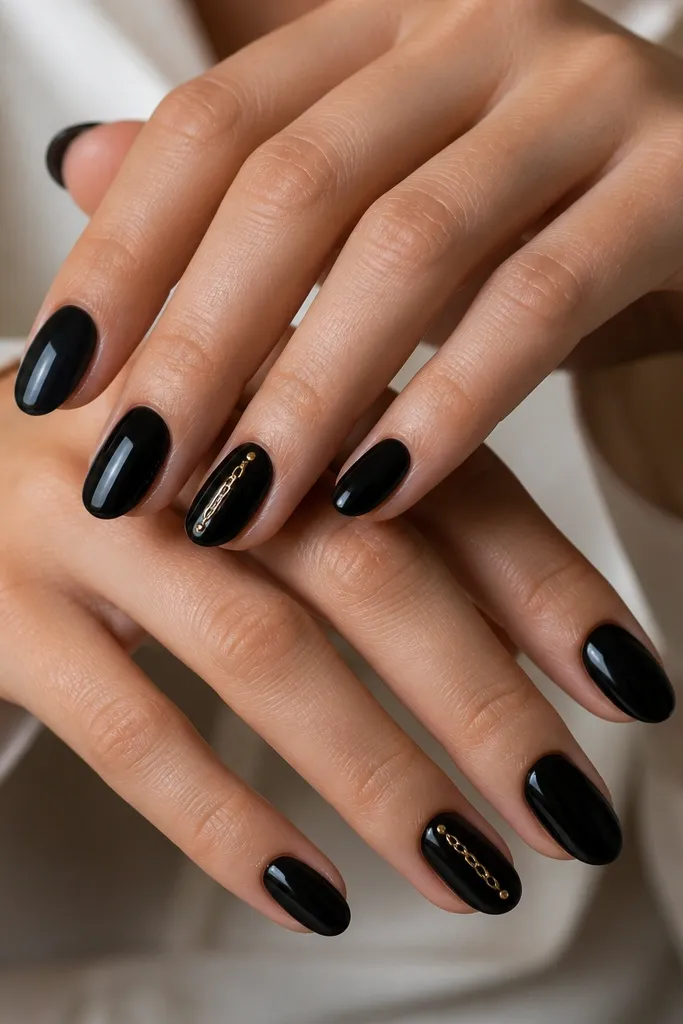
Paint everything glossy black and cure fully. On your chosen accent nail, draw a chain link shape using metallic gold liner — I outline two oval links side by side, then connect them with a small bar. Add two tiny dots at the top and bottom of the chain as “ends.” Seal carefully with a top coat, using a thin second coat to avoid flooding the chain details.
A gold chain link is the fastest way to make black nails look like jewelry. The Black And Gold Nails aesthetic works here because the chain is a thin, reflective element — it catches light when you move your hands. I keep most nails plain glossy black so the chain reads sharp, not busy. This is a great choice if you want birthday nails that still look good in office lighting after the party. It also flatters shorter nails because the accent is concentrated in the middle.
Watch outDon’t make the chain thick — chunky links look like costume jewelry on nails.
Editor's noteIf you’re placing chain pieces physically, use gel adhesive and keep the links flat — raised chain looks uneven under flash.
7. Black Gloss With Gold Rhinestone Crescent
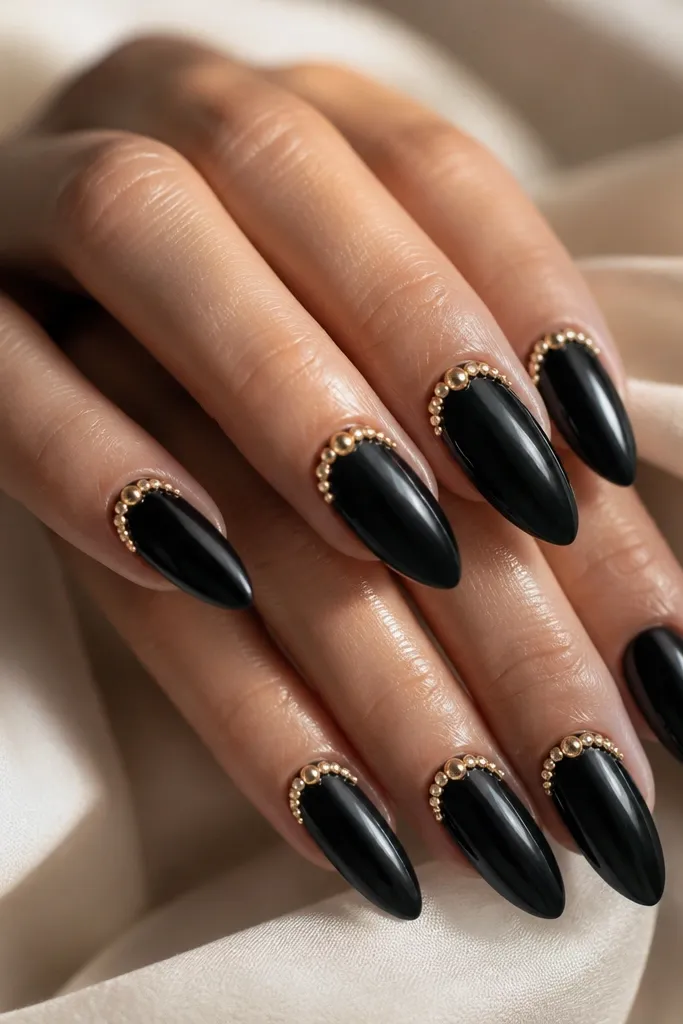
Apply glossy black as your base and let it set. Use a dotting tool to place rhinestones along a curved line near the cuticle; I start at the center and work outward for symmetry. Leave the outer edges slightly lower so the crescent looks natural. Seal with a top coat that’s thick enough to lock stones but not so thick it smears them — do one coat, cure, then a second coat lightly.
This is classic birthday energy without turning into a full rhinestone coat. The stones are small and evenly spaced, so the crescent looks clean and intentional rather than chaotic. Gold rhinestones match the warm gold tone and reflect flash beautifully. It flatters hands because the crescent frames the nail base and makes the nail look more “finished.” If you have short nail beds, keep the crescent tight — about 2 mm from the cuticle line.
Watch outDon’t cover the entire nail with stones — it lifts faster and looks heavy.
Editor's notePick stones that are all the same size for the first attempt; mixed sizes make spacing harder.
8. Gold Foil Half-Moon Cuticle Glow
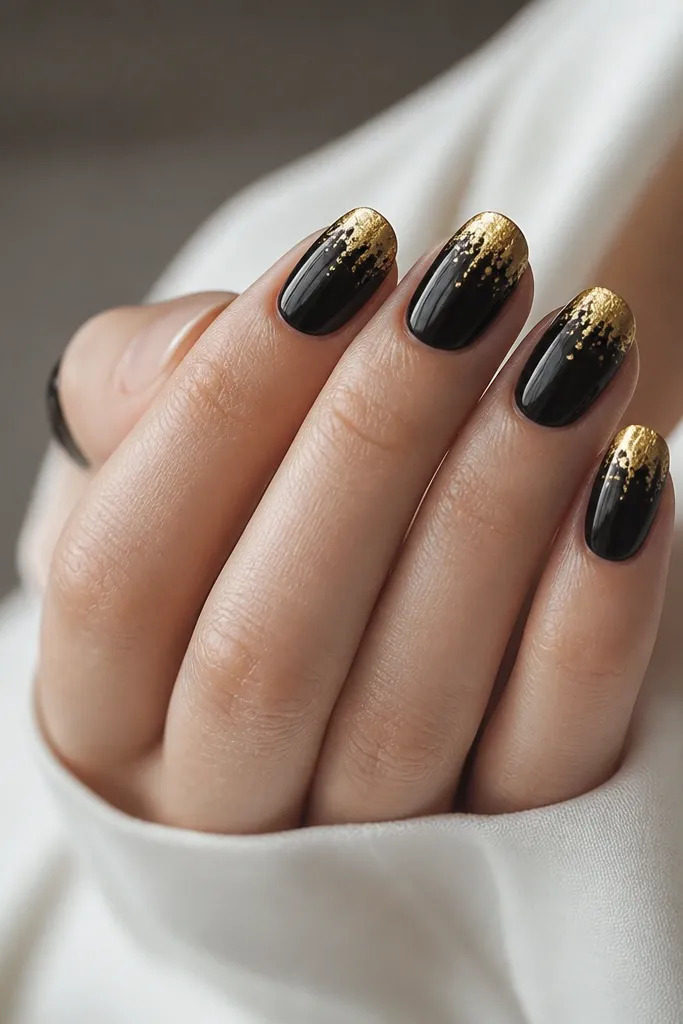
Half-moon cuticles look elegant because they mimic jewelry clasps and frame your nail bed. Using gold foil makes the glow soft and “alive” instead of flat. This design is the sweet spot between subtle and birthday-ready — it reads special even if you keep the rest of the nails simple. It flatters almost everyone because the foil sits right where your hand’s light hits when you gesture. On short nails, it adds polish without making the nail look longer than it is.
Paint glossy black and cure fully. Press gold foil into a half-moon shape at the cuticle, keeping the height around 2-3 mm. Leave a tiny gap between the foil and the black edge if you want a cleaner look. Seal with two top coats, and when you cap the edges, drag the brush over the foil line so it stays smooth.
Use foil adhesive or tacky gel under the foil so it sticks without sliding.
Don’t smear foil downward — it should look like a glow cap, not a spill.
9. Black Matte With Thin Gold Stripe Down the Center
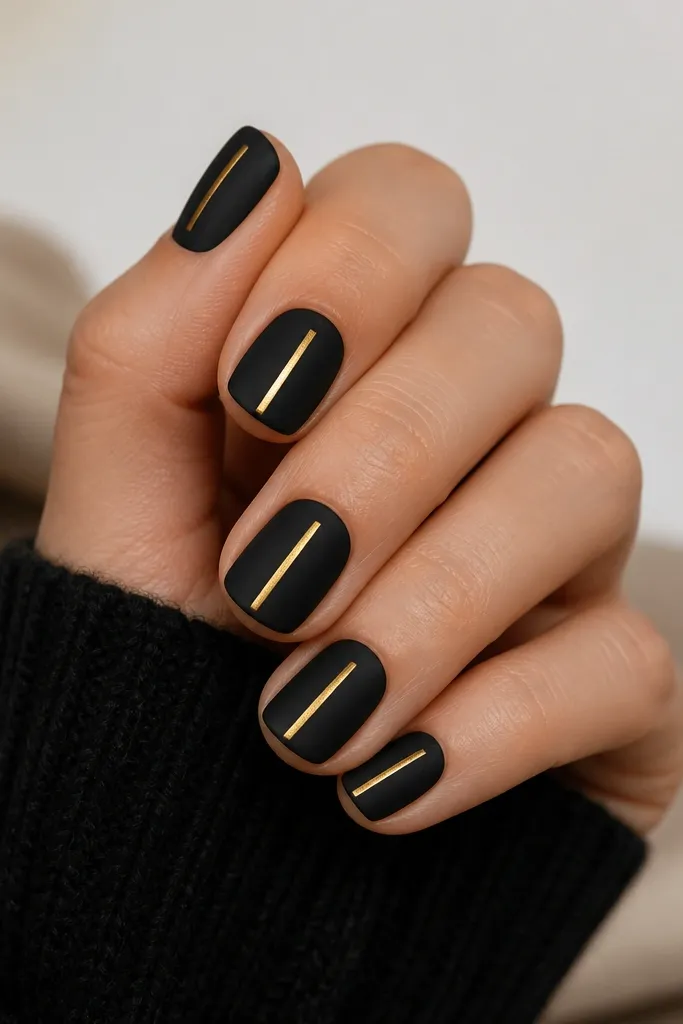
Apply matte black first and let it fully cure so it doesn’t turn patchy. Use striping tape or a fine liner brush to place a gold line exactly down the center; keep the line narrow. Peel tape carefully if you used tape, then trace the line again with metallic polish for crisp edges. Top coat only over the stripe with glossy gel or skip top coat if your matte finish stays intact.
This one is clean, sharp, and honestly flattering on every nail length I’ve tried. Matte black gives a soft, velvety surface, and the glossy gold stripe creates contrast that makes your nails look longer and more structured. The center placement is key — it visually straightens your nail shape and draws the eye to the middle. It works great for medium skin tones and deeper tones because the gold stays bright against the dark matte. For a Black And Gold Nails aesthetic, this is the “grown-up birthday” look.
Watch outDon’t top coat the whole nail glossy — it kills the matte-gold contrast.
Editor's noteIf you use tape, press it down firmly at the sidewalls so the gold line doesn’t bleed.
10. Gold Confetti Glitter Over Clear Gloss
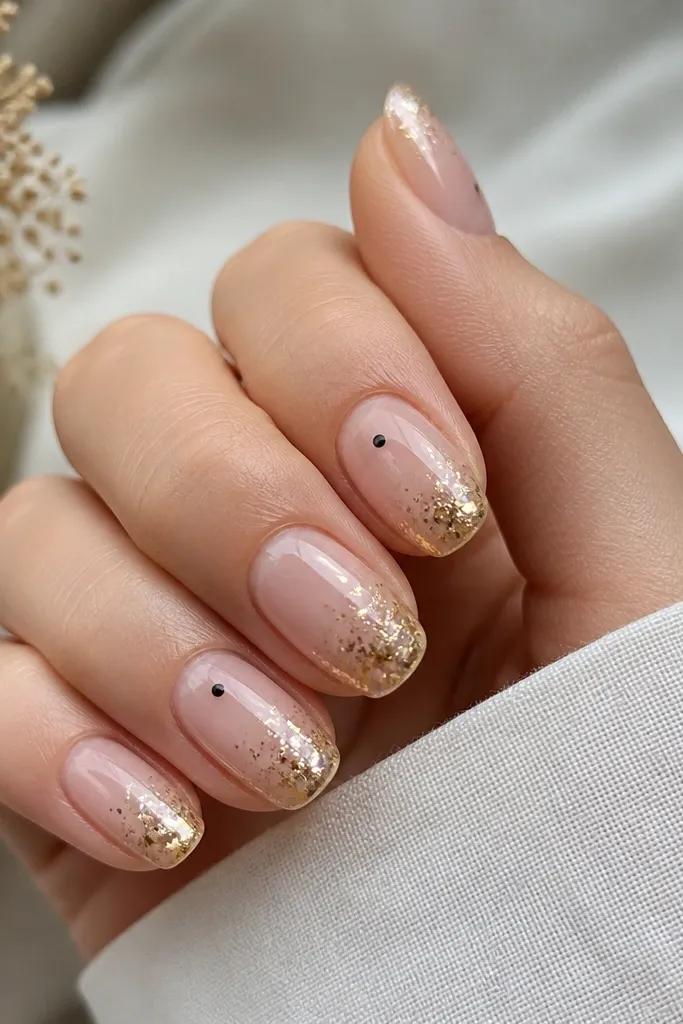
This design is for when you want birthday nails that look light and pretty, not heavy. The trick is using clear gloss and gold confetti glitter so the sparkle floats instead of sitting on top. Black accents stay minimal — tiny dots or a micro line — so it still reads Black And Gold Nails aesthetic without turning into a dark set. It’s flattering because the sheer base makes your fingers look softer and longer. This also photographs well because the glitter catches flash while the black stays controlled.
Start with a sheer nude or clear builder base, then paint the tips with gold confetti glitter. Leave the glitter slightly concentrated at the free edge — I keep it within the last third of the nail. Add tiny black dots on one or two accent nails using a dotting tool. Seal with a glossy top coat in two layers, making sure you cap the glitter edges so it doesn’t snag.
Use a top coat that’s thick enough to smooth glitter texture, or it will feel gritty.
Don’t use large glitter chunks; they catch on fabric and look uneven.
11. Black to Gold Ombre Fade
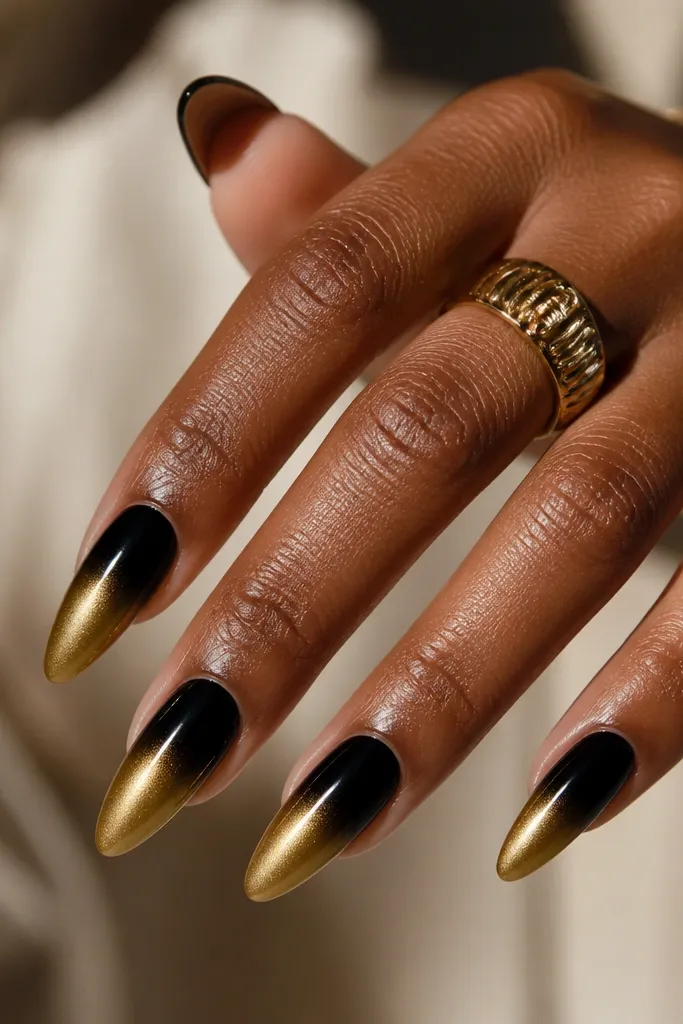
Ombre gives you the “dreamy night” effect because it looks like light is spilling across your nails. The key is a smooth gradient: black stays deep at the base, and gold becomes brighter near the tips where your fingers move most. This design looks amazing on longer almond and coffin nails because there’s room for the fade to breathe. It flatters all skin tones because gold is the highlight and black is the shadow. If you want Black And Gold Nails aesthetic that feels special but not costume-y, this is it.
Paint black as your base and cure. On a makeup sponge, mix a metallic gold polish with a tiny dab of clear top coat to make it blendable. Tap the sponge onto the lower half of the nail, starting at the midline and pulling toward the tips in light layers until the gradient looks smooth. Finish with a glossy top coat and wipe the sides clean so the fade doesn’t creep.
Do three light sponge taps instead of one heavy one — it keeps the gradient soft.
Don’t blend too high up the nail; if gold reaches the cuticle, it can look muddy.
12. Gold Studded Side Accent
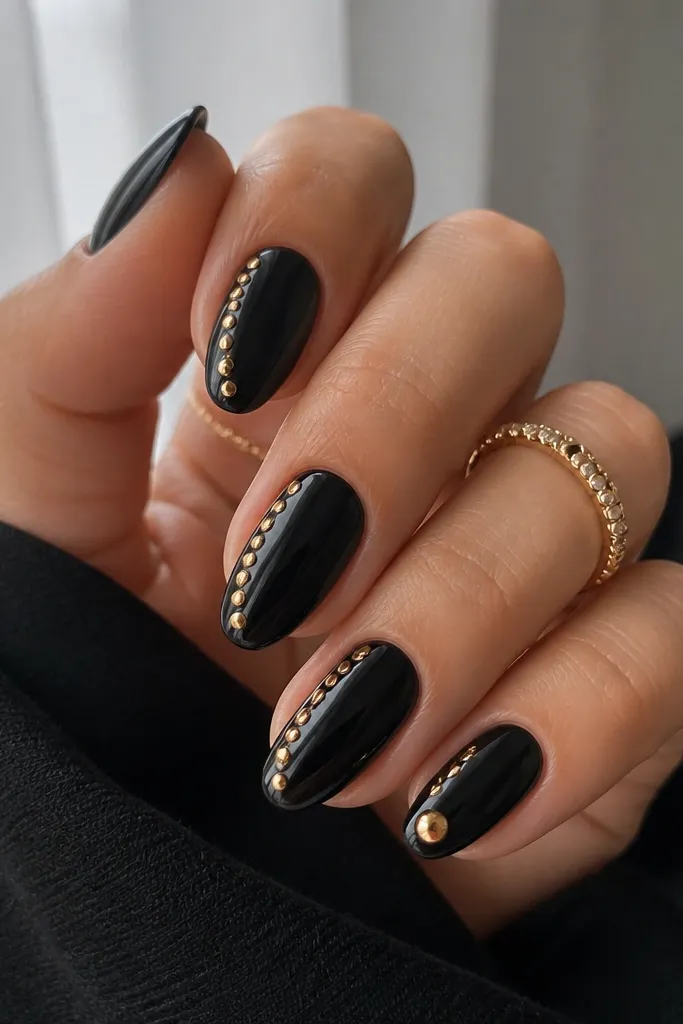
Paint glossy black and cure fully. Place a thin line of gel along one sidewall and press small gold studs into the gel, spacing them evenly from near the mid-cuticle down to about halfway. Use fewer studs near the middle if you want a slight taper. Cap with top coat carefully, brushing around each stud so they’re sealed but not flooded.
Side accents look sleek because they follow the nail’s natural curve. The gold studs are small and reflective, so they catch light when your hand turns — that’s the Black And Gold Nails aesthetic in action. I like limiting the studs to one side and stopping at mid-nail so it doesn’t feel like armor. This flatters hands with wider nail beds because the detail sits on the edge and makes the nail look more narrow. It’s also a good birthday option for people who hate glitter.
Watch outDon’t put studs too close to the cuticle; they lift faster there.
Editor's noteUse tweezers with a light grip so you don’t drag gel and smear the line.
13. Black Lace Overlay With Gold Dot Borders
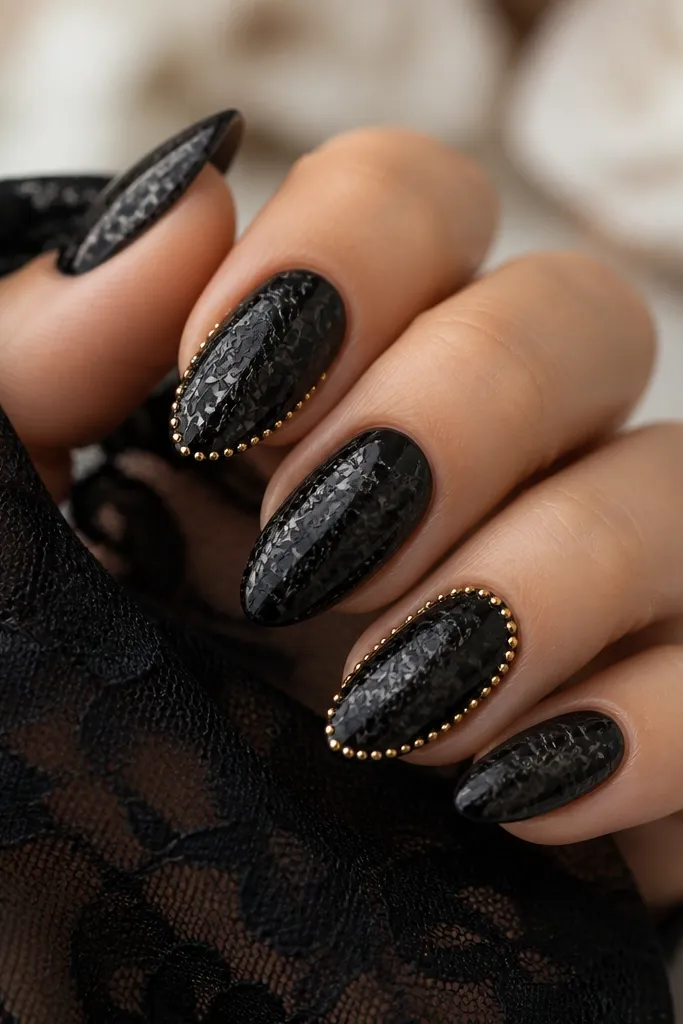
Lace makes black-and-gold feel like a party dress. The lace overlay is usually done in a darker shade so it shows up as texture, not a totally different color. Then gold dot borders add a controlled sparkle that frames the nail instead of spreading across it. This is flattering because the lace pattern pulls the eye toward the center and the dot border gives structure. It works especially well if you want Black And Gold Nails aesthetic that feels romantic, not aggressive.
Start with a glossy black base. Use a fine liner brush to draw lace-like loops and arches across the nail, keeping the pattern mostly on the center and slightly near the tip. On two accent nails, add gold dot border along the outer edge using a dotting tool — place dots about 0.5 mm apart. Top coat over the lace lightly first, then add a second glossy coat to smooth.
Practice the lace strokes on a paper swatch first; the rhythm matters more than perfect symmetry.
Don’t make lace lines too thick — chunky lines look heavy.
14. Gold Foil Marble Cross
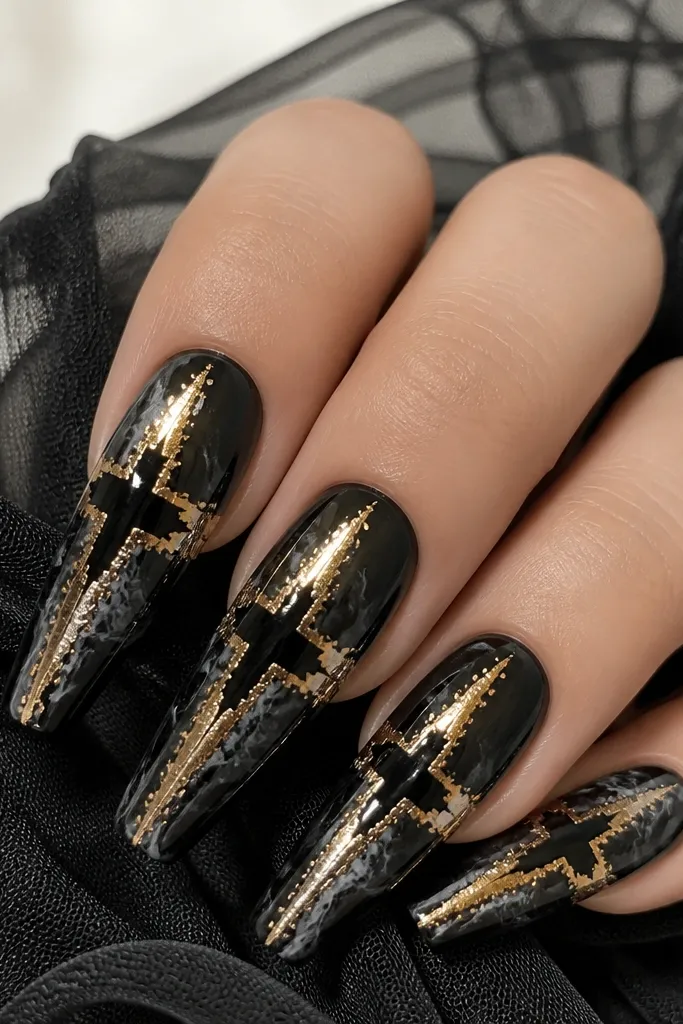
Paint black marble using glossy black plus a darker charcoal swirl. Press thin strips of gold foil along a vertical line down the center, then add a horizontal foil band across it at mid-nail. Keep the foil only on the edges of the cross arms so the center stays black. Seal with two glossy top coats and cap the cross foil so it doesn’t lift at the edges.
Cross shapes look bold and birthday-ready without using a ton of gems. The gold foil along the cross edges gives a stained-glass vibe while keeping the center dark for contrast. Marble underneath adds movement so the nails don’t look flat. This is a strong option if you want Black And Gold Nails aesthetic that feels edgy and photo-worthy. It flatters longer nail shapes because the cross has room to land cleanly. On shorter nails, scale it down into a small plus sign near the center.
Watch outDon’t fill the entire cross with foil — it turns into a gold block.
Editor's noteUse smaller foil pieces for the cross arms so the edges stay crisp.
15. Black Chrome With Micro Gold Speckles
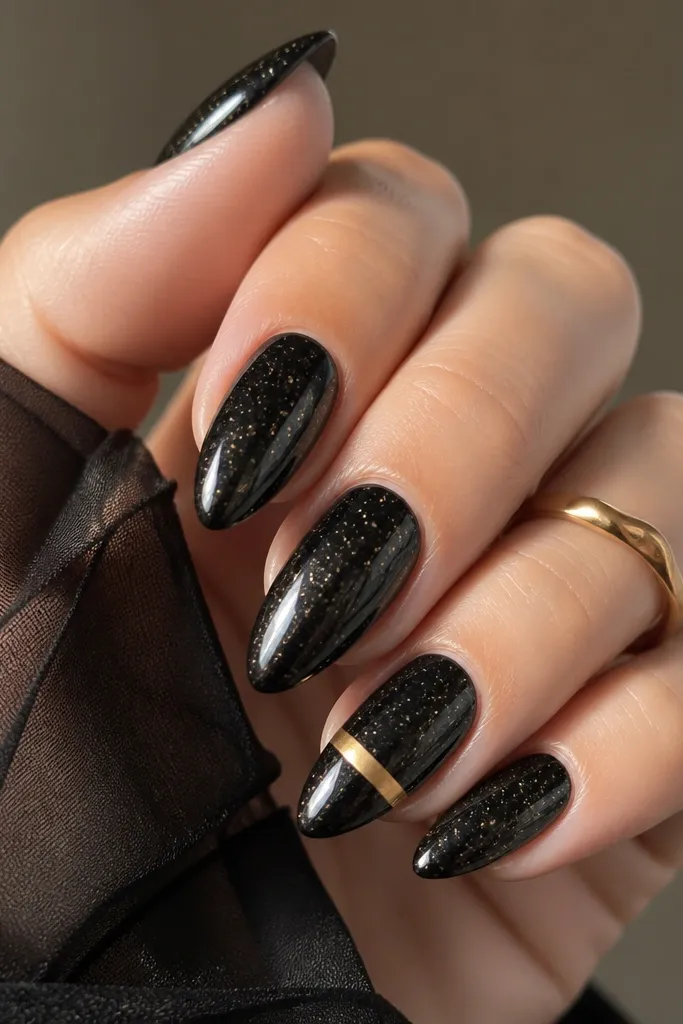
Apply black chrome powder or gel-based chrome to all nails and cure/buff until it looks mirror-smooth. Use a fine brush or toothbrush method (lightly tapped) to scatter micro gold speckles across the surface — keep it subtle. Add a single gold stripe near the tip on one accent nail using metallic liner gel. Seal with a chrome-safe top coat or a very thin protective layer so the micro speckles don’t get smeared.
Black chrome is the shortcut to making black nails look dimensional. Then micro gold speckles create that “night sky” effect that matches the Black And Gold Nails aesthetic perfectly. The speckles are key: they should be tiny and evenly scattered, not large glitter. This set flatters because black chrome makes the nail look smooth and sleek, and the speckles draw attention to the center. It looks great on fair, medium, and deep skin tones because the gold pops against the dark reflective base.
Watch outDon’t overdo speckles — if it turns into a glitter blanket, it loses the stardust look.
Editor's noteFor speckles, load the brush with very little gold paint so you get dots, not blobs.
16. Gold Ring Finger Half-Moon Only
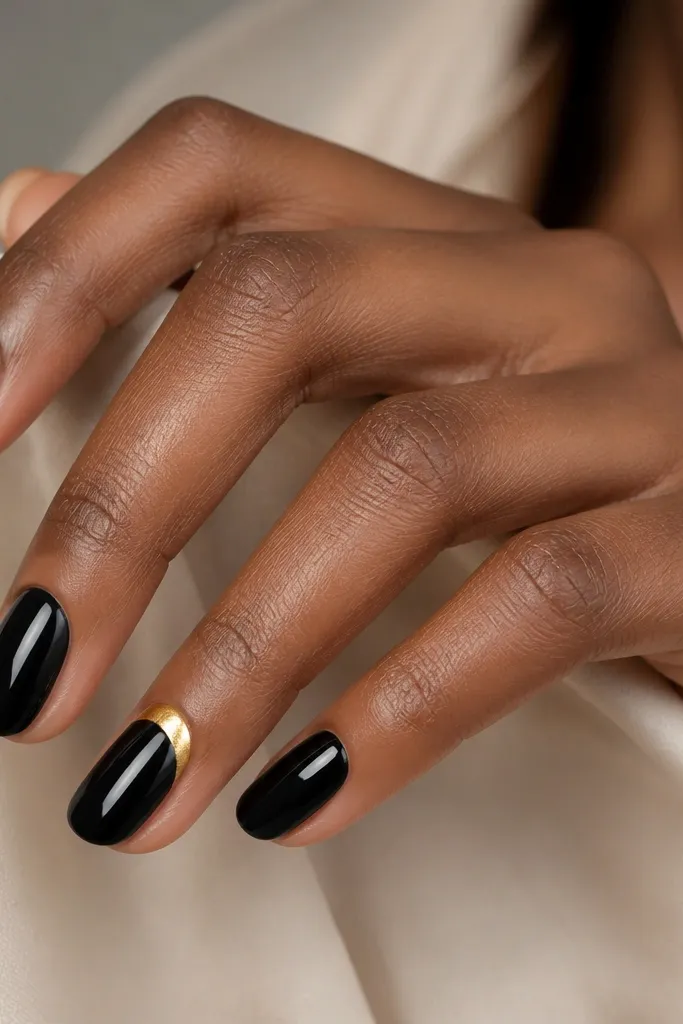
If you want the Black And Gold Nails aesthetic but you don’t want every nail to compete, this is the move. The glossy black on all nails keeps things sleek, and the gold half-moon on just the ring finger gives a jewelry-like focal point. It flatters because your eyes land on one spot instead of bouncing around. This also works for workdays between birthday events — it looks intentional, not like you’re wearing a costume. The half-moon shape is clean and easy to keep symmetrical if you use a stencil.
Paint all nails glossy black and cure. On the ring finger only, place a half-moon stencil at the cuticle — about 2-3 mm tall. Fill it with metallic gold gel or paint, then remove the stencil while the gold is still slightly workable so edges stay sharp. Top coat everything with one glossy layer, and cap the ring finger gold edges carefully to prevent lifting.
Use a silicone half-moon stencil for clean edges — freehand half-moons look uneven fast.
Don’t add gold to more than one finger if you’re going minimal; it stops reading as jewelry.
17. Black Ombré Tips With Gold Glitter Edge
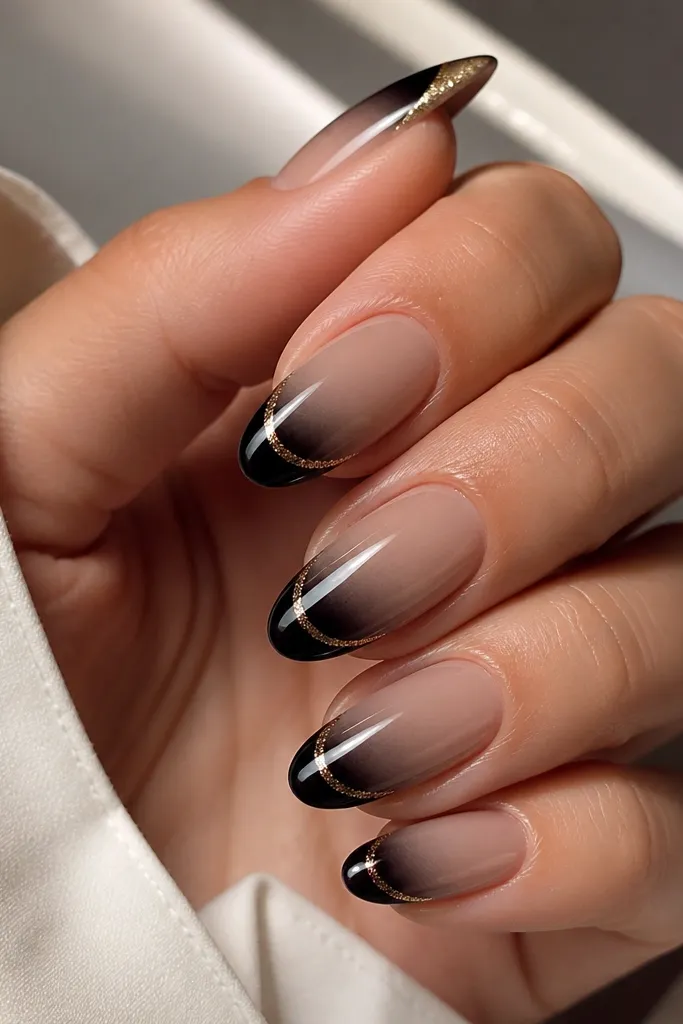
Start with a nude base or sheer pink and build opacity near the middle. Sponge the black polish from mid-nail down to create a soft ombré, then keep the fade gradual. Paint a thin line of gold glitter right at the free edge — I keep it 1 mm tall. Seal with glossy top coat, doing a second coat to smooth the glitter ridge.
This design looks like a birthday dessert — pretty, shiny, and framed. The nude-to-black ombré gives a smooth base that flatters nail beds, while the gold glitter edge adds a celebratory border that feels intentional. I like the glitter line thin because it reads like jewelry trim, not a full glitter coat. It works on short, medium, and long nails because the edge line stays consistent. For the Black And Gold Nails aesthetic, the gold should sit at the free edge where flash hits.
Watch outDon’t let the gold glitter creep up the sides; it ruins the clean border effect.
Editor's noteIf glitter feels gritty, add a gel top coat and cure longer so it levels out.
18. Gold Foil Swoop Diagonal Over Black
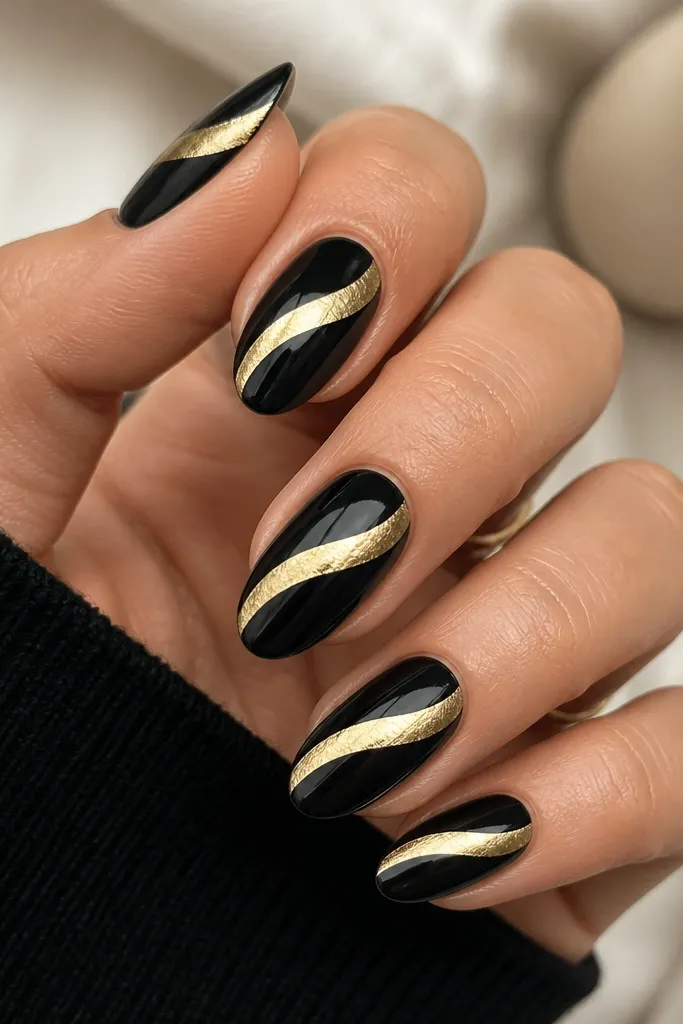
Diagonal swoops make nails look like they’re moving, which is exactly what you want for birthday photos. The gold foil is the star, but it’s placed in one sweeping line so it doesn’t look random. I like this on medium oval and almond shapes because the diagonal follows the nail curve naturally. It flatters most hands because it visually stretches the nail from base to tip. If you want Black And Gold Nails aesthetic that looks artsy but still wearable, this one hits.
Paint glossy black and cure fully. Tear gold foil into a curved strip and press it along a diagonal line — start near the lower-left of the cuticle area and aim toward the upper-right free edge. Leave small black gaps around the foil so it looks like a swoop, not a patch. Seal with two glossy top coats, making sure the foil edges are capped so they don’t lift.
Make the swoop thicker at the middle and thinner at the ends — it looks more like calligraphy.
Don’t make multiple diagonal foils on every nail; one swoop per nail looks clean.
19. Black Gloss With Gold Halo Rhinestone on One Nail
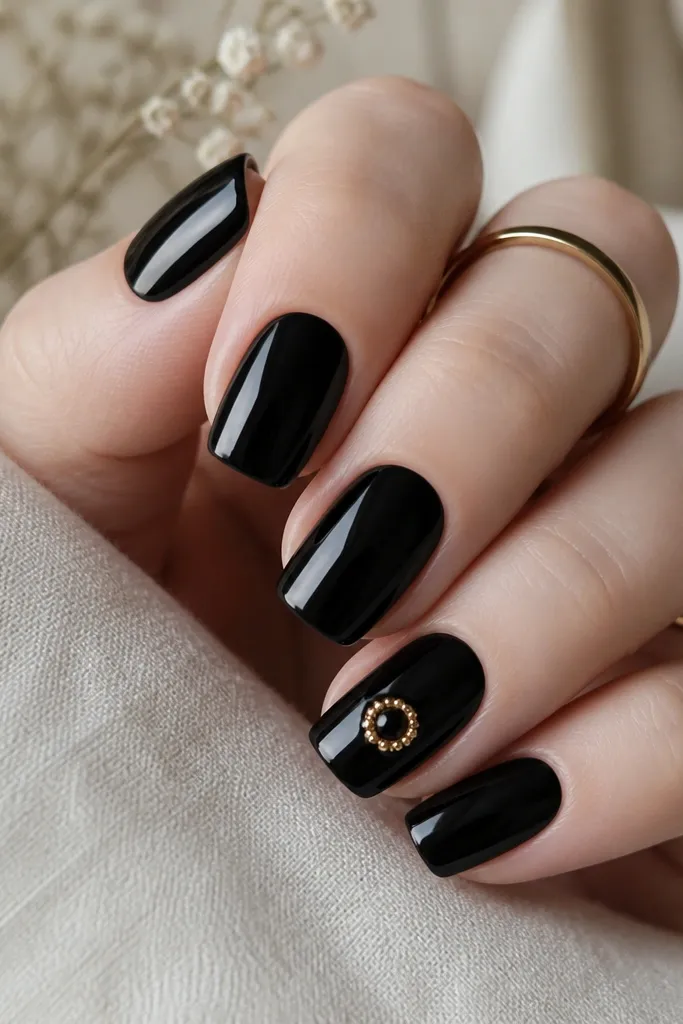
A single halo detail looks like a statement ring and keeps the rest of the set grounded. The Black And Gold Nails aesthetic stays cohesive because the base is consistent glossy black and the halo uses warm gold stones with tiny sparkle. This design is flattering because it puts the focus in the center of the nail, which makes the nail look more balanced. It’s also great if you have a birthday outfit with shiny accessories; the halo matches without clashing. I like it on medium almond and oval because the halo has a nice “frame” shape.
Paint all nails glossy black and cure. On the accent nail, place a small central rhinestone using gel adhesive, then build a circle of smaller gold stones around it. Keep the halo tight and round — you’re aiming for a 4-5 mm diameter. Seal with a top coat in two thin layers, and cap the sides so the stones don’t snag when you type or scroll.
Use a toothpick to adjust rhinestones while the gel is still moveable.
Don’t put a large rhinestone in the exact center and then surround it with big stones — the halo looks lopsided.
20. Gold Studded French With Black Negative Space
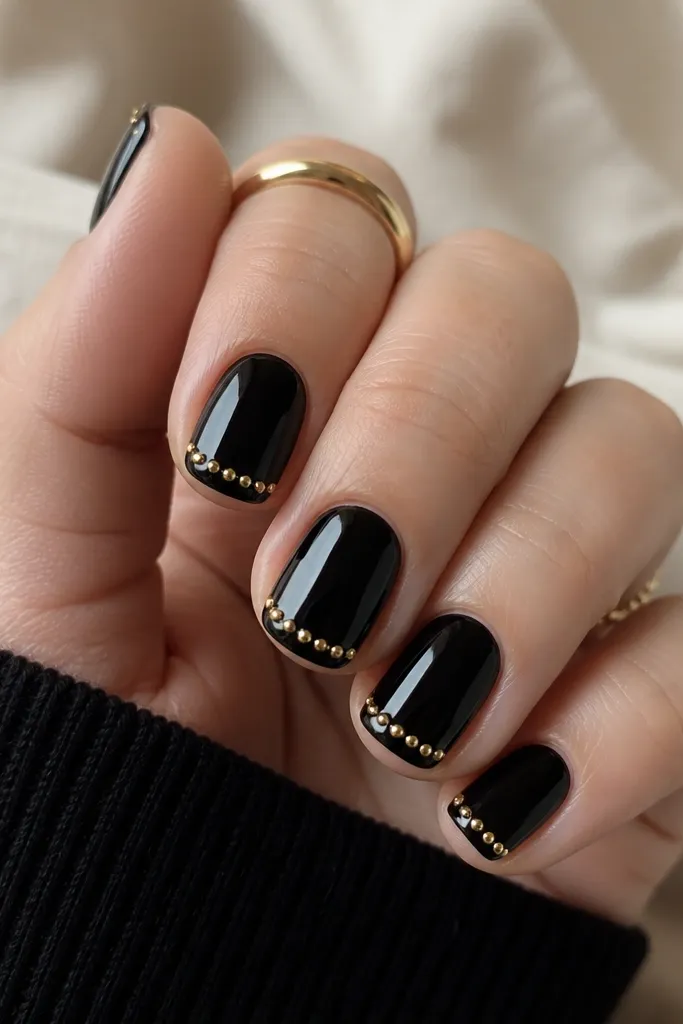
Studded French tips look like you spent a lot of time, because you did, but the result is clean and controlled. The studs sit along the smile line so the glitter-sparkle stays at the tip where it’s flattering. I like this for short nails because it doesn’t require extra length to look fancy. It also works on all skin tones since the studs are warm gold and the black base keeps contrast strong. For the Black And Gold Nails aesthetic, this is a “night out” birthday option that still feels tidy.
Paint the nails glossy black and cure. Add a thin line of gel where the French tip arc should be, then press tiny gold studs into the gel — one by one or with a pre-made strip if you have it. Keep the stud line consistent across nails, but you can make the ring finger tip slightly thicker for a focal point. Seal with a glossy top coat and cap the free edge so the studs stay smooth under your fingers.
Use studs that are all the same size so the arc stays crisp.
Don’t use mixed sizes on the French line; it looks messy instead of intentional.
21. Black Satin With Gold Leaf Cluster at Tip
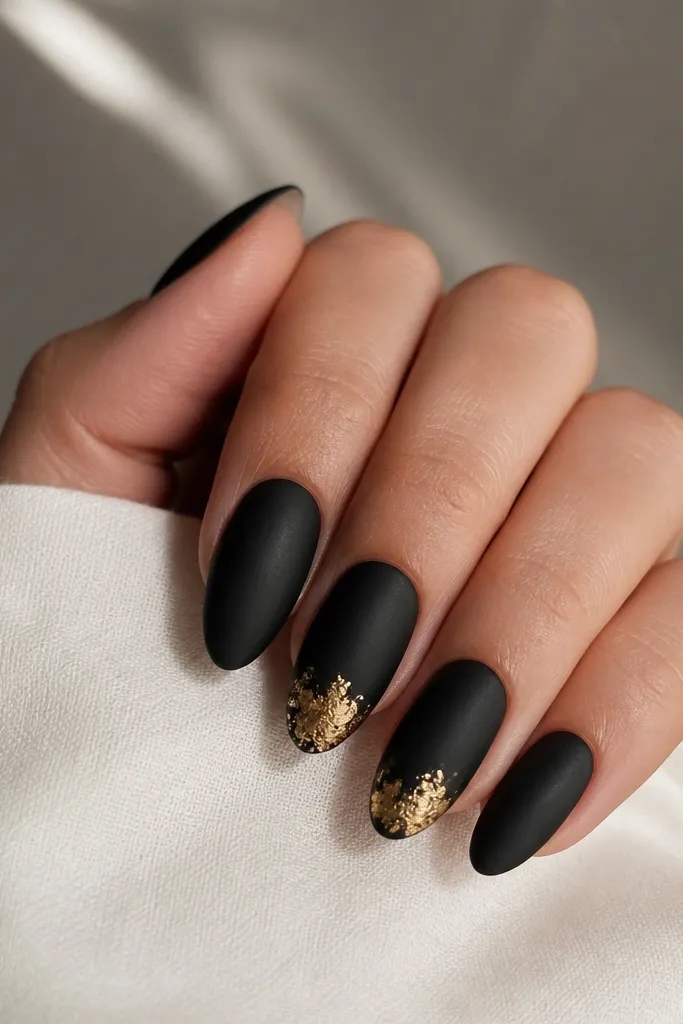
Satin black makes gold leaf look softer and more expensive than glossy black sometimes does. The gold leaf cluster at the tip looks like a little crown and keeps the rest of the nails calm. This is a good choice when you want Black And Gold Nails aesthetic to feel classy for a birthday dinner, not like club nails. It flatters because satin reduces glare and makes the gold cluster stand out without harsh reflections. On medium almond, the tip cluster makes the nail look slightly longer.
Apply satin-black polish and let it set fully so it stays velvety. On two accent nails, press small torn pieces of gold leaf at the center of the tip, leaving some black gaps so the cluster looks airy. Spread one or two wisps a few millimeters outward, but keep the heaviest part in the center. Seal with a satin-friendly top coat or a glossy top coat only over the leaf cluster if you want extra contrast.
If satin top coat dulls gold leaf, switch to a clear glossy top coat only on the cluster area.
Don’t cover the whole tip with leaf — clusters look more intentional and last longer.
22. Gold Foil Frame Around Black Center
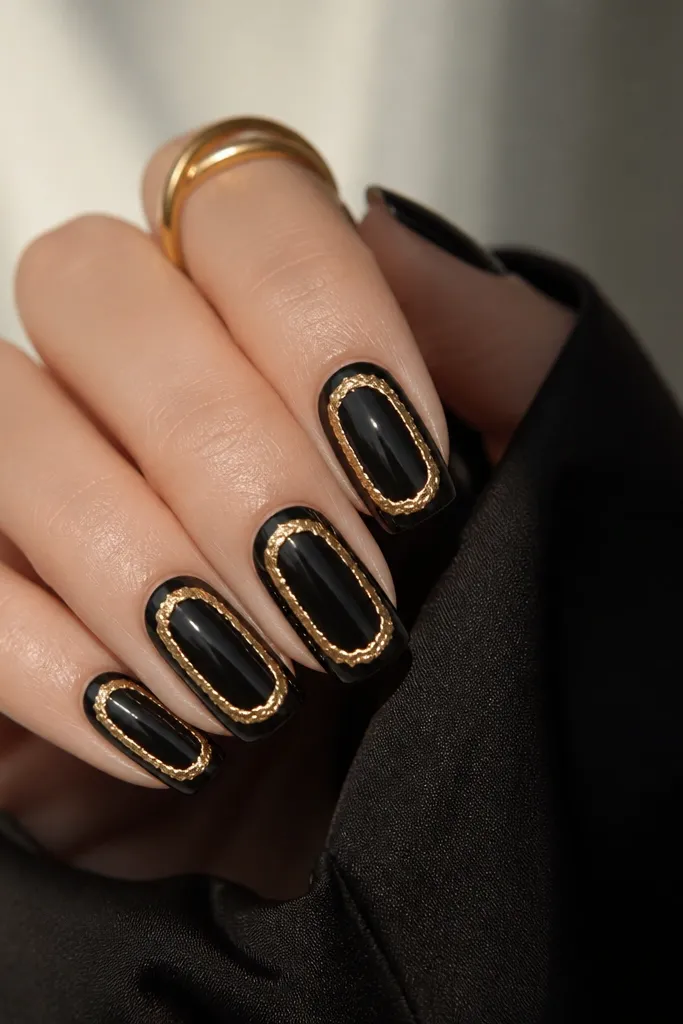
A gold frame makes black-and-gold feel like a miniature piece of art, and it stays birthday-appropriate because the gold catches light along the edges. The black center panel keeps the design grounded, so it doesn’t turn into a full gold look. I love this on oval nails because the frame curves naturally with the nail shape. It flatters hands by creating a focal “panel” that looks neat and intentional. For the Black And Gold Nails aesthetic, frames are one of the easiest ways to look high-end without using a full set of gems.
Paint the full nail glossy black first. Then apply gold foil strips or foil leaf along the perimeter — think of a 2-3 mm border around the nail edges — leaving the center mostly black. Press carefully so the frame sits flat and doesn’t wrinkle. Seal with two glossy top coats, and cap the foil border edges so the frame doesn’t lift.
Keep the center panel clean by wiping excess foil off the middle with a lint-free wipe before sealing.
Don’t let the foil spread into the center — it kills the “frame” effect.
23. Black Marble With Gold Dot Confetti
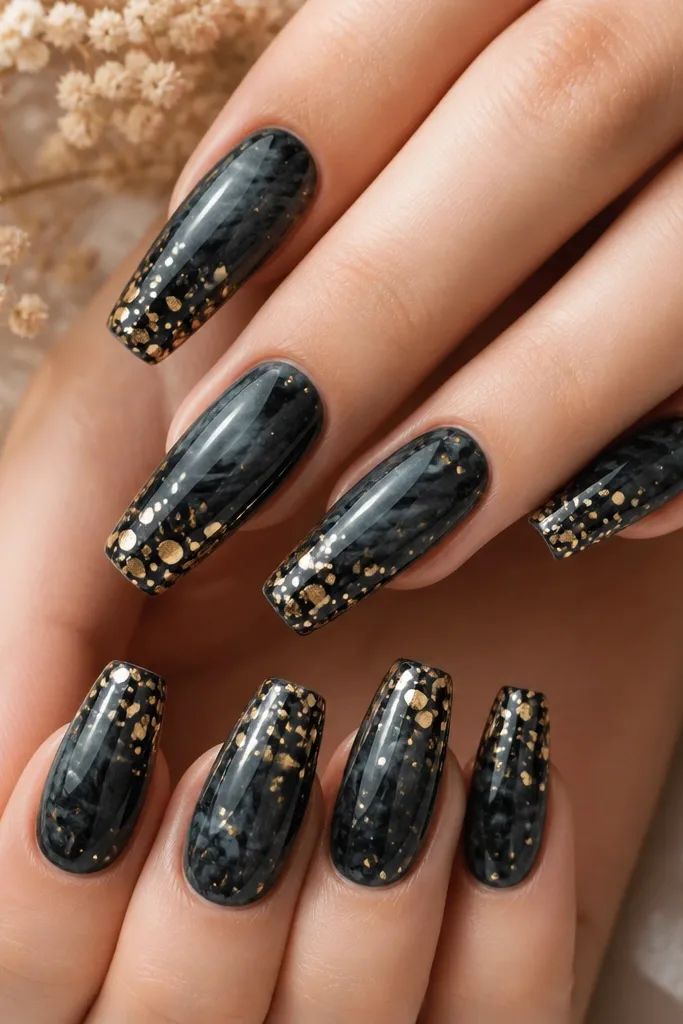
This one is fun but still looks grown-up because the dots sit on top of marble, not over plain black. The marble gives depth, and the gold dots add a party sparkle that reads birthday in photos. I like concentrating dots near the tip because it makes your hands look bright when you show off your nails at dinner. It flatters most nail lengths, but it really shines on coffin and almond because the tip area has more space. For the Black And Gold Nails aesthetic, the dots should be metallic gold, not yellow glitter.
Create black marble using glossy black plus a darker charcoal swirl, then cure. Add gold dots with a dotting tool using metallic gold paint or gel, placing more dots in the top third of the nail. Keep the dots varied in size — small, medium, then a few tiny ones — but avoid clustering too tightly in one spot. Seal with a glossy top coat in two layers to protect the dot texture and smooth the surface.
Use a toothpick for tiny dots — it gives you finer control than a brush.
Don’t use matte top coat — it makes gold dots look flat and dull.
24. Gold Leaf Drip Over Black Gloss
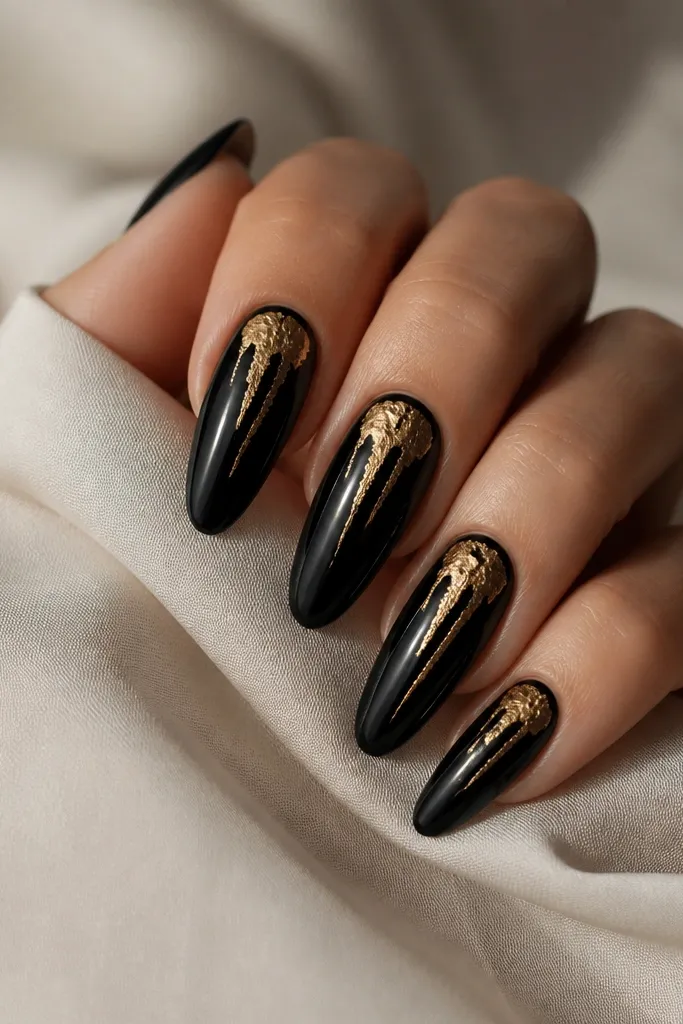
Drip details look like melted candlelight, which is why it fits a dreamy Black And Gold Nails aesthetic. The drip works because it’s vertical and ends around mid-nail, so it elongates without covering the whole nail. Gold leaf keeps it airy; it doesn’t turn into a thick glitter mess. This design flatters long almond and coffin shapes best, but you can scale it down for medium nails by shortening the drip length. It also looks great with dark outfits because the black base stays sleek.
Paint glossy black and cure fully. Tear gold leaf into thin pieces and press them onto the nail near the upper center, then gently drag pieces downward so they form a drip trail. Keep the drip edges irregular and leave gaps so black shows between leaf pieces. Seal with two glossy top coats, and cap the ends of the drip so it doesn’t snag or lift.
Start the drip higher than you think — the gold leaf settles as you press it.
Don’t make the drip too wide; thick drips look like a spill.
25. Gold Chrome Tip With Black Base (Reverse French)
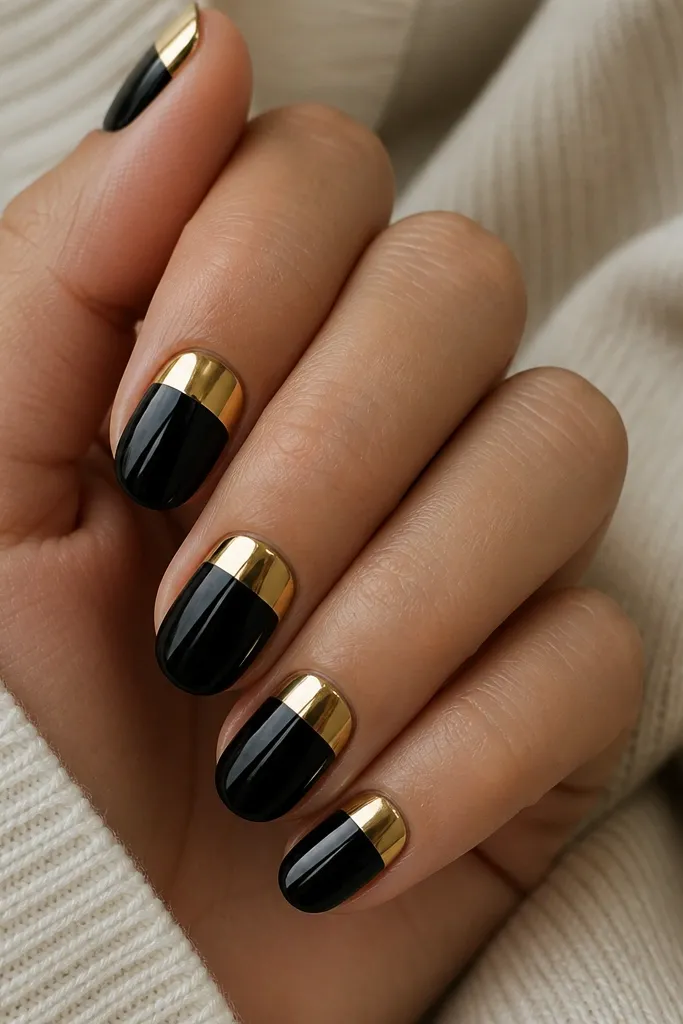
Paint a glossy black base and cure. Apply a straight strip of gold chrome gel or chrome powder across the tip — keep it about the top third of the nail or 2-3 mm if nails are short. Use a thin strip of tape to keep the chrome band perfectly straight, then remove tape after applying and smoothing. Seal with a chrome-safe top coat or a very thin protective layer depending on your chrome product.
Reverse French gives you bold glow with a clean, engineered look. Black chrome? No — gold chrome at the tip is what makes it feel birthday-ready because it reflects flash like jewelry. The straight band is flattering because it creates a crisp horizon line and makes nails look neat even when they’re shorter. This design works for all skin tones since gold chrome reads bright and warm. It’s also practical: it hides small tip wear because the chrome band still looks intentional.
Watch outDon’t make the chrome band uneven — wavy edges make it look cheap fast.
Editor's noteIf your chrome dulls, skip heavy top coat and use a glossy gel only on the edges.



