
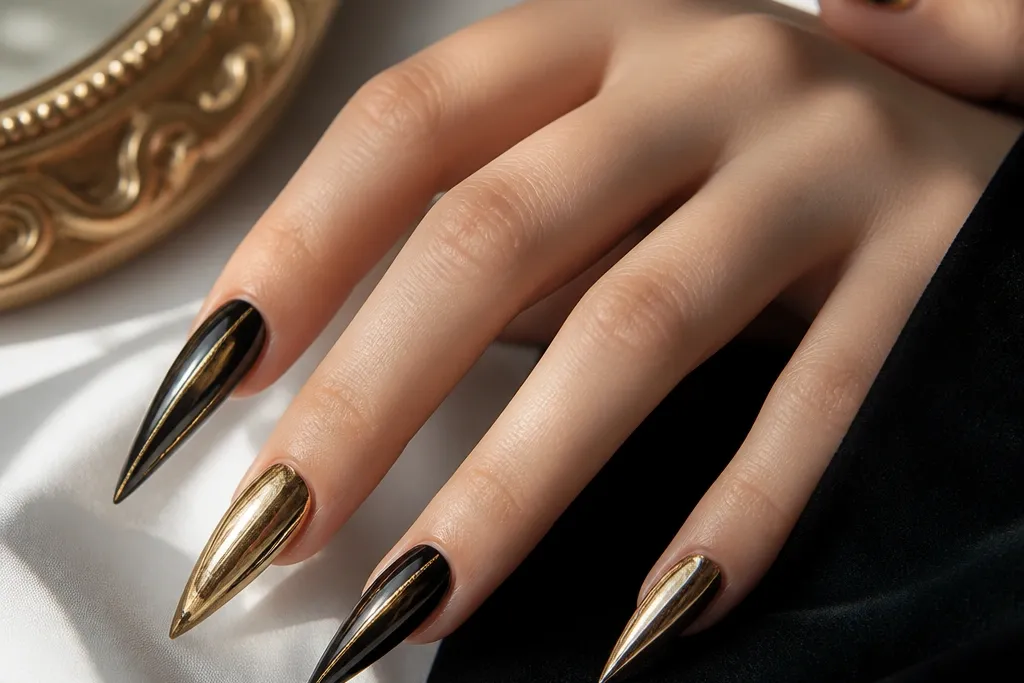
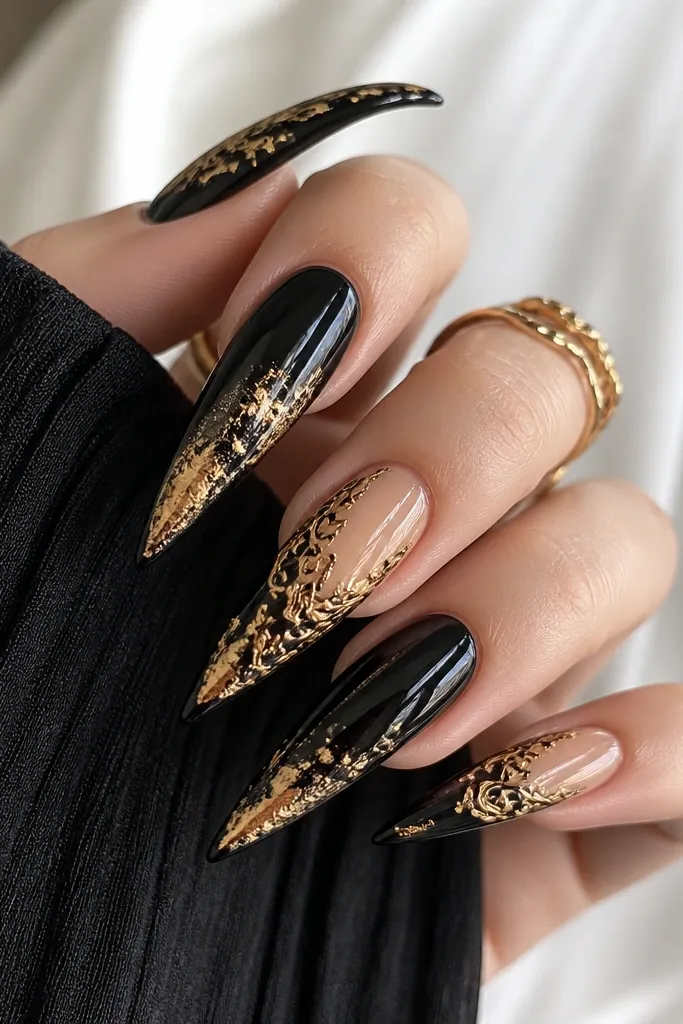
1. Mirror Black Stiletto With Gold Cuticle Halo
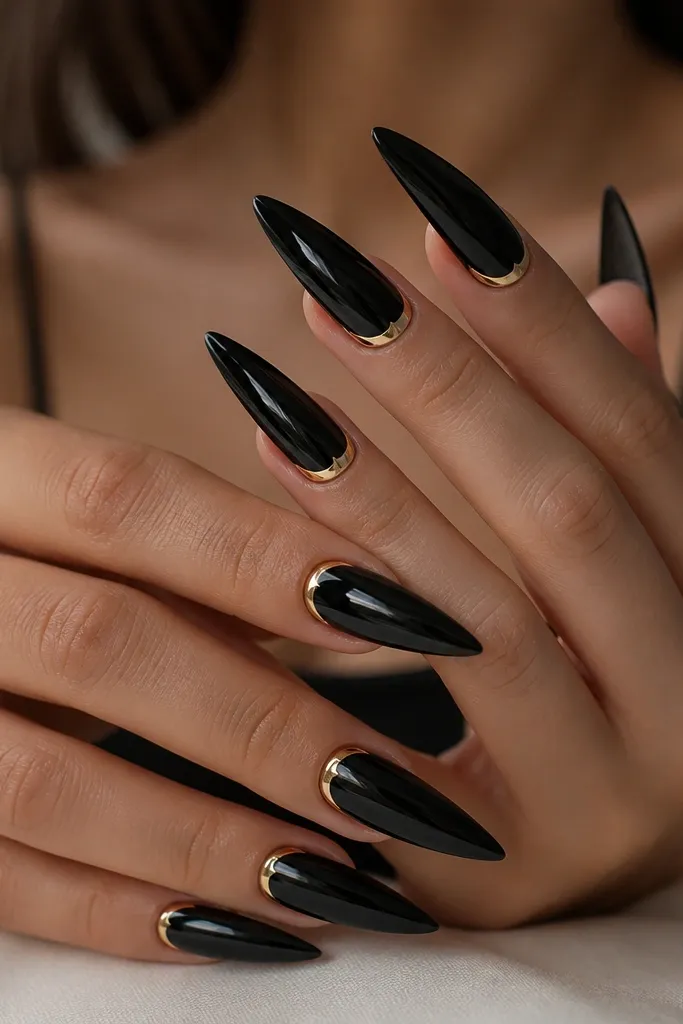
This set is pure “expensive hands” because the gold sits where light hits first — at the cuticle. I use mirror-black gel because it reflects like a phone screen, so the gold halo looks brighter without needing heavy coverage. The gold arc is thin and even, which flatters shorter nail beds by visually lifting the center of the nail. It’s also perfect for medium to deep skin tones because the contrast stays crisp, even in indoor lighting. Wear it for dinners, date nights, and events where you want your manicure to look styled without changing your outfit.
Editor's noteUse a liner brush with a slightly flattened tip so the halo stays perfectly round, not wobbly.
Start by applying a rubber base, then cure. Paint the nail with mirror-black gel in two medium coats, curing fully between coats, and keep the surface smooth at the center. Add a gold chrome or gold gel liner halo: place the arc right at the cuticle line, leaving a tiny gap so the black still frames it. Cure, then top coat with a thick glossy finish and cap the free edge.
Watch outSkipping a mirror-black underlayer makes the gold look dull and uneven.
2. Black Velvet Matte With Gold Foil Tip Drip
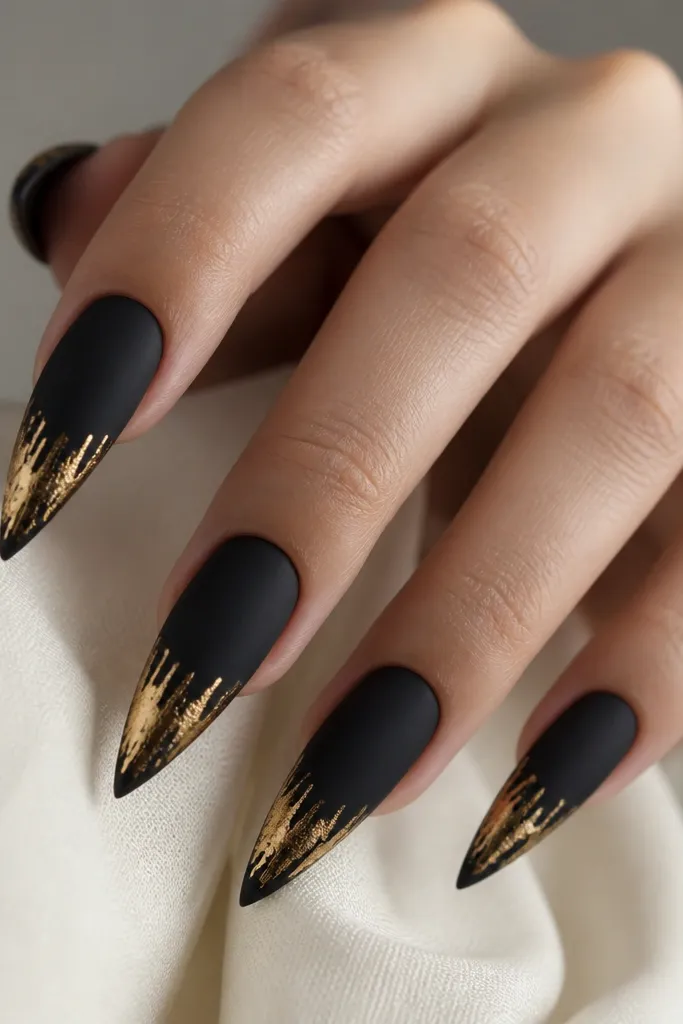
Matte black changes the whole vibe. The velvet matte finish makes gold foil look like it’s embedded in the nail instead of sitting on top. The foil drip at the tip adds movement and makes the stiletto feel longer, which flatters hands that want extra length. This design works great on fair to deep skin because the matte background absorbs light and the gold catches it. If you’re wearing mostly black, this keeps things from looking too shiny and loud.
Start with a smooth black base in a matte system — I recommend a velvet matte top coat over cured black gel. Press gold foil onto the very tip while the tacky layer is still active, then use a small silicone tool to guide the foil downward for the drip look. Leave some matte black showing so the gold doesn’t cover the whole nail. Finish with one thin matte coat over areas you don’t want glossy, and keep the foil areas slightly textured rather than over-sealing them.
Press foil with short, firm touches instead of dragging, or you’ll get smears.
Putting a glossy top coat over foil without planning can flatten the texture and make it look like cheap glitter.
3. Black Ombre To Gold Chrome Tips
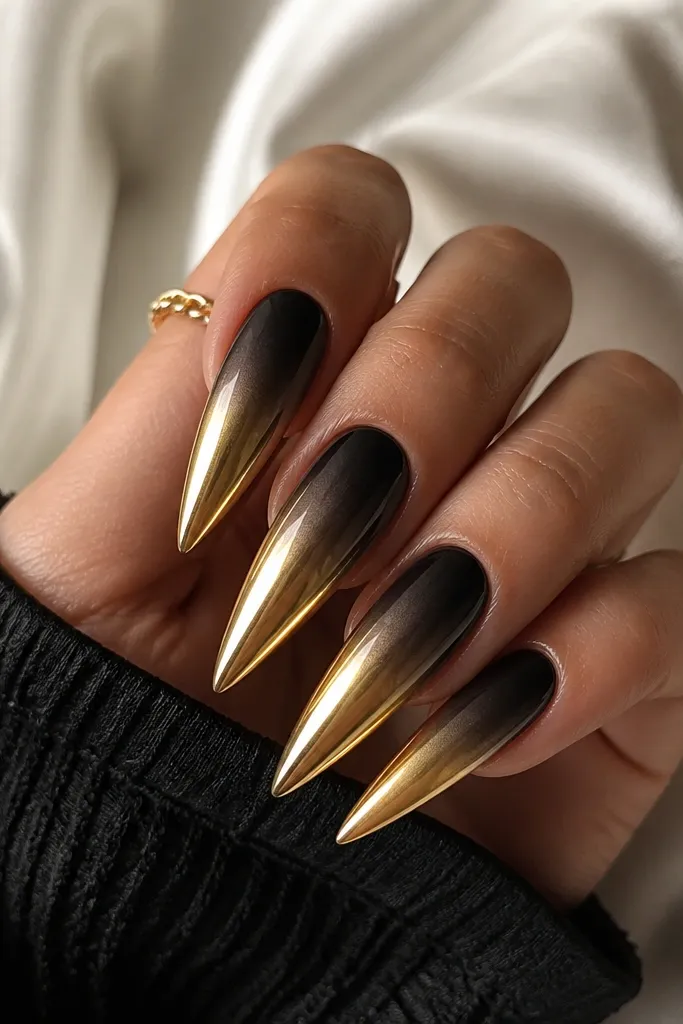
This is my go-to when someone wants drama but hates busy art. The black-to-charcoal fade makes the stiletto look soft and wearable, and the gold chrome tip gives that “jewelry” shine. The chrome concentrates at the free edge, which visually lengthens the nail and balances the hand. It looks especially good on nails that are slightly uneven in shape because the ombre hides minor dips. For everyday luxe, it’s also easier to maintain than full gold coverage.
Apply rubber base, cure, then paint the nail with black gel from the cuticle down. Sponge an ombre using a makeup sponge: blend black into charcoal toward the middle while it’s still slightly tacky, then cure. For the gold chrome tip, apply a gold chrome base only on the lower third and cure, then buff on gold chrome powder. Seal with a chrome-safe top coat and cap the tip.
Blend the ombre from the center outward — it prevents a harsh stripe near the cuticle.
Curing too long between ombre steps leaves hard edges that look like a sticker.
4. Gold Leaf On Black Negative Space Stiletto
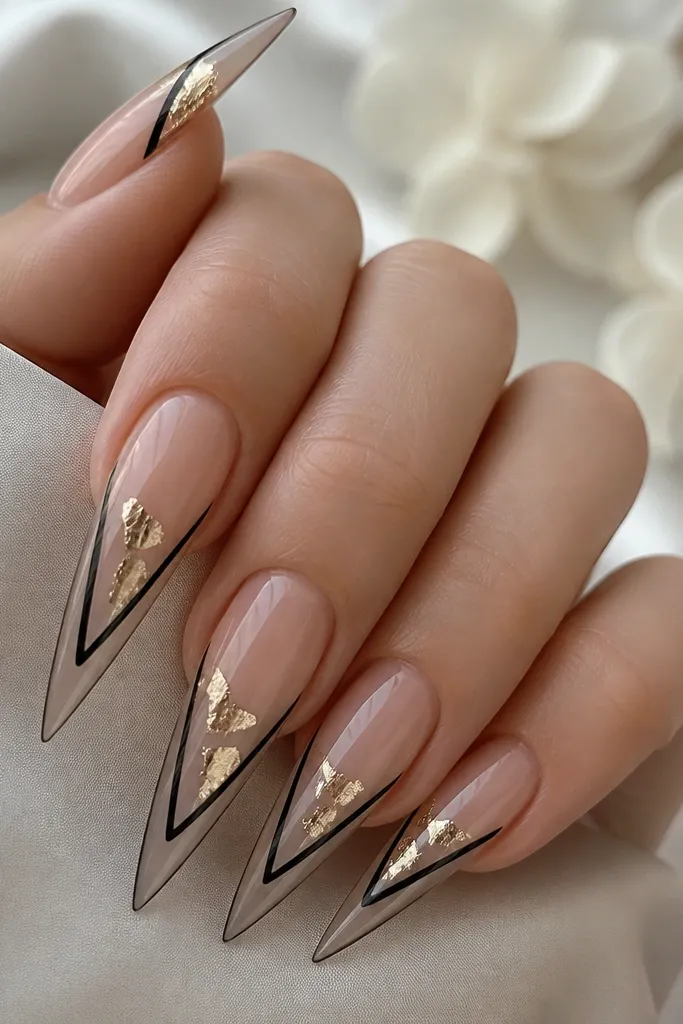
Negative space makes gold leaf look airy and intentional. I use a nude or clear base so the gold leaf has room to show its thin, papery texture. The black outline — usually along the sides or as a diagonal stripe — keeps it from looking messy. This is flattering for almost every skin tone because it adds brightness to the hand and keeps the nail from feeling heavy. It also looks great with rings since the negative space doesn’t compete.
Start by applying a nude base gel and cure it fully. Add black gel lines using striping tape as a guide so the edges stay sharp — I like a diagonal on each nail or side borders. Place gold leaf on top of the gold-friendly tacky layer in small chunks, pressing lightly so it doesn’t smear. Cure, then finish with a glossy top coat that seals around the leaf without flooding it.
Use tweezers to place leaf — fingers smudge it and it looks cloudy.
Covering gold leaf completely with thick gel makes it lose the paper-thin look.
5. Black Lace Stiletto With Gold Thread Lines
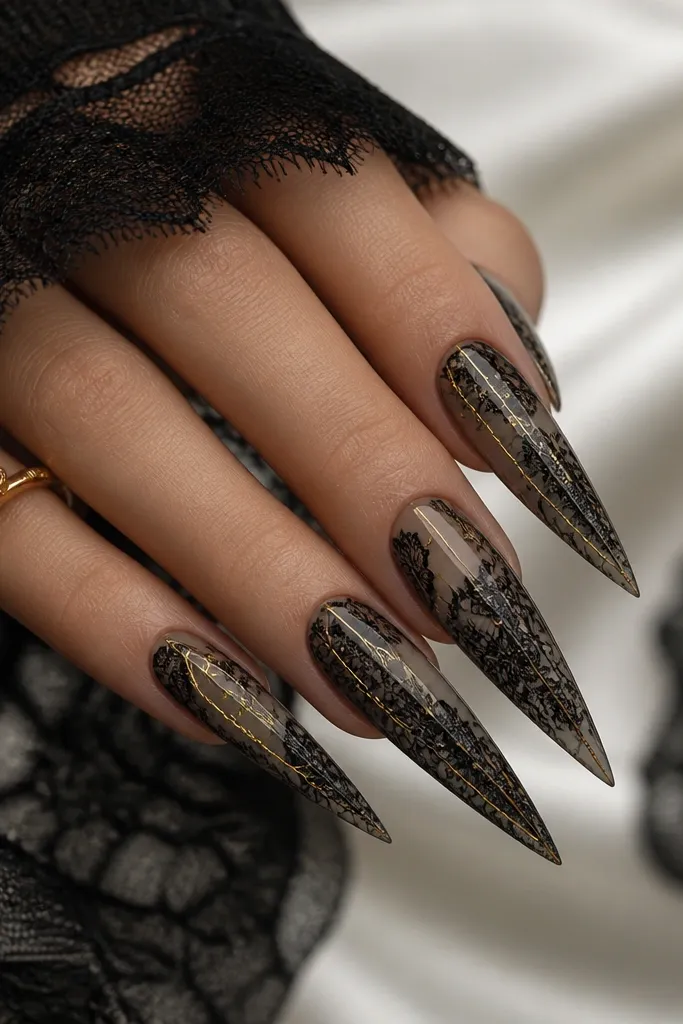
Lace on nails looks delicate, but it turns luxe when the gold traces specific parts instead of filling everything. I start with a sheer base so the lace feels airy, then paint black lace motifs — usually floral swirls and small mesh-like loops. Gold thread lines run through the center or along the lace edges, which makes the design read like couture. This set flatters short nail beds because the sheer base keeps the nail from looking bulky. It’s also gorgeous for weddings, engagement parties, and holiday dinners.
Editor's noteIf your lace looks messy, thin your black gel slightly and do two passes instead of one thick one.
Prep and apply a sheer nude base gel, cure. Build black lace using a lace stencil or a fine detail brush, keeping the pattern mostly in the upper half so it doesn’t crowd the tip. Add gold gel liner lines through the lace — just two or three per nail is enough. Cure and top coat with a glossy finish, then cap the free edge carefully.
Watch outUsing fully opaque black over the whole nail makes lace disappear and look like a sticker.
6. Gold Foil Confetti Over Glossy Black Stiletto
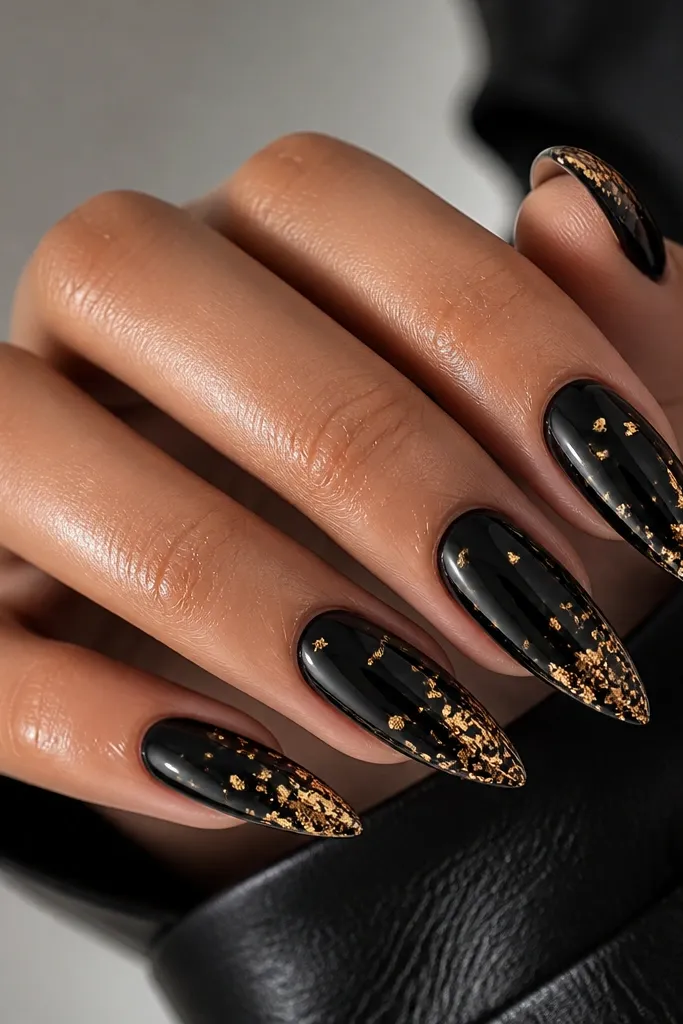
Confetti foil gives a lively, light-catching effect without needing painted artwork. I like it because it looks different each time the hand moves, which makes the set feel alive in photos. The glossy black base keeps the foil crisp, and the random clusters make the stiletto look longer. This works on any skin tone because the foil is bright and the black is clean. If you want glam but don’t want to stare at tiny details all day, confetti is your friend.
Editor's notePress foil with a flat silicone stamper so flakes stick without dragging.
Start with glossy black gel in two coats, curing fully. Apply a tacky layer only on the top half, then press small gold foil flakes onto it. Leave negative gaps so the black shows through — that contrast is what makes it luxe. Add a slightly heavier cluster at the tip by pressing a few extra flakes there, then seal with a thick glossy top coat.
Watch outOverloading foil across the whole nail can make it look like cheap glitter.
7. Black Stiletto With Gold Chevron Spine
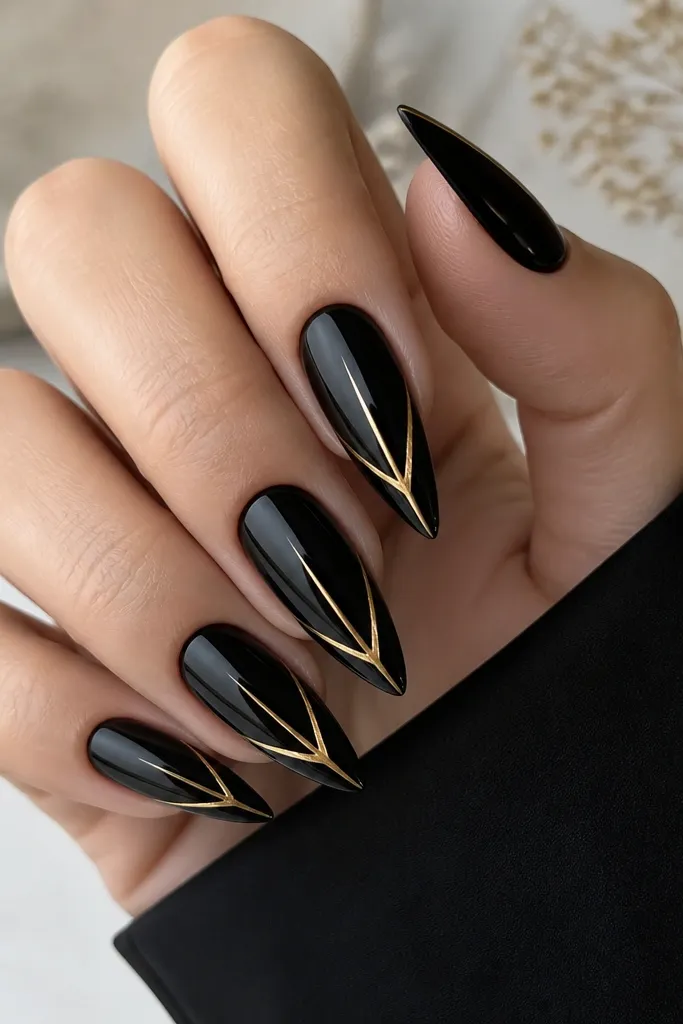
This design is clean, graphic, and it makes the stiletto shape look intentional. The gold chevron spine pulls the eye straight down, so it elongates the nail and makes hands look more slender. I recommend a high-gloss black base so the gold edges stay crisp. It’s also a good choice if you like black nails but want something more structured than foil. Works well for fair, olive, and deep skin because the contrast stays bold.
Editor's noteMark the center line lightly with a dot of gel before you place the tape — it keeps symmetry.
Paint the nails with glossy black gel and cure. Add two thin lines of gold gel from the center — one line slopes left down, the other slopes right down, forming the chevron points as you go. Use striping tape to hold alignment: place tape as guides, paint the gold, cure, then remove tape while gel is still set enough to avoid pulling. Top coat with a glossy finish and cap the free edge.
Watch outFreehanding chevrons without a guide usually makes one side thicker and it reads sloppy.
8. Gold Chrome Half-Moon Over Black Full Coverage
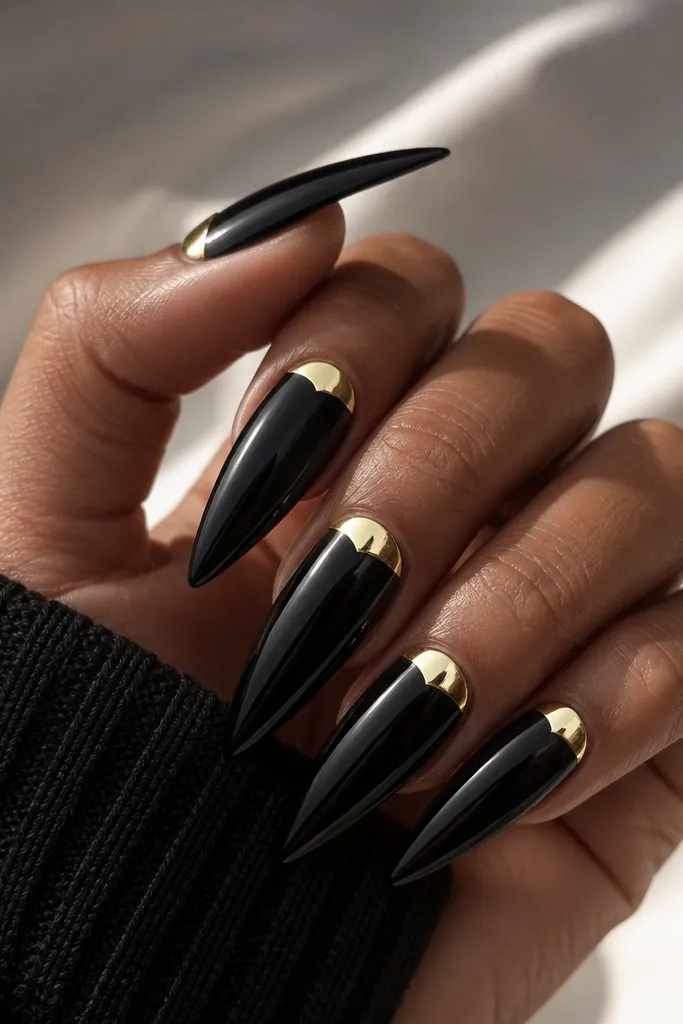
A half-moon at the cuticle feels classic, but the gold chrome makes it modern and loud in the best way. Because the shape is small and precise, it looks luxe even if your nails are short-to-medium length. The gold chrome reflects strongly, so it looks great under ring lights and car headlights. This also flatters hands with slightly dry cuticles because the chrome draws attention upward. Pair it with gold jewelry and you’ll look put together instantly.
Editor's noteUse a small curved silicone brush to shape the half-moon edge — it’s faster than trying to freehand the curve.
Apply black gel in two coats and cure. For the half-moon, place gold chrome base only in a curved band at the cuticle center — keep it about 2-3 mm tall. Cure, then apply gold chrome powder and buff off excess. Seal with a chrome-safe top coat that still keeps the reflection sharp.
Watch outSmearing chrome over the cuticle skin makes it look messy and can lift faster.
9. Black Marble With Gold Veins Stiletto
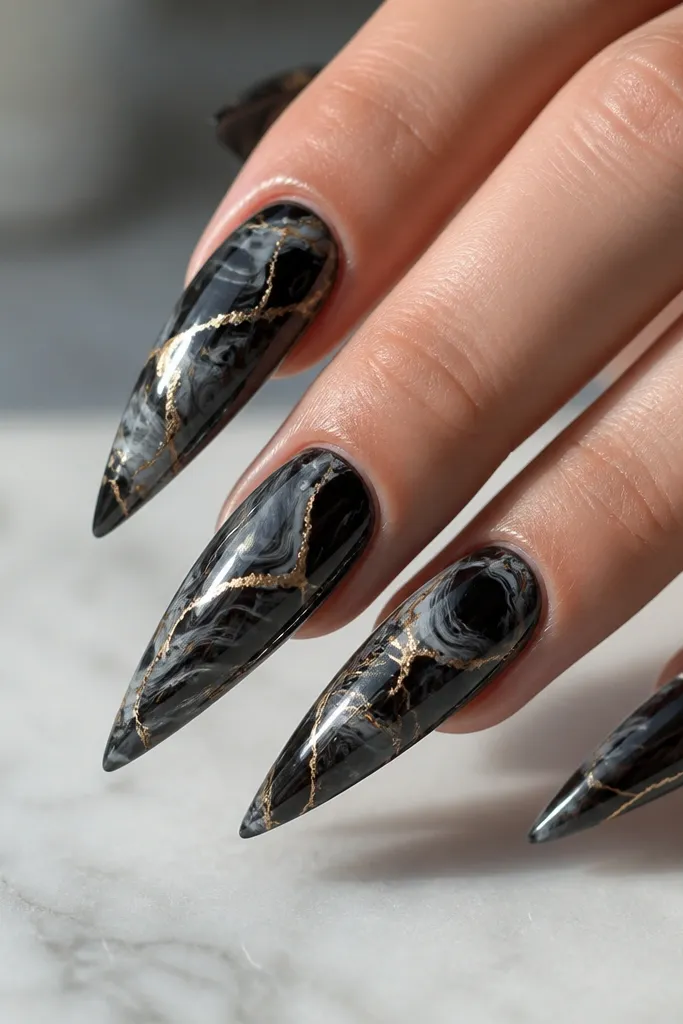
Marble nails look high-end when the veining is thin and controlled. I do black marble with a glossy base, then paint gold veins as lines that branch and taper — not blobs. That taper matters because it mimics real stone and keeps the gold from looking like glitter. This style looks incredible on stiletto tips because the marble lines can flow down the nail length. It also works for most skin tones because the colors stay deep and the gold pops.
Editor's noteKeep gold veins under 1 mm wide — if they’re thicker, it turns into “foil” instead of marble.
Start with a glossy black base and cure. Add marble movement using a marbling brush and a slightly lighter black/charcoal gel — swirl and drag thin lines, then cure. Paint gold gel veins over the marble using a detail liner brush, letting lines split and thin out toward the tip. Cure and top coat with a thick glossy layer to smooth everything.
Watch outUsing too many gold lines makes marble look chaotic instead of luxe.
10. Black And Gold Dotwork Stars On Stiletto
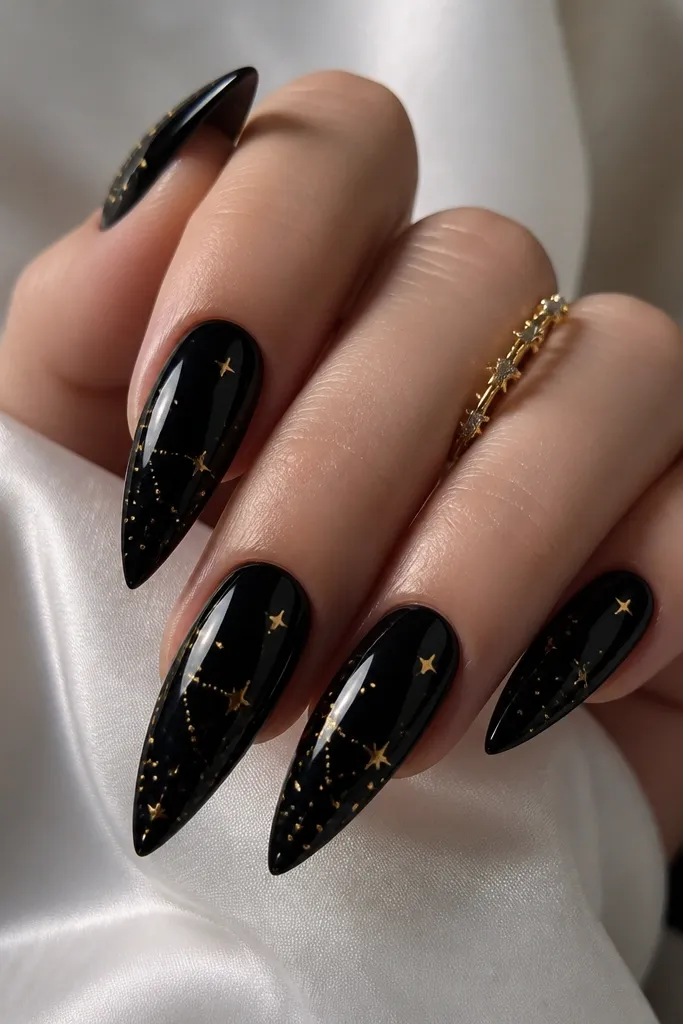
Dotwork is one of the easiest ways to get drama without heavy hand-painting. On black nails, tiny gold dots look like jewelry settings, and the star pattern reads playful but still luxe. This set is flattering because the gold is concentrated toward the free edge, making the nail look longer. It also looks good for people who don’t want foil texture — it’s clean and smooth. If you’re doing a party look with gold earrings, this matches perfectly.
Paint nails glossy black and cure. Use a dotting tool to place gold dots in star clusters near the tip — I do one main star per nail plus a few smaller dots around it. Connect some dots with a micro gold gel liner to form tiny constellation lines, then cure. Finish with one glossy top coat and cap the tip.
Use a dotting tool size that makes each dot about the width of your pinky nail’s edge — too big looks chunky.
Spacing dots randomly across the whole nail makes it look like accidental glitter.
11. Gold Chain Link Accent On Black Stiletto
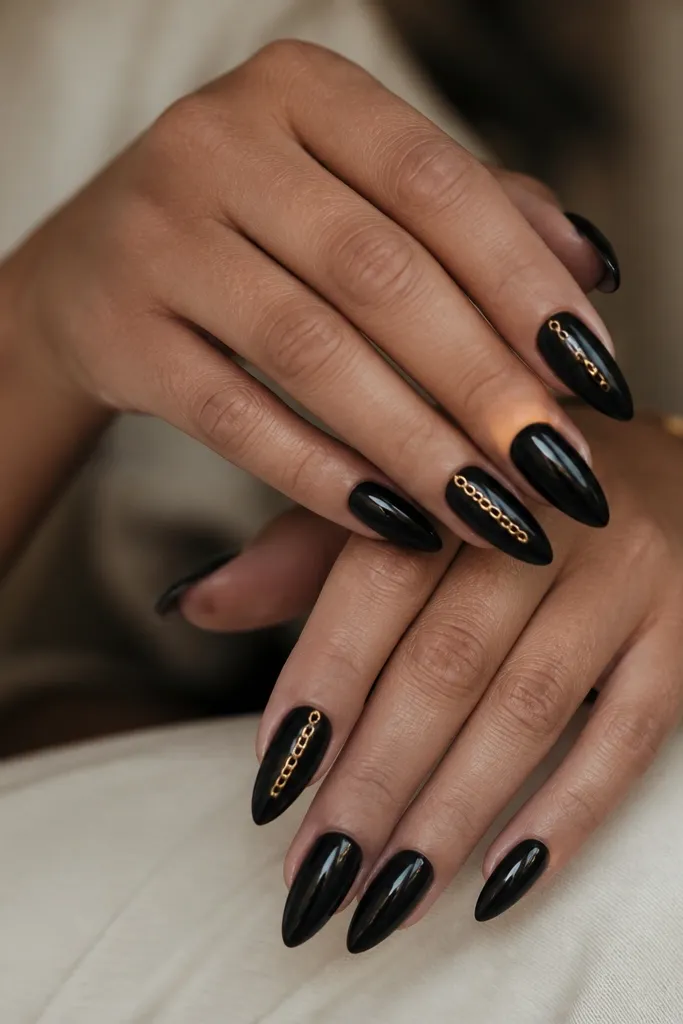
Chain link details look like real jewelry when you keep them minimal. I like doing one statement nail with a vertical chain, while the other nails stay solid black or have tiny side accents. That contrast makes the gold chain look intentional and expensive instead of busy. It flatters hands because the vertical line lengthens the nail. Works well for formal events, especially if you wear a chain necklace or gold hoop earrings.
Editor's noteIf your chain catches on hair, file the top coat thinner around the links and reapply a smoother final layer.
Start with glossy black gel in two coats, cure. For the chain, either use pre-made gold 3D chain pieces or a gold gel line technique: place a thin gold line down the center, then add small “link” shapes with gold gel dots. If you use 3D chain, anchor it with a thin layer of clear gel and cure under a light. Seal with a glossy top coat, pressing lightly at the edges so the chain doesn’t snag.
Watch outCovering 3D chain with thick gel makes it look bulky and dull.
12. Black French Stiletto With Gold Outline
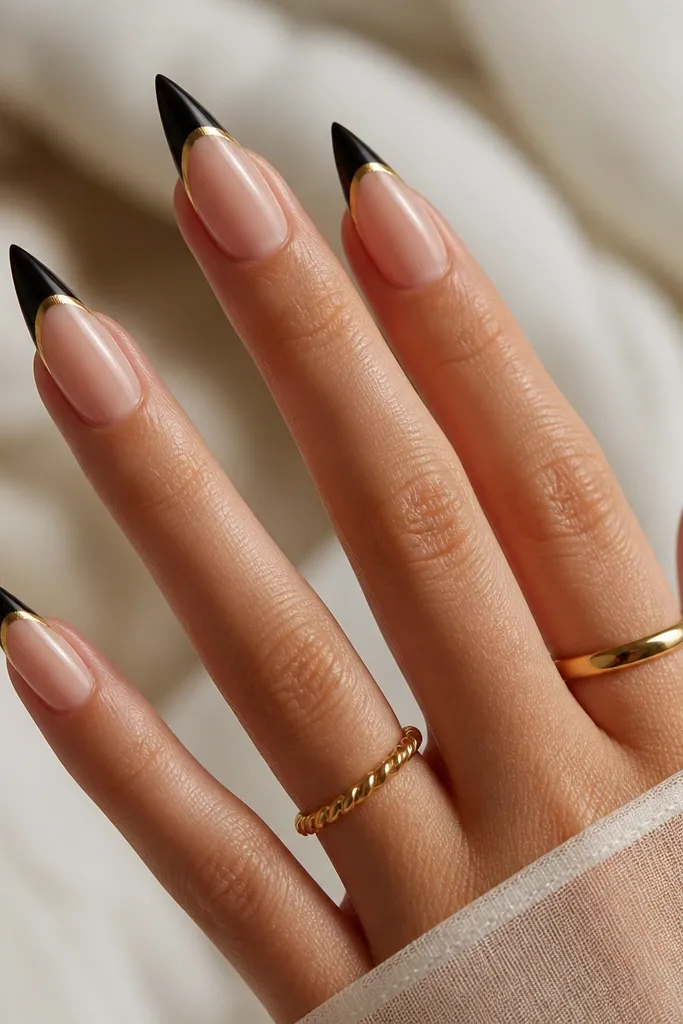
This is the cleanest “luxe” variation of French. Instead of a gold tip, you get a black tip with a gold outline, so the design looks sharp and expensive without covering the whole nail. The sheer nude base keeps it wearable, and the gold outline gives that jewelry edge. This flatters short nail beds because the nude base stretches the hand visually. It’s perfect for office looks, weddings, and anything where you want drama but still polished.
Apply a sheer nude base gel and cure. Use a French guide or thin striping tape to paint a black French tip, keeping the curve neat and the tip length consistent. Outline the black tip with gold gel liner following the same curve, then cure. Finish with a glossy top coat and cap the free edge so the outline stays crisp.
Use a black gel that self-levels — it makes the French line smooth instead of bumpy.
Freehanding French curves without a guide usually creates uneven tips that look cheap.
13. Gold Foil Frame Over Glossy Black Center
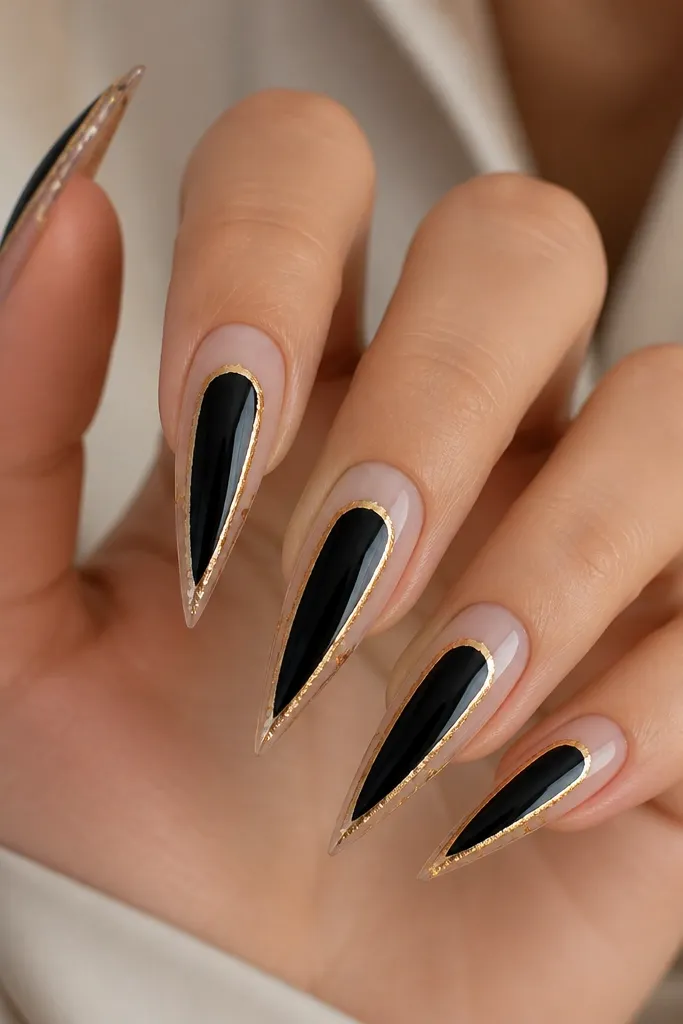
Frames make nails look like little fashion accessories. I do a sheer nude background so the gold foil frame reads like a picture border, while the glossy black center panel adds depth. The frame also looks great on stiletto tips because it follows the nail geometry. This set flatters hands with slimmer nails and looks amazing against long sleeves since the border catches light. It’s a strong choice for nights out when you want something architectural.
Editor's notePlan your frame thickness first — aim for a foil border about the width of a credit card’s edge.
Start with a nude sheer base and cure. Paint a glossy black center panel in an oval or elongated rectangle shape, leaving even margins on both sides. Press gold foil onto a tacky layer around the edges to form a thin frame, keeping it mostly clean and consistent. Seal with a glossy top coat, making sure the frame edges are fully sealed but not thickened.
Watch outLetting foil overlap the black center makes it look muddy instead of framed.
14. Black Glitter Gel With Gold Flake Edge
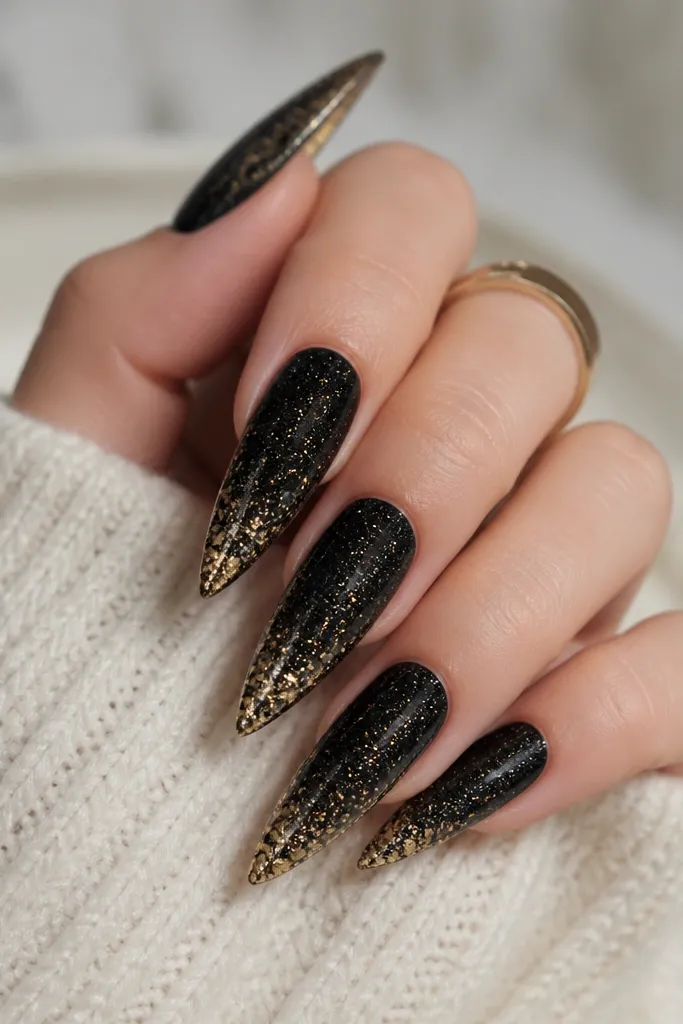
This one is for when you want sparkle but still want the set to read black-and-gold luxe. The black glitter gel gives dimension, while gold flakes at the edge make the tip look like it’s been dipped in jewelry. I like this for longer stiletto shapes because the glitter catches light along the curve. It flatters olive and deep skin tones because the base stays dark and the gold stays bright. If you’re going to a party and want your nails to look good in flash photos, this is a winner.
Editor's noteUse a makeup brush to dust off loose flakes before top coat so it doesn’t turn patchy.
Apply a black glitter gel in one even layer, cure, then add a second thin layer if you need more opacity. Keep the cuticle area neat — push glitter gel back with a brush so it doesn’t flood the skin. For the gold edge, apply a strip of clear tacky gel on the last 2-3 mm of the tip, then press gold flakes into it. Blend the flakes slightly inward by tapping a few extra pieces mid-tip, then top coat with a glossy sealer.
Watch outSkipping a clean cuticle cleanup makes glitter sets look messy fast.
15. Black Gloss With Gold Spiderweb Lines
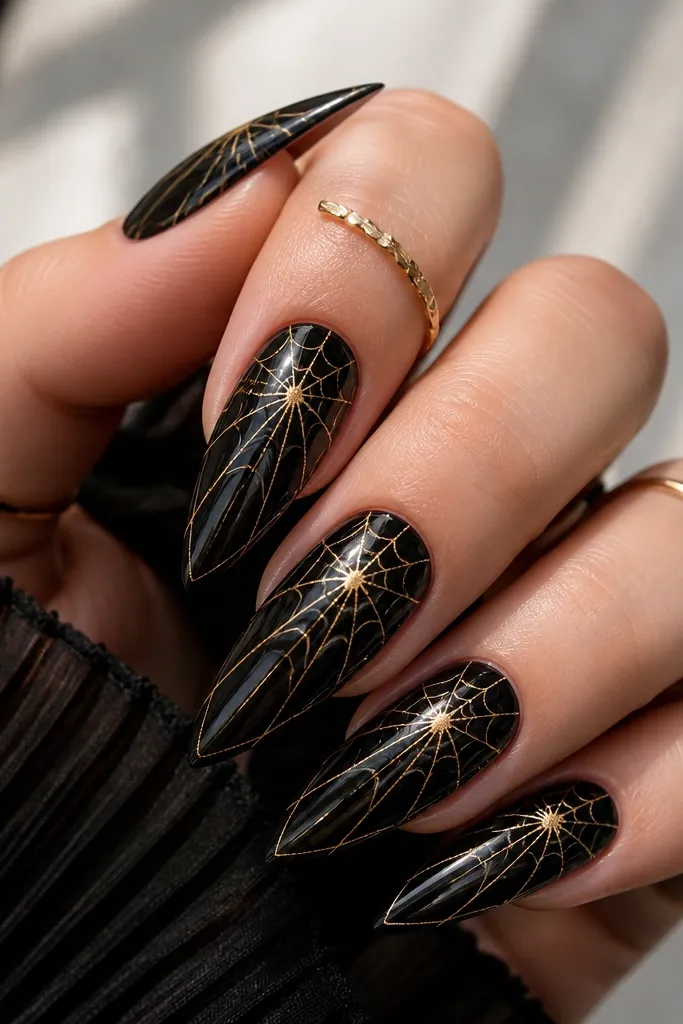
Spiderweb lines look dramatic without needing huge coverage. The key is keeping the lines thin and spacing them so the black still shows through. I start from a center point slightly above the middle, then radiate outward and add connecting arcs toward the tip. This pattern flatters most nail shapes because it creates symmetry and draws the eye down. It’s also great for Halloween-adjacent events, but it stays luxe because the web is gold, not neon.
Editor's noteIf your gold lines look shaky, rest your pinky finger on the table while you paint the web.
Paint nails glossy black and cure. Mark a tiny dot at the center using a gold gel dot — it’s your anchor point. With a fine liner brush, pull thin gold lines from that dot to the edges, then add a few curved connection lines near the tip. Cure and top coat with a glossy layer that won’t thicken the lines too much.
Watch outThick spiderweb lines turn into a blob and lose the “web” effect.
16. Gold Chrome With Black Side Cutout Stiletto
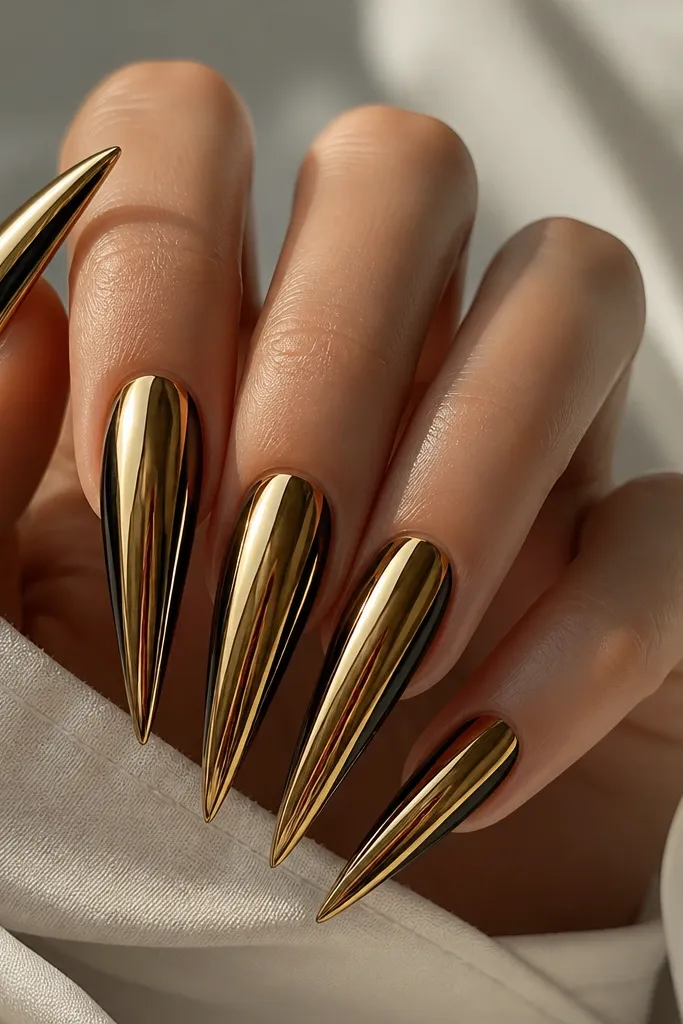
This is bold in a clean way. The gold chrome is the main event, and the black side cutouts make the nail look sculpted. I like it for hands that look best with strong contrast — especially if you wear gold rings and want your nails to match. The cutouts also prevent the set from feeling too heavy because you’re breaking up the chrome with black. It’s flattering for medium and long nail beds because the vertical lines elongate the hand. For parties and photos, it looks like liquid metal.
Start with gold chrome base gel and cure. Apply gold chrome powder and buff for full mirror shine. Use striping tape to mask two vertical side strips where you want black cutouts — about 1.5-2 mm wide each. Paint those masked areas with glossy black gel, cure, then remove tape and seal with a chrome-safe top coat.
Remove tape while gel is still tacky enough to keep edges crisp, not after it fully hardens and pulls.
Overlapping tape edges causes uneven cutout widths that look sloppy.
17. Black And Gold Foil Marble Accent On One Nail
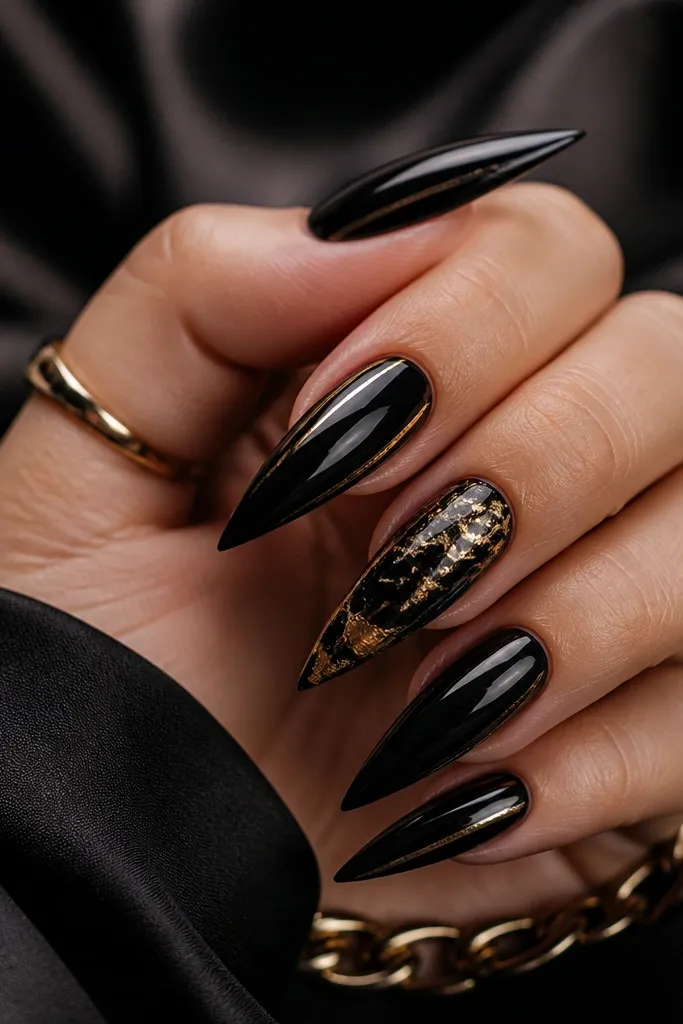
This set looks luxe because it follows the “one statement nail” rule I use in real life. The black base keeps everything consistent, and the accent nail gives you the drama without cluttering every finger. I do a marble look on the accent nail with black swirls plus gold foil patches — the foil adds texture, while thin gold lines keep it from looking random. It flatters hands because the gold is concentrated, and your rings still show. It’s a great option if you want Black And Gold Stiletto Nails luxe but you’re not sure you want full foil coverage.
Paint all nails glossy black in two coats, cure. On the accent nail, build marble with black and charcoal swirls, cure, then press gold foil onto the tacky layer in a few irregular patches near the tip. Add two or three thin gold gel lines through the marble so the foil looks placed, not scattered. Cure and top coat all nails glossy, keeping the accent nail sealed smoothly.
If foil looks too bright, tap it lightly with a lint-free wipe before top coat so it tones down.
Putting heavy art on every nail makes it look costume-y instead of luxe.
18. Black Matte Stiletto With Gold Outline French Tips
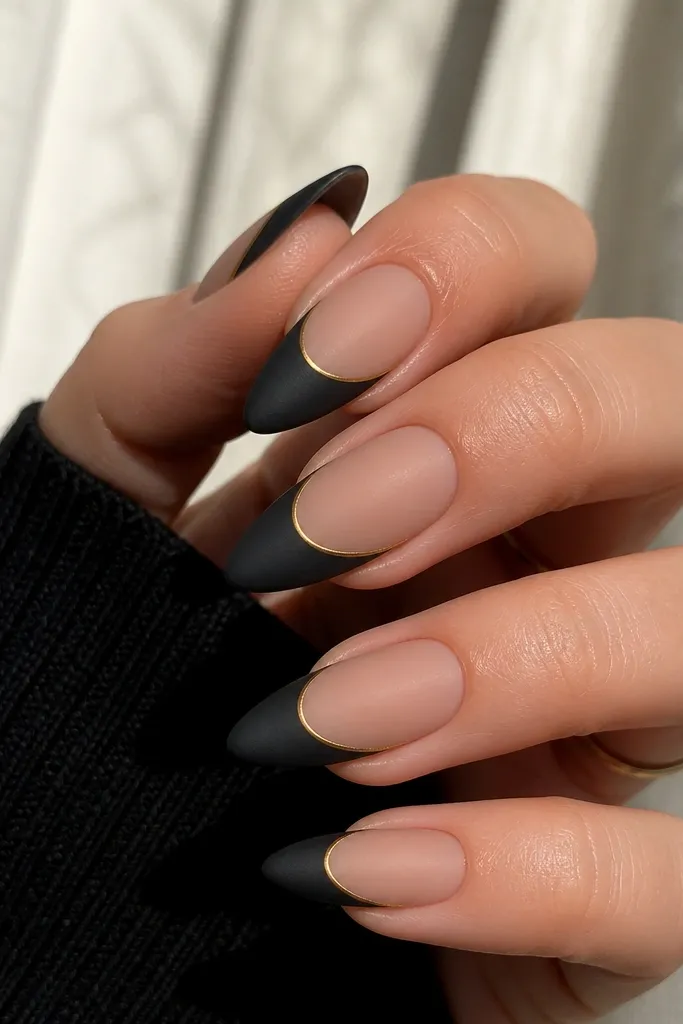
This is the matte version of a French that still reads expensive. Matte black makes the gold outline look sharper because there’s no gloss glare to compete with it. I keep the gold line thin so it feels like jewelry wire rather than paint. The sheer base keeps it light and flattering, especially if your nail beds are short. It’s also a great everyday luxe set because matte hides minor surface bumps better than gloss.
Editor's noteUse two top coats: matte over black, glossy over gold. It makes the outline pop.
Apply a sheer nude base gel and cure. Paint the French tip with matte-friendly black gel, cure, then apply a matte top coat over the whole nail. Use striping tape to outline the French line with gold gel liner, cure, then remove tape. Finish with one more very thin matte coat over the black areas only — keep the gold outline glossy by using a separate glossy top coat just on the gold.
Watch outMatting the entire nail including the gold outline kills the contrast.
19. Black Gloss With Gold Studded Tip Corners
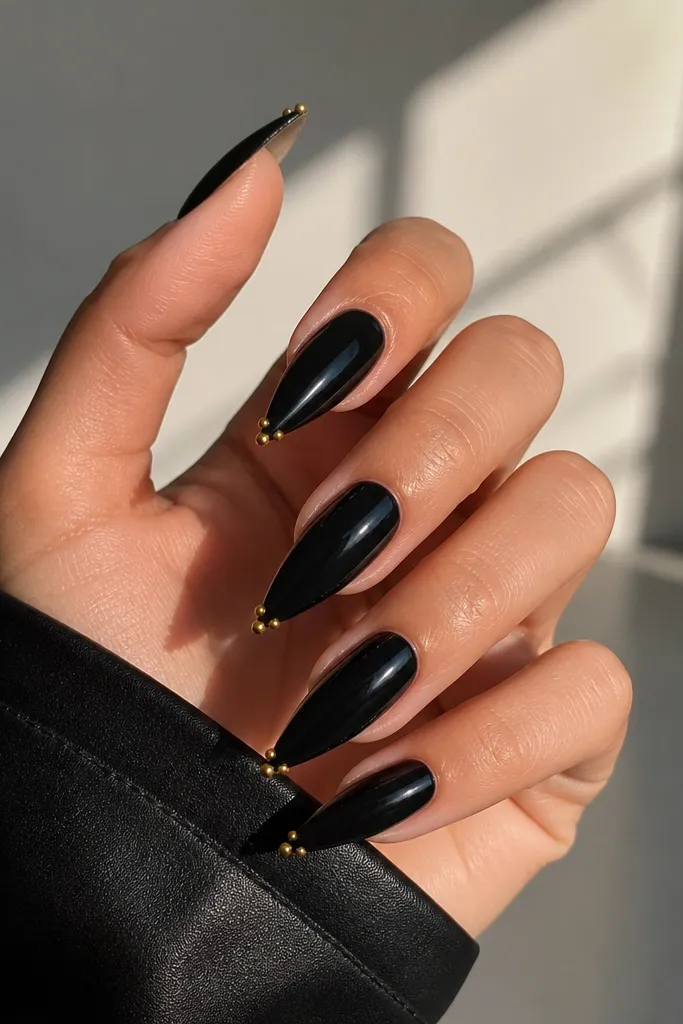
Stud corners feel like designer details because they’re placed like hardware. I like two studs per nail — one near each tip corner — because it keeps the design clean while still looking dramatic. The gold studs add dimension that foil can’t, and they catch light even when you’re not moving. This is flattering for people who like minimal nails but want a luxe finish. It also works for medium to deep skin tones because the black stays deep and the studs read bright.
Paint nails glossy black and cure. Apply a thin layer of clear gel on the last 1-2 mm of each side corner of the tip. Place small gold studs with tweezers, press gently, then cure under a lamp. Seal with a glossy top coat, making sure you fully cover around the studs so they don’t snag on fabric or hair.
Choose studs that are flat-backed and small enough to sit flush — raised studs catch and chip faster.
Using big studs makes stiletto tips look heavy and can lift at the edges.
20. Gold Foil Reverse French On Black Stiletto
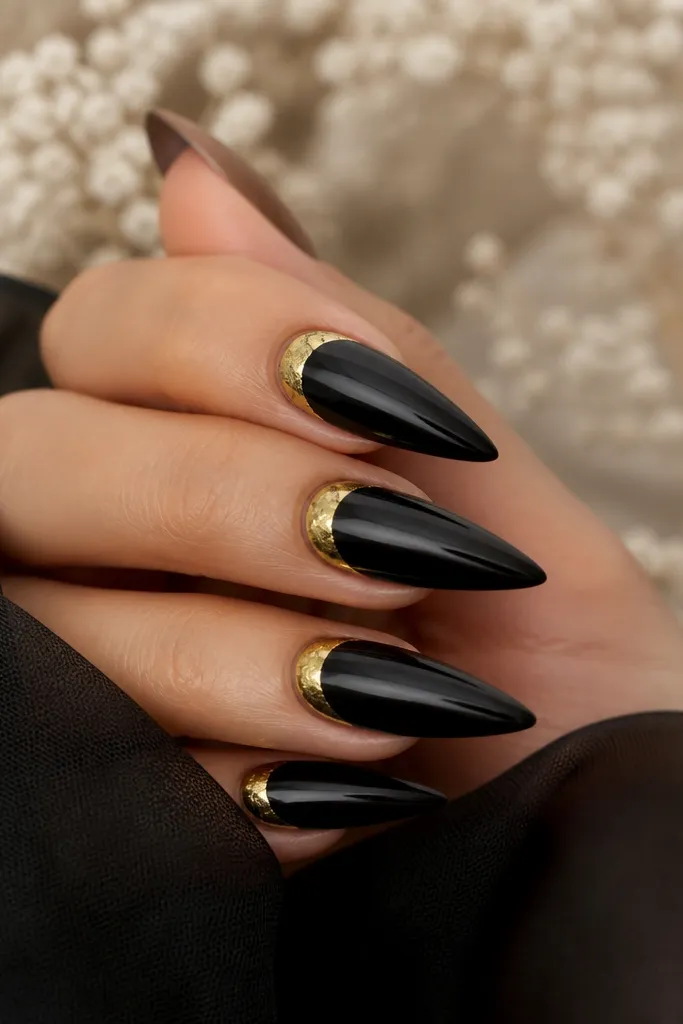
Reverse French gives you that “frame from the top” look. With a black full base and gold foil at the cuticle curve, your nails look styled even when you’re not showing the tip. I love this for workdays because it’s dramatic but controlled. The gold foil band also flatters hands with shorter nails by visually widening the upper nail area. It looks great against skin tones ranging from fair to deep because it creates a bright horizontal accent near the cuticle. This is a strong choice if you want Black And Gold Stiletto Nails luxe without full gold coverage.
Apply a full black base in two coats and cure. For the reverse French band, apply a tacky layer only where the curve will sit, about 2-3 mm tall. Press gold foil onto that curve, then use a small brush to nudge edges into a clean arc. Cure and seal with a glossy top coat, making sure the foil band is fully covered at the edges without flooding it.
Keep the reverse French curve slightly higher in the center so it looks lifted, not droopy.
Letting foil drift into the sidewalls makes the curve look uneven.
21. Black And Gold Geometric Panels Stiletto
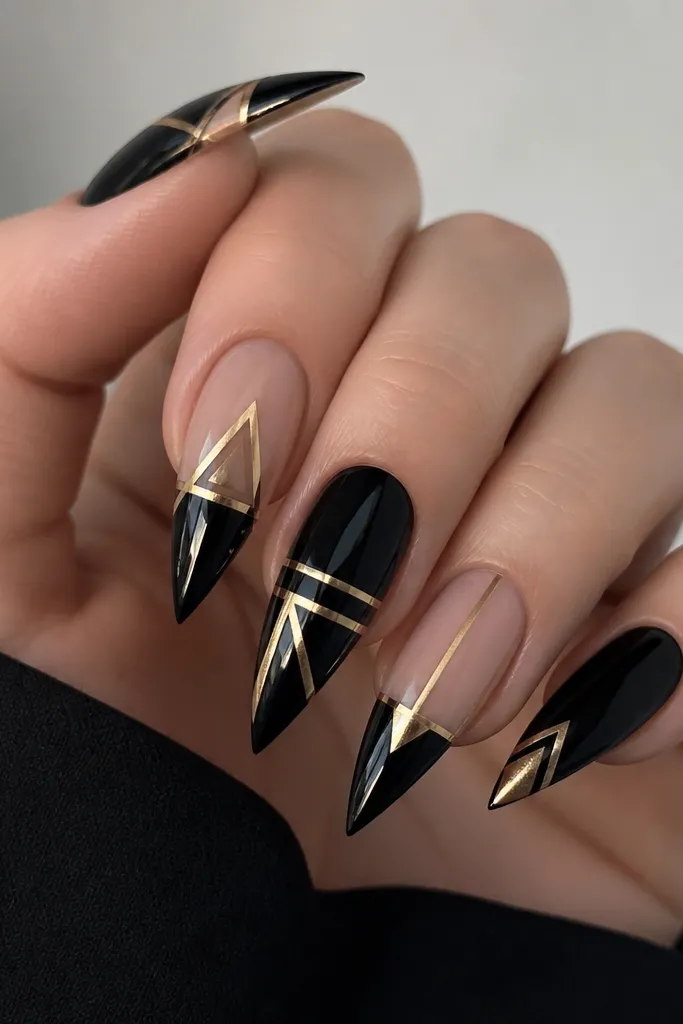
Geometric panels make the set look designed, not decorated. I use black as the main field, then carve out gold shapes that follow the nail’s length with crisp corners. The negative space keeps it from feeling crowded, and it flatters hands by making the nail look more structured. This works well if you like modern style — it looks sharp with leather jackets, gold watches, and sleek outfits. For skin tones, it’s easy because the nude negative space brightens the hand.
Start with a nude base gel and cure. Paint the center panels in glossy black using tape to block off sharp shapes. Add gold gel liner or gold striping tape for triangles and bars, curing between layers if needed. Peel tape carefully after curing so edges stay crisp. Finish with a glossy top coat and cap the free edge.
Use thin tape for gold shapes — thick tape makes the geometry look cartoonish.
Overlapping gold shapes without spacing makes the design look messy.
22. Black Marble French With Gold Micro Tips
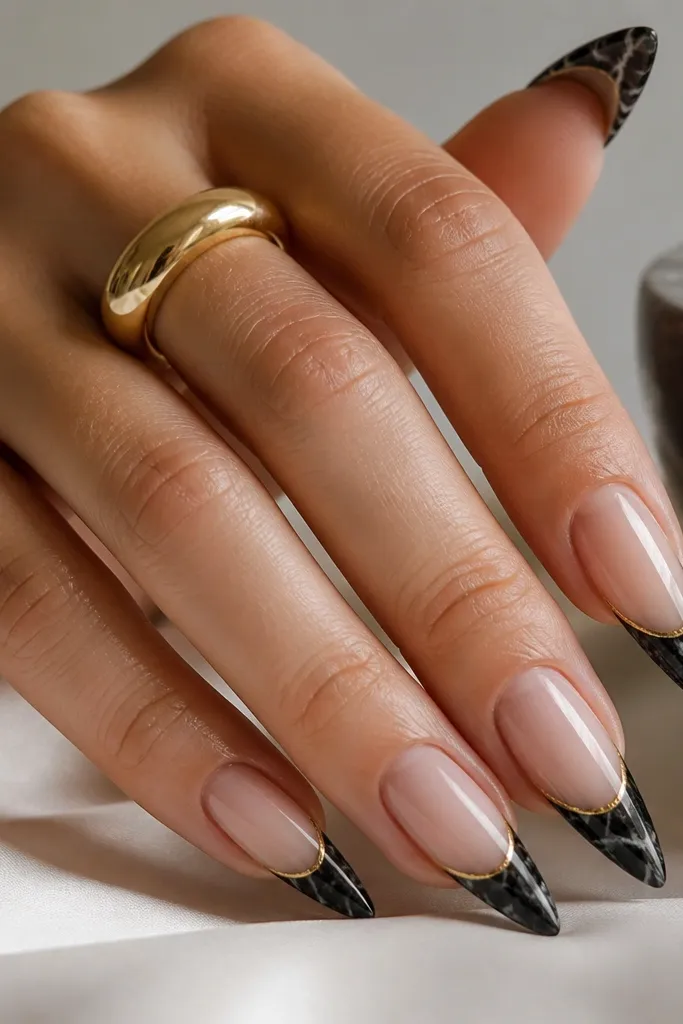
This is a subtle luxe set that still looks dramatic because the tip is the focus. The marble French gives depth, and the gold micro lines at the very edge look like a thin ring around the nail. I like it for people who hate big gold flakes but still want Black And Gold Stiletto Nails luxe. It flatters short nail beds because the nude area stays open, and the marble is concentrated at the free edge. It also looks great for daytime events because it’s not overly heavy.
Apply a sheer nude base and cure. Create a French tip with black marble: paint black, then swirl in charcoal lines, cure, and smooth with top coat if needed. Add a gold gel micro line right at the tip edge on top of the marble — keep it under 0.5 mm. Cure and seal with glossy top coat, making sure the line is fully trapped so it doesn’t wear off.
Use a gel liner brush and wipe it on a lint-free pad between nails so the gold line stays sharp.
Filling the entire tip with gold instead of micro lines turns the set into glitter overload.
23. Black Gloss With Gold Halo Borders And Tiny Crystals
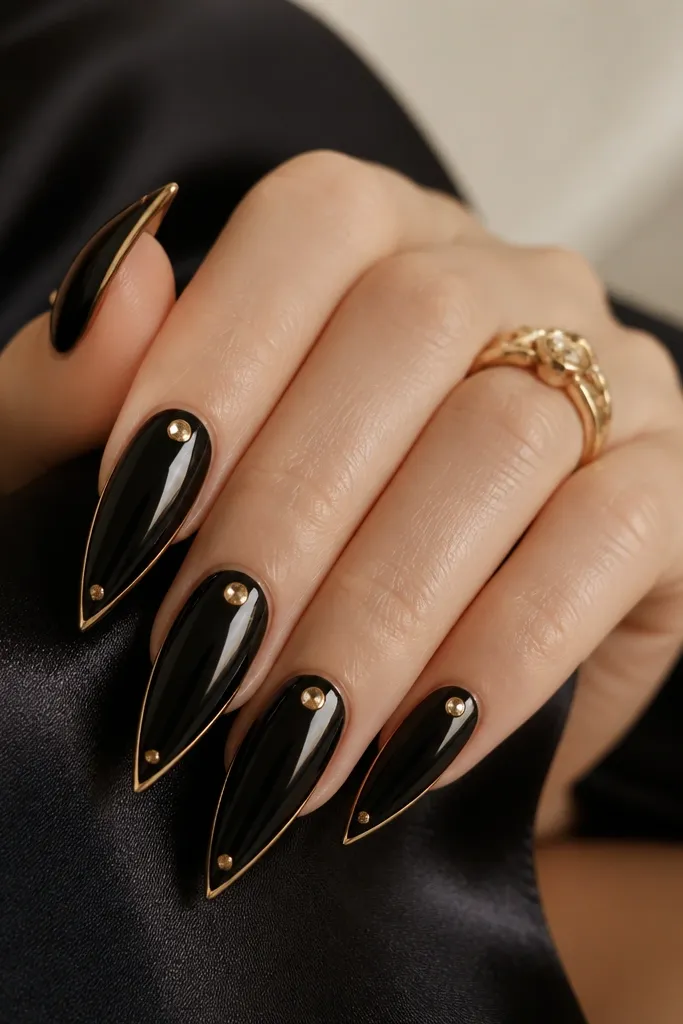
Borders and tiny crystals look like high-end accessories when you keep the placement tight. The gold halo border frames the nail, while the small crystals add a sparkle point that looks expensive up close. I keep crystals to two per nail so it doesn’t look like a rhinestone mess. This style flatters hands because the border defines the nail shape and makes stiletto tips look sharper. It also looks great with both silver and gold jewelry, but it really shines with gold rings.
Paint nails glossy black and cure. Add a thin gold gel border along the sidewalls and tip edges — I use a steady hand and a liner brush, but tape guides help. Place two tiny gold crystals on the center and near the cuticle border using clear gel as glue, then cure. Seal with glossy top coat, pressing at the crystals so they sit smooth and don’t snag.
Pick crystals that are flat-backed and small enough to fit under your top coat without creating bumps.
Adding crystals to every corner makes the nail look bulky and cheap.
24. Black And Gold Stiletto With Reversed Side Stripes
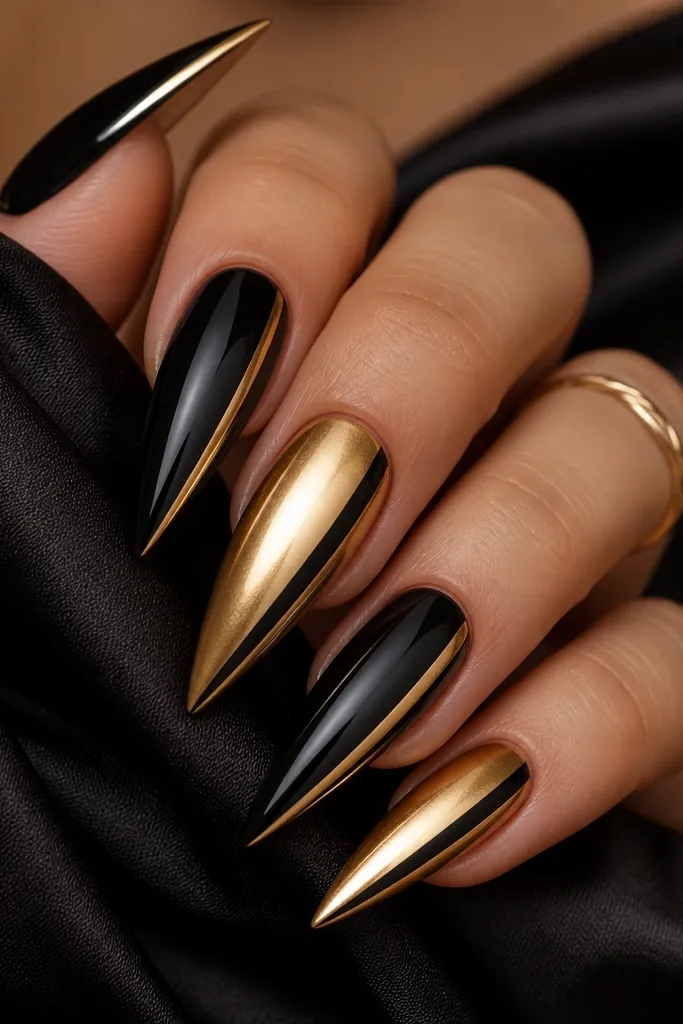
Reversed side stripes look modern and make your hands look longer because the stripes run the full vertical length. I use a sheer nude base so the stripes look like they’re floating, not painted thick. The black stripes give contrast, while the gold stripes on the opposite side add that luxe highlight. This set flatters most nail shapes because it doesn’t rely on perfect marble swirls or tiny art. It also looks great if you wear stripes in your outfit — it matches the clean lines.
Editor's noteKeep the stripe width consistent across nails — that’s what makes it look designer.
Apply a sheer nude base gel and cure. Place glossy black stripes along one side of each nail using striping tape as a guide, then paint and cure. Remove tape and add gold stripes on the opposite side using gold gel liner or gold striping tape, cure again. Finish with glossy top coat and cap the free edge so tape edges don’t lift.
Watch outThick stripes can make nails look shorter and wider.
25. Black Chrome Base With Gold Edge Foil Fade
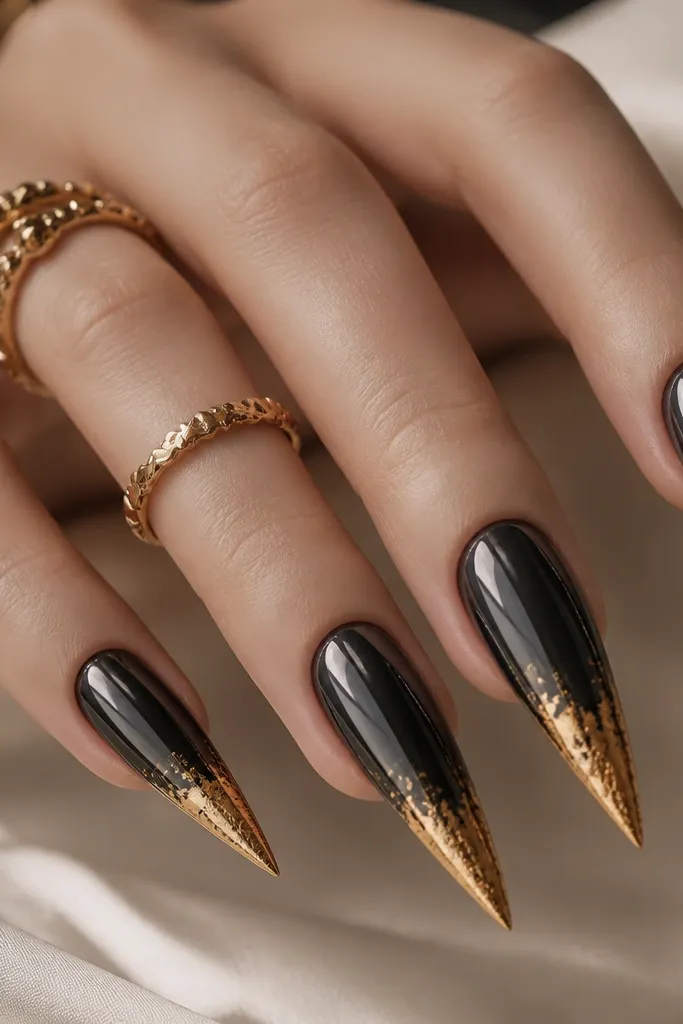
Black chrome is underrated for black-and-gold sets. It reflects differently than mirror black — it has a metallic depth that makes gold foil look richer. The gold edge fade creates a gradient effect that feels expensive and smooth, not like stickers. This flatters longer stiletto tips because the fade follows the nail’s curve. It also works across skin tones since both colors are cool and high-contrast. If you want a luxe look that still feels sleek, this is it.
Apply a black chrome base system, cure, then apply black chrome powder and buff to a mirror-like reflection. Add gold foil only at the tip edge: apply tacky layer to the last 2-3 mm, press foil, then gently tap a few pieces upward to create the fade. Leave most of the gold concentrated at the edge so it doesn’t cover the whole nail. Seal with a glossy top coat that won’t dull chrome too much.
Tap the foil upward lightly with a silicone tool — that gives the fade without smearing.
Putting gold foil over the entire nail kills the metallic depth of black chrome.



