
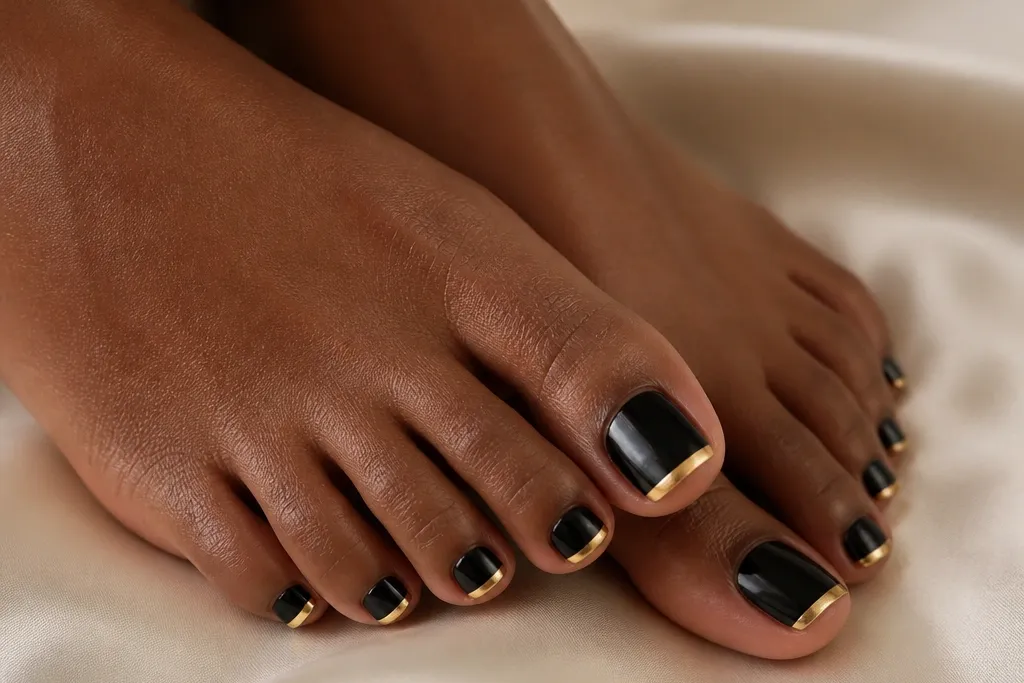
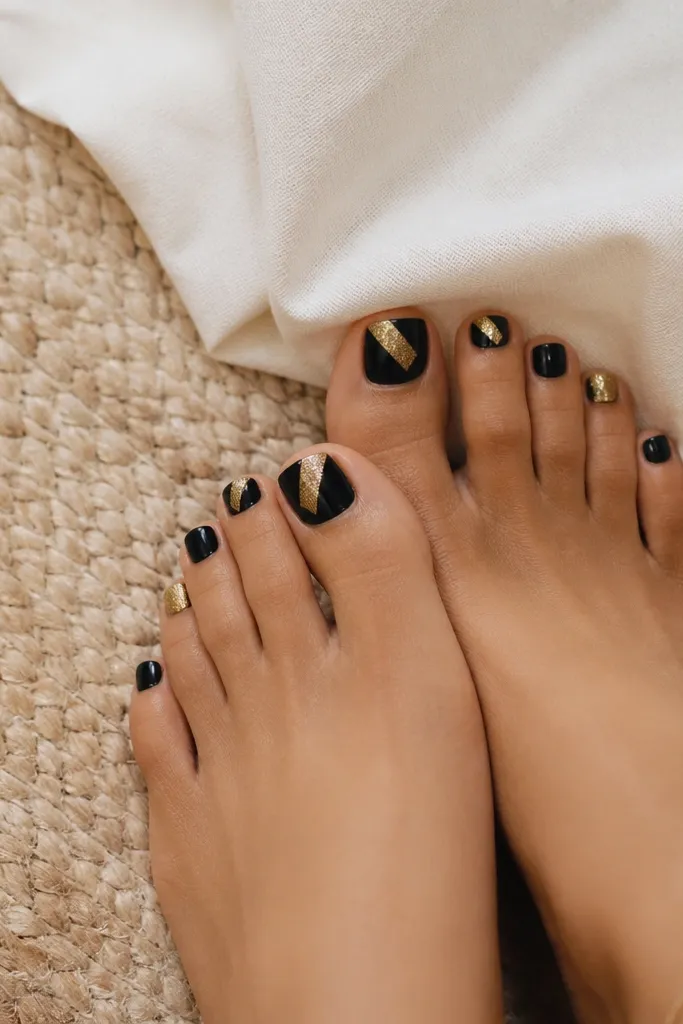
1. Matte Black Base With a Thin Gold French Line
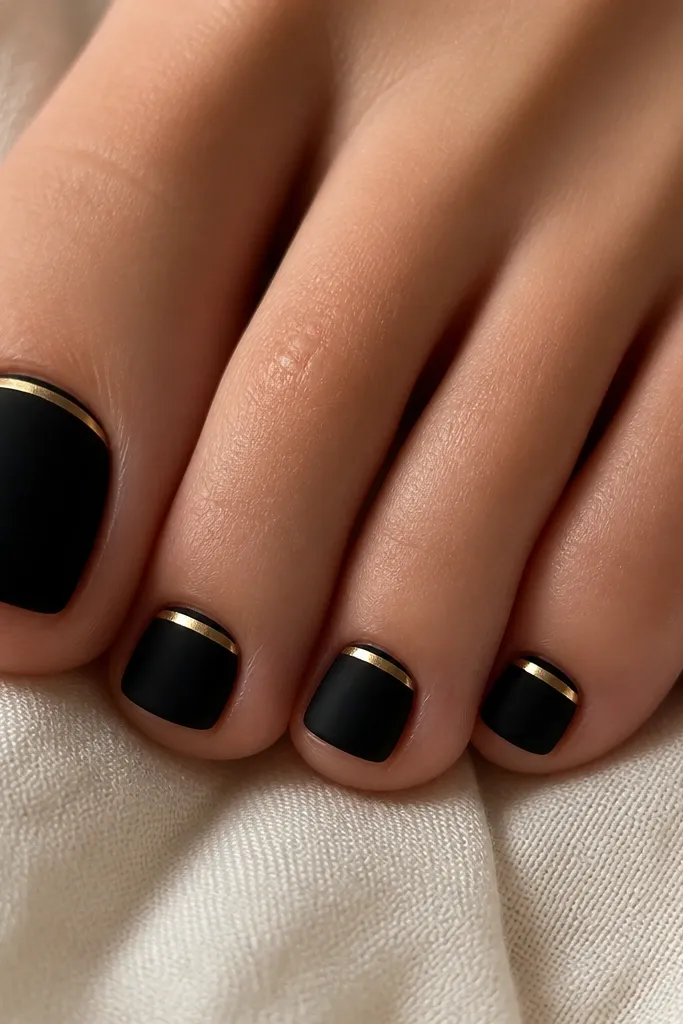
This is the toe version of a classic black-and-gold outfit. Matte black gives you a soft, velvety surface that hides tiny ridges, while the gold French line adds sharp light-catching contrast. I like it most on short almond or rounded square toes because the micro line keeps the nail looking longer without overbuilding. It flatters a wide range of skin tones — from fair to deep — because black anchors and gold warms. For occasions, this fits everything from everyday sandals to a dinner date where you want your toes to look “done” without being loud.
Start with matte black polish in two thin coats. Let it dry fully, then use a striping brush or French-tip guide tape to paint a thin metallic gold line exactly at the edge of the free nail. Keep the gold line 1 to 2 millimeters thick so it doesn’t flood the cuticle. Finally, seal with a glossy top coat over the tips and gold line, but avoid drowning the matte area — you want that matte-vs-metal shine contrast.
If your gold looks streaky, shake it longer and wipe the brush on the bottle lip before you paint the line.
Avoid a thick gold tip — it makes toes look smaller and often chips faster.
2. Black Half-Moon Cuticle With Gold Micro Dots
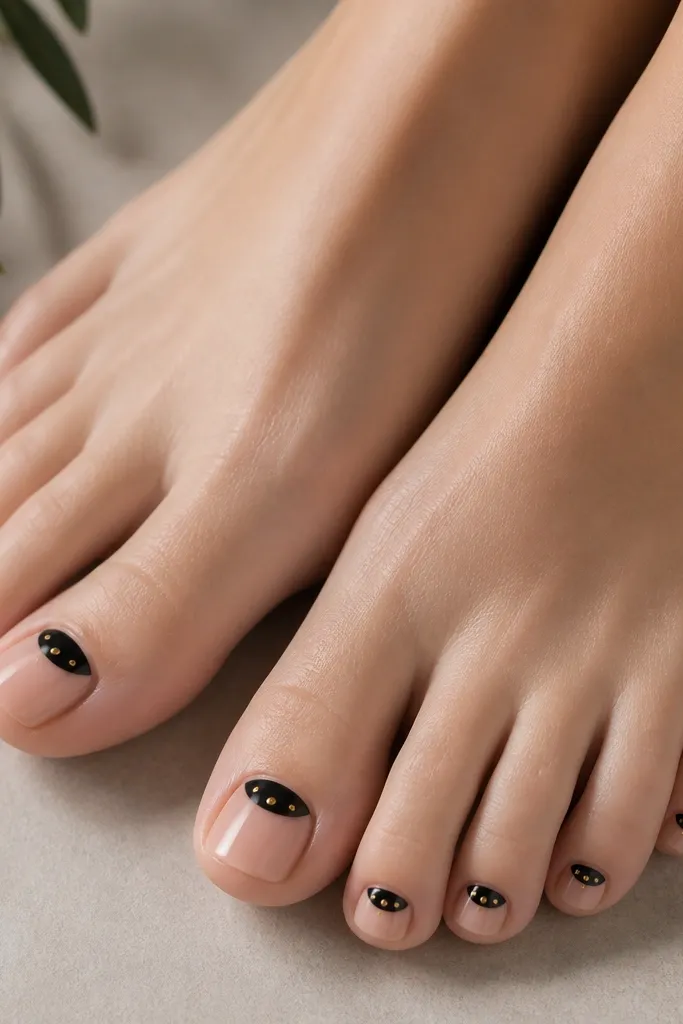
This design looks delicate because the black is confined to the cuticle area and the gold is tiny. The half-moon shape visually lifts the nail and makes the nail bed look longer, which is great if your toes run short or wide. I’ve worn it with both warm and cool undertones — the gold dots pick up warmth while black adds structure. It works especially well for everyday because it grows out gracefully; the dots are near the top and still look intentional as the nail moves forward.
Start by painting a sheer nude base or a very light pink so the nail bed looks smooth. Then paint a clean black half-moon at the cuticle using a small angled brush. While the black is still tacky, place 3 micro gold dots along the outer curve of the half-moon — dot, dot, dot — keeping them the same size. Finish with a glossy top coat to lock in the dots and prevent snagging in sandals.
Editor's noteUse a toothpick for the dots if your dotting tool is too big; dip lightly so the dot stays round.
Watch outDon’t place the dots across the whole nail — it turns into clutter instead of a focal detail.
3. Diagonal Black Stripe With a Gold Outline
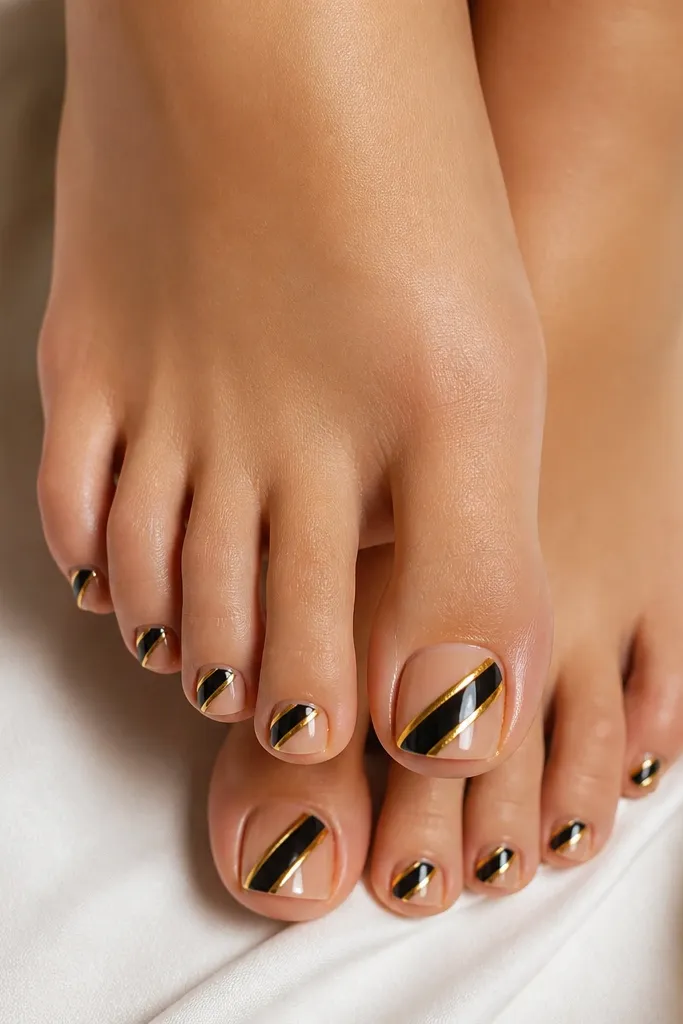
Diagonal lines make toes look longer, and the gold outline makes the stripe look crisp. I like this when you want a bolder look without covering the entire toe in dark polish. It flatters toes of all sizes because the diagonal hits the eye and creates a “slimmer” visual line. The gold outline also reflects light when you walk, so it looks good even in low light. This one works for parties and nights out, but it still looks polished for a regular pedicure.
Paint the base coat in a sheer nude or soft nude-pink, then let it dry. Use striping tape to create a diagonal guide, and paint a solid glossy black stripe inside the tape channel. Once dry, remove the tape and paint a thin gold outline right along both edges of the black stripe using a fine liner brush. Seal everything with a glossy top coat; keep the gold outline thin so it doesn’t look raised.
Editor's notePress the tape down firmly at the edges so the gold outline stays sharp, not fuzzy.
Watch outDon’t freehand the gold outline with a thick brush — it drags and makes the stripe look messy.
4. Black Glossy Base With Gold Foil Flake Placement
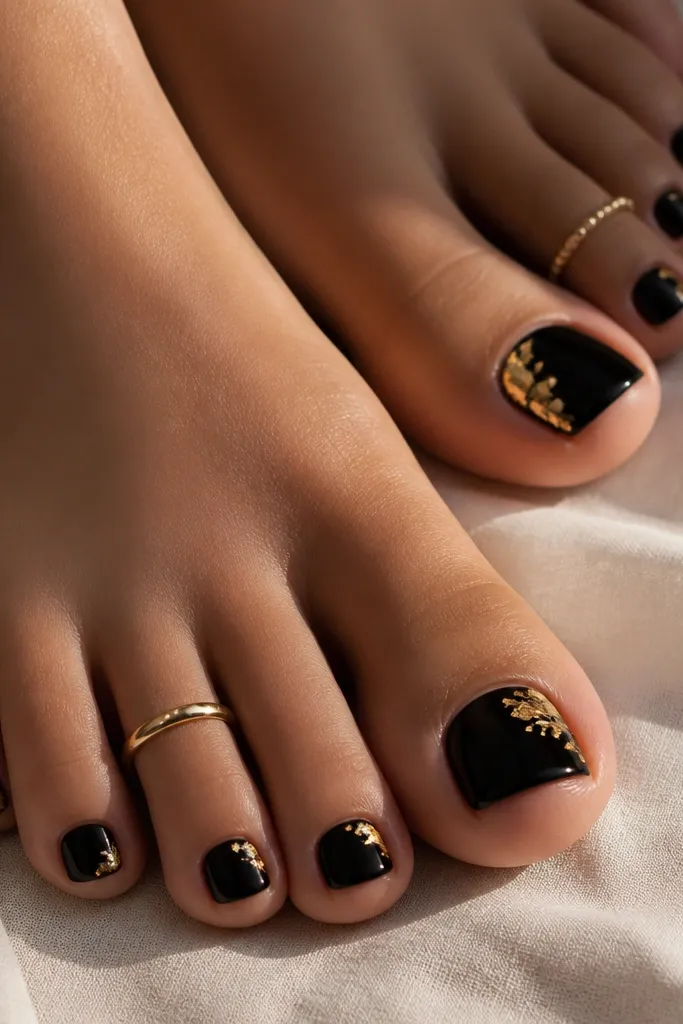
Gold foil flakes look expensive because they’re irregular — they don’t look like a perfect sticker. This design works best on glossy black because the foil reads more dimensional. It’s flattering for medium to deep skin tones, but it also looks great on fair skin because the contrast is strong. I wear this when I want “glam” without detailed nail art — the foil placement does the work. It also hides small imperfections in your base coat because the flakes break up the surface.
Start with two coats of glossy black polish. Add a small amount of nail glue or foil gel (depending on your system) where you want the flakes — I usually place them near the outer third of the nail. Press gold foil flakes in tiny pieces, then lightly tap to flatten the edges. Brush off excess and seal with a thick glossy top coat, focusing on the areas you placed flakes so they don’t lift.
Editor's noteUse tweezers and place flakes in odd numbers — 3 or 5 clusters — for a more natural look.
Watch outAvoid putting foil too close to the cuticle; it lifts first there.
5. Black Marble Swirl With Gold Vein Accent
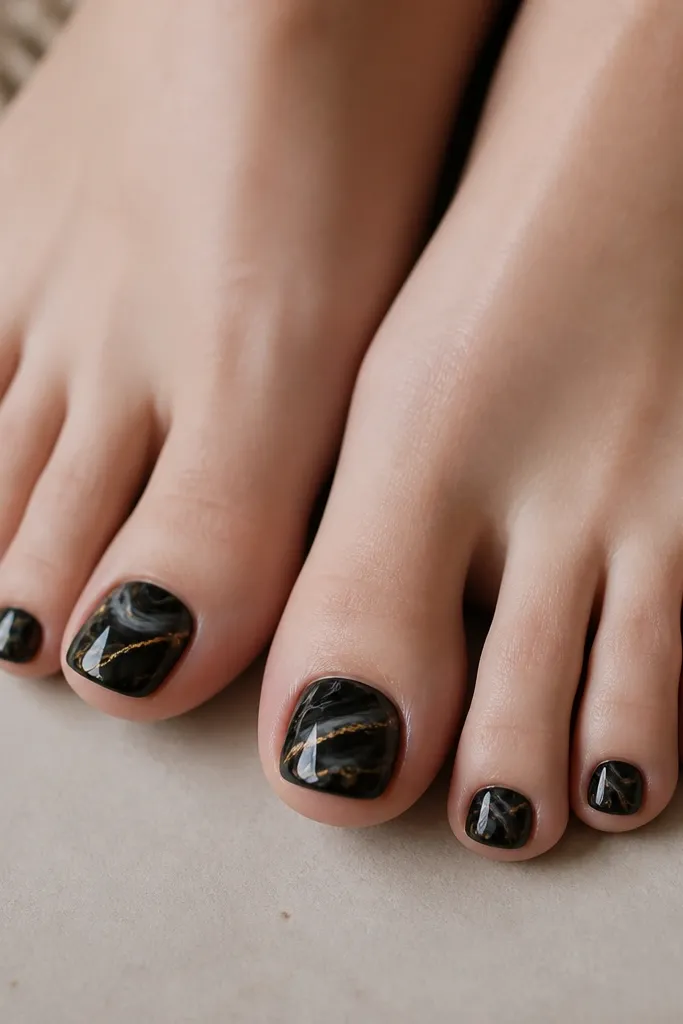
Marble looks fancy on toes because the pattern fills space without needing lots of tiny details. The key is to keep the black as the main color and use gold as one line, not random glitter. This flatters short nails because the swirl movement makes the nail look longer. It also looks stunning on skin tones that already have warm undertones because gold plays nicely with that warmth. I’ve used this for holiday sandals, and people always ask what the “effect” is.
Paint a base of deep black glossy polish. Mix a small amount of black with a clear base to create a thinner ink-like consistency, then drag it with a thin brush to make marble swirls. Add a gold striping polish vein down one side of the swirl — keep it narrow and continuous. Finish with glossy top coat and avoid adding too much gold glitter; the thin line is what makes it look like real stone.
Use a makeup sponge to soften the edges of your marble pulls so it looks like stone, not brush strokes.
Don’t overdo the gold — two or three tiny veins looks good, random gold everywhere looks cheap.
6. Gold Spotted French Tips Over Black
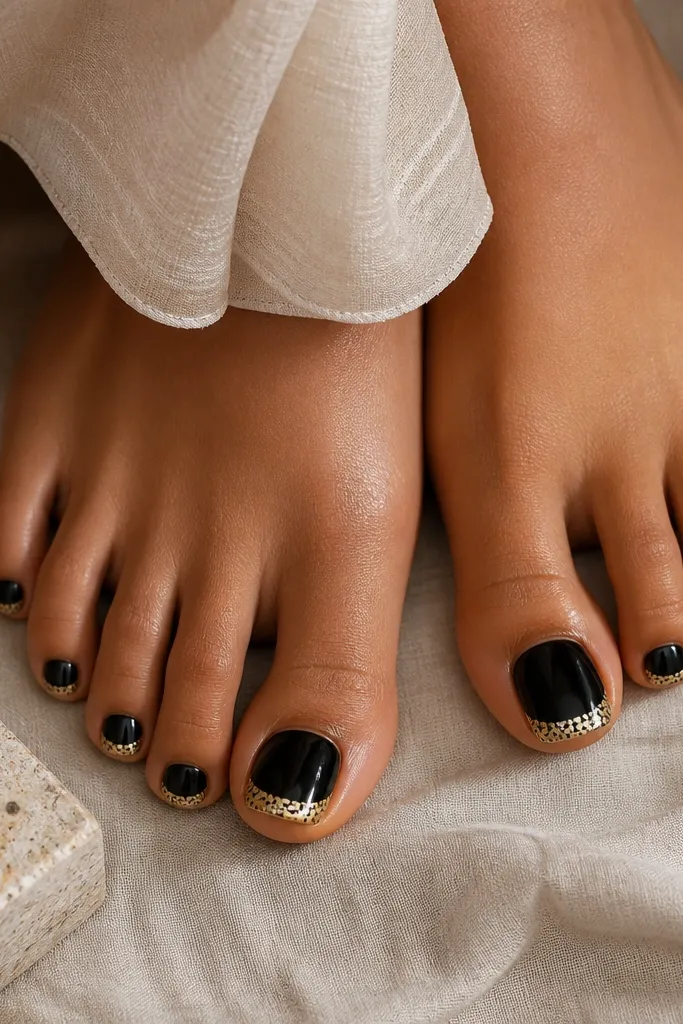
This one flips the usual French look and it photographs really well. The black base keeps it grounded, and the gold tip looks like it’s glowing. The scattered dots add a playful texture without needing a full pattern. It flatters people who want something fun but still clean, and it works well on medium-length toes because the gold tip is a clear focal area. I’ve worn it with gold jewelry and it always matches without trying too hard.
Start with black glossy polish as your base. Use a French guide to paint a gold tip shape — keep it slightly rounded at the corners. While the gold is wet, add tiny black dots with a dotting tool, spacing them so they don’t touch each other. Seal with a glossy top coat so the dots stay crisp and don’t smear during the dry time.
Editor's noteLet the gold tip dry for 2-3 minutes before dotting so the dots sit raised, not sinking.
Watch outAvoid making the dots too big — large dots turn the look into a chunky sticker effect.
7. Black Velvet Look With Gold Half-Arc
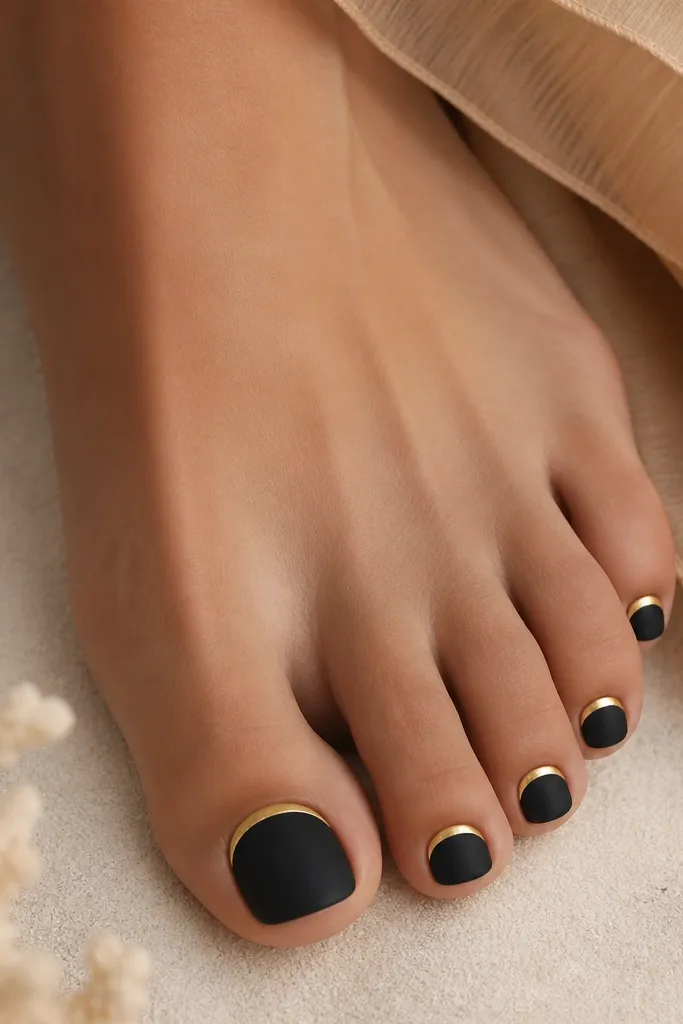
Velvet-style black reads rich even with affordable polish because it’s all about texture. The gold half-arc is minimal, which keeps it from looking busy on small nails. This is flattering on toes that have ridges because matte hides texture, and the gold arc draws attention upward. It’s a good choice if you want black-and-gold but you don’t want glitter everywhere. I use this for winter sandals because it looks warm and cozy instead of shiny.
Paint matte black in two thin coats. If you have a velvet matte top (or a matte top that gives a fuzzy finish), use it after the black dries. Then paint a thin gold half-arc across each nail just above the cuticle line — imagine a bracelet curve. Place the arc so it runs from the inner side to the outer side without touching the sidewalls. Seal with a top coat that doesn’t erase the velvet texture; if your top coat turns everything shiny, use a matte top on the black and a separate glossy coat on the gold arc.
Editor's noteUse a liner brush and rest your hand on your thigh so the arc stays even across toes.
Watch outAvoid thick gold arcs — they look like paint blobs on small nails.
8. Black Base With Gold Cross Lines
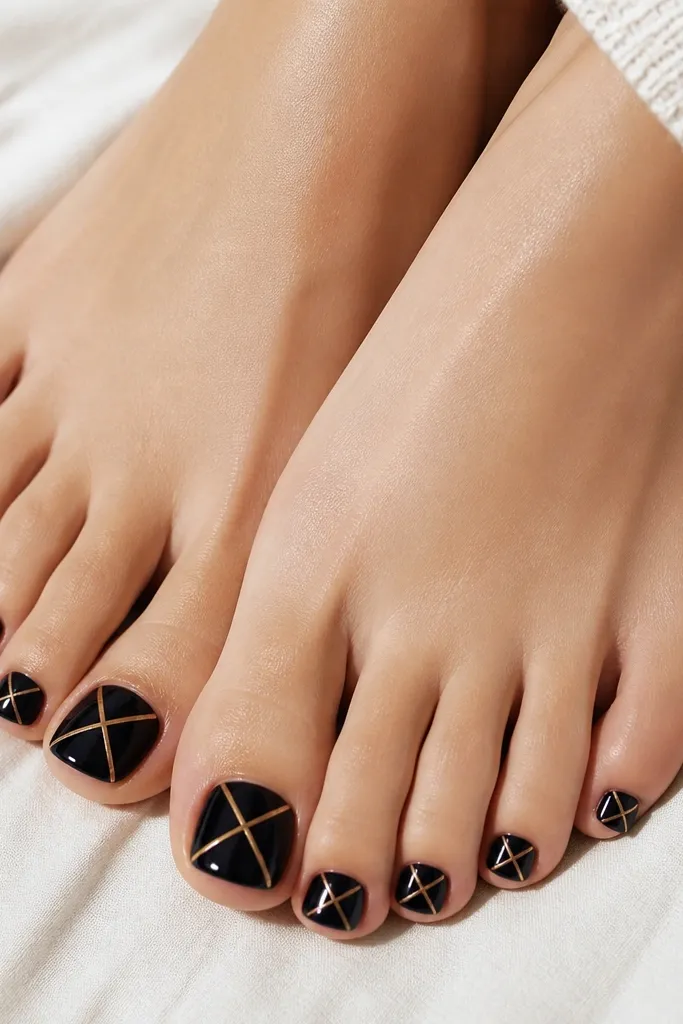
Gold cross lines look sharp and graphic, and they’re surprisingly easy once you map the center. The black makes the gold pop, and the X shape creates a strong focal point even when your toes are short. This design flatters all skin tones because it’s high-contrast. It also works well if your nails are slightly uneven — the gold lines draw the eye to the center and away from edges. I like this for events because it looks intentional, not random.
Start with a glossy black base in two coats. Use a fine liner brush to paint a thin vertical gold line through the nail center, then add a diagonal line to form an X. Keep the intersection centered and leave equal spacing on both sides so it looks symmetrical. Let it dry, then apply a glossy top coat over the entire nail to level the lines.
If your gold bleeds, clean the brush edge on a paper towel before you touch the nail.
Avoid uneven lines — crooked X shapes make it look like a rushed hobby project.
9. Black and Gold Zebra Tip
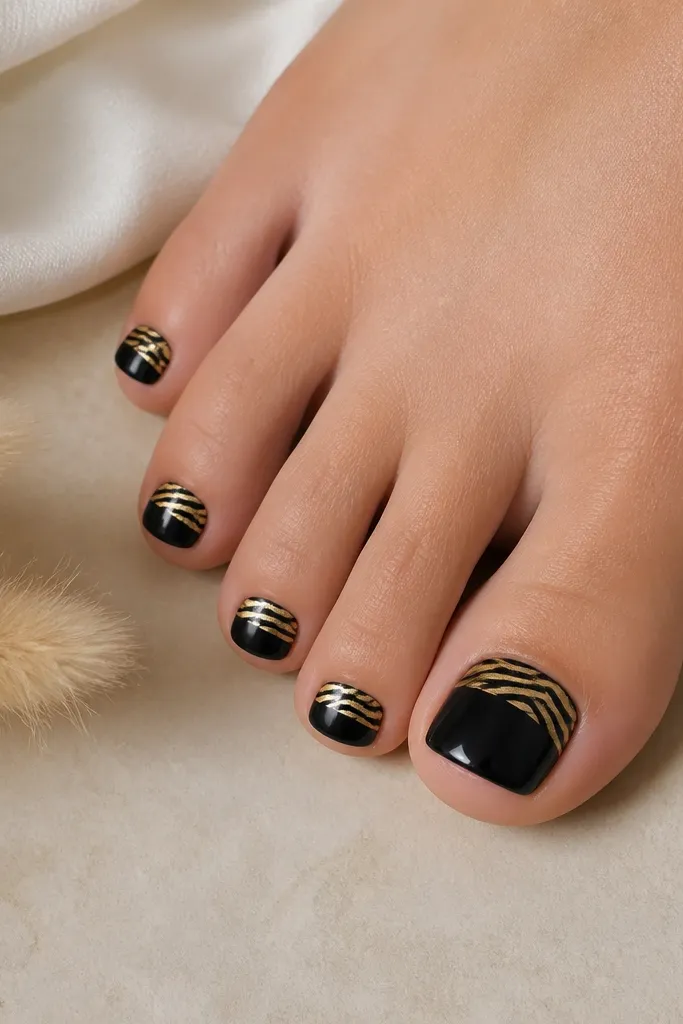
Zebra tips give you a wild look without covering the whole nail. The gold stripes add shine, and the black stripes keep it cohesive with the base. This flatters toes that are longer rather than super short, because the tip area needs space for stripes. It also looks great on medium to deep skin tones, but the high contrast still works for fair skin. I wear this when I want something that looks fun from far away.
Apply two coats of black glossy polish. Use a French guide tape to outline a tip zone. Paint the tip zone gold first, then use a thin striping brush to add black zebra stripes on top of the gold, keeping the stripes narrow and slightly curved. Remove the tape while the edges are still a little tacky to keep a crisp border, then seal with a glossy top coat.
Editor's notePractice zebra stripes on a paper palette first — toes are small and the rhythm matters.
Watch outAvoid thick stripes — they blur together and lose the zebra pattern.
10. Gold Outline Stamping Over Black
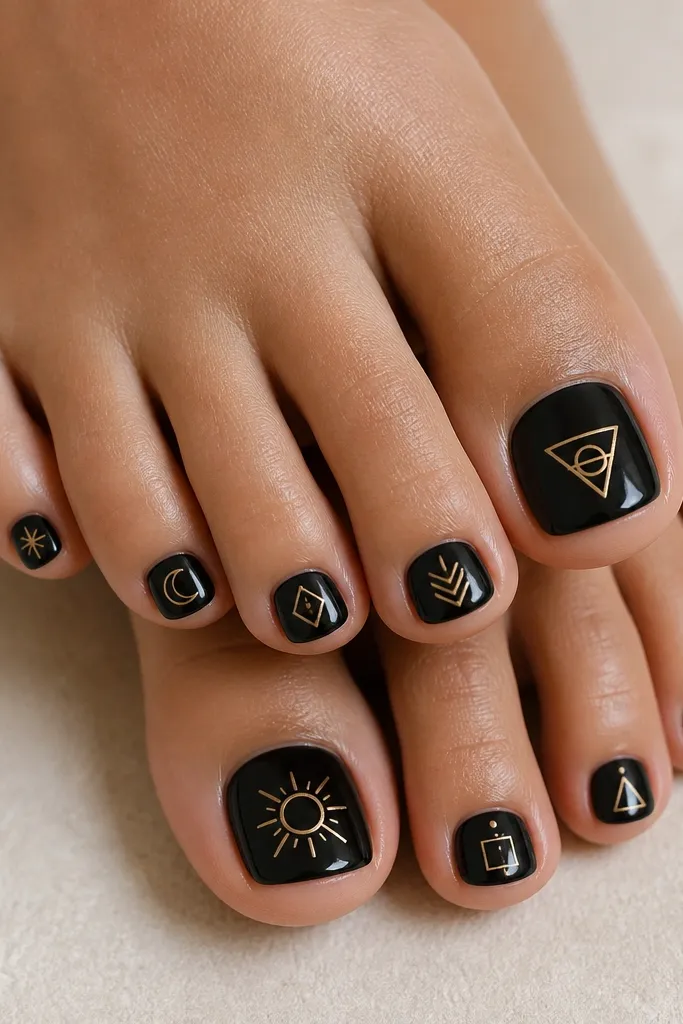
Stamps look professional because the lines are consistent. If you’re trying to keep it affordable, stamping plates and stamping polish are a smart buy because you reuse them for months. The gold outline effect over black looks clean and crisp, and it photographs well in sandals. This flatters most toe shapes because the stamp sits in the center and doesn’t demand perfect nail symmetry. I’ve done this on chipped-toe nails before — the stamp covers minor imperfections and makes everything look planned.
Paint a glossy black base and let it dry until tack-free. Choose a small plate with line-art patterns, apply gold stamping polish, then scrape the plate clean. Press the stamper onto the nail and roll once — don’t drag. Let the design set for a minute, then apply a glossy top coat without flooding the edges so the lines stay defined.
Use a lint-free wipe to clean the stamper between nails; it keeps the gold from smearing.
Avoid stamping on wet base — the design will slide and blur.
11. Black and Gold Checkerboard Accent Nail
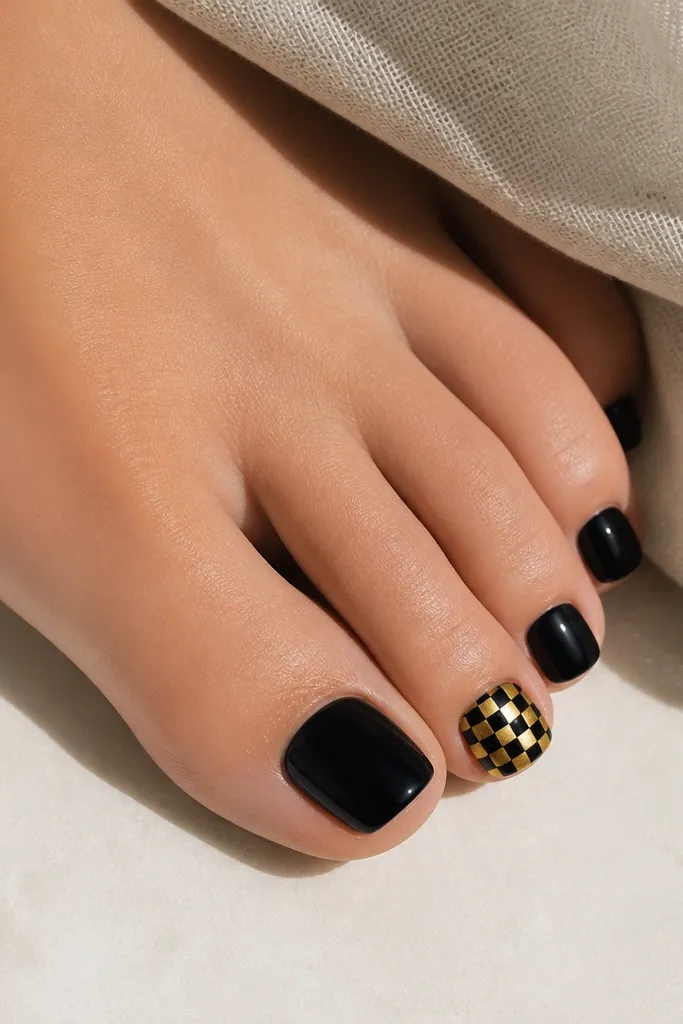
Checkerboard is bold but it stays wearable when you limit it to one or two nails. The black makes the pattern look crisp, and the gold squares add a playful shine. I like doing this on the big toe and one smaller toe because toes already vary in size — the pattern looks balanced. It flatters people who want glam but don’t want every toe to match perfectly. This is great for parties, vacations, and anything where you want your toes to be a conversation piece.
Paint all toes solid black glossy. On the accent nail, use a striping tape grid or a small checker stencil to block in tiny squares. Fill alternating squares with metallic gold polish, then remove tape carefully to keep edges sharp. Add a glossy top coat over everything, and cap the checkerboard edges so they don’t catch on shoes.
Make the squares tiny — about 1-2 millimeters — so it stays cute, not blocky.
Avoid large checks on short nails — they look like a patch instead of a pattern.
12. Gold Glitter Inner V Over Black
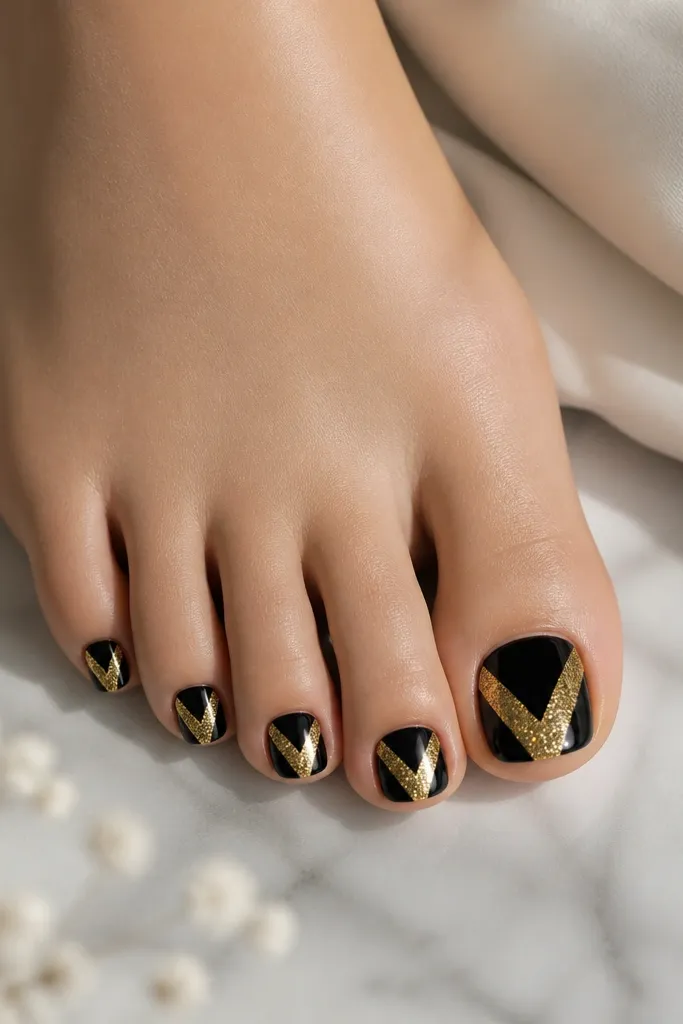
A gold inner V is a flattering shape because it points upward and makes the nail look longer. The gold glitter gives sparkle without needing full coverage. I like this for toes that need a little visual length and for people who want something “wow” but still neat. It works across skin tones because the V is centered and high contrast. You’ll also get a lot of wear because the glitter is concentrated in the middle, not across the sidewalls.
Start with black glossy polish as your base. Let it dry fully, then use a thin brush to paint a V shape in the center — tip of the V near the cuticle, wide part toward the free edge. Fill the V with gold glitter polish, adding a second layer if it’s sheer. Seal with a glossy top coat, pressing gently along the glitter edges so it levels and doesn’t snag.
Editor's noteIf your glitter is chunky, mix one drop with clear polish so it applies in a smooth layer.
Watch outAvoid a V that’s too wide — it eats the nail and looks messy on small toes.
13. Black Marble Tips With Gold Caps
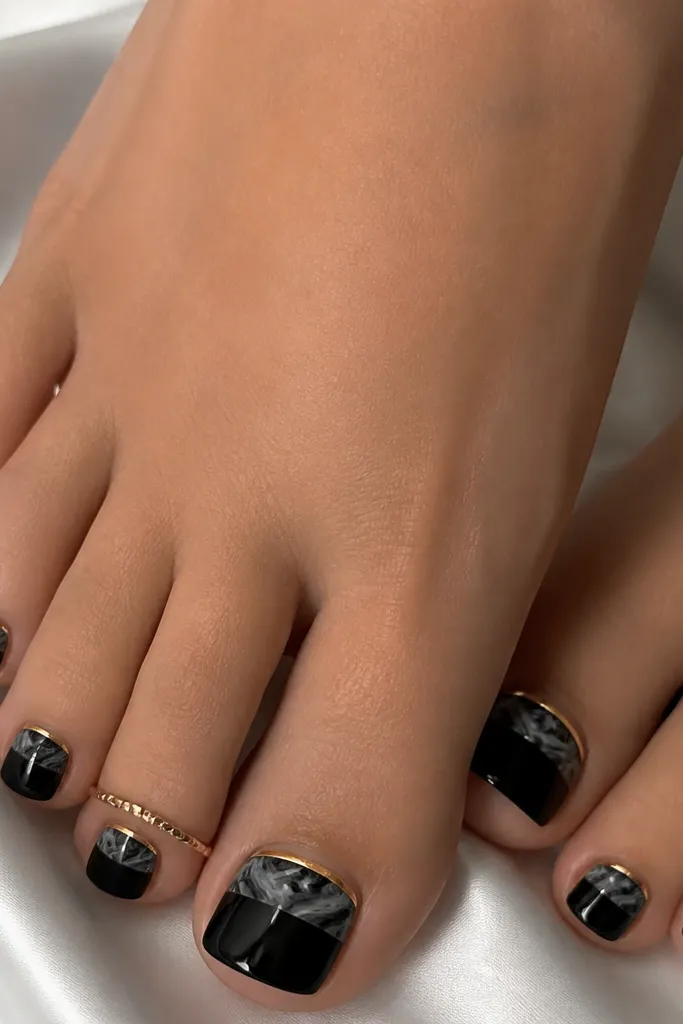
This design is a cheat code for people who want marble but don’t want to draw it everywhere. Keeping most of the nail solid black makes it clean, while the marbled tip adds movement. The thin gold cap line at the very edge makes it look intentional and finished. It flatters short almond toes because the gold cap visually defines the tip without widening the nail. I’ve worn this with both silver and gold jewelry and it always looks tied together thanks to the gold edge.
Paint the entire nail glossy black in two coats. For the tip, add a small marble area by dragging a grey-black mix (grey polish thinned with clear) in swirl strokes across the free edge. Then paint a thin metallic gold line right at the tip border — like a cap. Finish with a glossy top coat over the whole nail, and lightly buff the tip edge so the gold cap stays smooth.
Editor's noteKeep your marble area to the last third of the nail so it stays readable from far away.
Watch outAvoid marble starting too close to the cuticle — it makes the nail look messy as it grows.
14. Gold Bar Accent on Black Matte Toe Nails
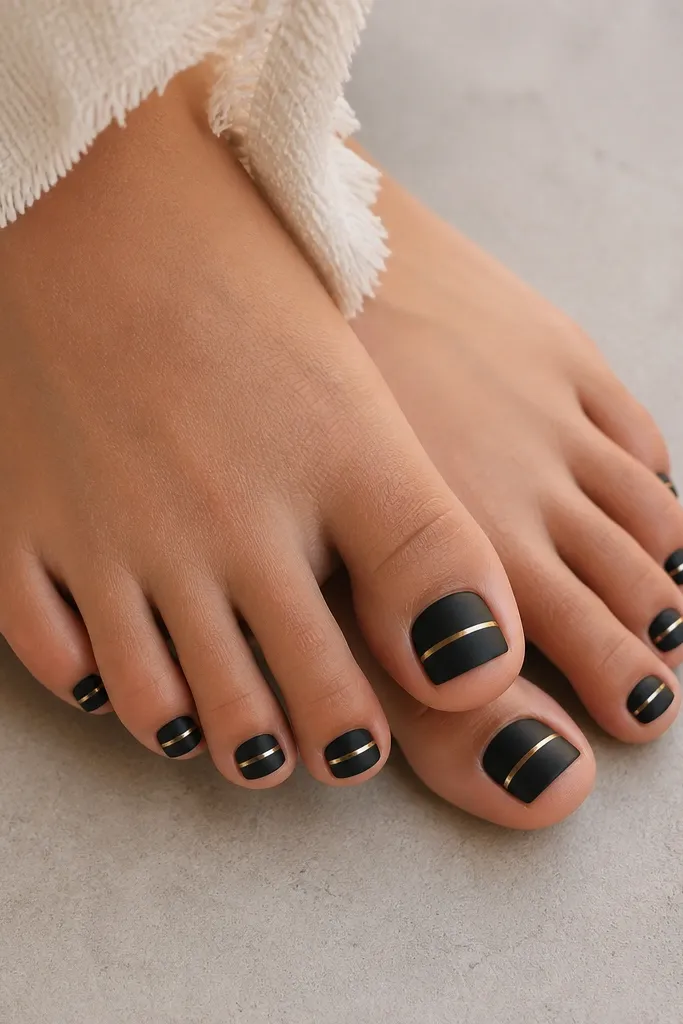
A single gold bar gives you a clean, modern look and it’s easy to repeat across toes. Matte black keeps everything soft and hides minor staining, while the gold bar gives a crisp line that catches light when you walk. This flatters toes that are slightly uneven because the bar draws attention to the center. I like it for work-to-weekend sets because it’s stylish without being loud. It also works for both fair and deep skin tones because the gold is the only warm element.
Paint matte black in two thin coats. Mark the center of the nail with a tiny dot (you’ll remove it later) so the bar lands in the same spot on each toe. Use striping tape to create a straight bar width, then paint metallic gold inside the tape channel. Remove tape while the gold is still slightly tacky for sharp edges. Seal with a glossy top coat only over the gold bar so the rest stays matte.
If your matte top makes gold look dull, add a separate glossy top only on the gold stripe.
Avoid multiple bars — it turns from chic to costume fast.
15. Black and Gold Crescent With Single Line
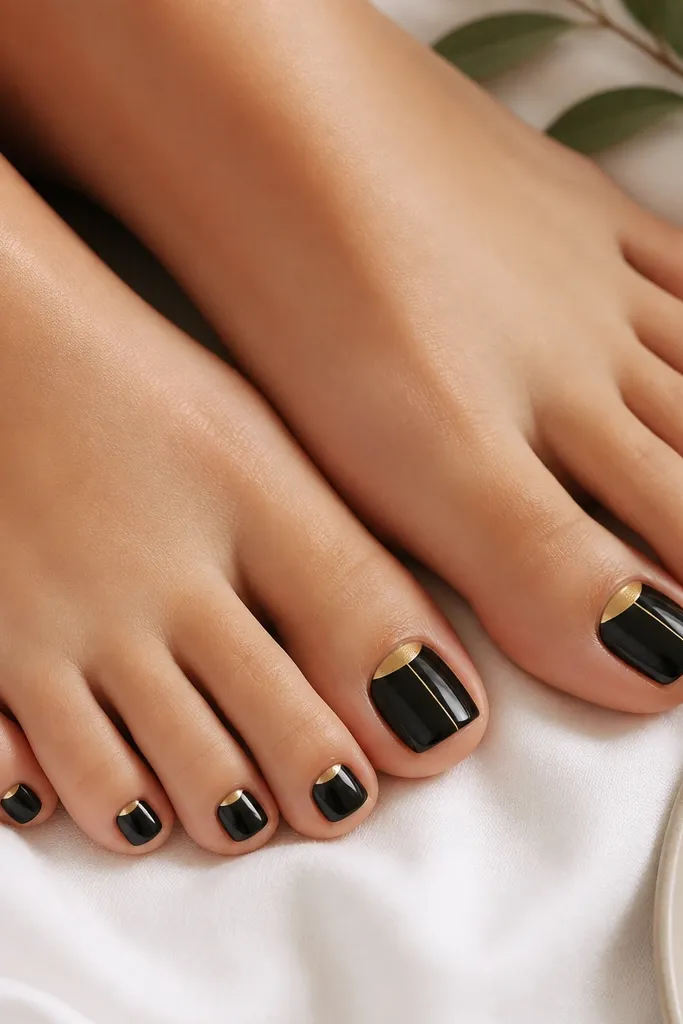
This is a minimal design that still looks fancy. The gold crescent lifts the nail visually near the cuticle, and the single line adds a graceful diagonal movement. It’s flattering on short nails because the design sits high and doesn’t require a lot of space. The contrast is strong enough for fair skin and warm enough for deeper skin tones. I like it because it grows out without looking awkward — the crescent stays near the natural nail base.
Start with glossy black polish. Paint a gold crescent right under the cuticle line on each nail using a small angled brush or stencil. Then draw one thin gold line starting at the crescent and sweeping toward the outer edge, stopping before the sidewall. Let it dry, then apply a glossy top coat over everything to seal the line and smooth the surface.
Editor's noteUse less gold than you think — a thin crescent looks cleaner than a thick one.
Watch outAvoid dragging the line — short, controlled strokes keep it crisp.
16. Black Base With Gold Studs Near the Tip
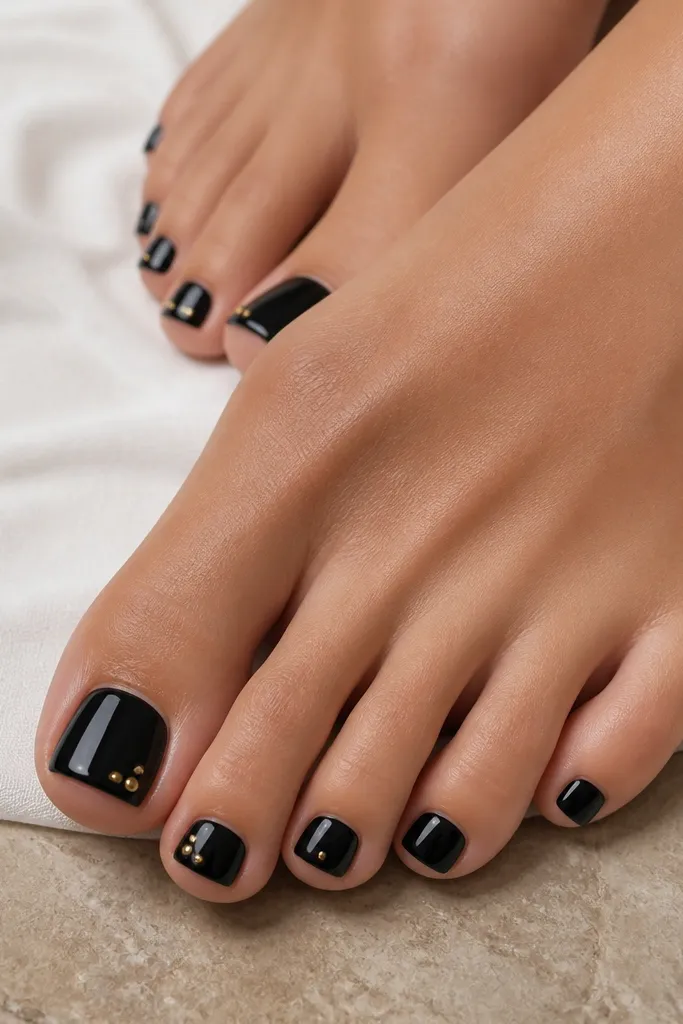
Studs give you that “jewelry on toes” look, and gold studs match the vibe without needing heavy polish art. I like placing them near the outer tip corner because it looks intentional and it makes the toe look longer. This flatters most nail shapes, especially rounded squares, and it looks great on medium to deep skin because the metal pops. For parties or weddings, this is a strong option that still feels neat. It’s also easy to do in an affordable way if you buy one small pack of flat-back studs.
Paint two coats of glossy black. After the base is dry, use nail glue to place one gold stud on the big toe and one on a neighboring toe, each positioned about 1-2 millimeters from the outer free edge. Press gently with tweezers so it sits flat. Seal with a top coat around the stud first, then cap over the top so the edges are smooth and won’t snag.
Editor's noteLet the glue set for a full 5 minutes before you cap with top coat so studs don’t shift.
Watch outAvoid placing studs too close to the cuticle — they pop off first there.
17. Gold Glitter Fade Onto Black Tips
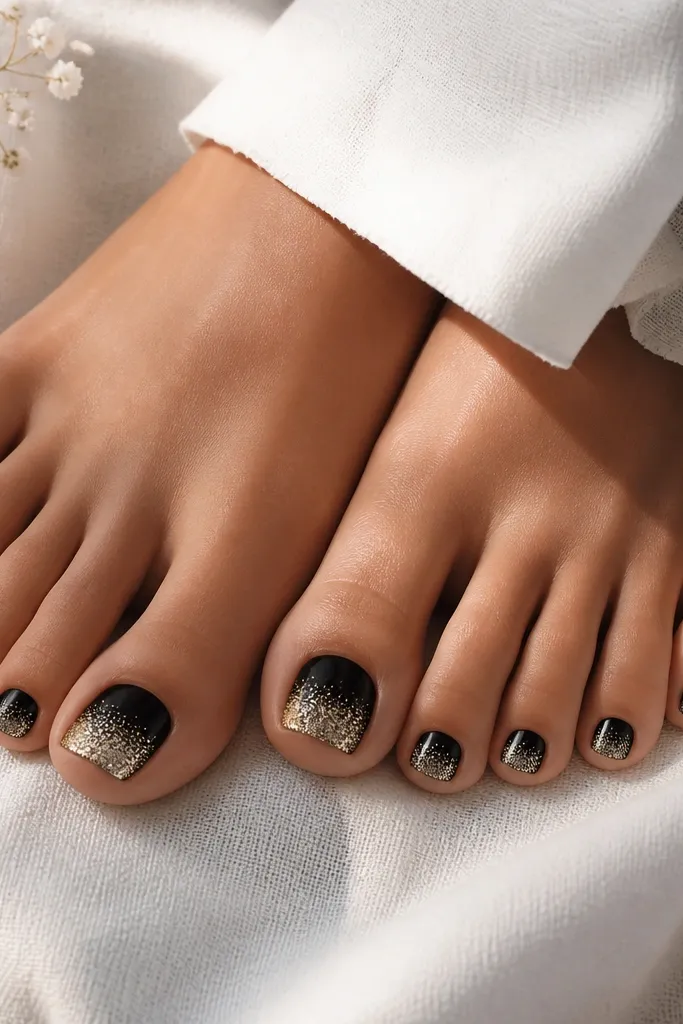
A glitter fade looks expensive because it mimics light scattering. The black base keeps it grounded, and the fade makes it feel smoother than glitter packed in one spot. This flatters short toes because the fade starts at the free edge and pulls attention upward without taking over the whole nail. It also looks good on fair skin because the gold lifts the look, not just darkens it. I like this for vacation because it looks great even when you’re moving fast and can’t keep perfect nail art fresh.
Paint glossy black and let it dry. Sponge on gold glitter polish at the tip using a makeup sponge — dab, don’t wipe — then lightly drag the sponge upward just 1-2 millimeters to soften the edge. Add a second dab layer if you want the tip more opaque. Clean up the sides with a brush dipped in remover, then seal with a glossy top coat that helps the glitter blend.
Editor's noteUse a fresh section of sponge for each toe to avoid uneven chunks.
Watch outAvoid harsh sponge edges — they look like a sticker cut line.
18. Black Gloss With Gold Chain Link Detail
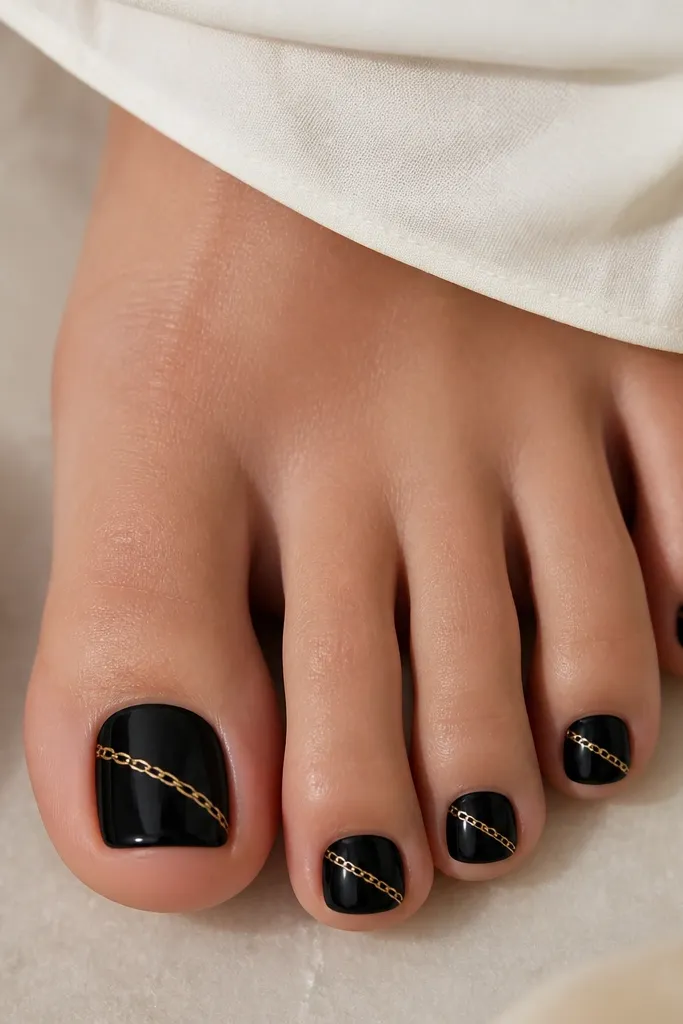
Chain link detail looks like jewelry and it’s one of the quickest ways to make black-and-gold feel luxe. The gold links are small so they don’t overwhelm toe width, and the diagonal placement makes toes look longer. I like this for people who hate bulky glitter — it stays sleek and smooth. It flatters a range of skin tones because it’s sharp and metallic. I’ve done this for nights out with gold sandals, and it always looks like I planned it.
Paint glossy black in two coats. Use a fine liner brush to draw two parallel diagonal lines across the center, then add tiny gold link shapes between those lines — think little ovals or rectangles connected. Keep the links consistent in size, about the width of a fine hair. Let it dry and apply a glossy top coat in thin layers so the chain stays defined but fully sealed.
Editor's noteIf your liner brush is too thick, use a striping brush and wipe excess polish off the tip first.
Watch outAvoid big chain links — they look heavy on toes and snag in sandals.
19. Gold Leaf Accent on Matte Black
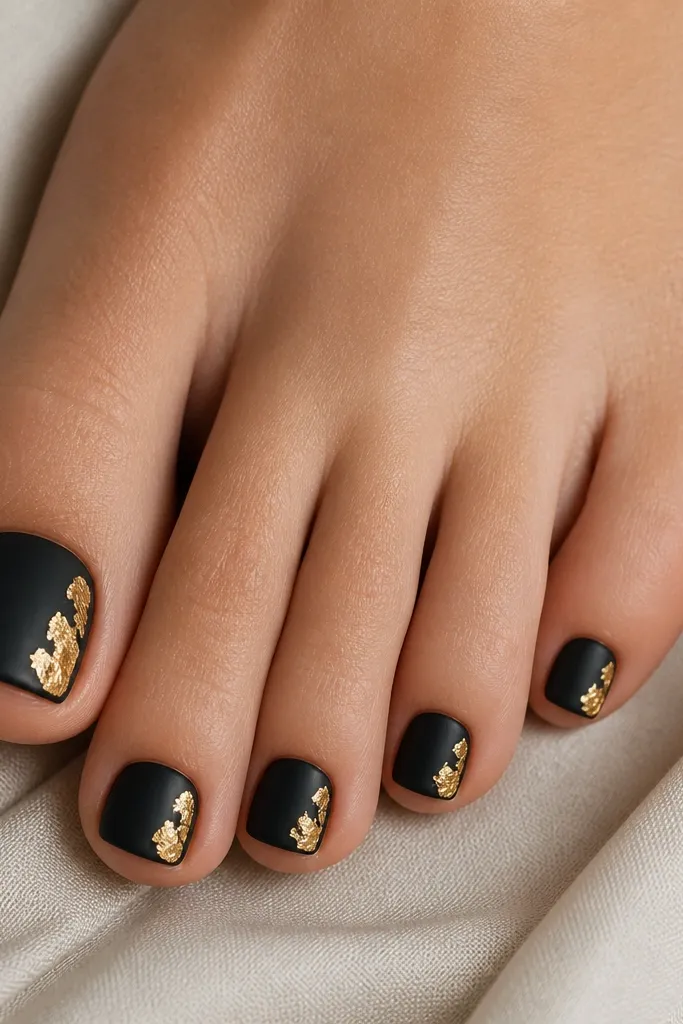
Gold leaf looks artsy without needing a complex pattern. On matte black, the leaf looks like it’s been pressed into velvet, which reads high-end even if you’re using affordable leaf sheets. I like placing it on one or two toes so it’s not too busy, and it looks best on skin tones that show contrast well, but it still works on fair skin because the gold is bright. This design is great if you’ve got a little bit of nail texture — matte hides it, and leaf breaks up the surface.
Paint matte black first and let it dry completely. Cut or tear small gold leaf pieces and apply them with nail glue or leaf adhesive where you want the accent, usually on the outer edge of the nail. Press gently and dab off excess with a soft brush. Seal with a glossy top coat over the leaf area so it stays locked and smooth, while keeping the rest of the nail matte.
Editor's noteTear the leaf instead of cutting — uneven edges catch light more naturally.
Watch outAvoid covering the whole nail with leaf — it lifts and looks patchy.
20. Black Base With Gold Triangle at the Sidewall

A side triangle is a geometric trick for making the nail look more “built” and clean. It gives you a strong accent without needing full coverage and it looks sharp from the side when you’re wearing open-toe shoes. I like it on rounded square toes because the triangle echoes the nail’s edges. It flatters fair to deep skin tones because the gold triangle is bright and focused. This is a good choice if you want black-and-gold but hate lines that run across the whole nail.
Paint glossy black as your base. Place a small piece of striping tape along the sidewall to outline one triangle — one edge parallel to the side, one edge angling toward the center. Paint metallic gold inside the triangle and let it dry. Remove tape and seal with a glossy top coat, making sure the triangle edges are fully capped to prevent lifting.
Editor's noteKeep the triangle small — about 1/4 of the nail width — so it reads as an accent.
Watch outAvoid a triangle that reaches the cuticle — it looks like a mistake as it grows out.
21. Gold Dotted Grid Over Black (Accent Nail)

A dotted grid looks like you planned it, but it’s actually simple. The dots create texture and a subtle sparkle without chunky glitter, so it feels wearable. I like doing this on just one nail because the grid is busy and toes look best when you give the eye a break. It flatters smaller nails because the dot spacing can be adjusted to fit your nail width. For skin tones, the gold reads warm and flattering, and the black background keeps it sleek.
Paint all toes glossy black. Choose one accent nail and outline the grid area with a faint guideline using a pencil under a clear nail form if you need it. Use a dotting tool to place metallic gold dots in rows — for example, 4 dots across by 4 rows — keeping spacing even. Let it dry, then seal with a glossy top coat, focusing on the grid so it doesn’t catch on shoes.
Wipe your dotting tool between rows so the dots stay the same size.
Avoid random dot sizes — uneven dots make the grid look chaotic.
22. Black and Gold Wave Tip
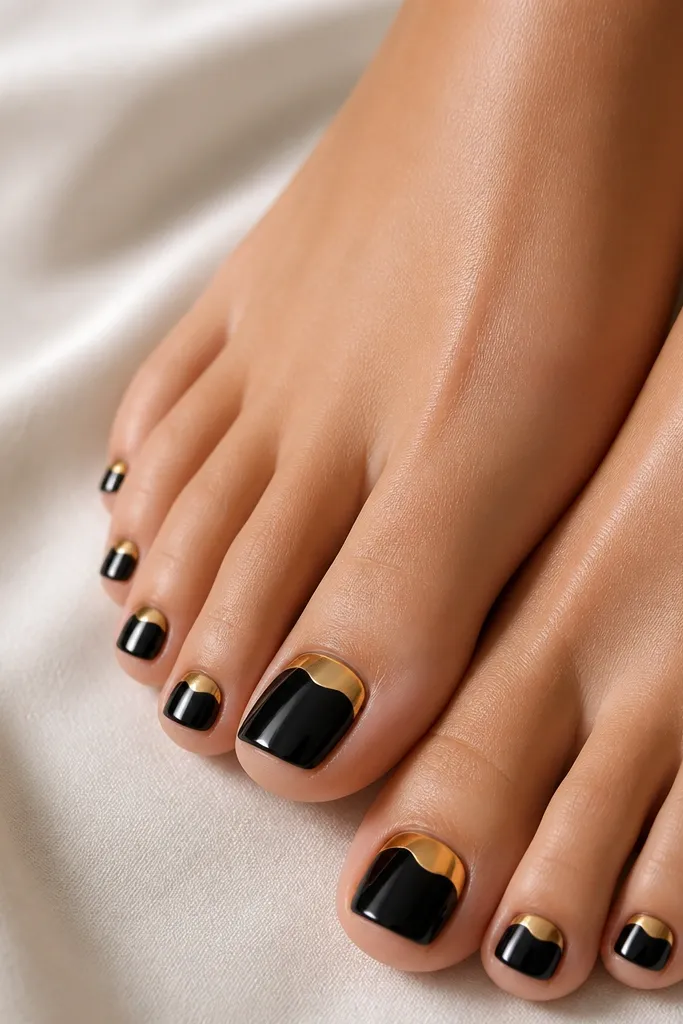
A wave tip is the easiest way to make a French tip feel custom. The gold wave edge looks softer than a straight line, and it creates movement when you walk. This flatters toes because it keeps the design in the tip zone and avoids crowding the cuticle. It works for fair, medium, and deep skin tones because the gold is bright and the black base is consistent. I like it for beach weekends because it matches the vibe without needing actual sea-themed art.
Apply black glossy polish on all toes. Use a French tip guide tape to create a gold tip area, then remove the tape at an angle to help you paint the wave shape. Paint metallic gold across the tip and use a thin brush to refine the wave edge — one smooth curve per nail. Seal with glossy top coat and cap the wave edge so it stays smooth.
Editor's noteDo one nail at a time so the gold edge doesn’t start drying before you finish shaping the wave.
Watch outAvoid wobbly wave lines — keep the curve smooth and controlled.
23. Black Base With Gold Micro Stud Line
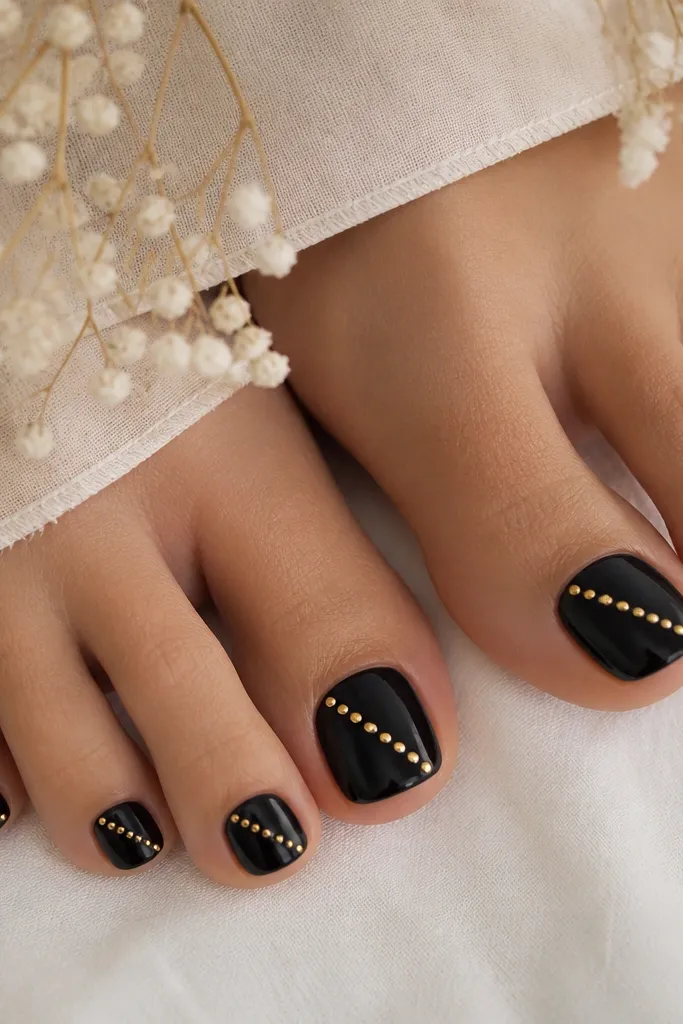
This is a “minimal glam” look that still sparkles with movement. The micro studs catch light as you walk, and the diagonal line makes the nail look longer. I recommend this when you want something that looks like salon nail jewelry but you don’t want to paint tiny details. It flatters most skin tones because the studs are bright points against black. It also works for short nails since the studs are small and placed in a line rather than covering the whole nail.
Paint glossy black in two coats and let it dry. Mark a diagonal path with very light pencil on the nail or use a striping tape guide. Place tiny flat-back gold studs along the path using nail glue, pressing each one lightly with tweezers. Once the studs set, apply top coat carefully around the studs first, then cap over the top to smooth everything out.
Use tweezers with fine tips — you’ll place studs faster and more accurately.
Avoid spacing studs too far apart — the line looks broken.
24. Gold Chrome Half-Nail Over Black

A vertical half-and-half split looks modern and clean, and chrome makes it look like you spent more than you did. The black side grounds the chrome so it doesn’t look gaudy. This flatters toes because the split creates a strong shape and makes the nail look more structured. It looks best on short almond or rounded square toes since the split stays tidy at the edges. I like it for events because it looks bold in photos, even when you’re wearing simple sandals.
Paint one coat of base — either glossy black or a clear base — then paint the left half of each toe nail in glossy black and the right half in metallic gold chrome polish. Use striping tape to keep the split line razor straight. Remove tape while both sides are still slightly tacky so the edges don’t tear. Seal with a glossy top coat that works with chrome; avoid thick top coats that dull the chrome finish.
If your chrome dulls after top coat, use a thinner top coat and apply it lightly in one pass.
Avoid fuzzy split lines — tape is your friend for this look.
25. Black Confetti Dots With Gold Sparkle Top
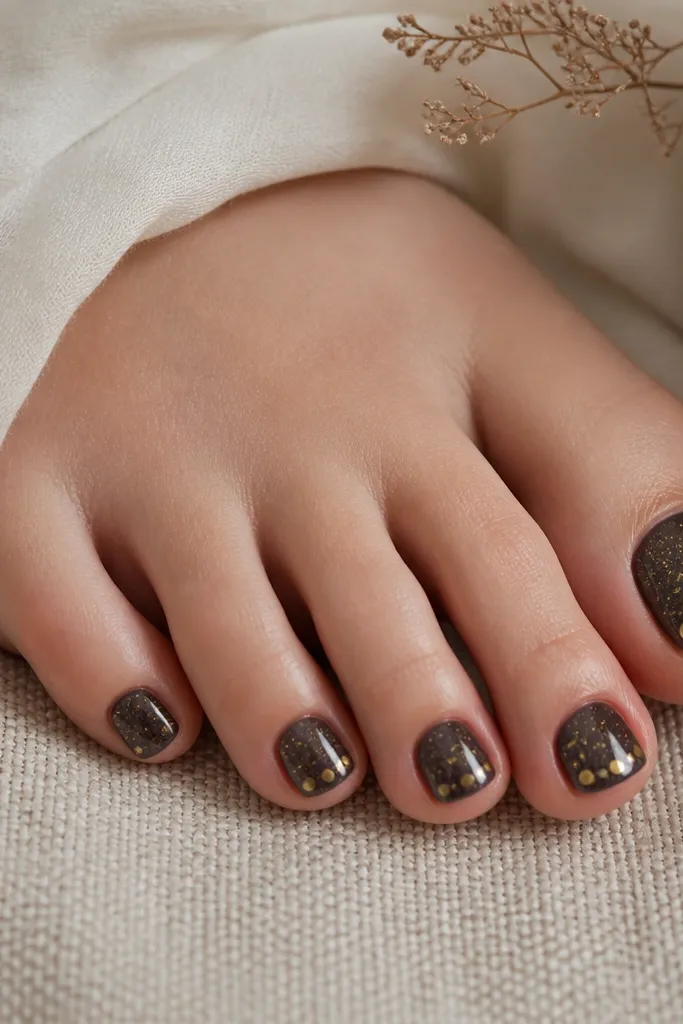
This look is for when you want black-and-gold but you don’t want to draw lines. Gold confetti sparkles give depth and movement, and the black-tinted base keeps it classy instead of party-only. It flatters toes because the sparkle fills small gaps and makes the nail look smooth. I’ve worn this on days when my cuticles looked a little rough — the sparkle distracts and the set still looks finished. It’s also easy to redo because you can add more sparkles where you need them.
Start with a sheer black base or a black jelly polish so the sparkle still shows. Add gold confetti glitter polish by dabbing lightly with a brush so you don’t flood the cuticle. Place a few slightly larger gold dots near the tip for a focal point. Finish with a glossy top coat that’s thick enough to smooth the confetti so it doesn’t feel gritty.
Editor's noteSponge a tiny bit of glitter onto just the free edge if you want more focus at the tip.
Watch outAvoid heavy glitter near the cuticle — it lifts and catches.



